The following is a list of all photo exhibits used in Steven Avery's 2007 trial.
| Photo exhibit # | Description | Trial day | |
|---|---|---|---|
| 1 | Teresa Halbach | 1 | exhibit n/a |
| 2 | Halbach family | 1 | exhibit n/a |
| 3 | Toyota RAV4 license plate | 1 | 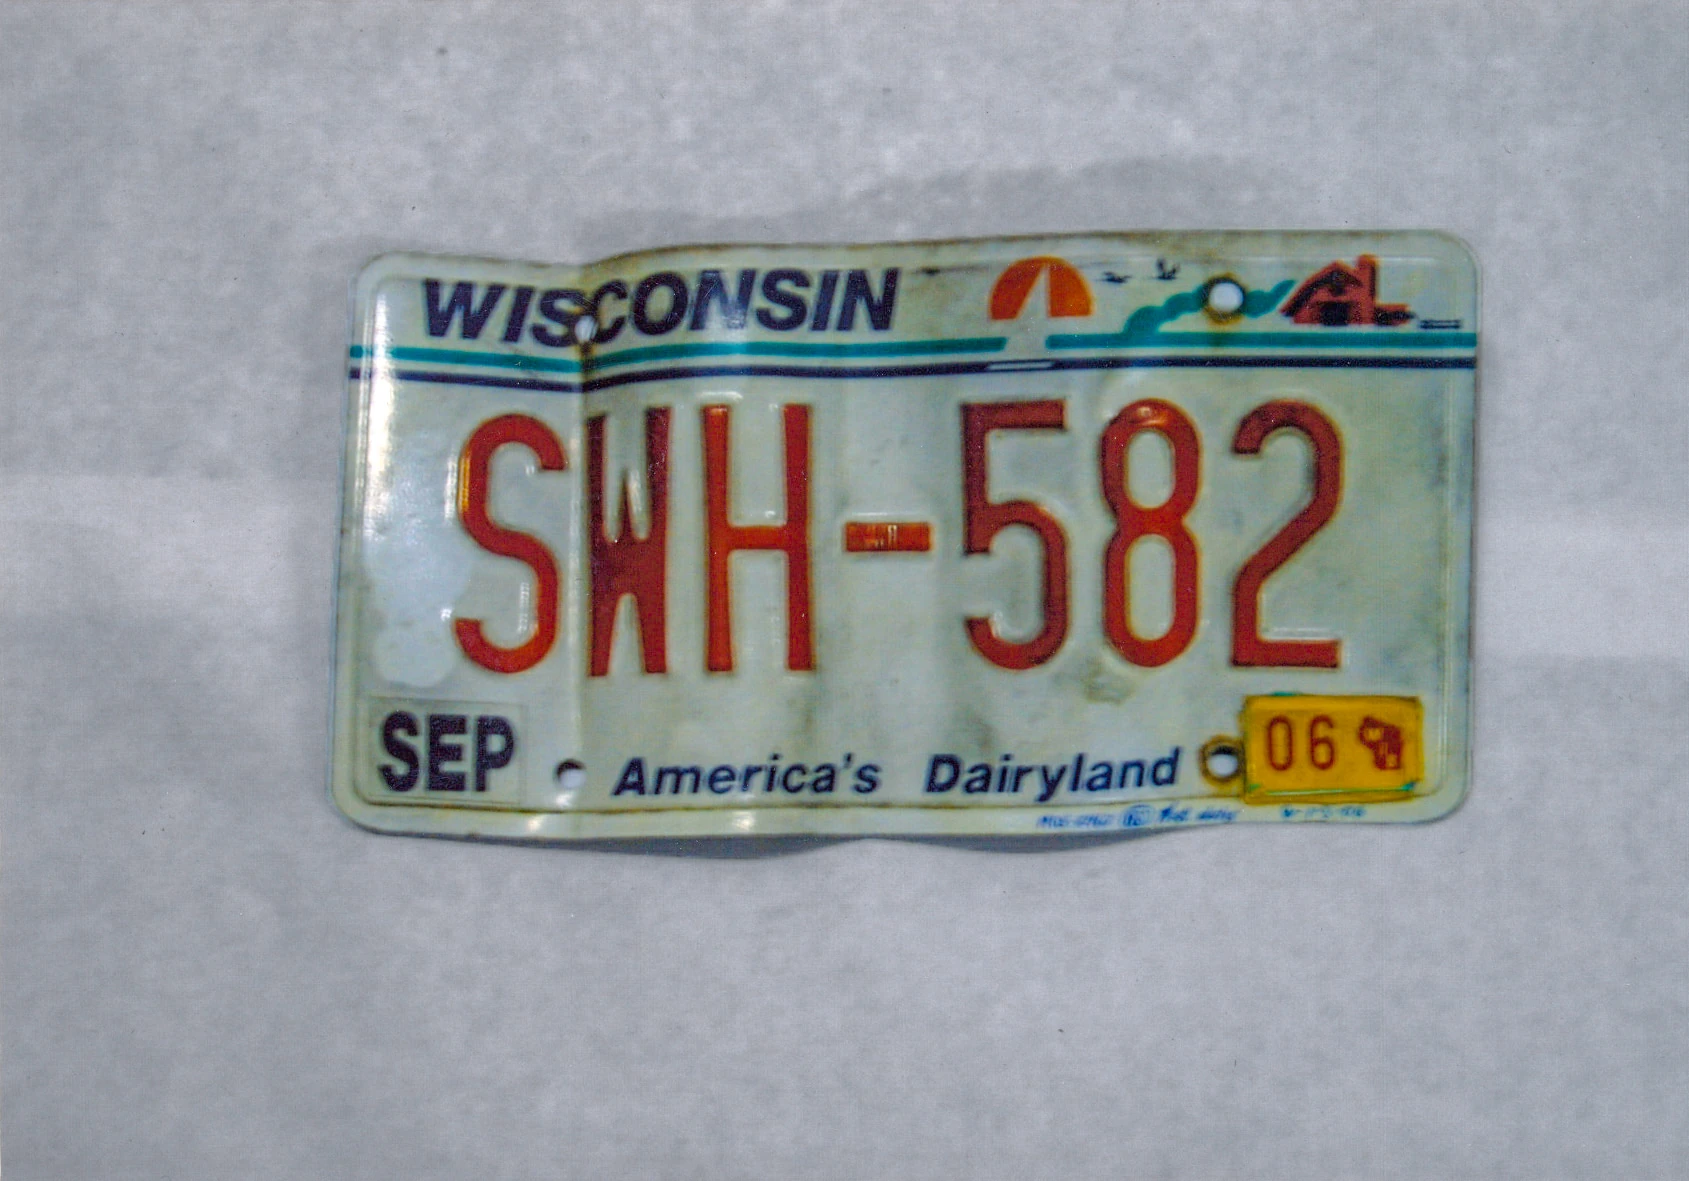
|
| 4 | Toyota RAV4 front license plate | 1 | 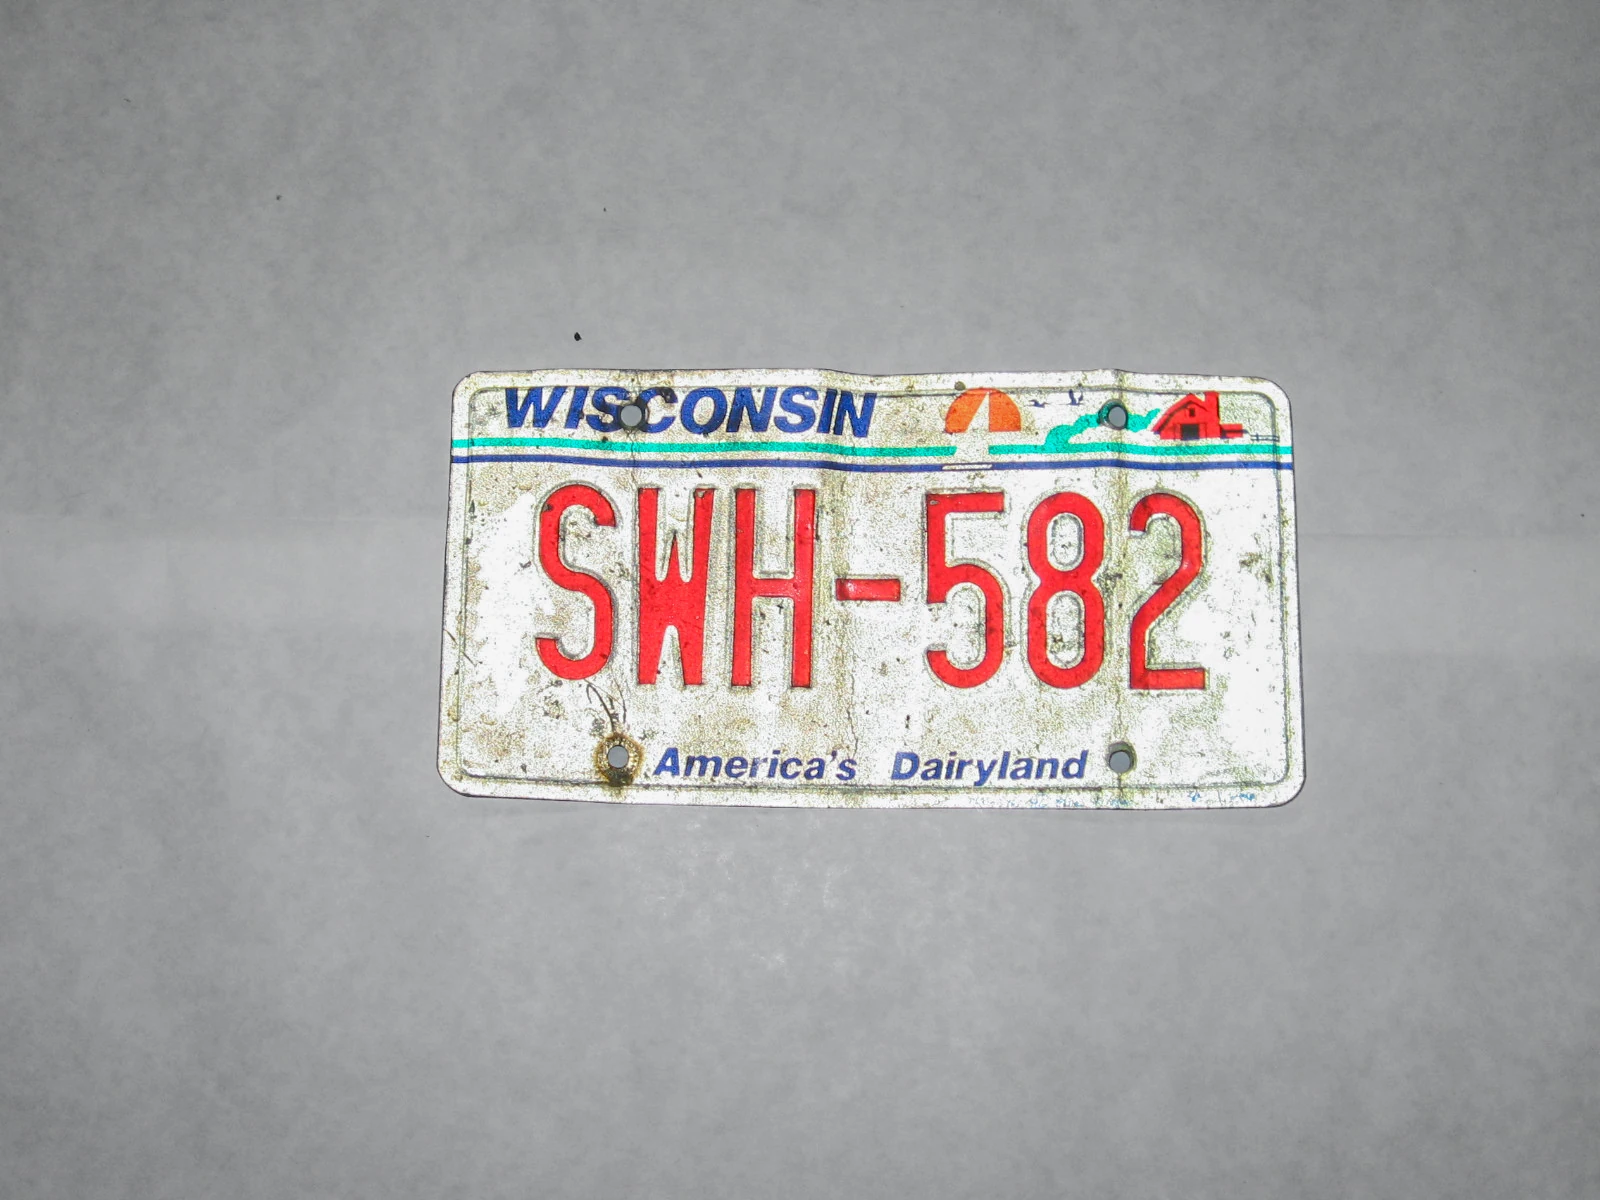
|
| 5 | Teresa in front of her Toyota RAV4 | 1 | 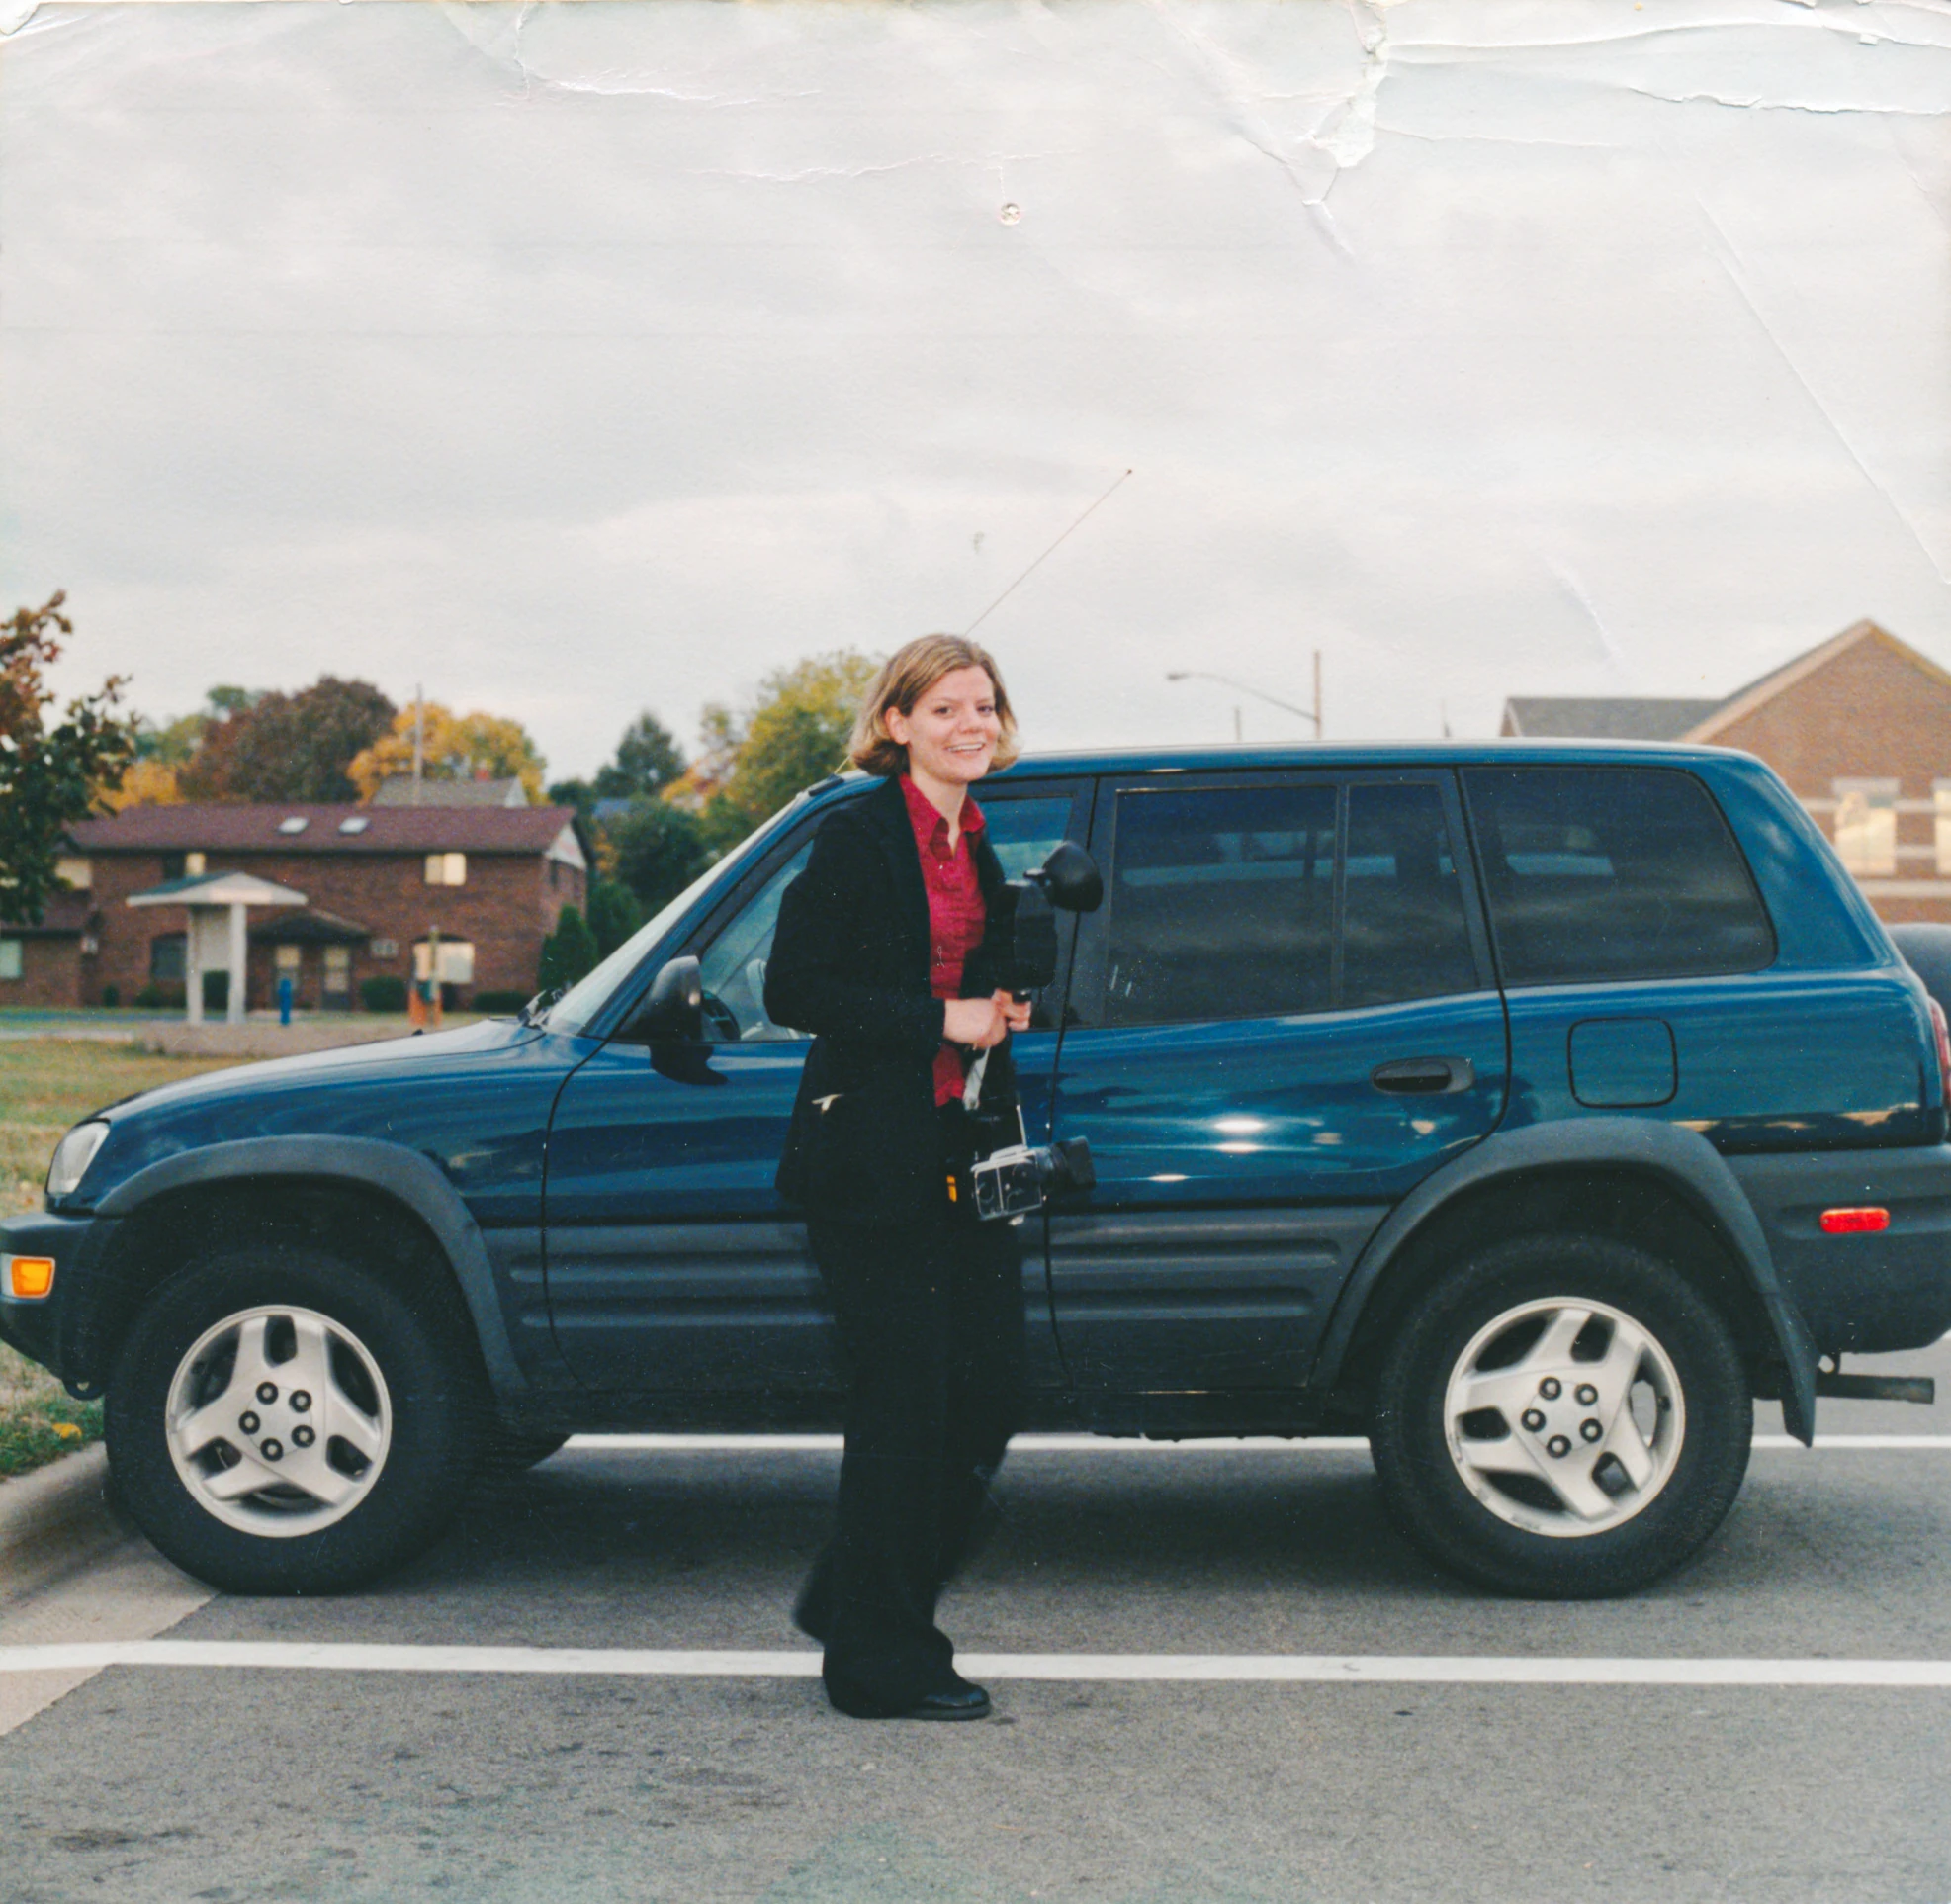
|
| 6 | Palm Zire 31 PDA box | 1 | 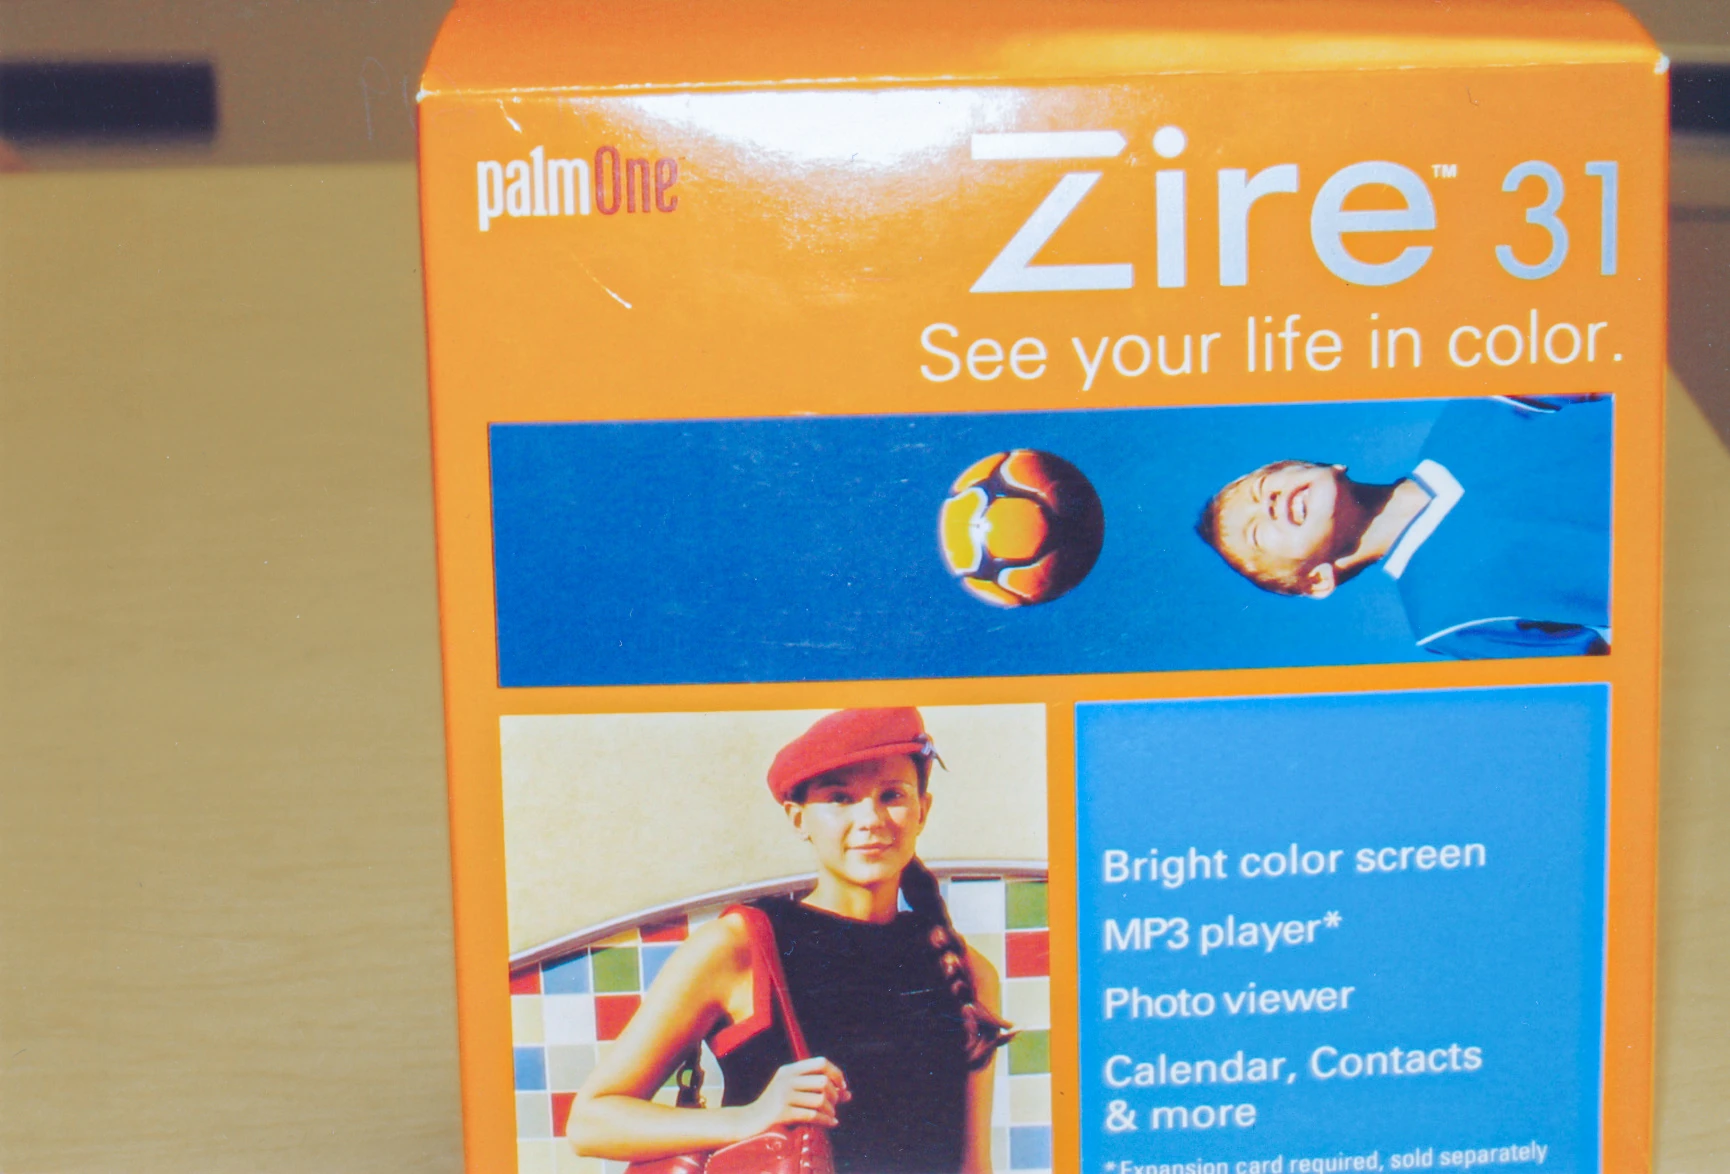
|
| 7 | Canon PowerShot camera A310 box | 1 | 
|
| 10 | Missing person poster | 1 | 
|
| 11 | Photo by Halbach on Avery property on 20 June 2005 | 2 | 
|
| 12 | Photo by Halbach on Avery property on 22 August 2005 | 2 | 
|
| 13 | Photo by Halbach on Avery property on 29 August 2005 | 2 | 
|
| 14 | Photo by Halbach on Avery property on 19 September 2005 | 2 | 
|
| 15 | Photo by Halbach on Avery property on 19 September 2005 | 2 | 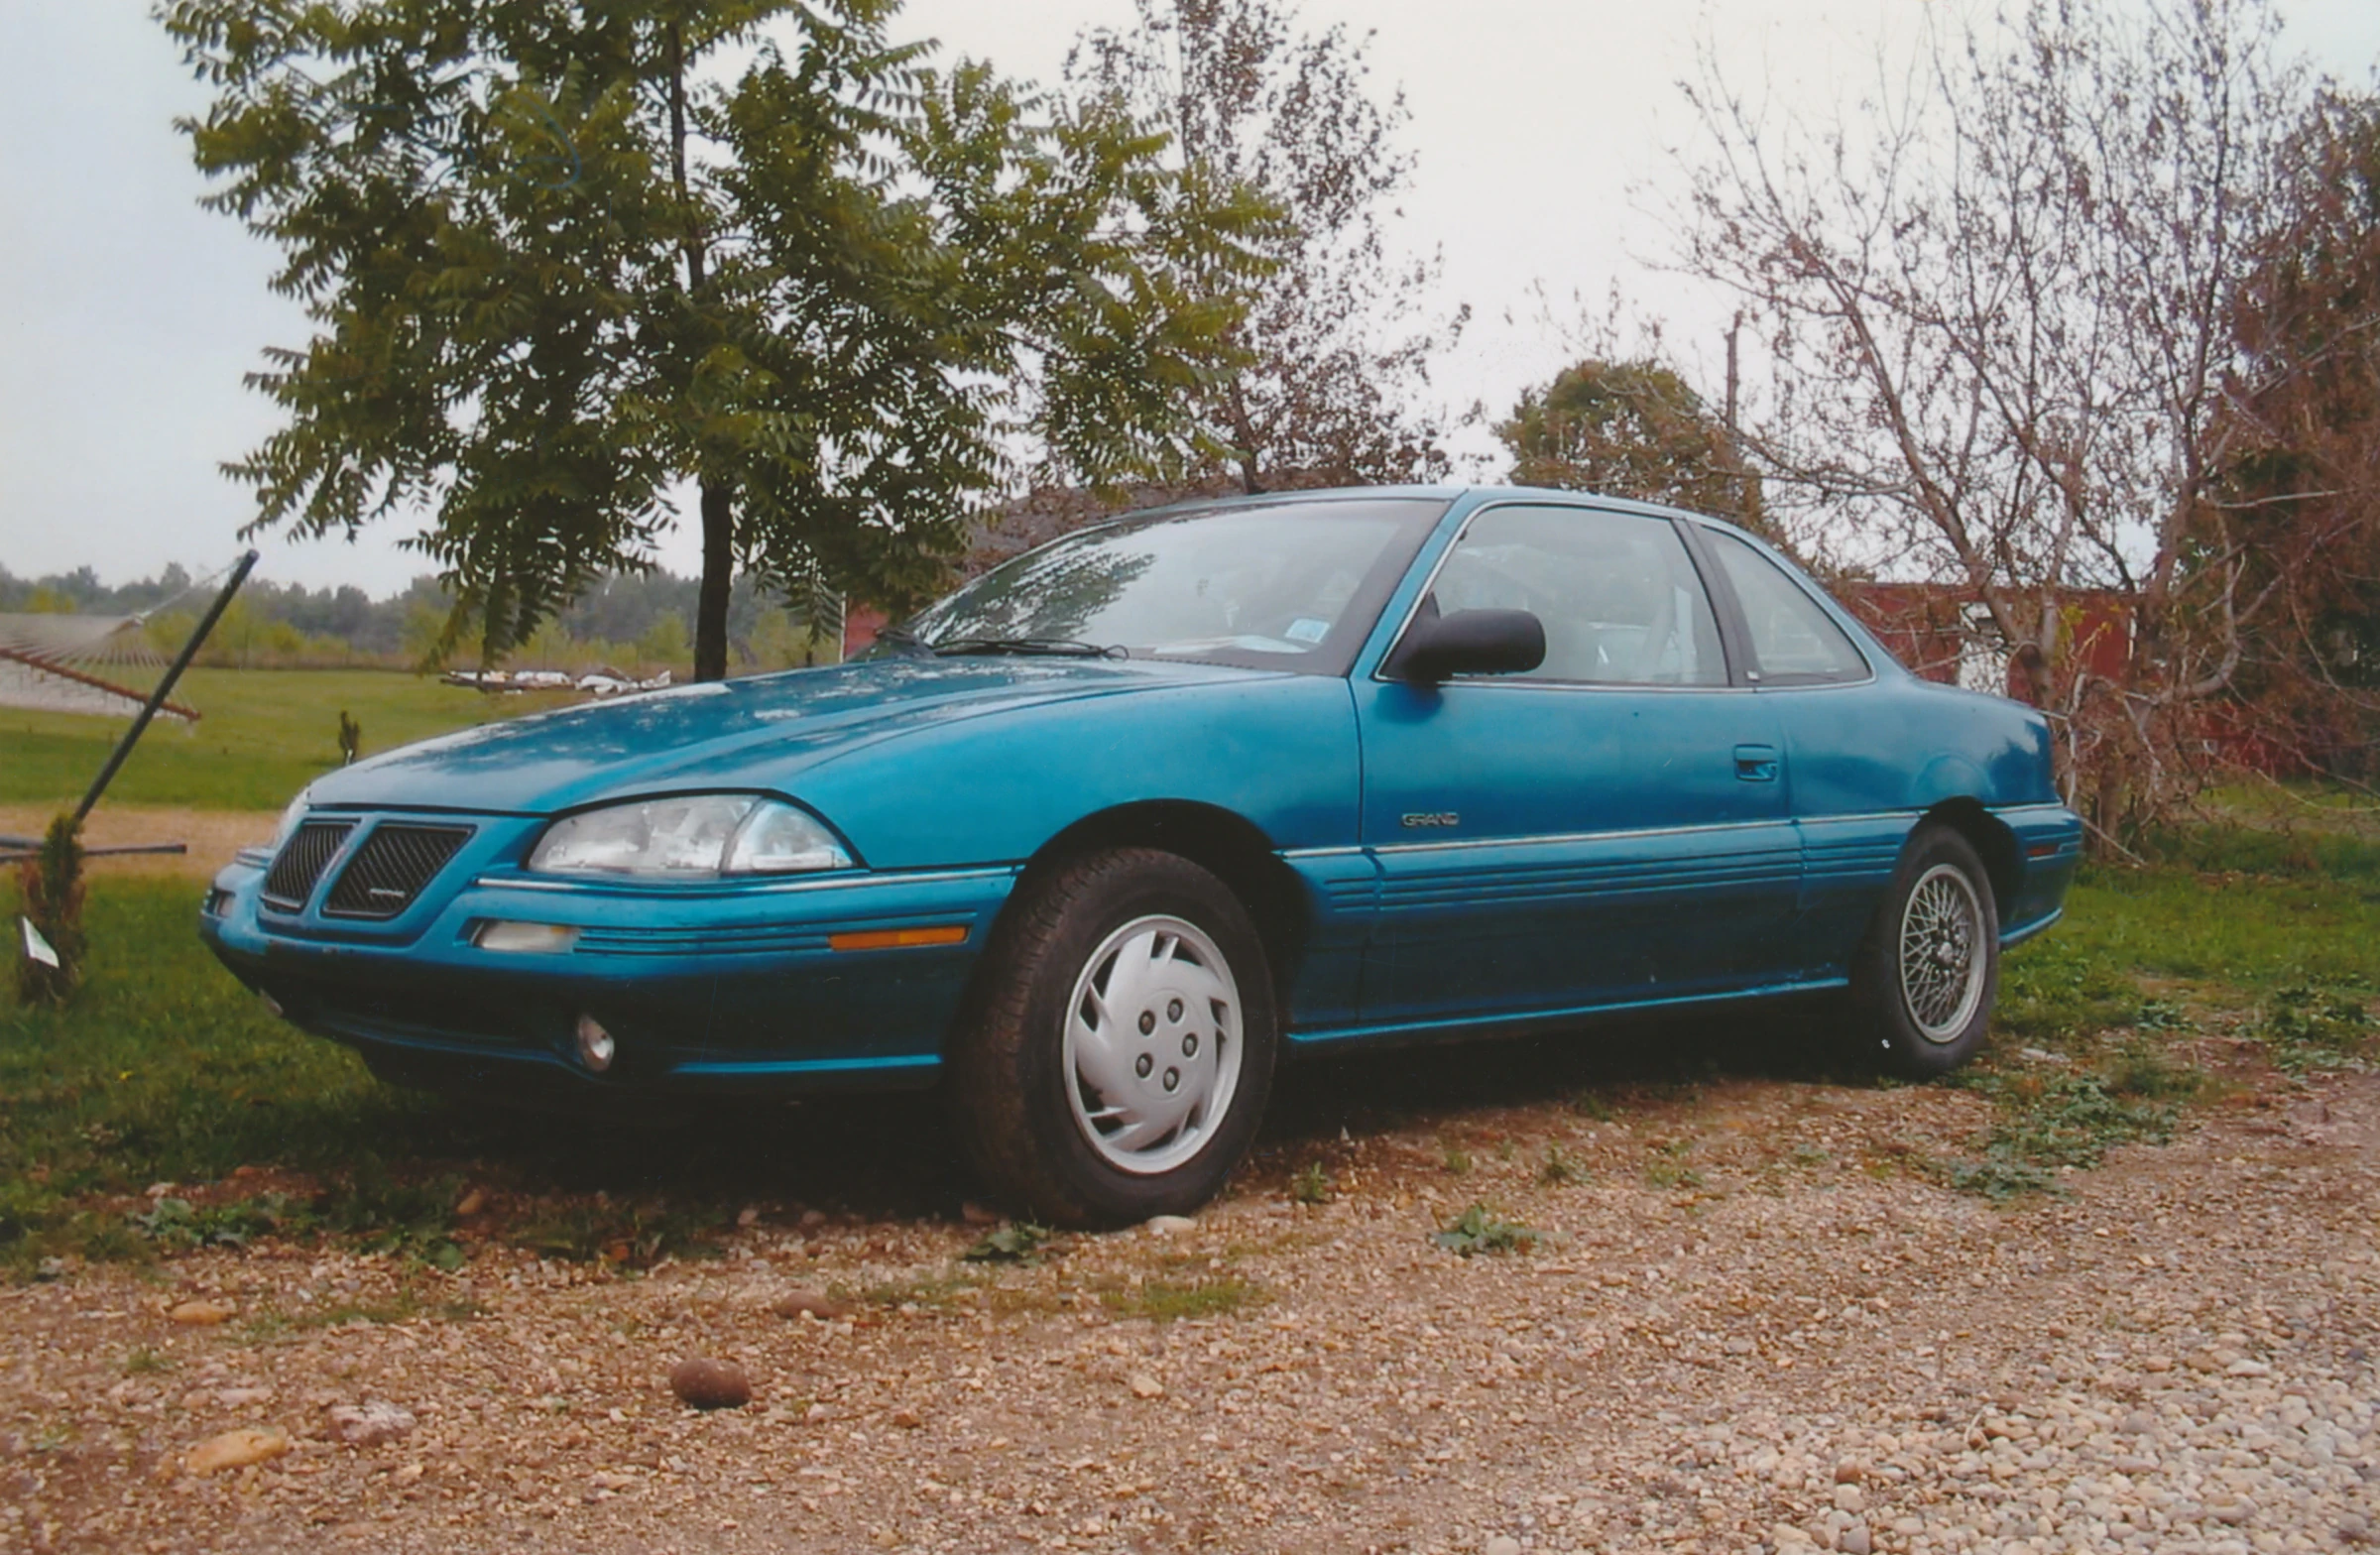
|
| 16 | Photo by Halbach on Avery property on 10 October 2005 | 2 | 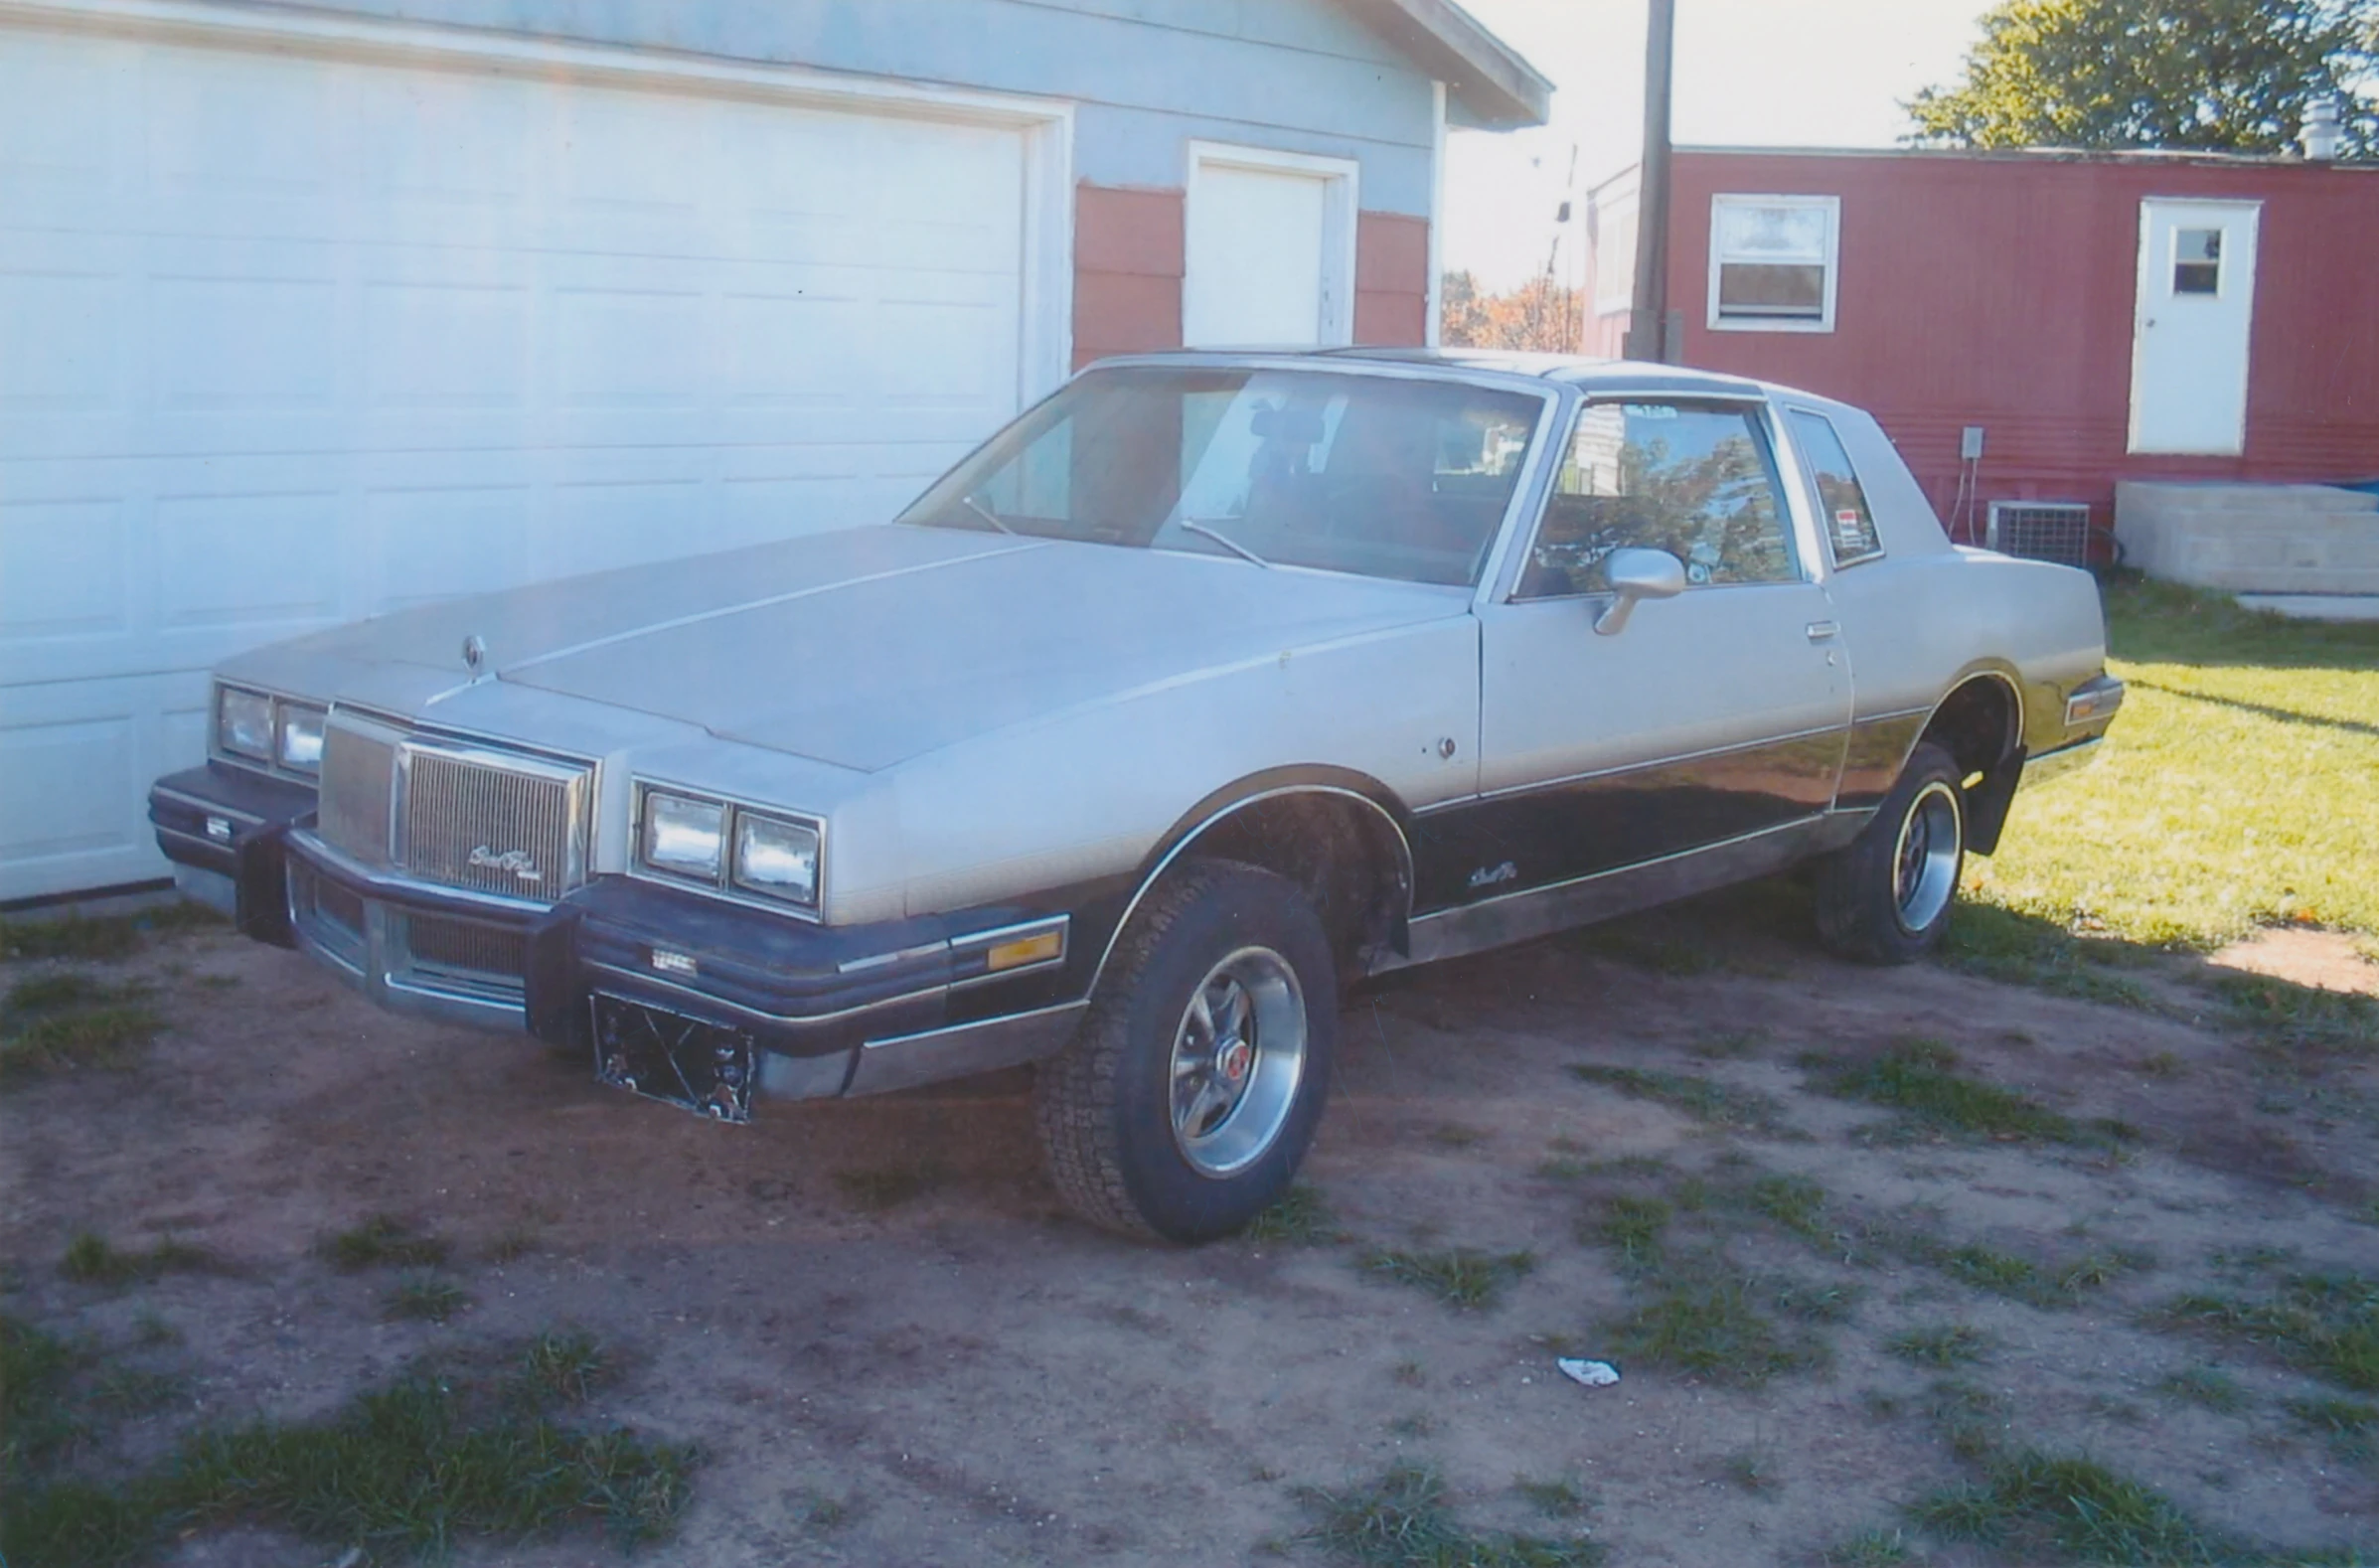
|
| 19 | Aerial view of Avery’s Auto Salvage and surrounding area | 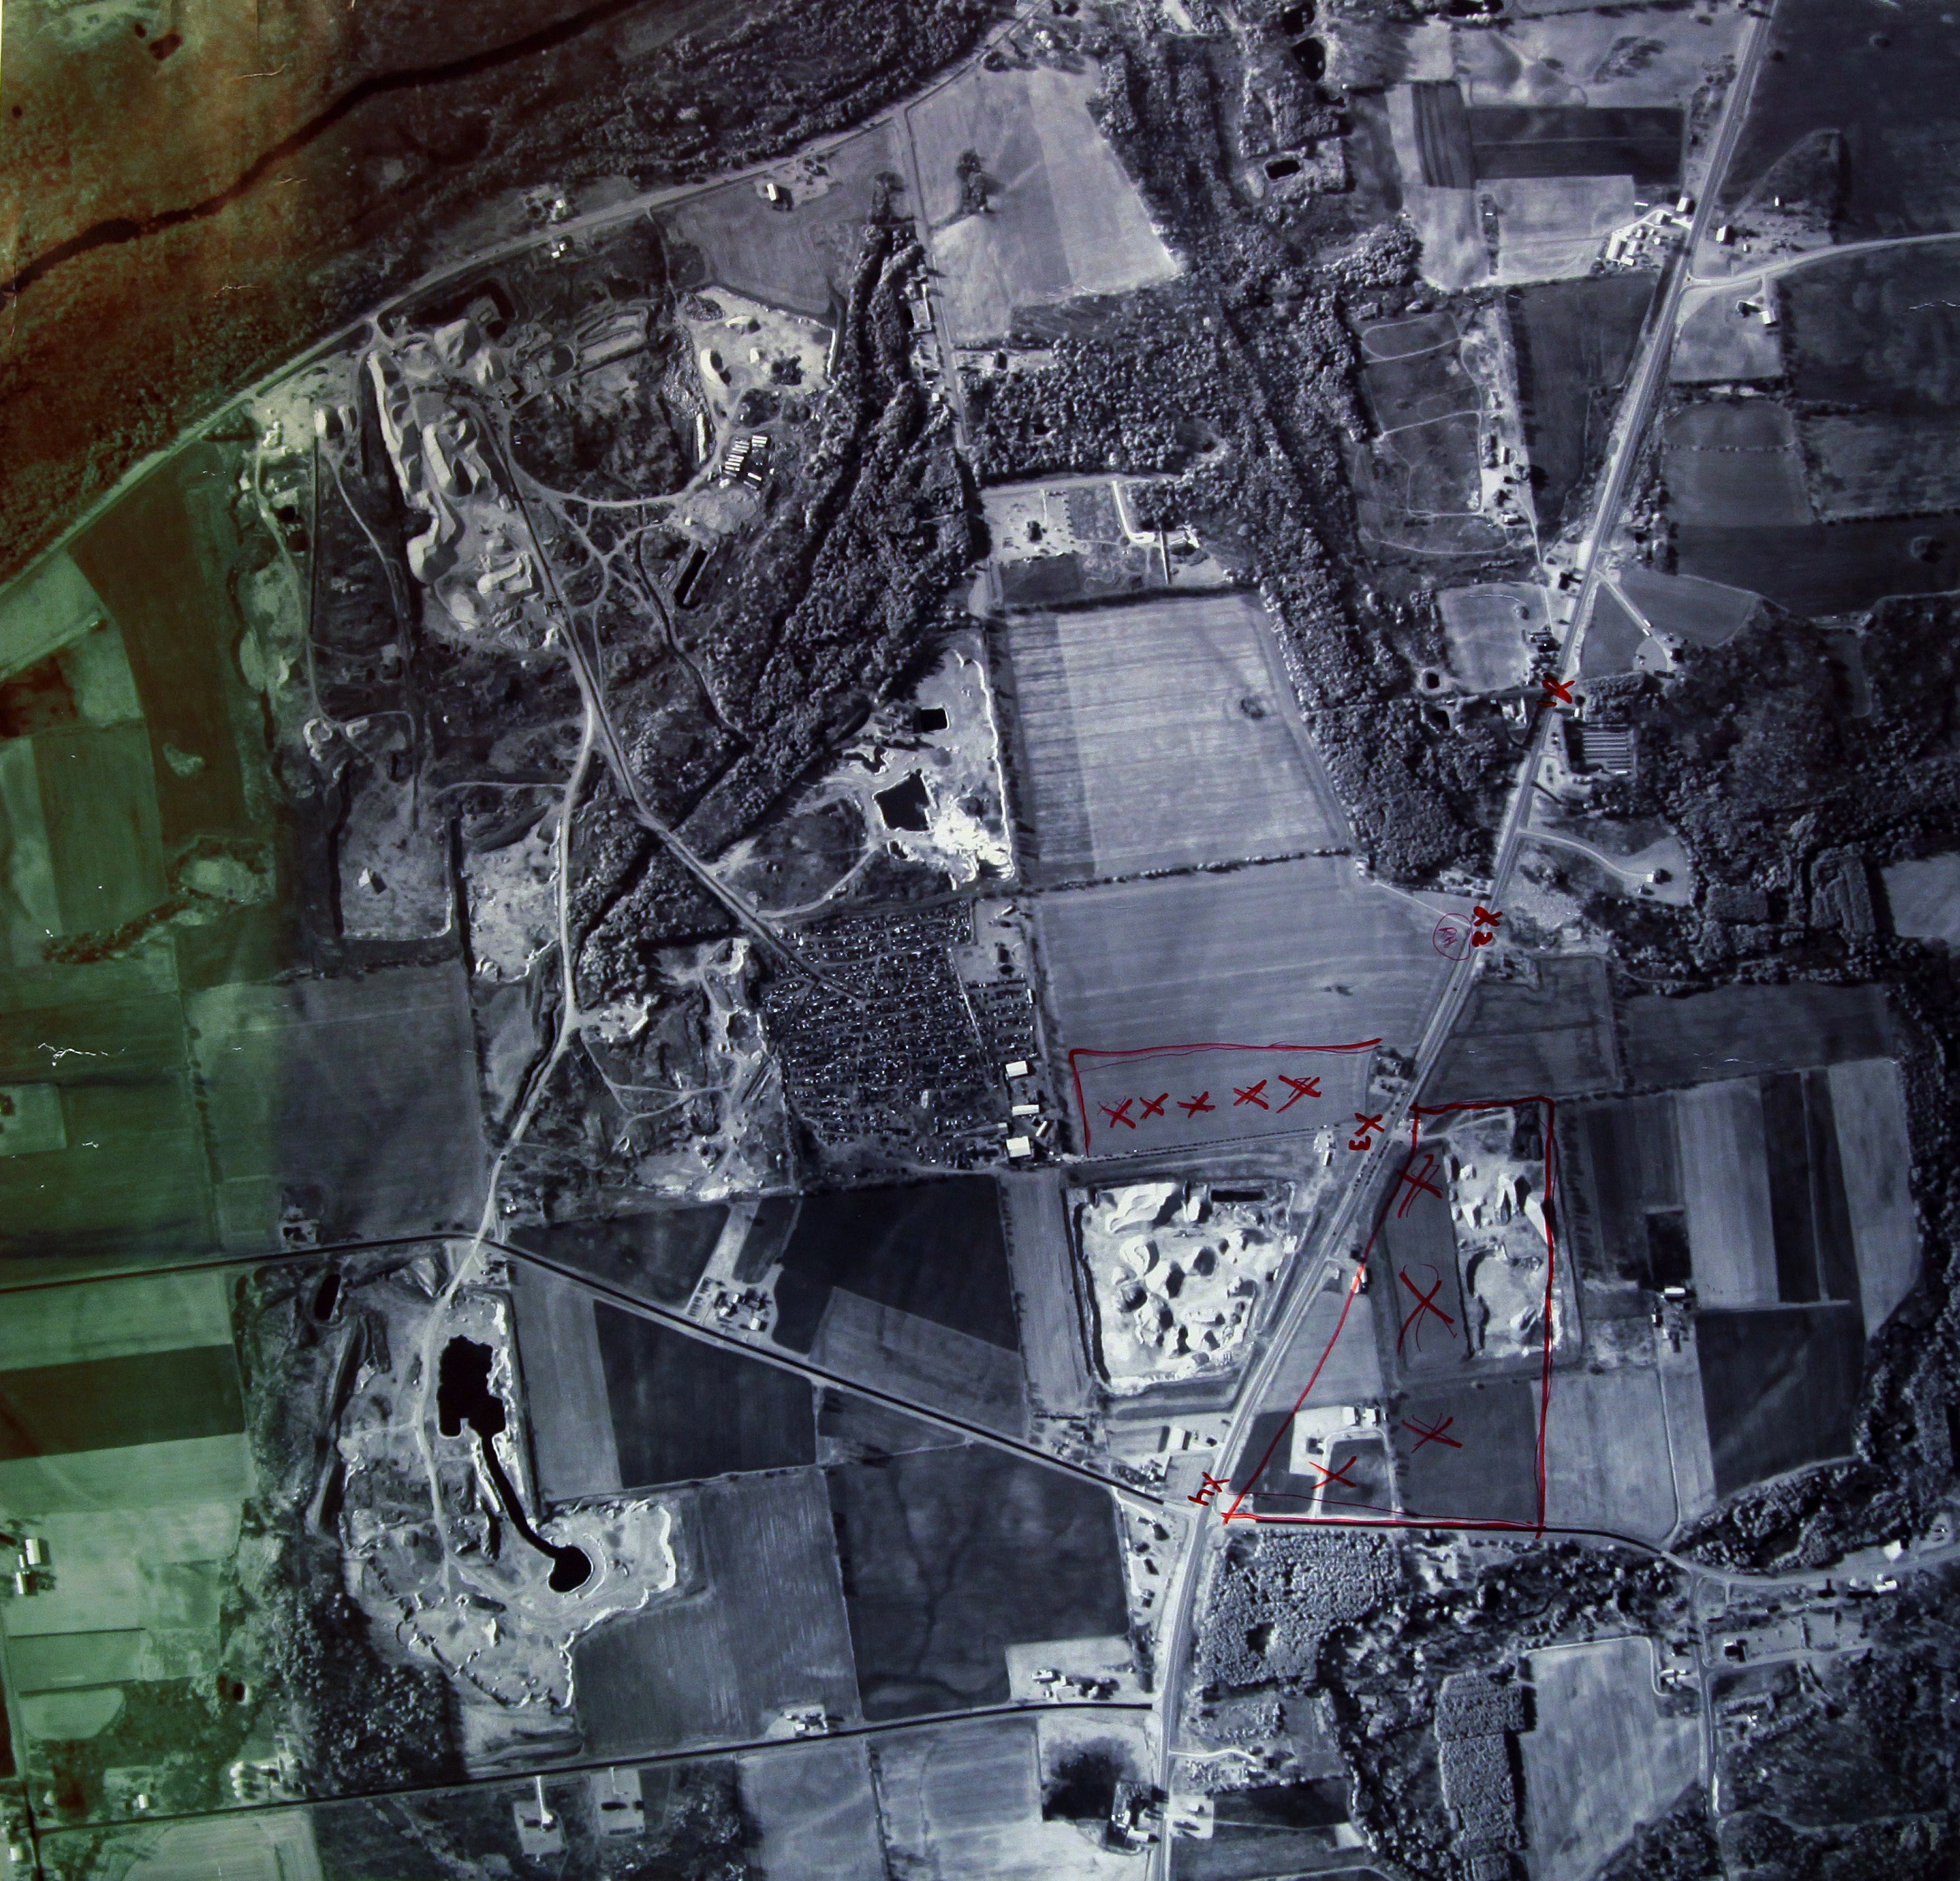
| |
| 25 | Aerial view of Avery’s Auto Salvage | 2 | 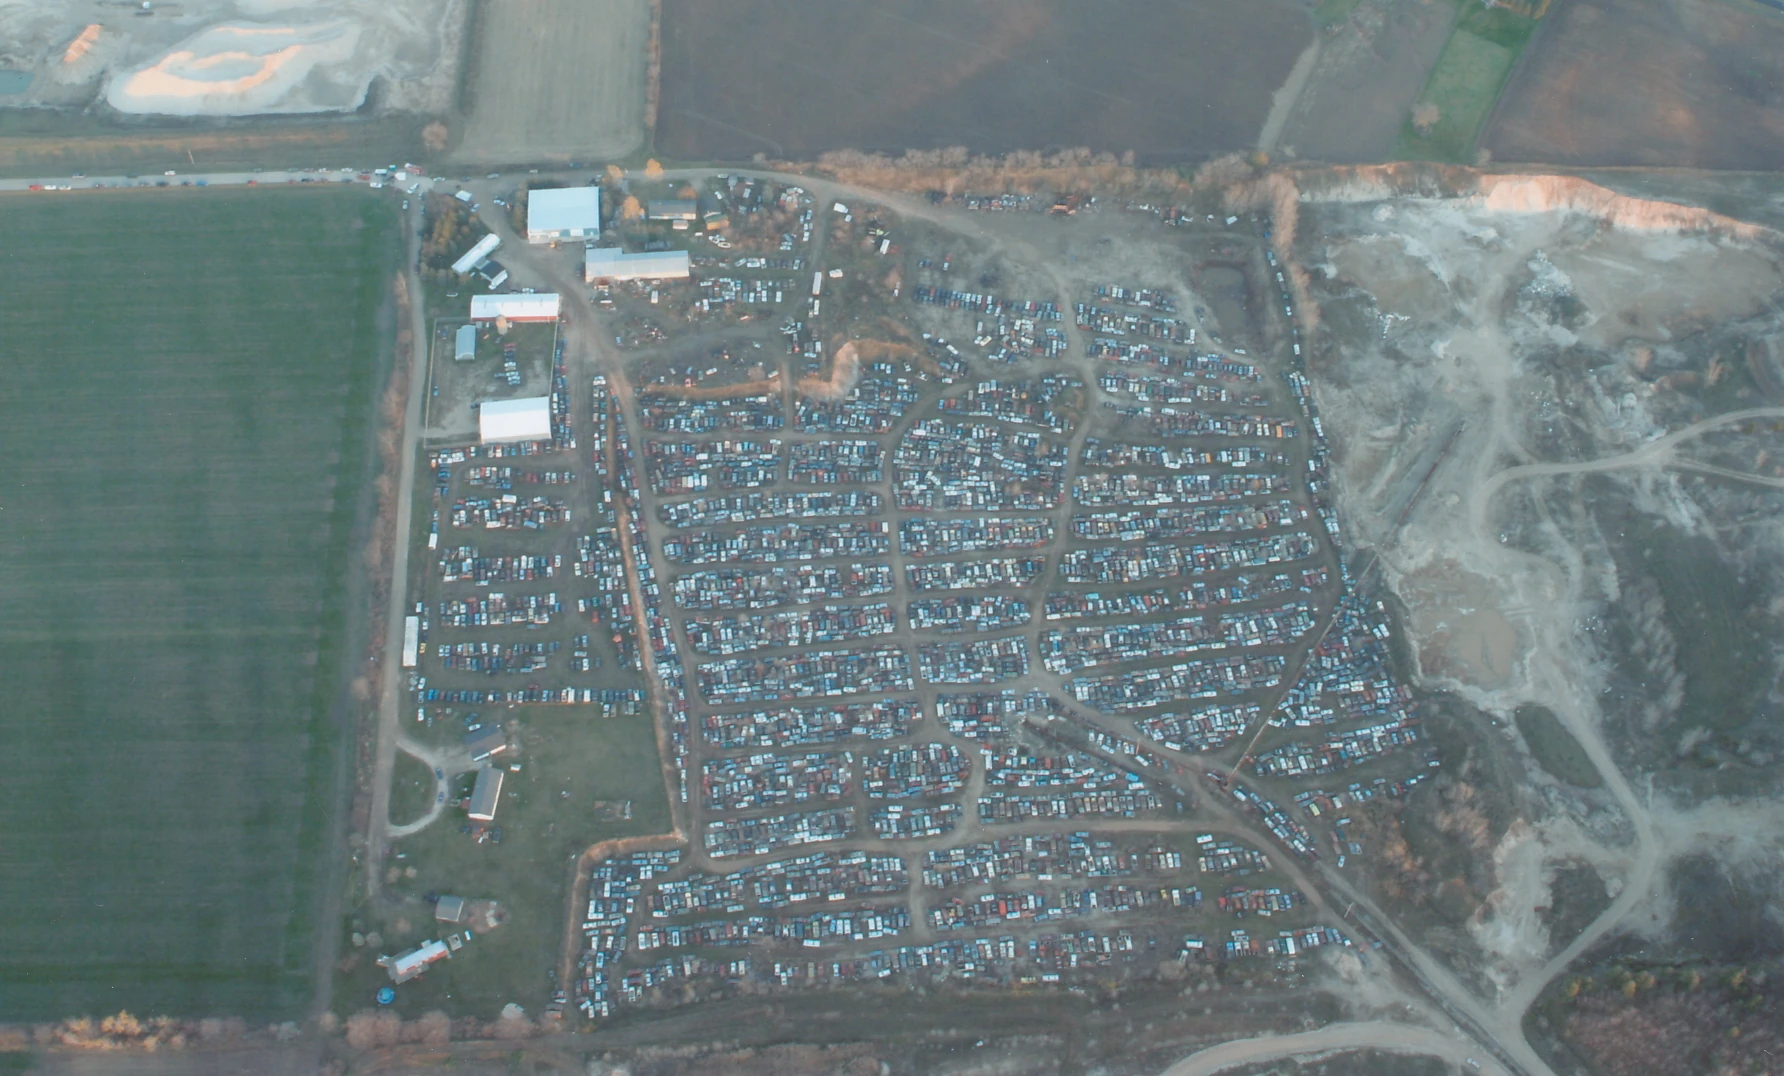
|
| 27 | AutoTrader magazine left at Zipperer’s | 2 | 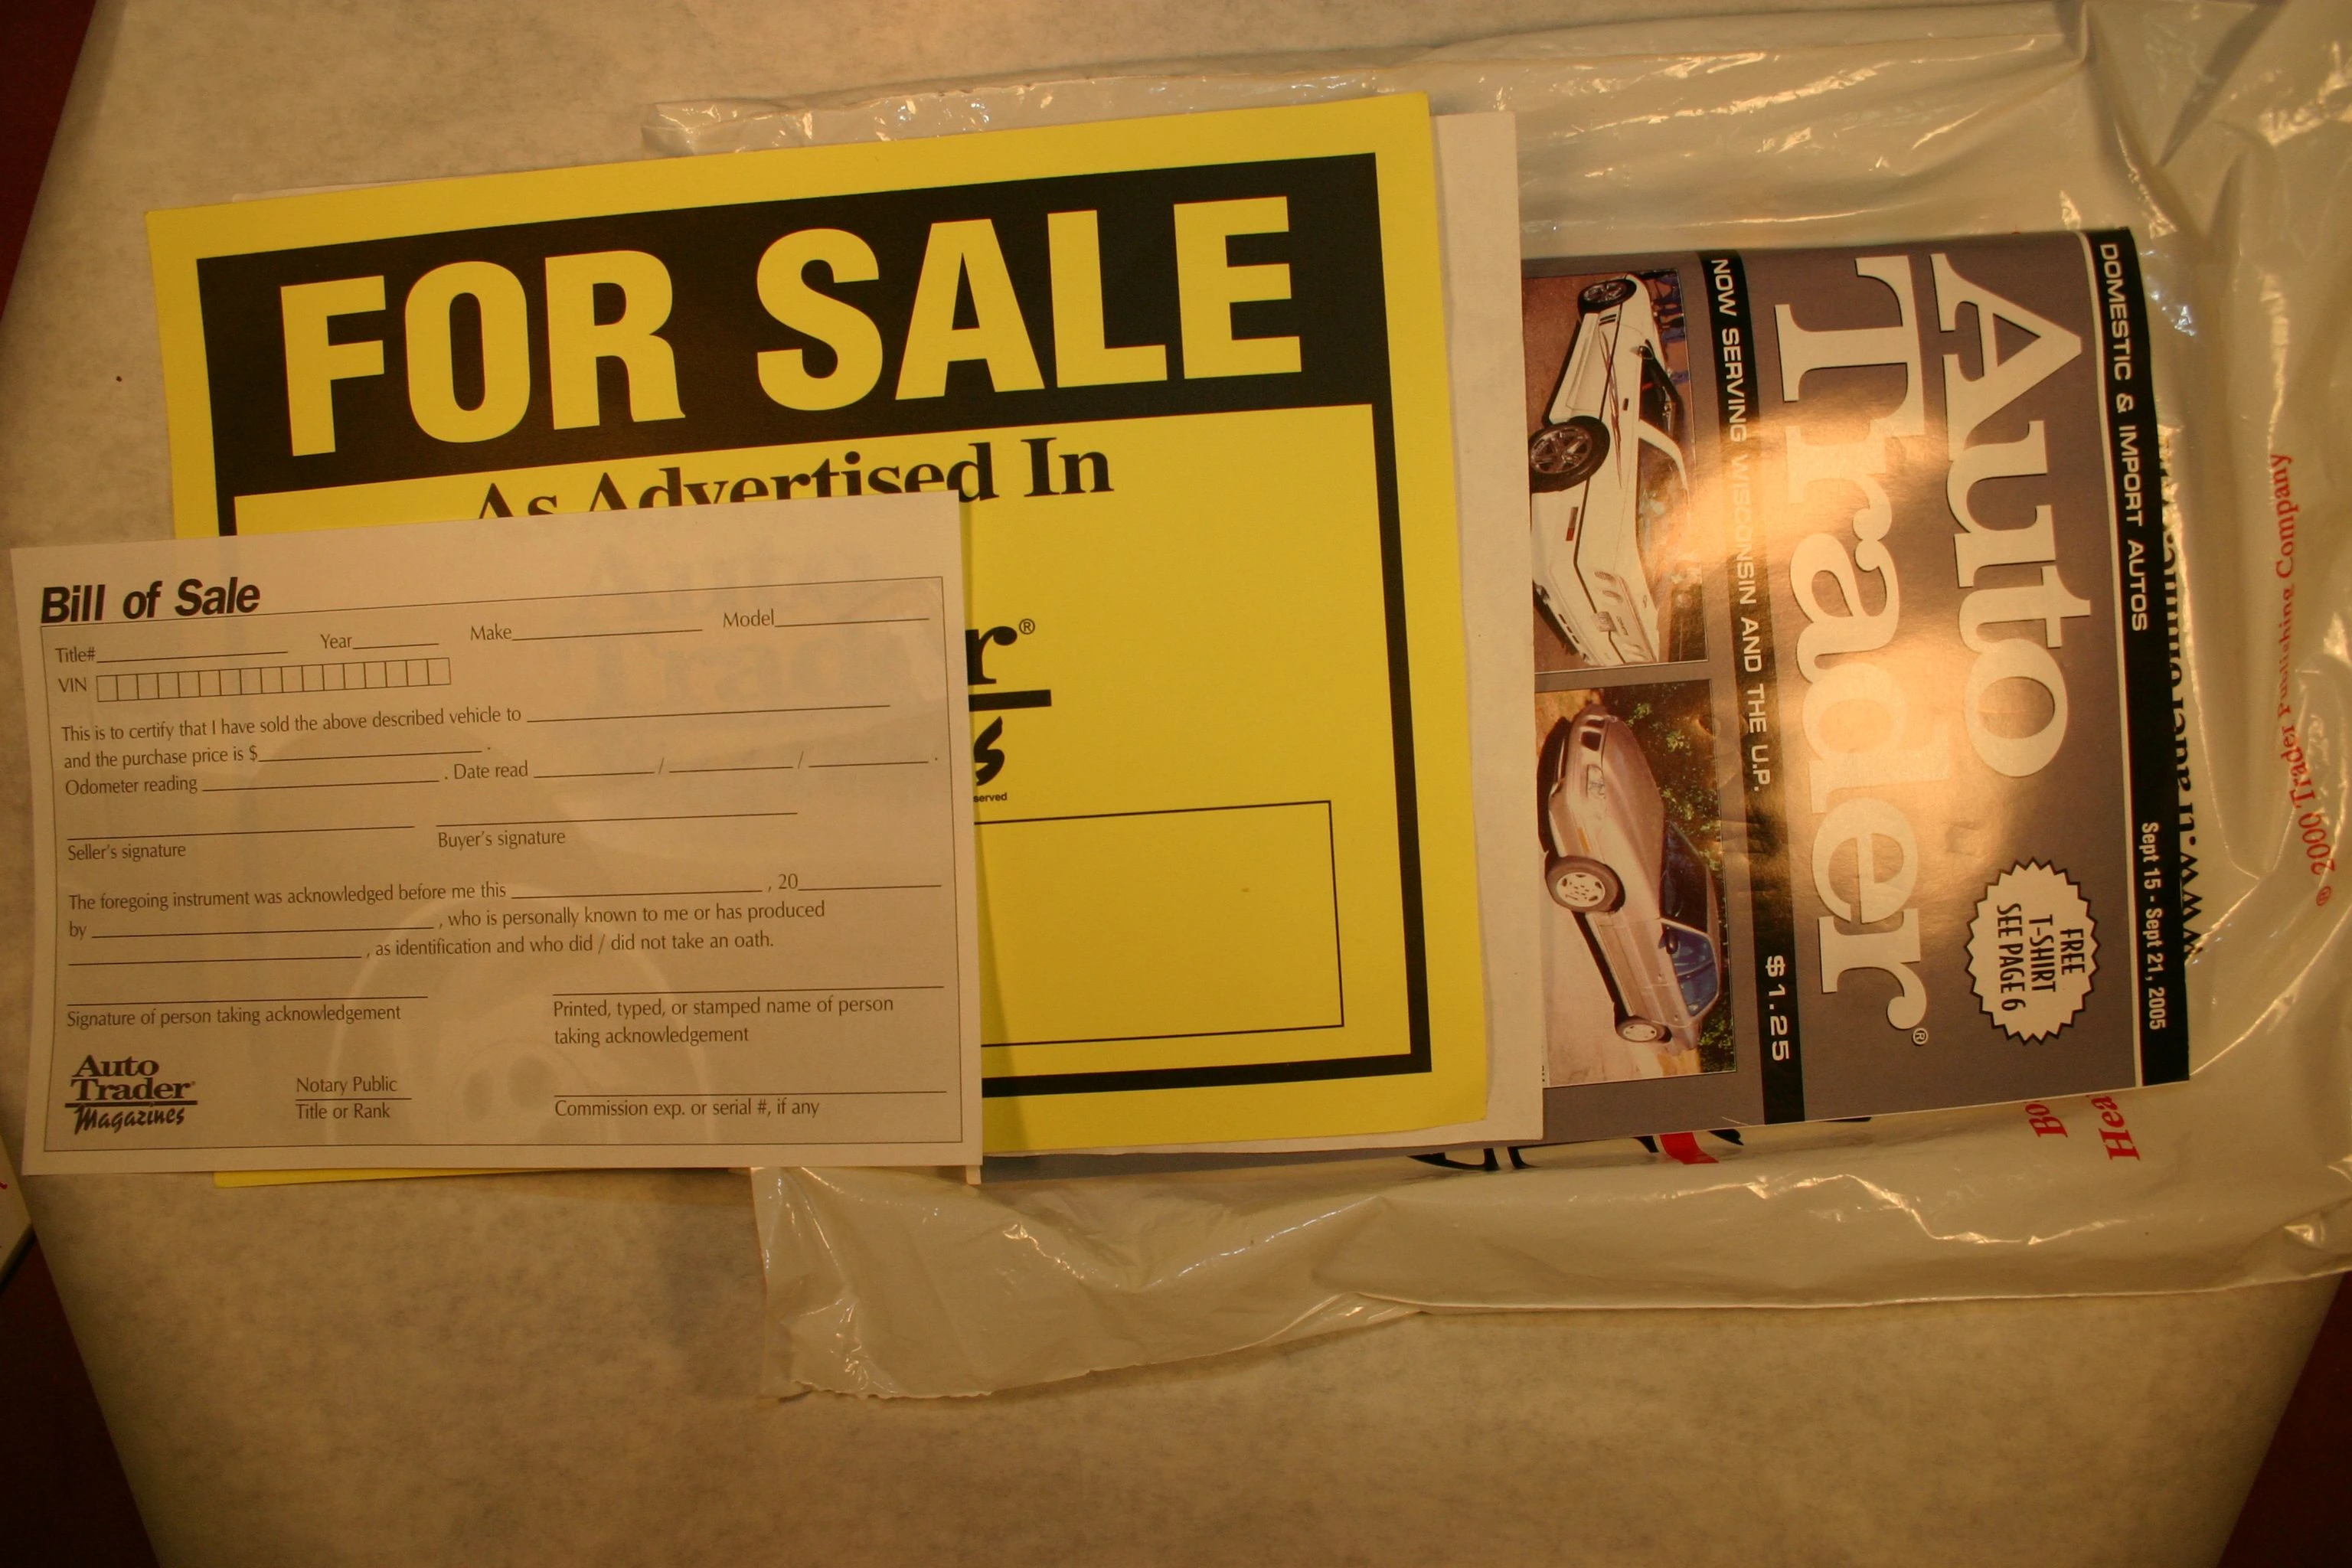
|
| 29 | Volunteer searcher photo of RAV4 | 2 | 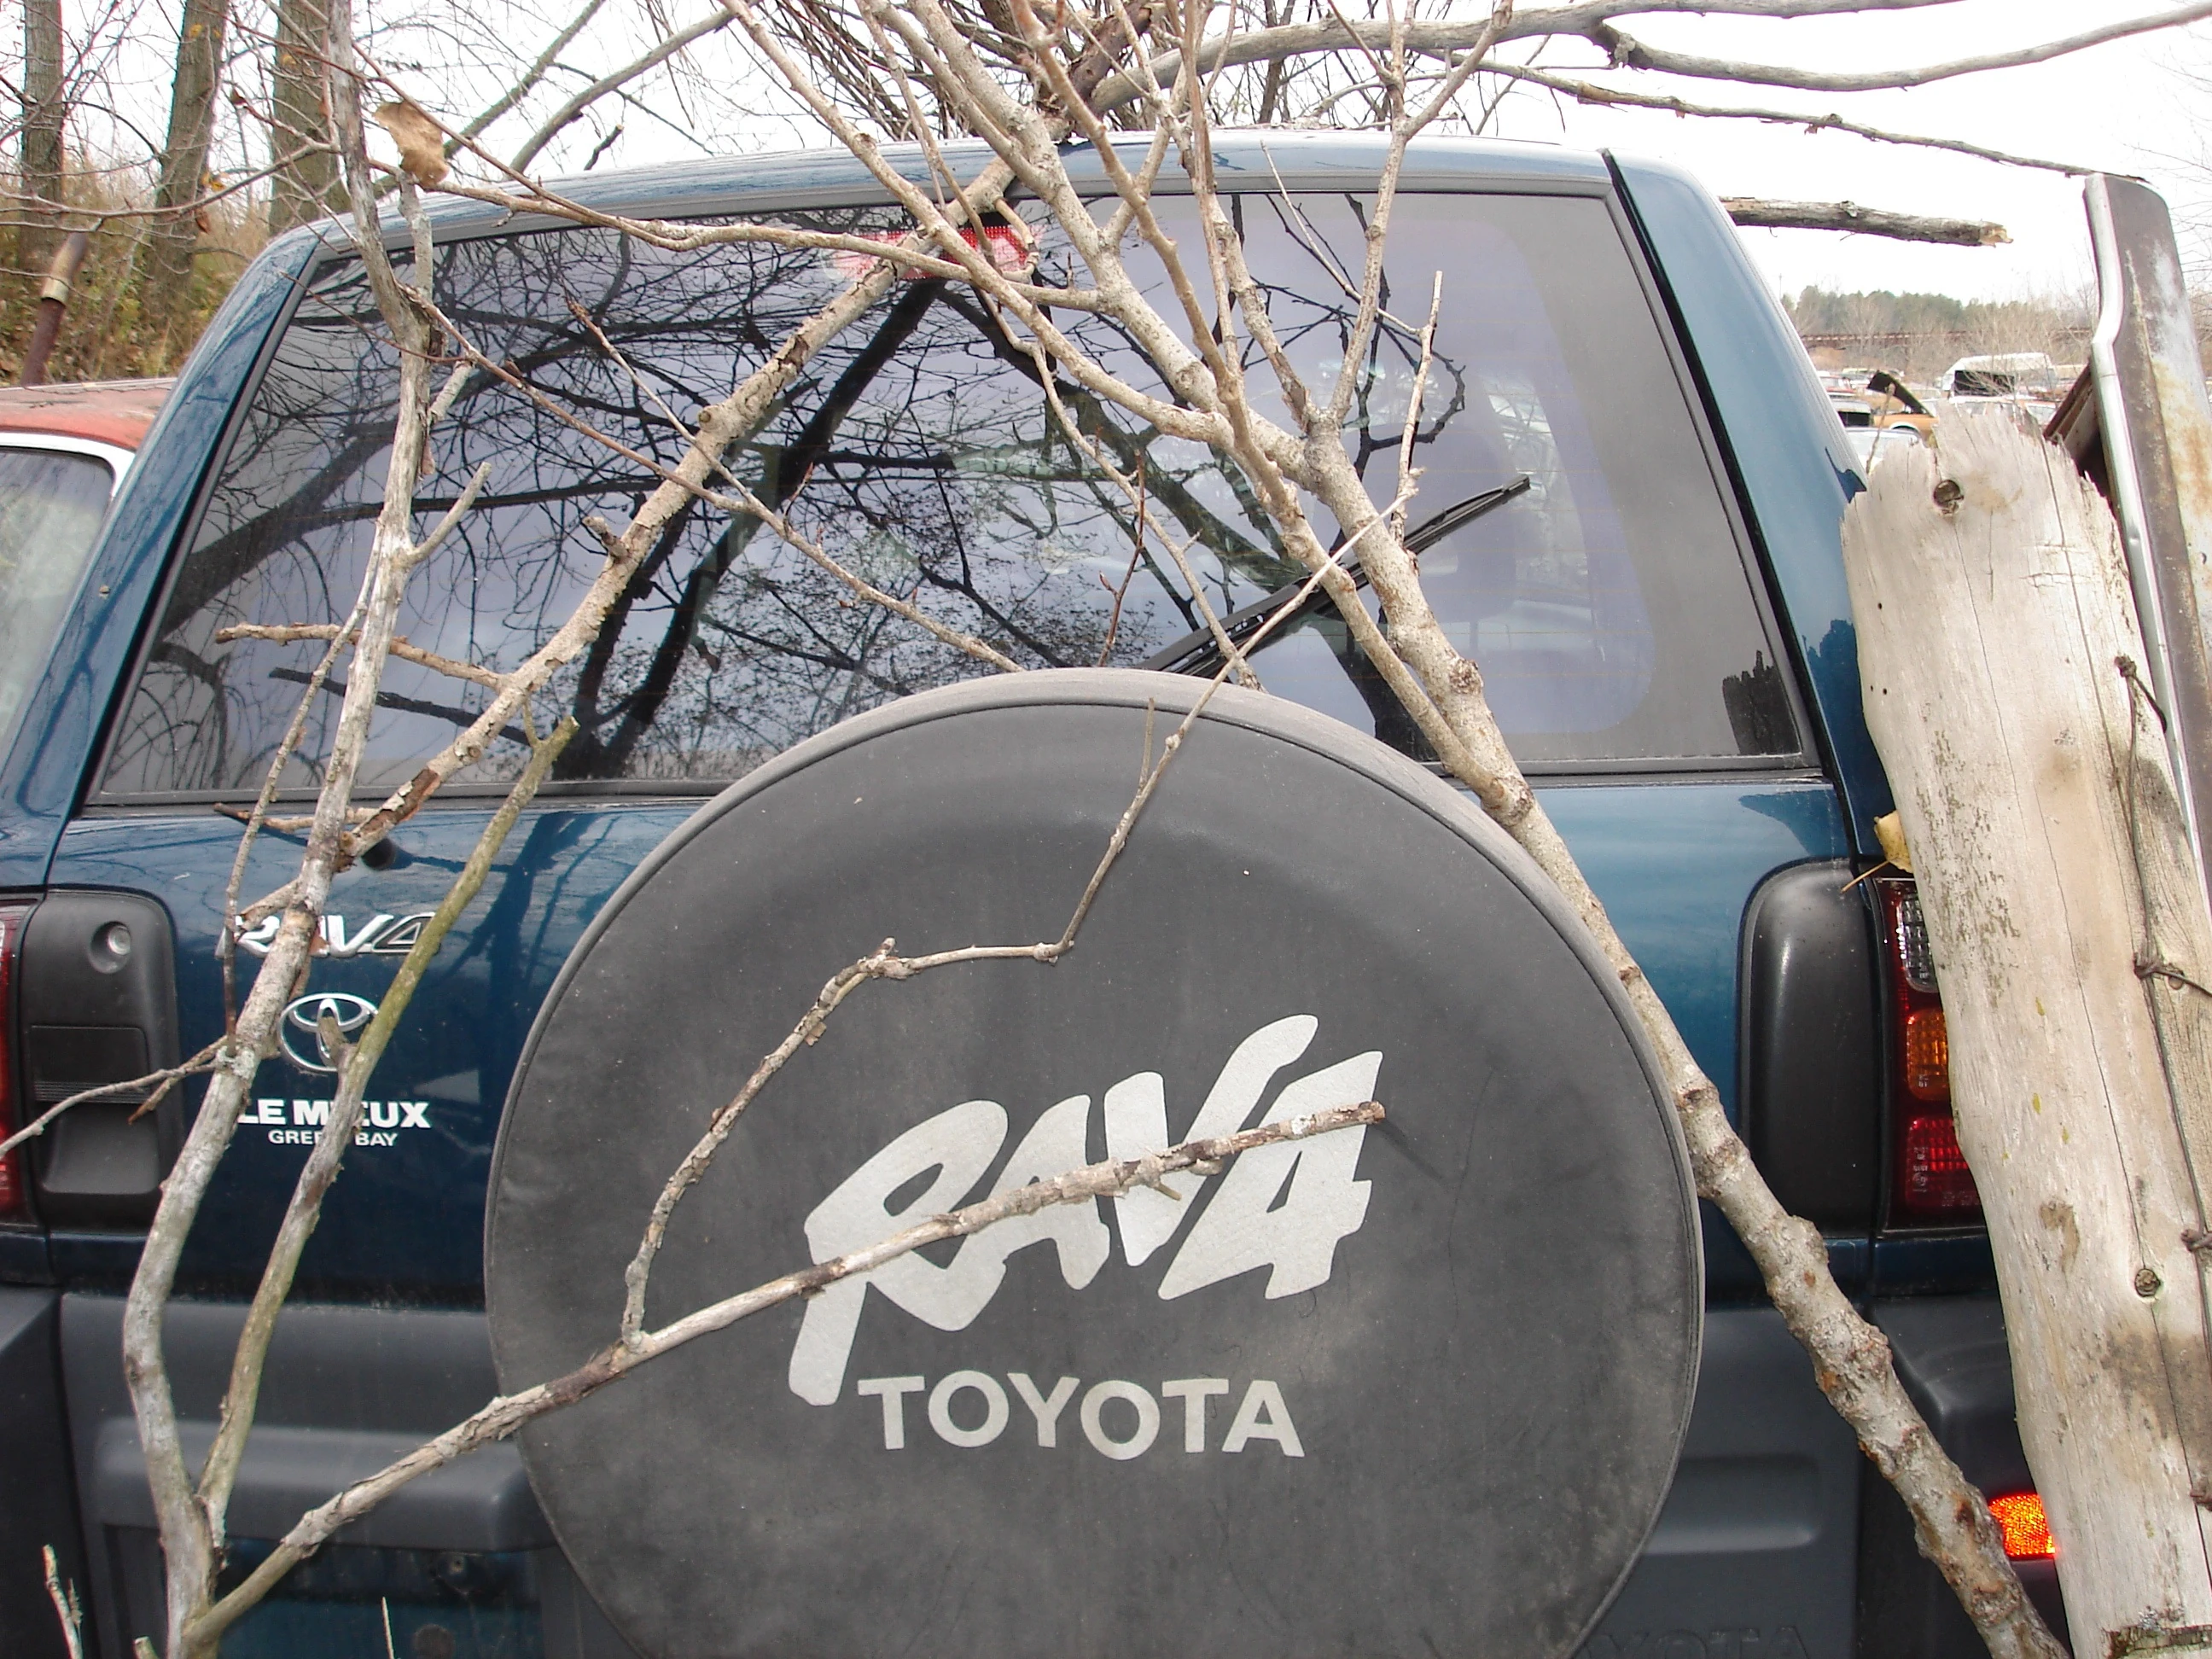
|
| 30 | Volunteer searcher photo of RAV4 | 2 | 
|
| 31 | Volunteer searcher photo of RAV4 | 2 | 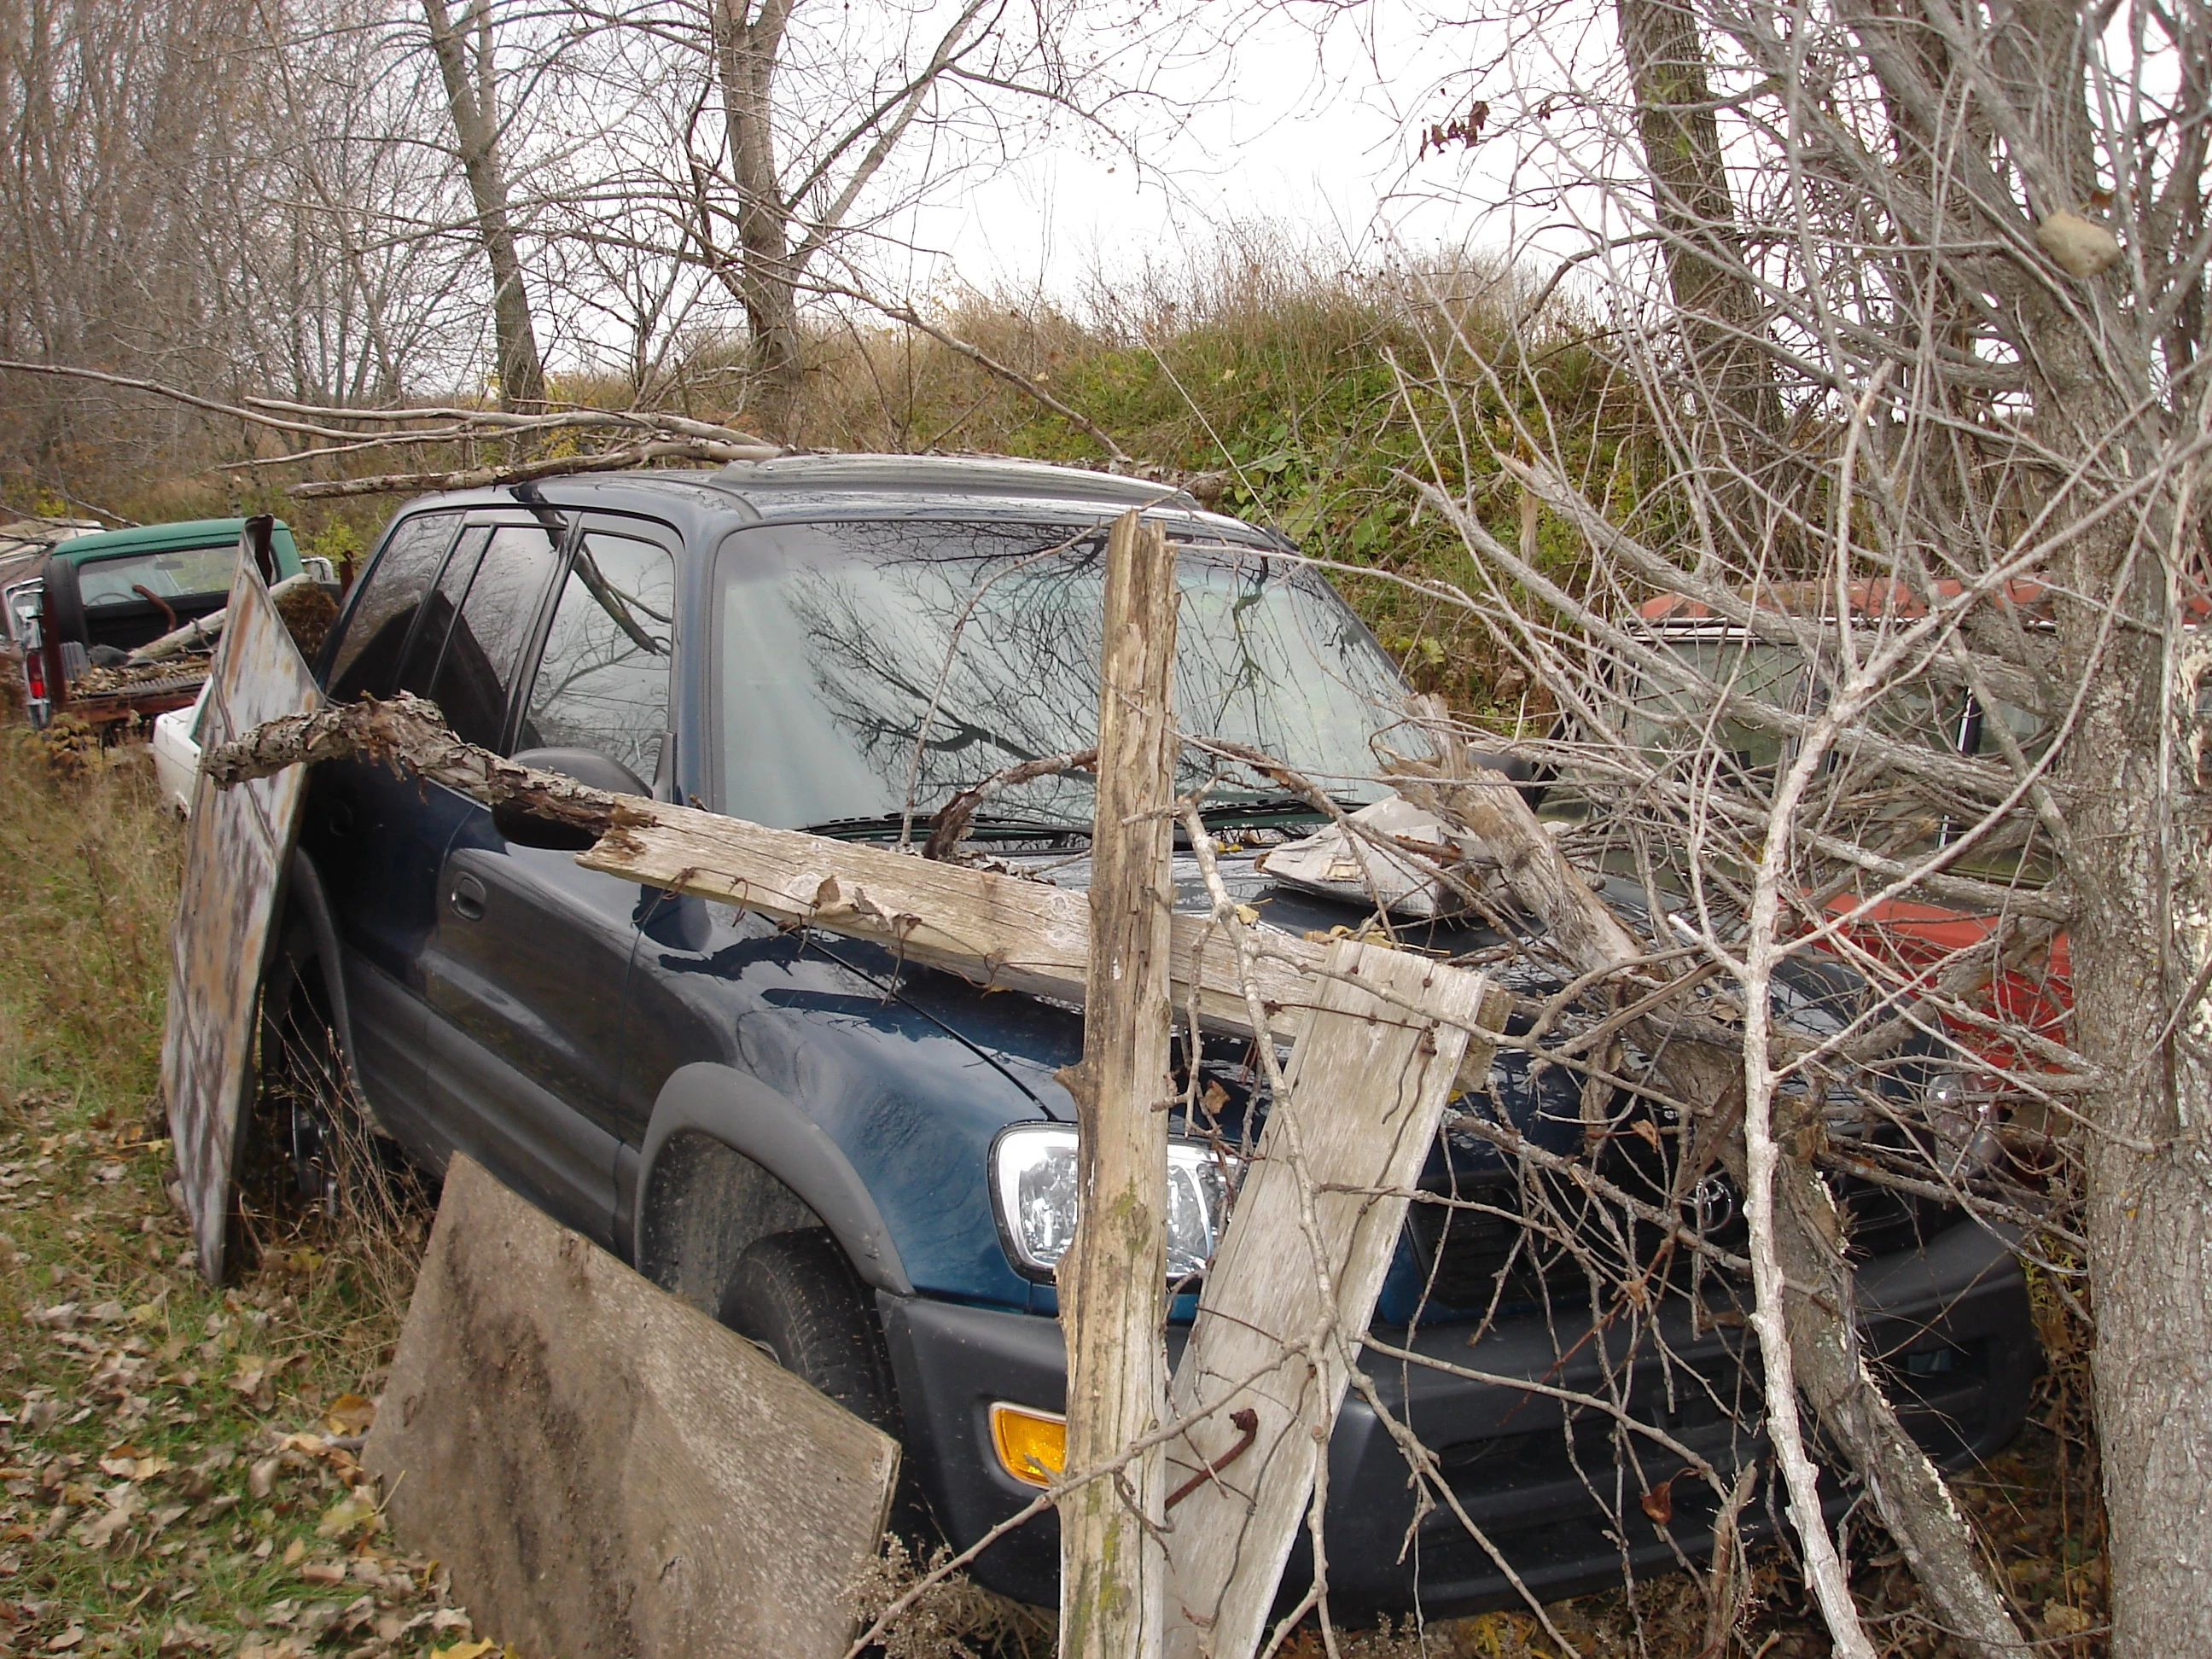
|
| 32 | Volunteer searcher photo of RAV4 | 2 | 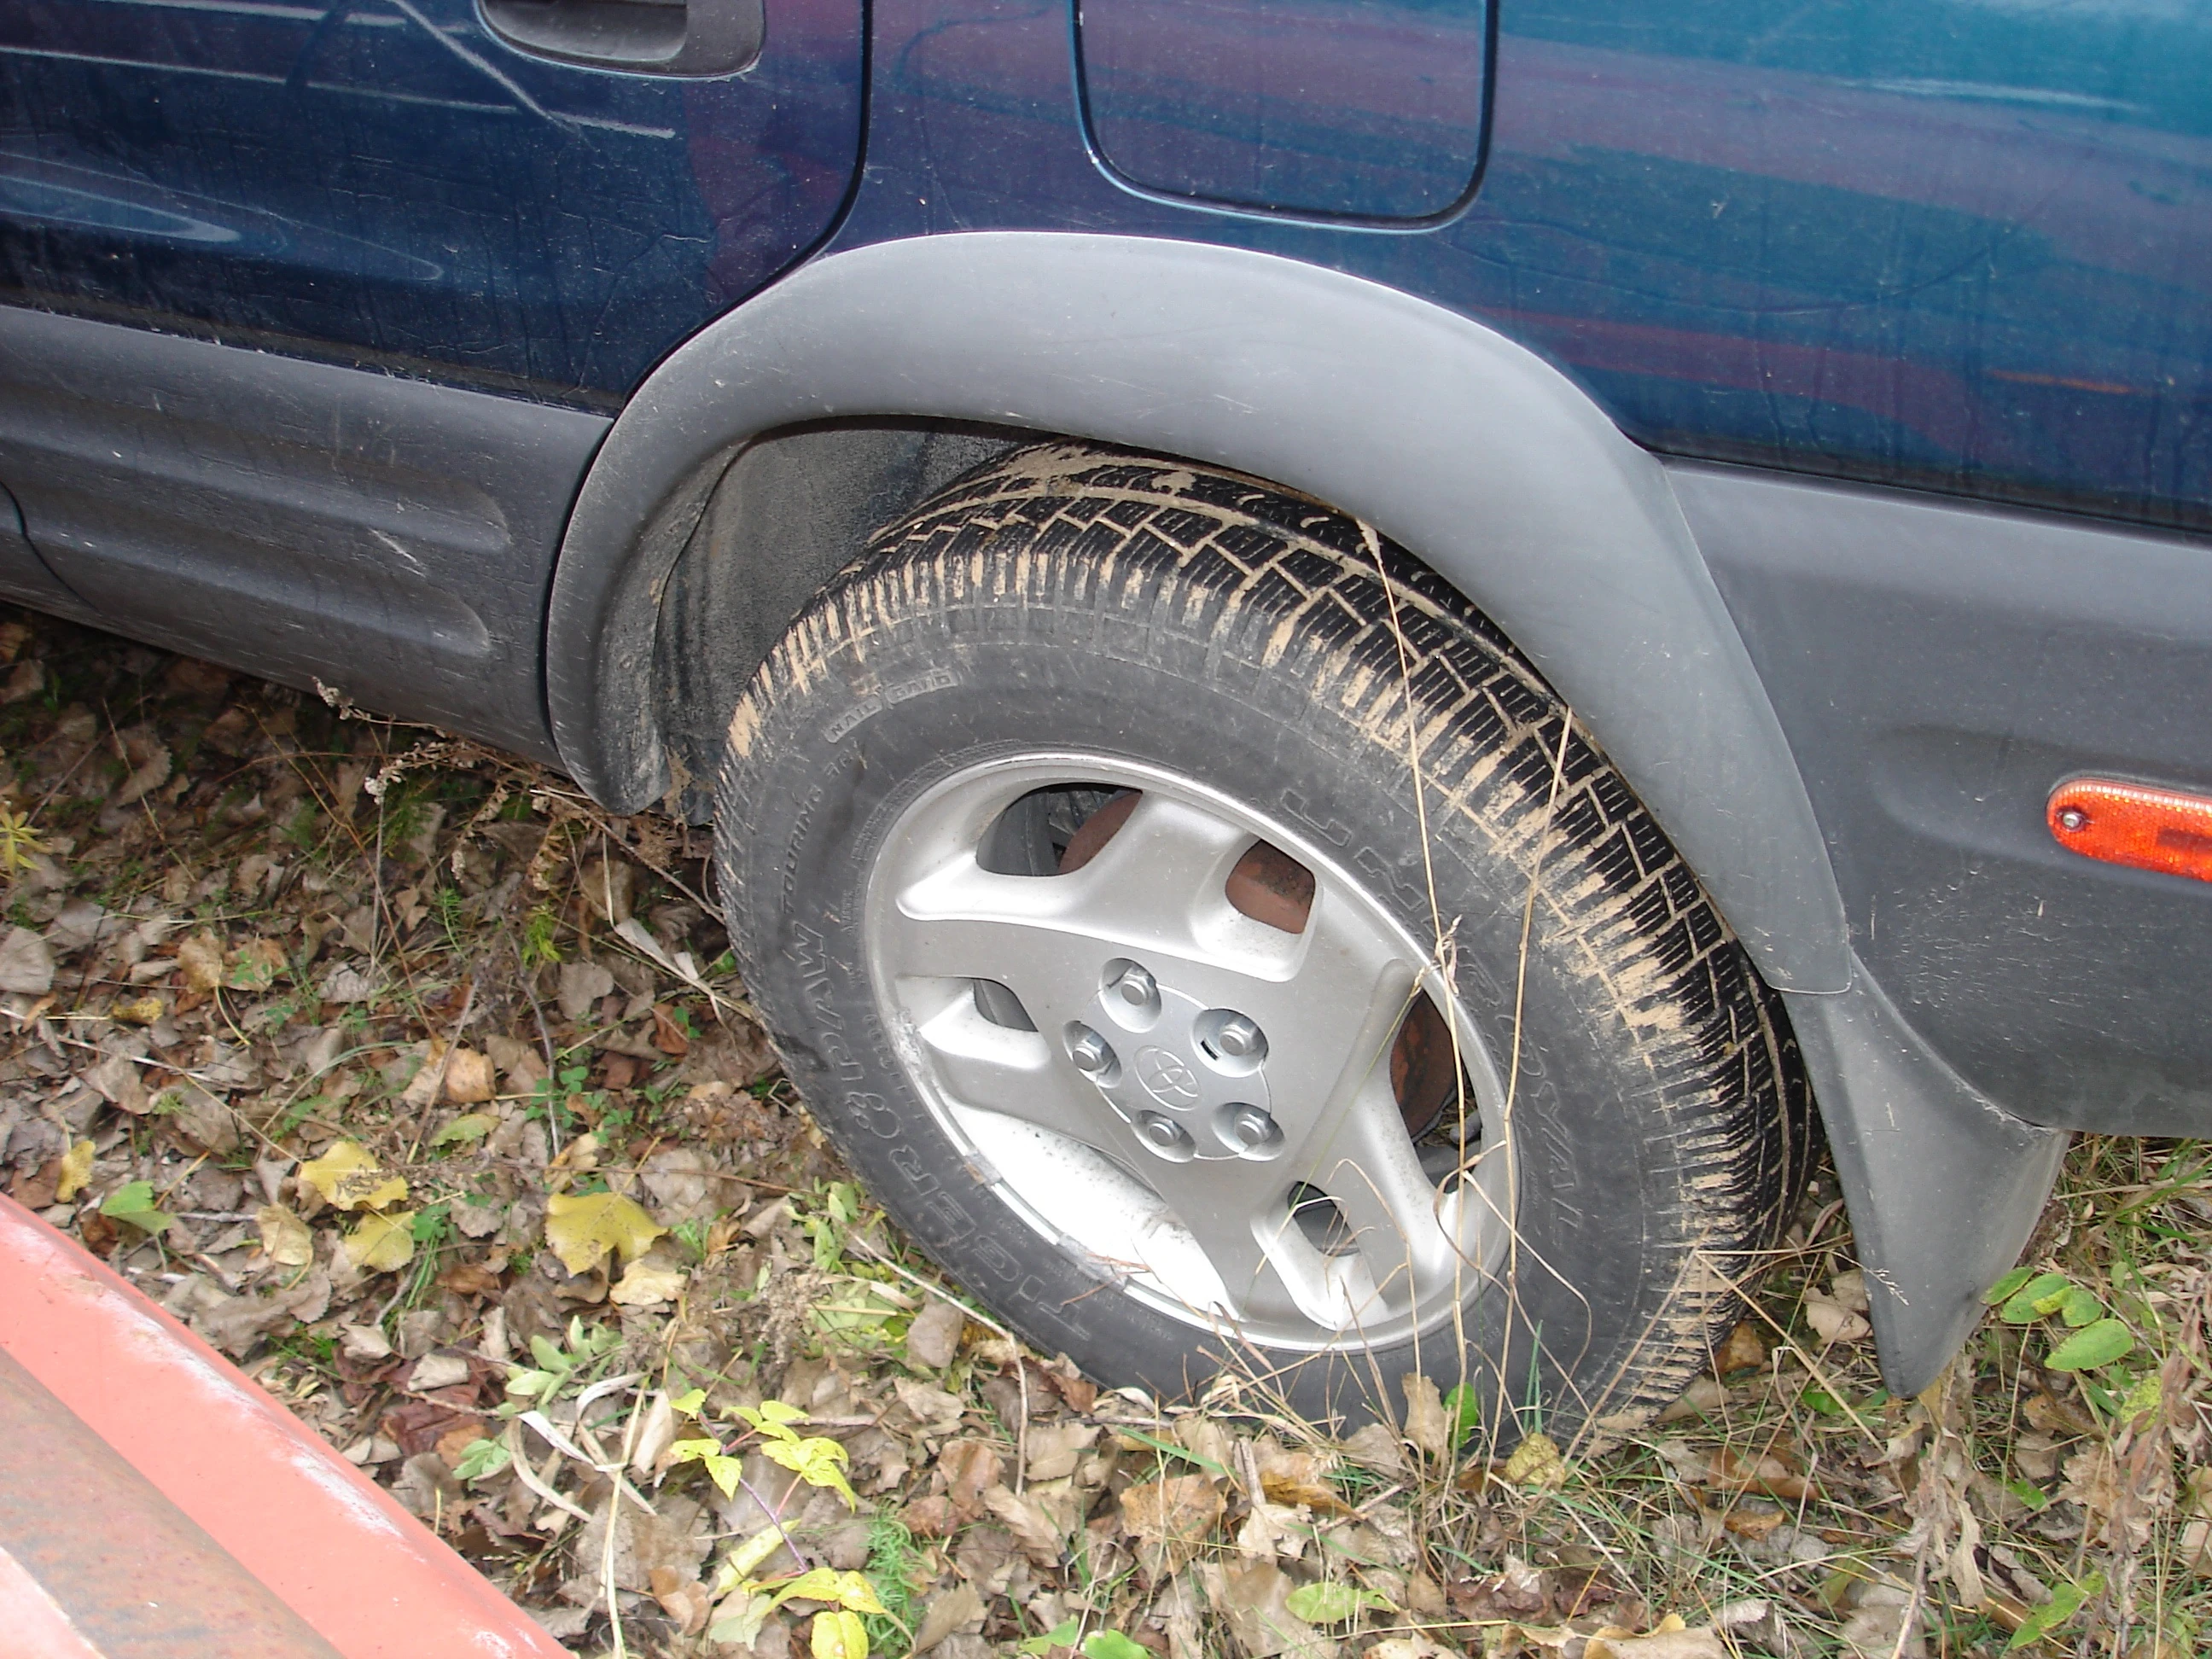
|
| 33 | Volunteer searcher photo of RAV4 | 2 | 
|
| 34 | Volunteer searcher photo of RAV4 | 2 | 
|
| 37 | Steven Avery’s trailer and burn barrel | 3 | 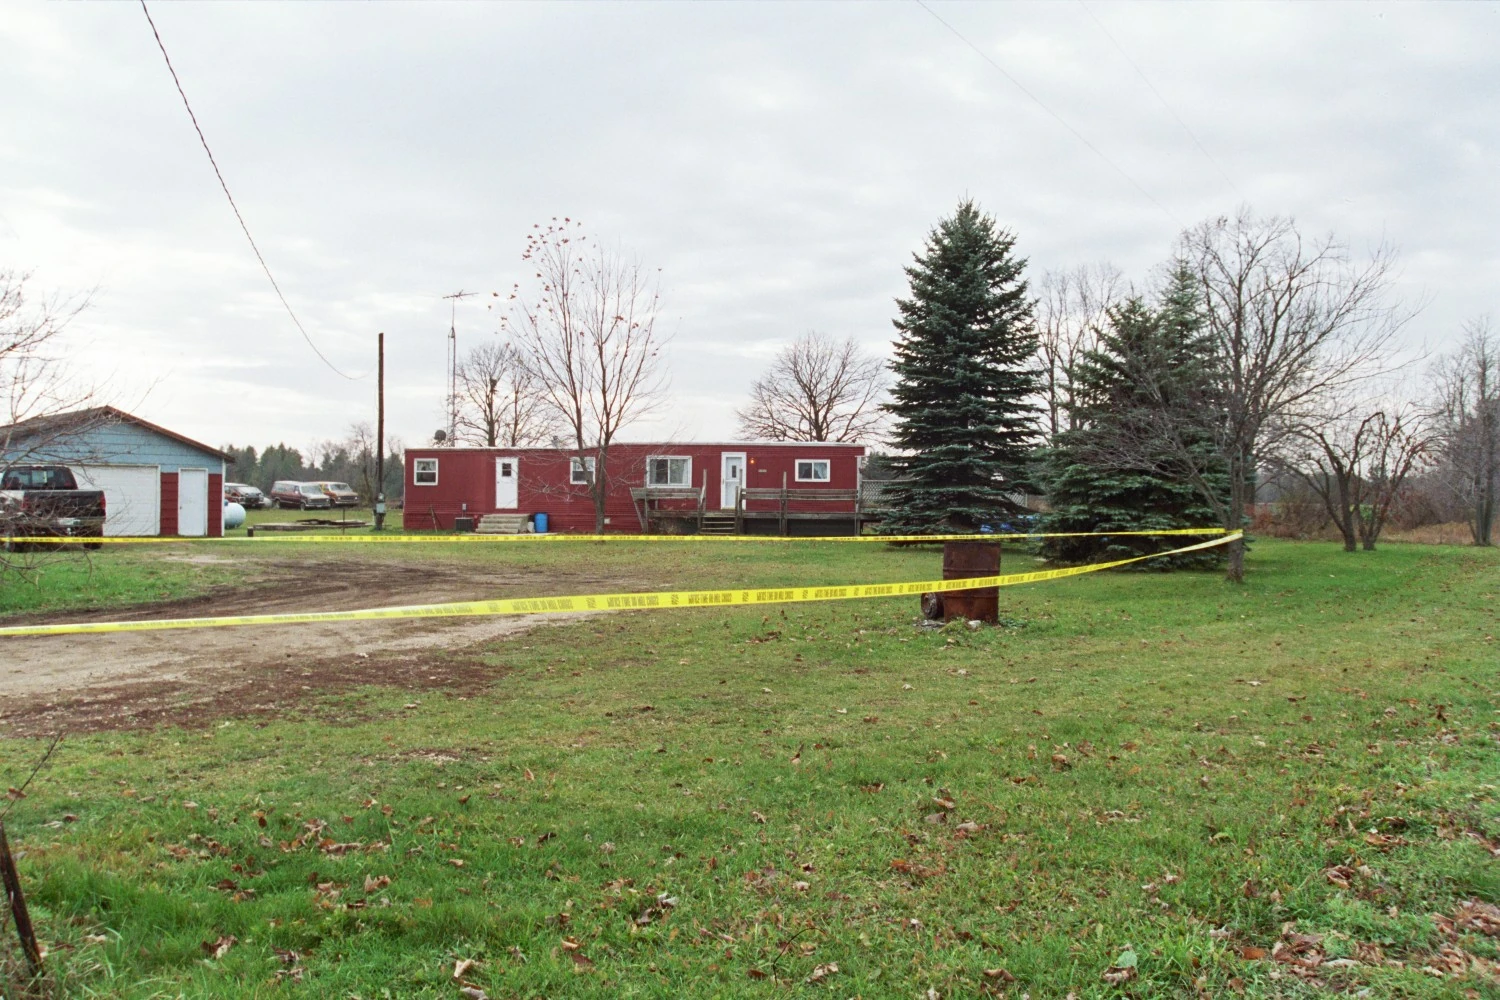
|
| 38 | Steven Avery’s trailer and garage | 3 | 
|
| 39 | Steven Avery’s trailer (nearby shot) | 3 | 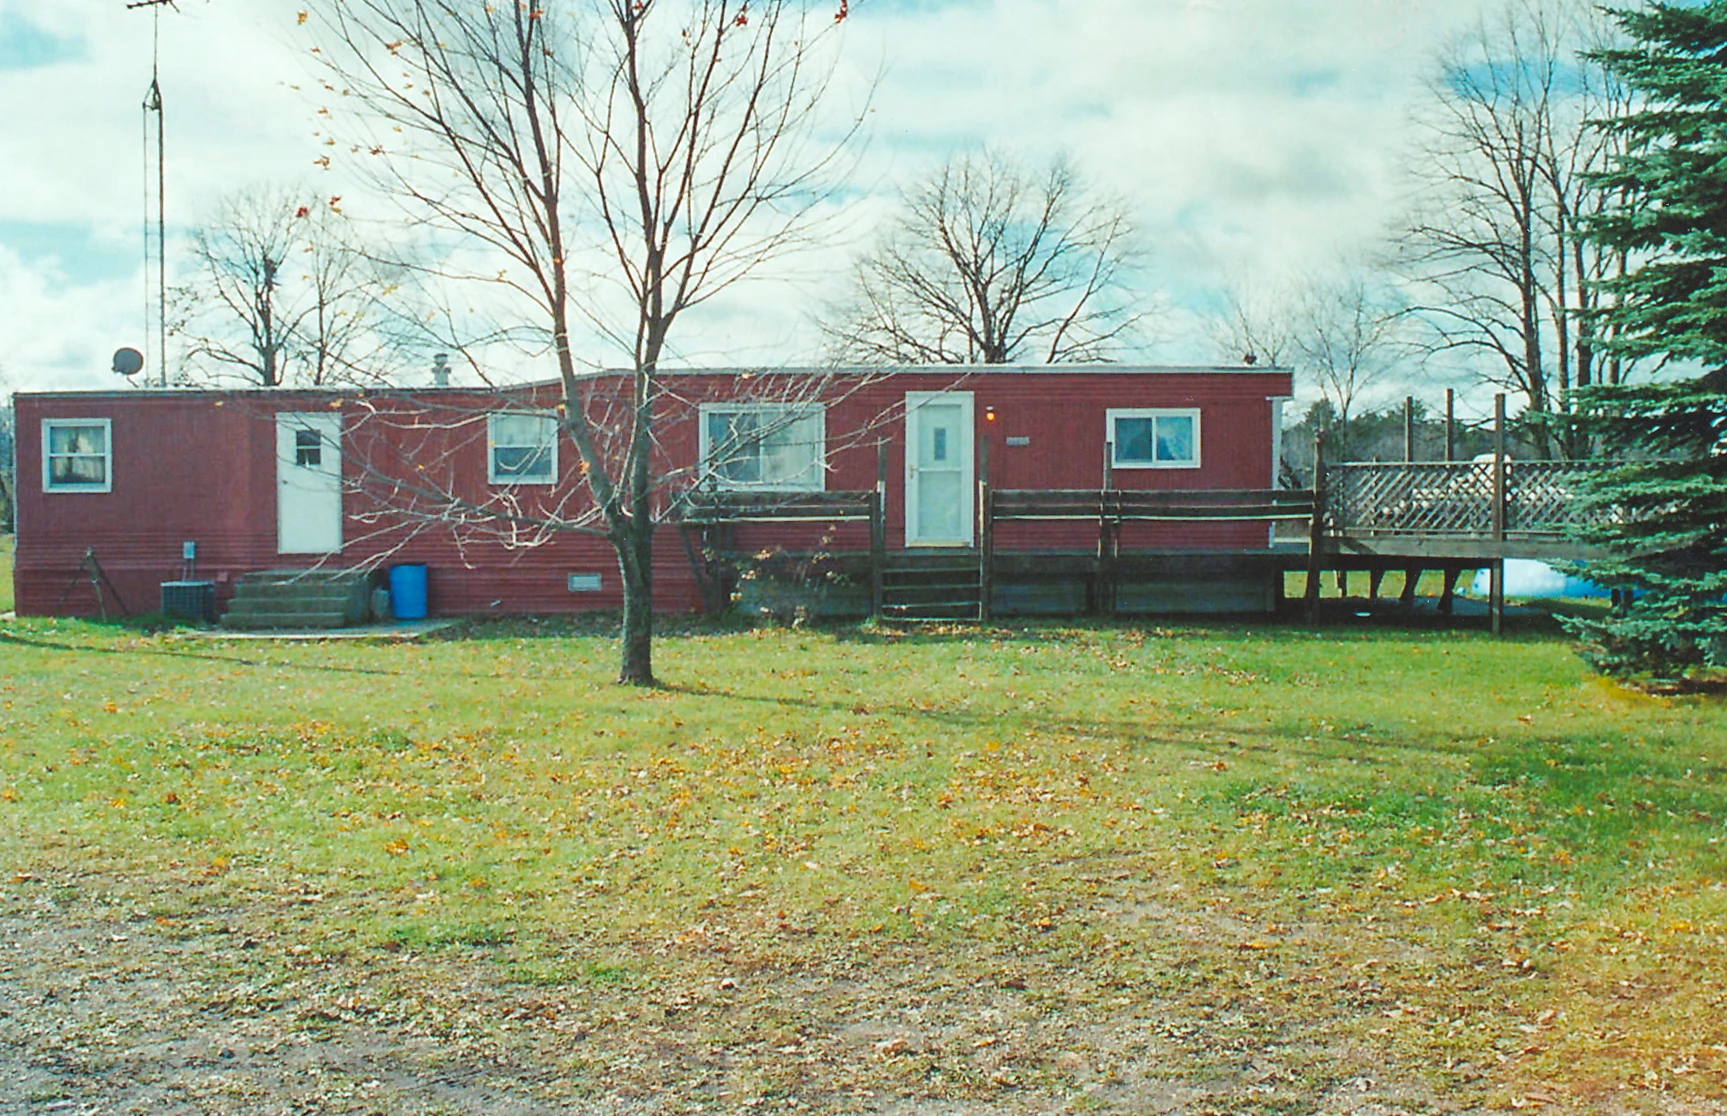
|
| 40 | Steven Avery’s trailer front door | 3 | 
|
| 41 | Steven Avery’s trailer two front doors | 3 | 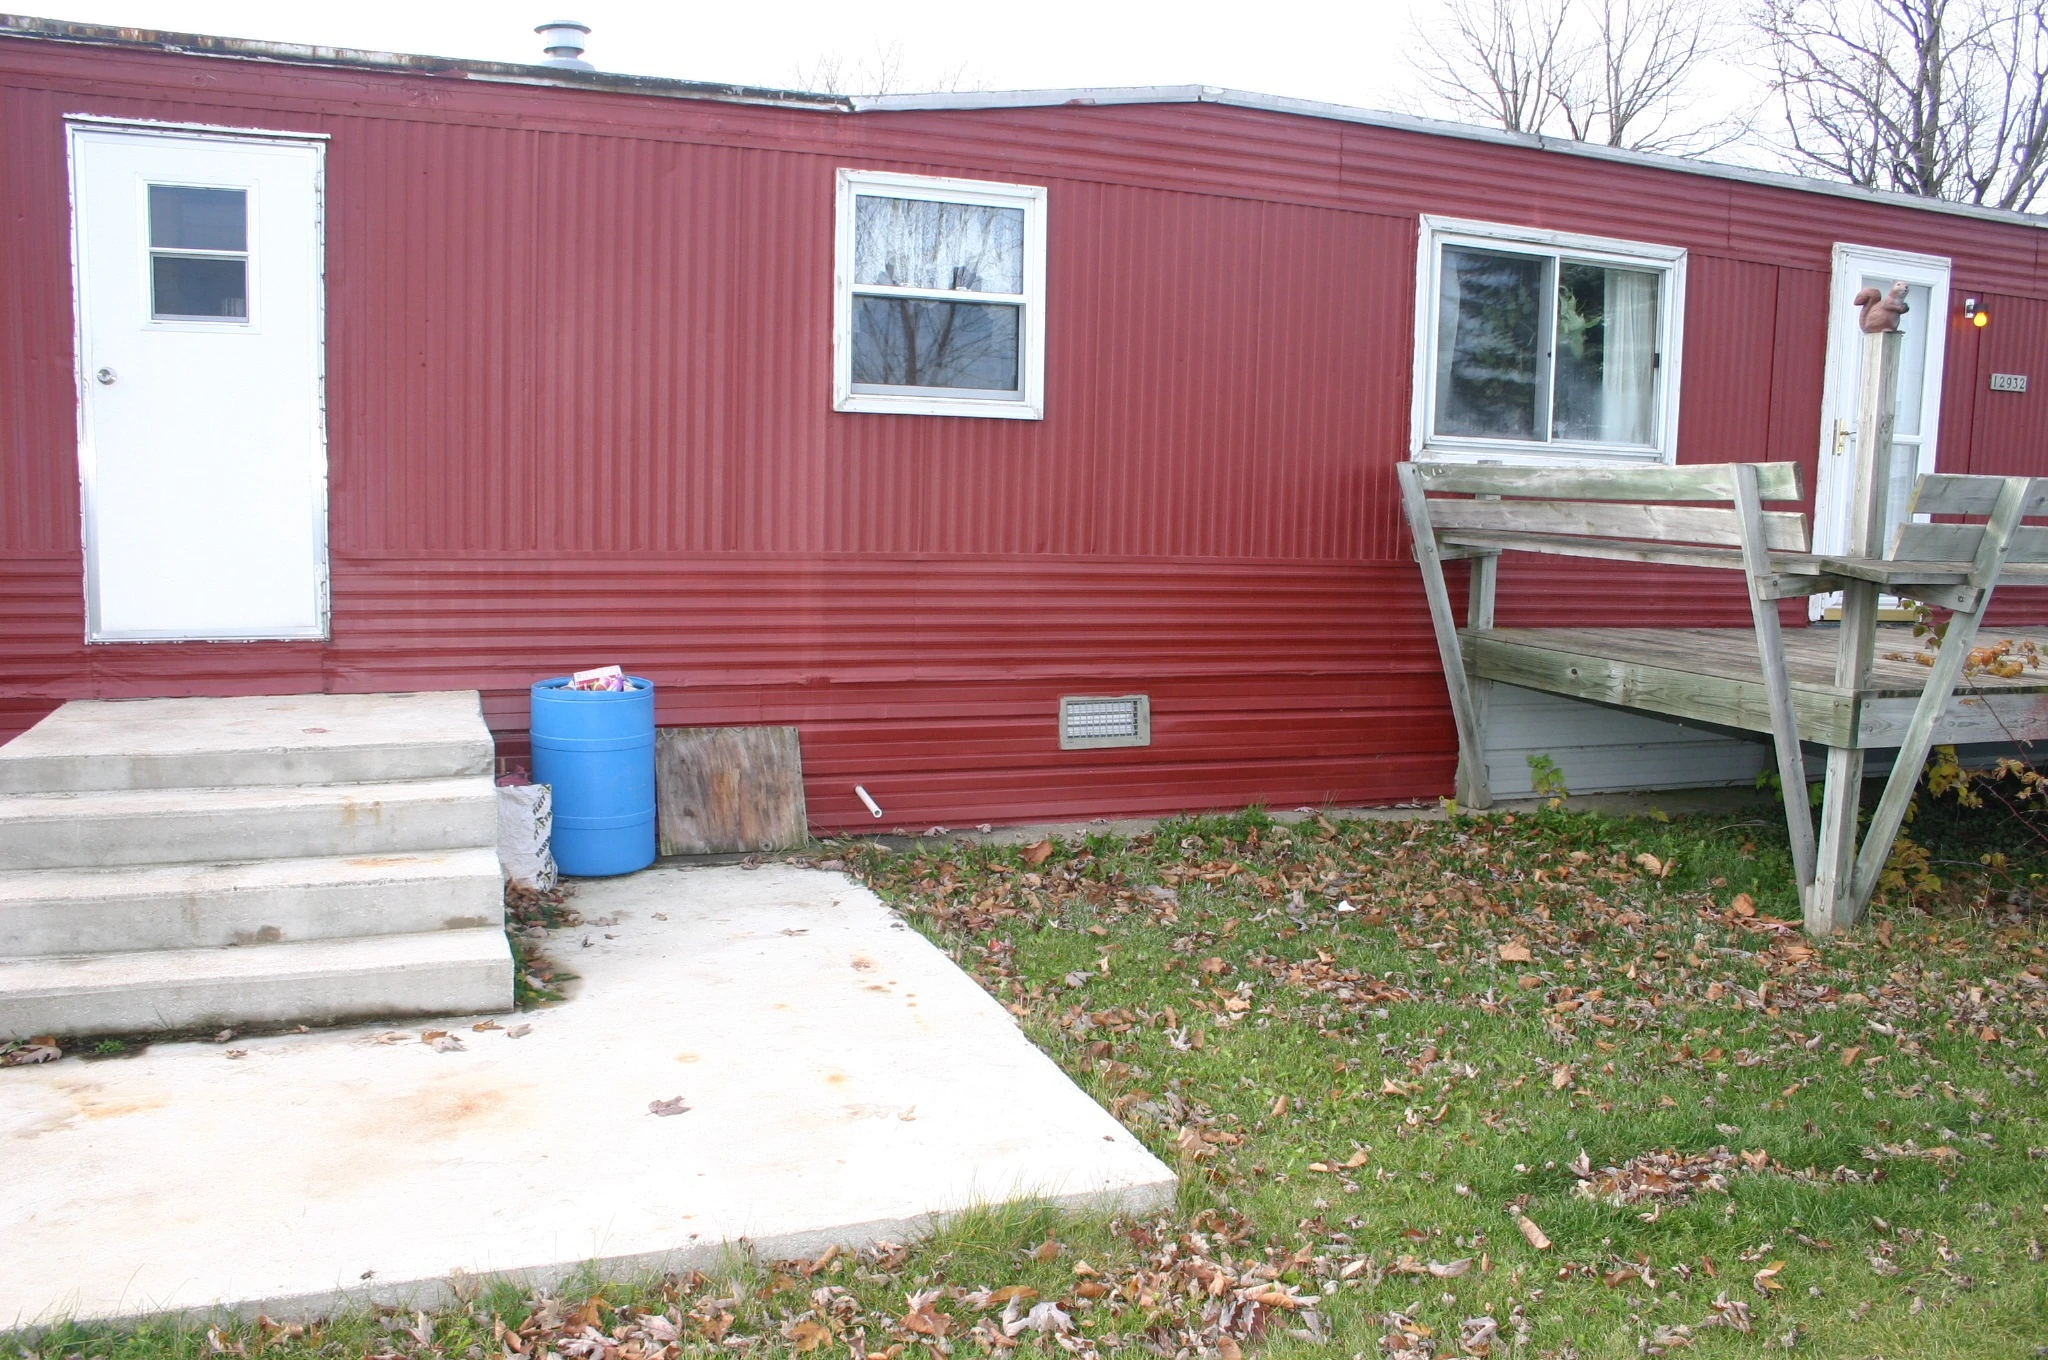
|
| 42 | Steven Avery’s trailer and pool | 3 | 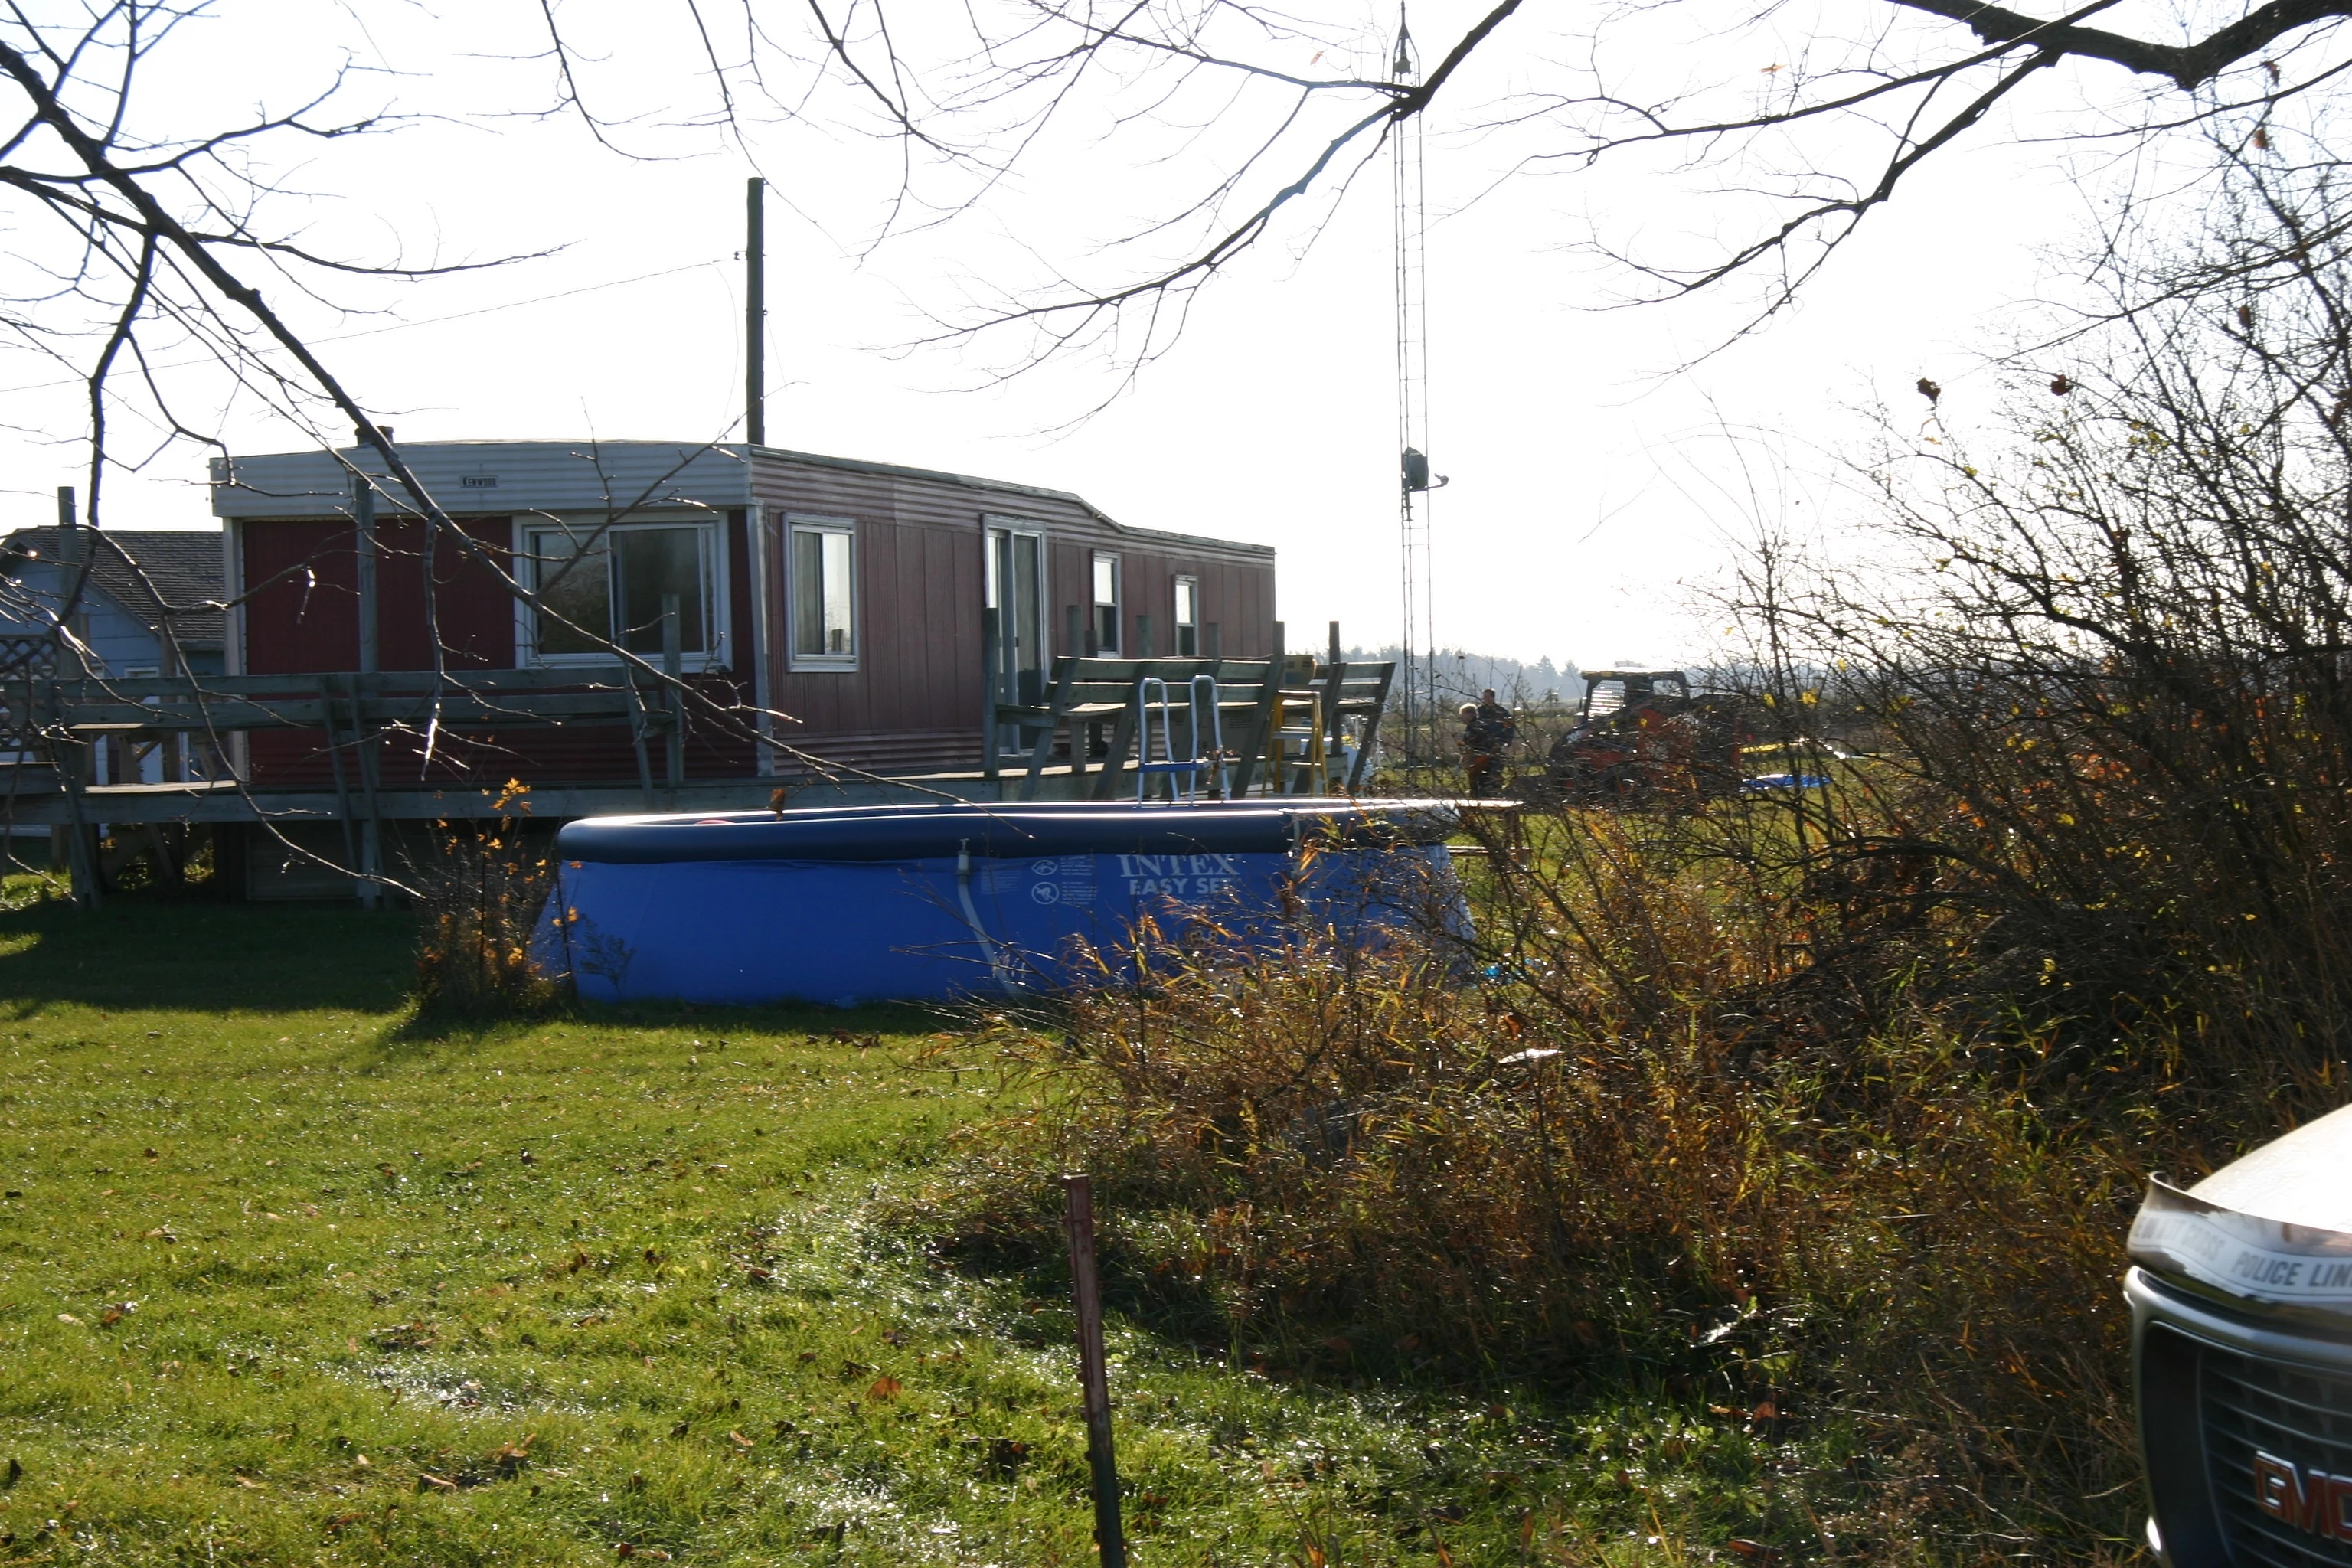
|
| 43 | Steven Avery’s trailer (back) | 3 | 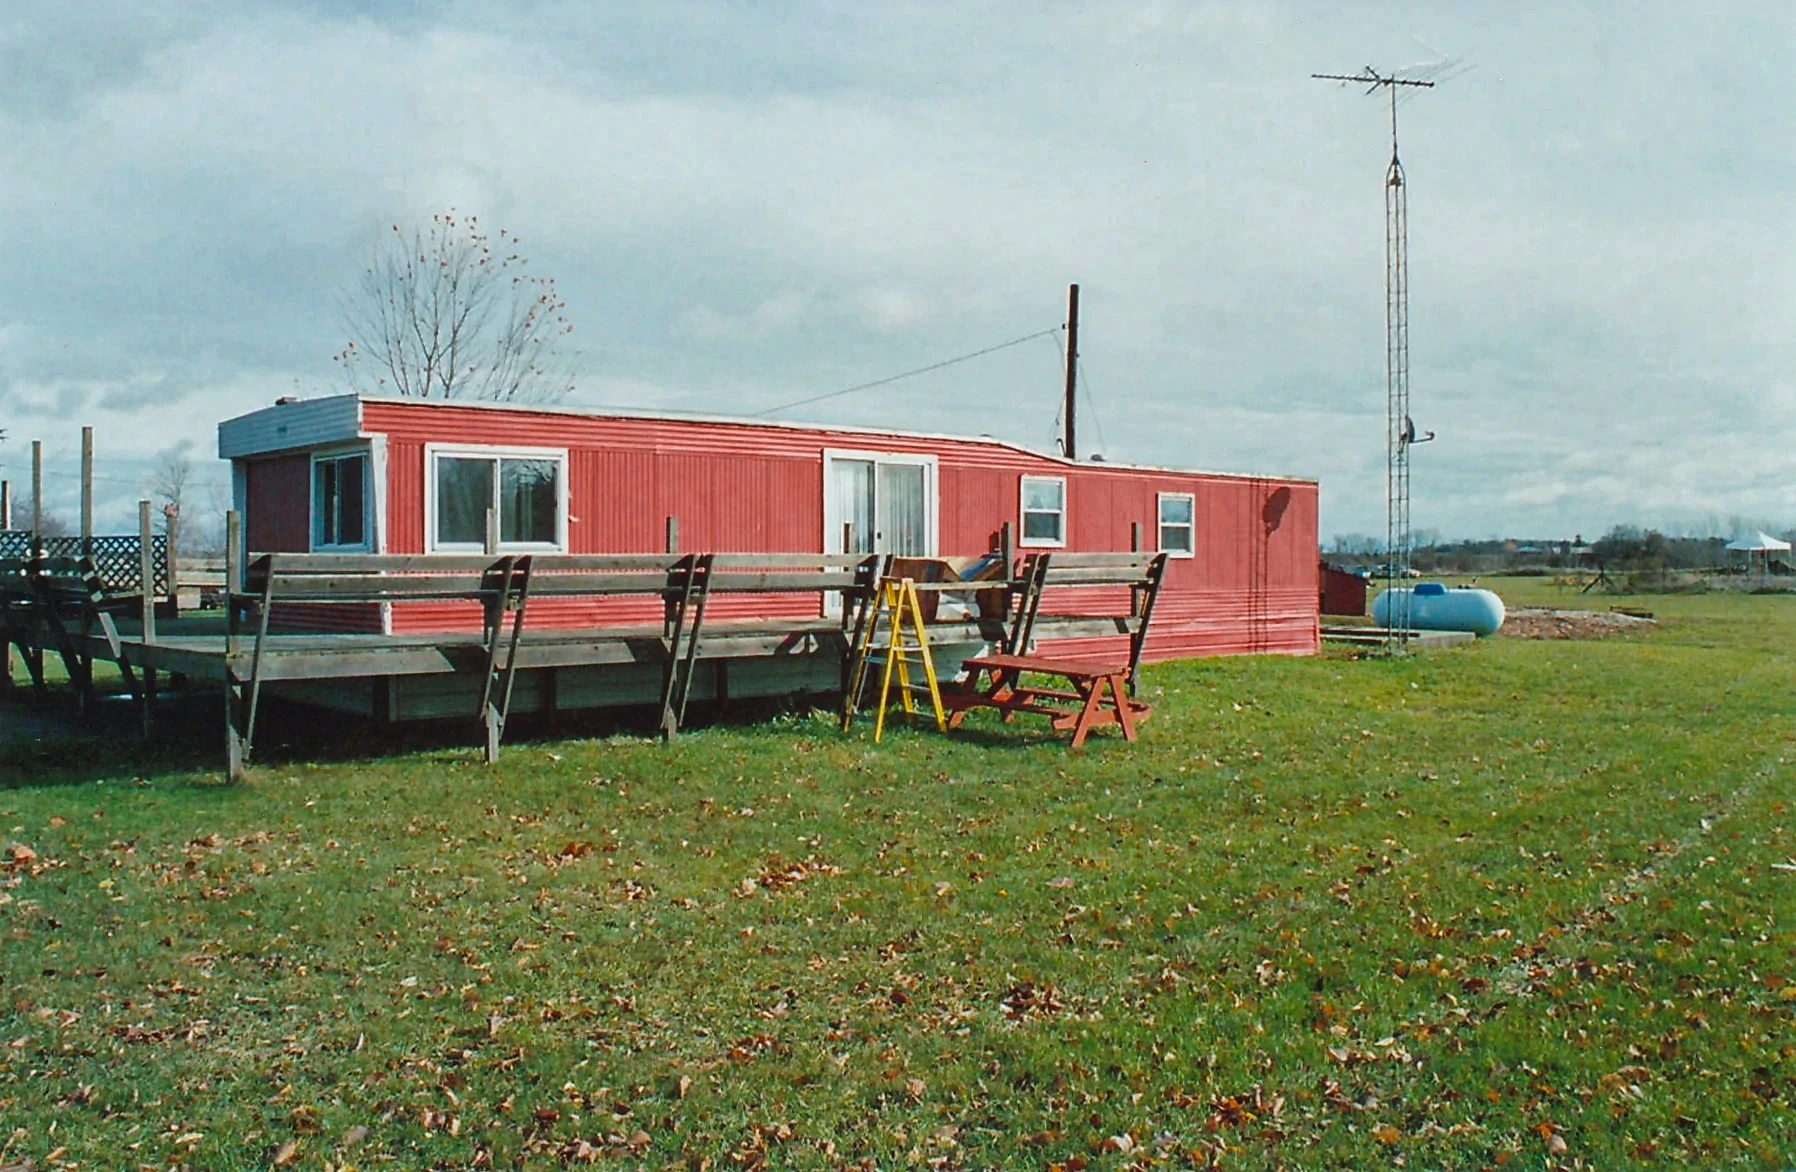
|
| 44 | Steven Avery’s garage, dog house, truck and trailer | 3 | 
|
| 45 | Steven Avery’s garage and truck | 3 | 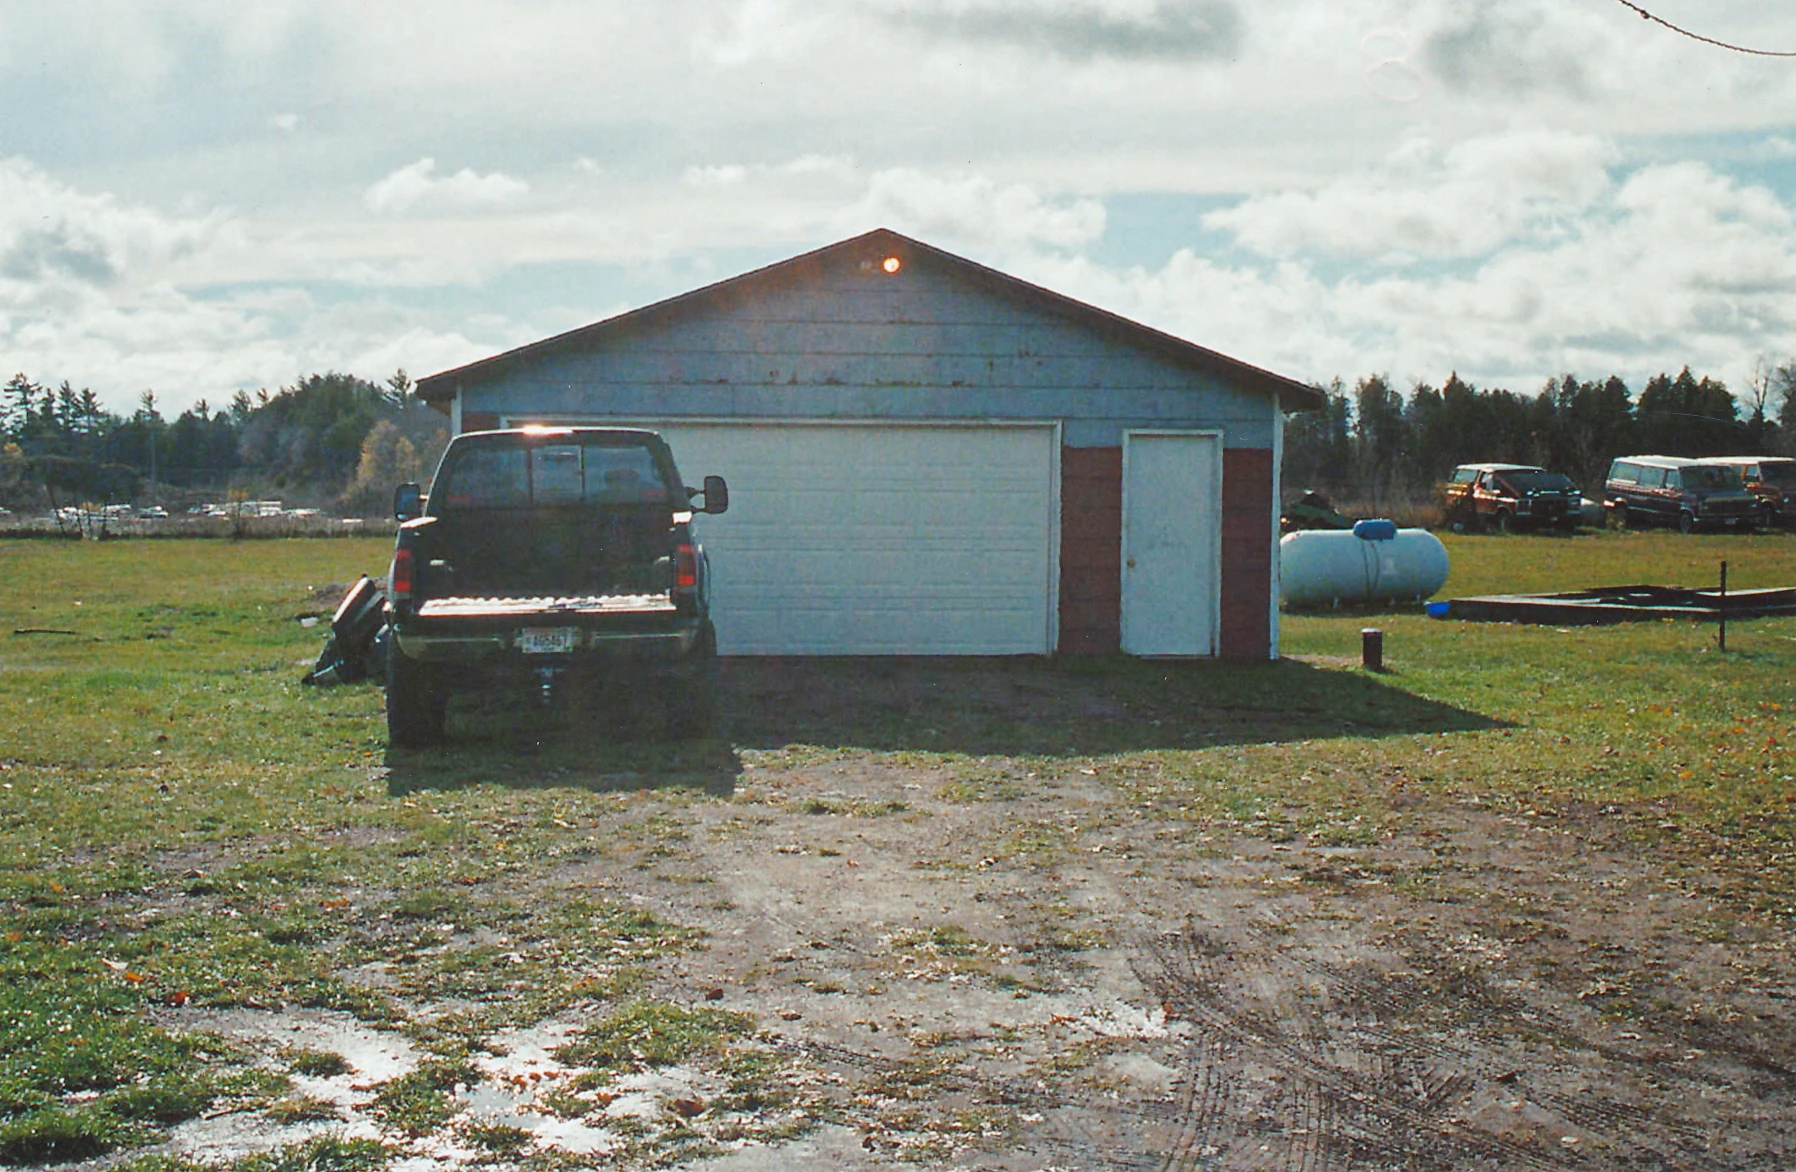
|
| 46 | Steven Avery’s garage (door open) | 3 | 
|
| 47 | Steven Avery’s burn pit and burned van seat | 3 | 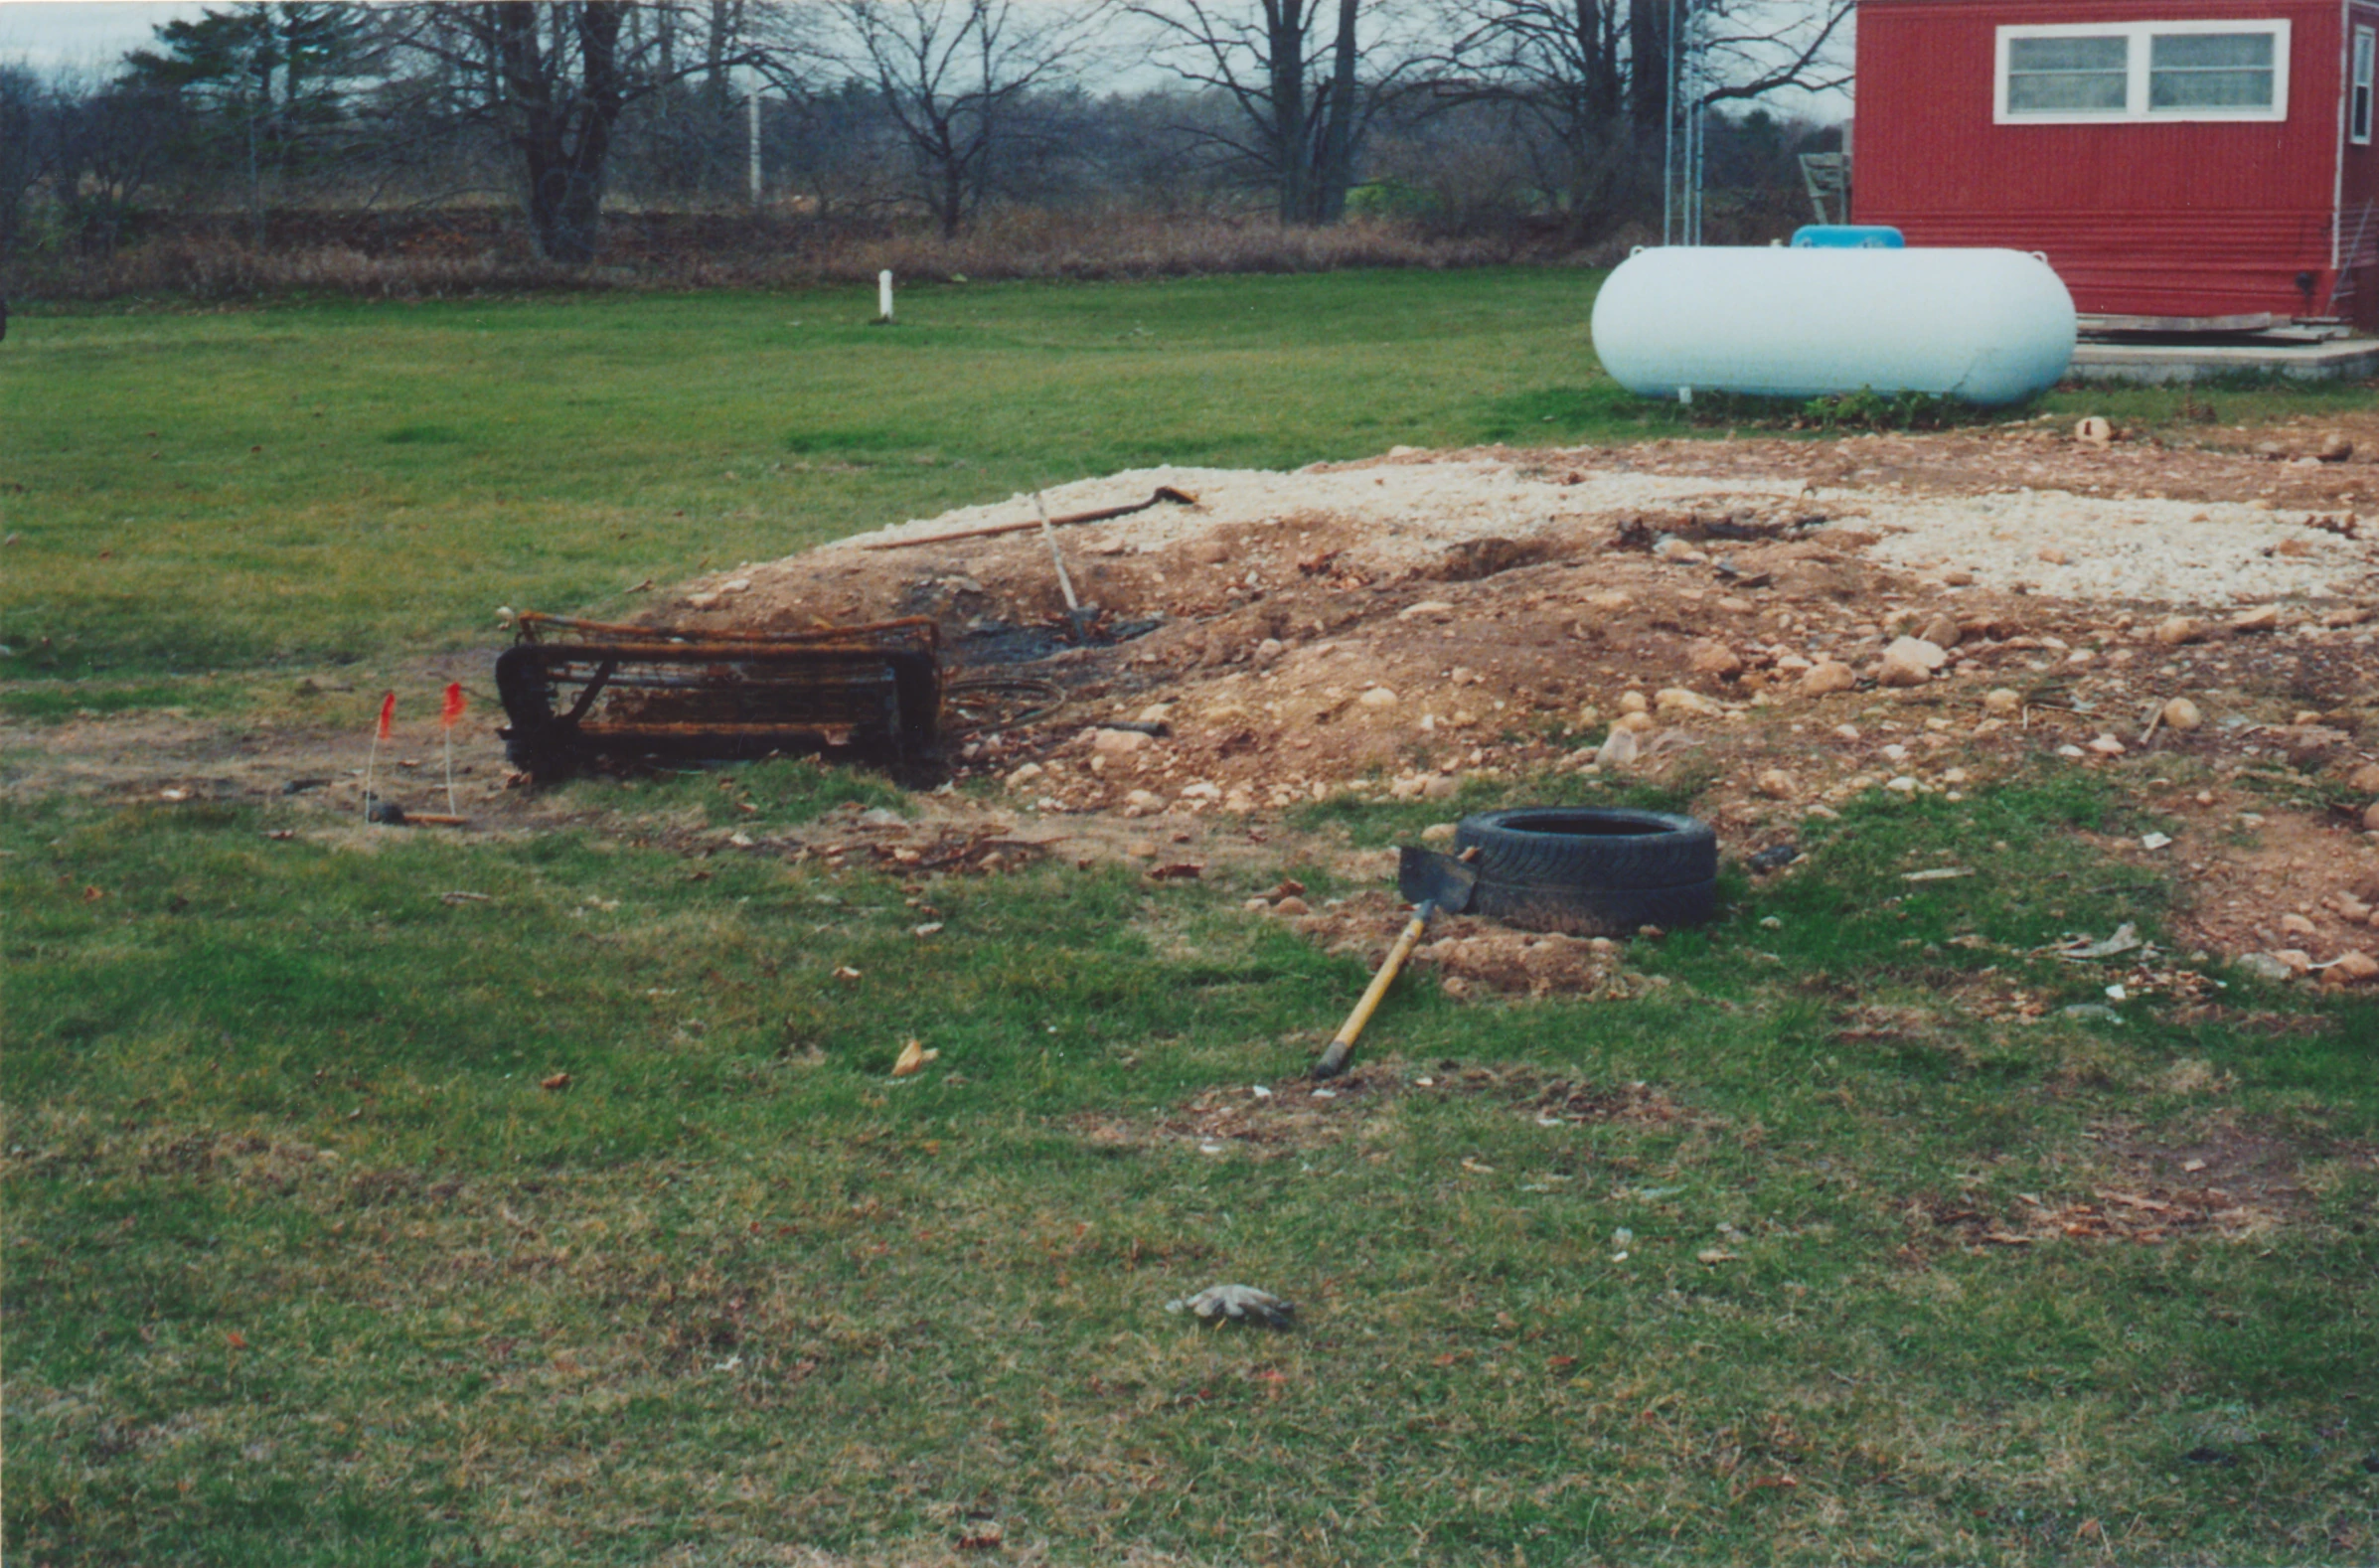
|
| 48 | burn pit and dog house | 3 | 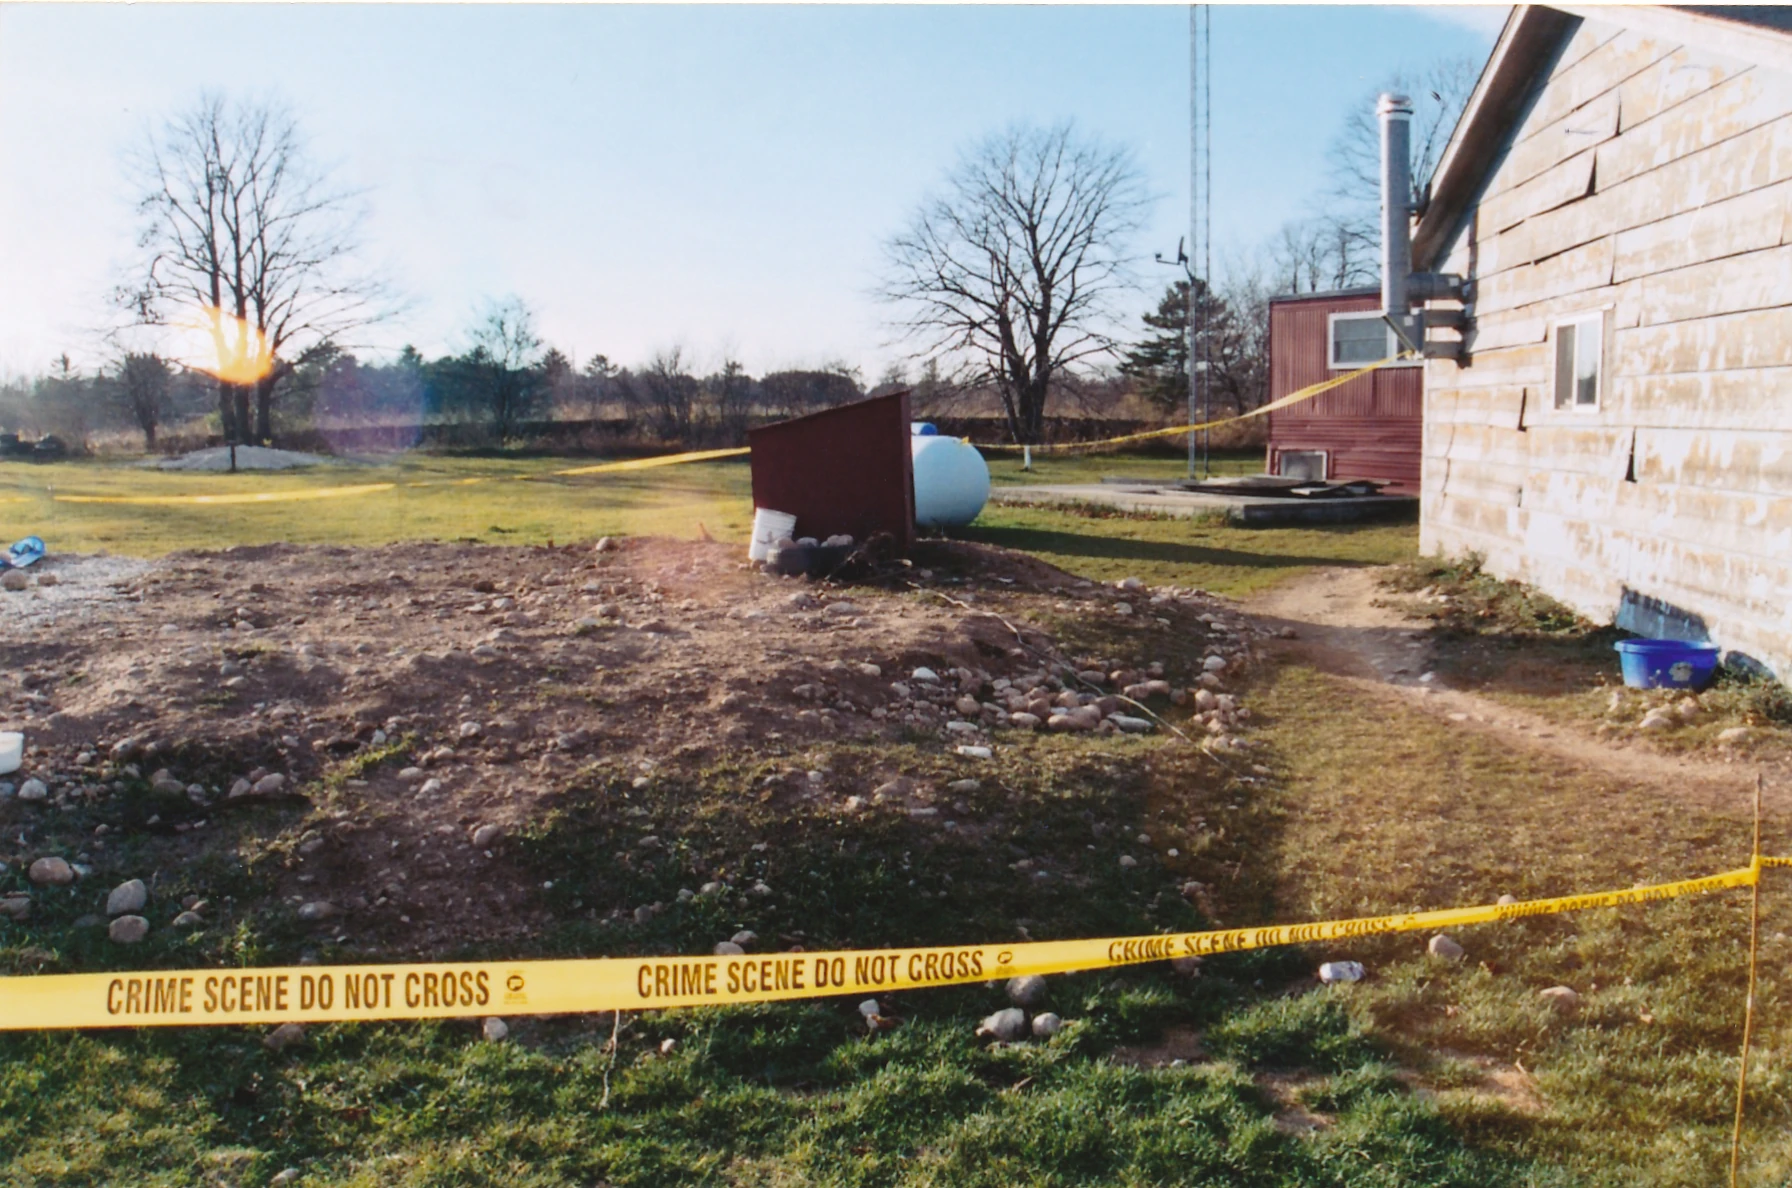
|
| 49 | burn pit and dog house | 3 | 
|
| 50 | burn pit and Bear | 3 | 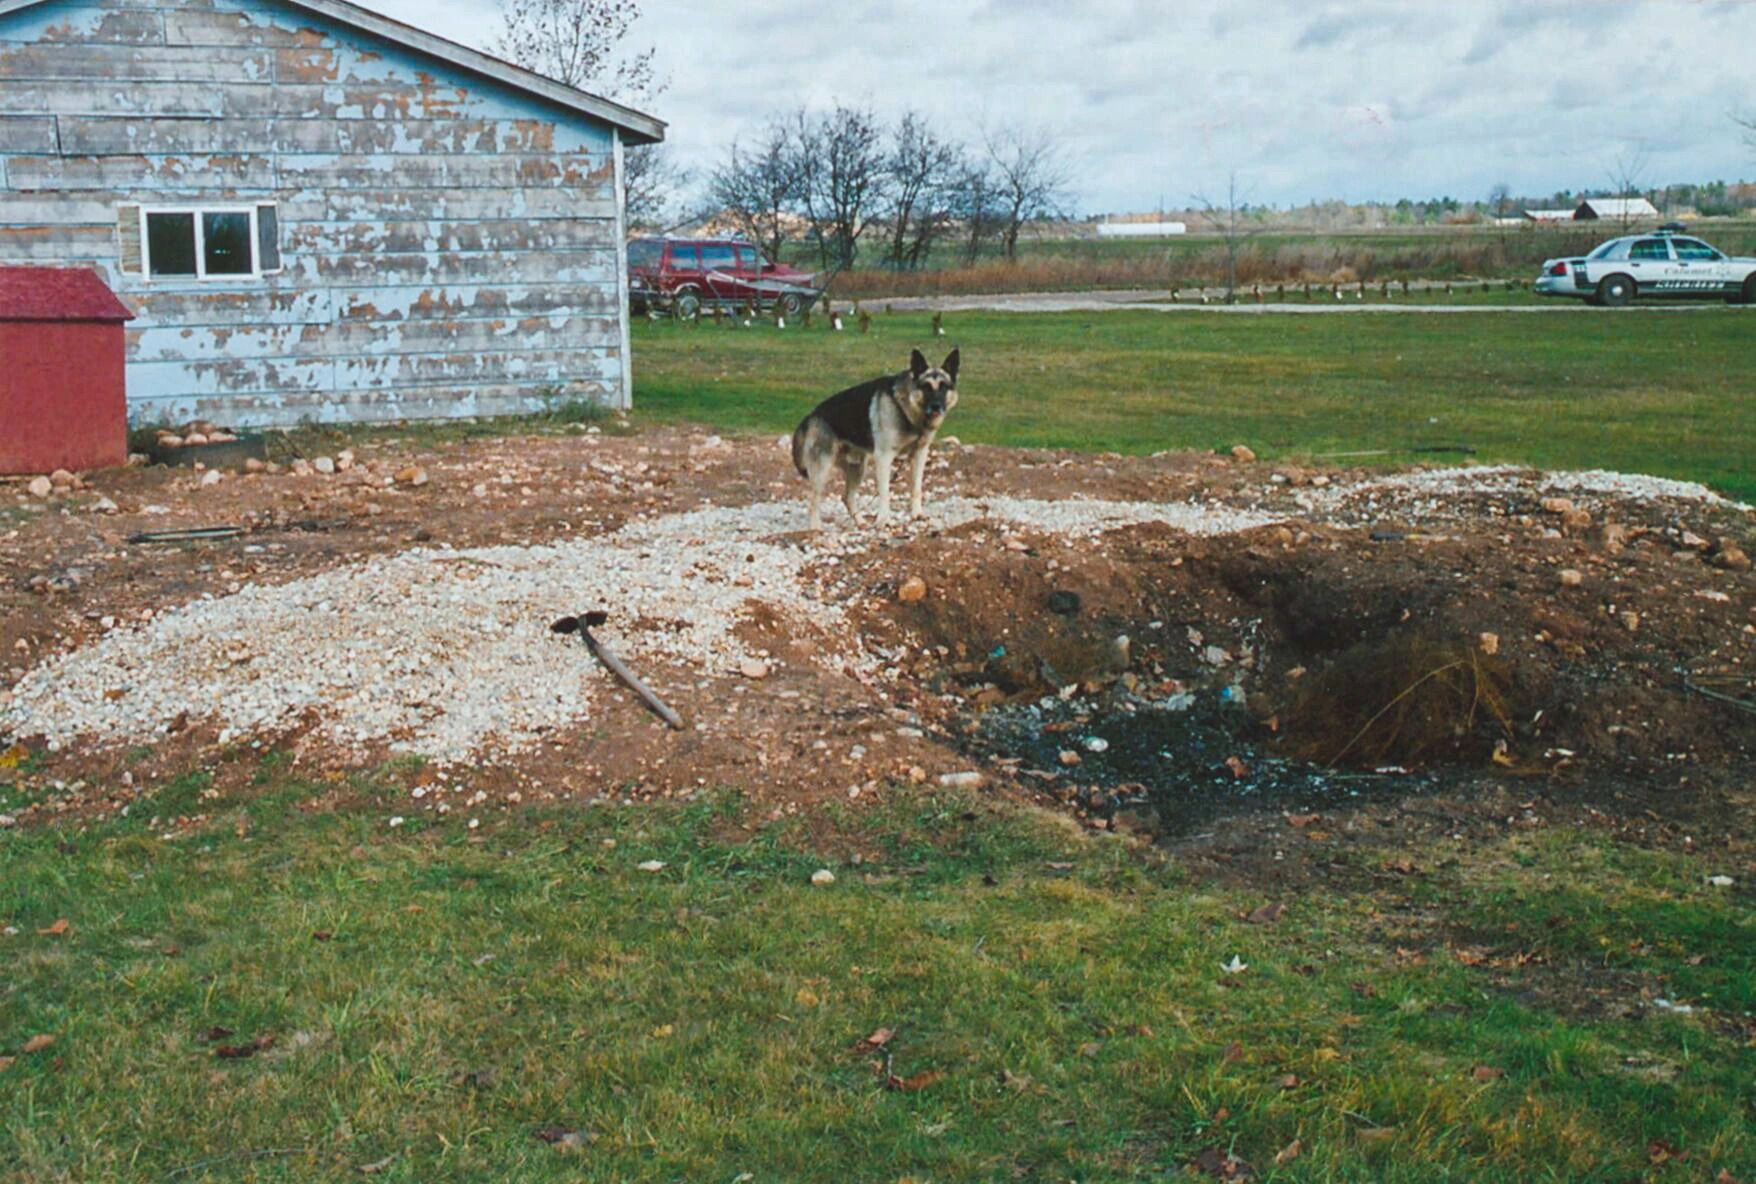
|
| 51 | Steven Avery’s burn barrel | 3 | 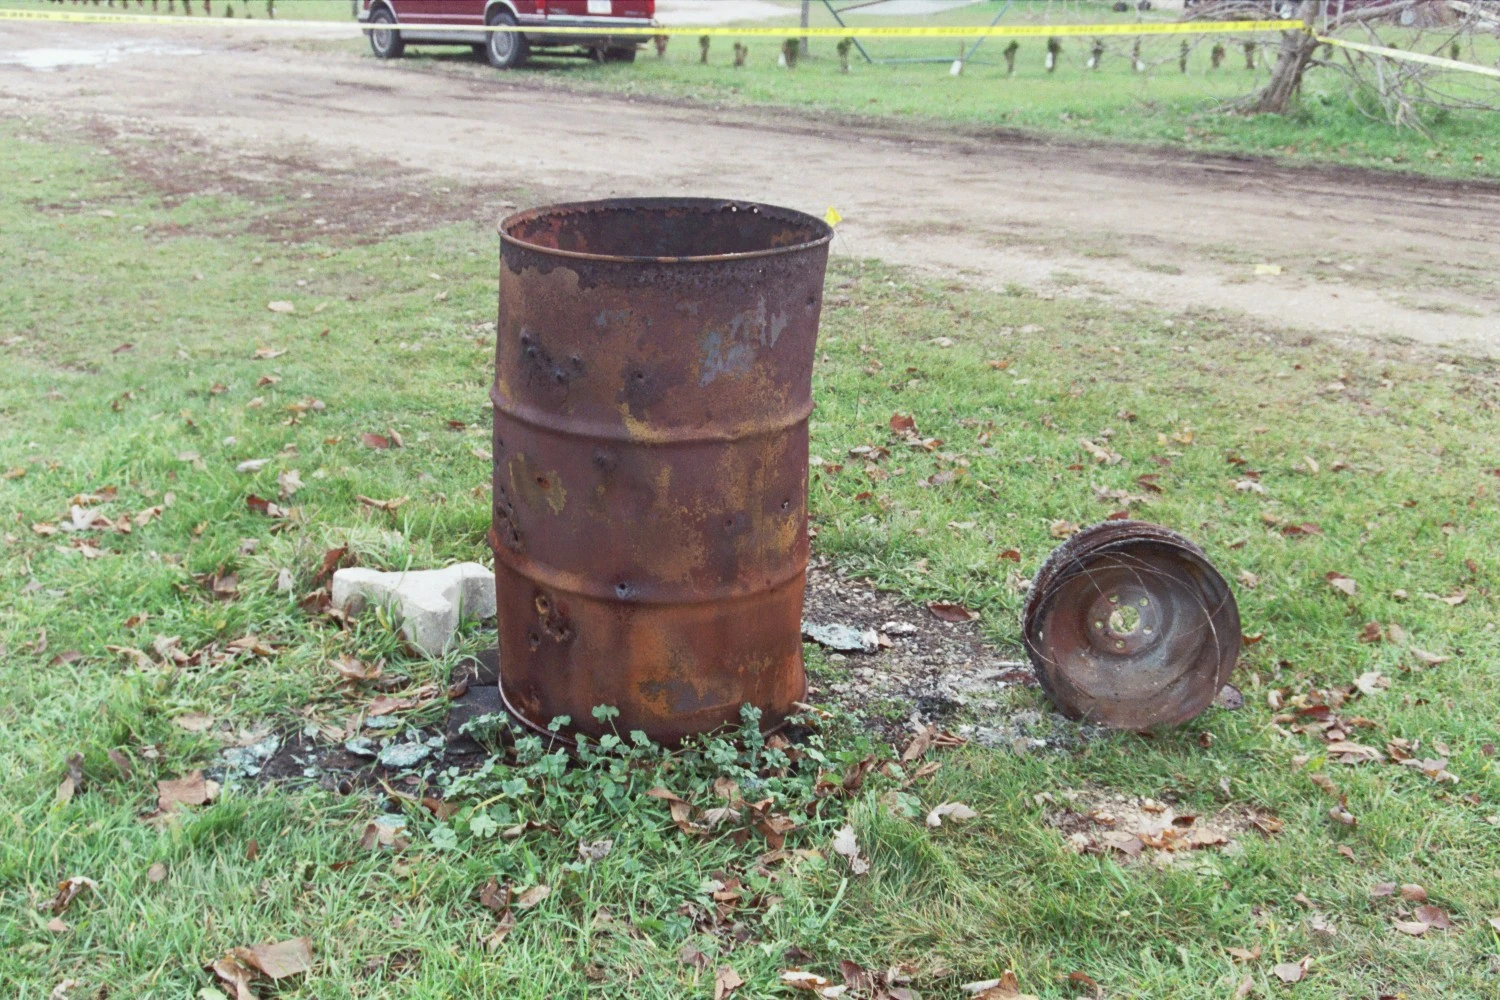
|
| 52 | Janda and Dassey burn barrels | 3 | 
|
| 53 | Steven Avery’s trailer | 3 | 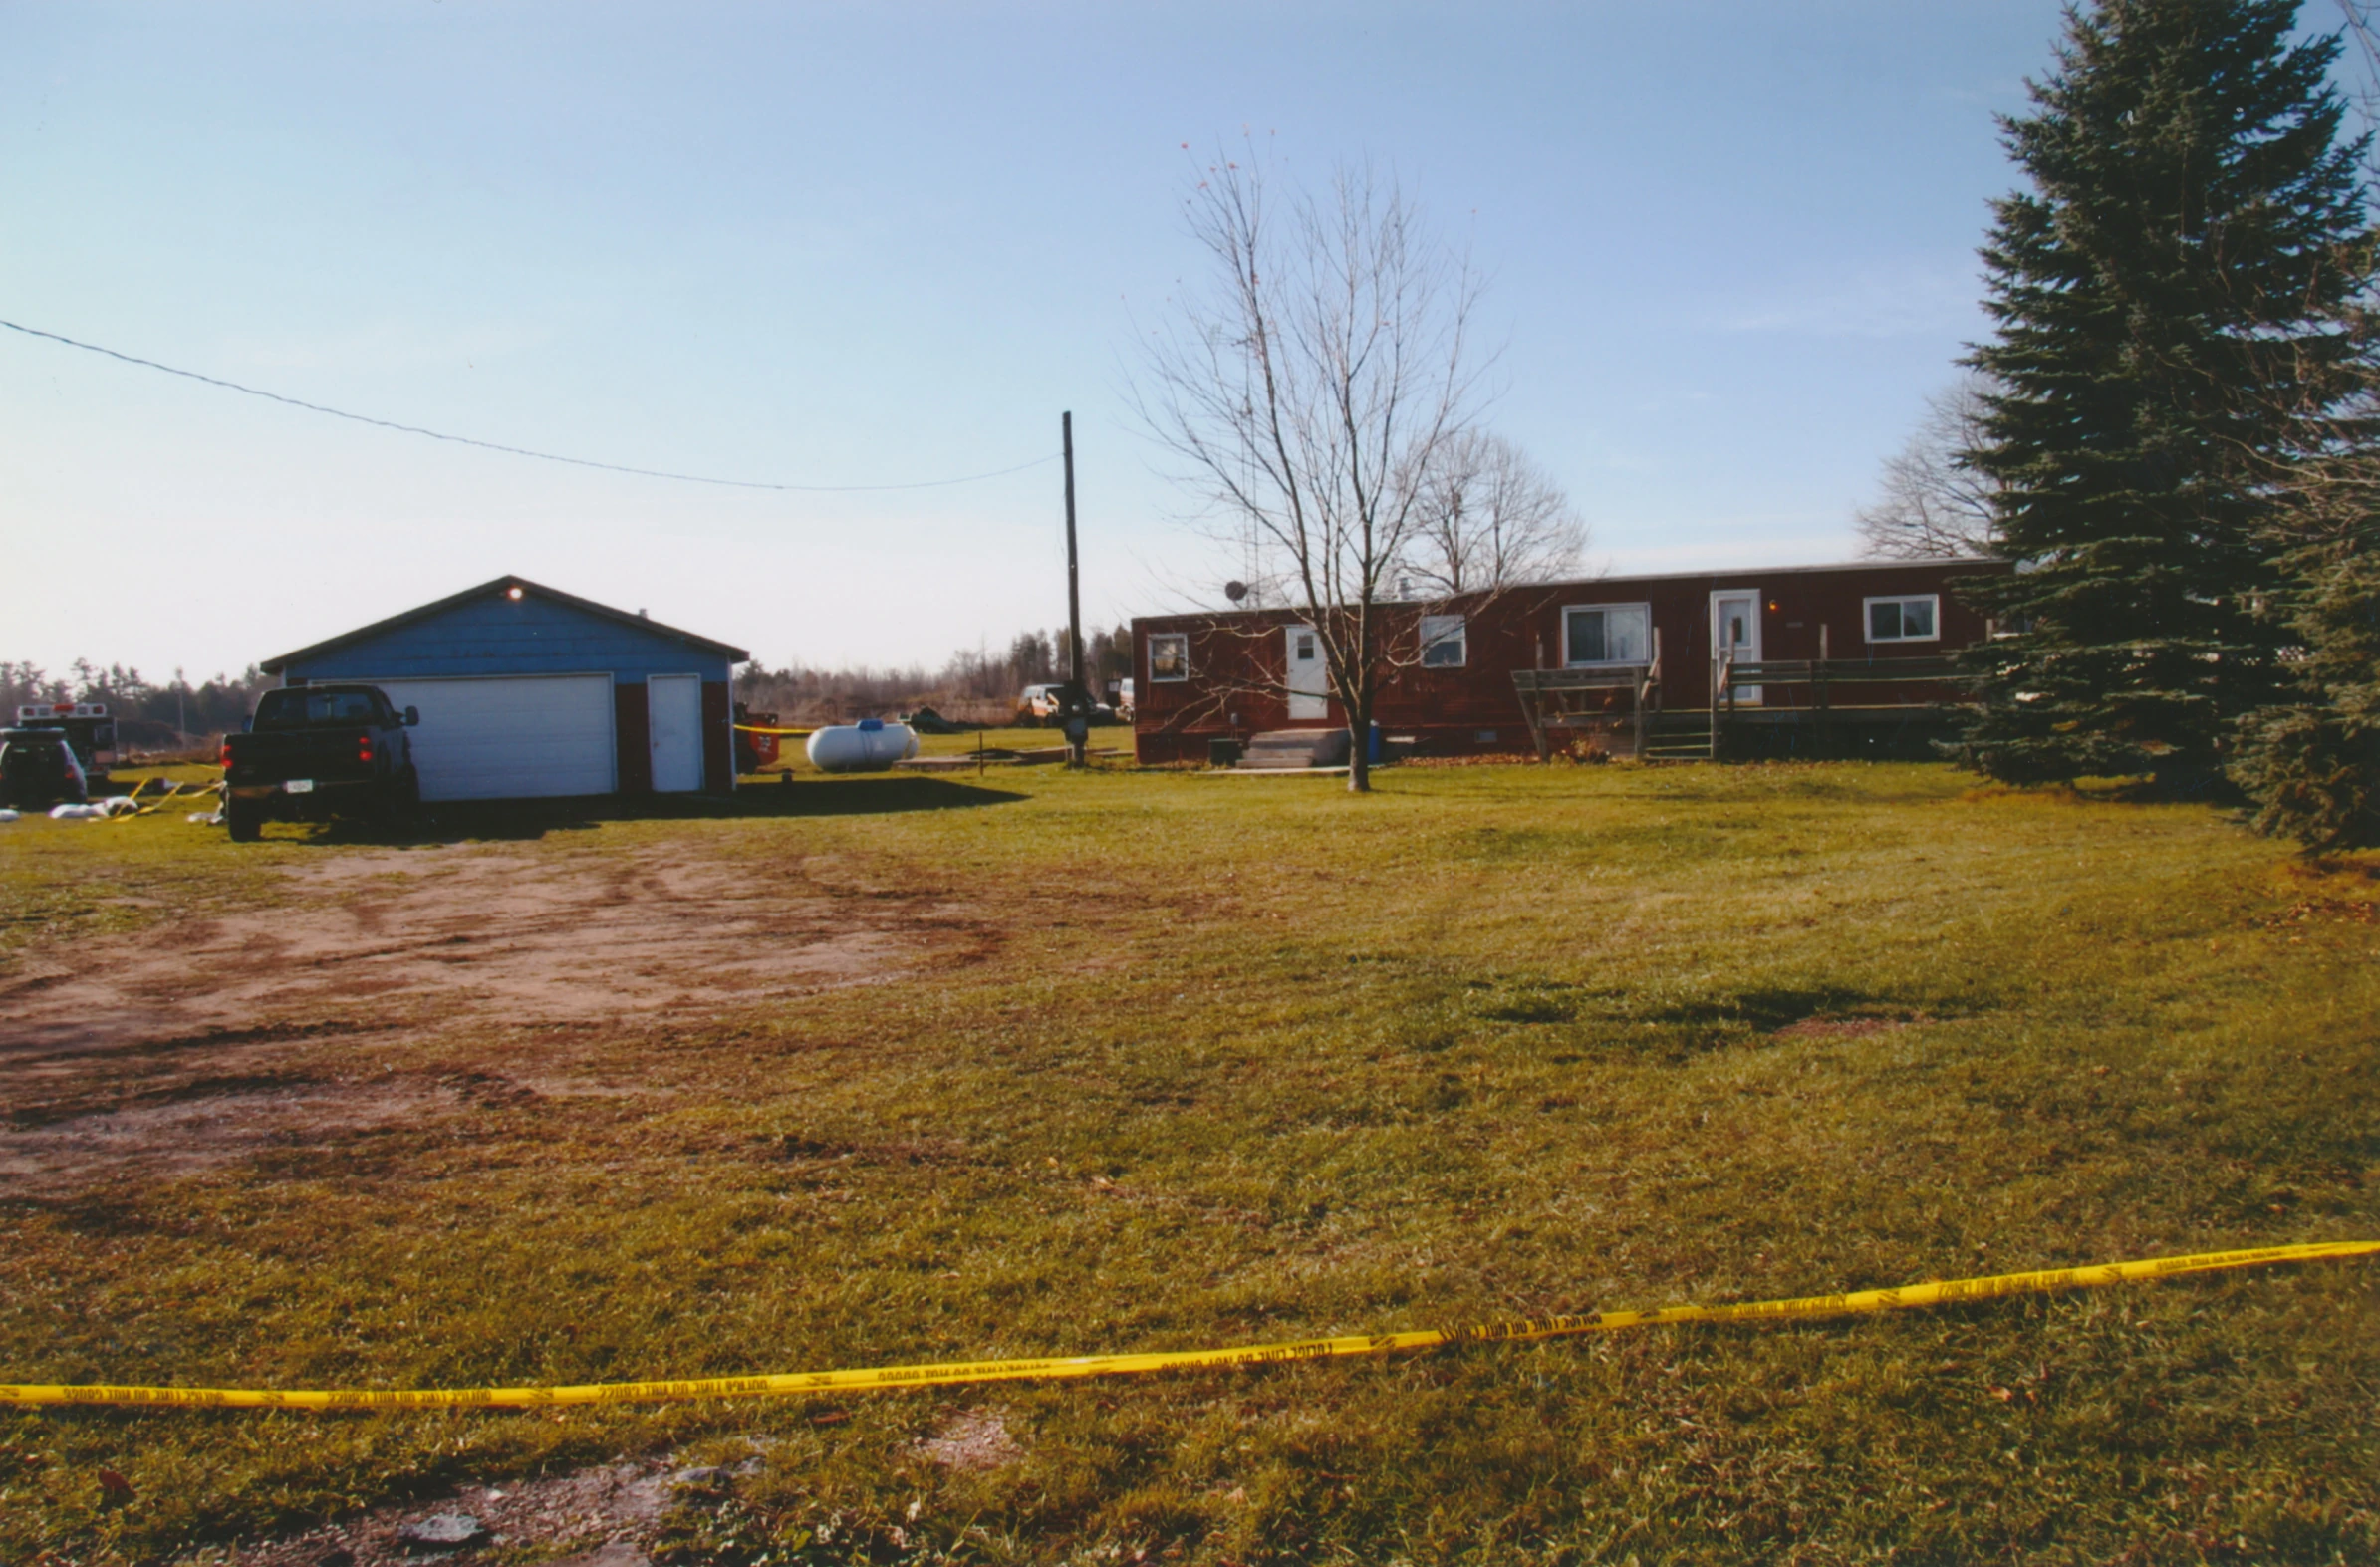
|
| 54 | Janda/Dassey residence | 3 | 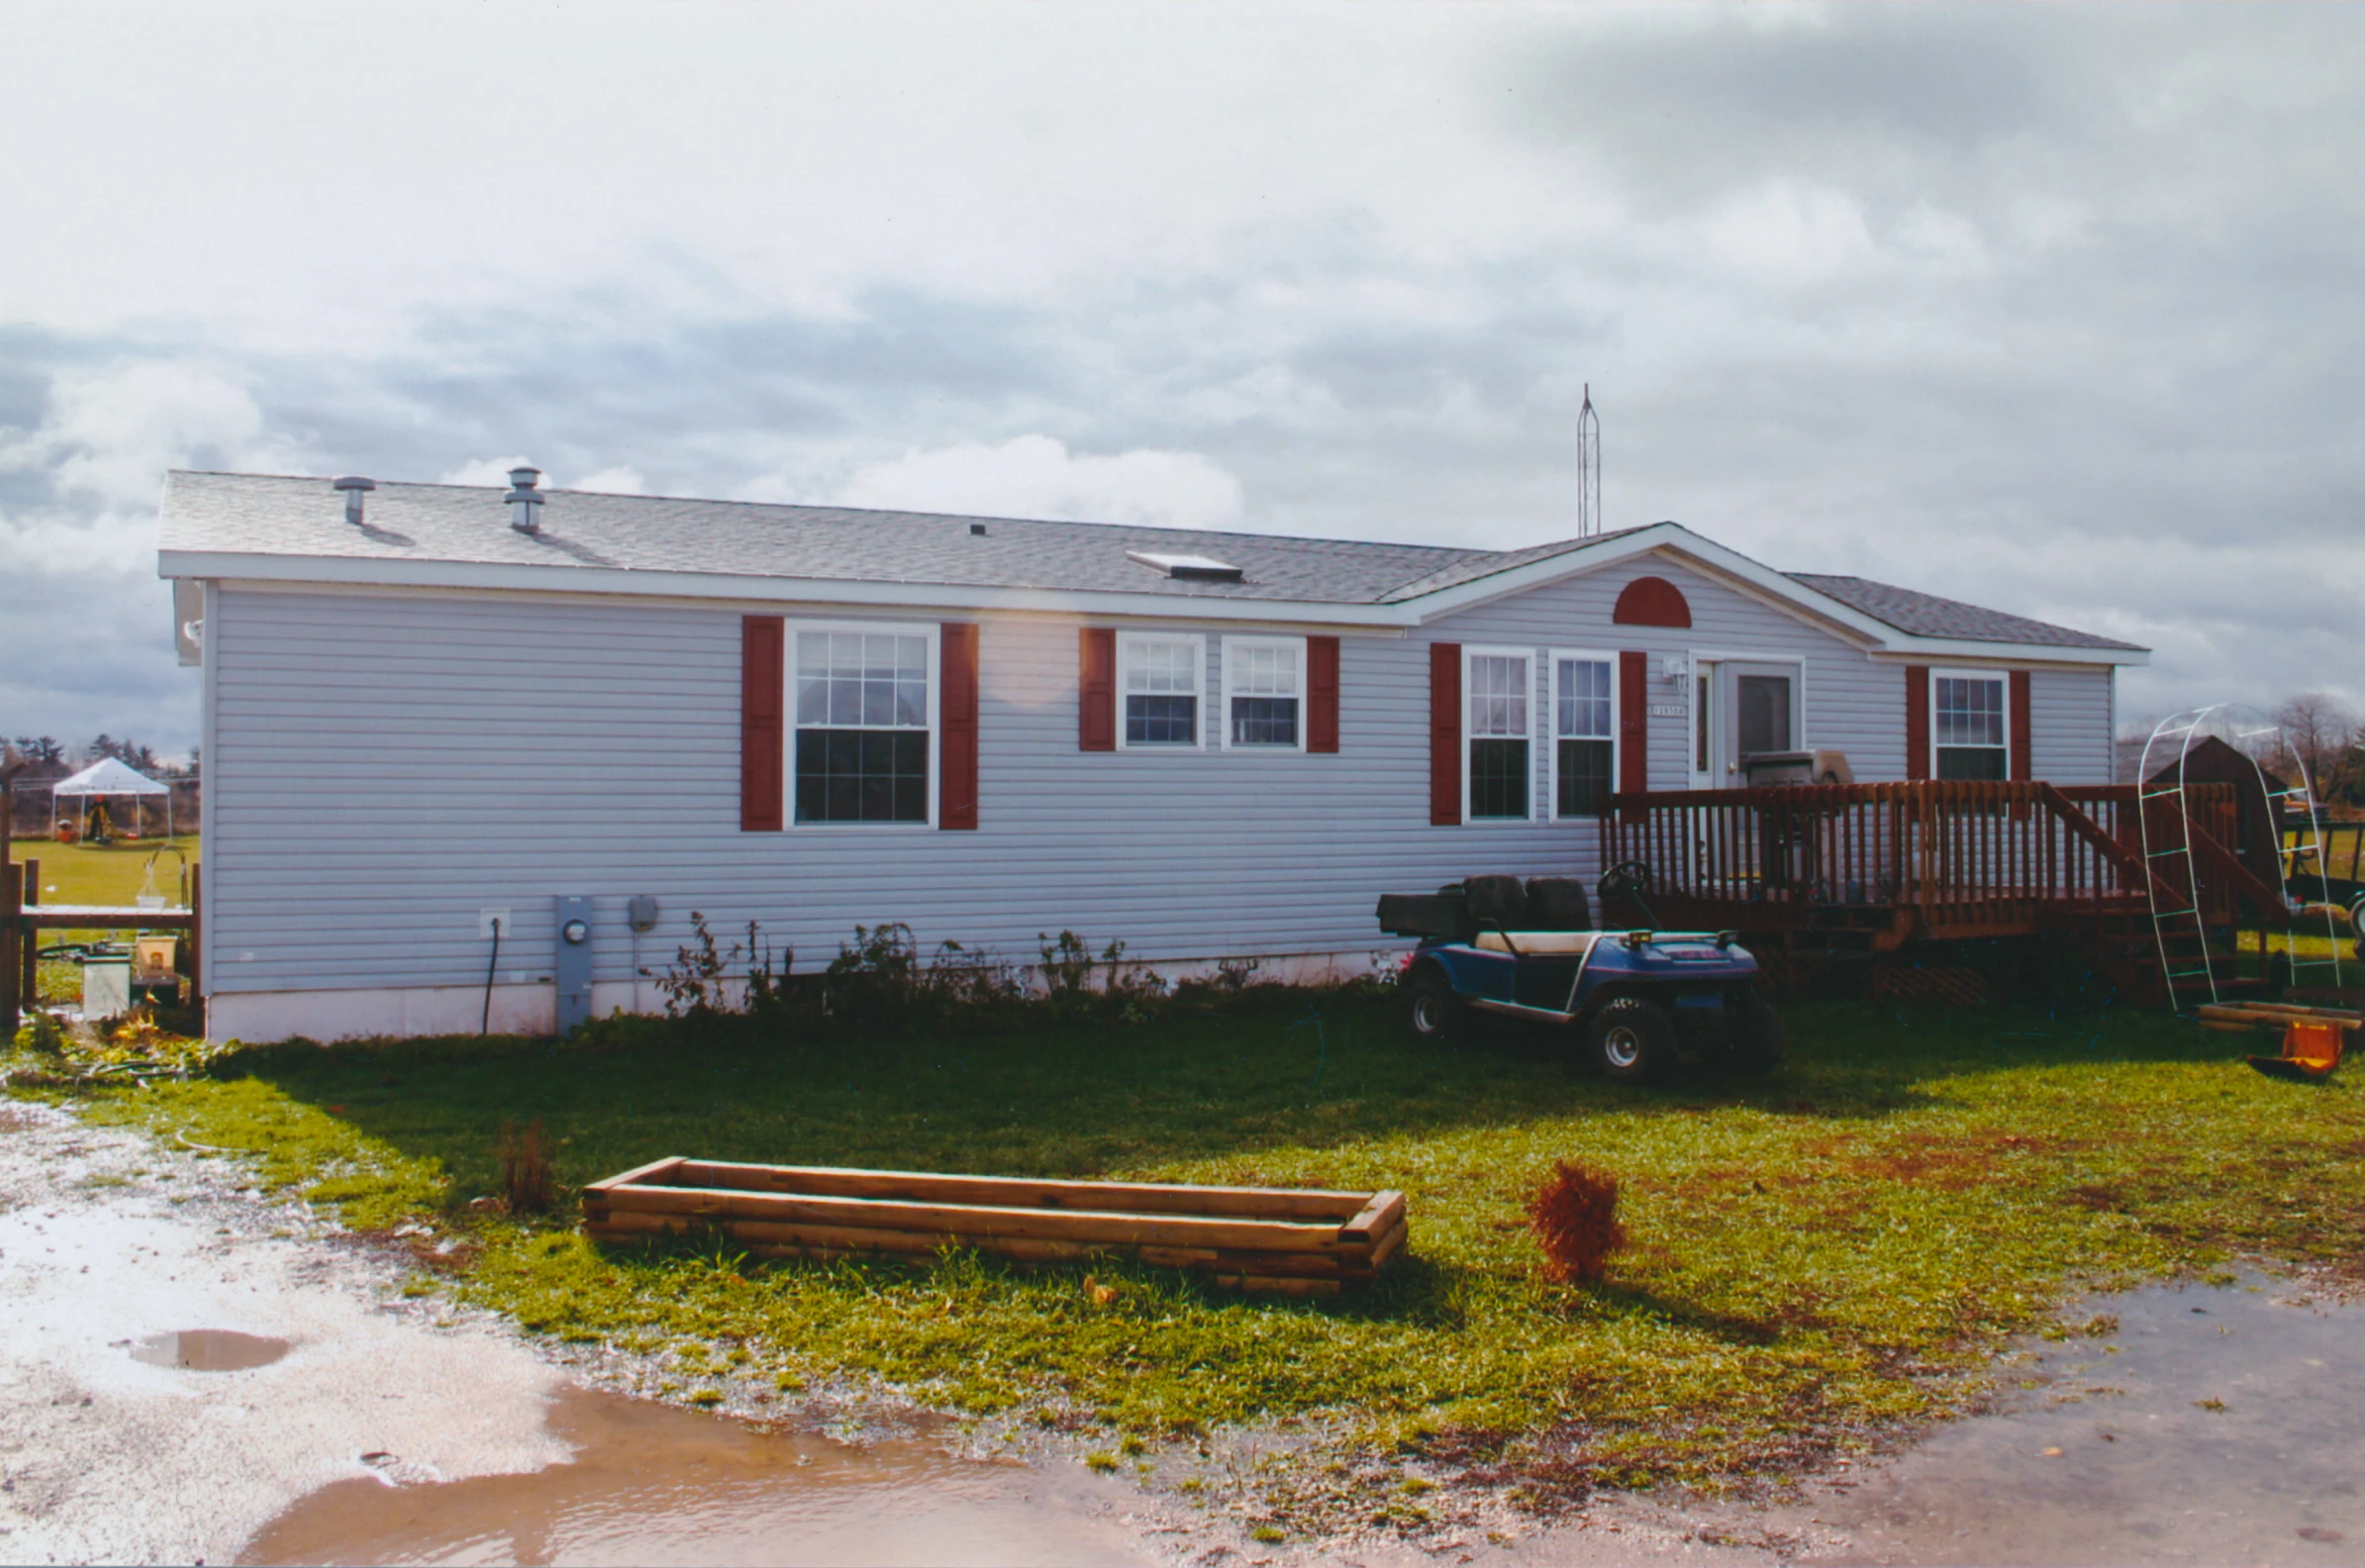
|
| 55 | Barb Janda answering machine | 3 | 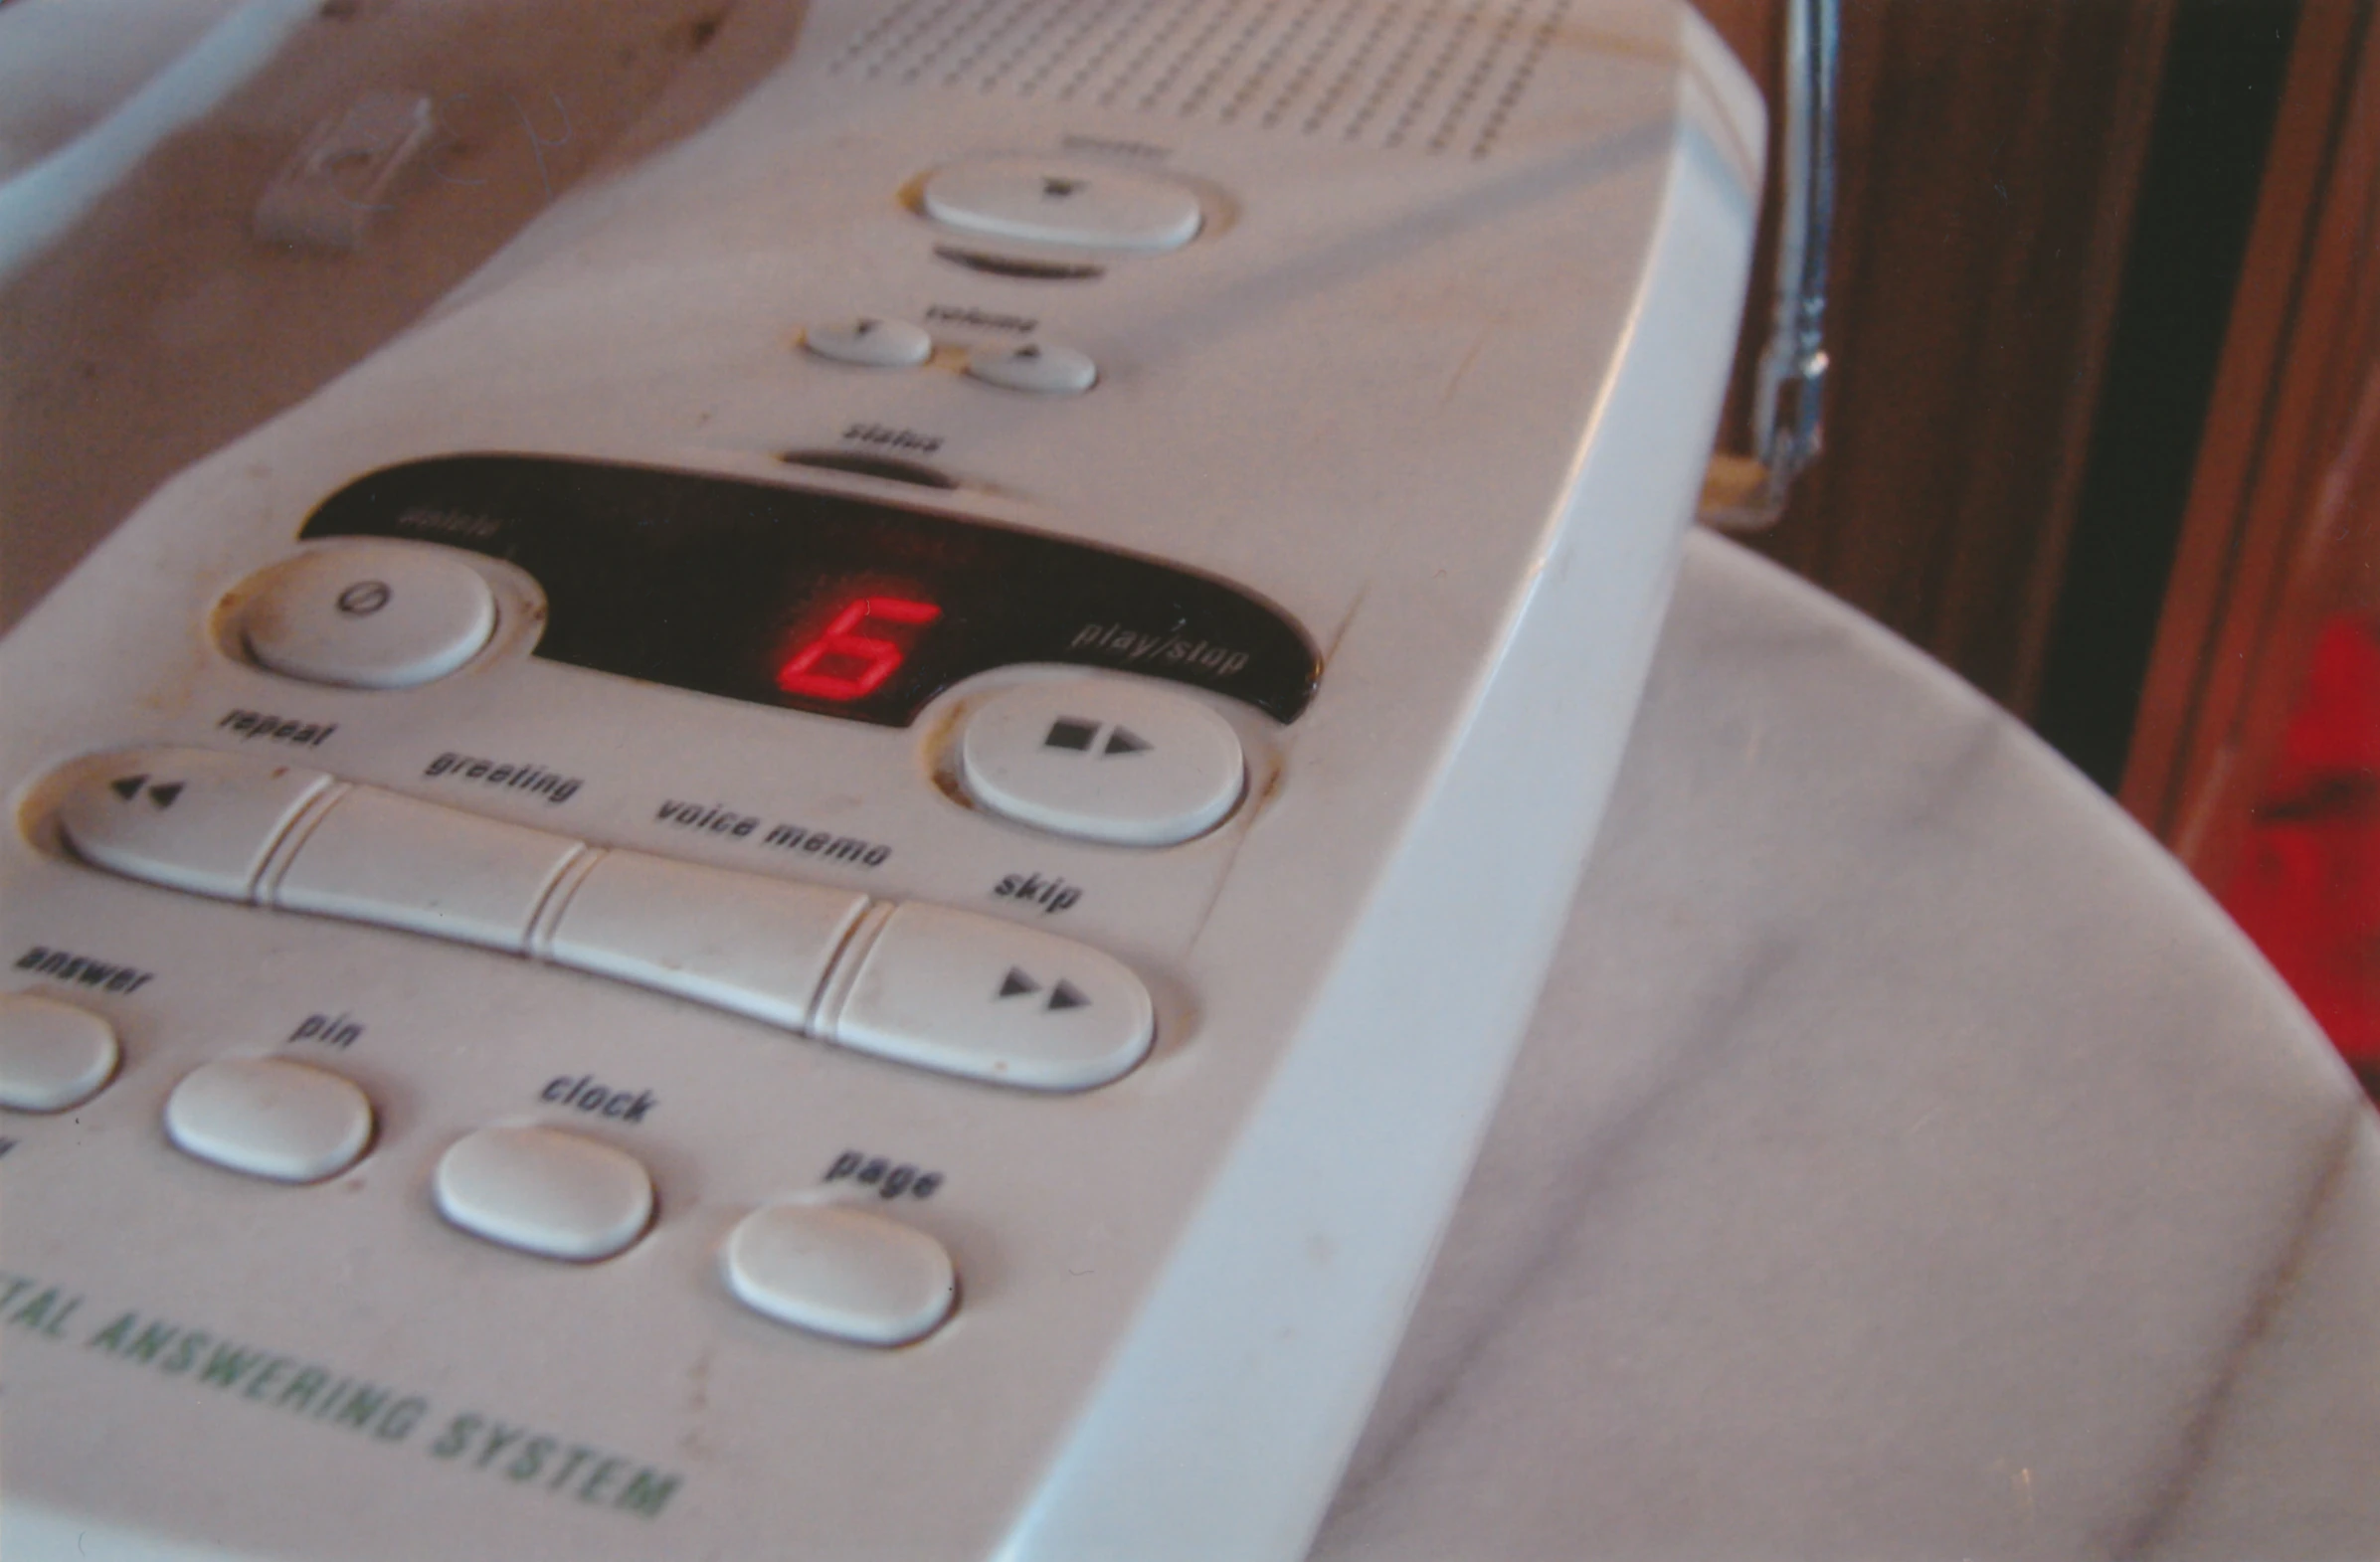
|
| 56 | Allan and Dolores residence | 3 | 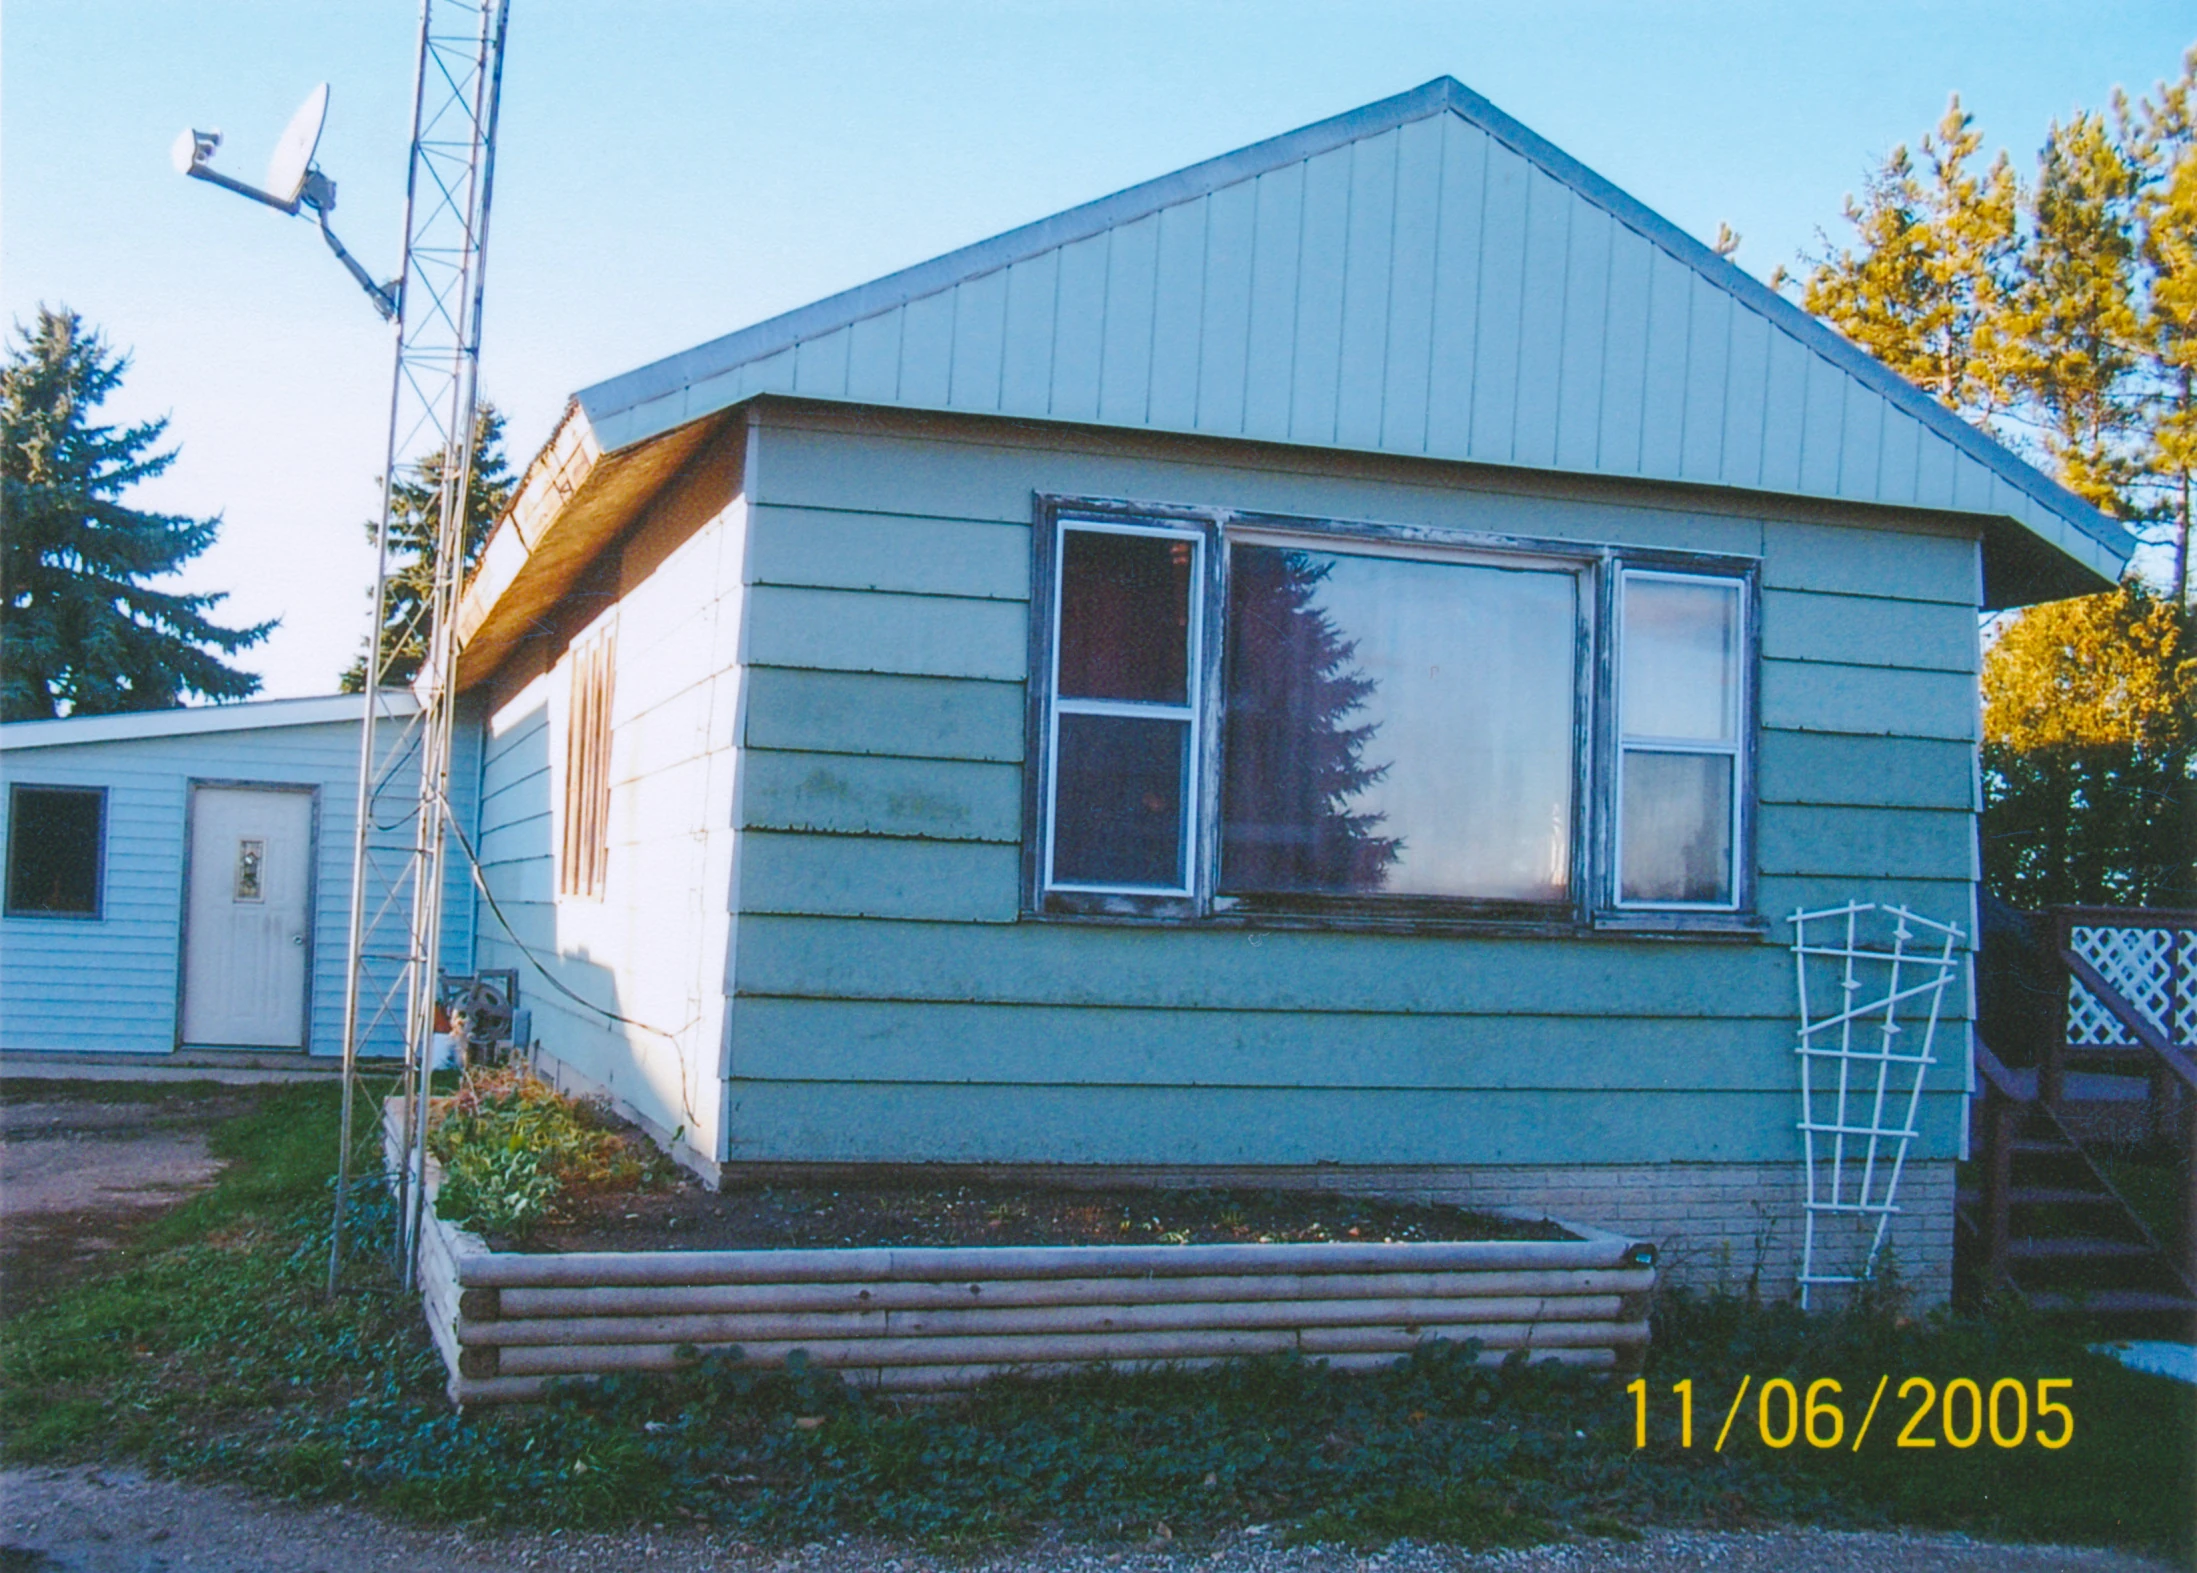
|
| 57 | Allan and Dolores residence | 3 | 
|
| 58 | Shop building interior | 3 | 
|
| 59 | Barb Janda’s red van | 3 | 
|
| 60 | Barb Janda’s red van | 3 | 
|
| 61 | Barb Janda’s red van | 3 | 
|
| 62 | Steven Avery’s Pontiac Grand Am | 3 | 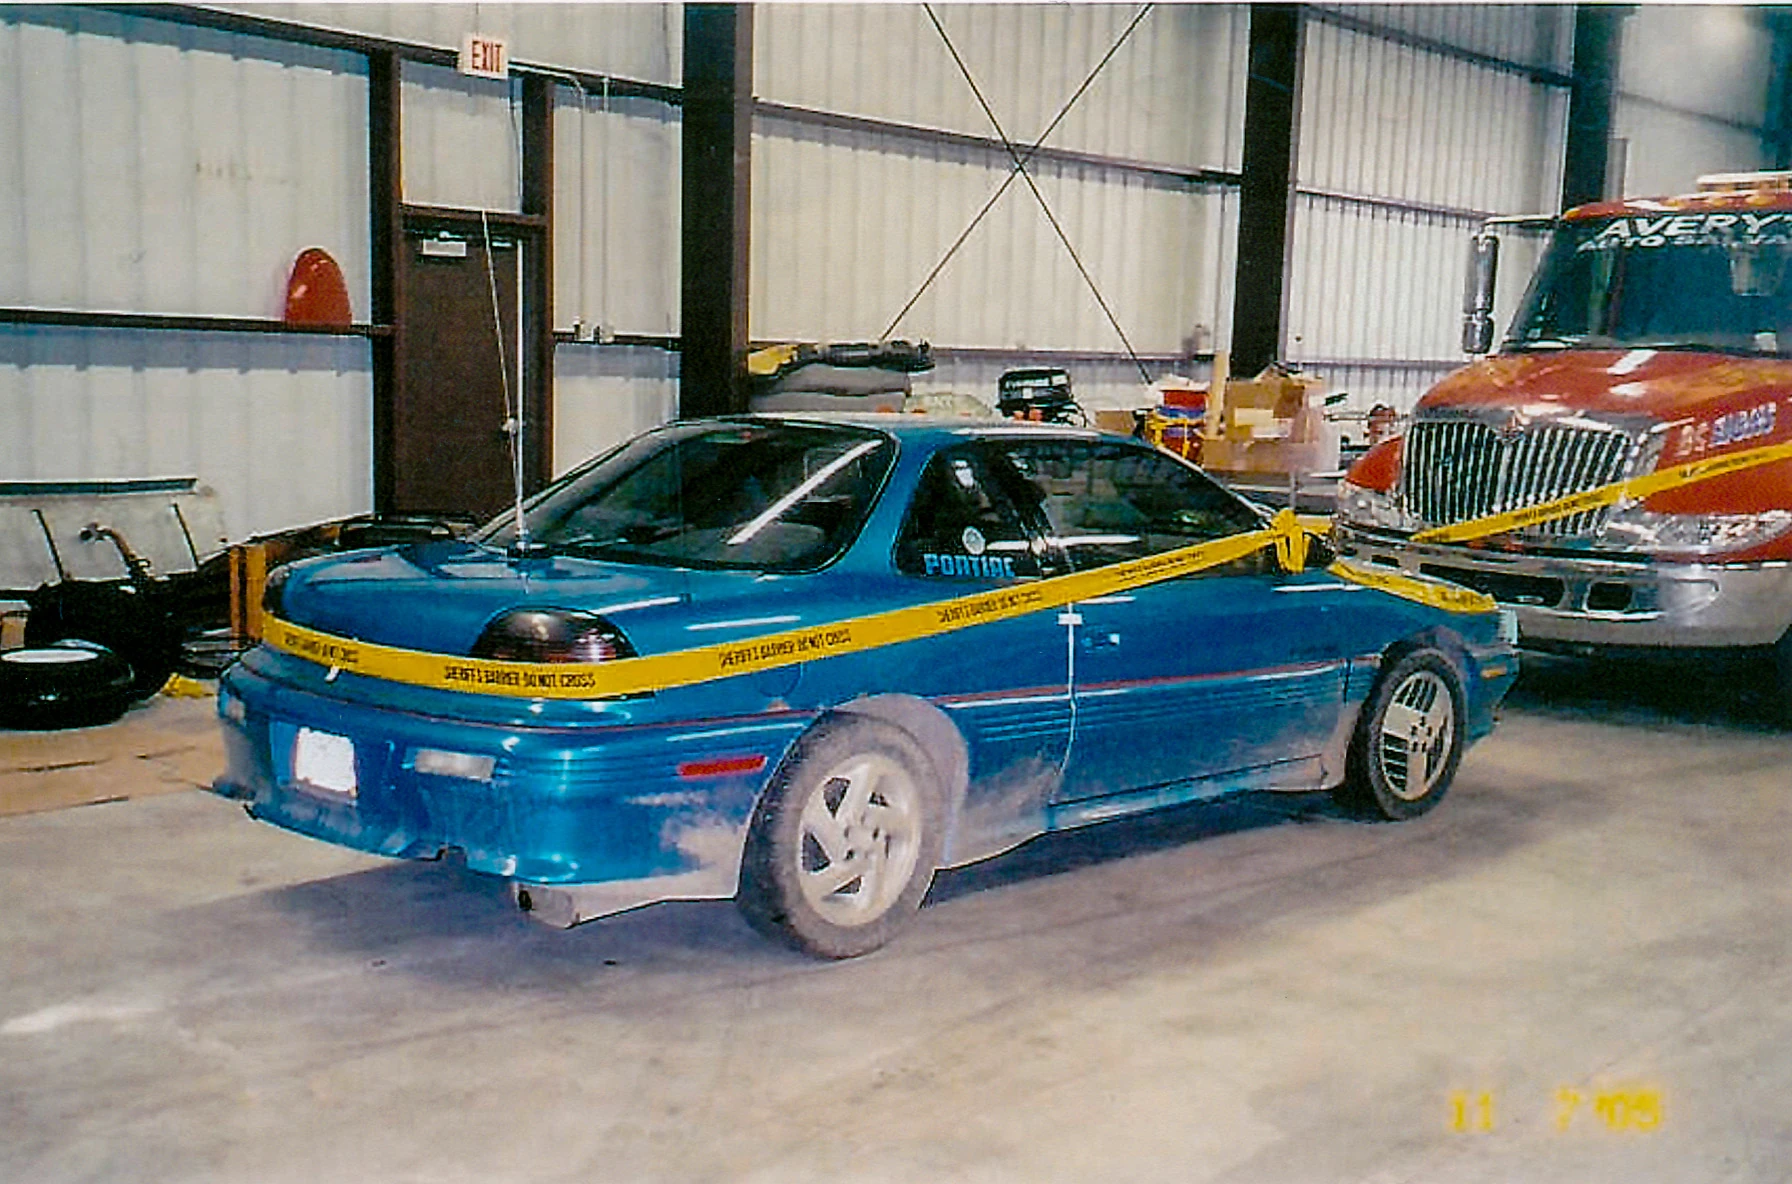
|
| 63 | Avery’s Auto Salvage flatbed | 3 | 
|
| 64 | Dolores’ Club Car golf cart | 3 | 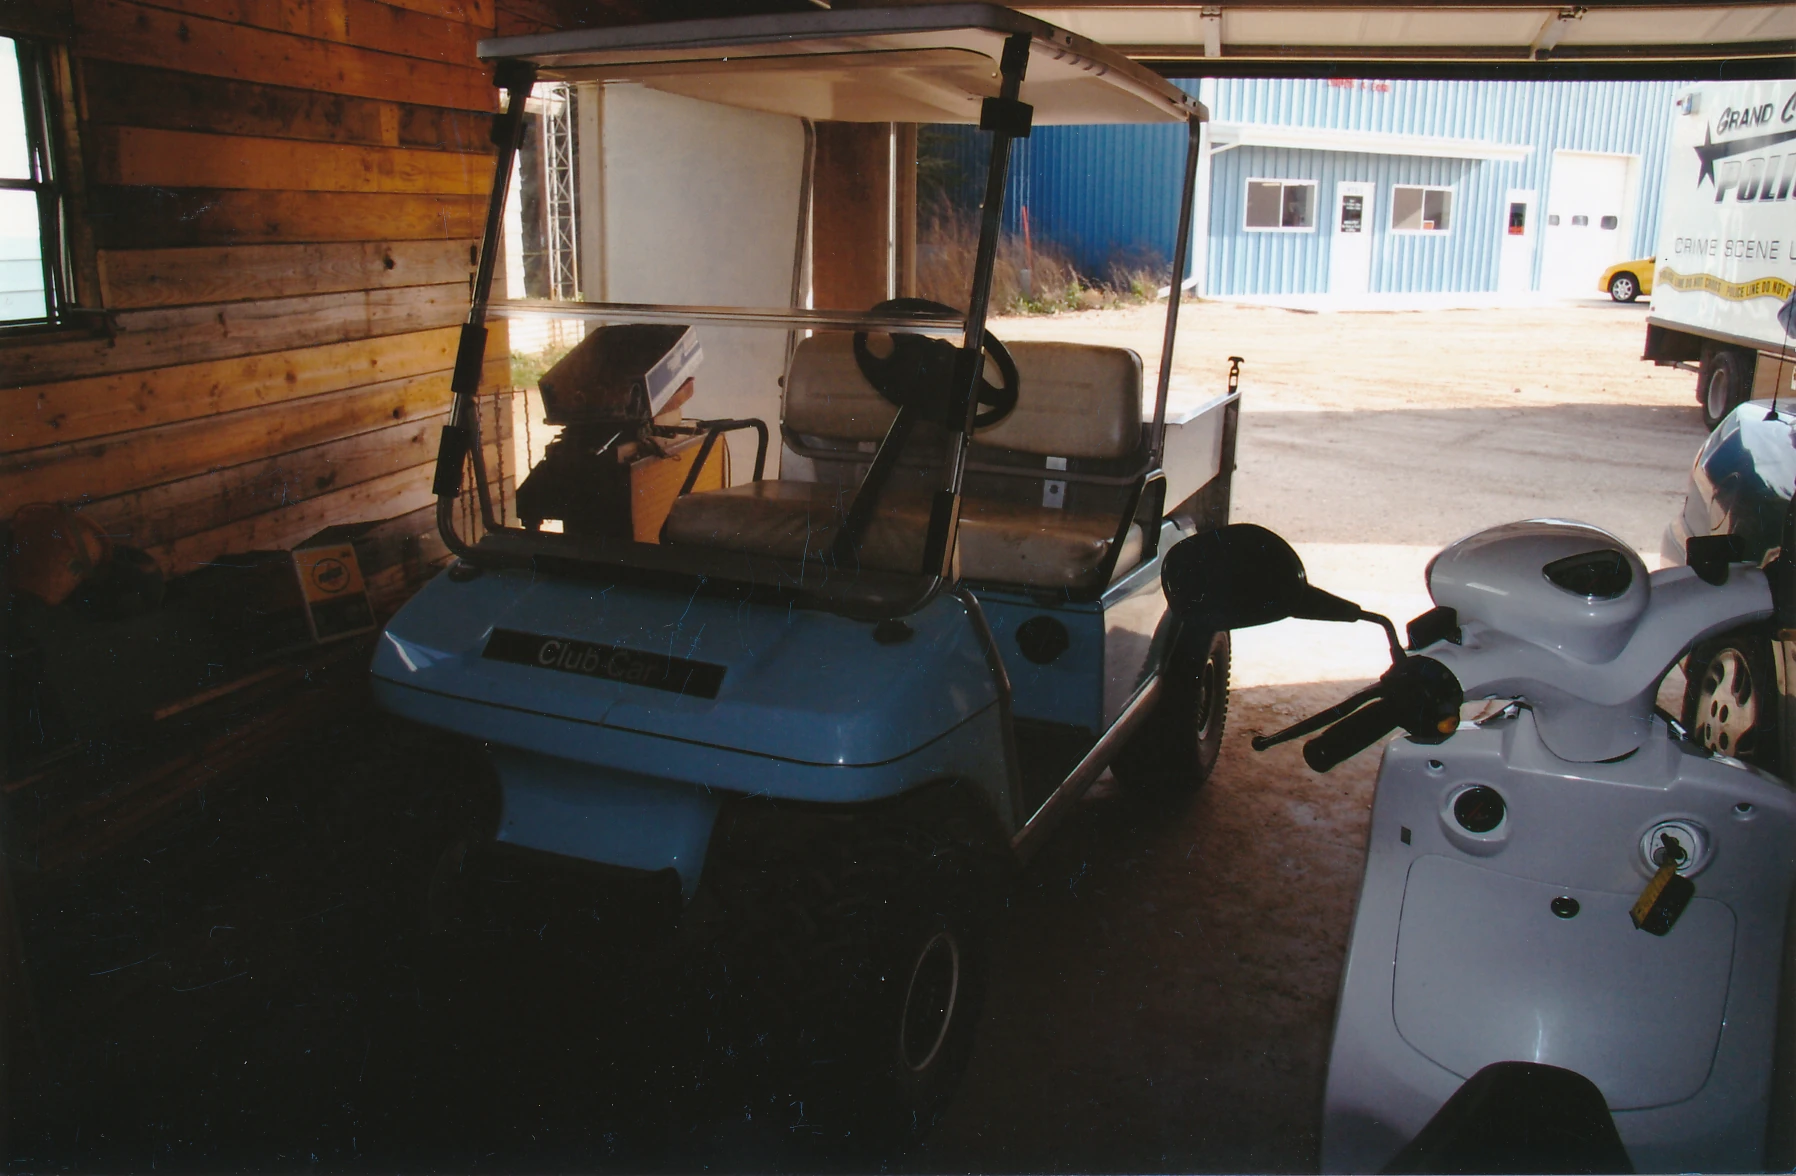
|
| 65 | Barb Janda’s golf cart | 3 | 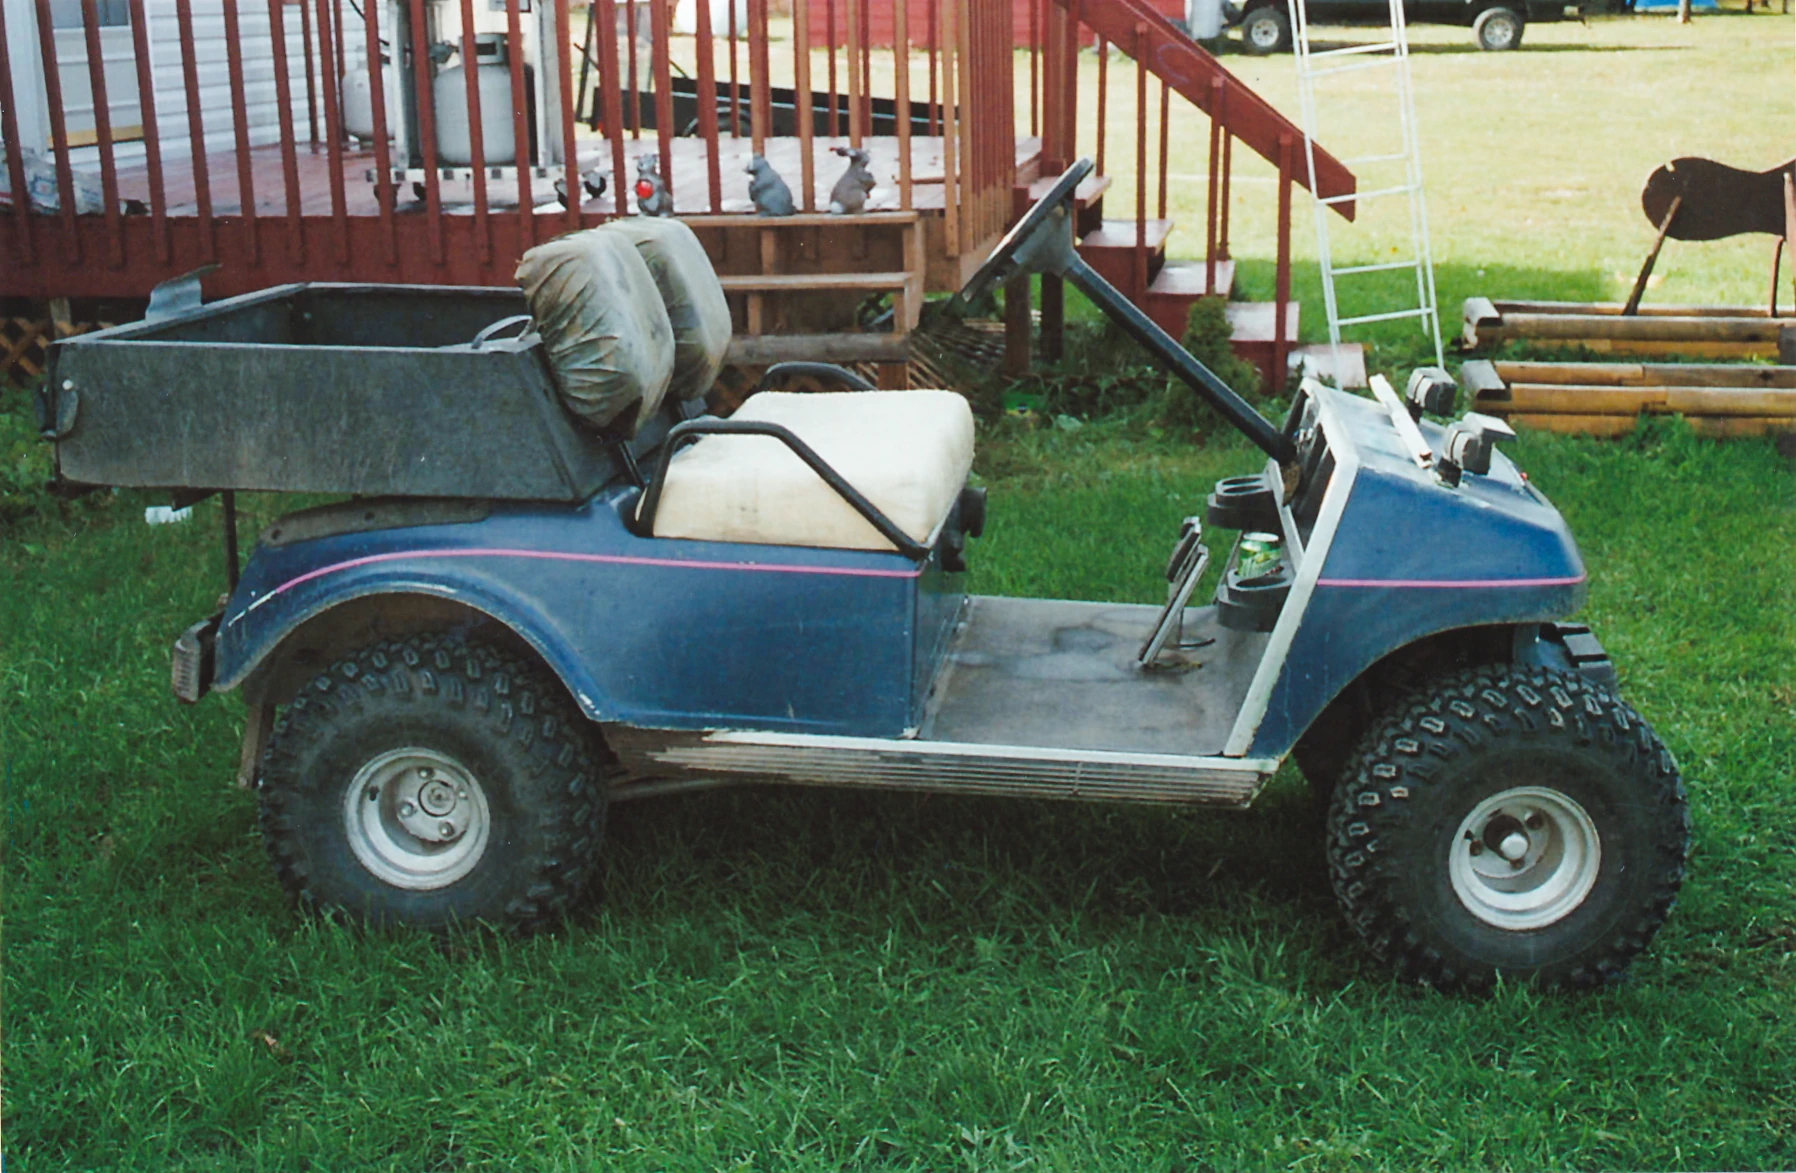
|
| 66 | Car crusher | 3 | 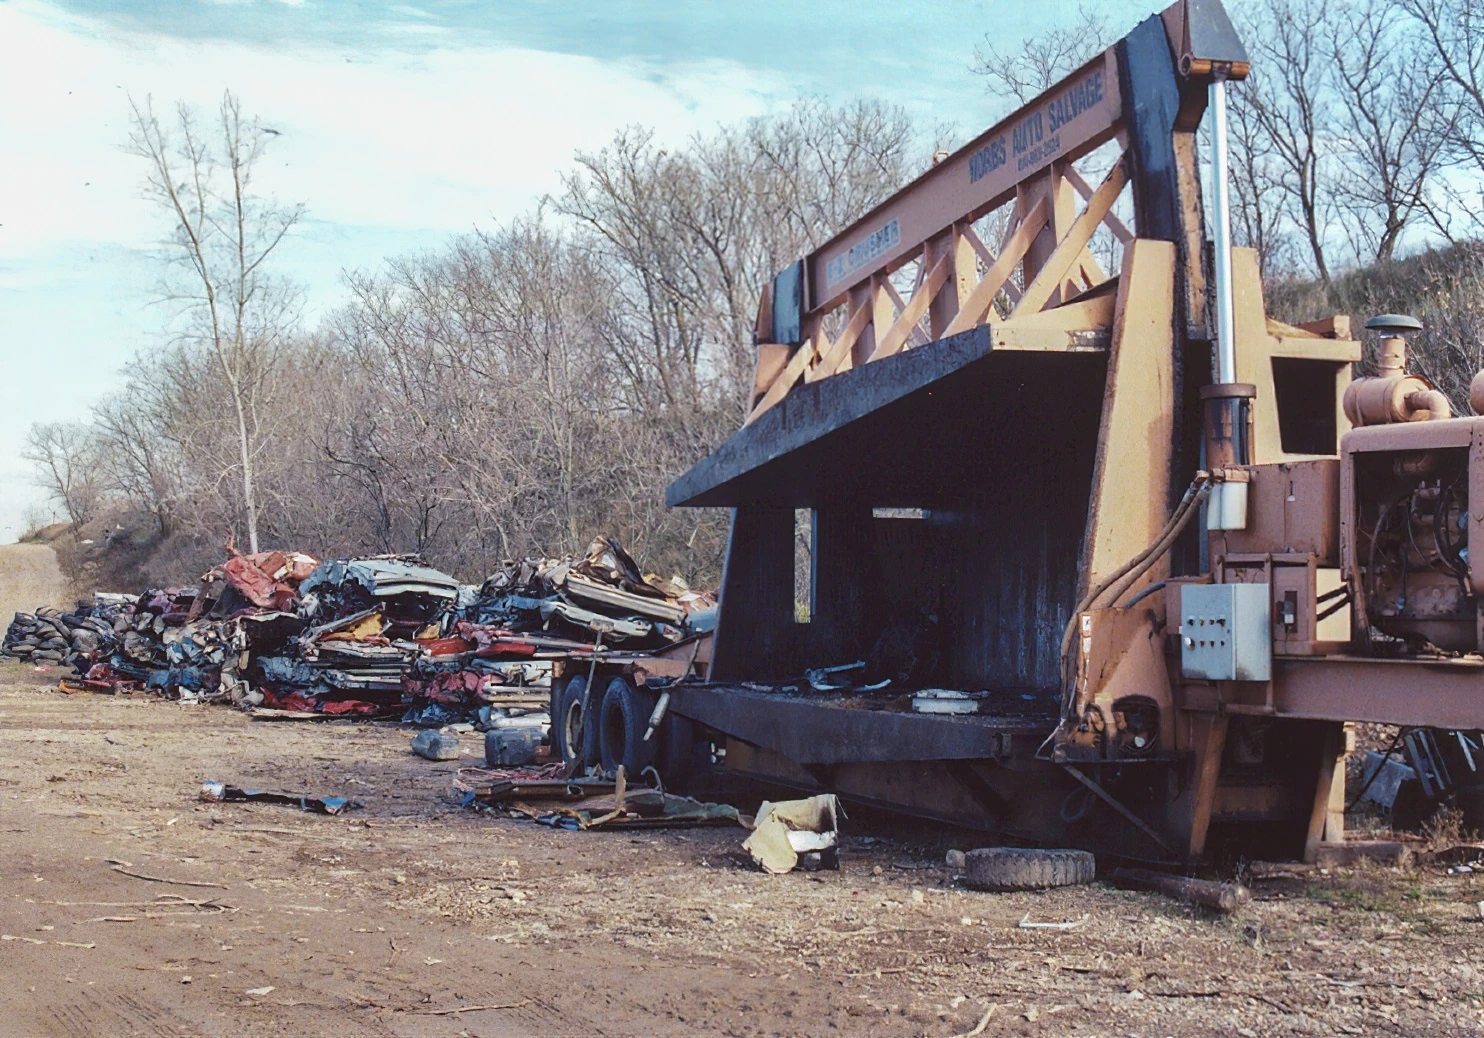
|
| 67 | Car crusher (front view) | 3 | 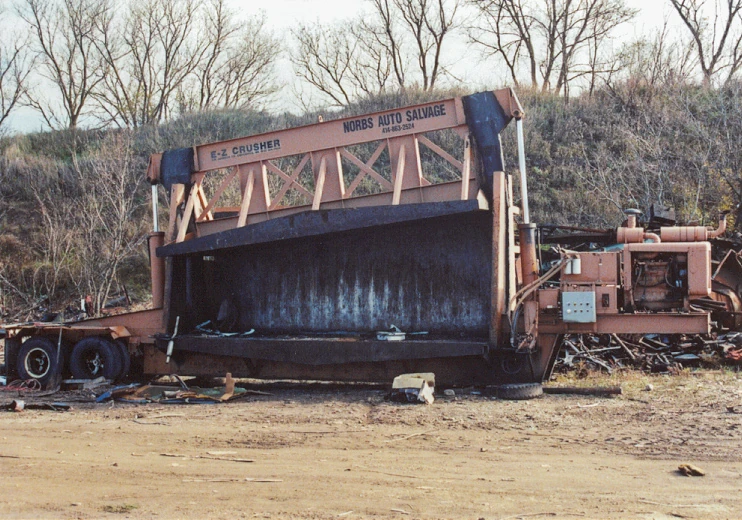
|
| 68 | Car crusher (rear view) | 3 | 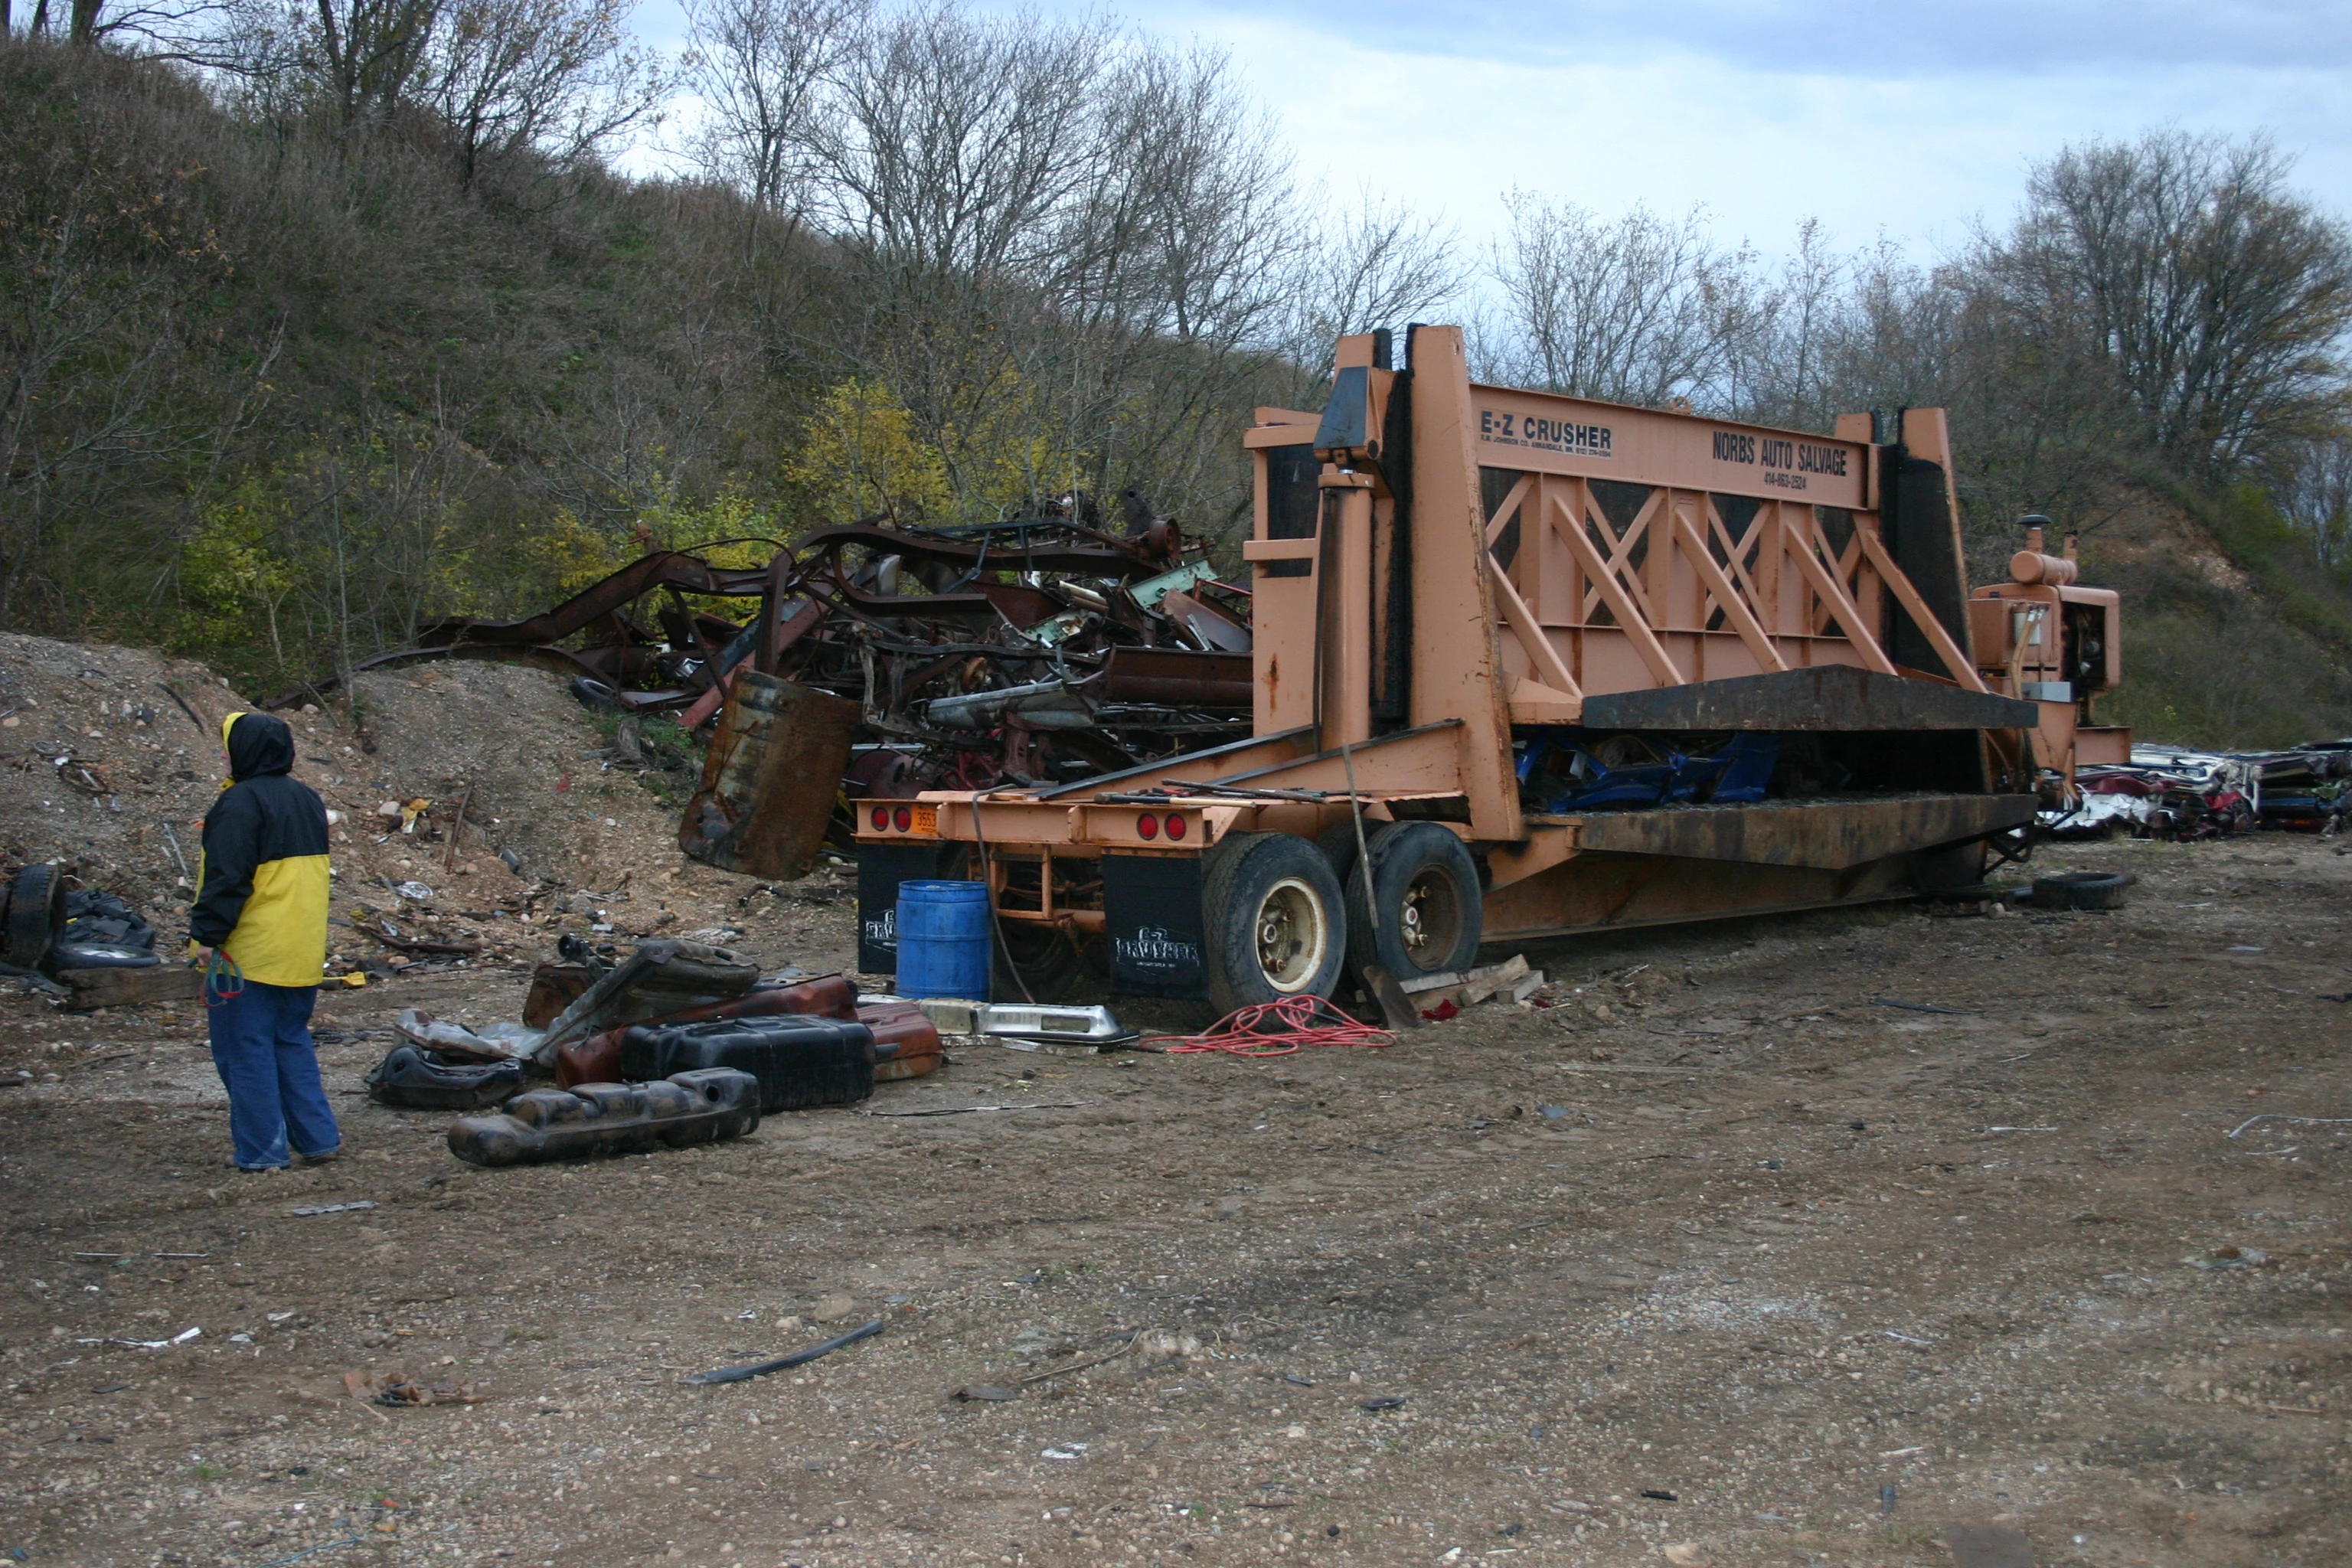
|
| 69 | Avery’s Auto Salvage pit area with car crusher and loader | 3 | 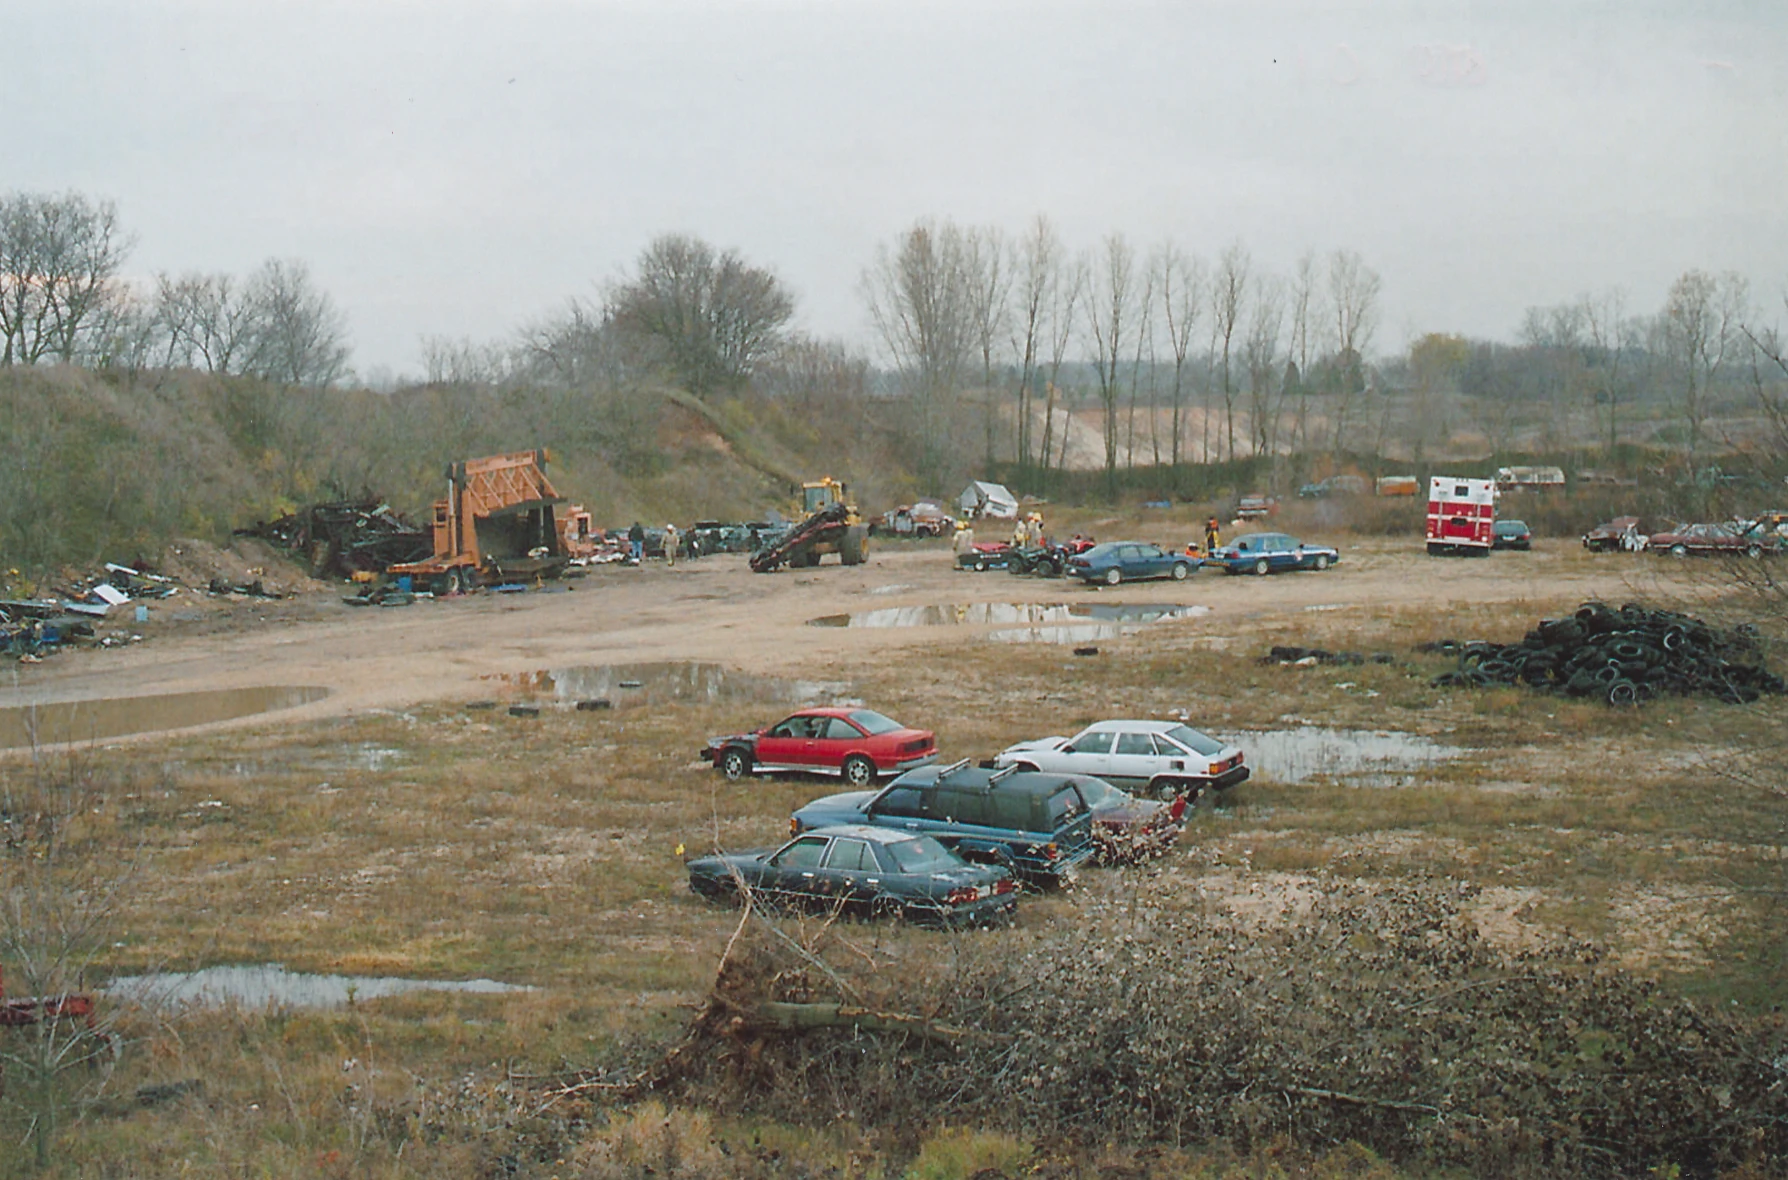
|
| 70 | Crushed cars | 3 | 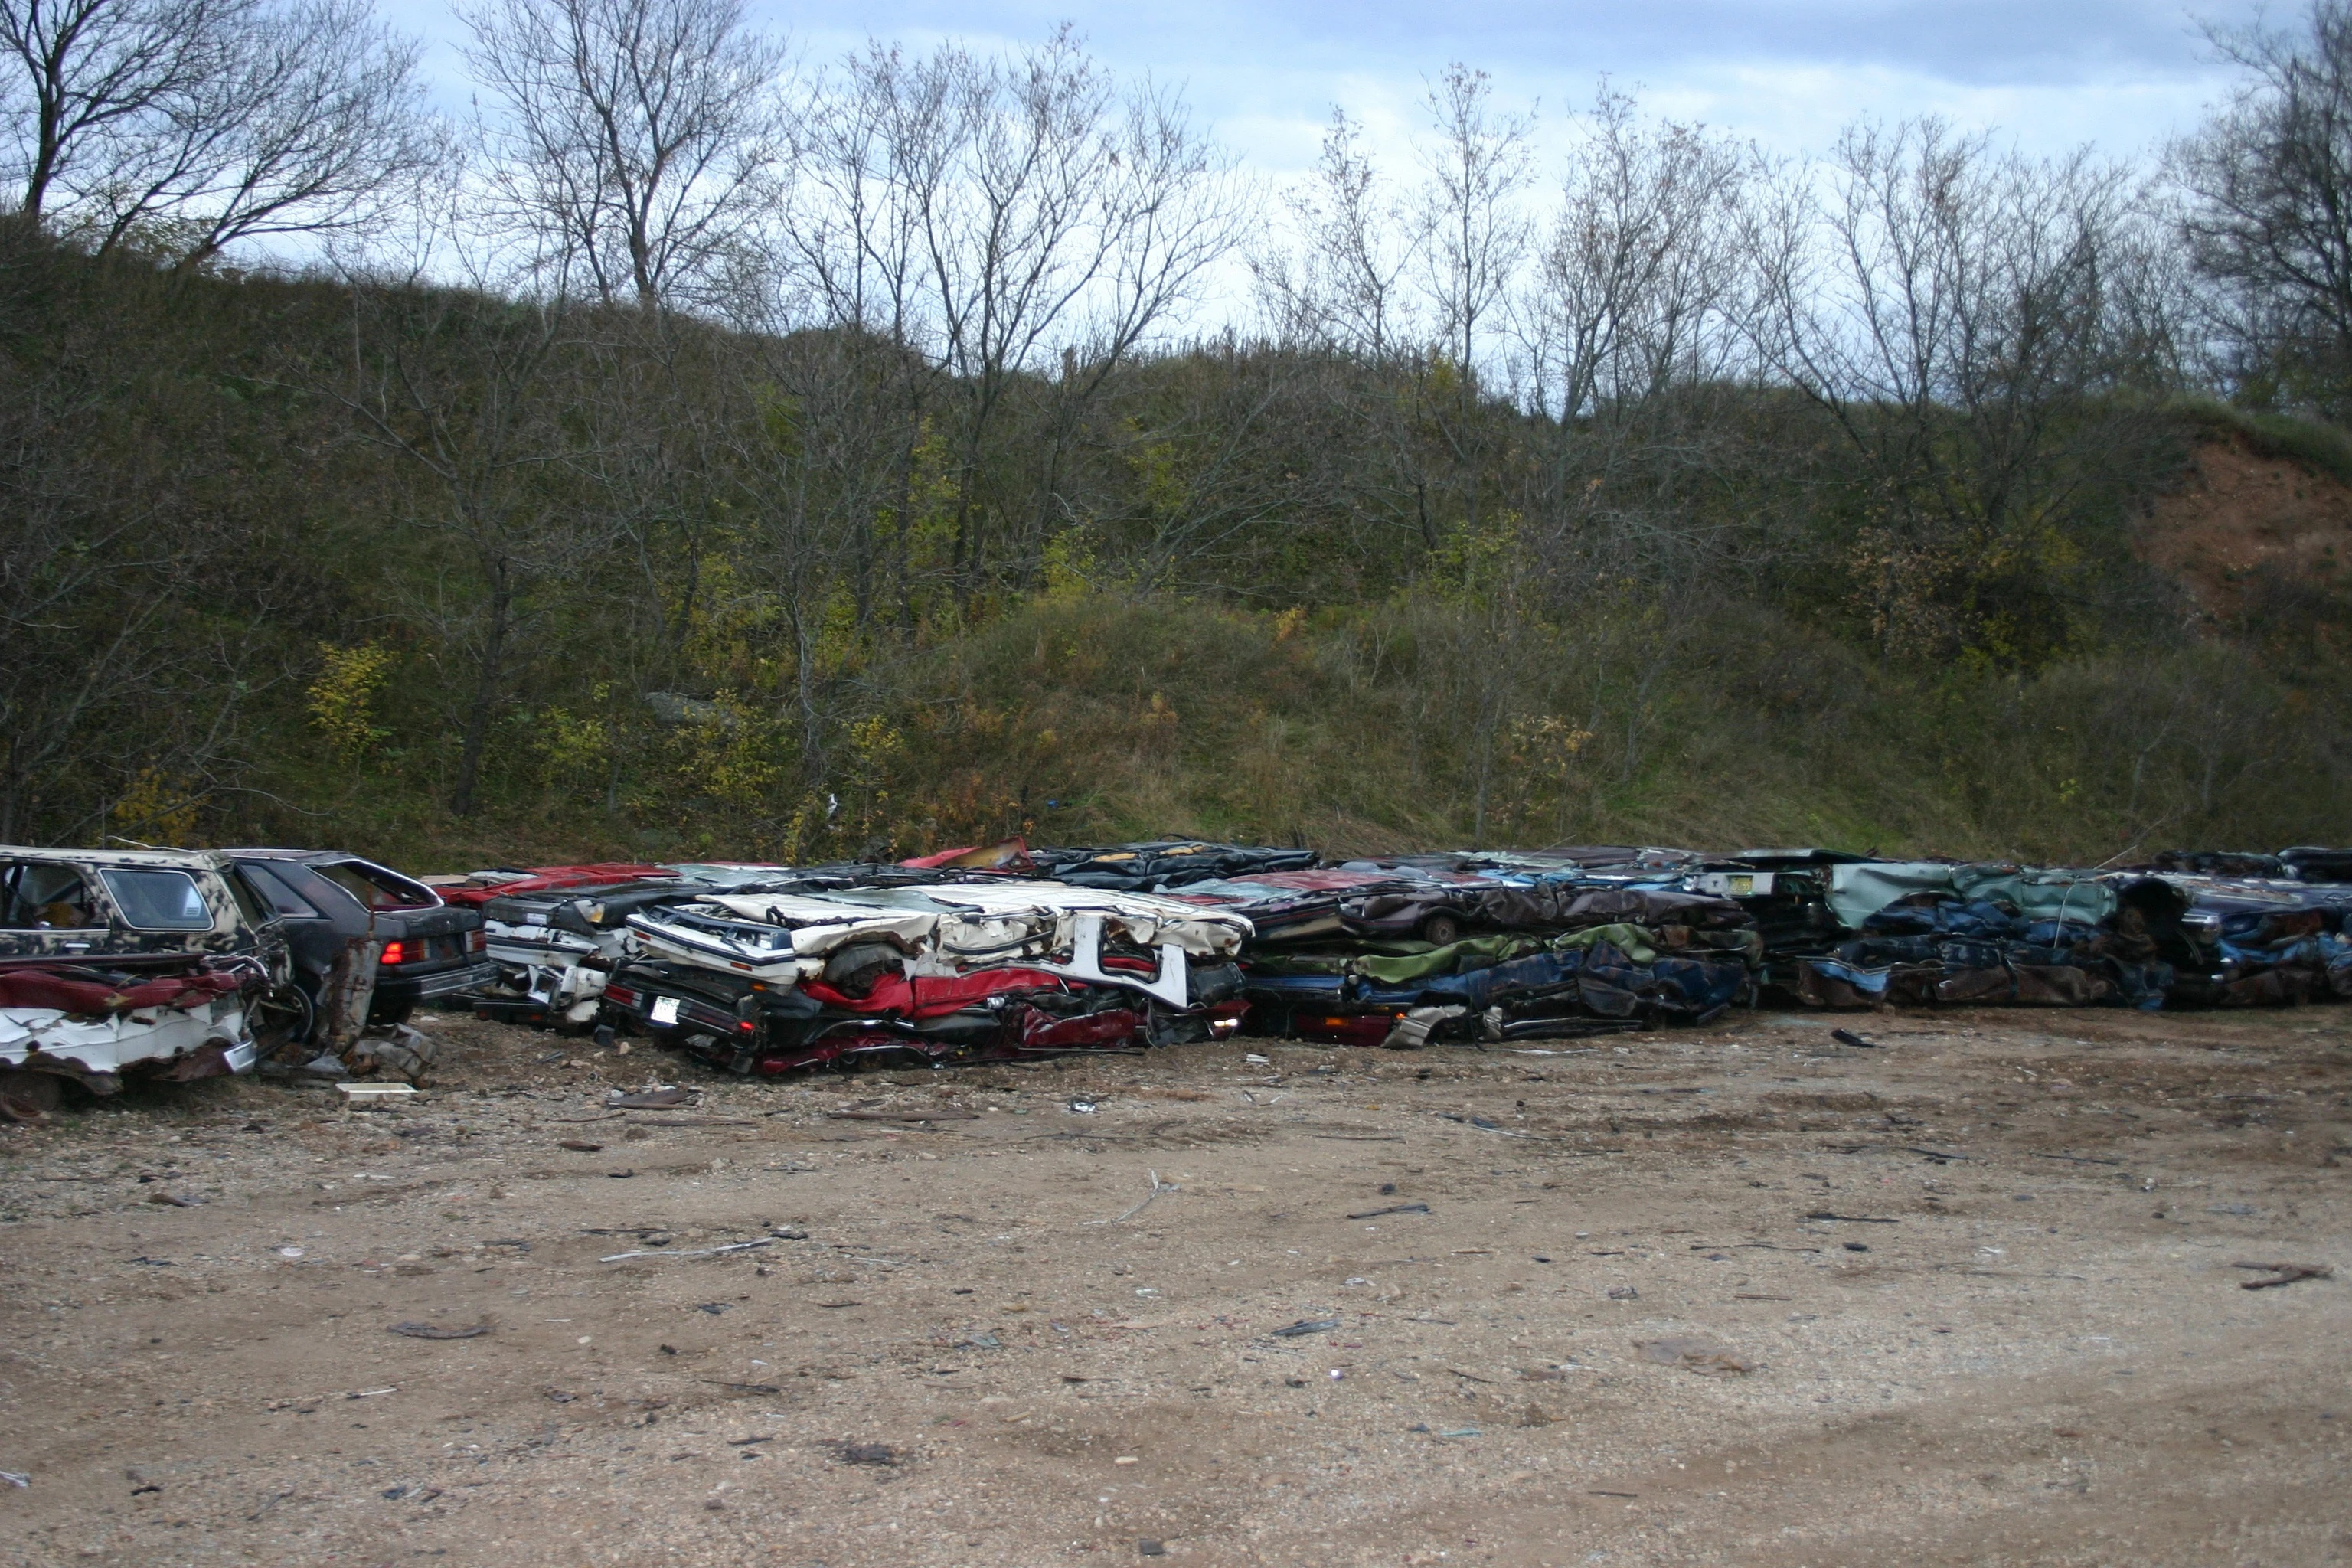
|
| 71 | Tires north of car crusher | 3 | 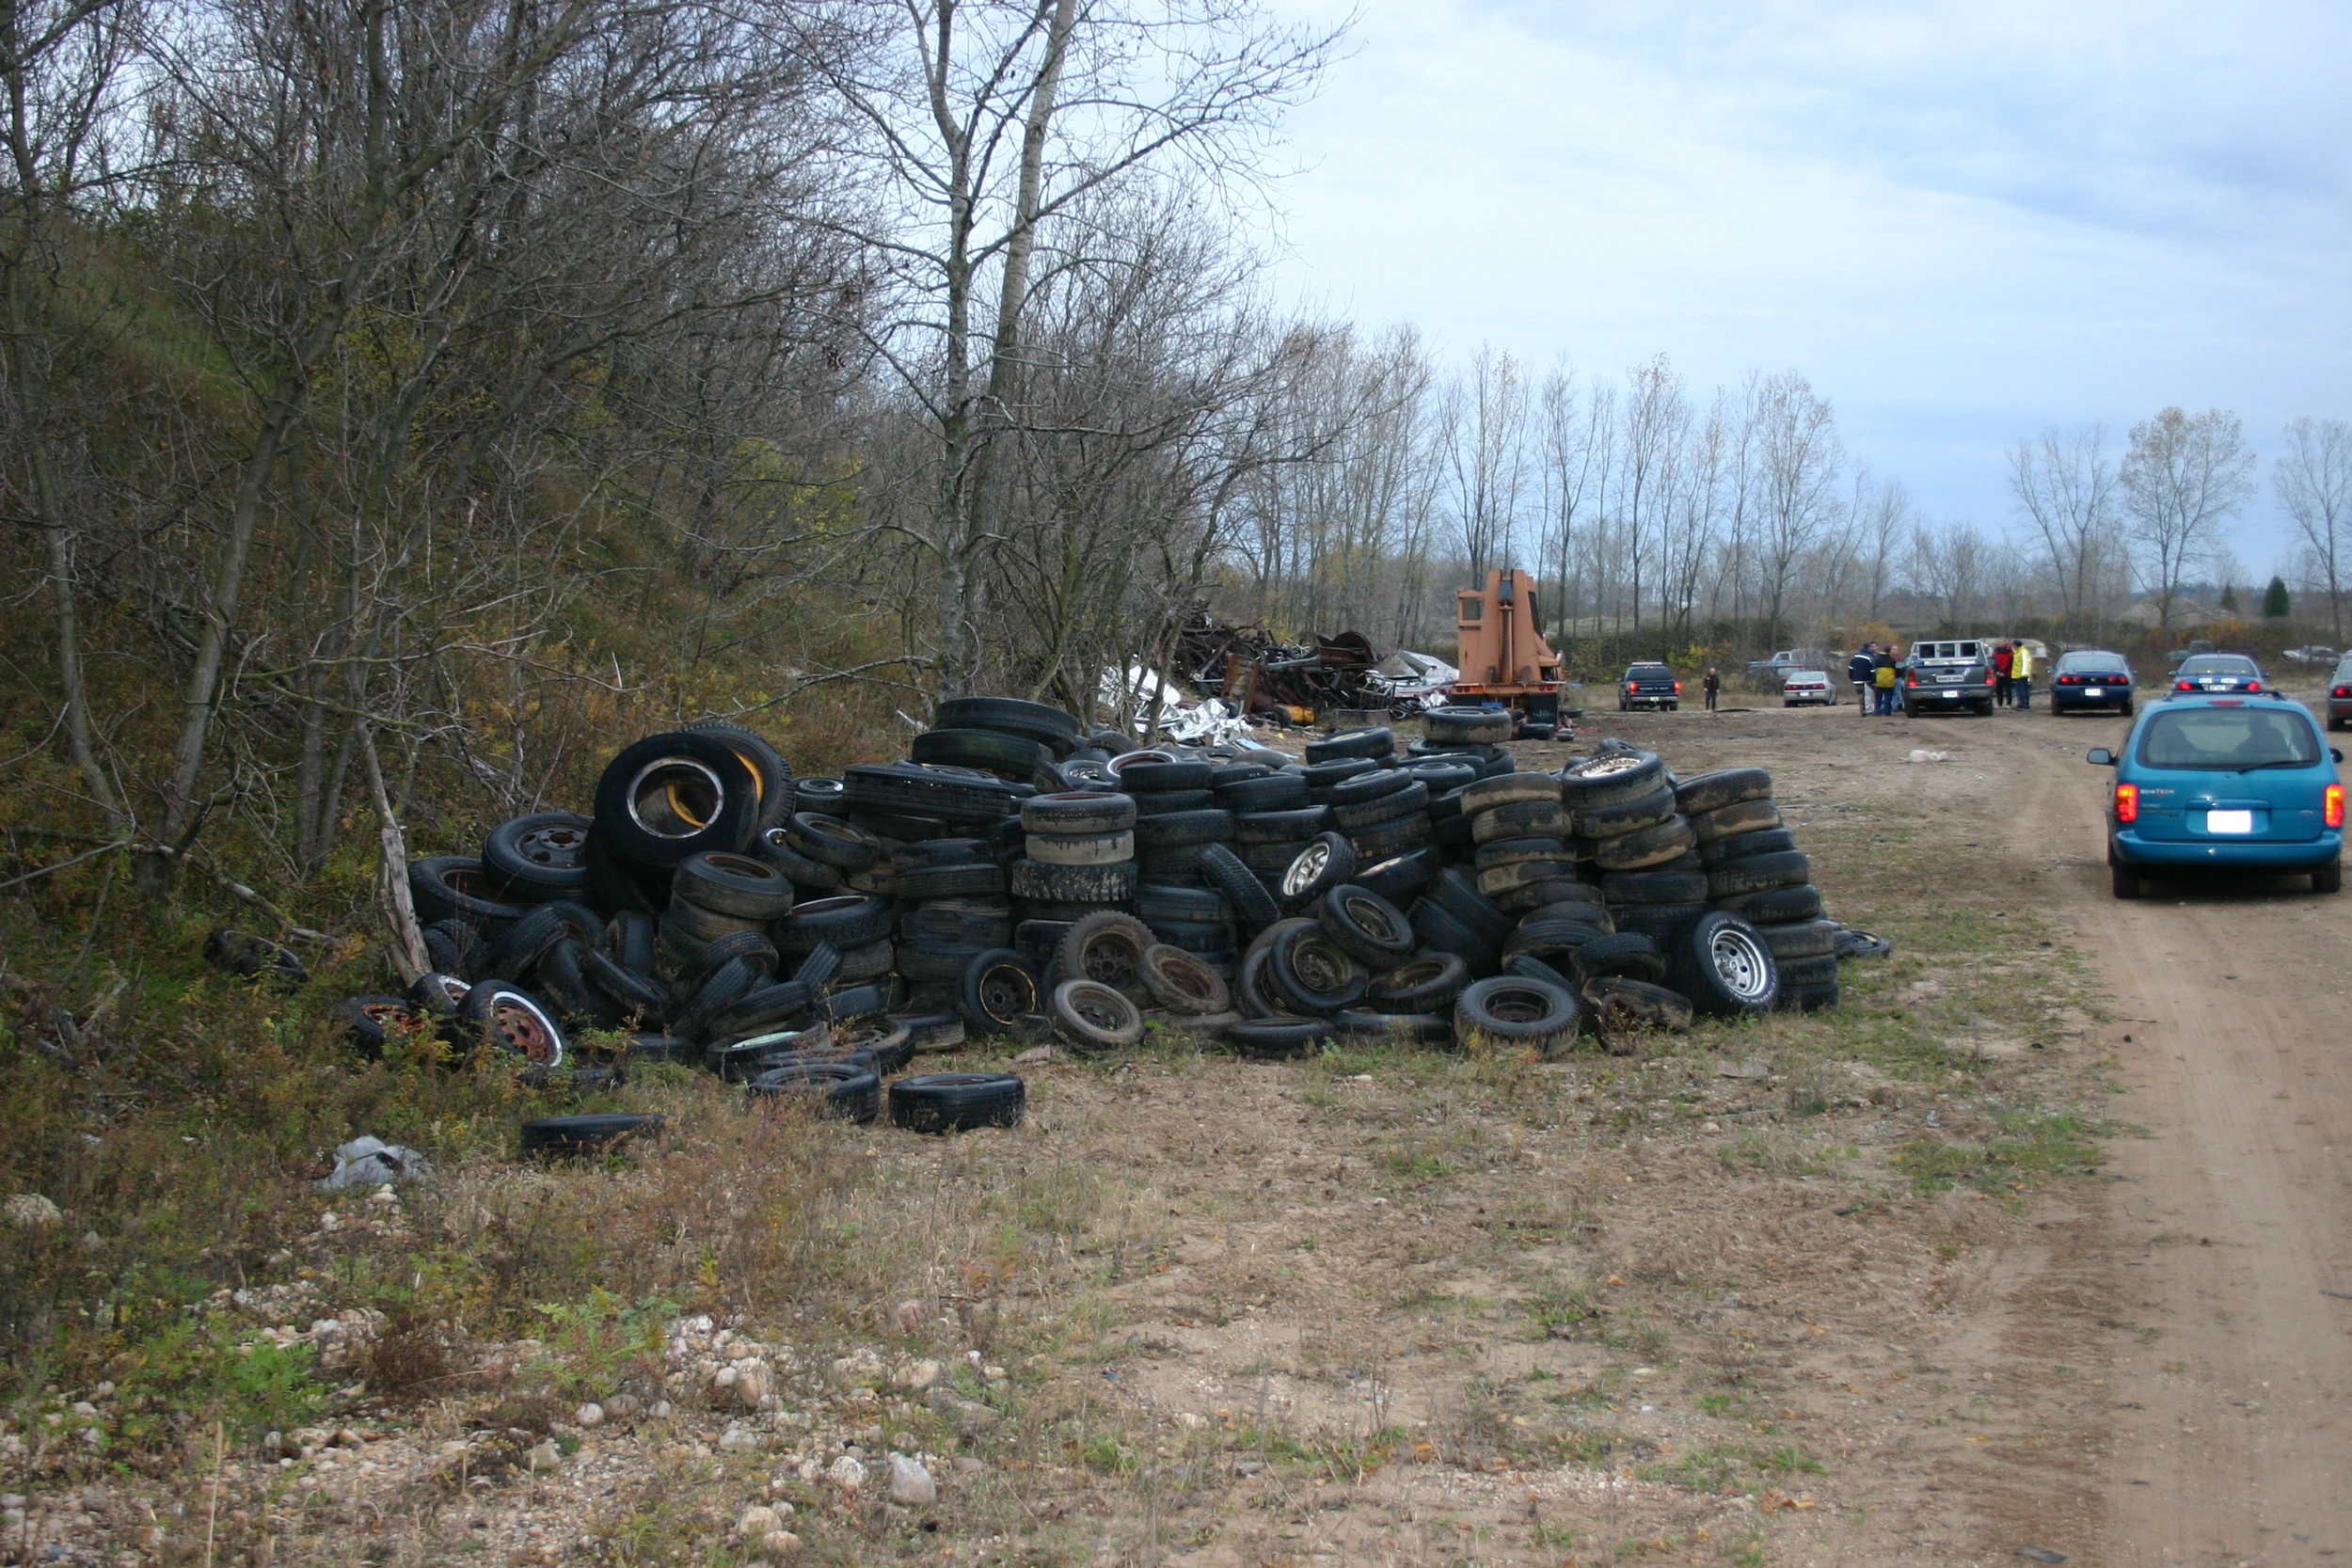
|
| 72 | Tires south-west of Avery’s trailer | 3 | 
|
| 73 | Avery’s Auto Salvage sign | 3 | 
|
| 74 | Avery’s Auto Salvage area overview | 3 | 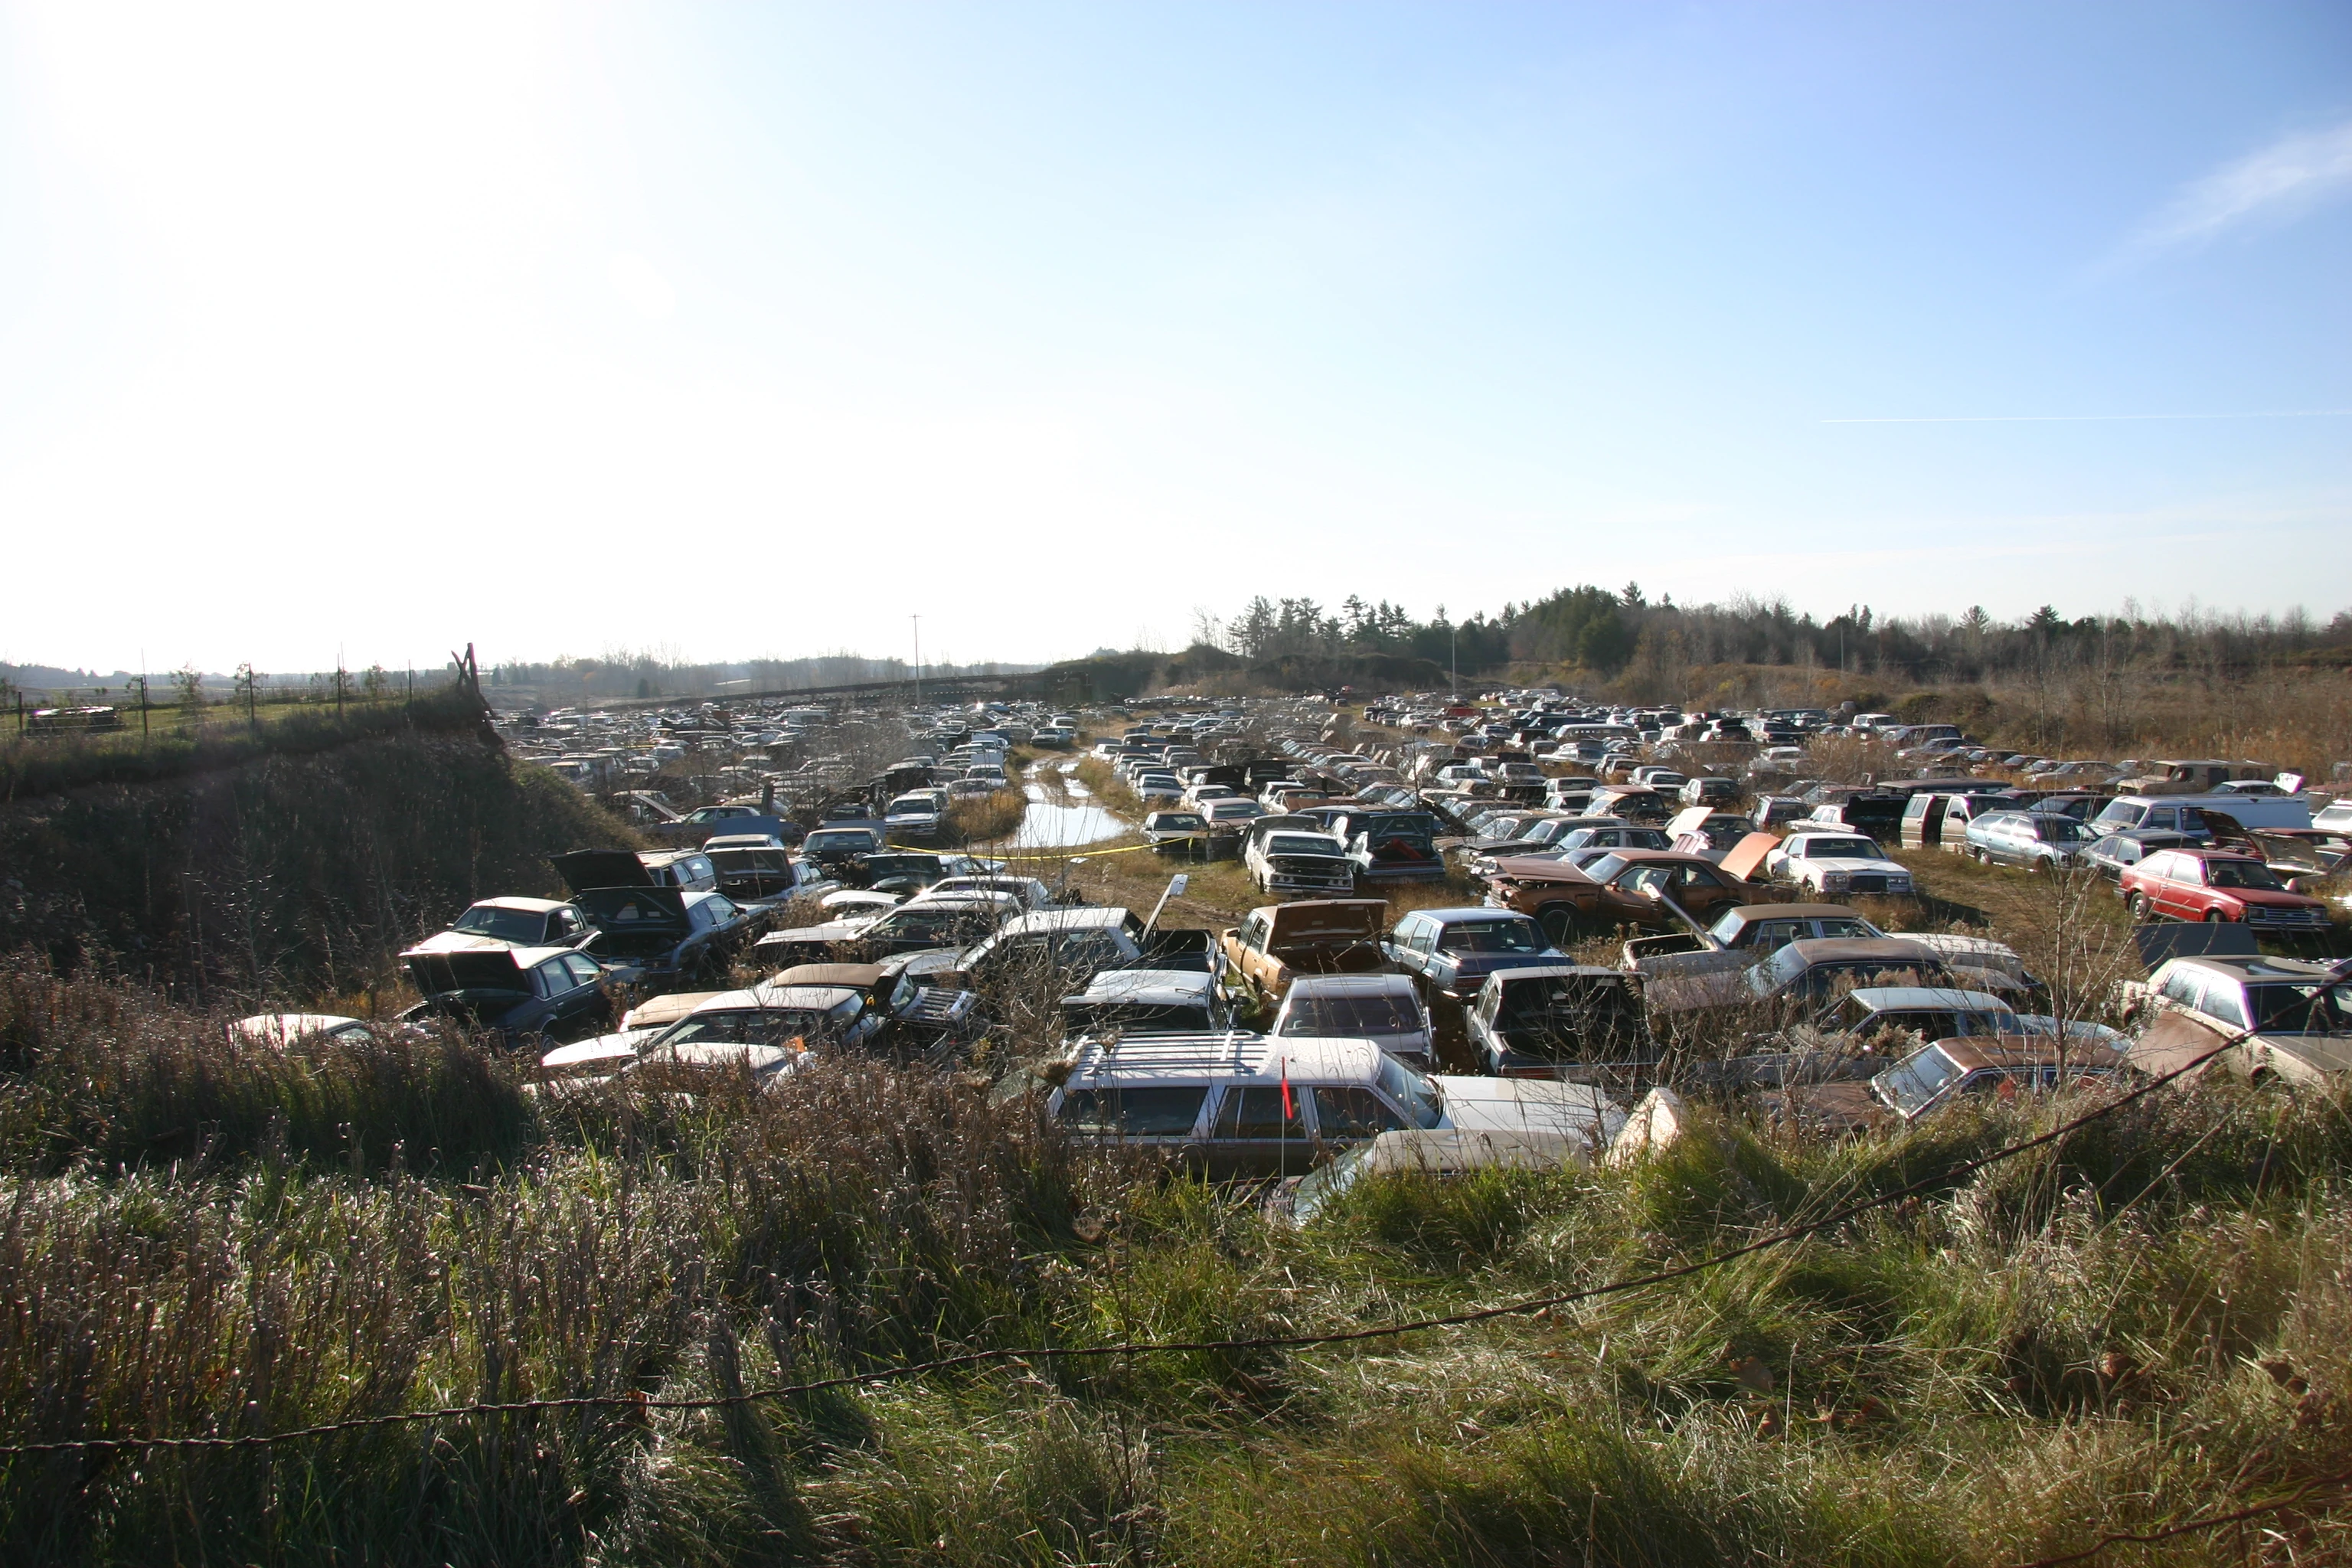
|
| 75 | Avery’s Auto Salvage area overview | 3 | 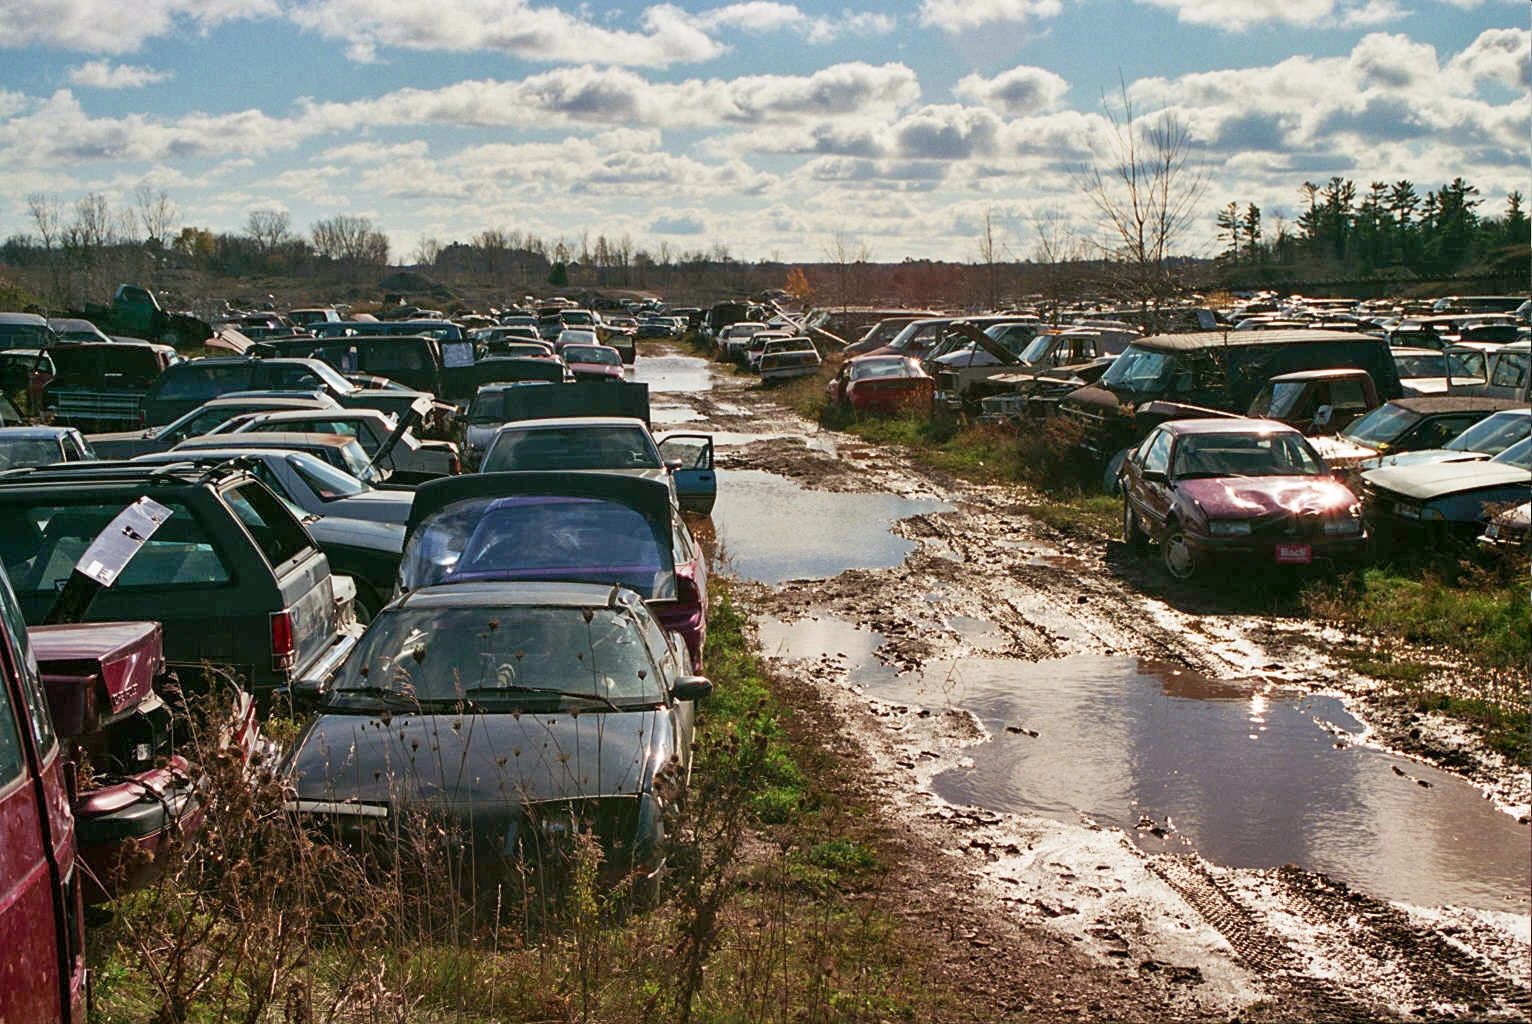
|
| 76 | Avery’s Auto Salvage area overview | 3 | 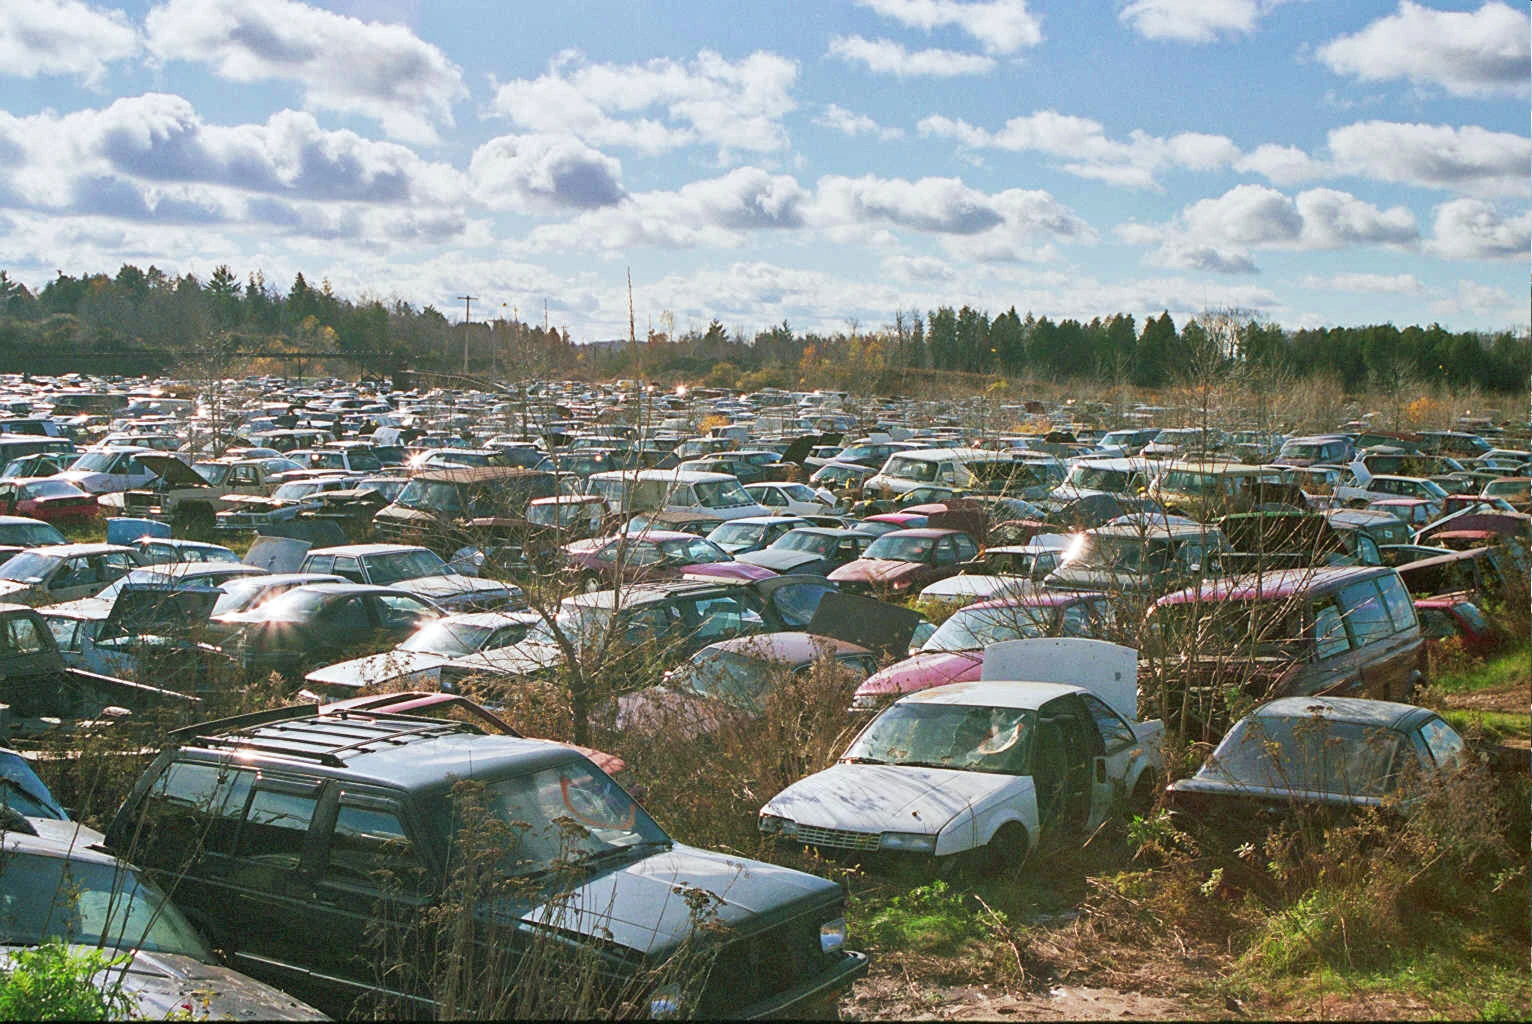
|
| 77 | Avery’s Auto Salvage area overview | 3 | 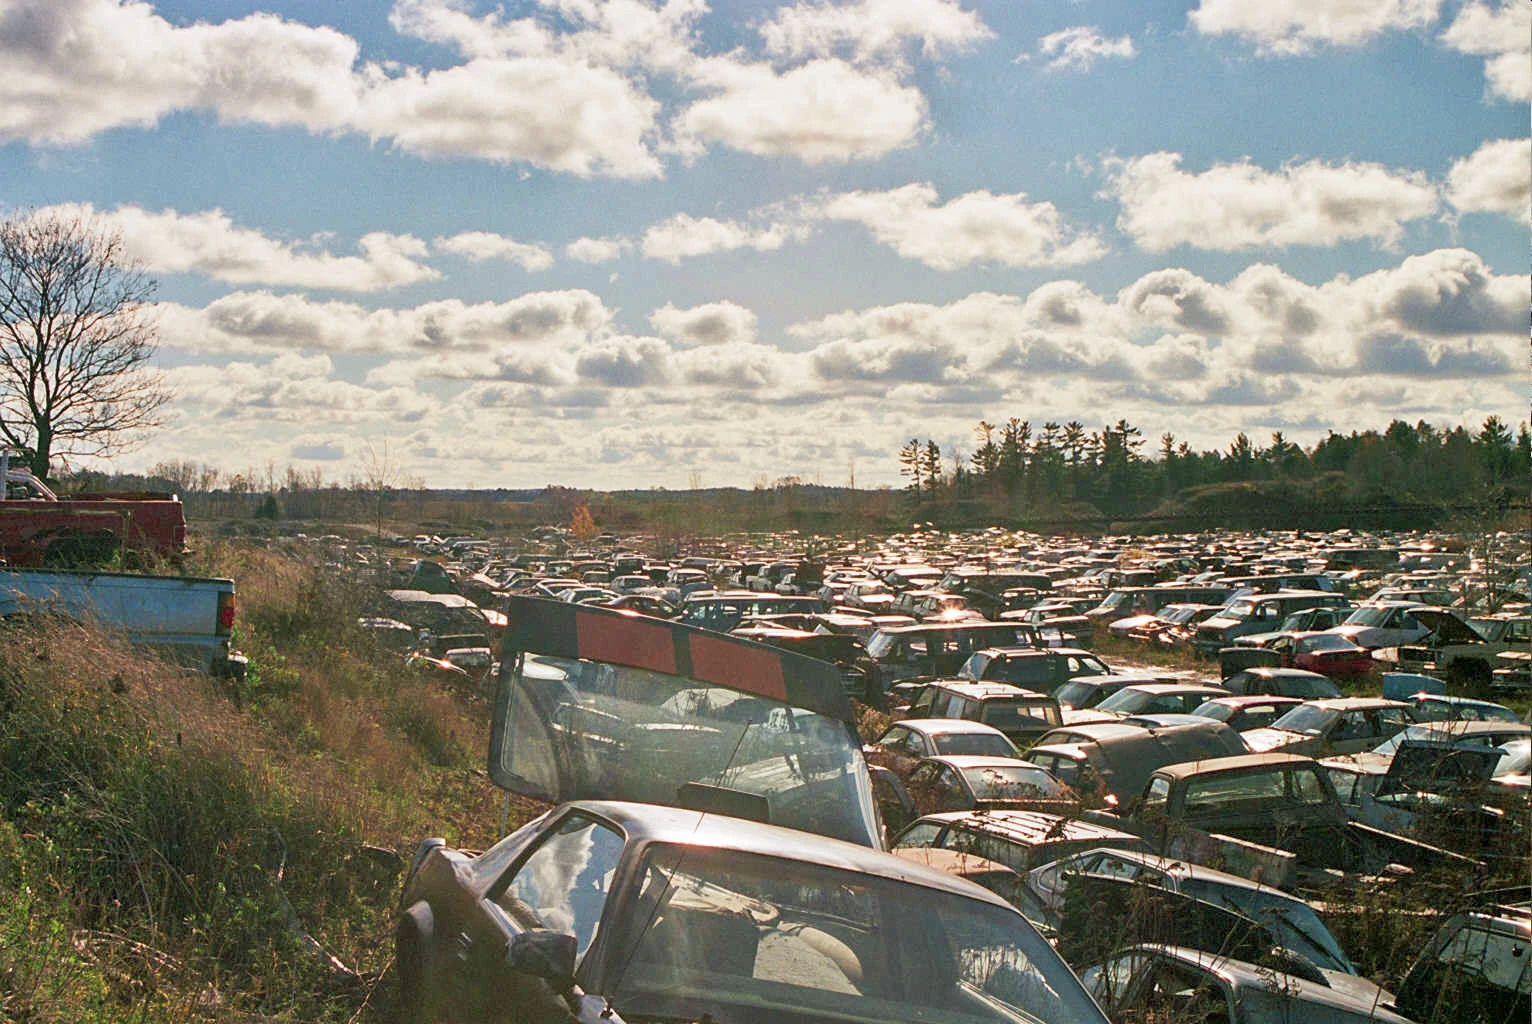
|
| 78 | Avery’s Auto Salvage area overview | 3 | 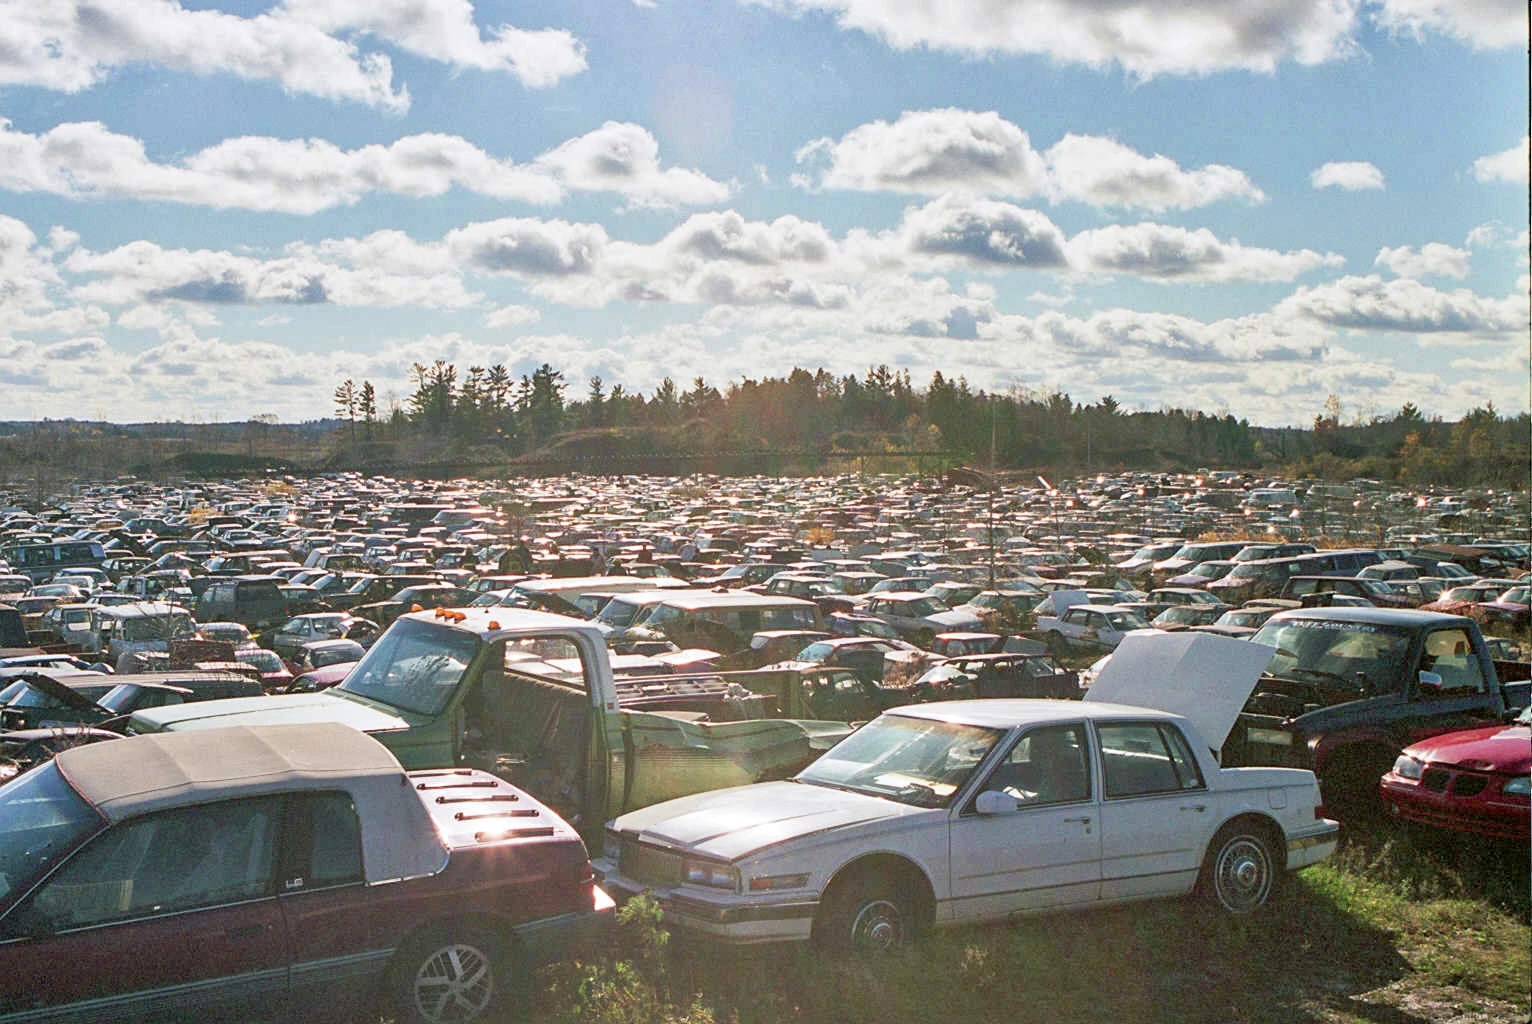
|
| 79 | Avery’s Auto Salvage aerial view | 4 | 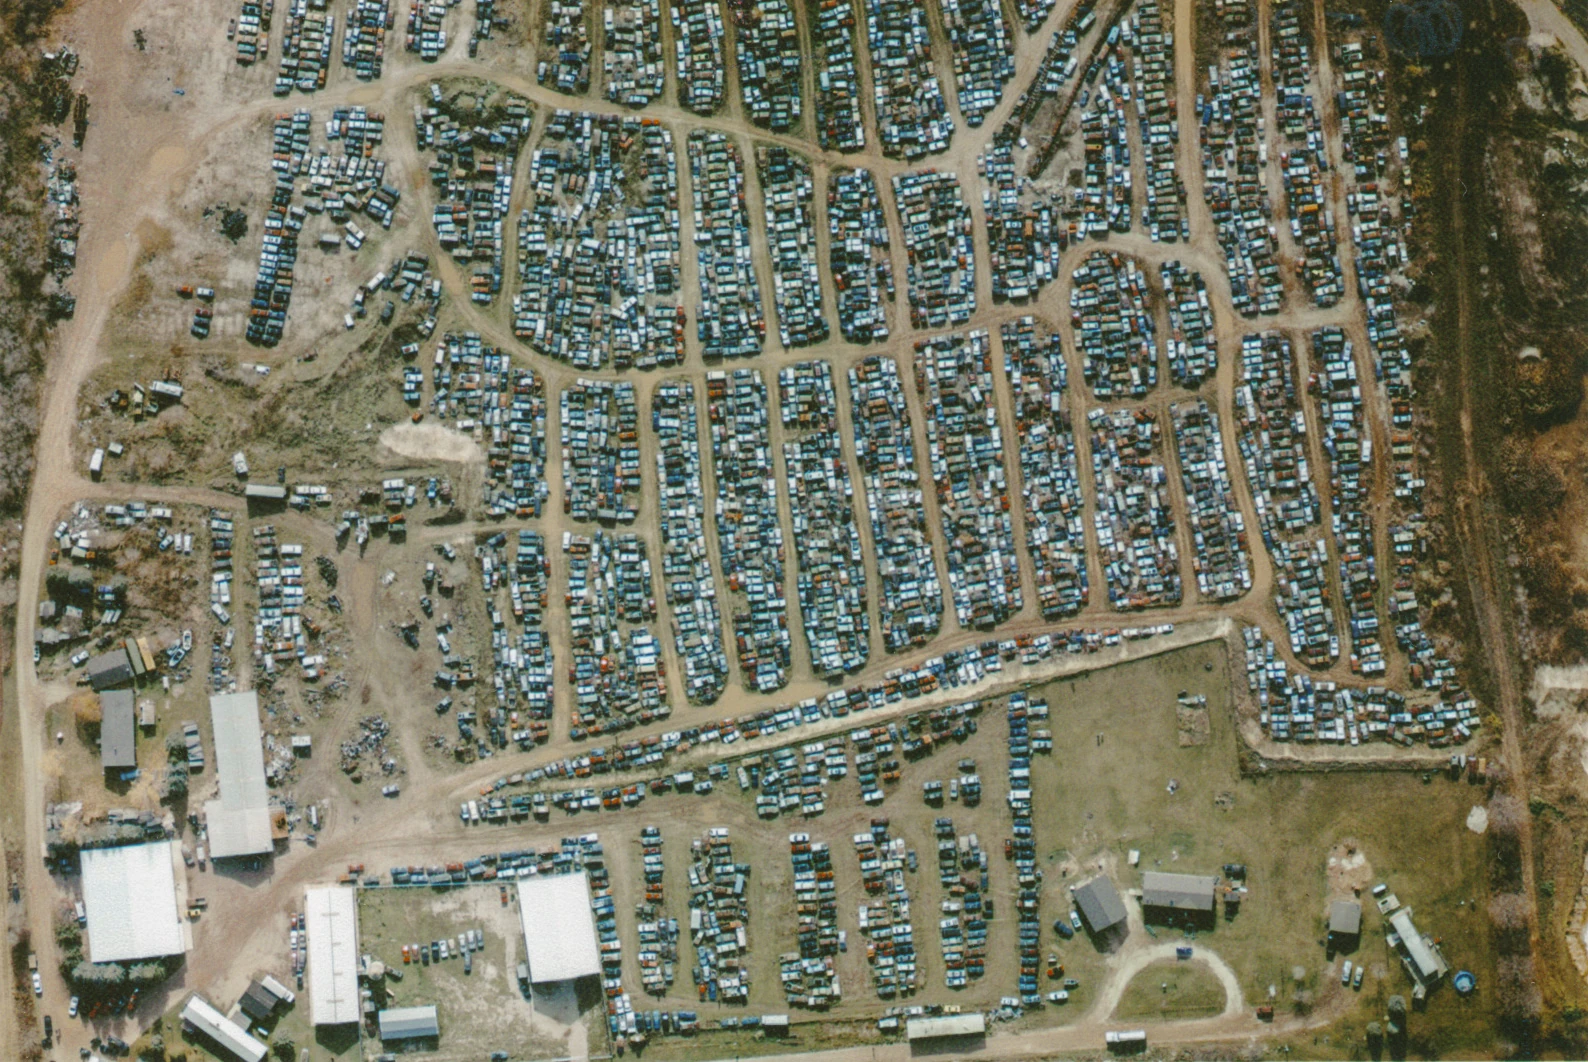
|
| 80 | Steven Avery’s trailer and garage (rear view) | 4 | 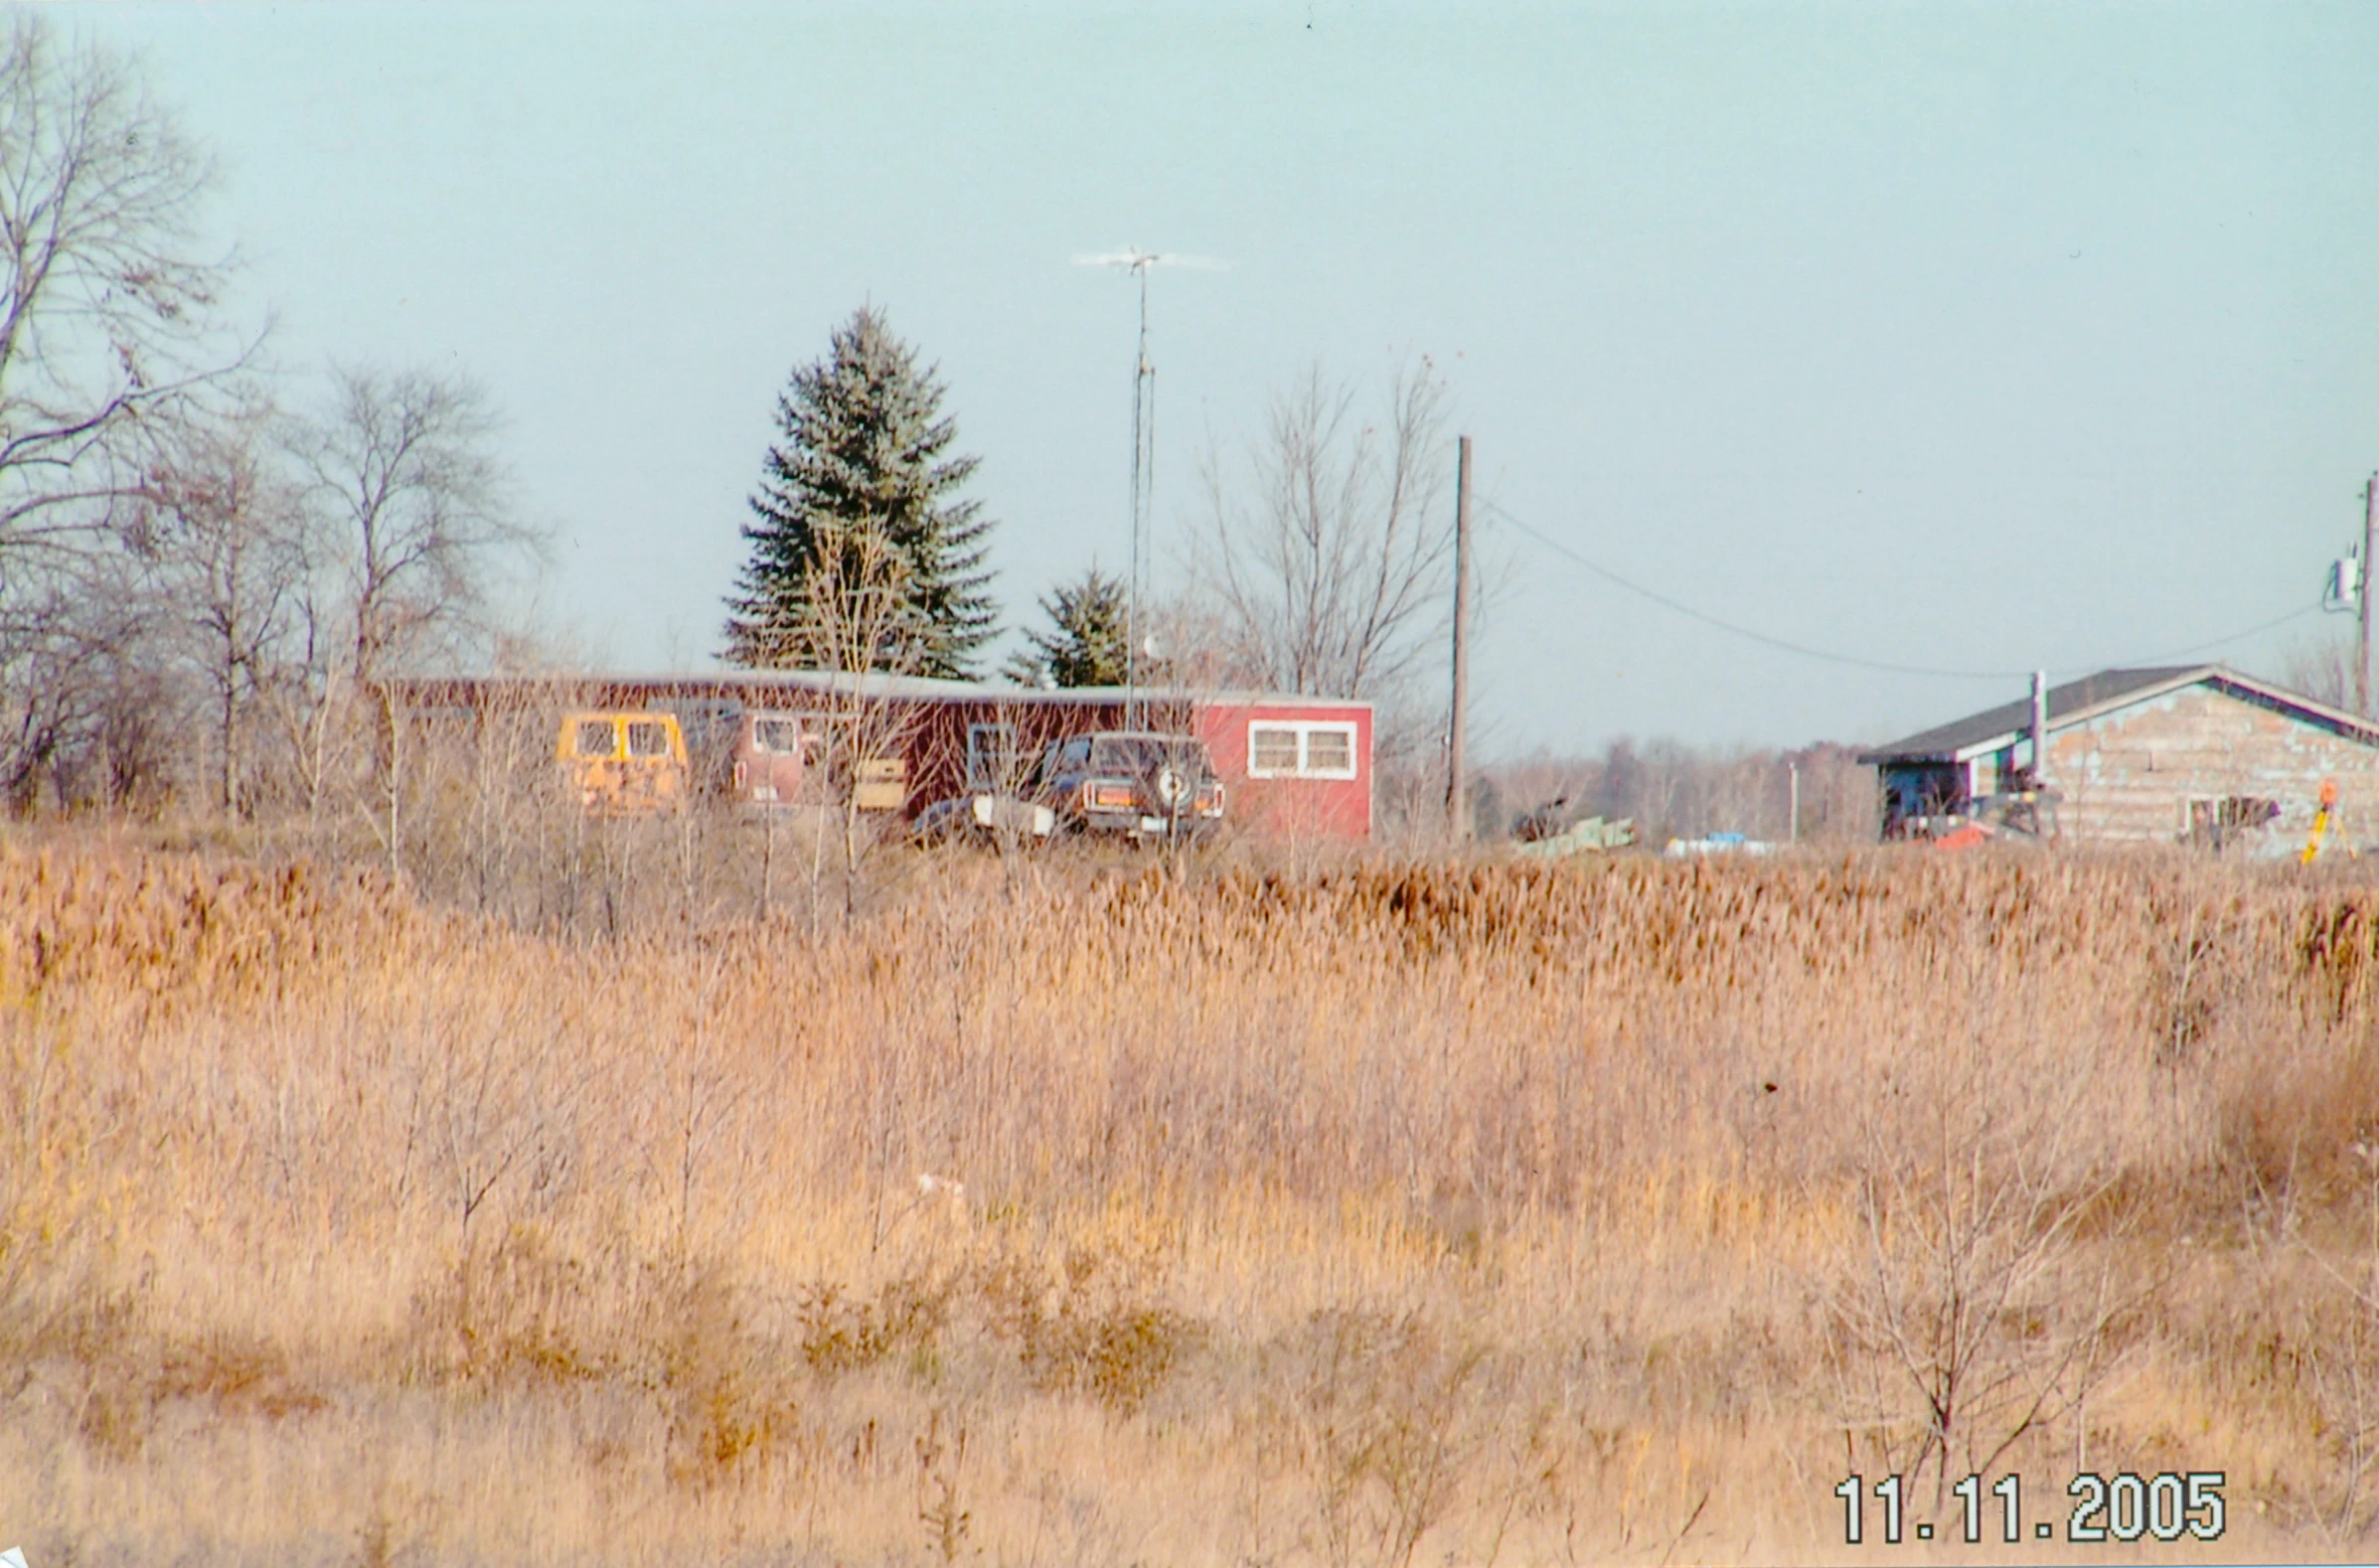
|
| 81 | Avery’s Auto Salvage entrance aerial view | 4 | 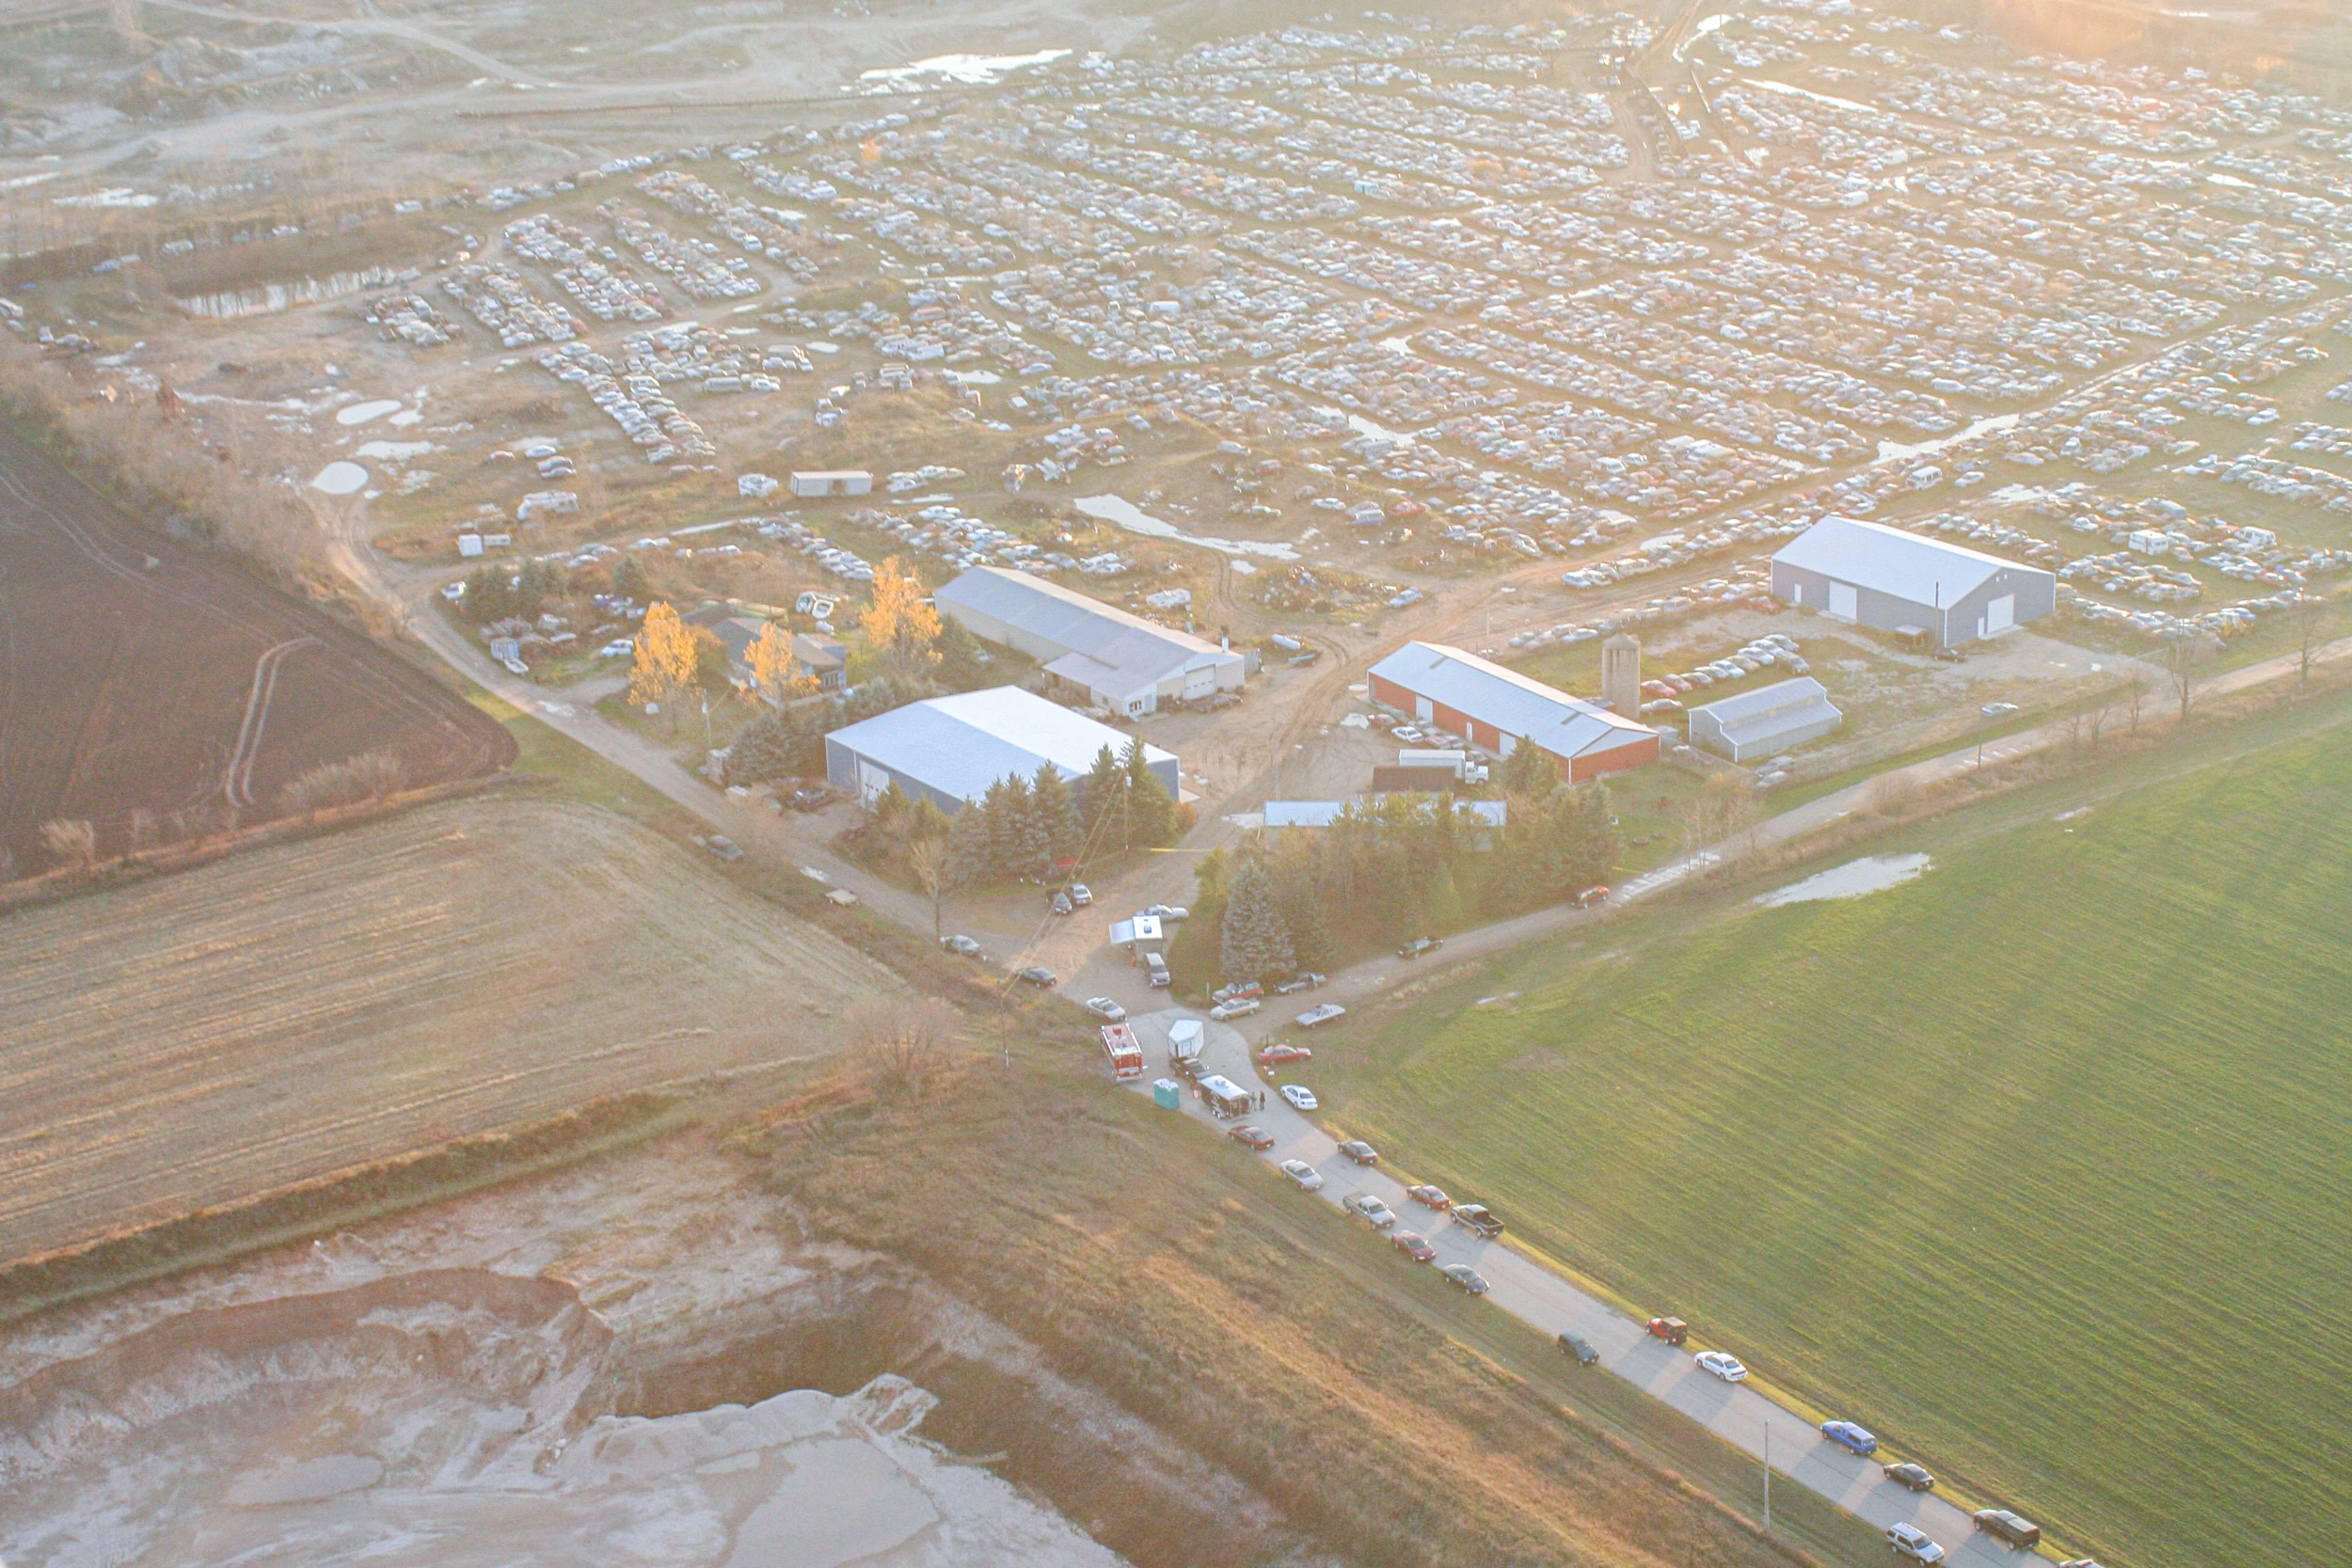
|
| 82 | Avery’s Auto Salvage car crusher area aerial view | 4 | 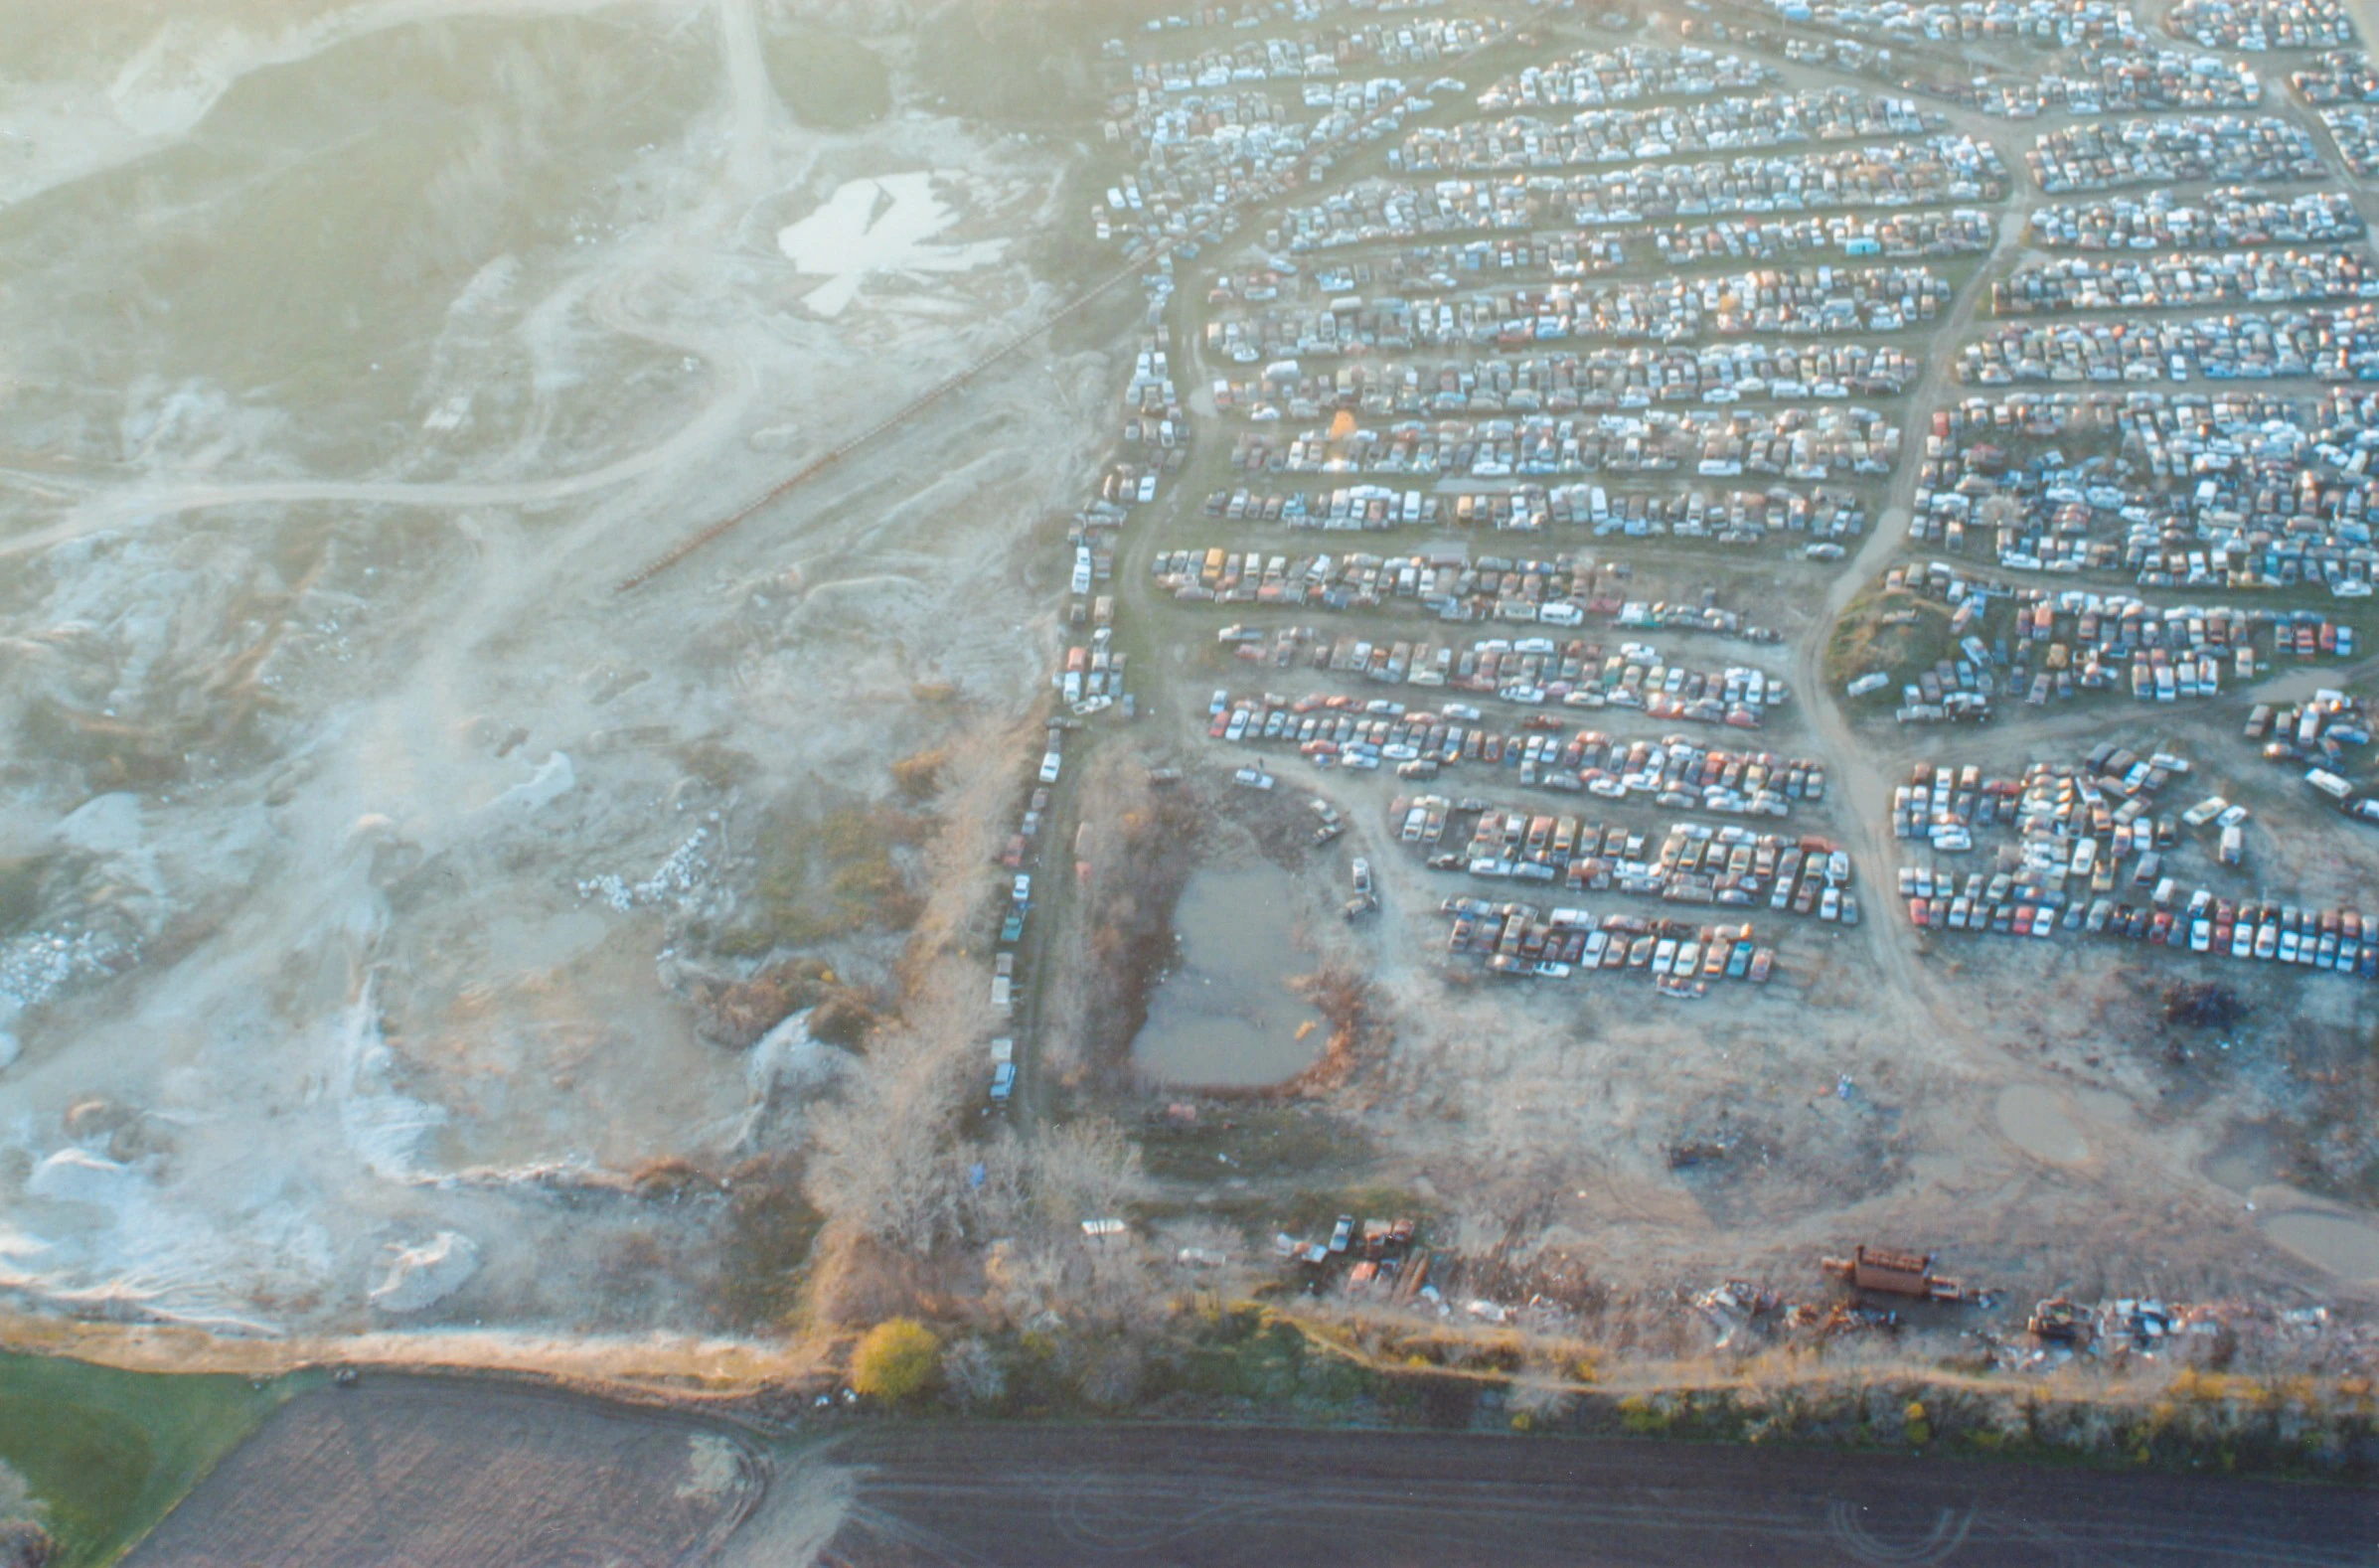
|
| 83 | Avery’s Auto Salvage Barb and Steven residences aerial view | 4 | 
|
| 84 | Quarry behind Avery residence aerial view | 4 | 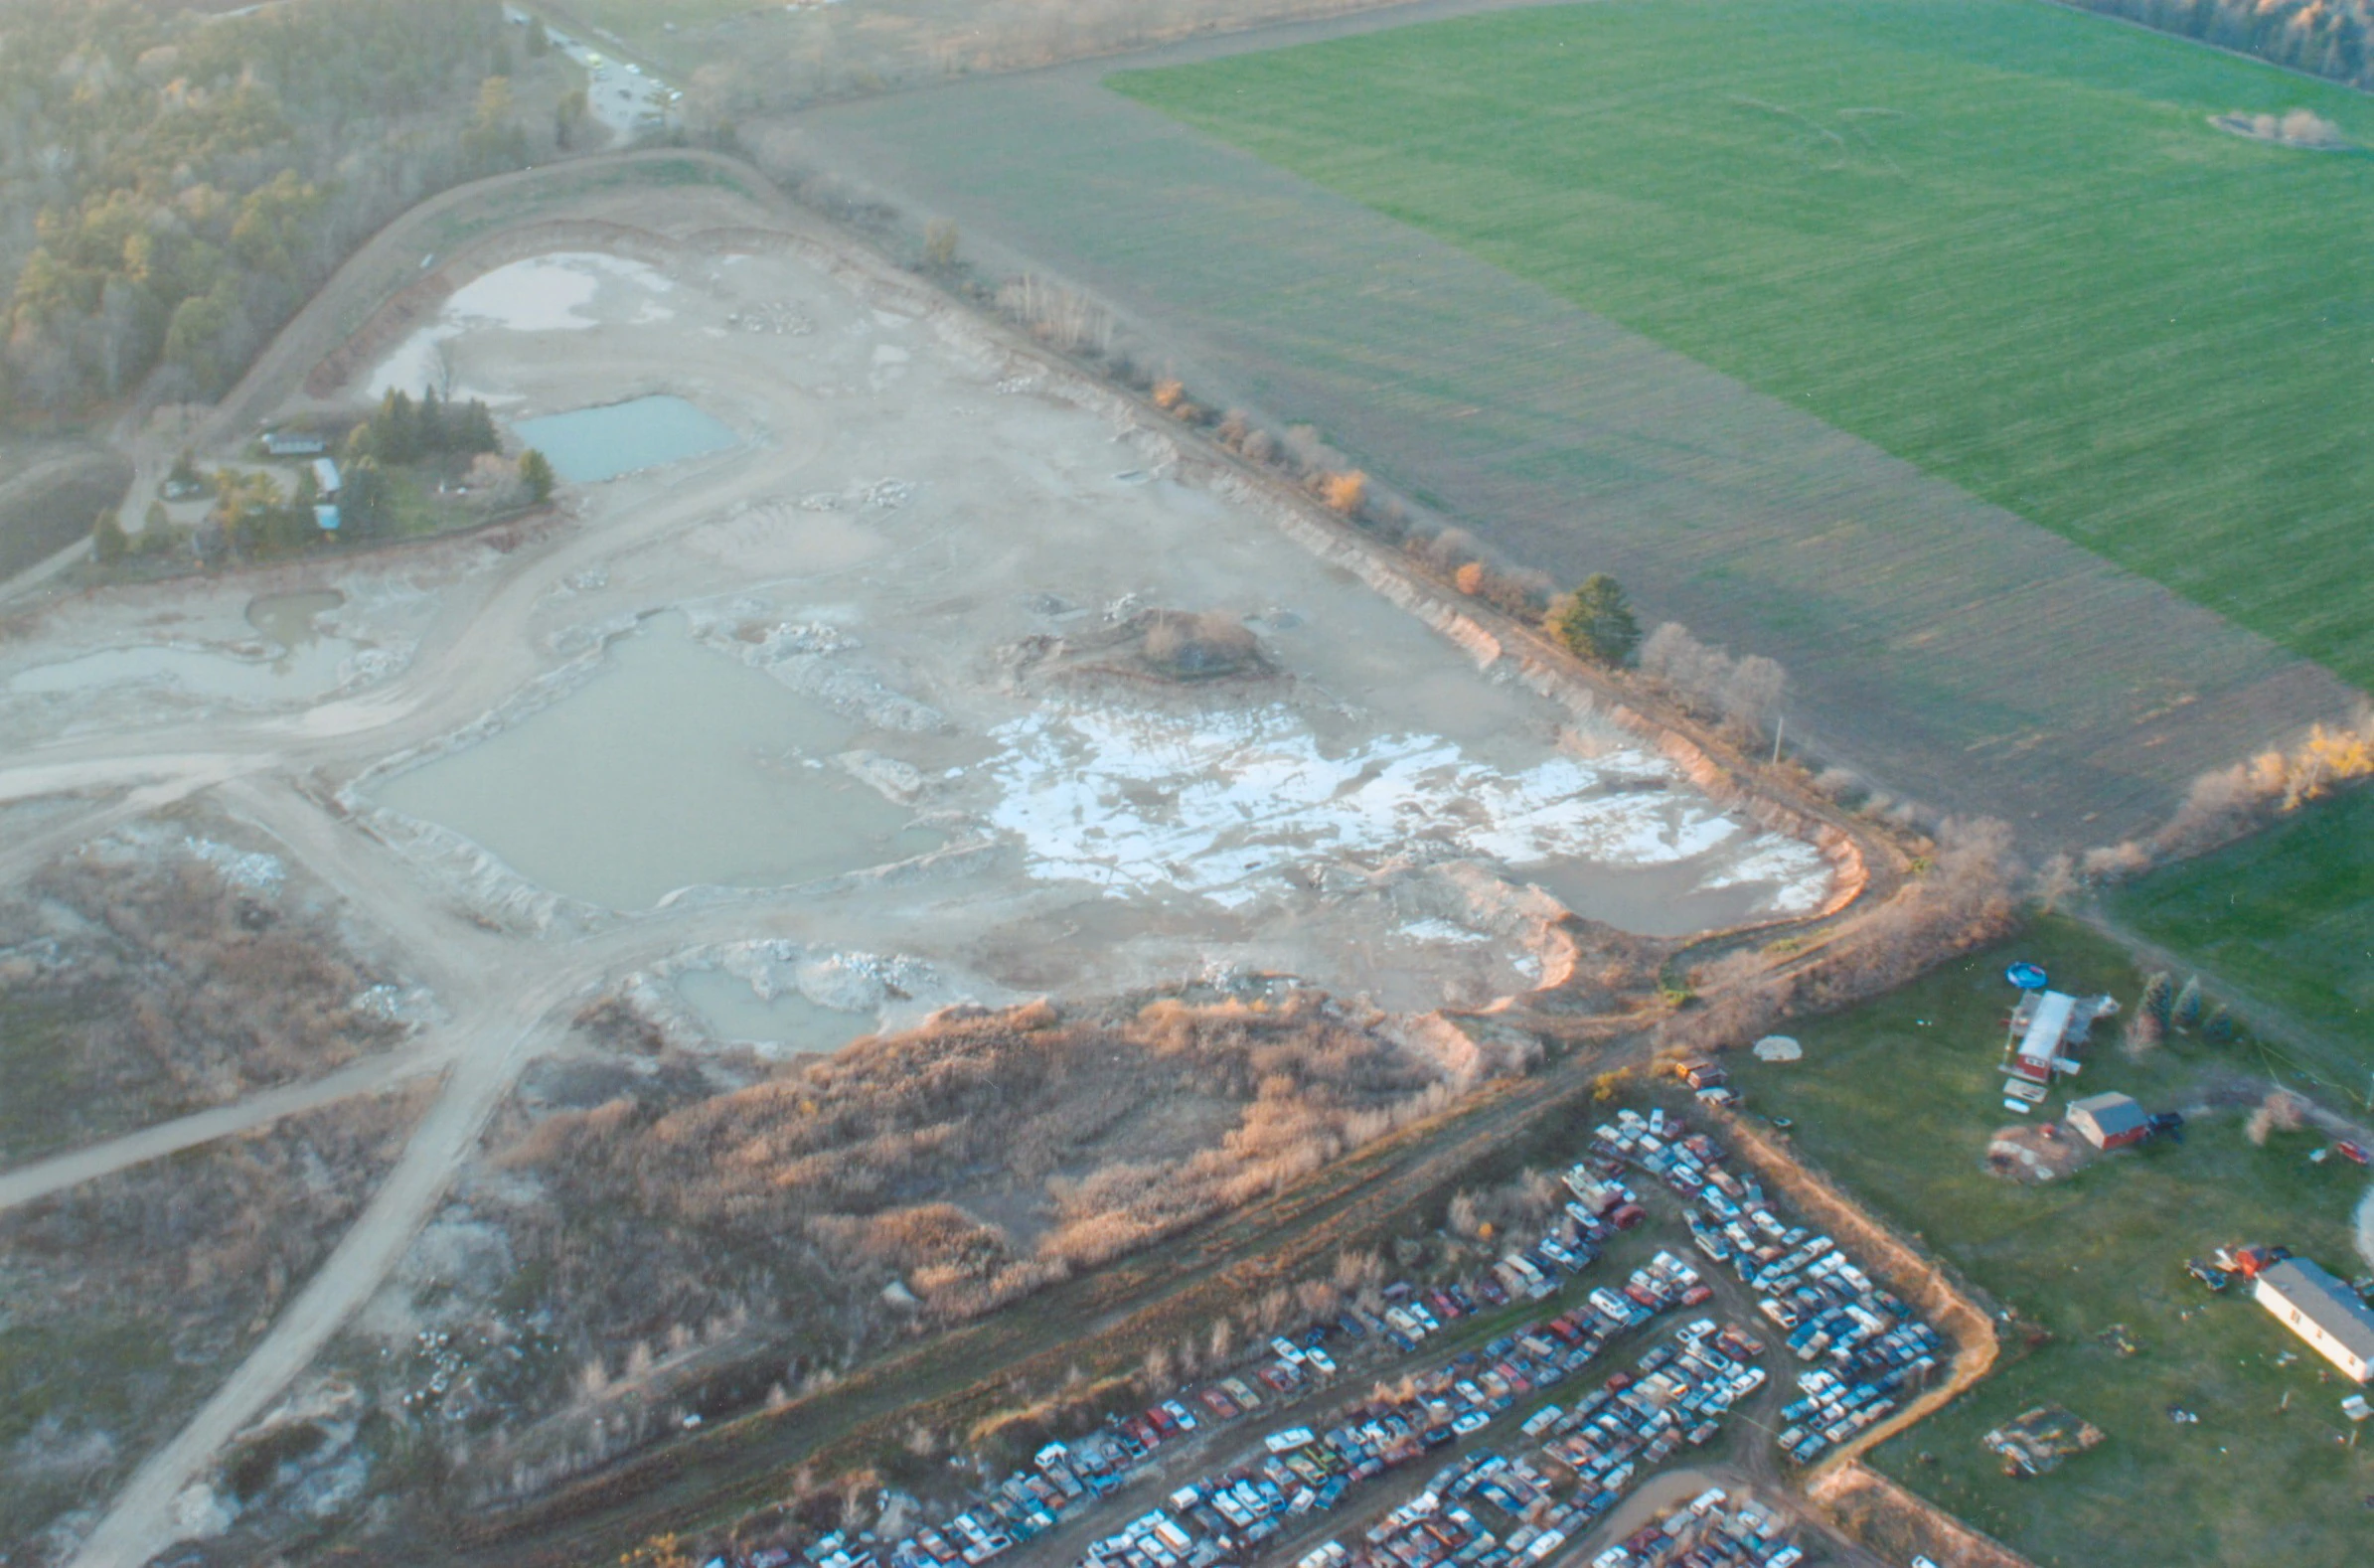
|
| 85 | Avery’s Auto Salvage aerial view | 4 | 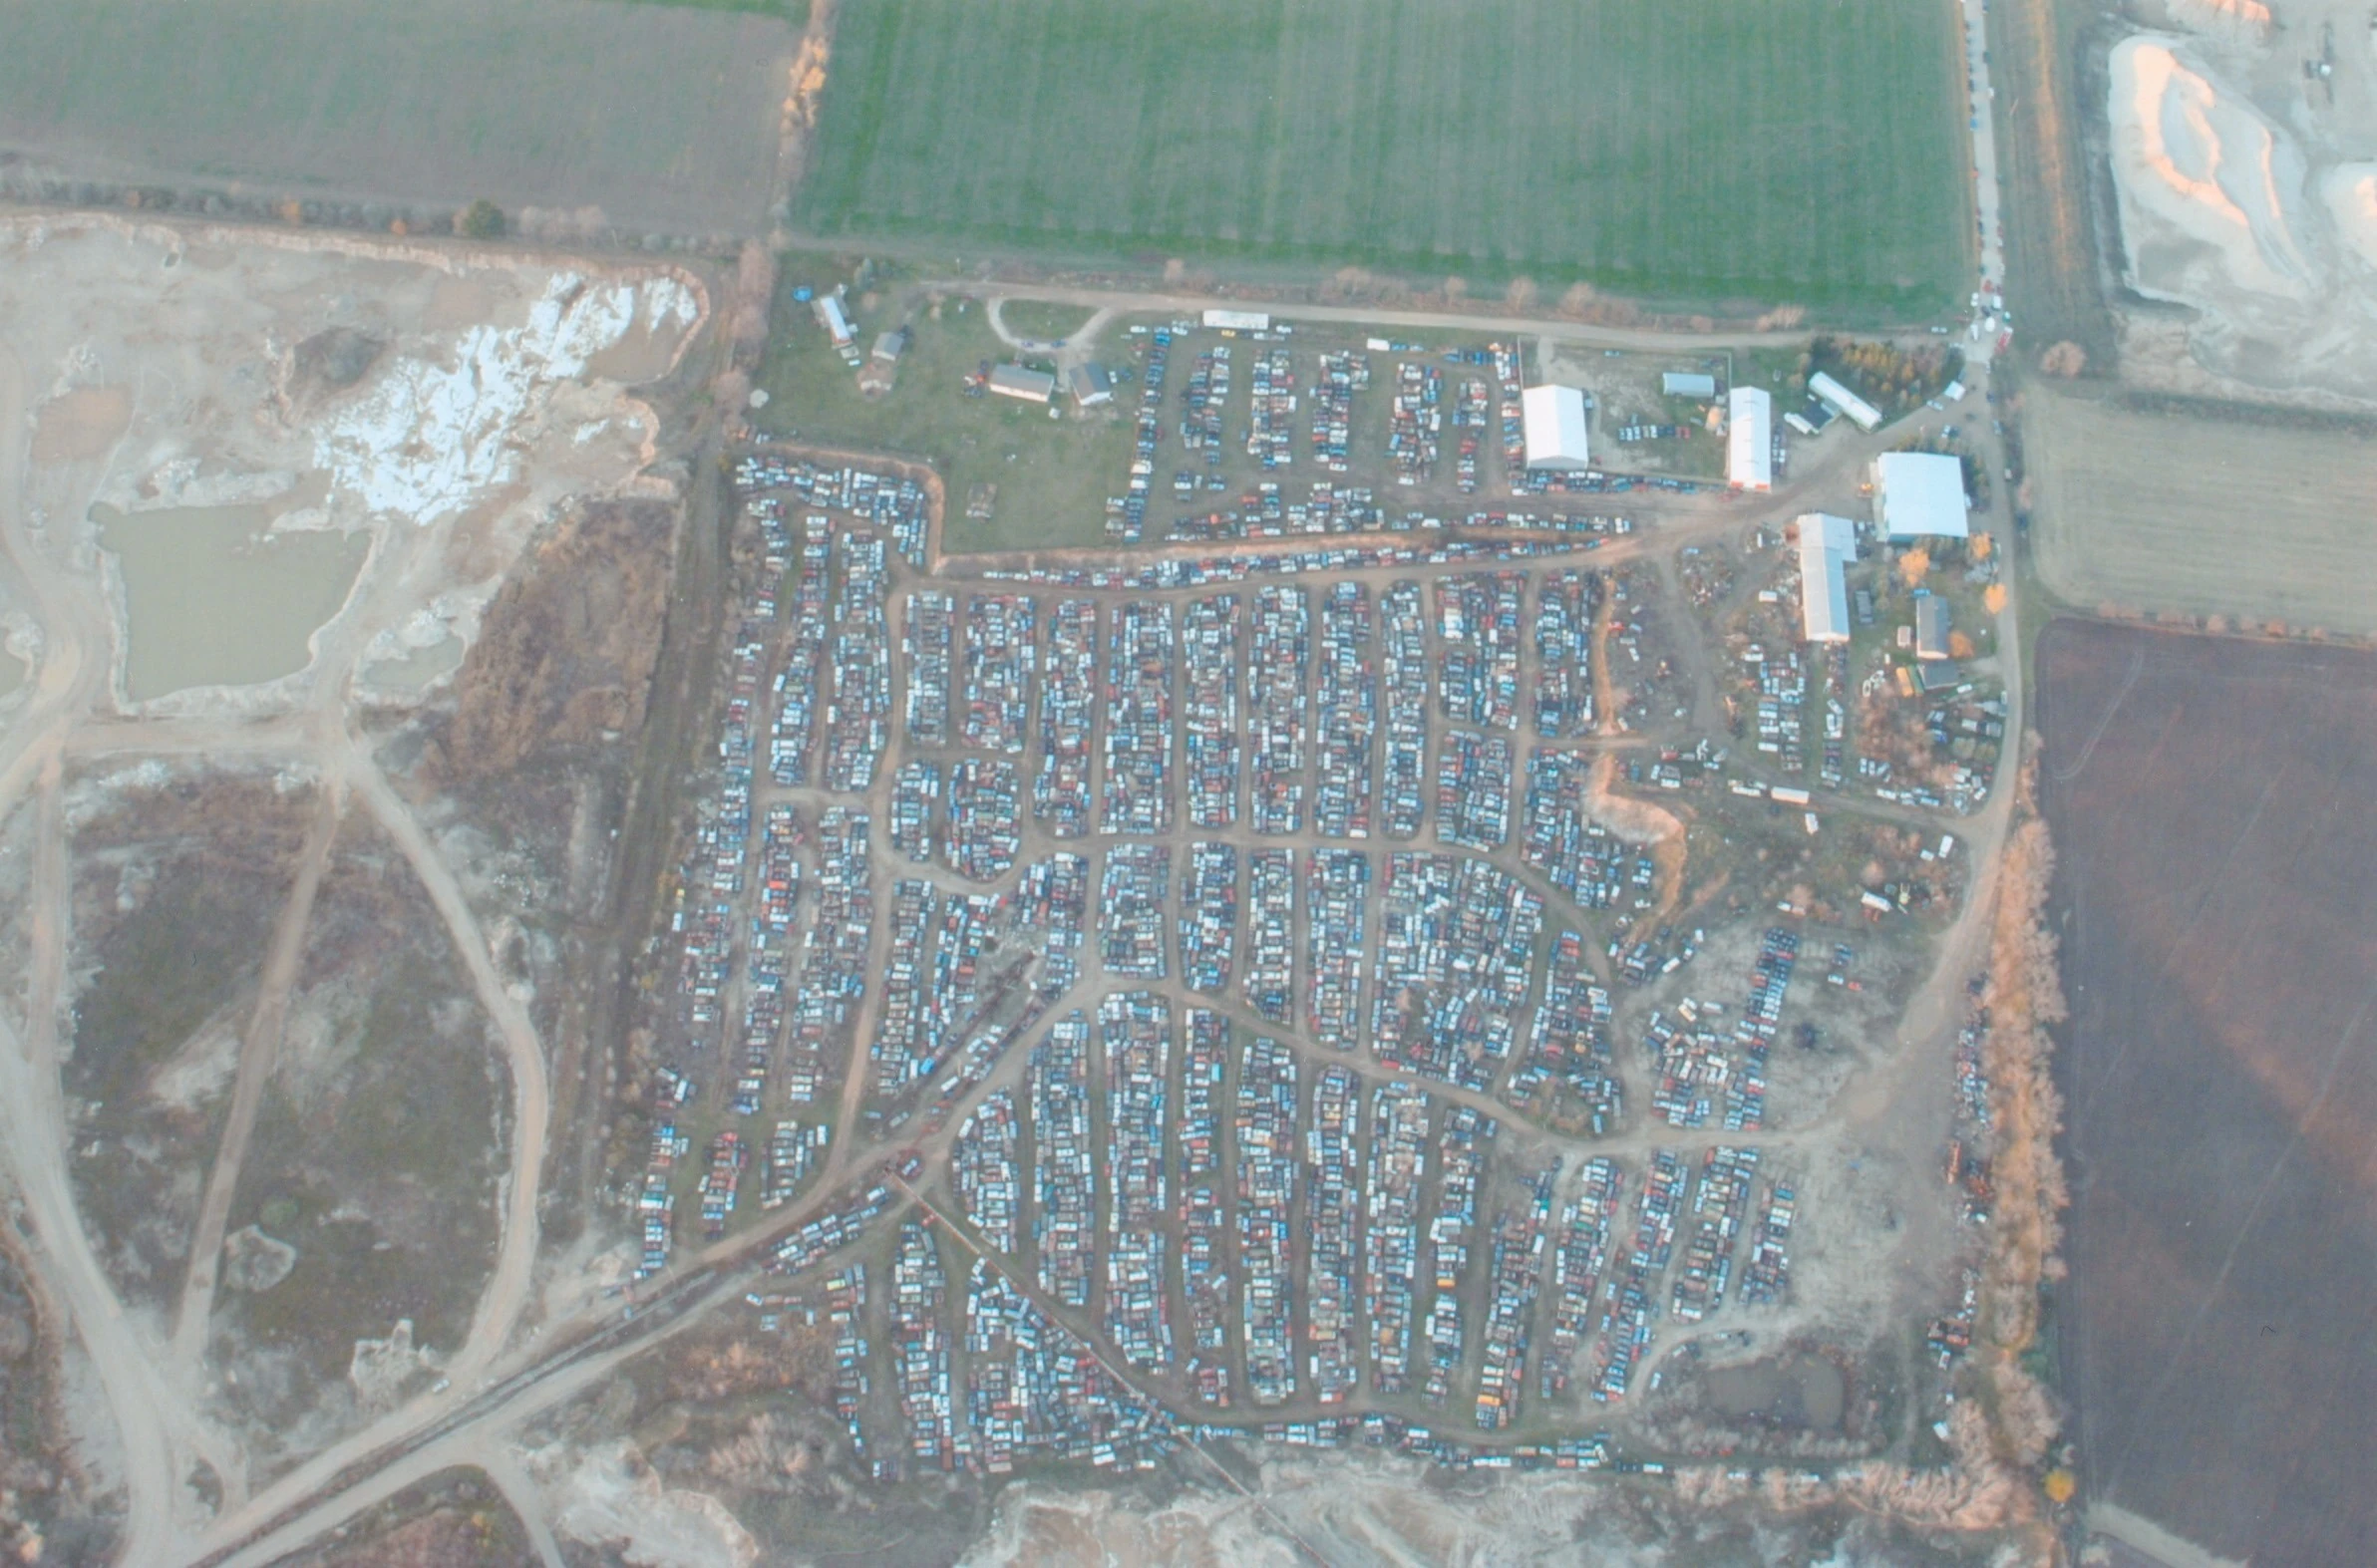
|
| 86 | Avery’s Auto Salvage aerial view | 4 | 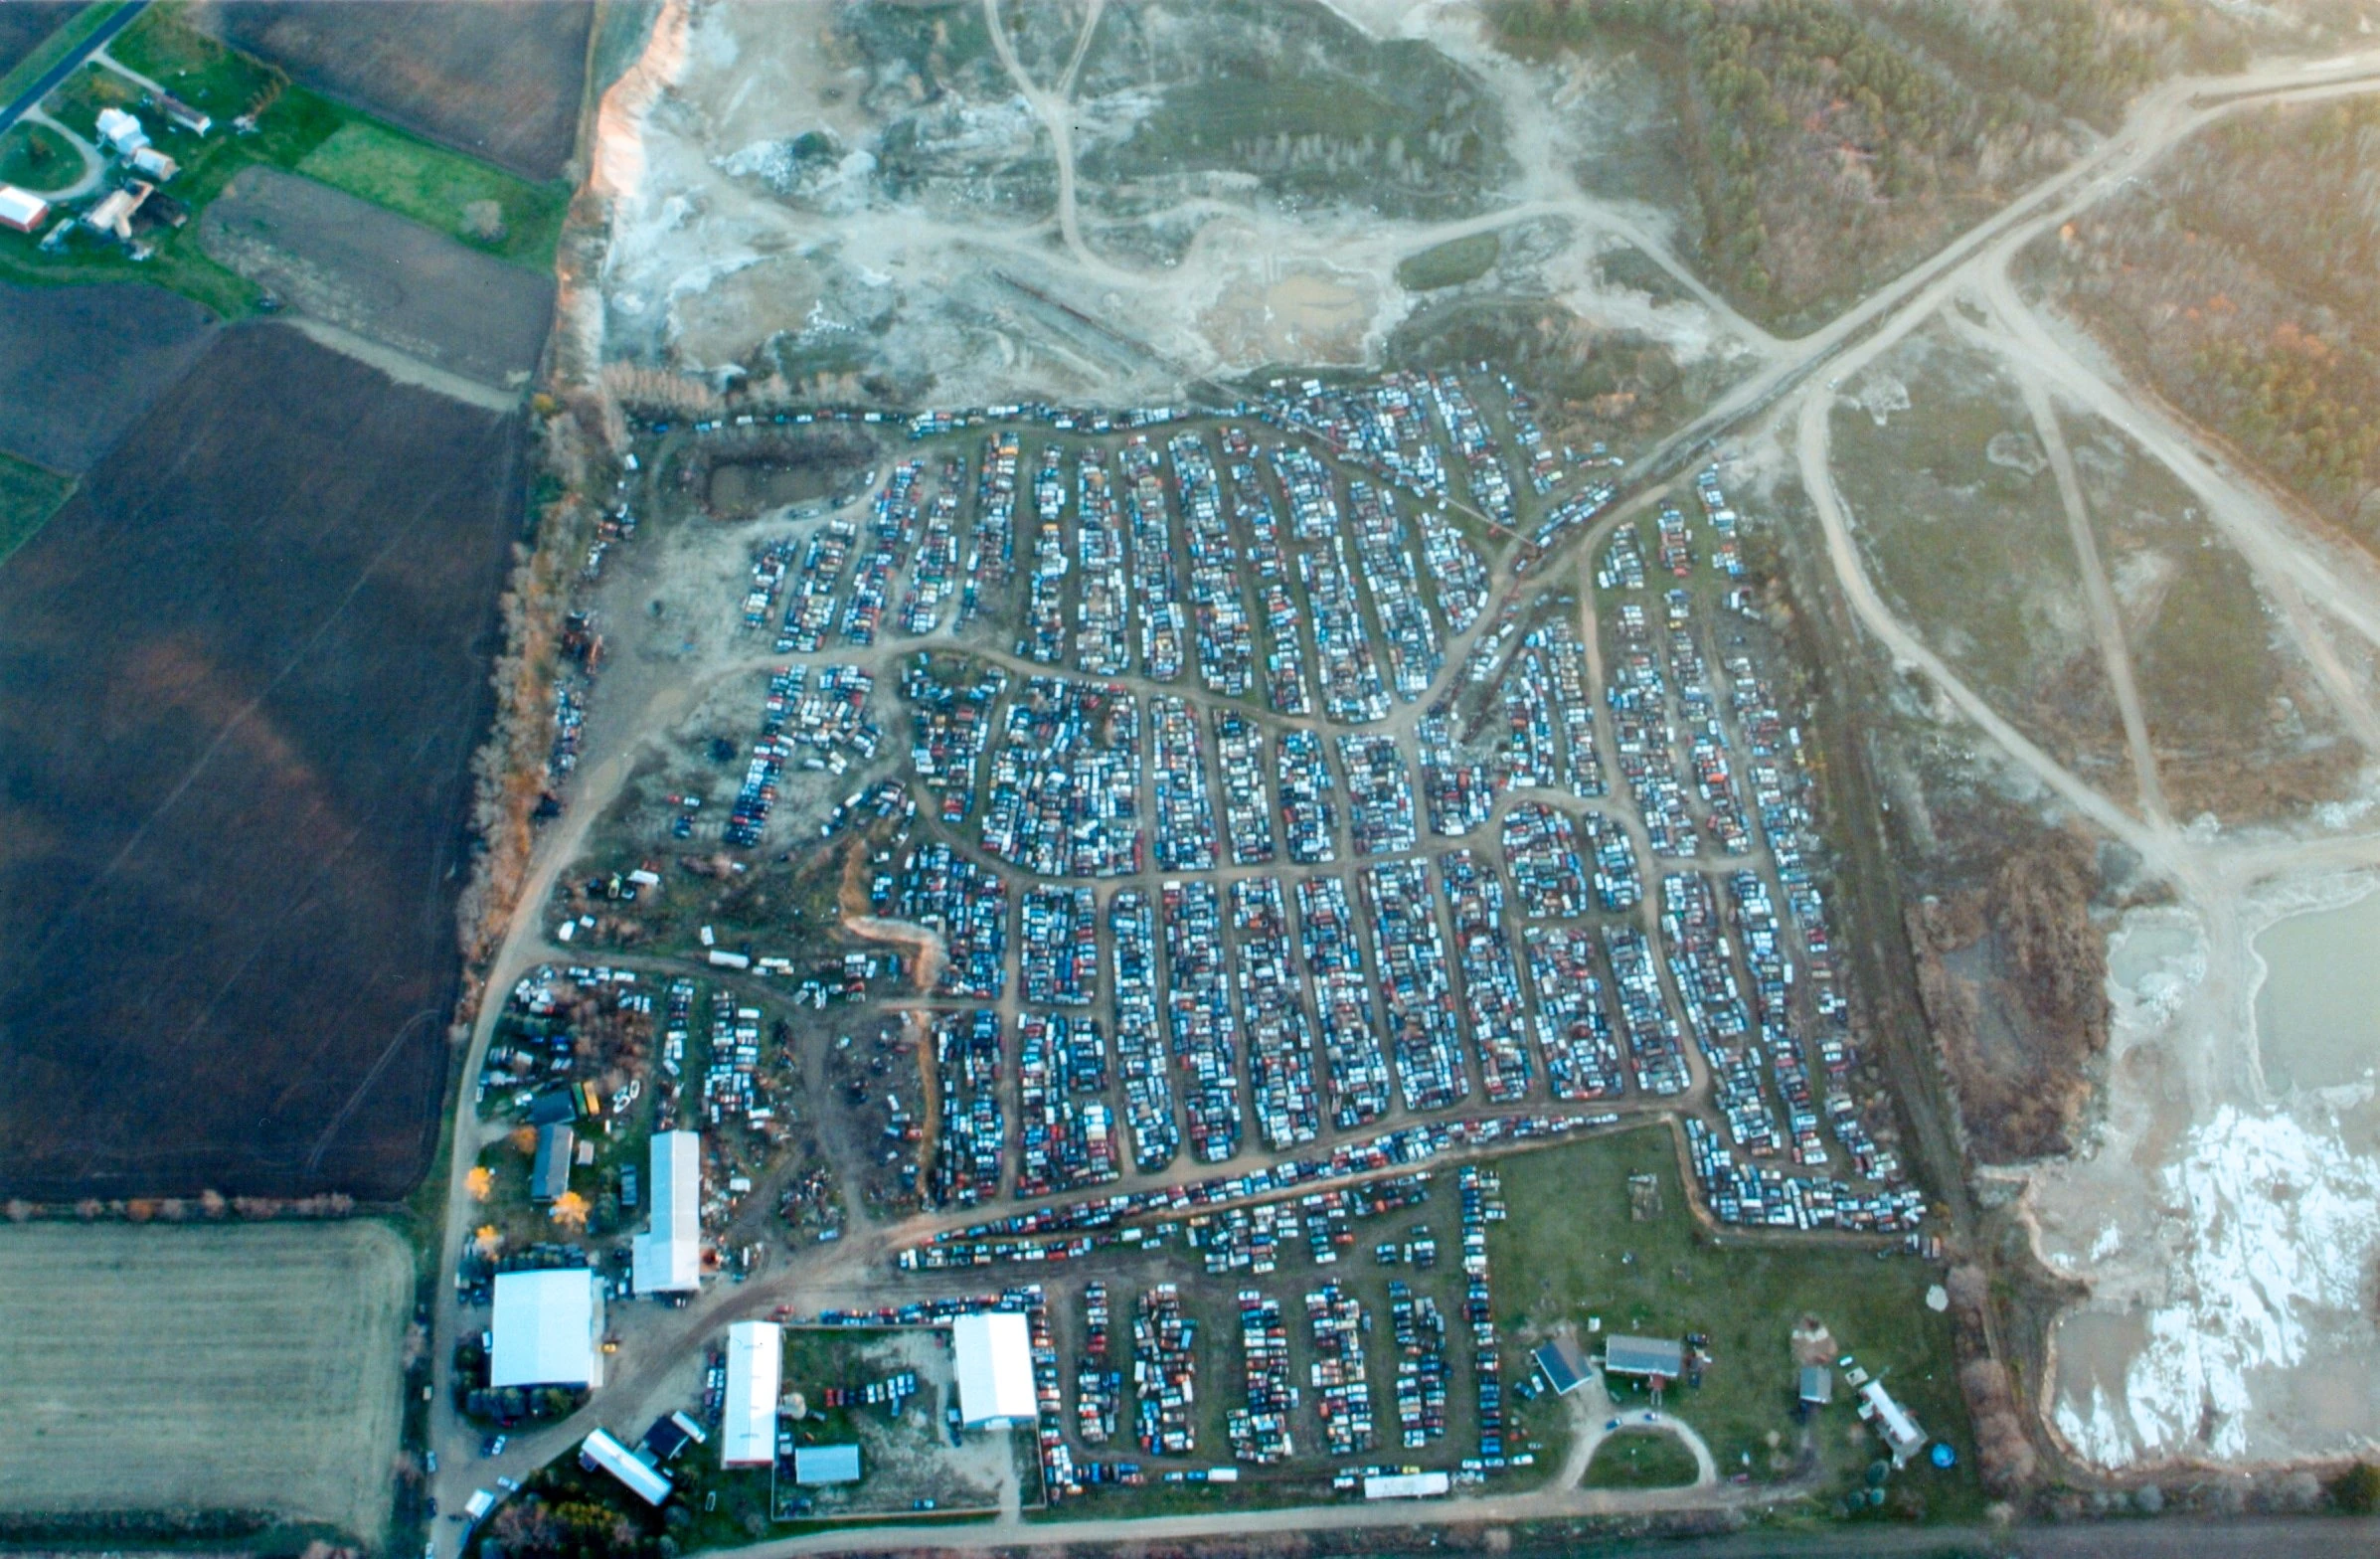
|
| 91 | Image used for animation | 3 | 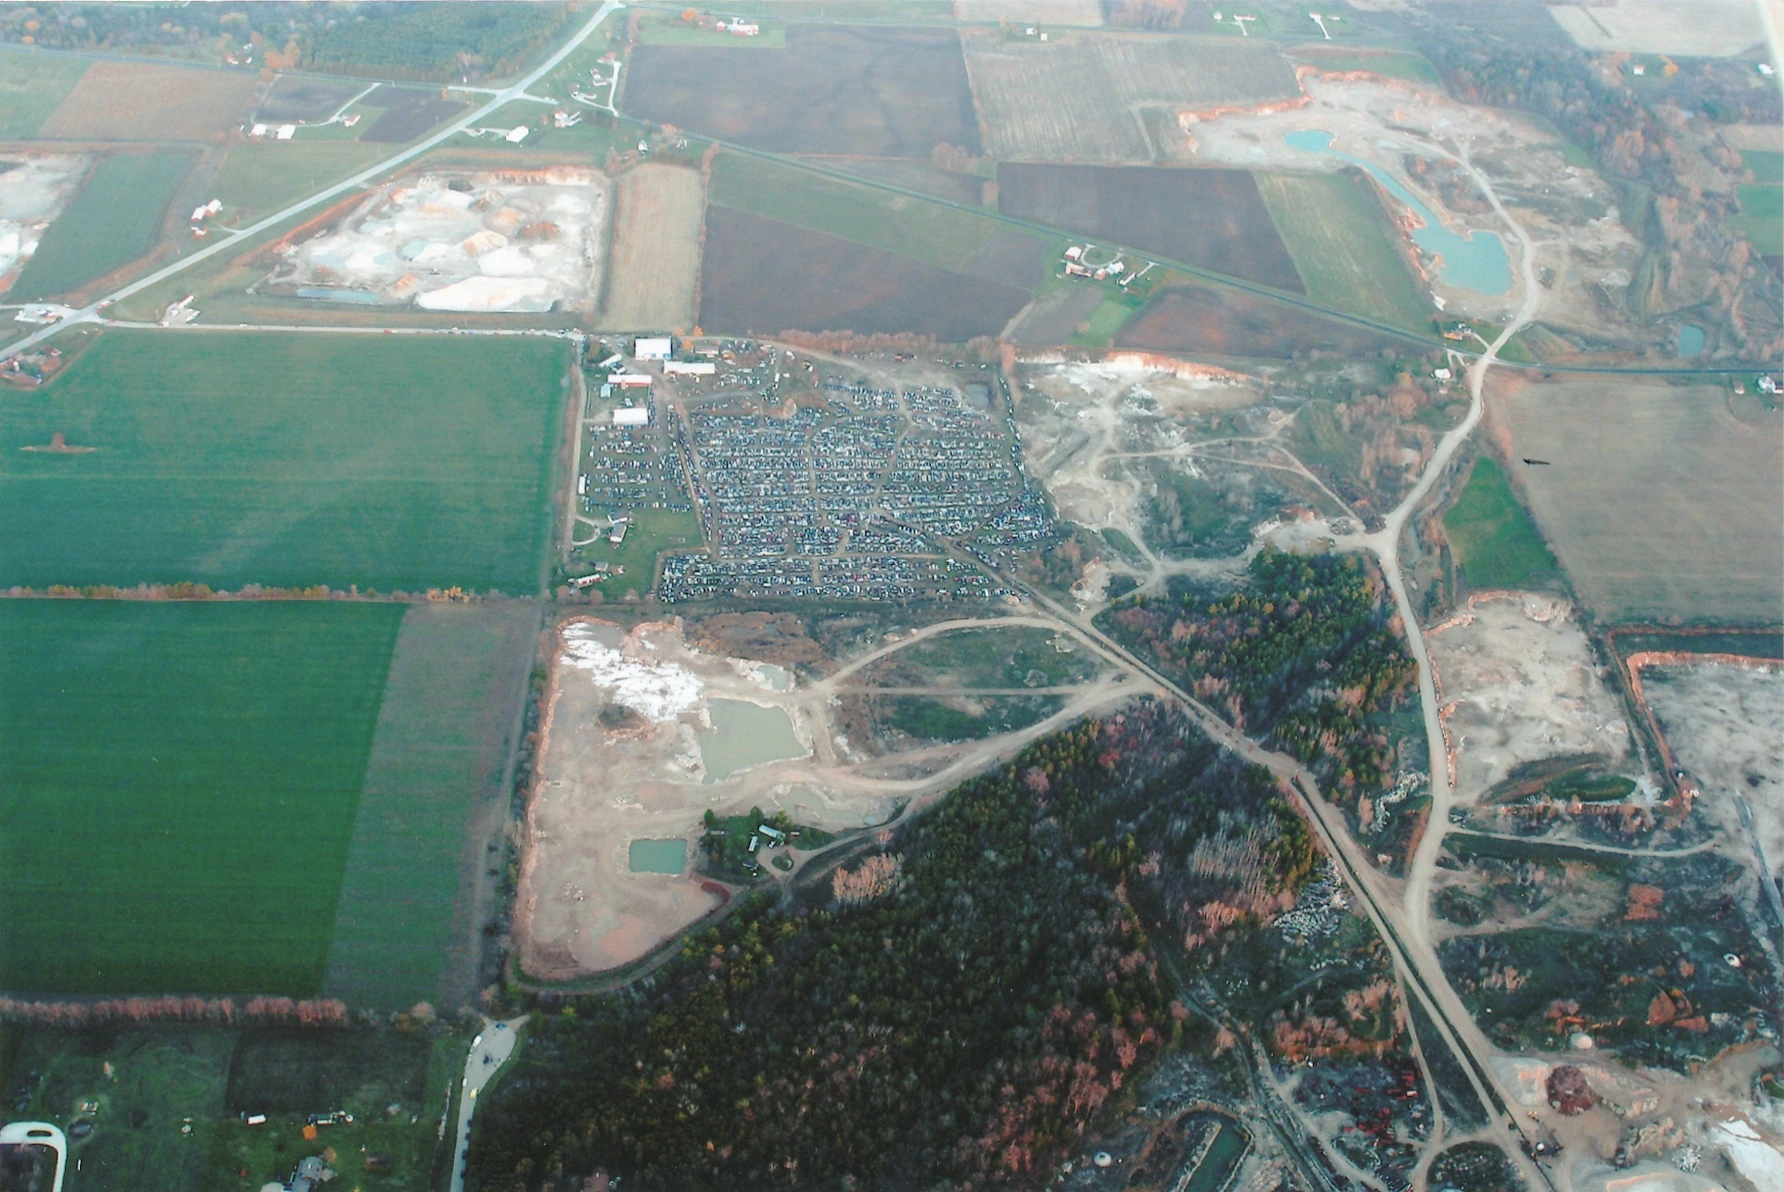
|
| 92 | Image used for animation | 3 | 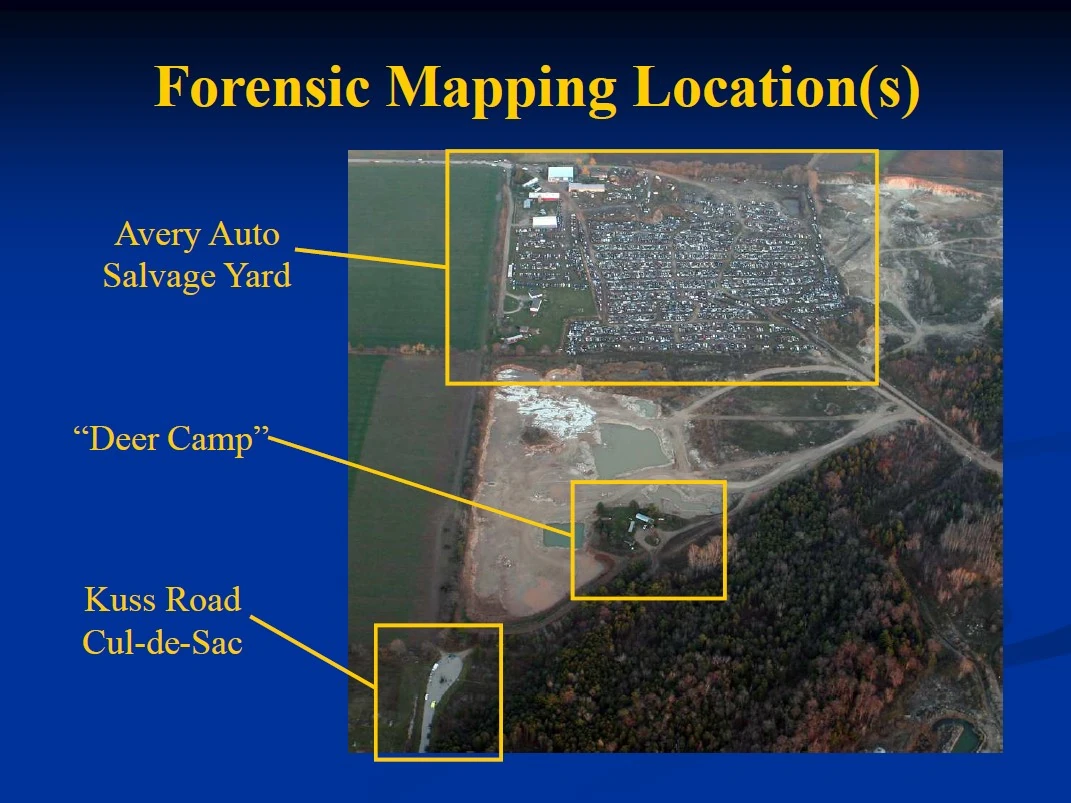
|
| 93 | Image used for animation | 3 | 
|
| 94 | Image used for animation | 3 | 
|
| 95 | Image used for animation | 3 | 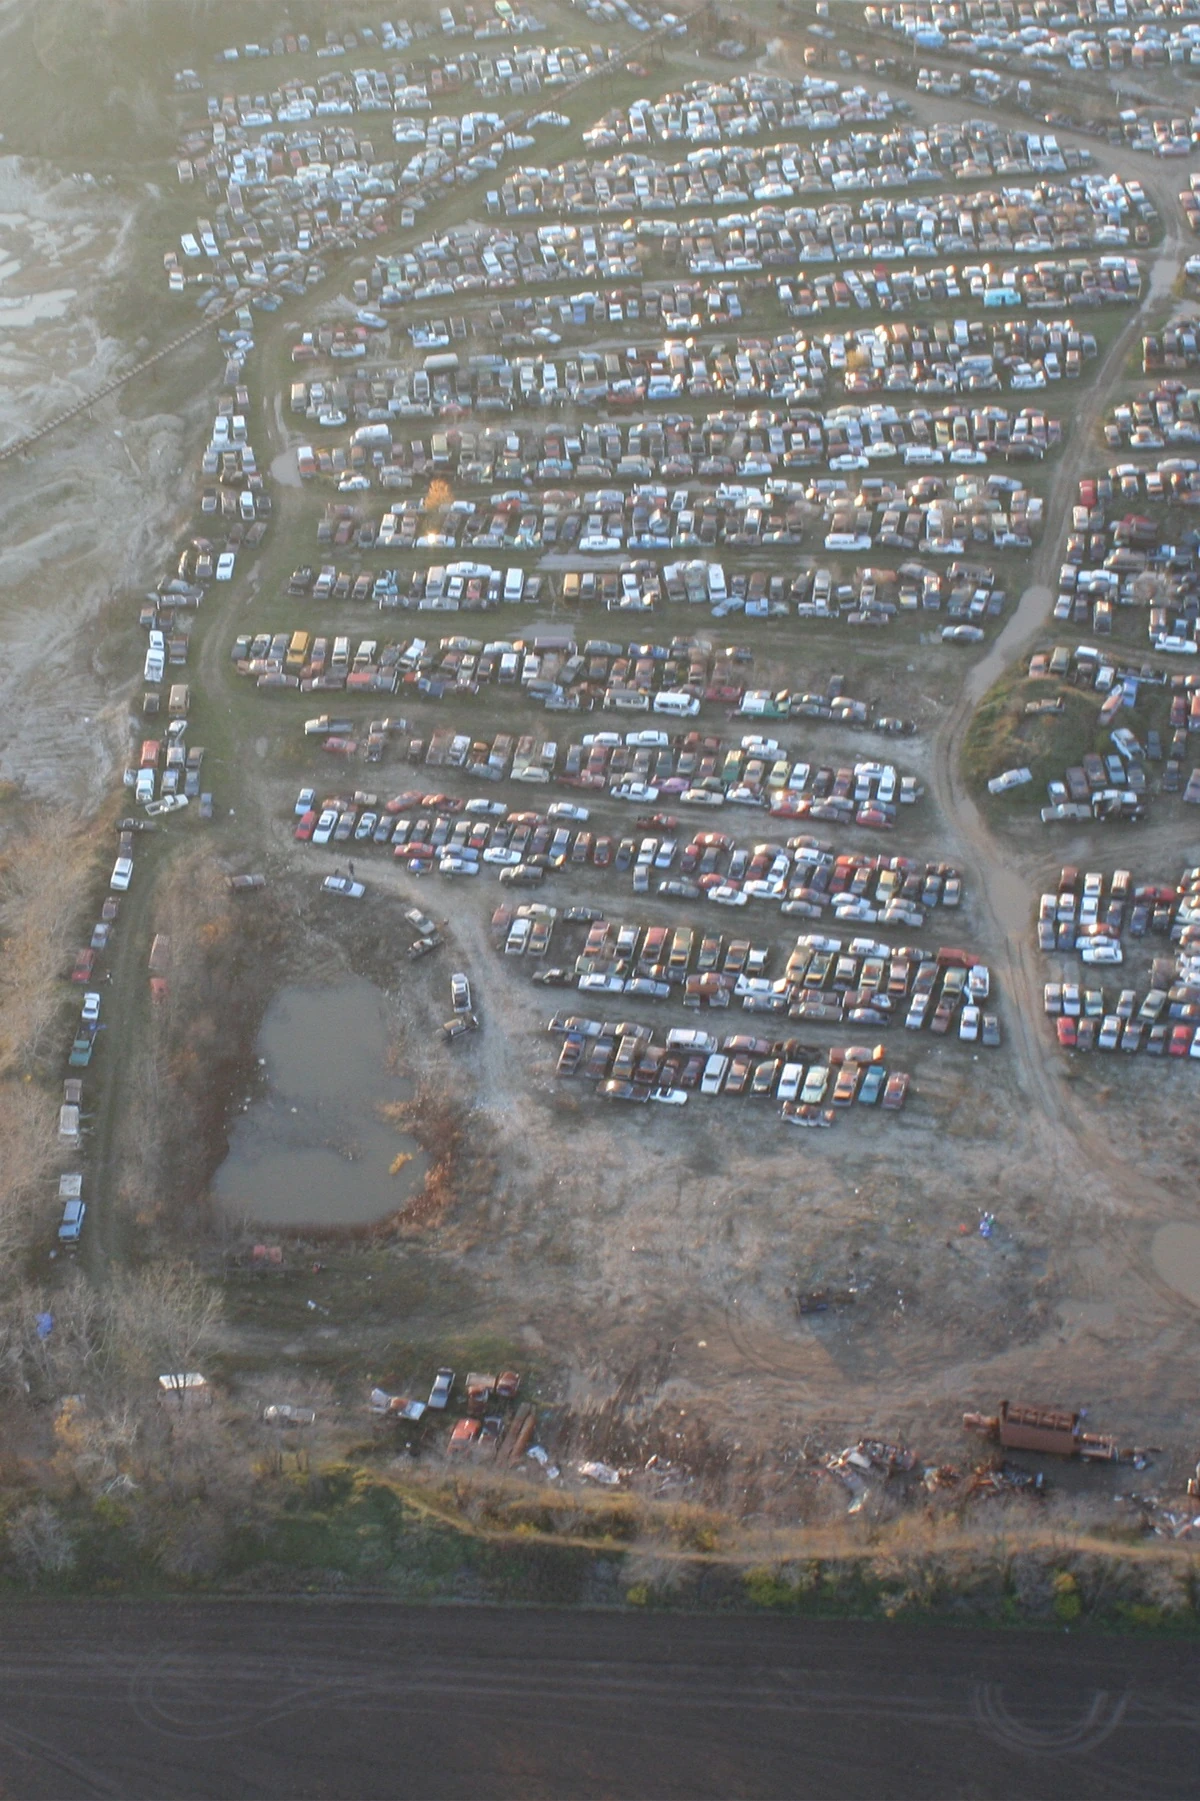
|
| 96 | Image used for animation | 3 | 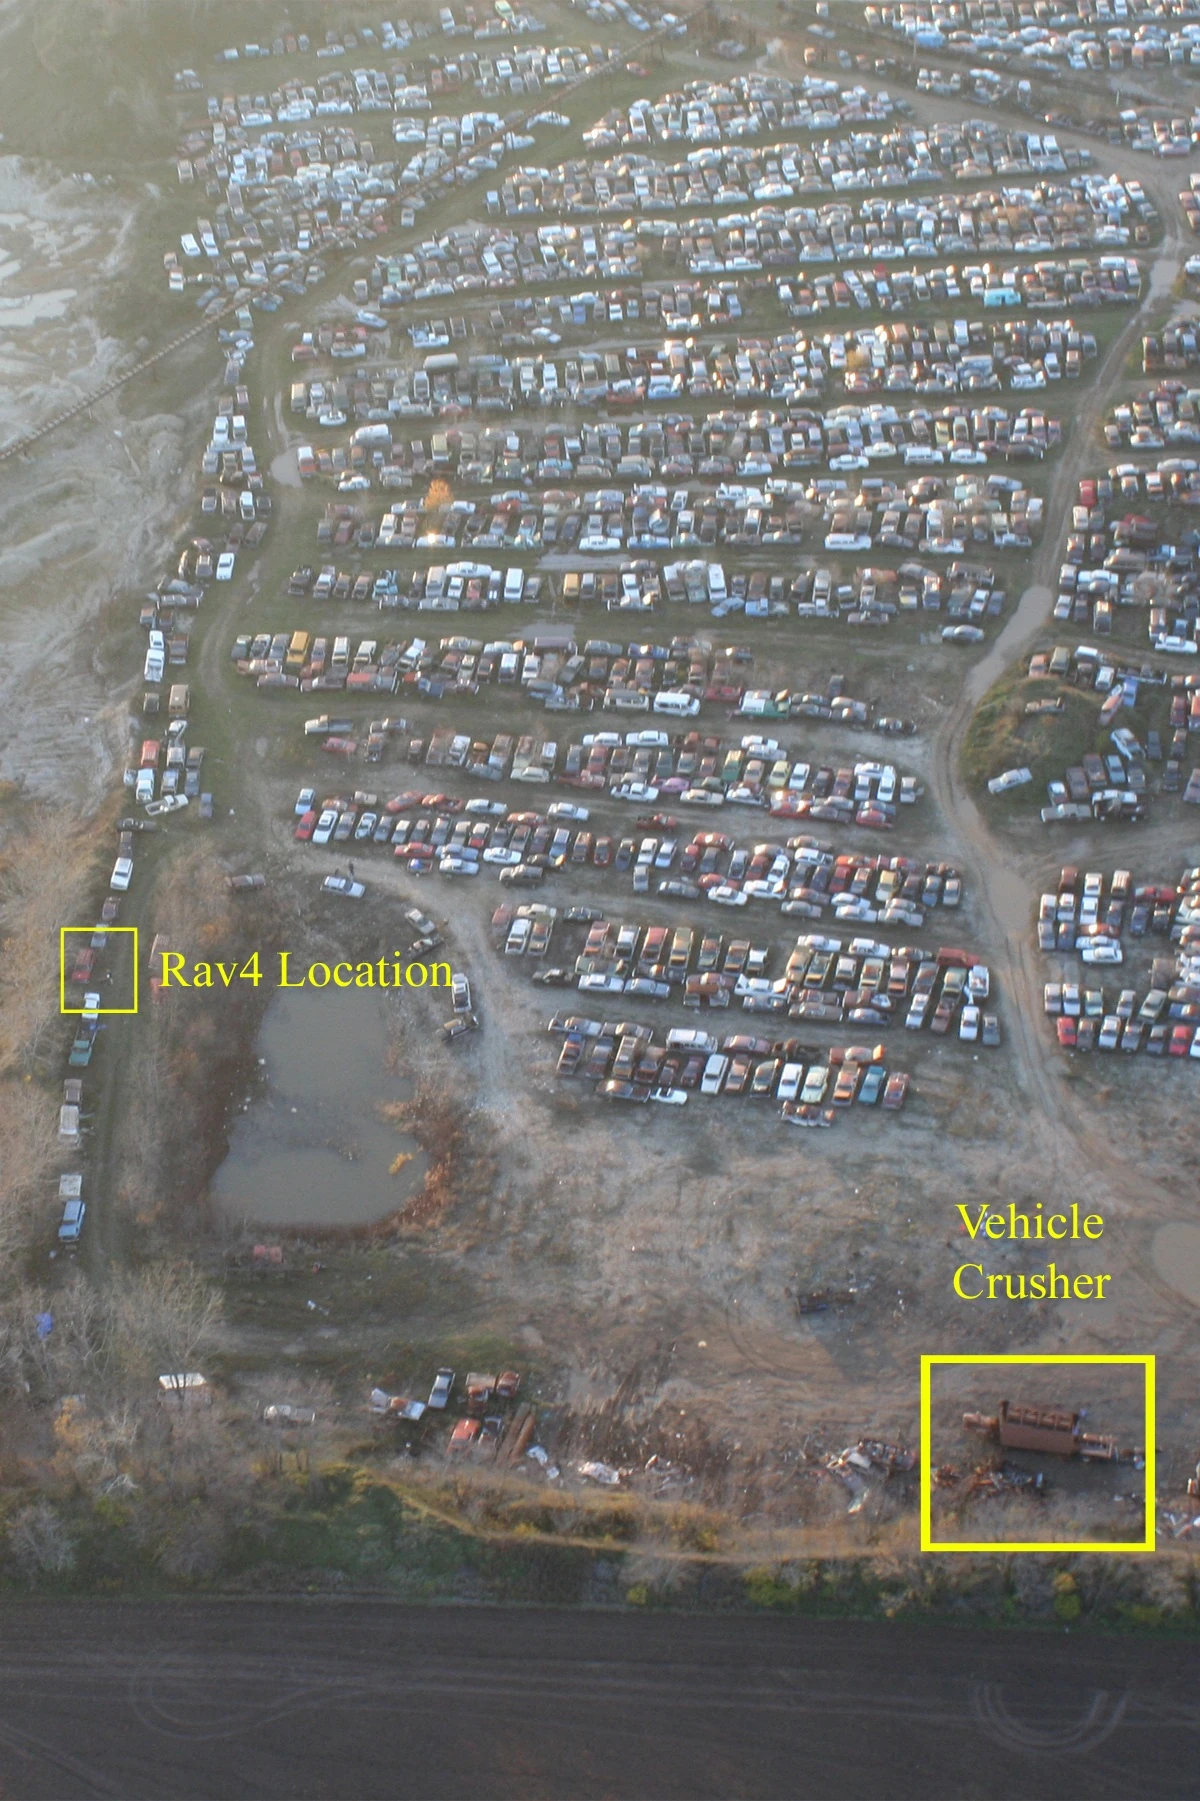
|
| 97 | Image used for animation | 3 | 
|
| 98 | Image used for animation | 3 | 
|
| 99 | Image used for animation | 3 | 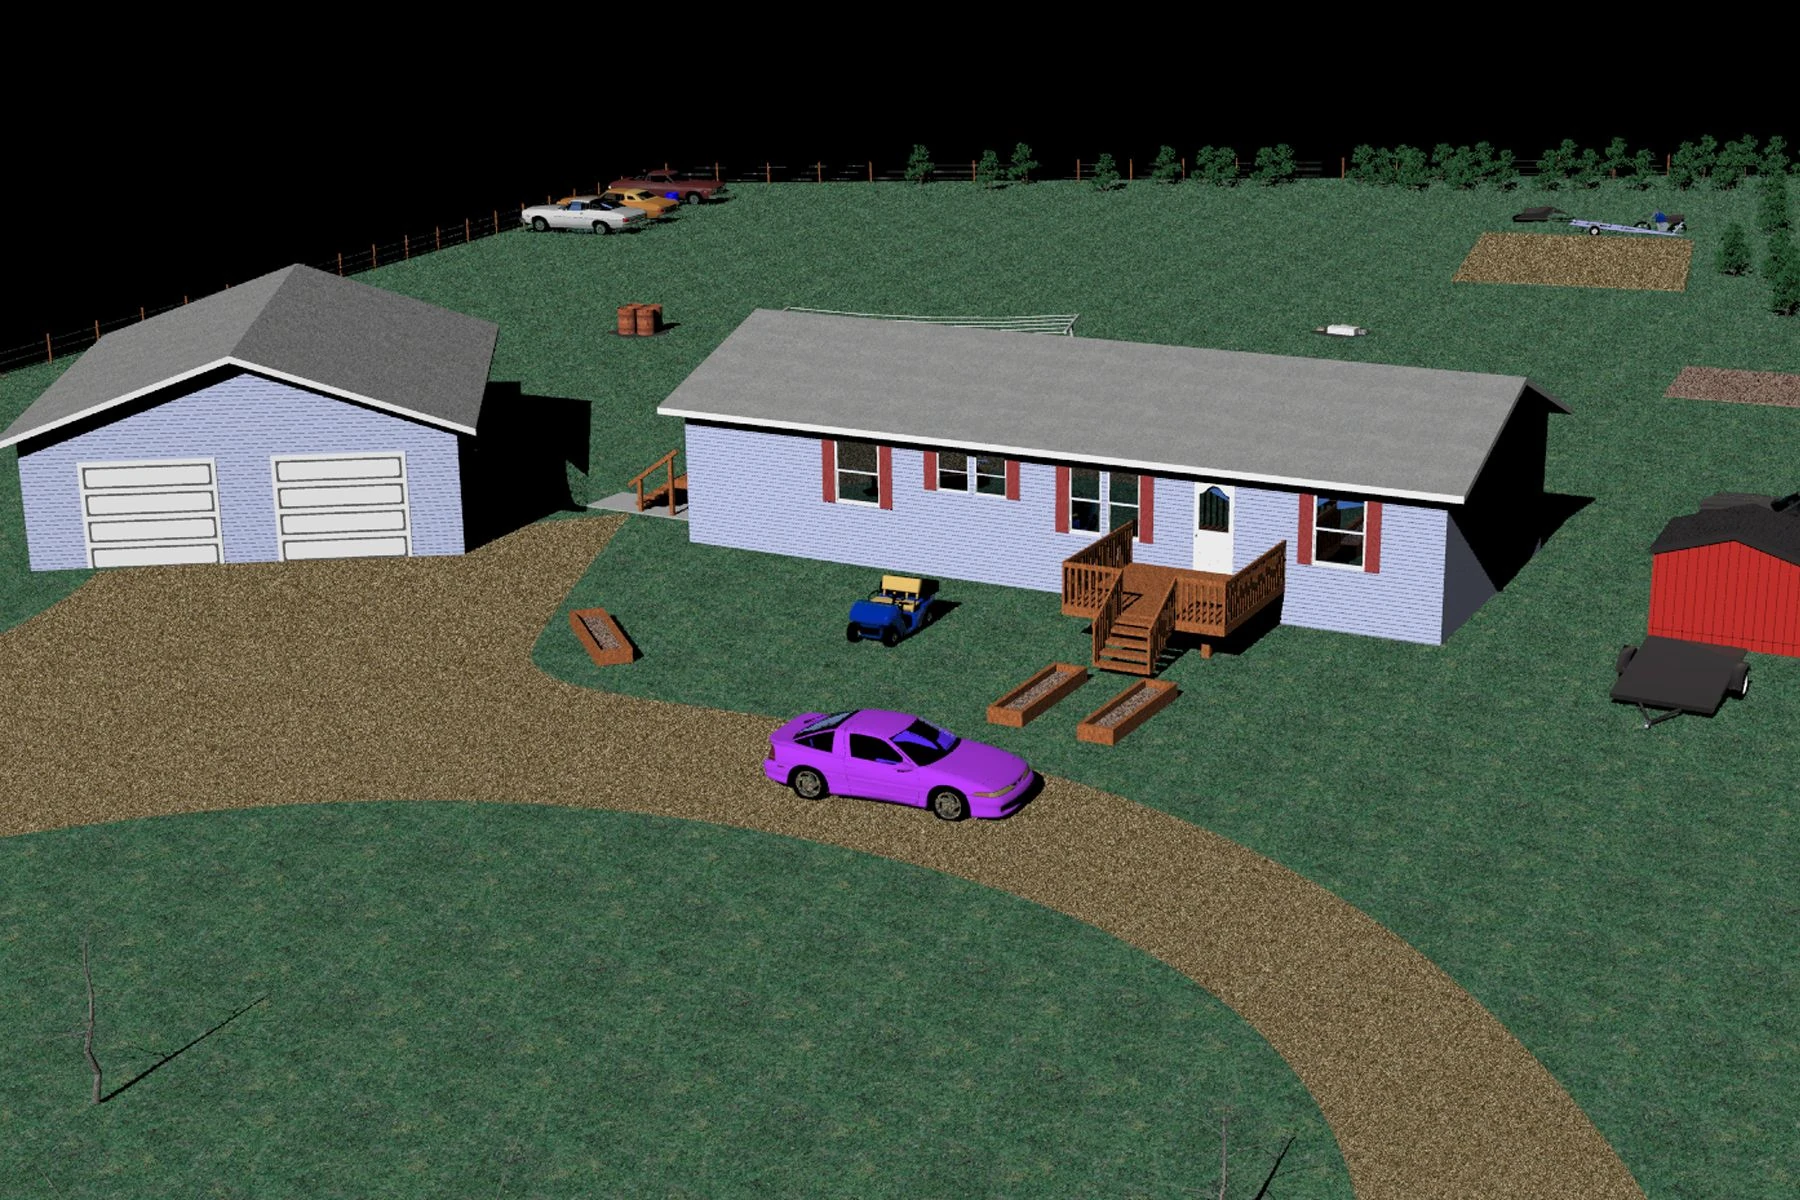
|
| 100 | Image used for animation | 3 | 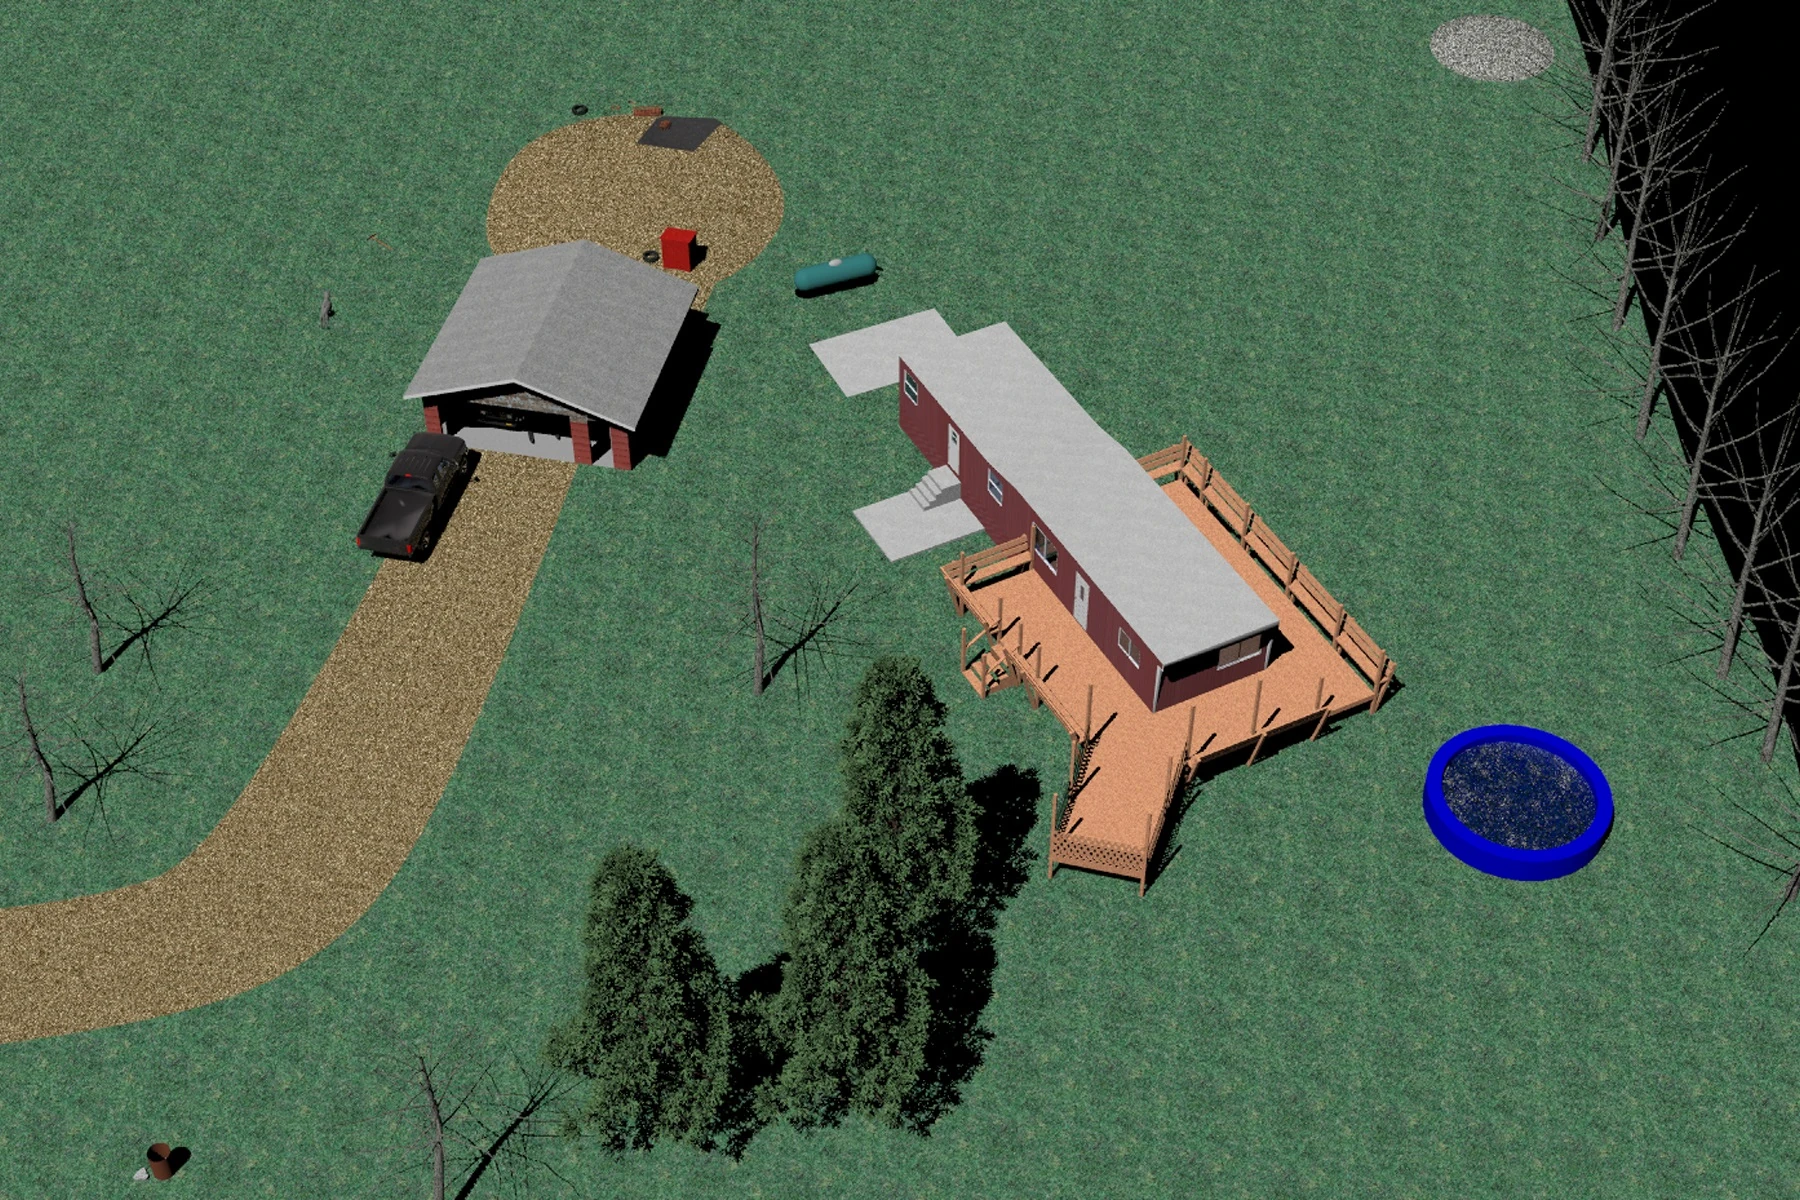
|
| 101 | Image used for animation | 3 | 
|
| 102 | Image used for animation | 3 | 
|
| 103 | Image used for animation | 3 | 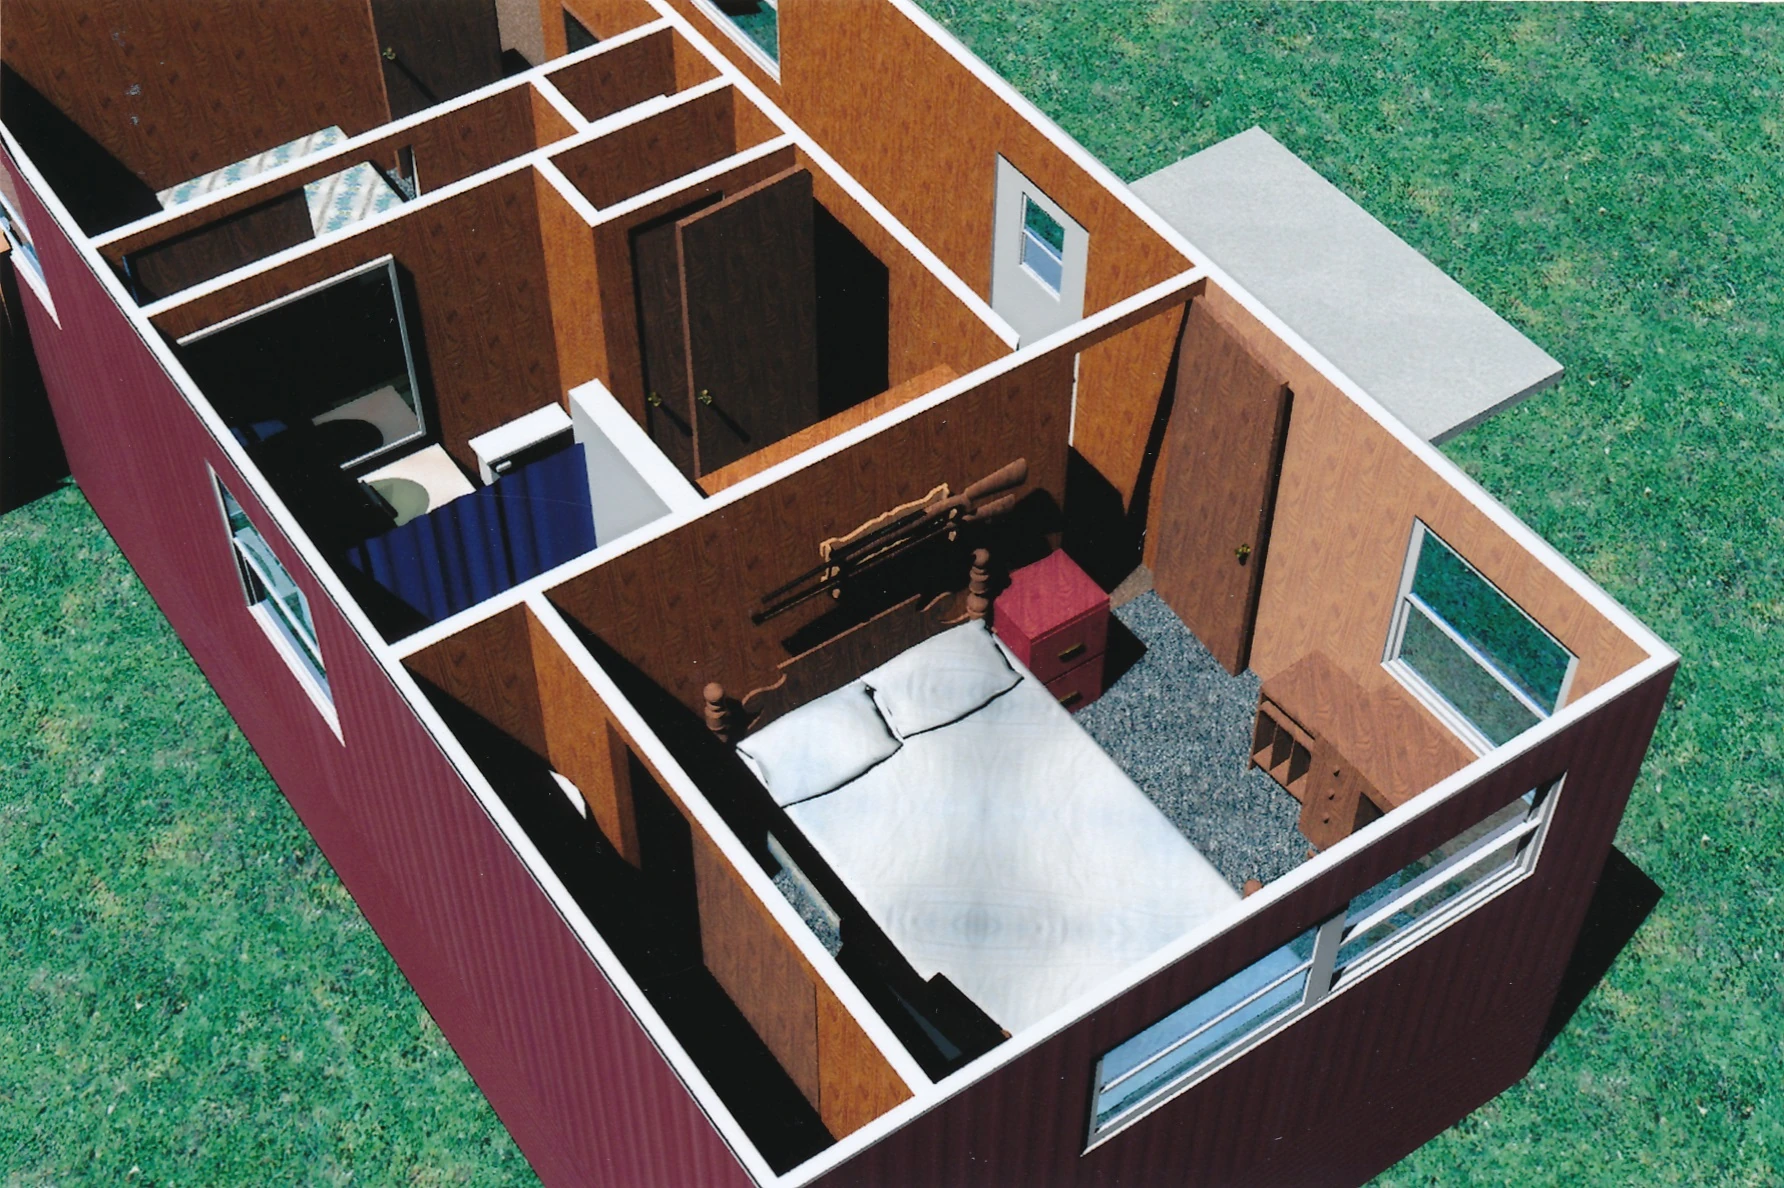
|
| 104 | Image used for animation | 3 | 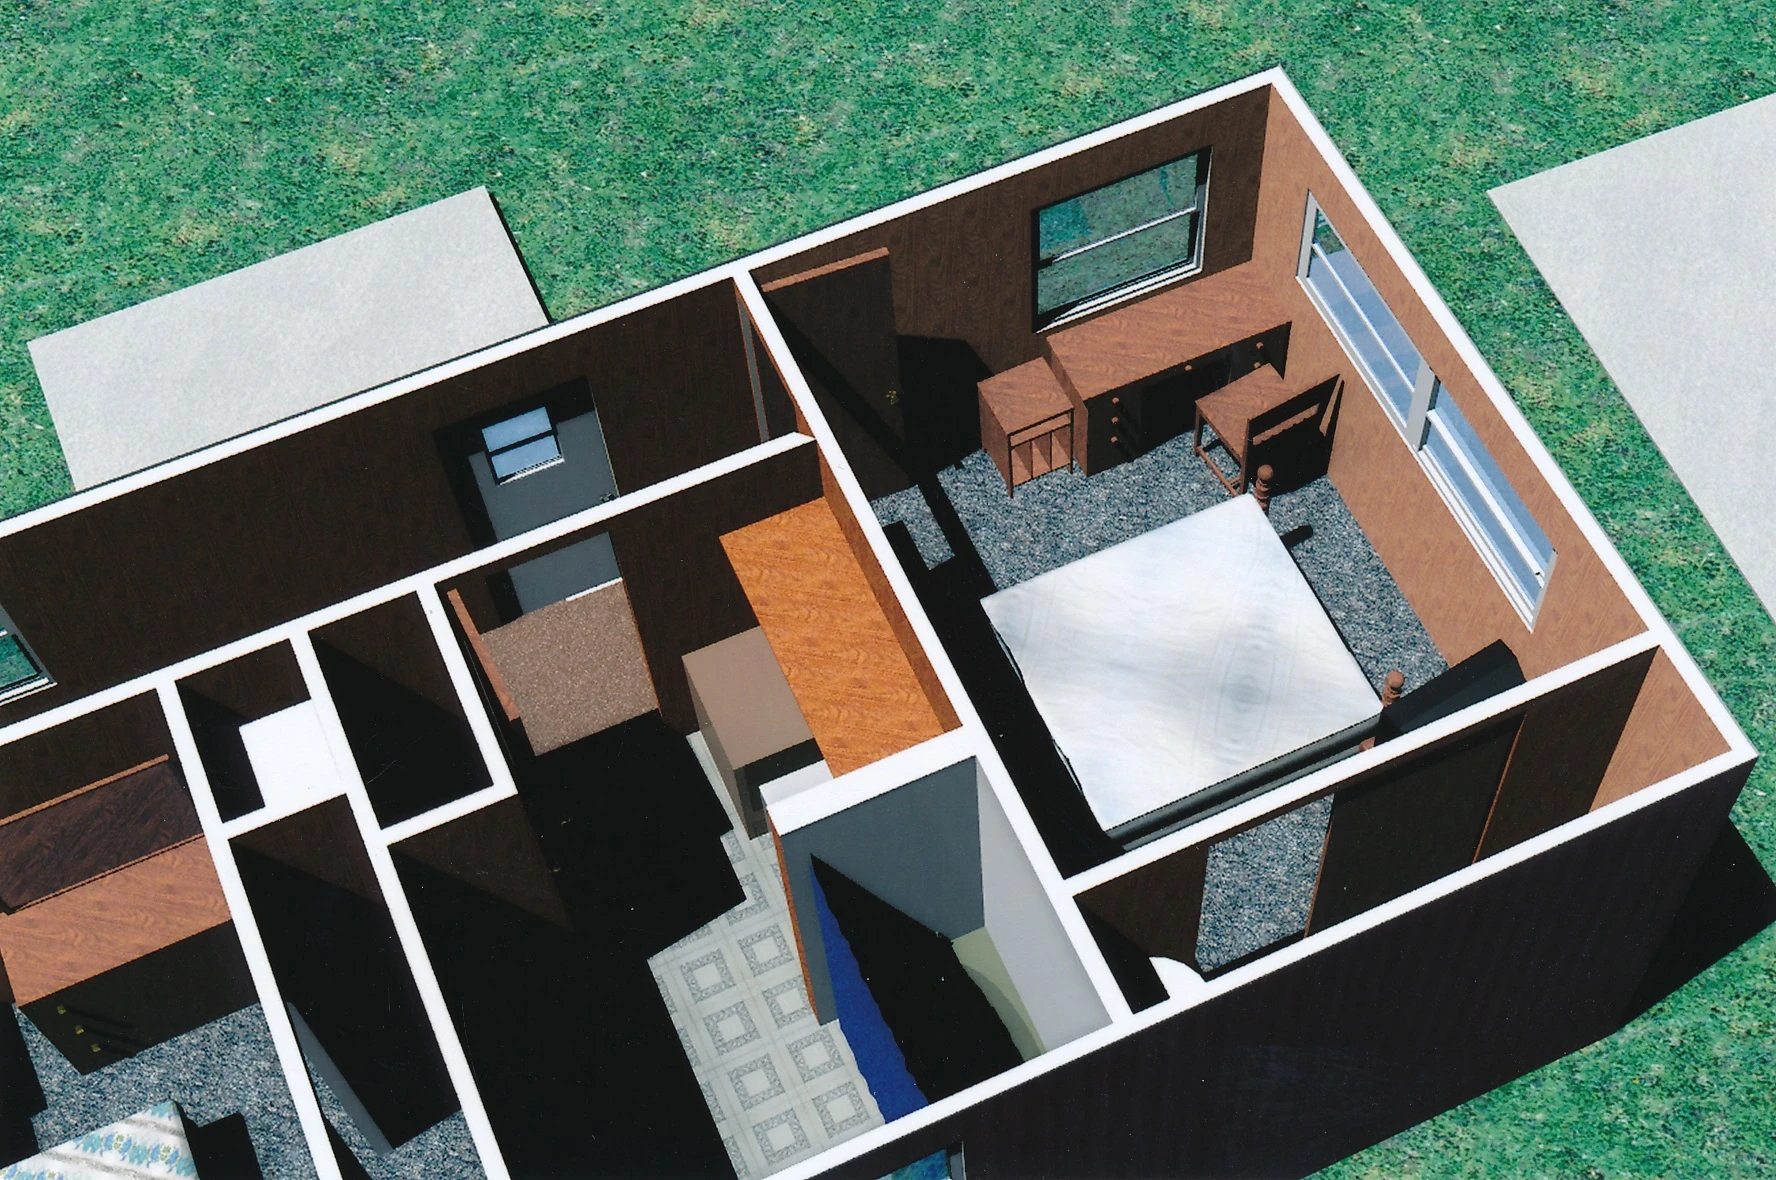
|
| 105 | Image used for animation | 3 | 
|
| 106 | Image used for animation | 3 | 
|
| 107 | Image used for animation | 3 | 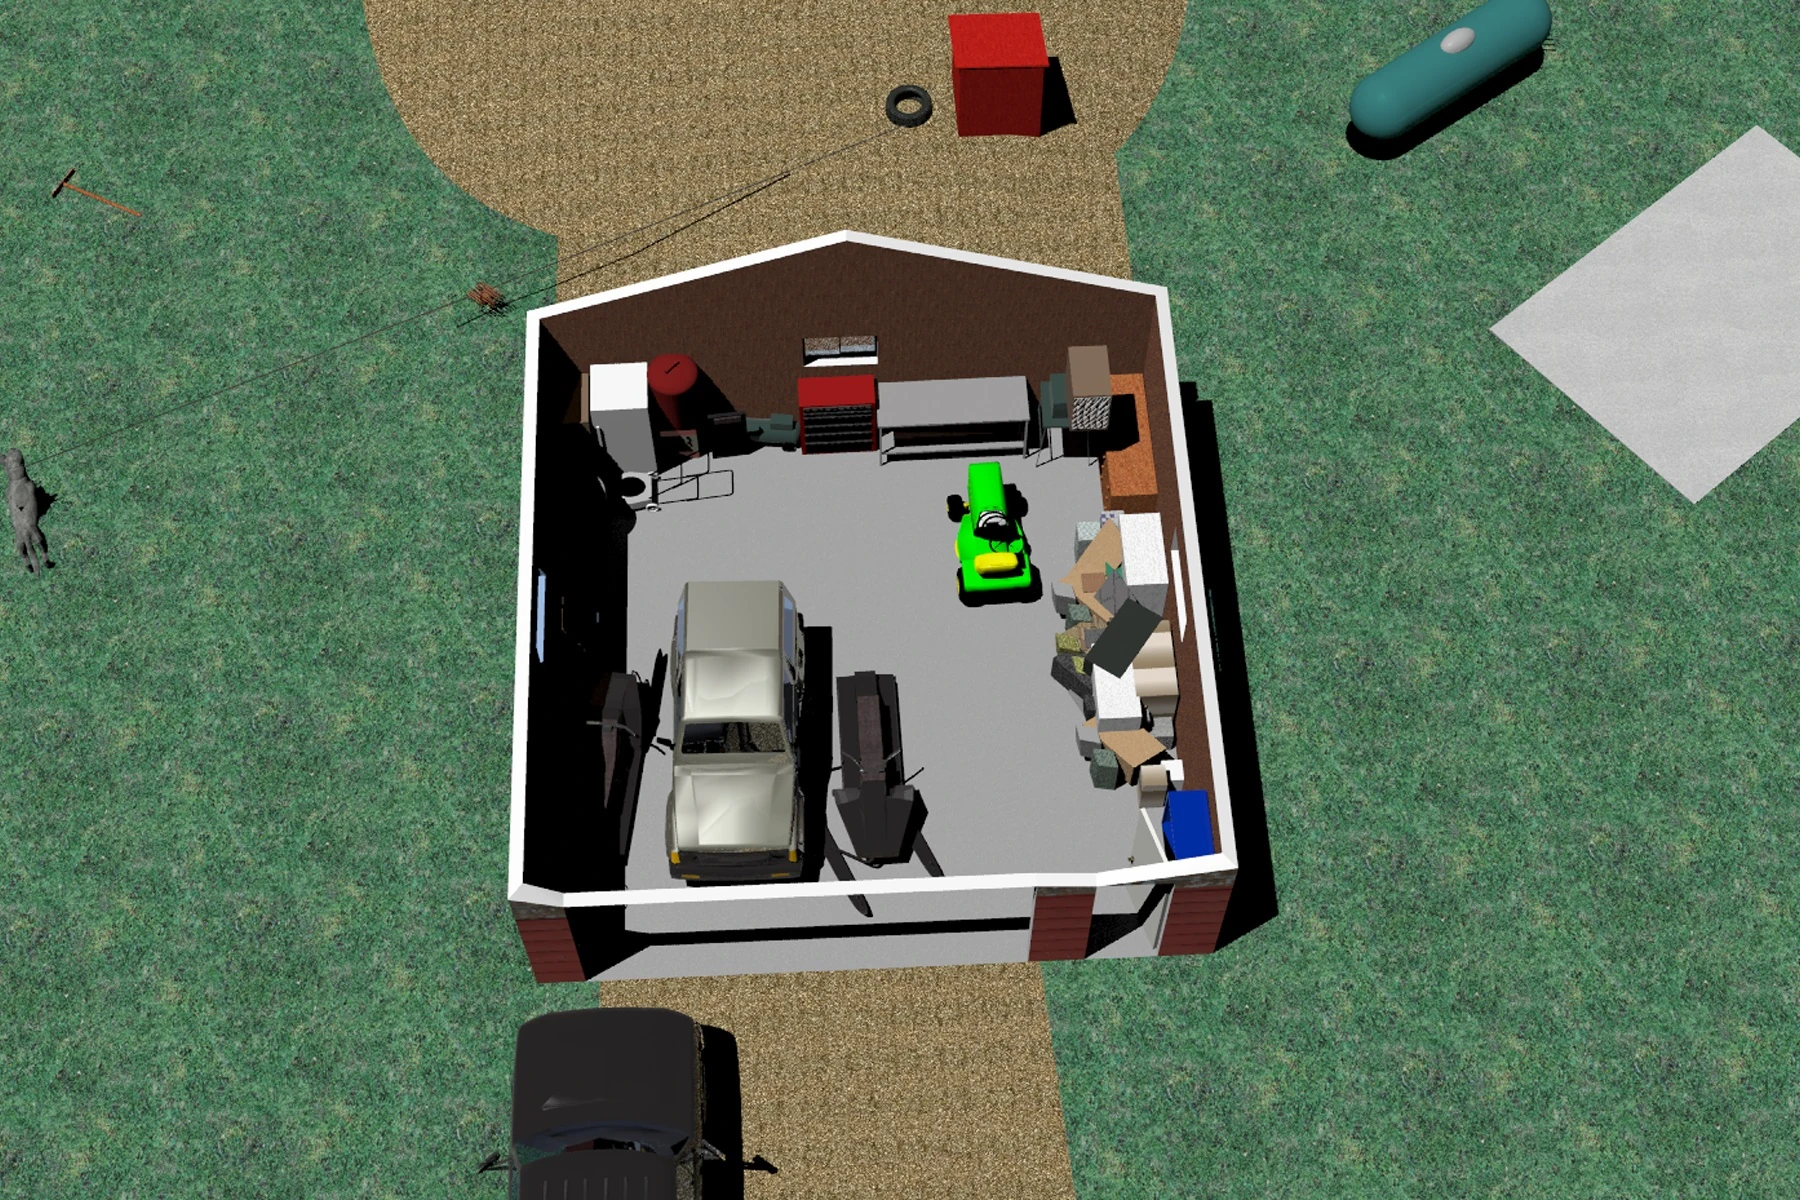
|
| 108 | Image used for animation | 3 | 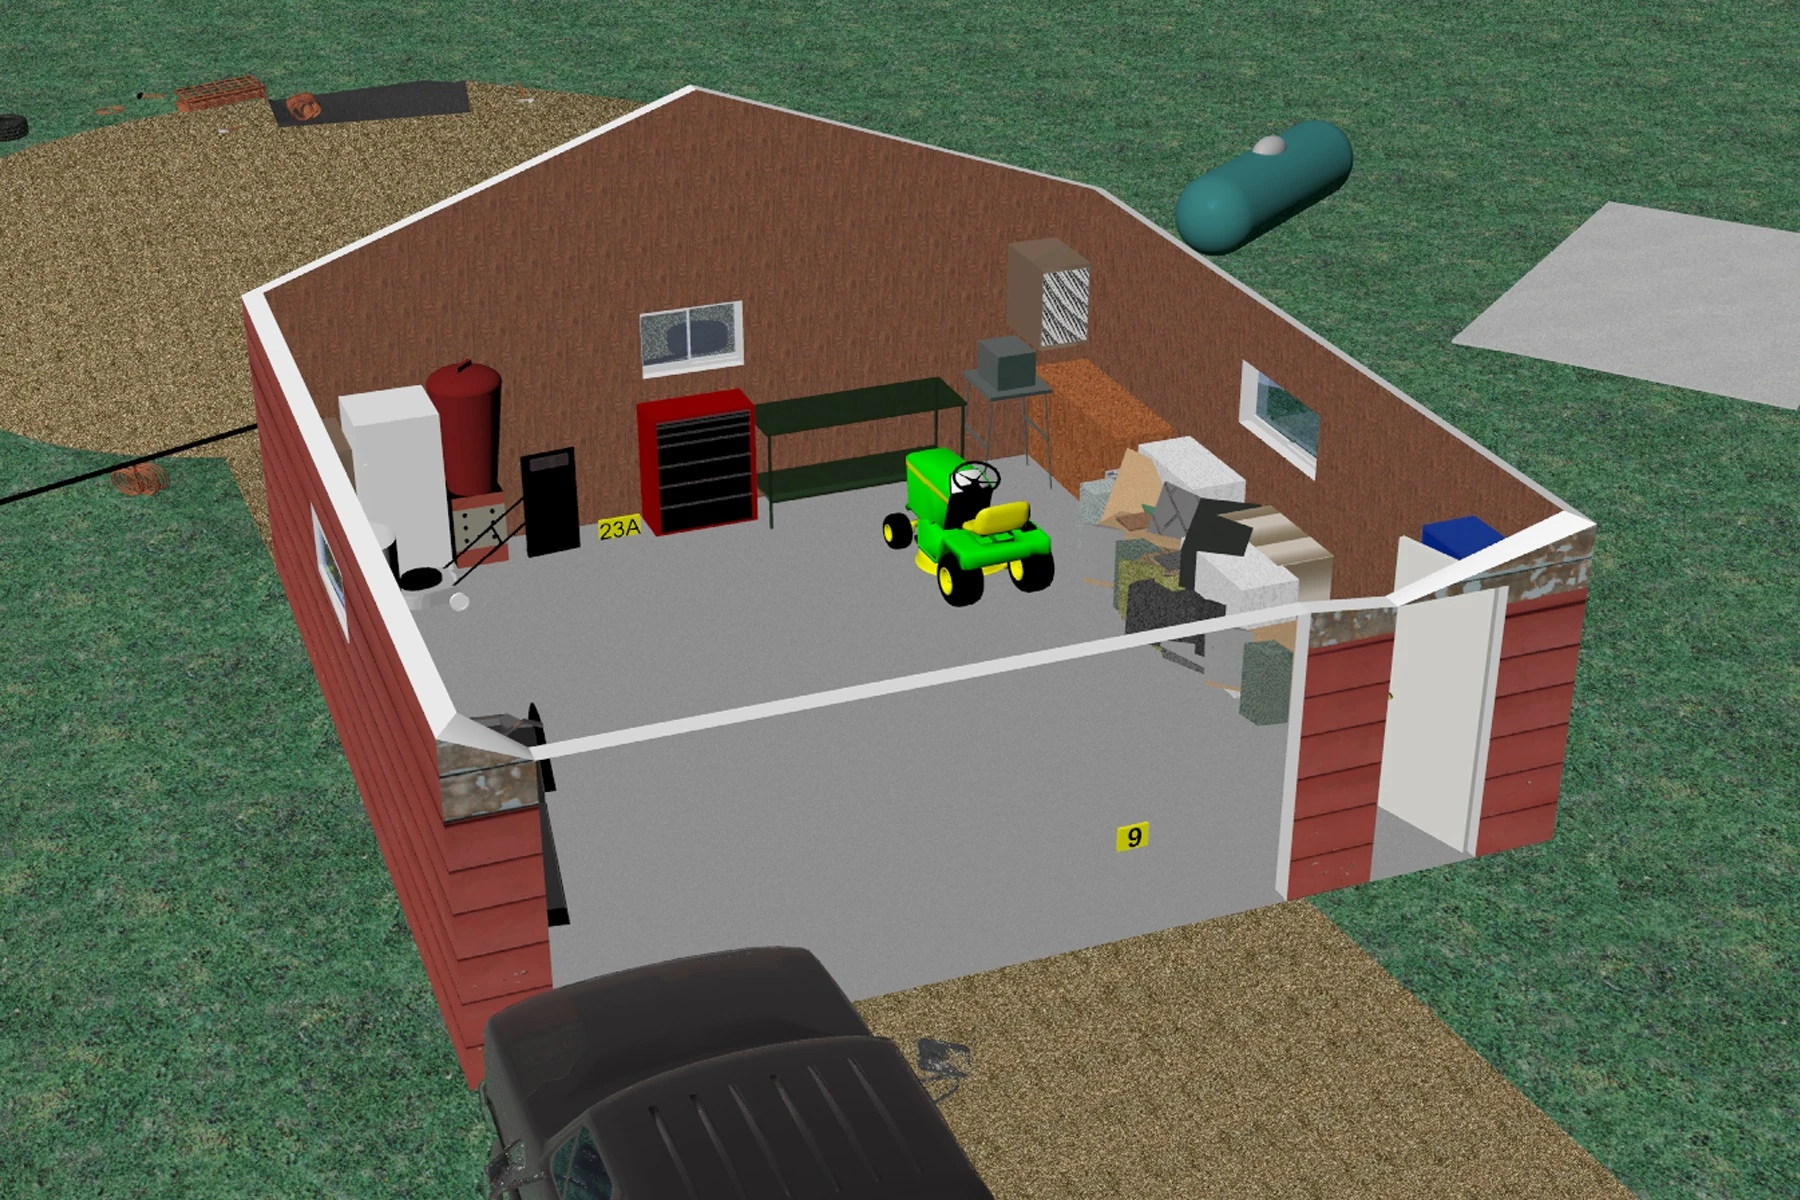
|
| 109 | Image used for animation | 3 | 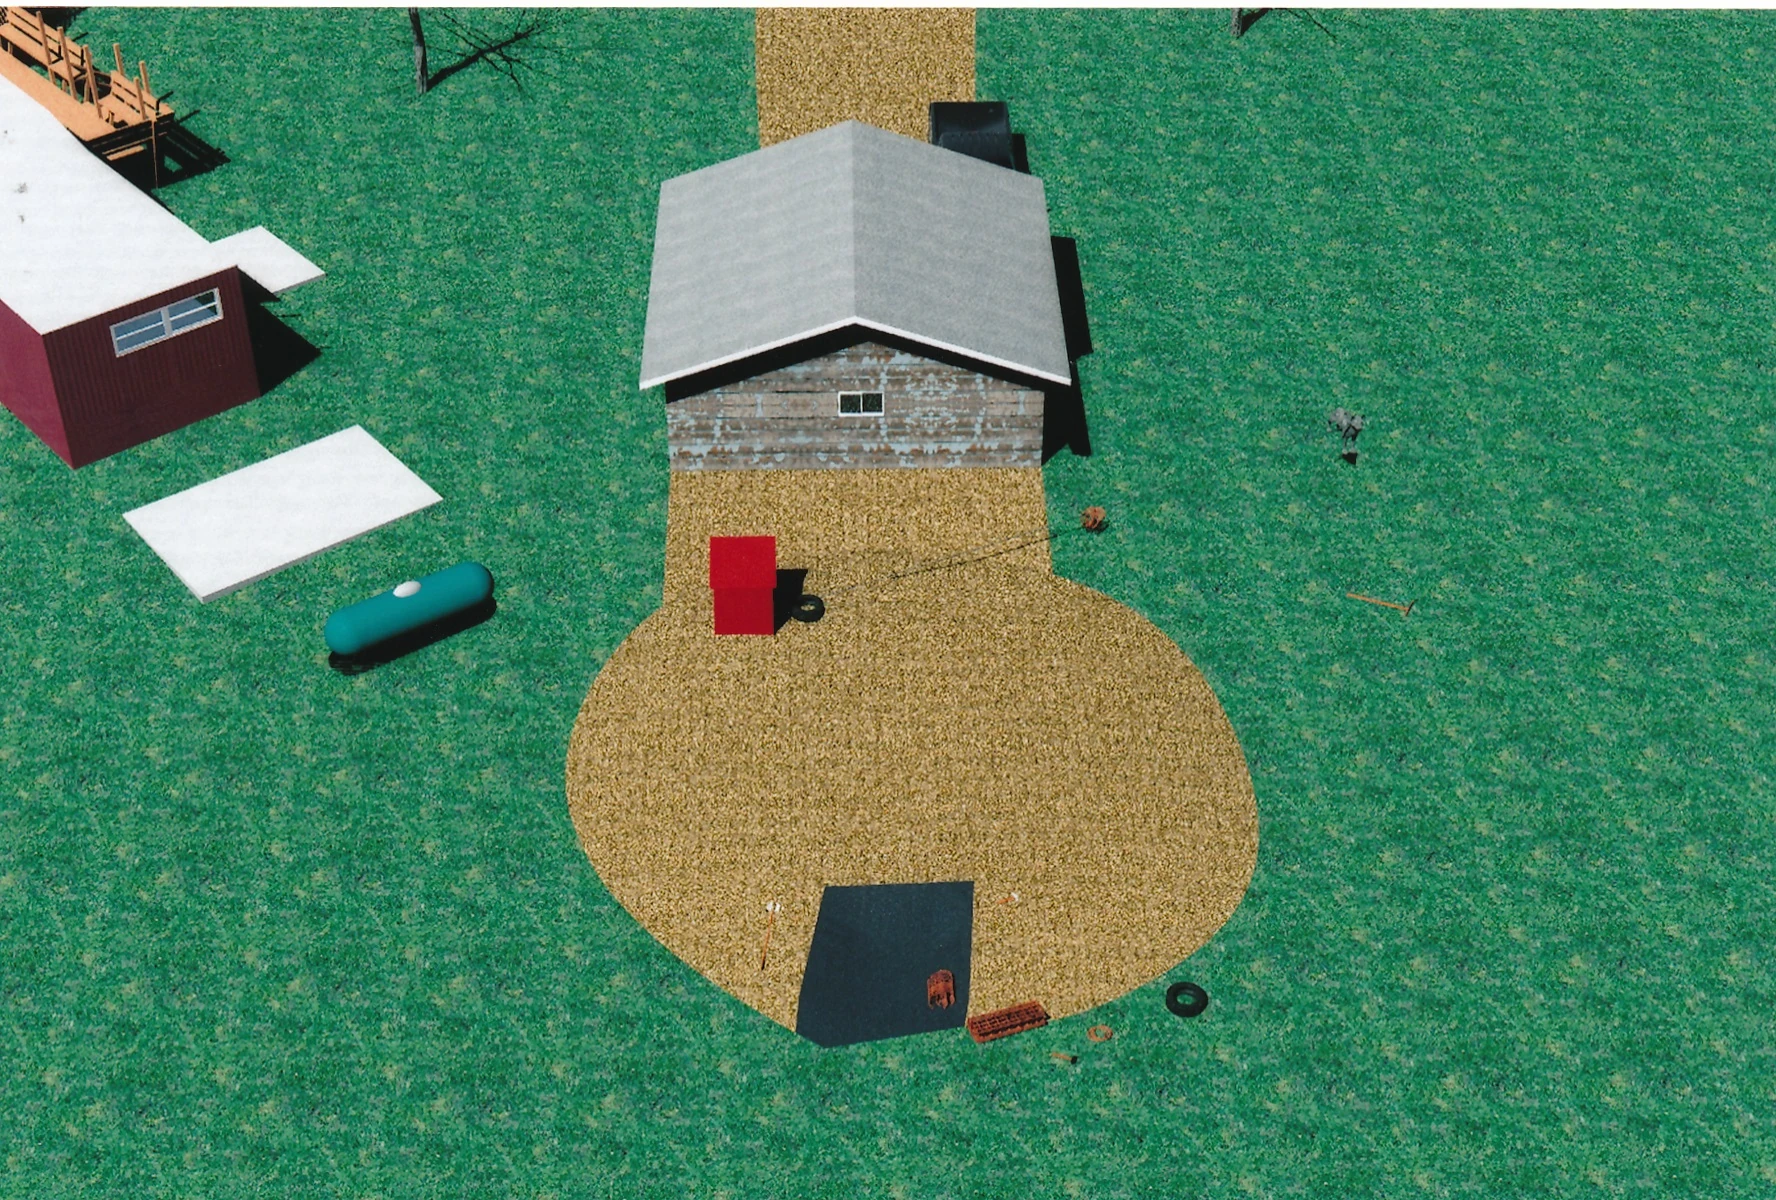
|
| 110 | Image used for animation | 3 | 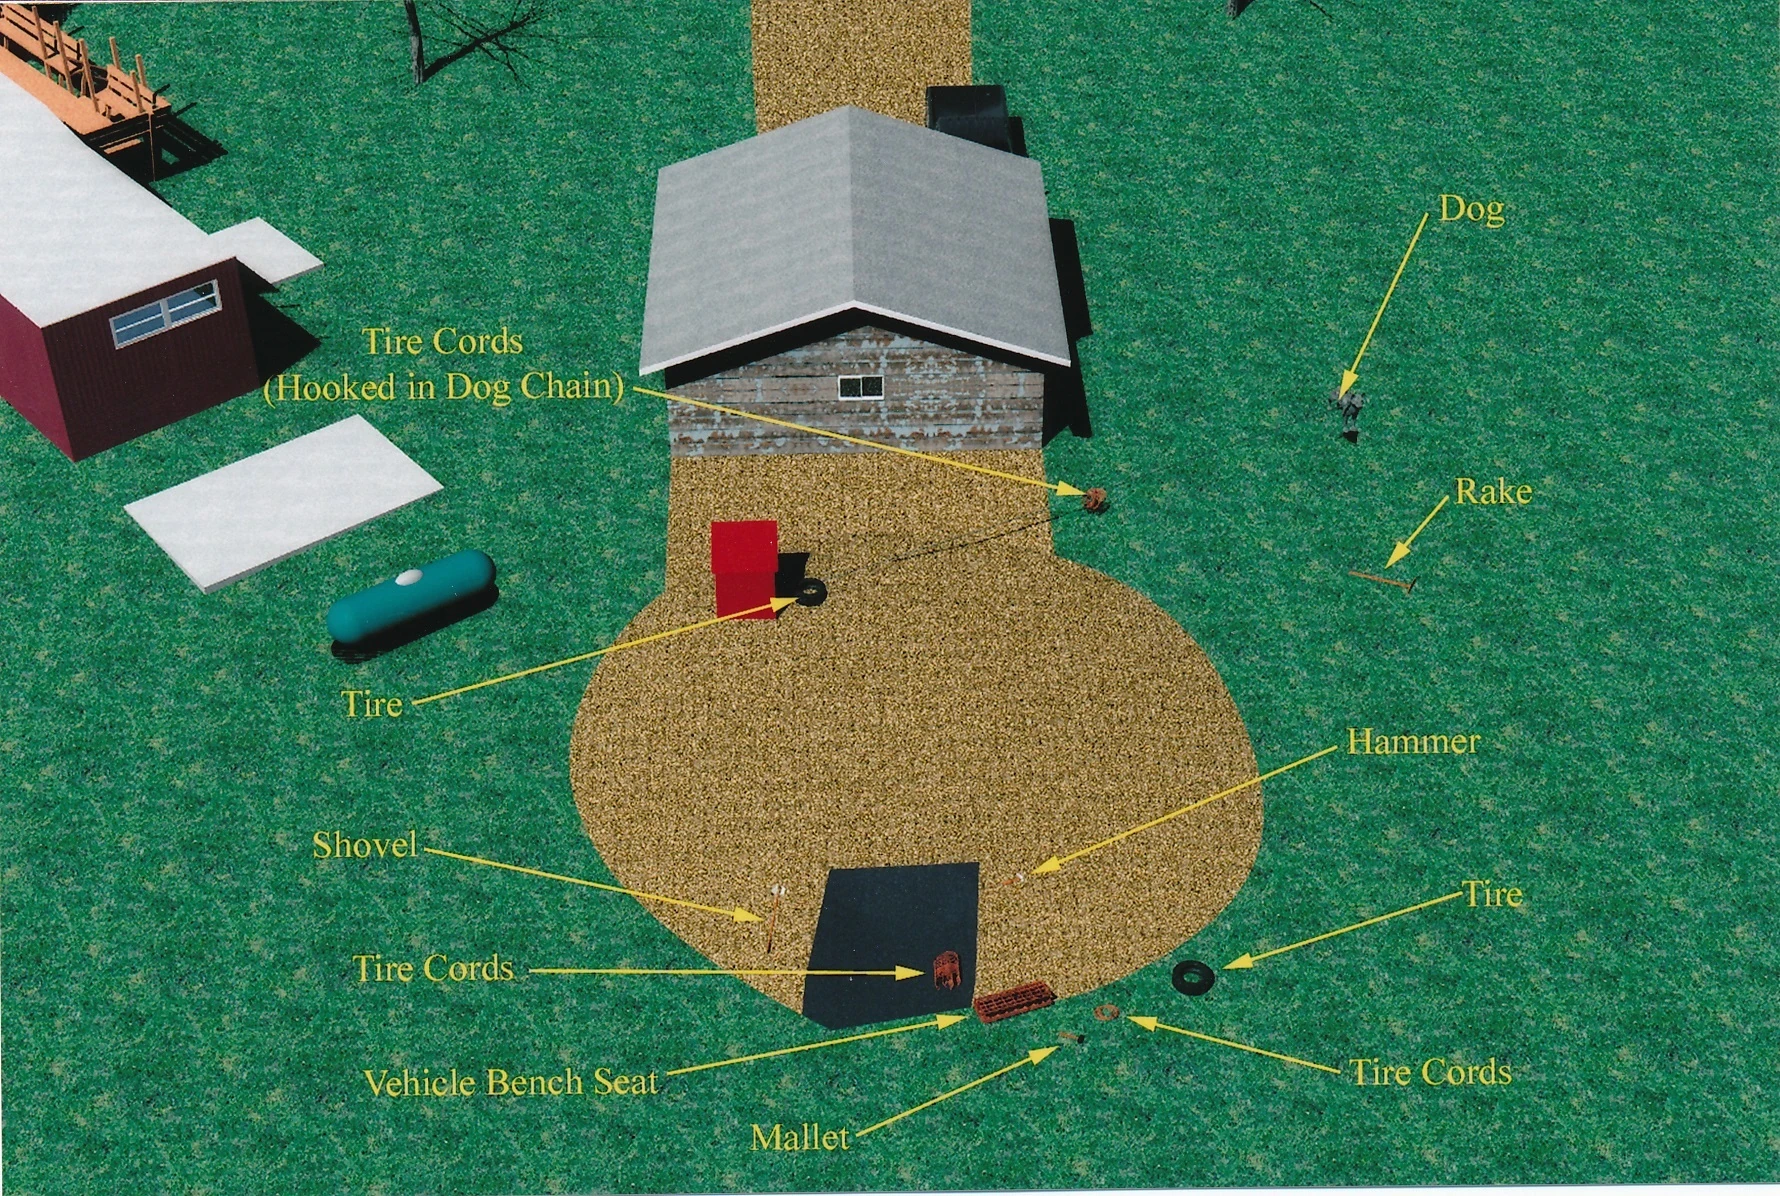
|
| 111 | Image used for animation | 3 | 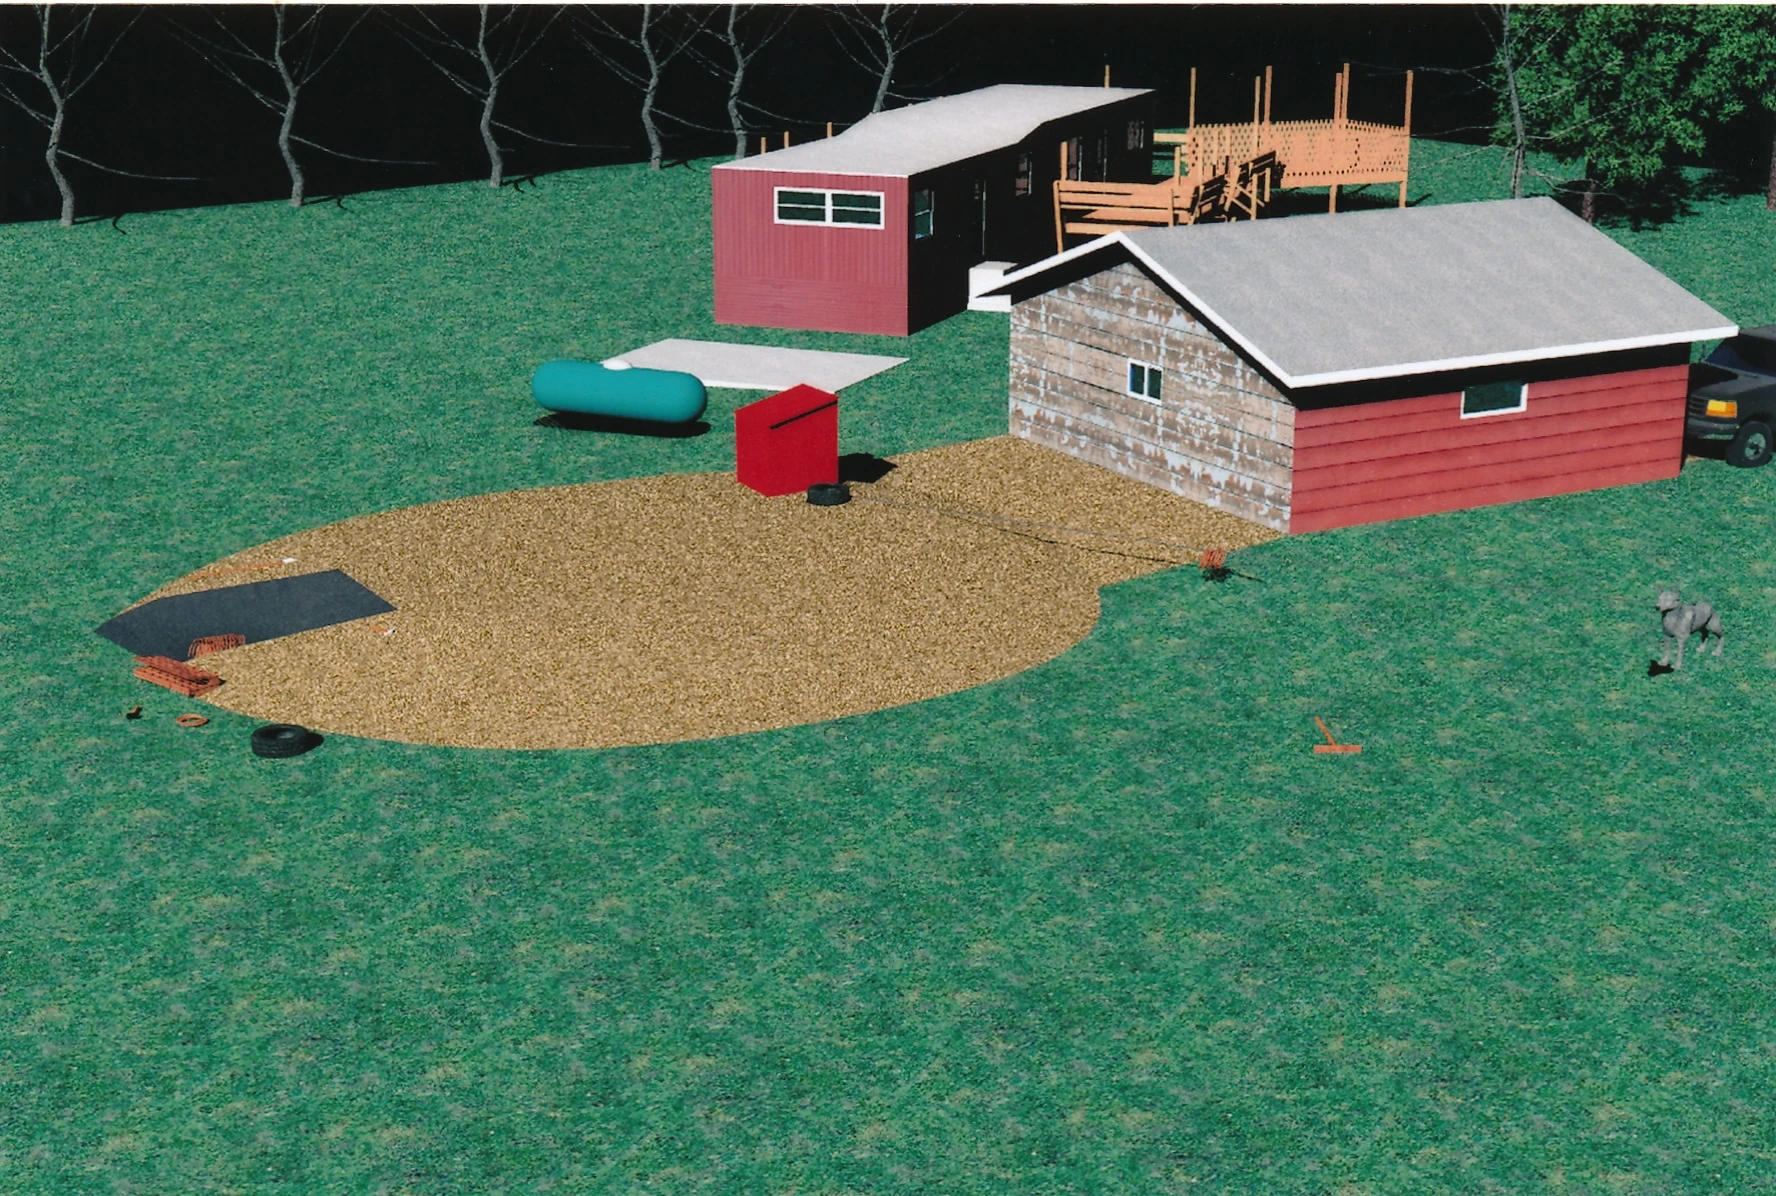
|
| 112 | Image used for animation | 3 | 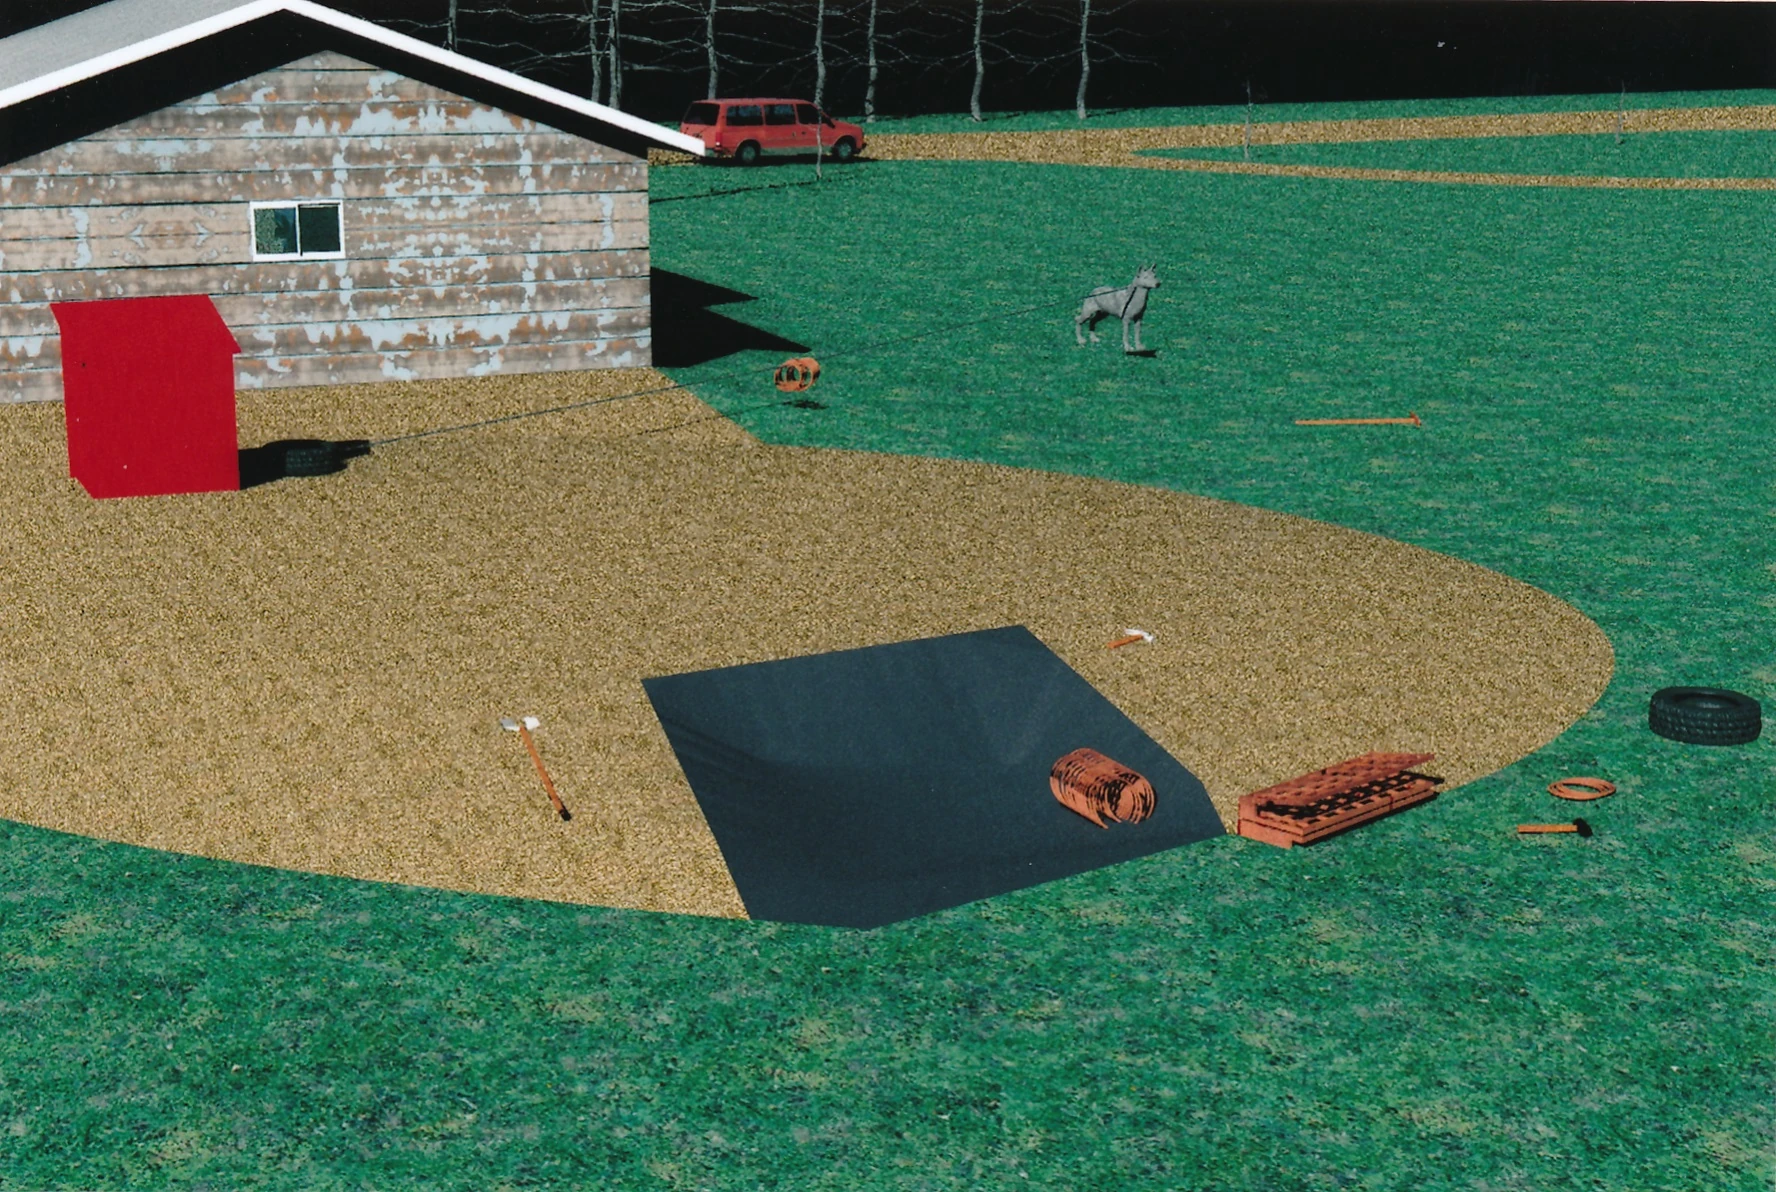
|
| 113 | Image used for animation | 3 | 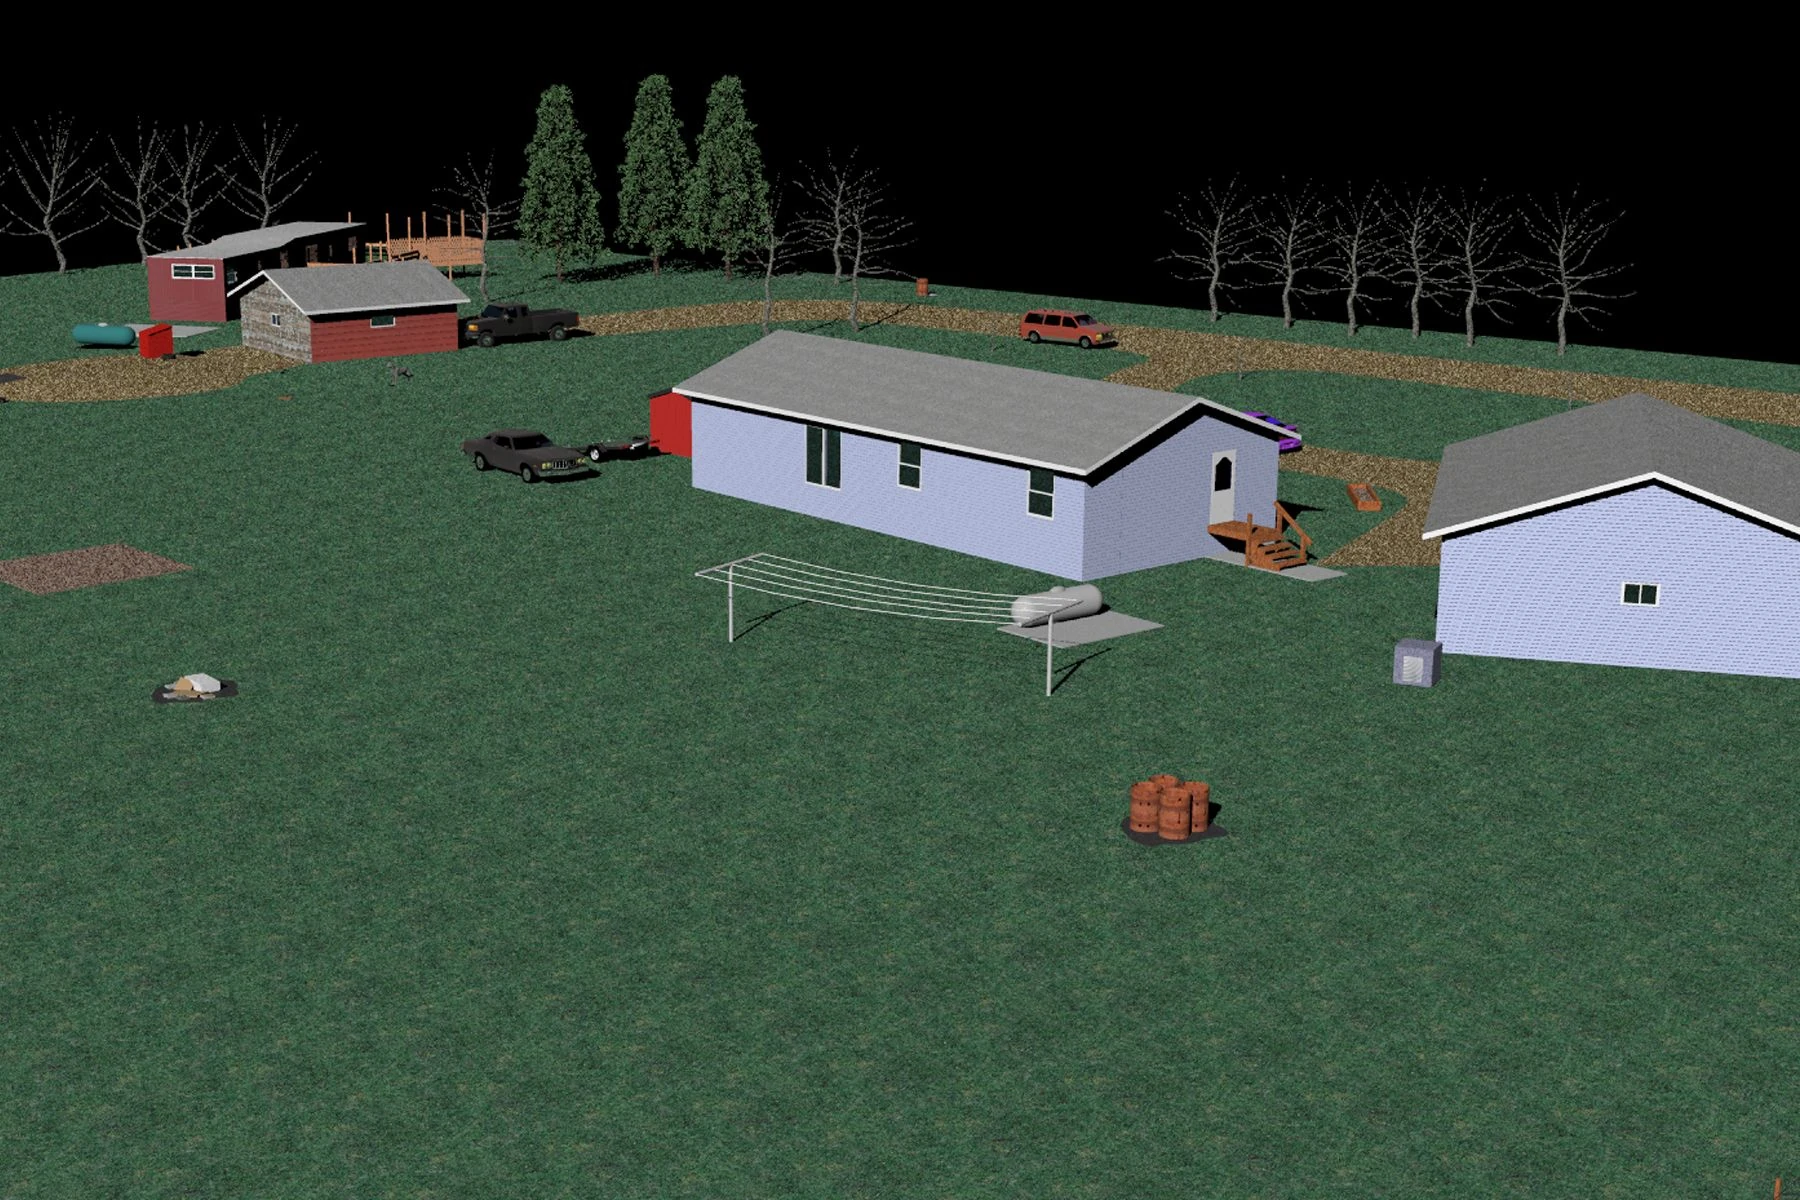
|
| 114 | Image used for animation | 3 | 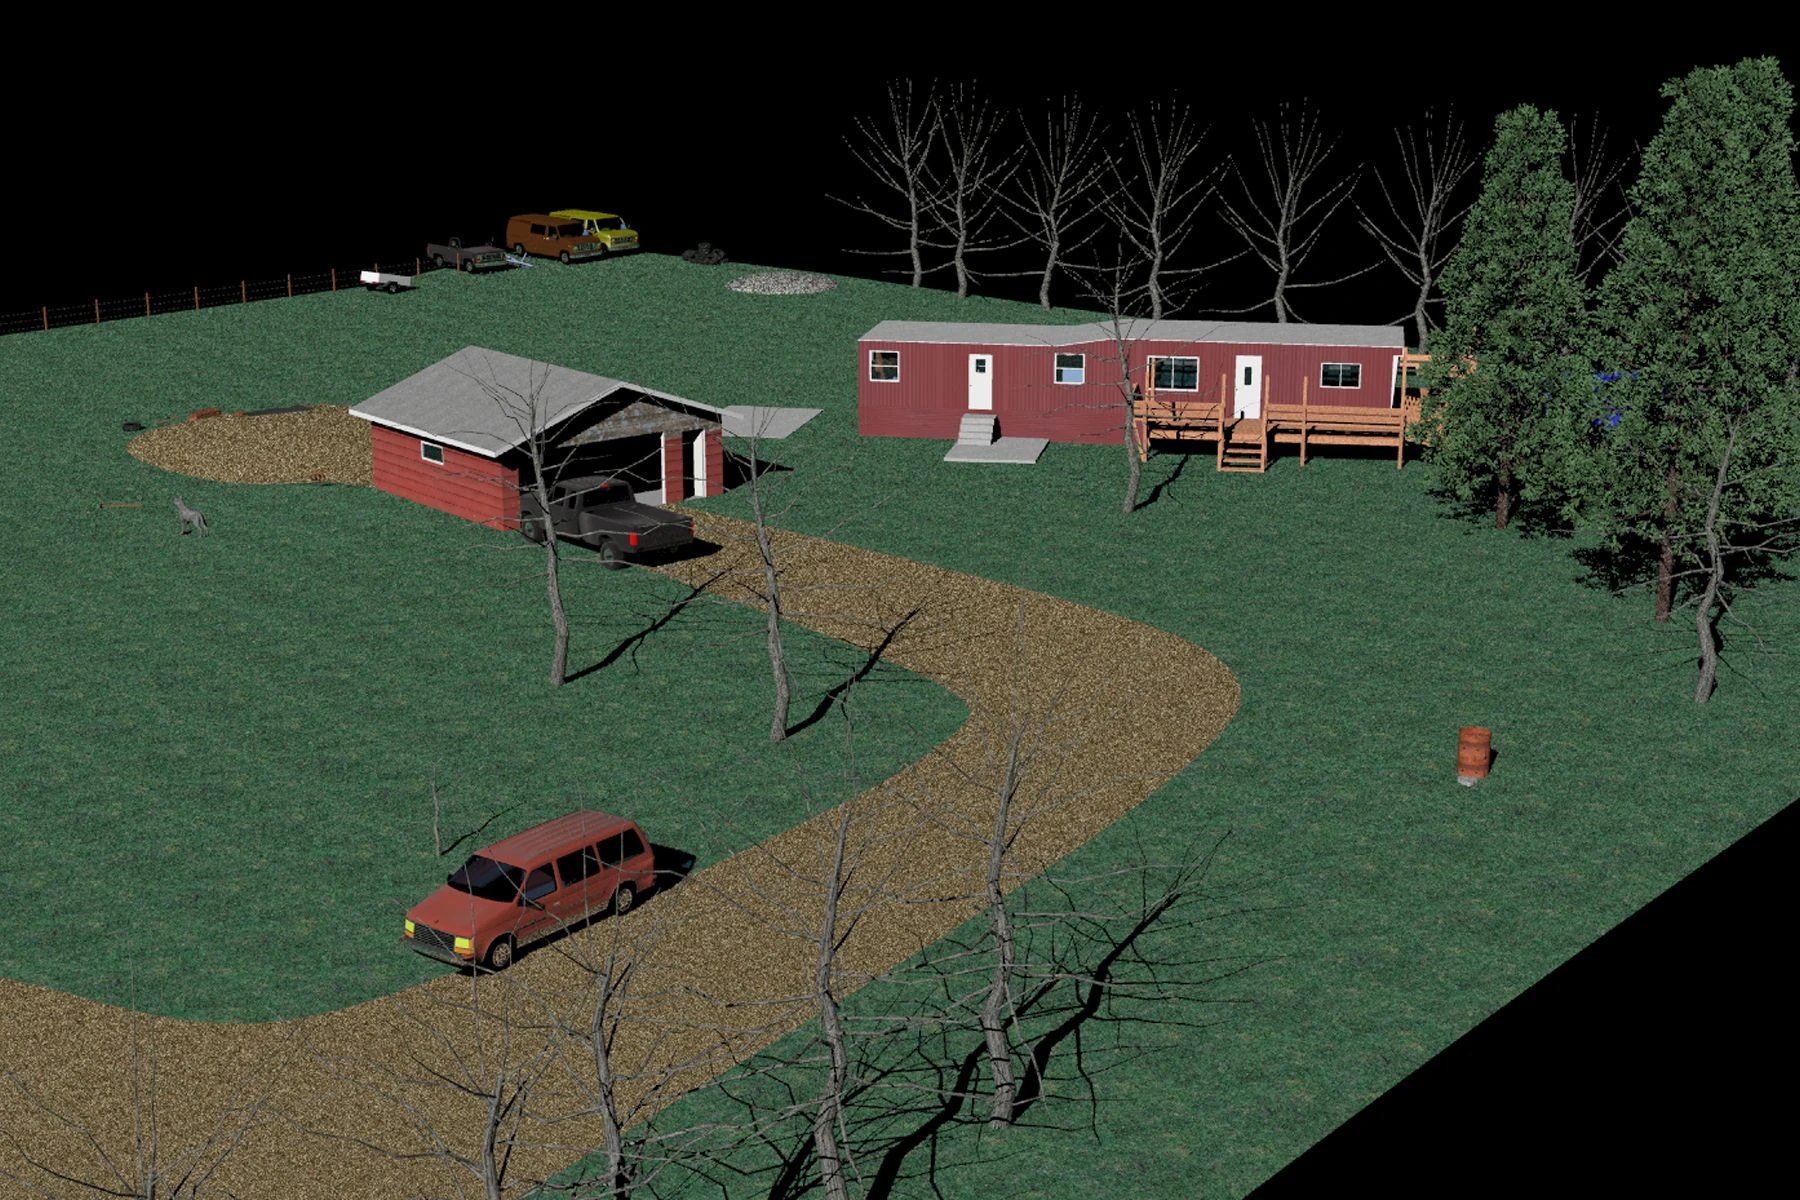
|
| 115 | Image used for animation | 3 | 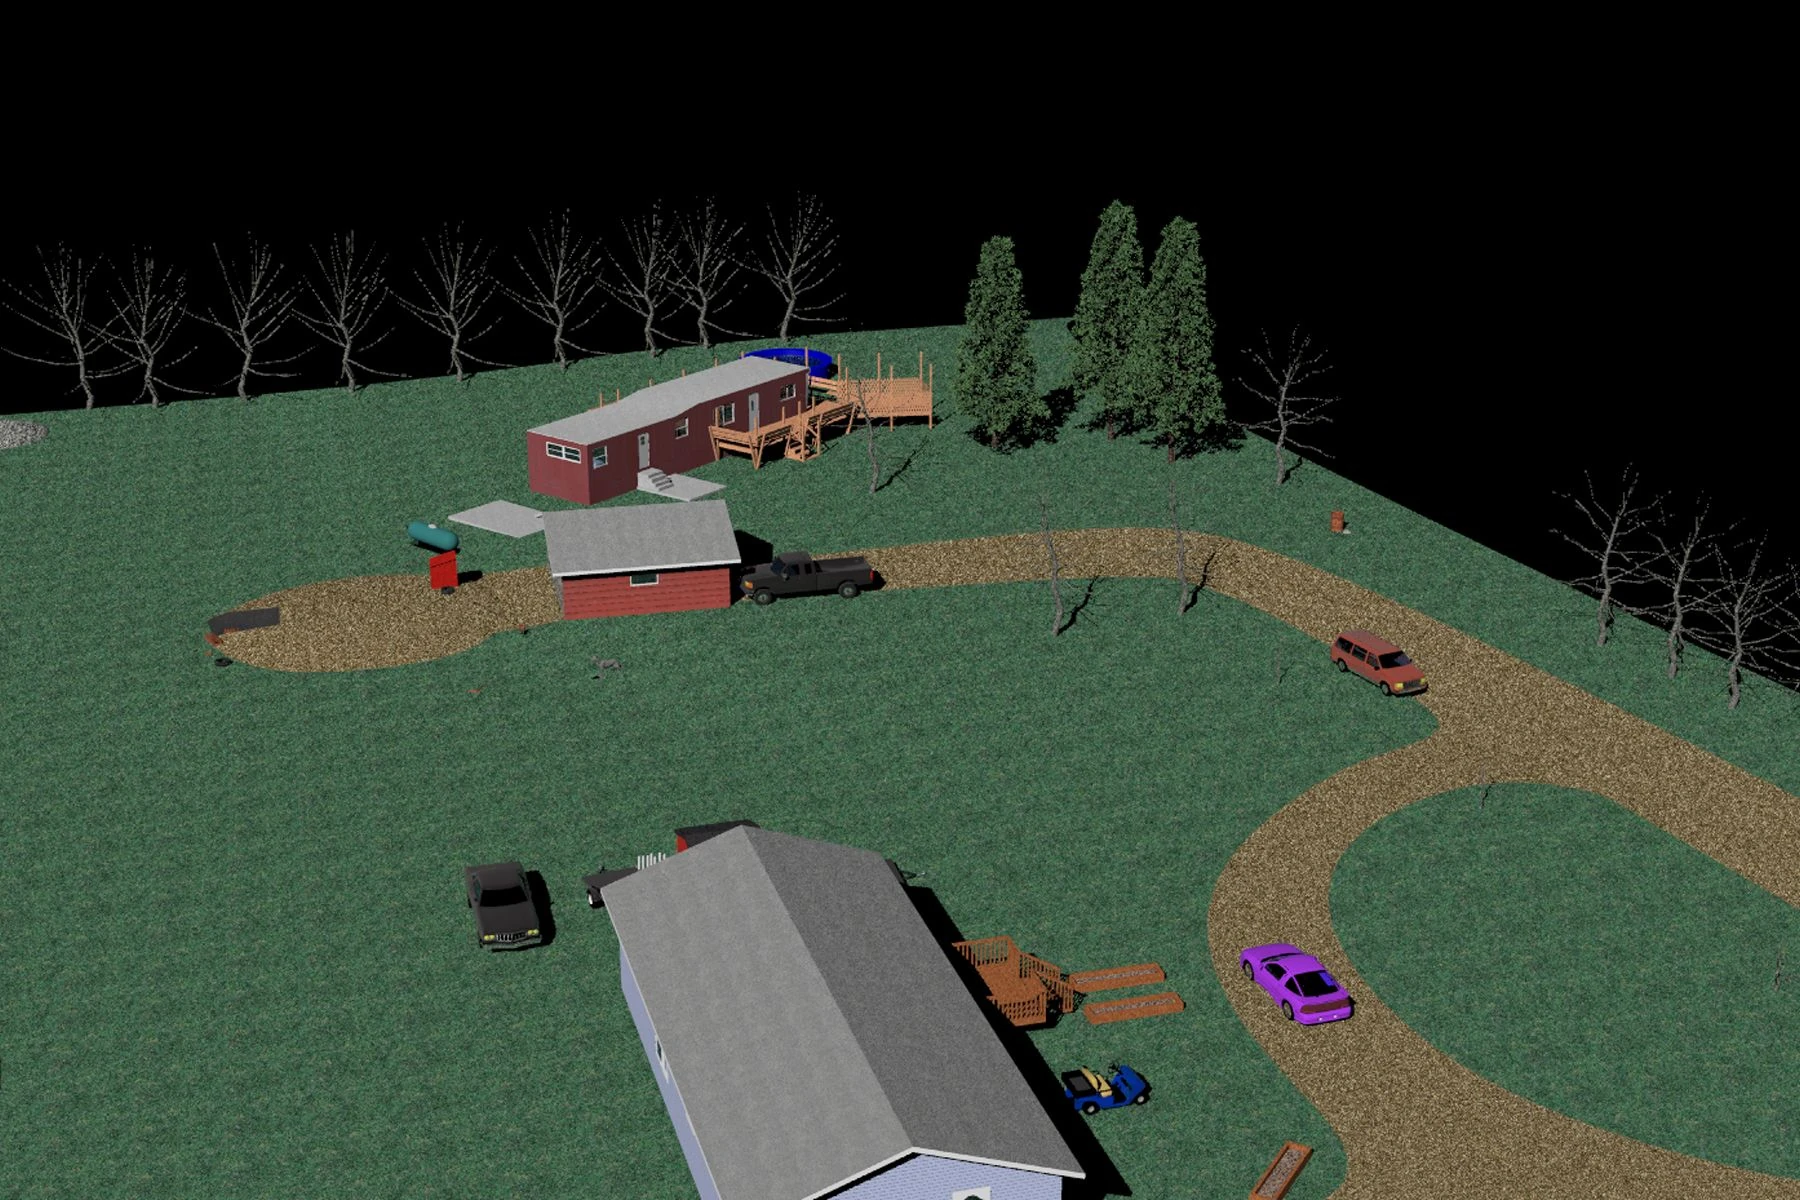
|
| 116 | Image used for animation | 3 | 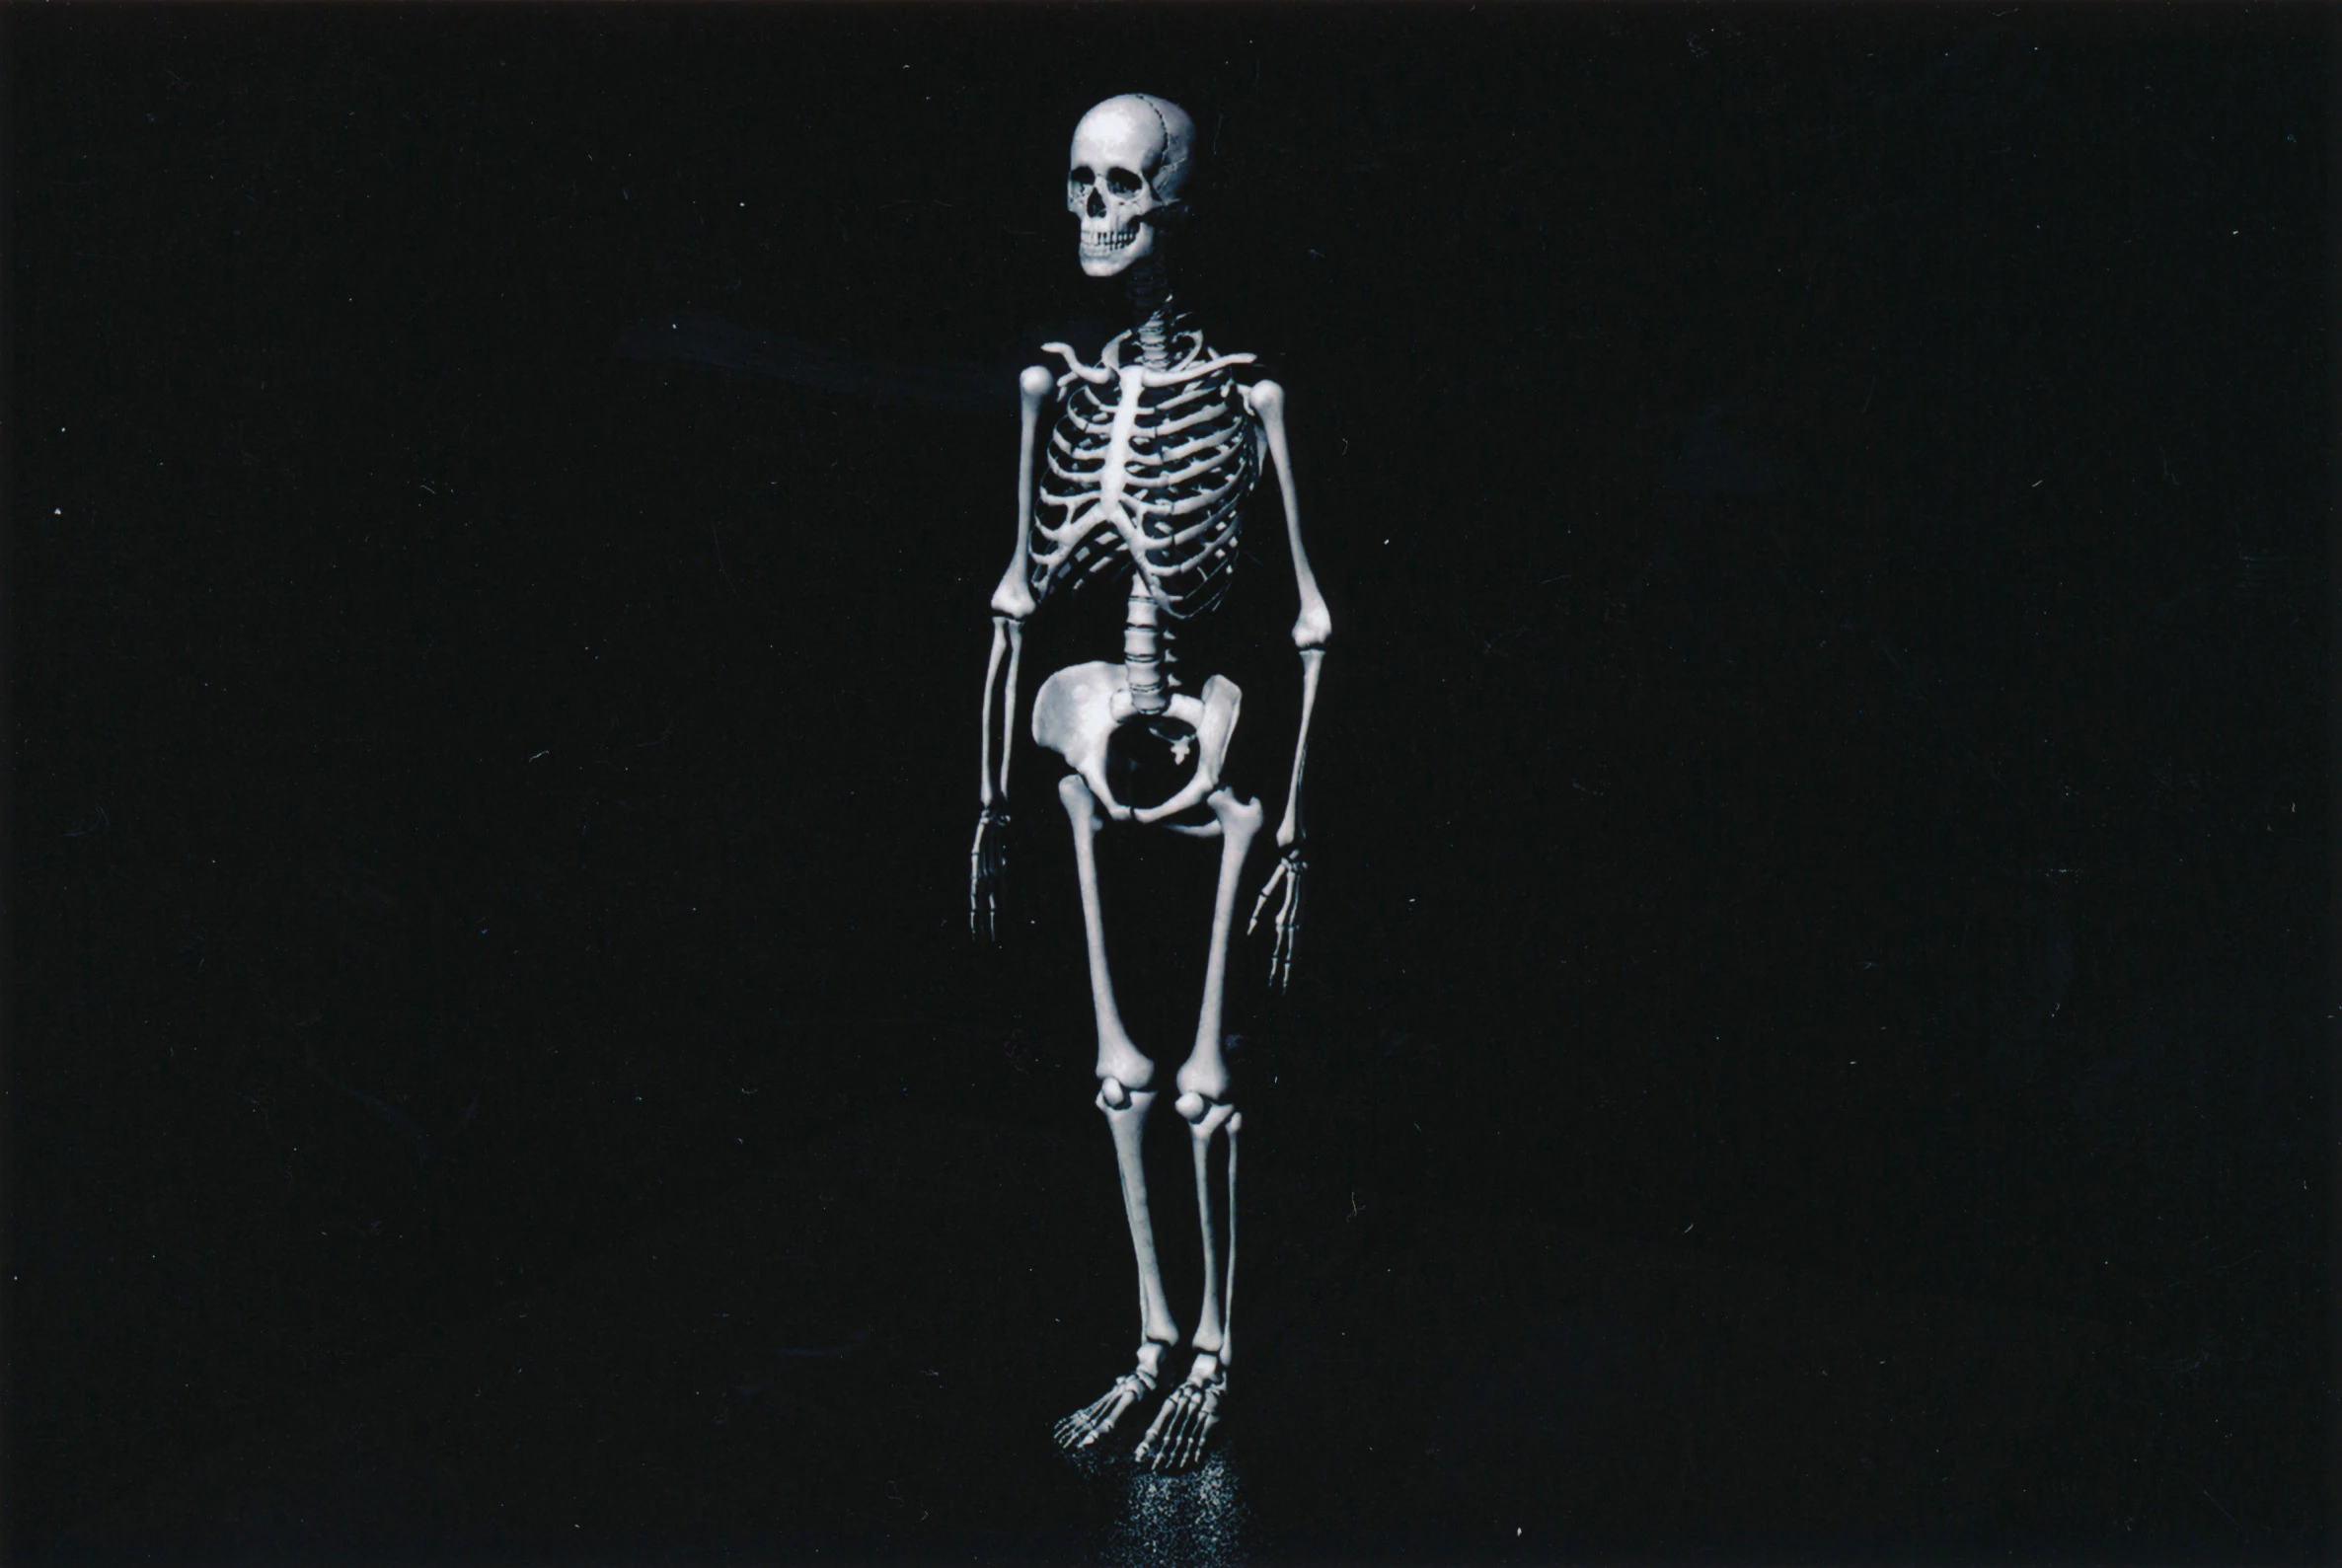
|
| 118 | Area where RAV4 was found | 3 | 
|
| 119 | Steven Avery's garage with John Deere lawnmower | 3 | 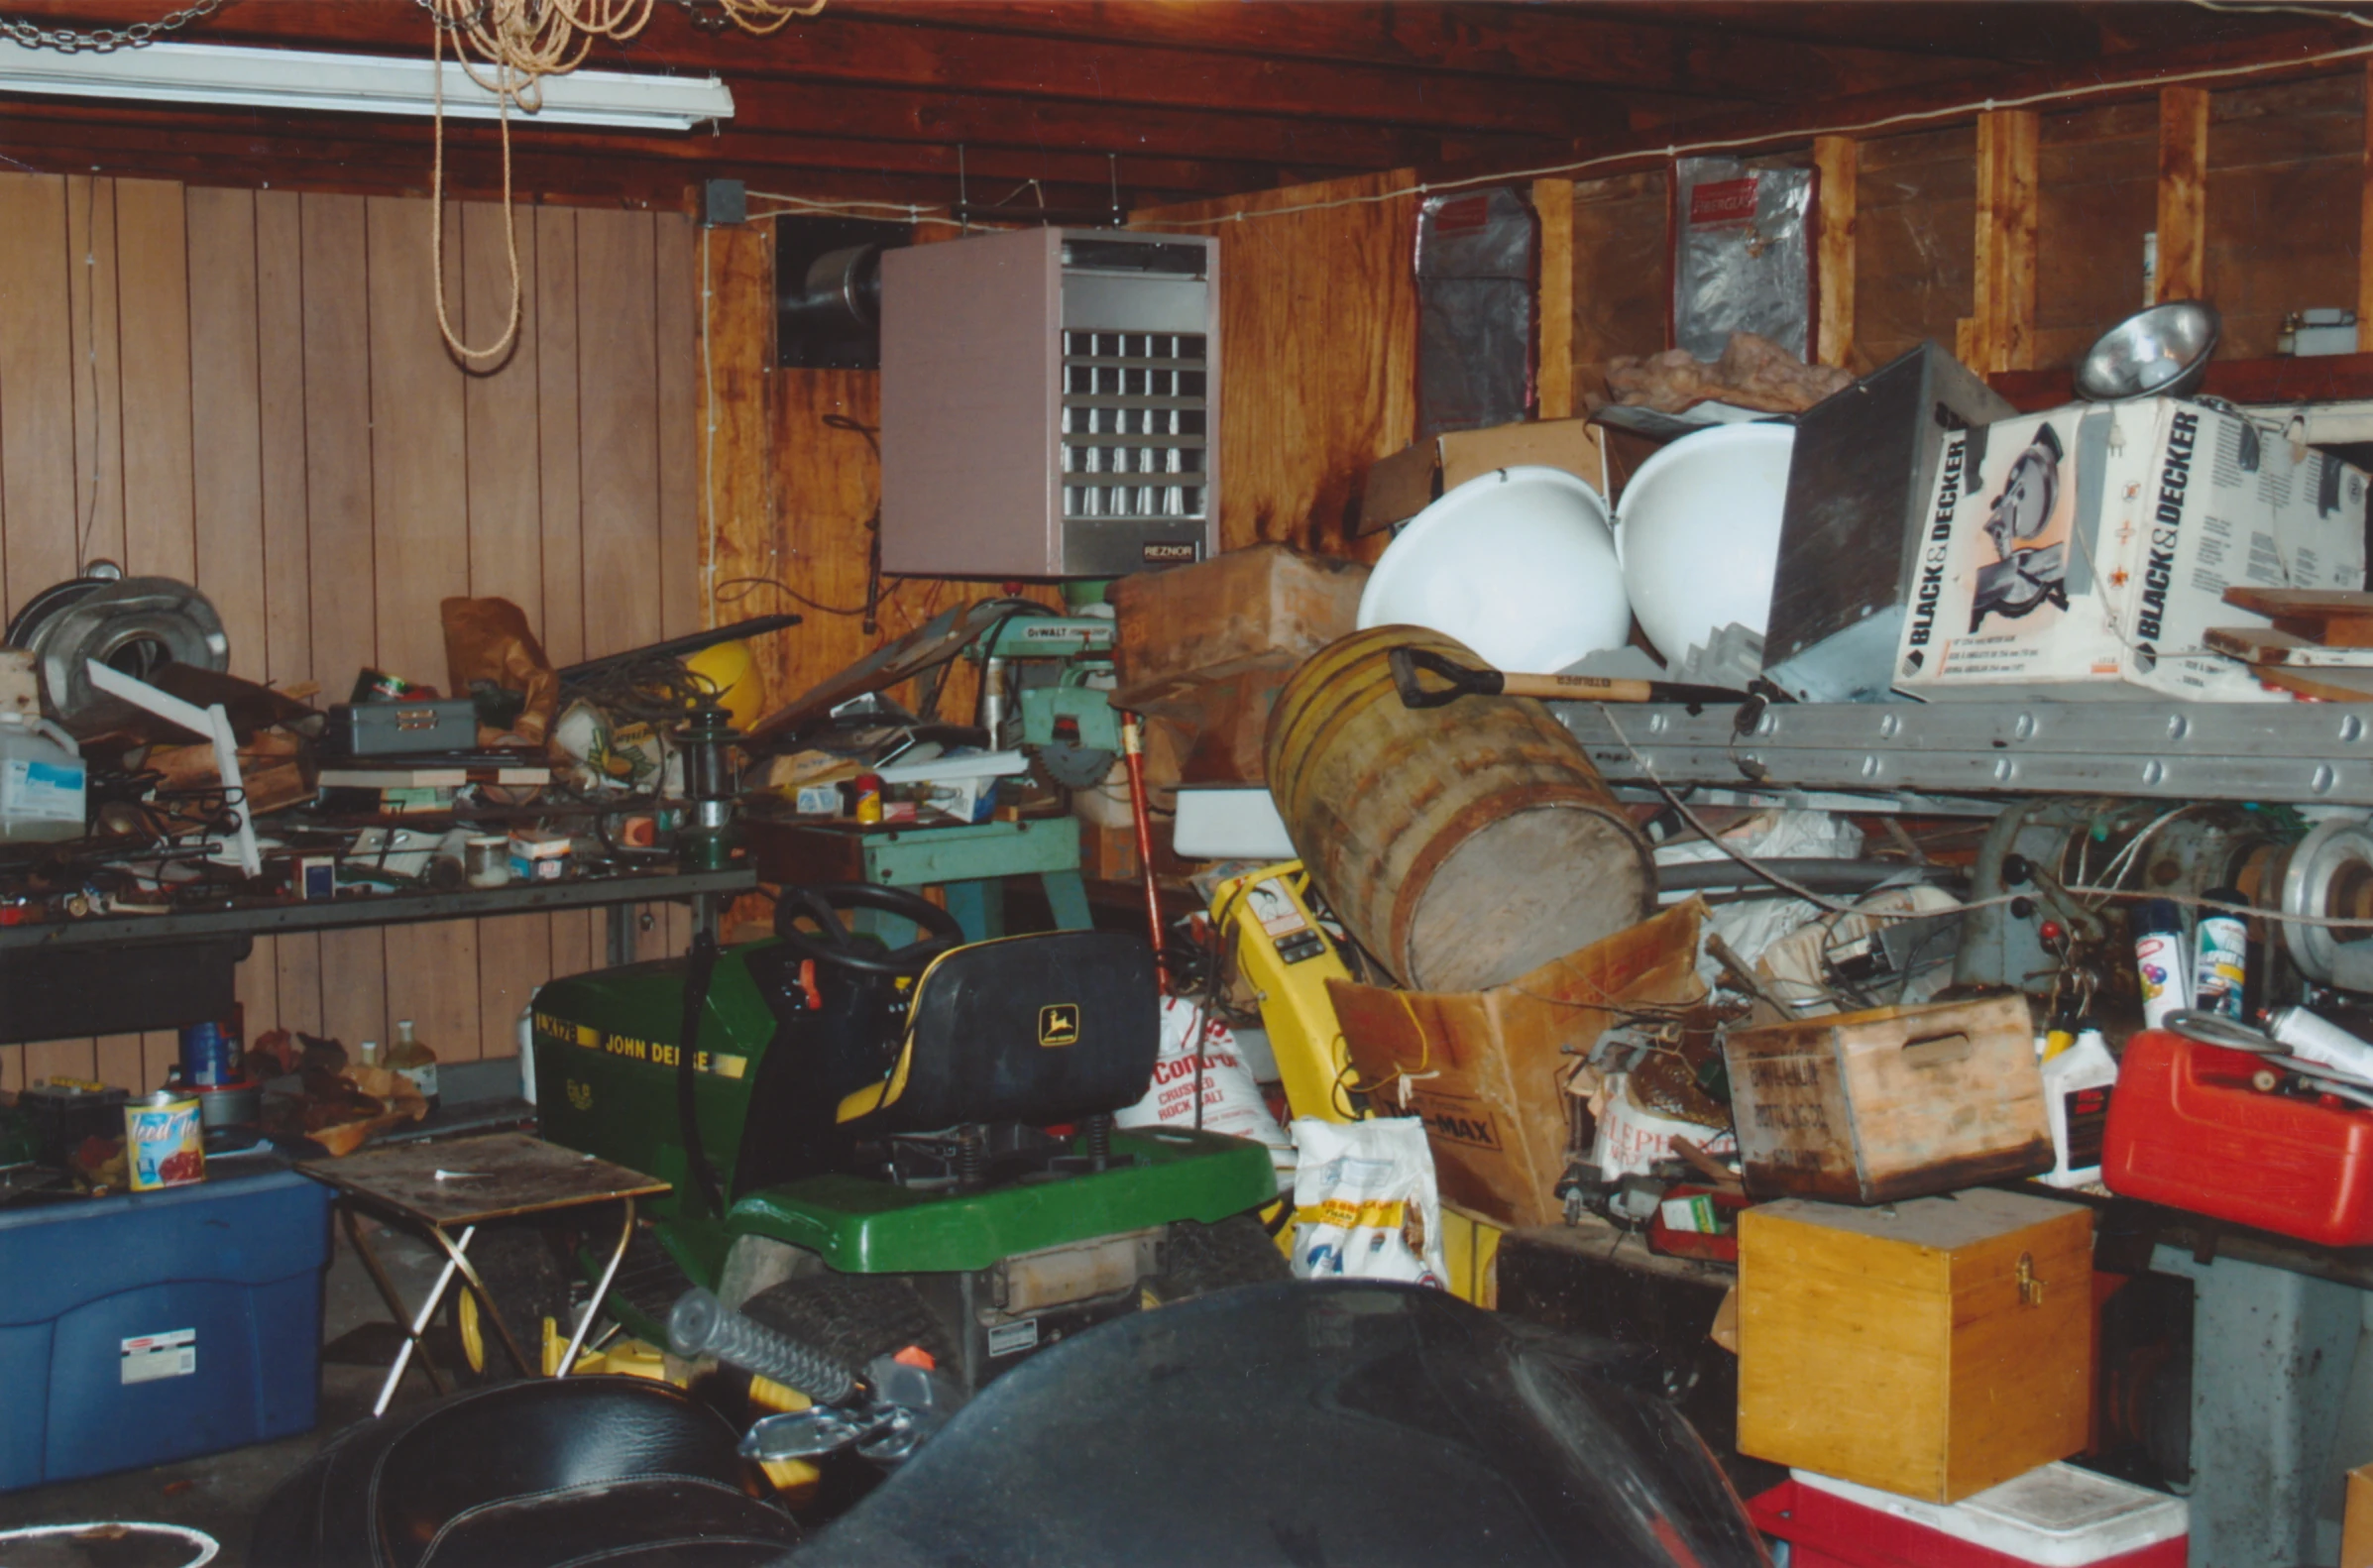
|
| 120 | Steven Avery's garage (east side) with Suzuki and gas cans | 3 | 
|
| 121 | Steven Avery's garage south wall with air compressor | 3 | 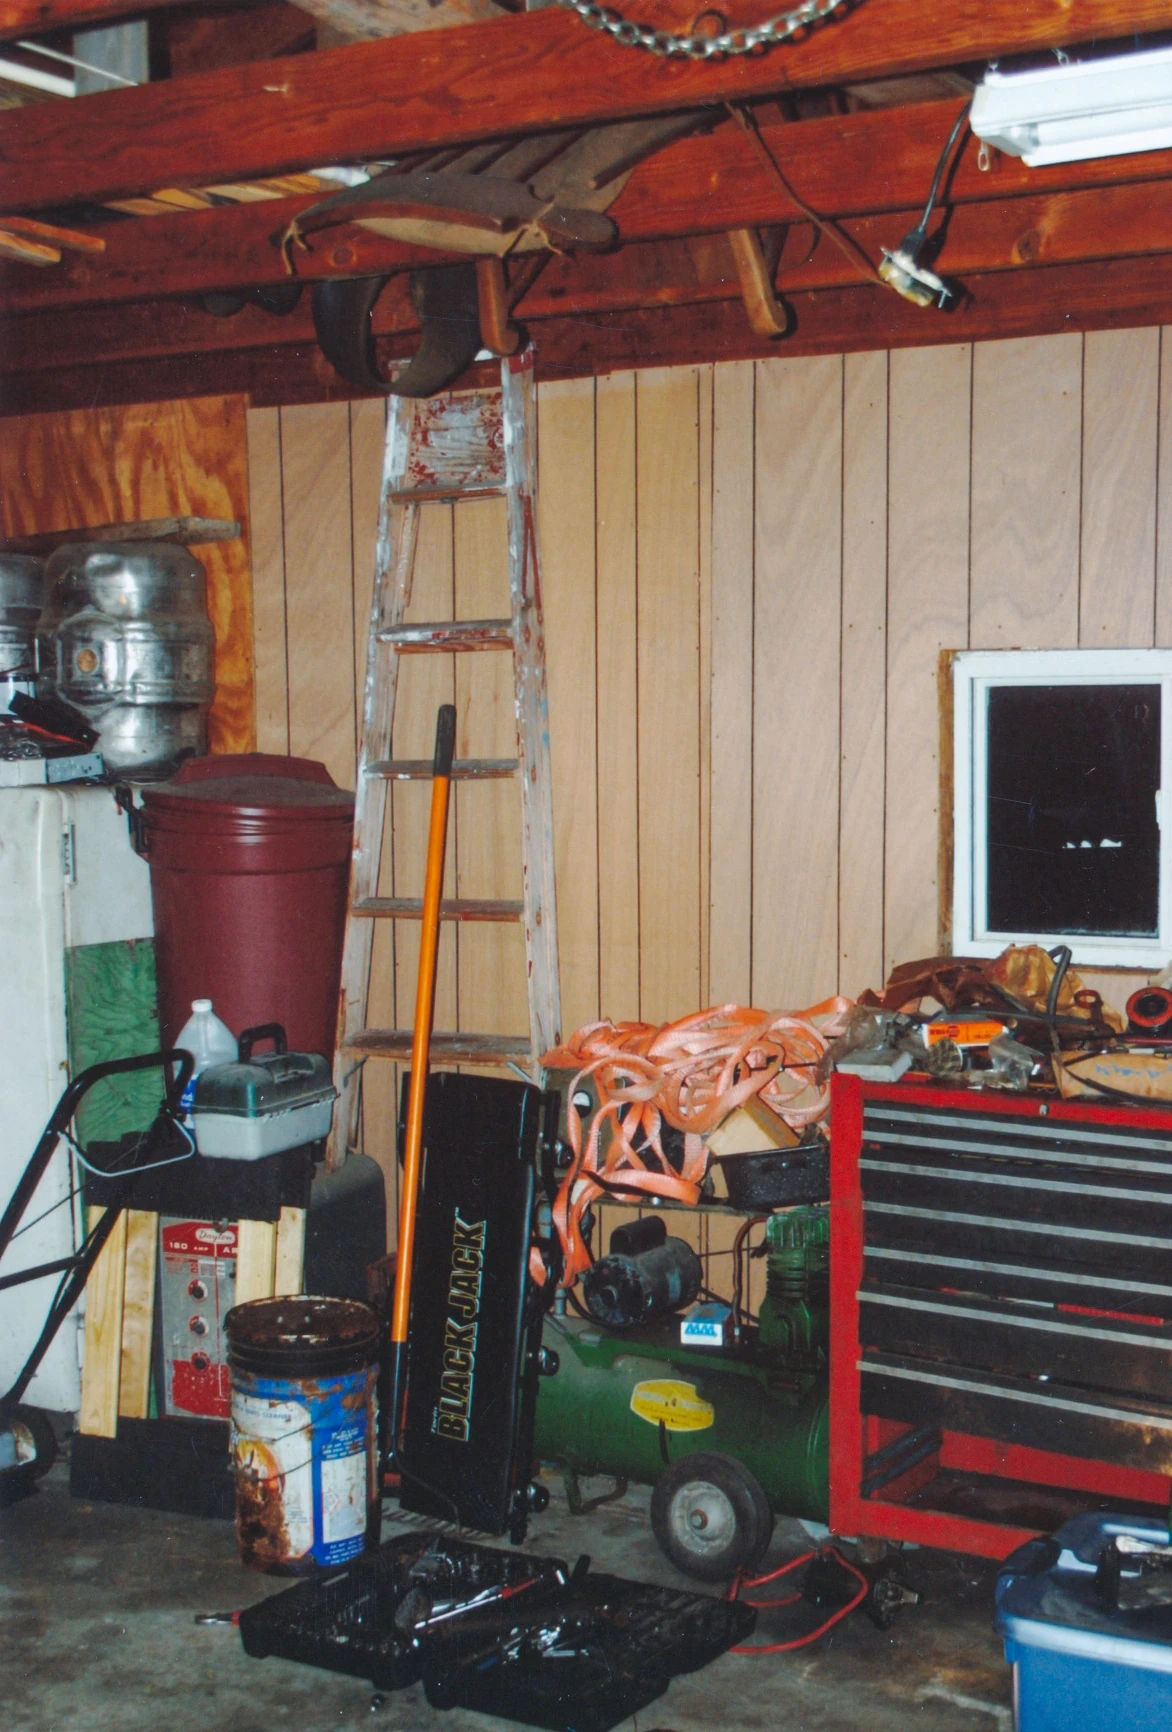
|
| 123 | Dead deer and deer tag | 4 | 
|
| 127 | Avery Road aerial view | 4 | 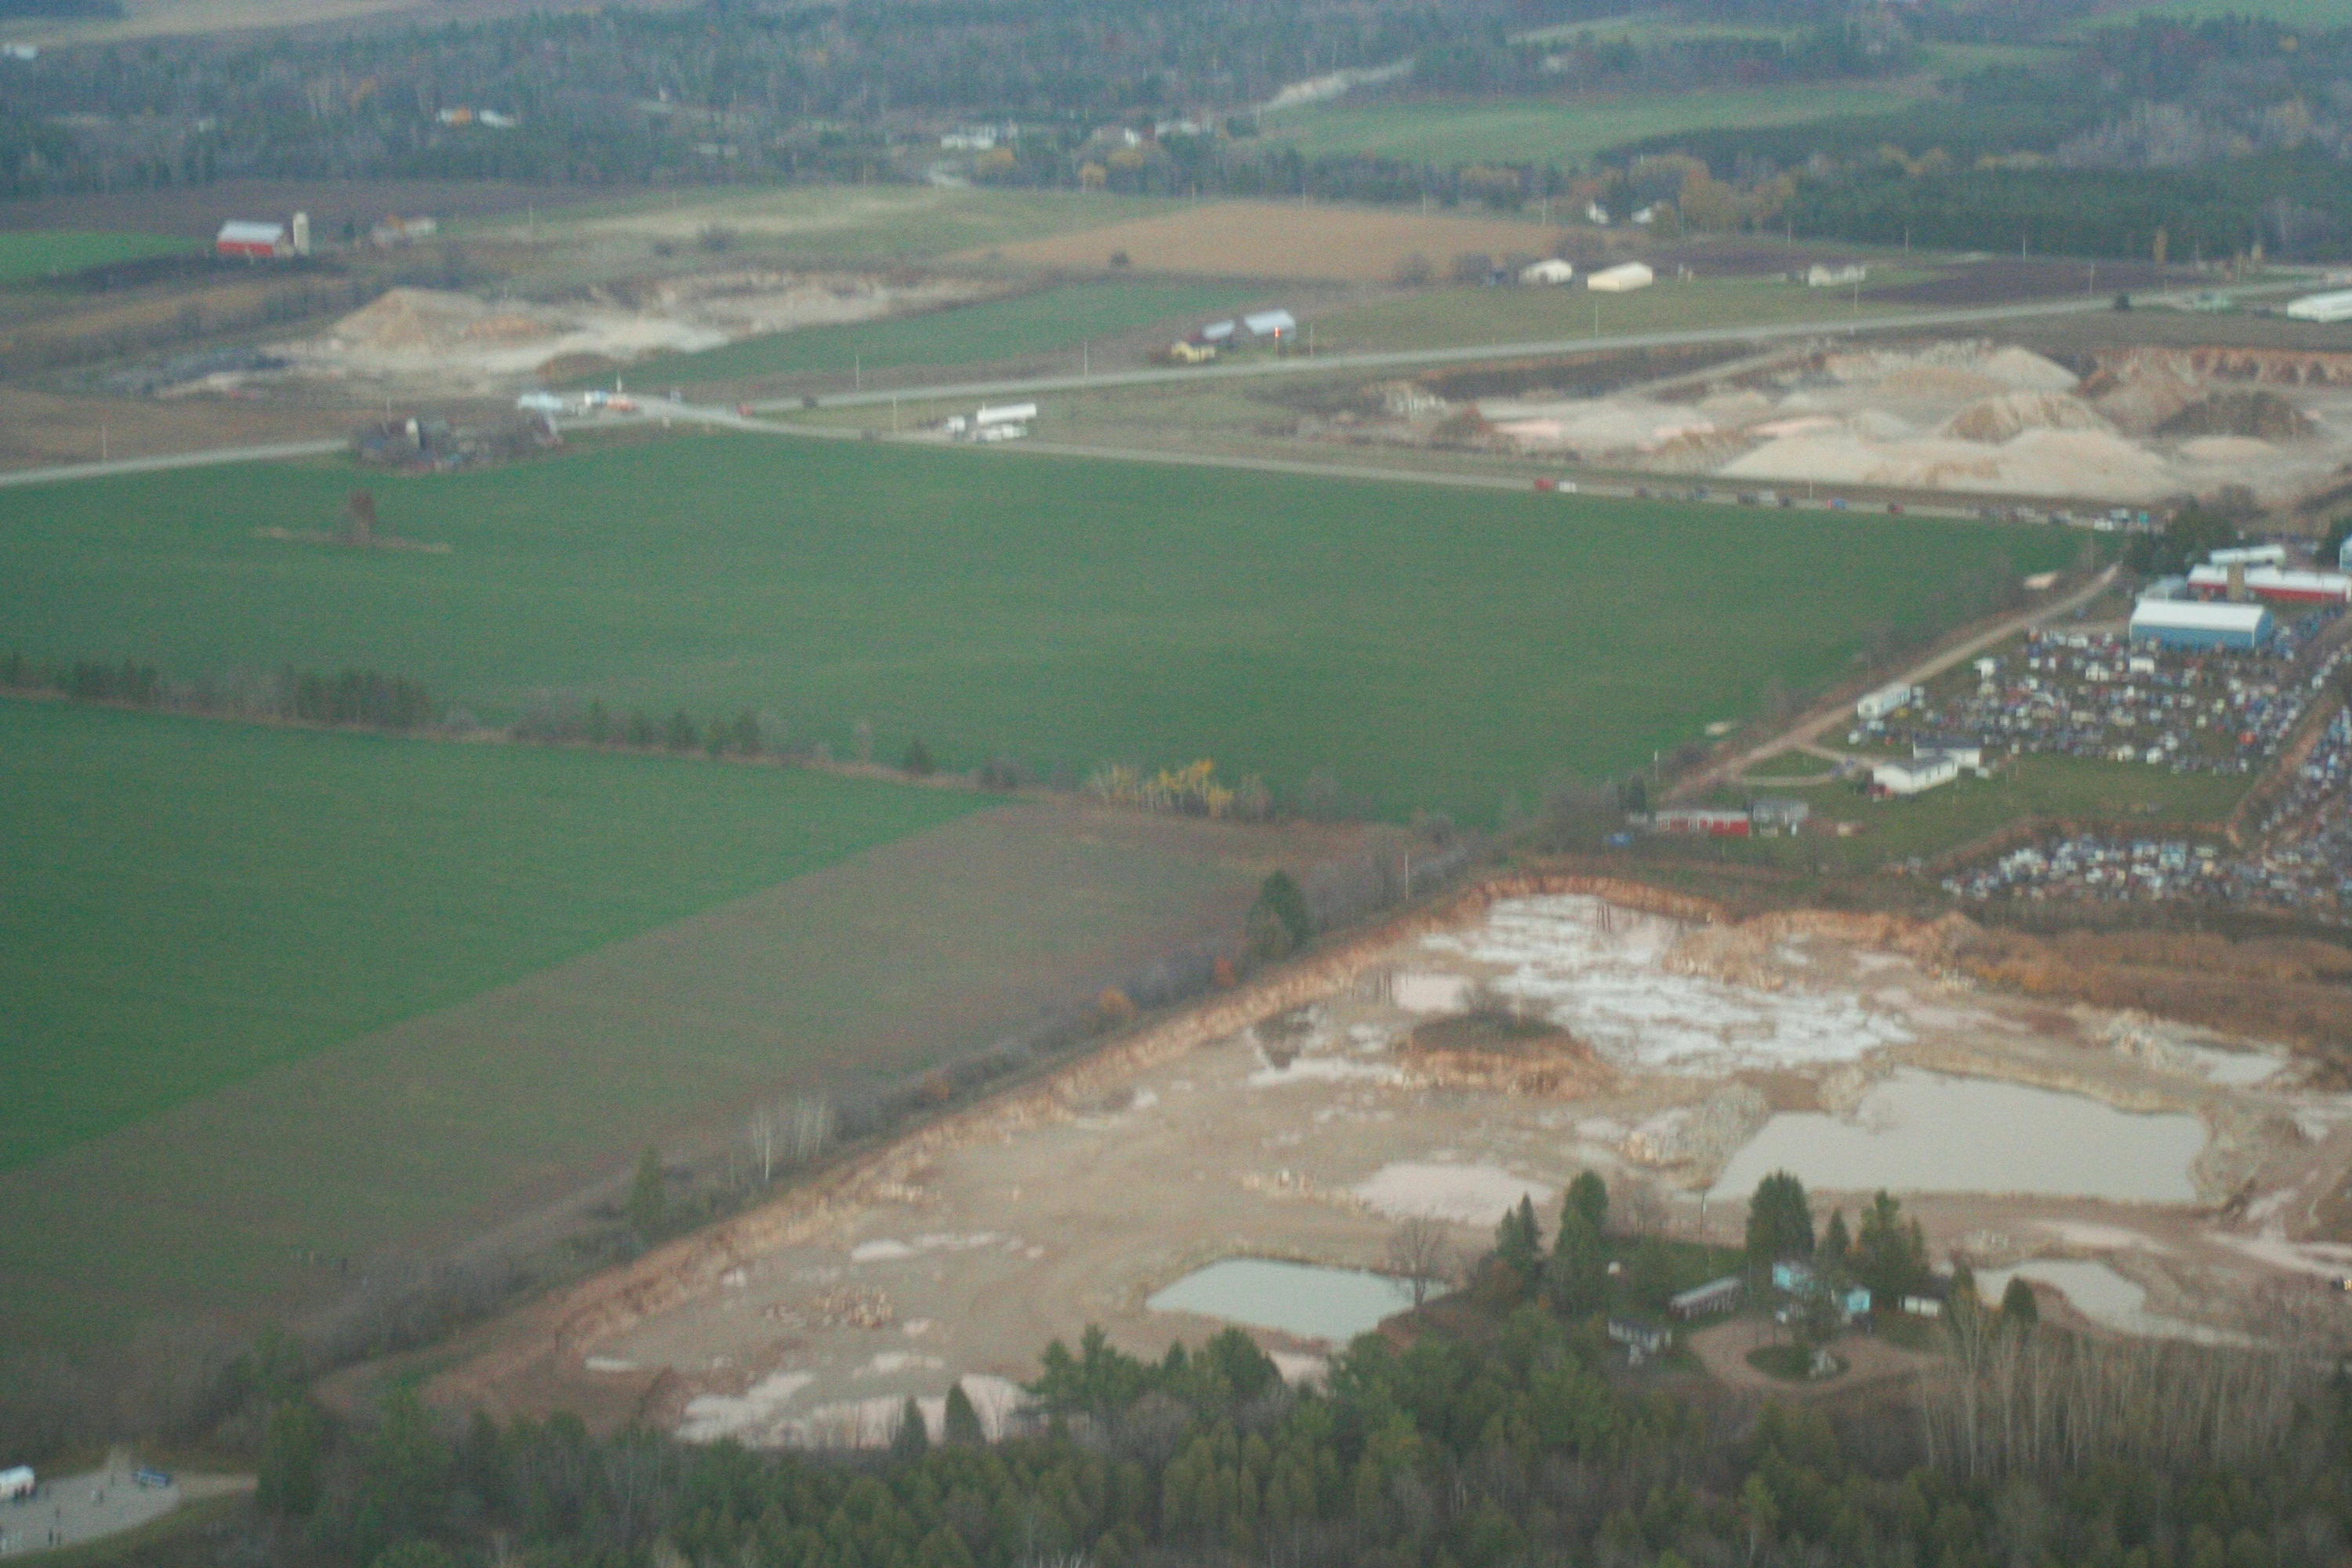
|
| 128 | Julie Cramer and K9 Brutus | 5 | 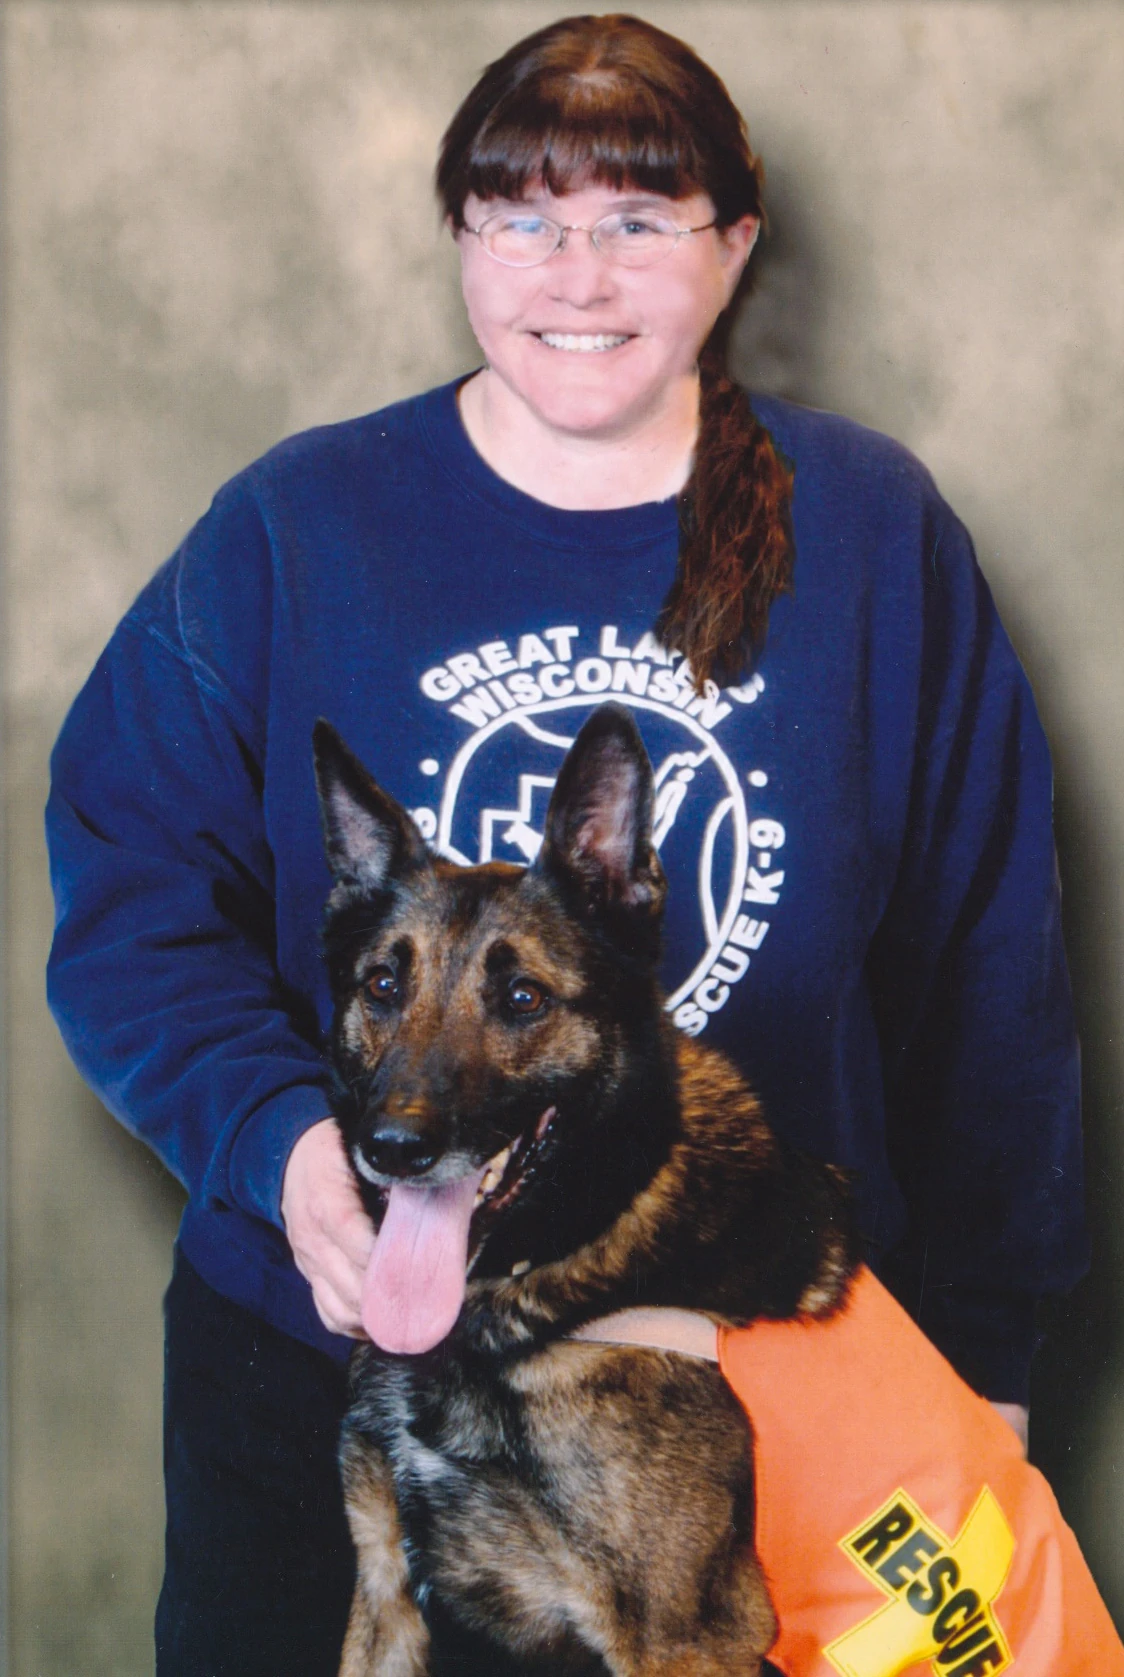
|
| 130 | Toyota RAV4 at Avery’s Auto Salvage | 5 | 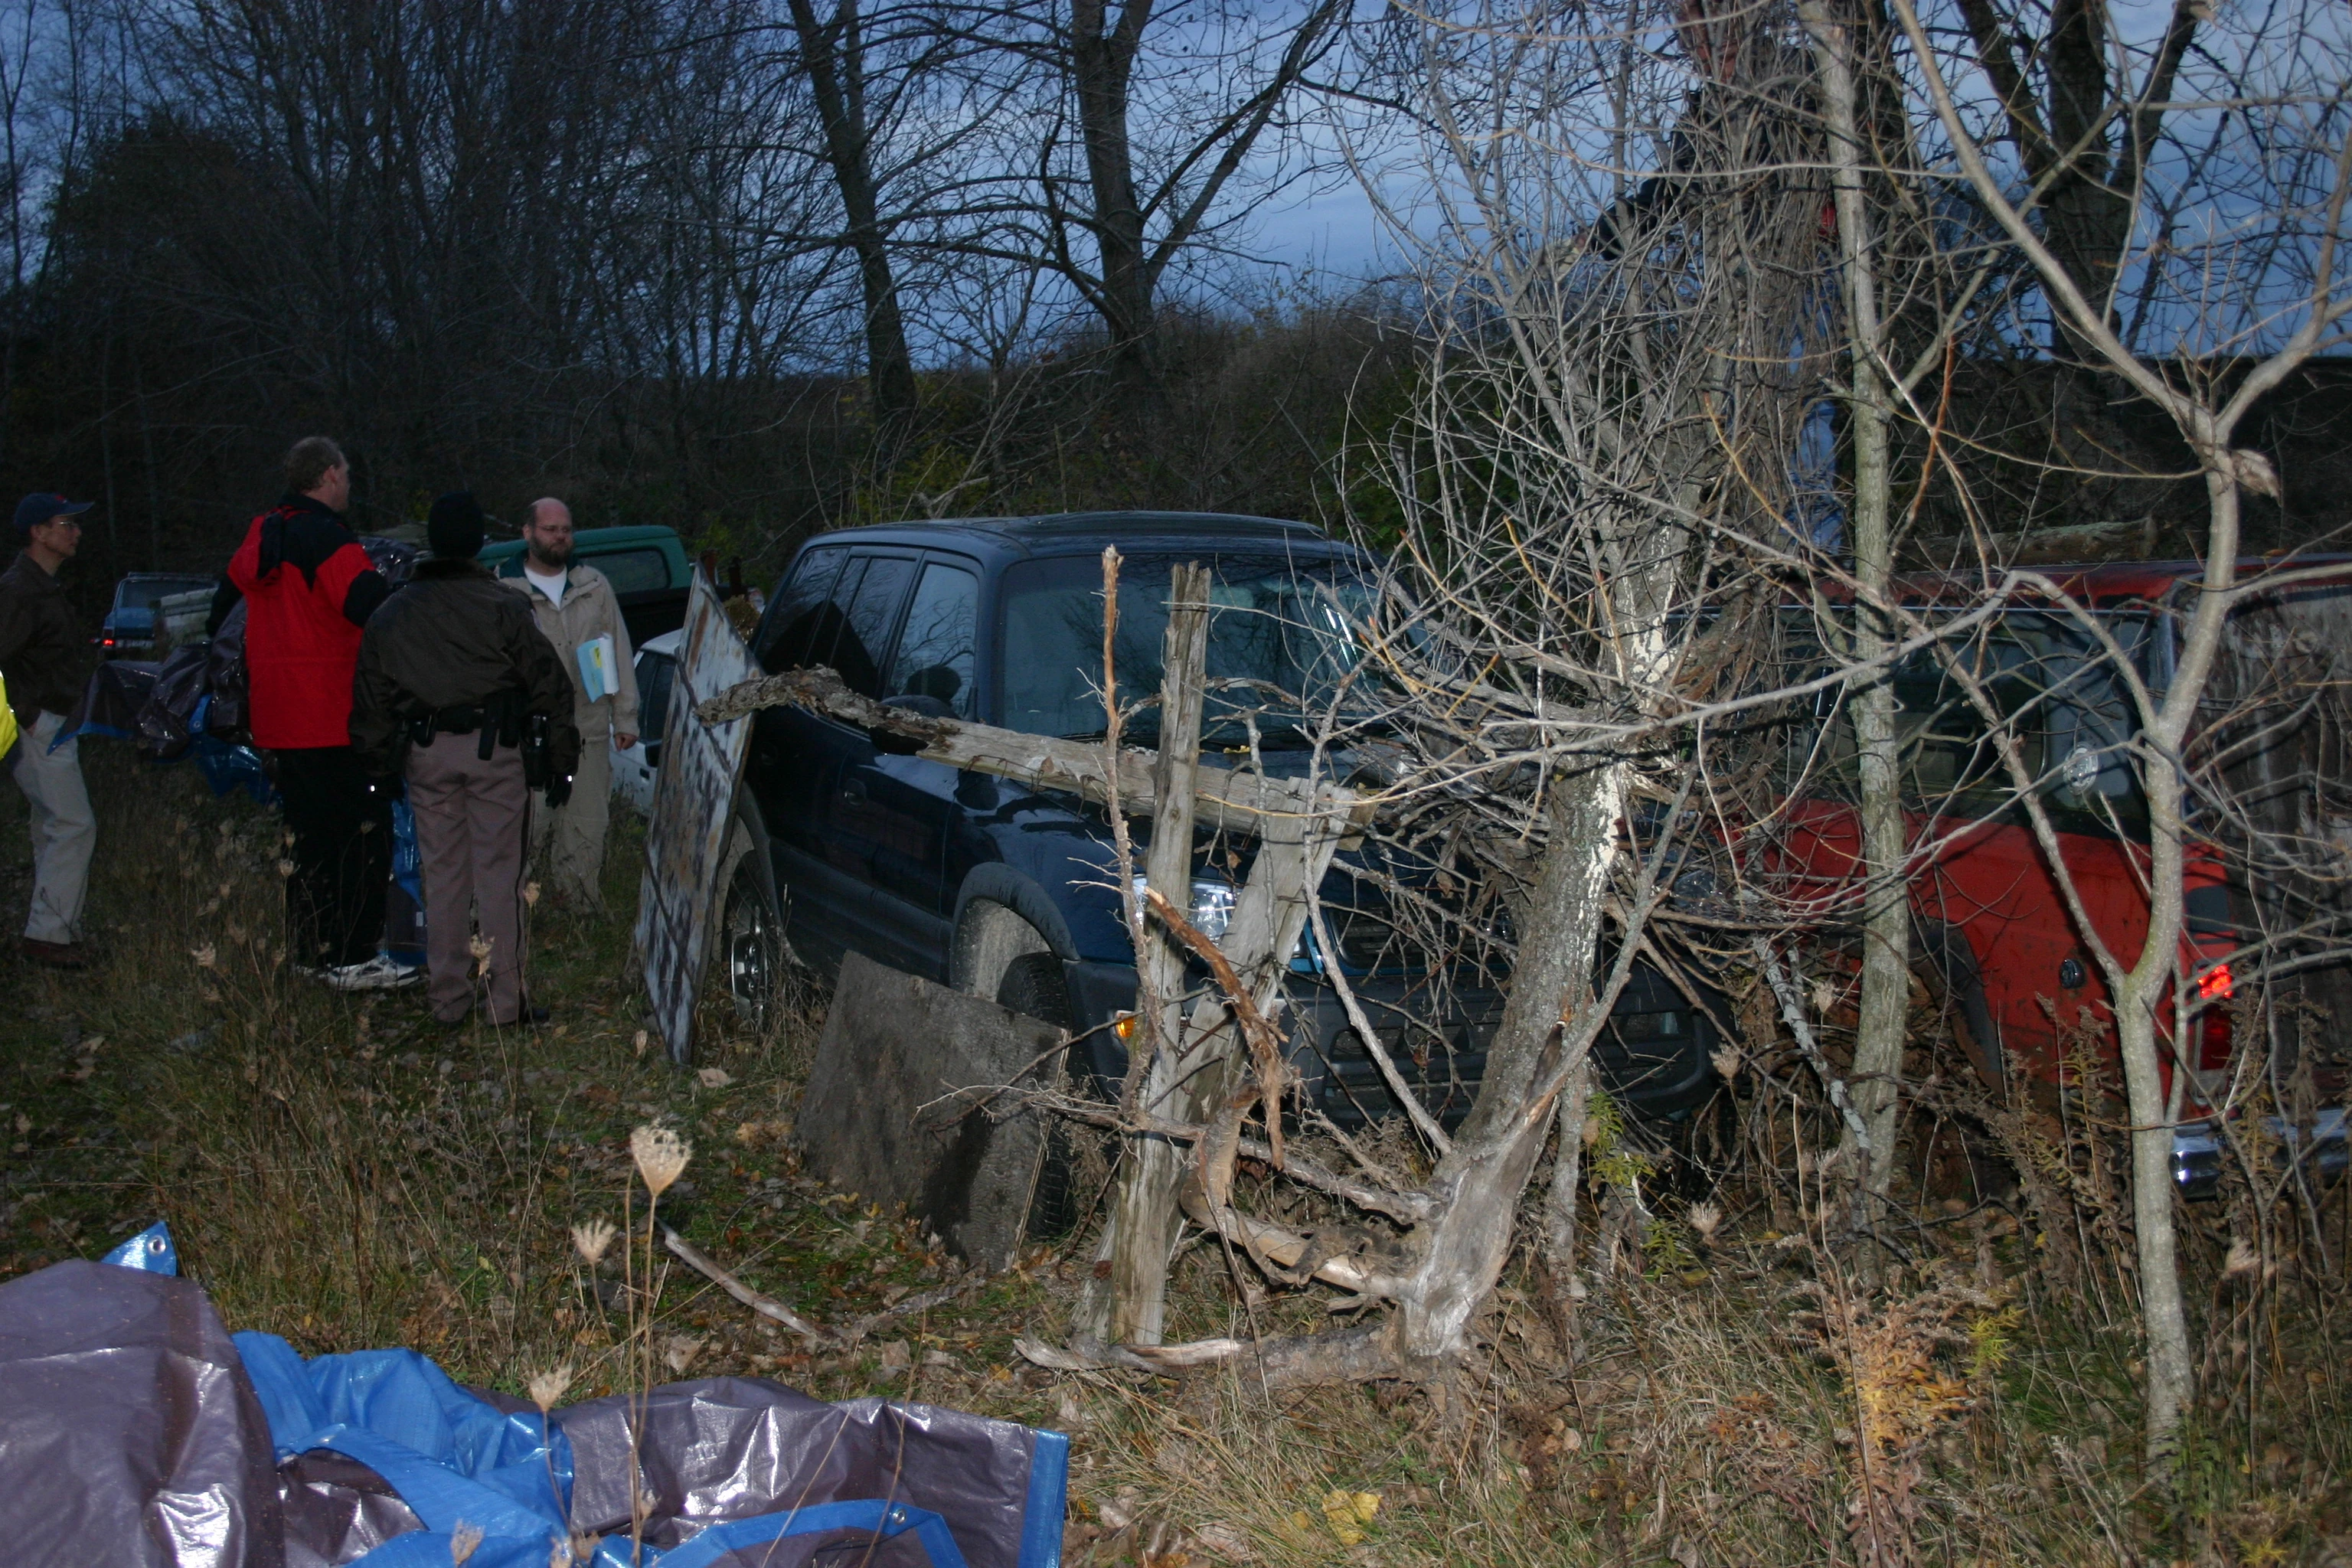
|
| 131 | Toyota RAV4 hood and windshield | 5 | 
|
| 132 | Toyota RAV4 front passenger side view | 5 | 
|
| 133 | Toyota RAV4 rear driver side view | 5 | 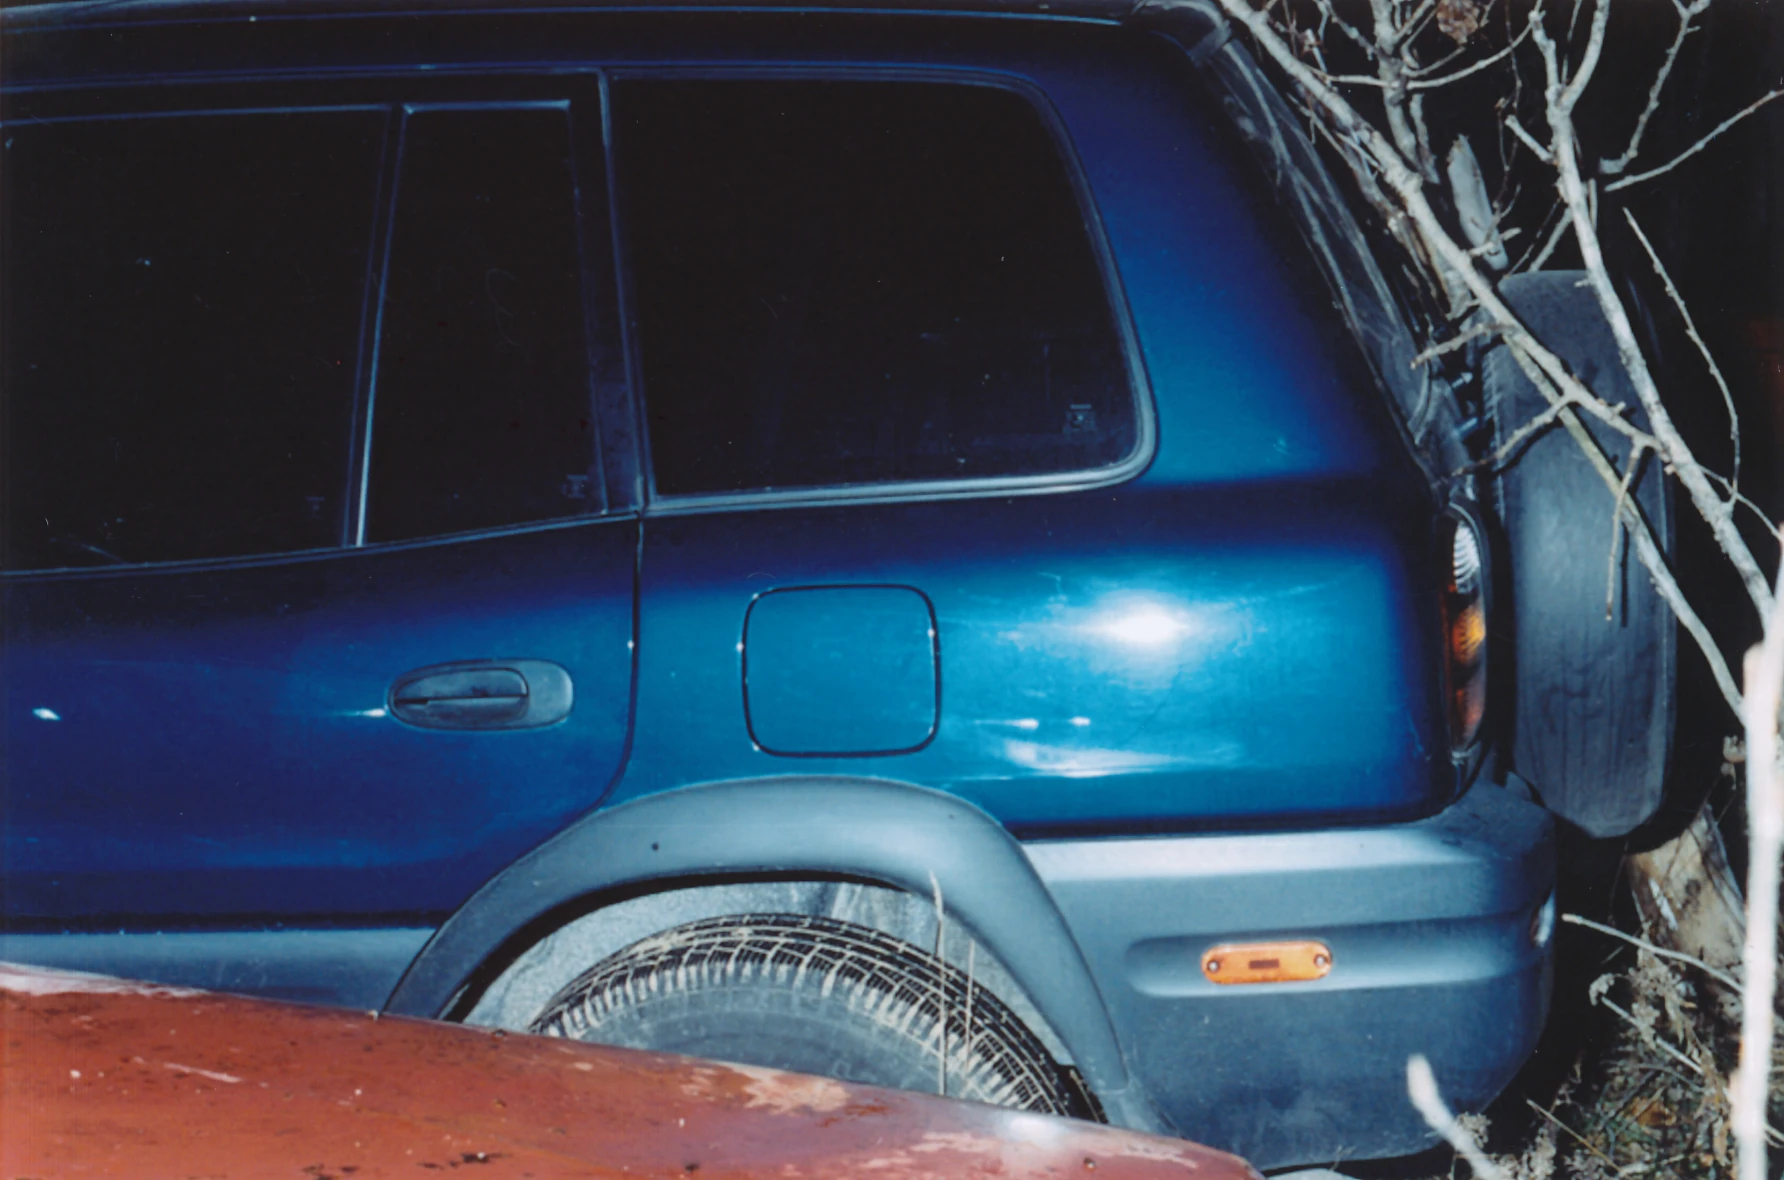
|
| 134 | Toyota RAV4 passenger side view | 5 | 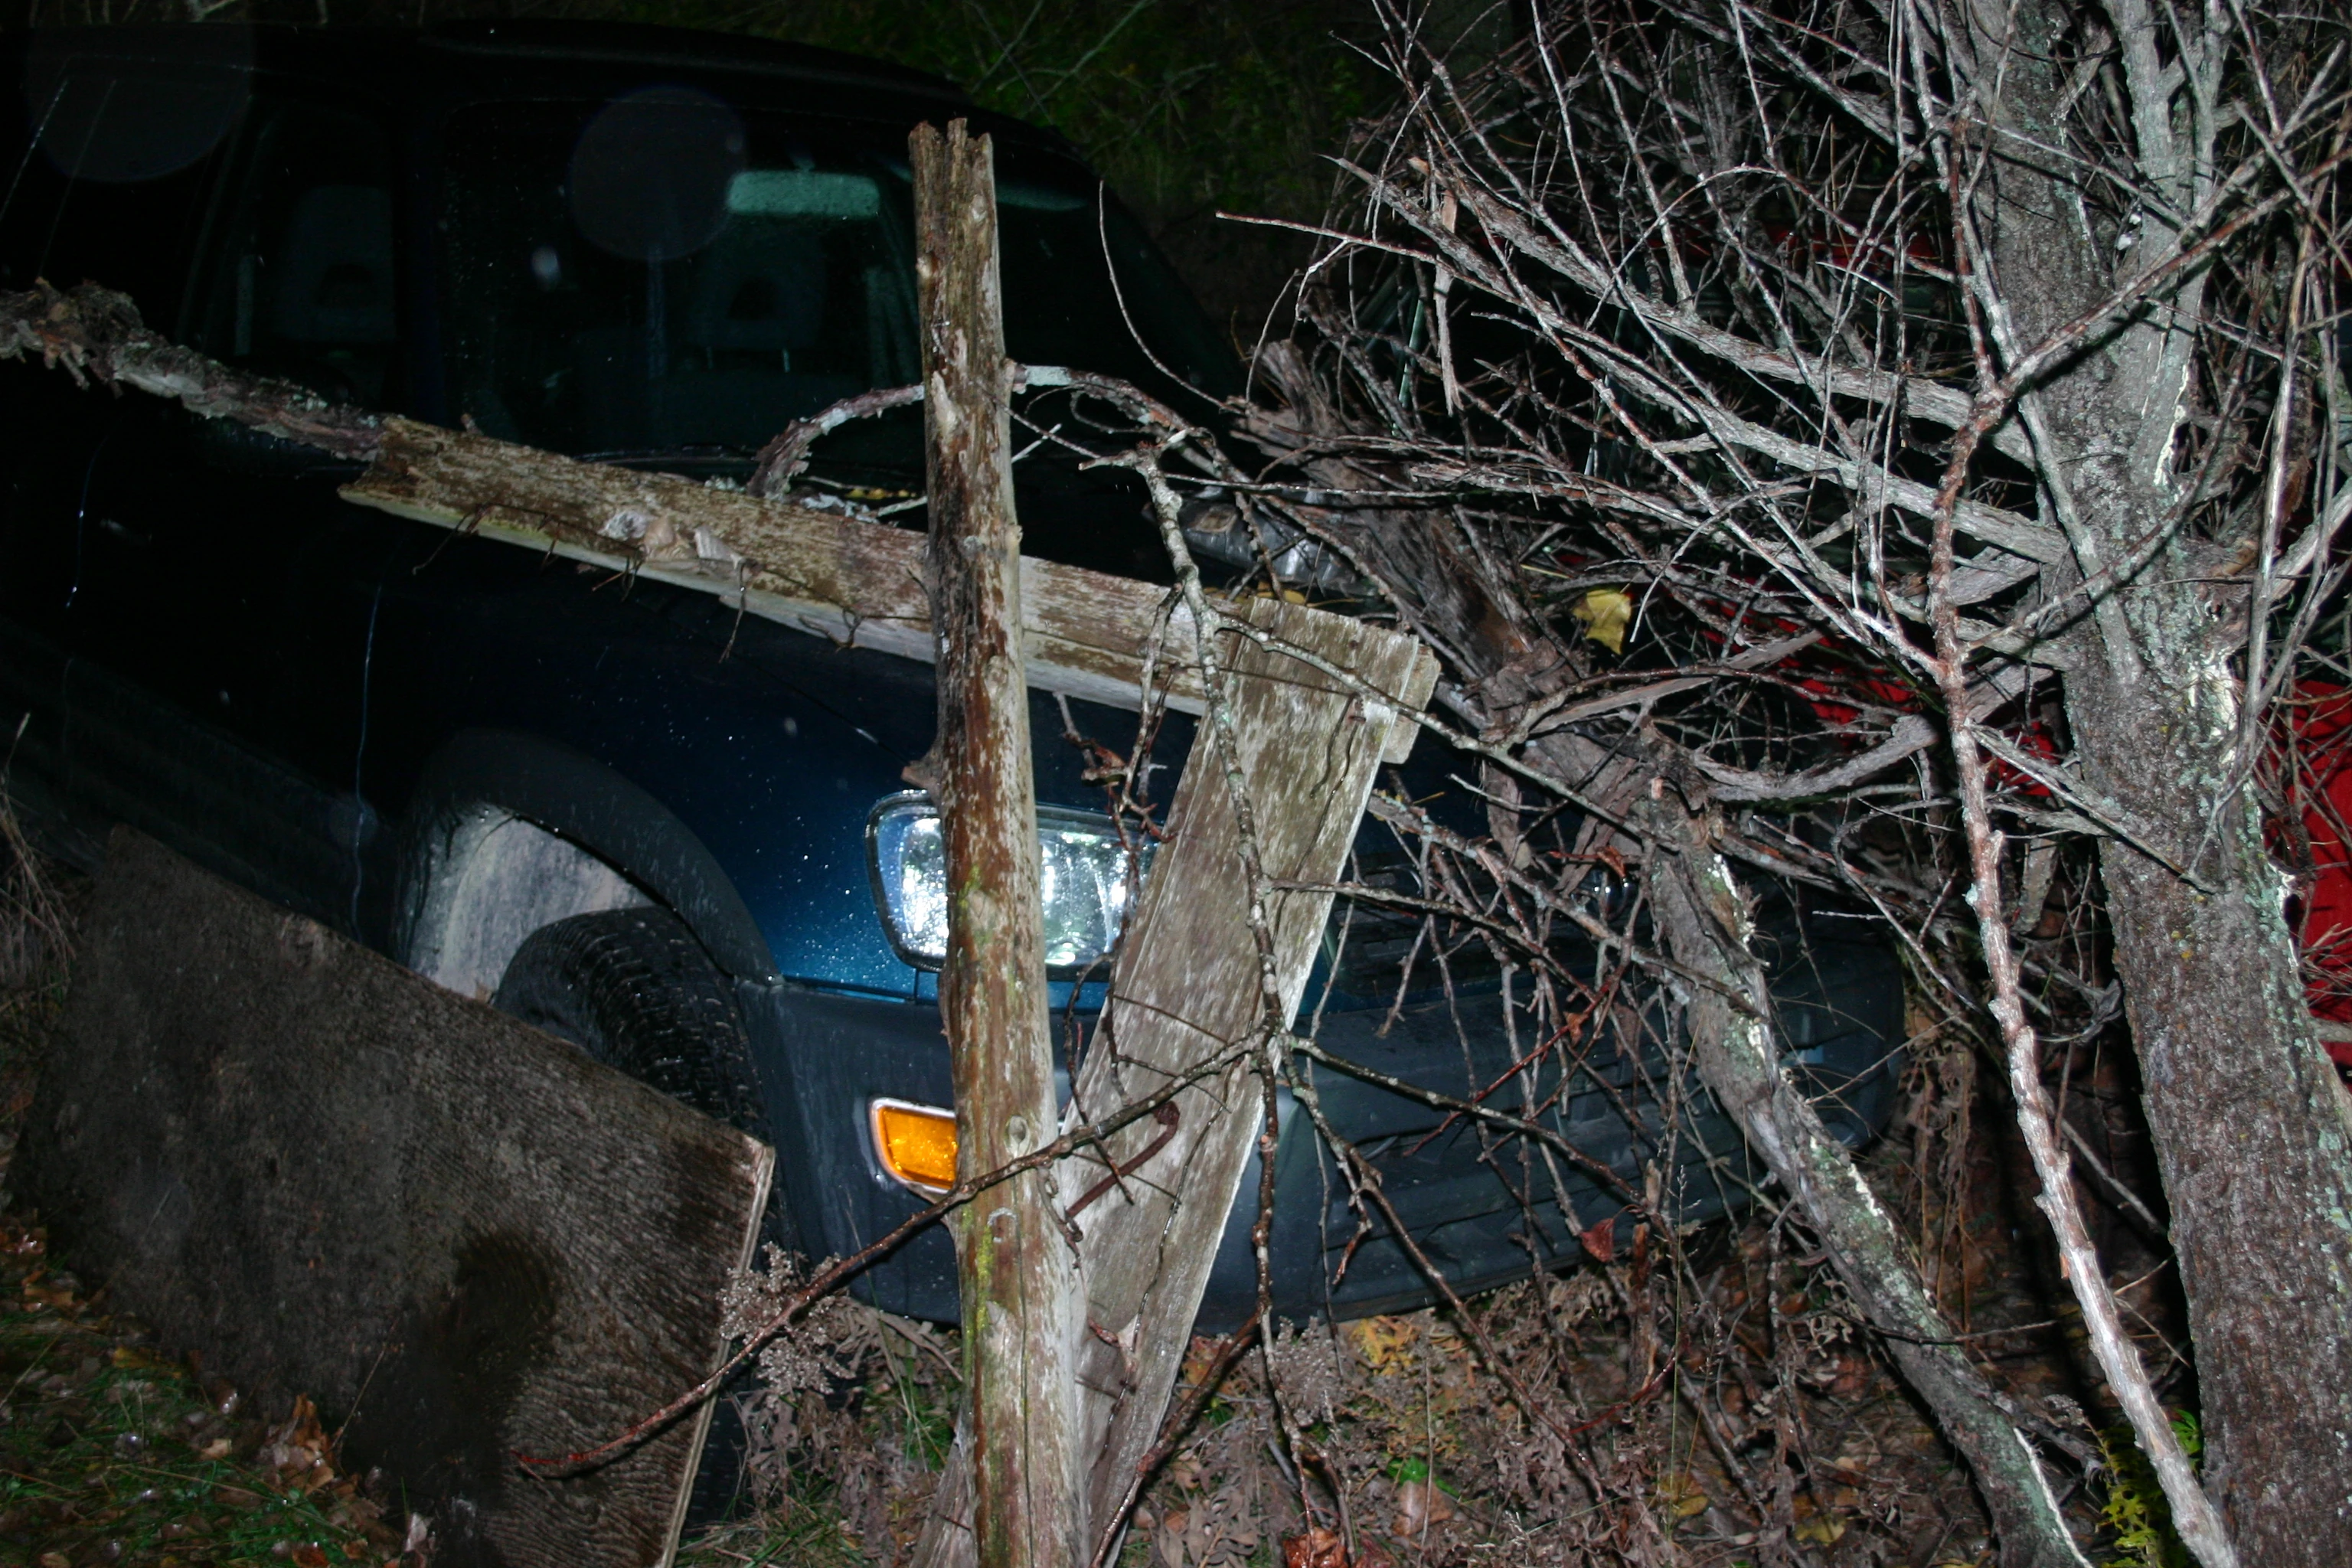
|
| 135 | Toyota RAV4 rear view | 5 | 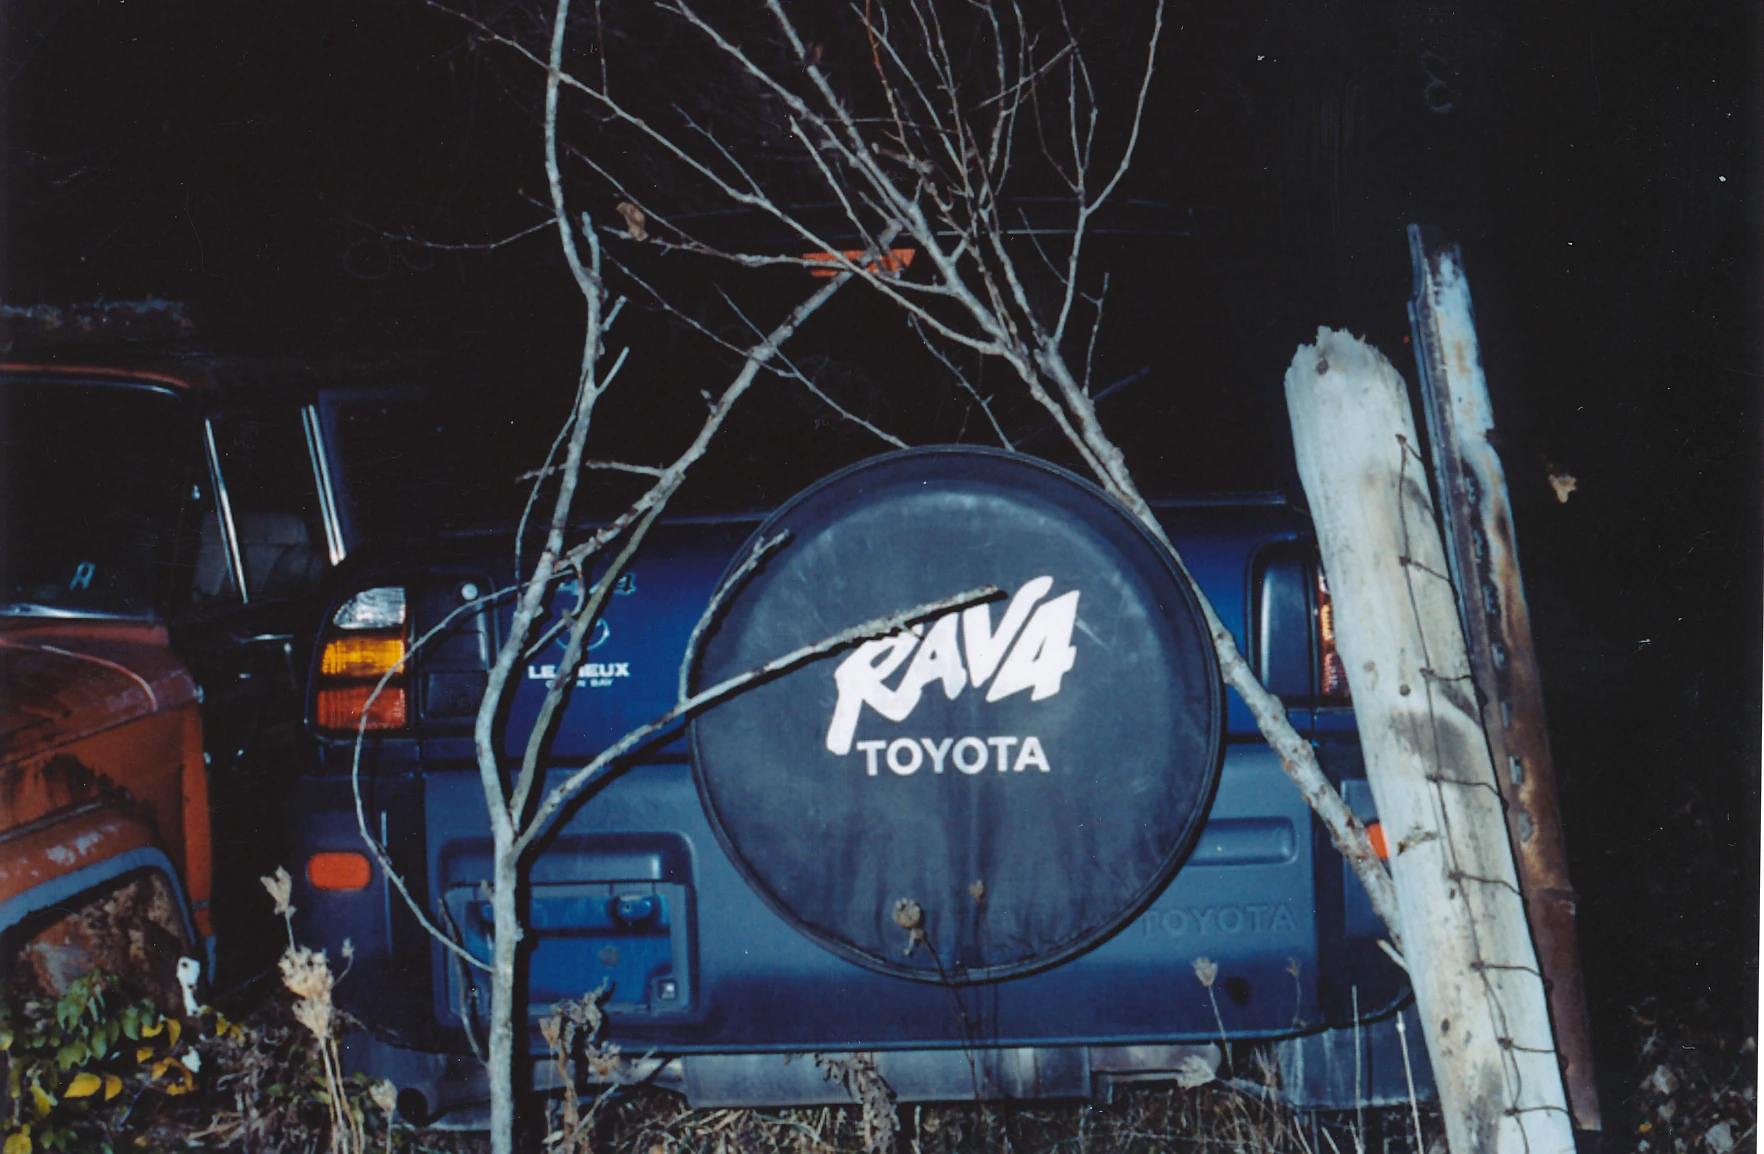
|
| 136 | Toyota RAV4 rear passenger side view | 5 | 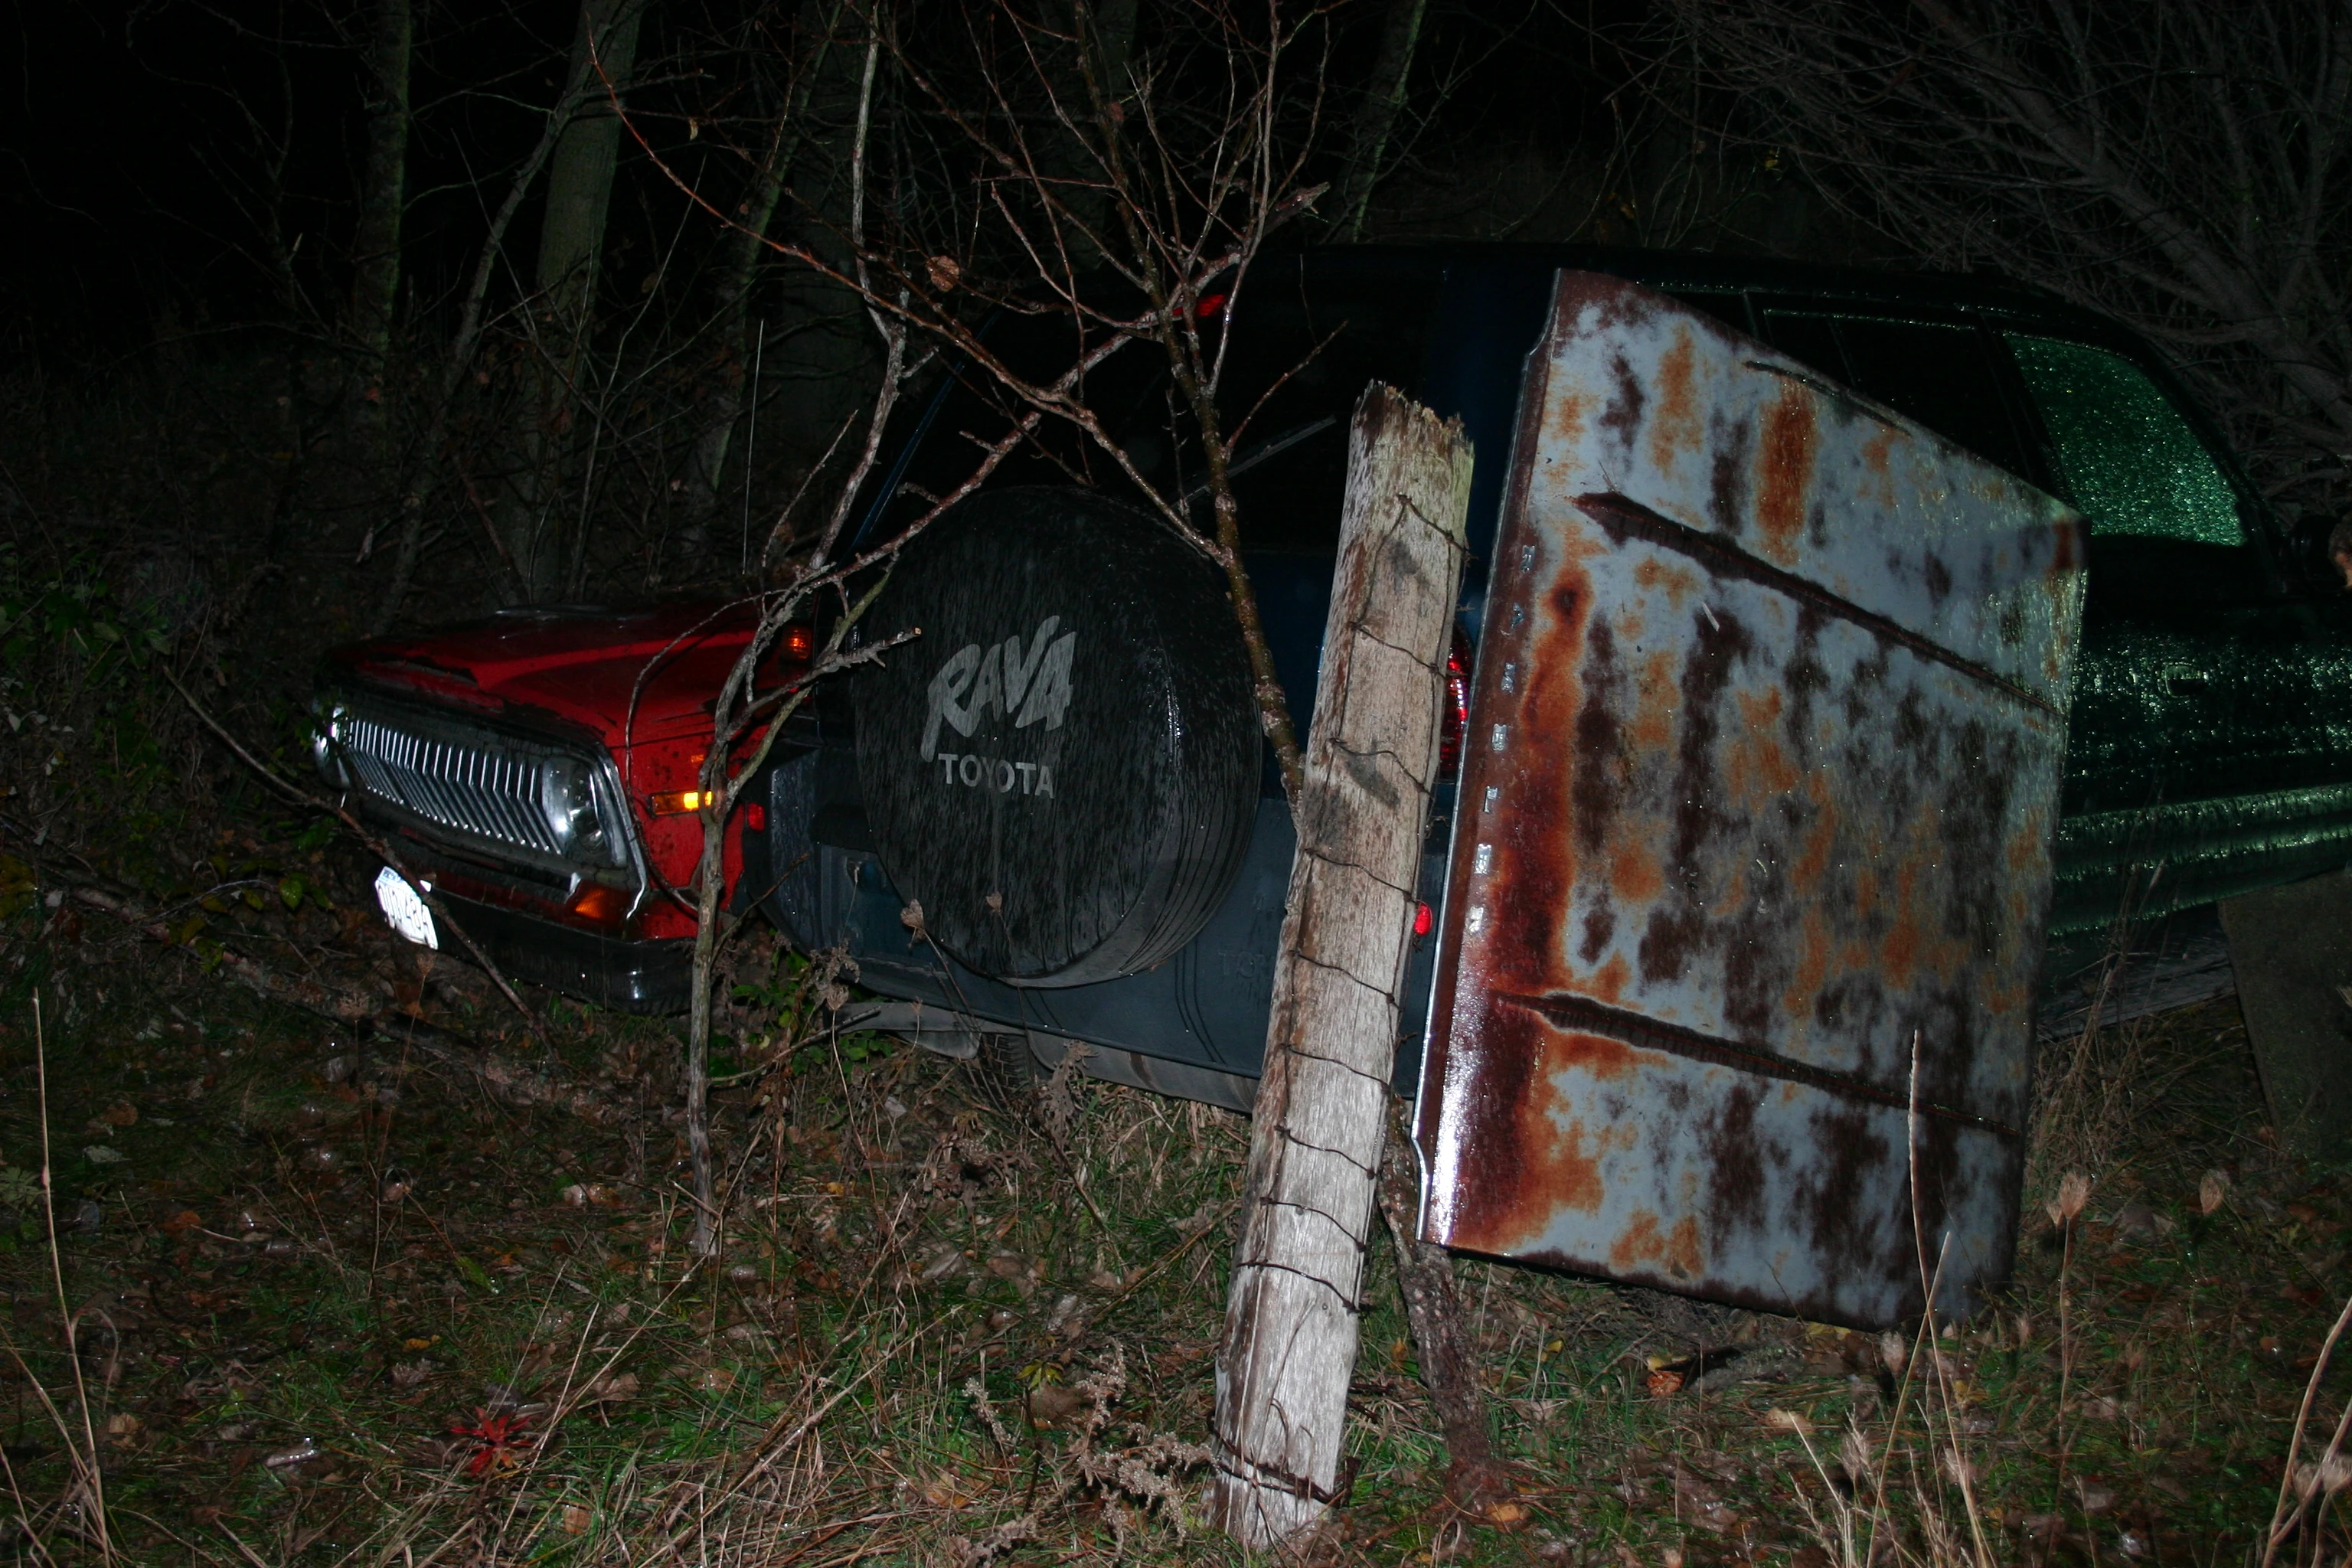
|
| 137 | Toyota RAV4 passenger side view | 5 | 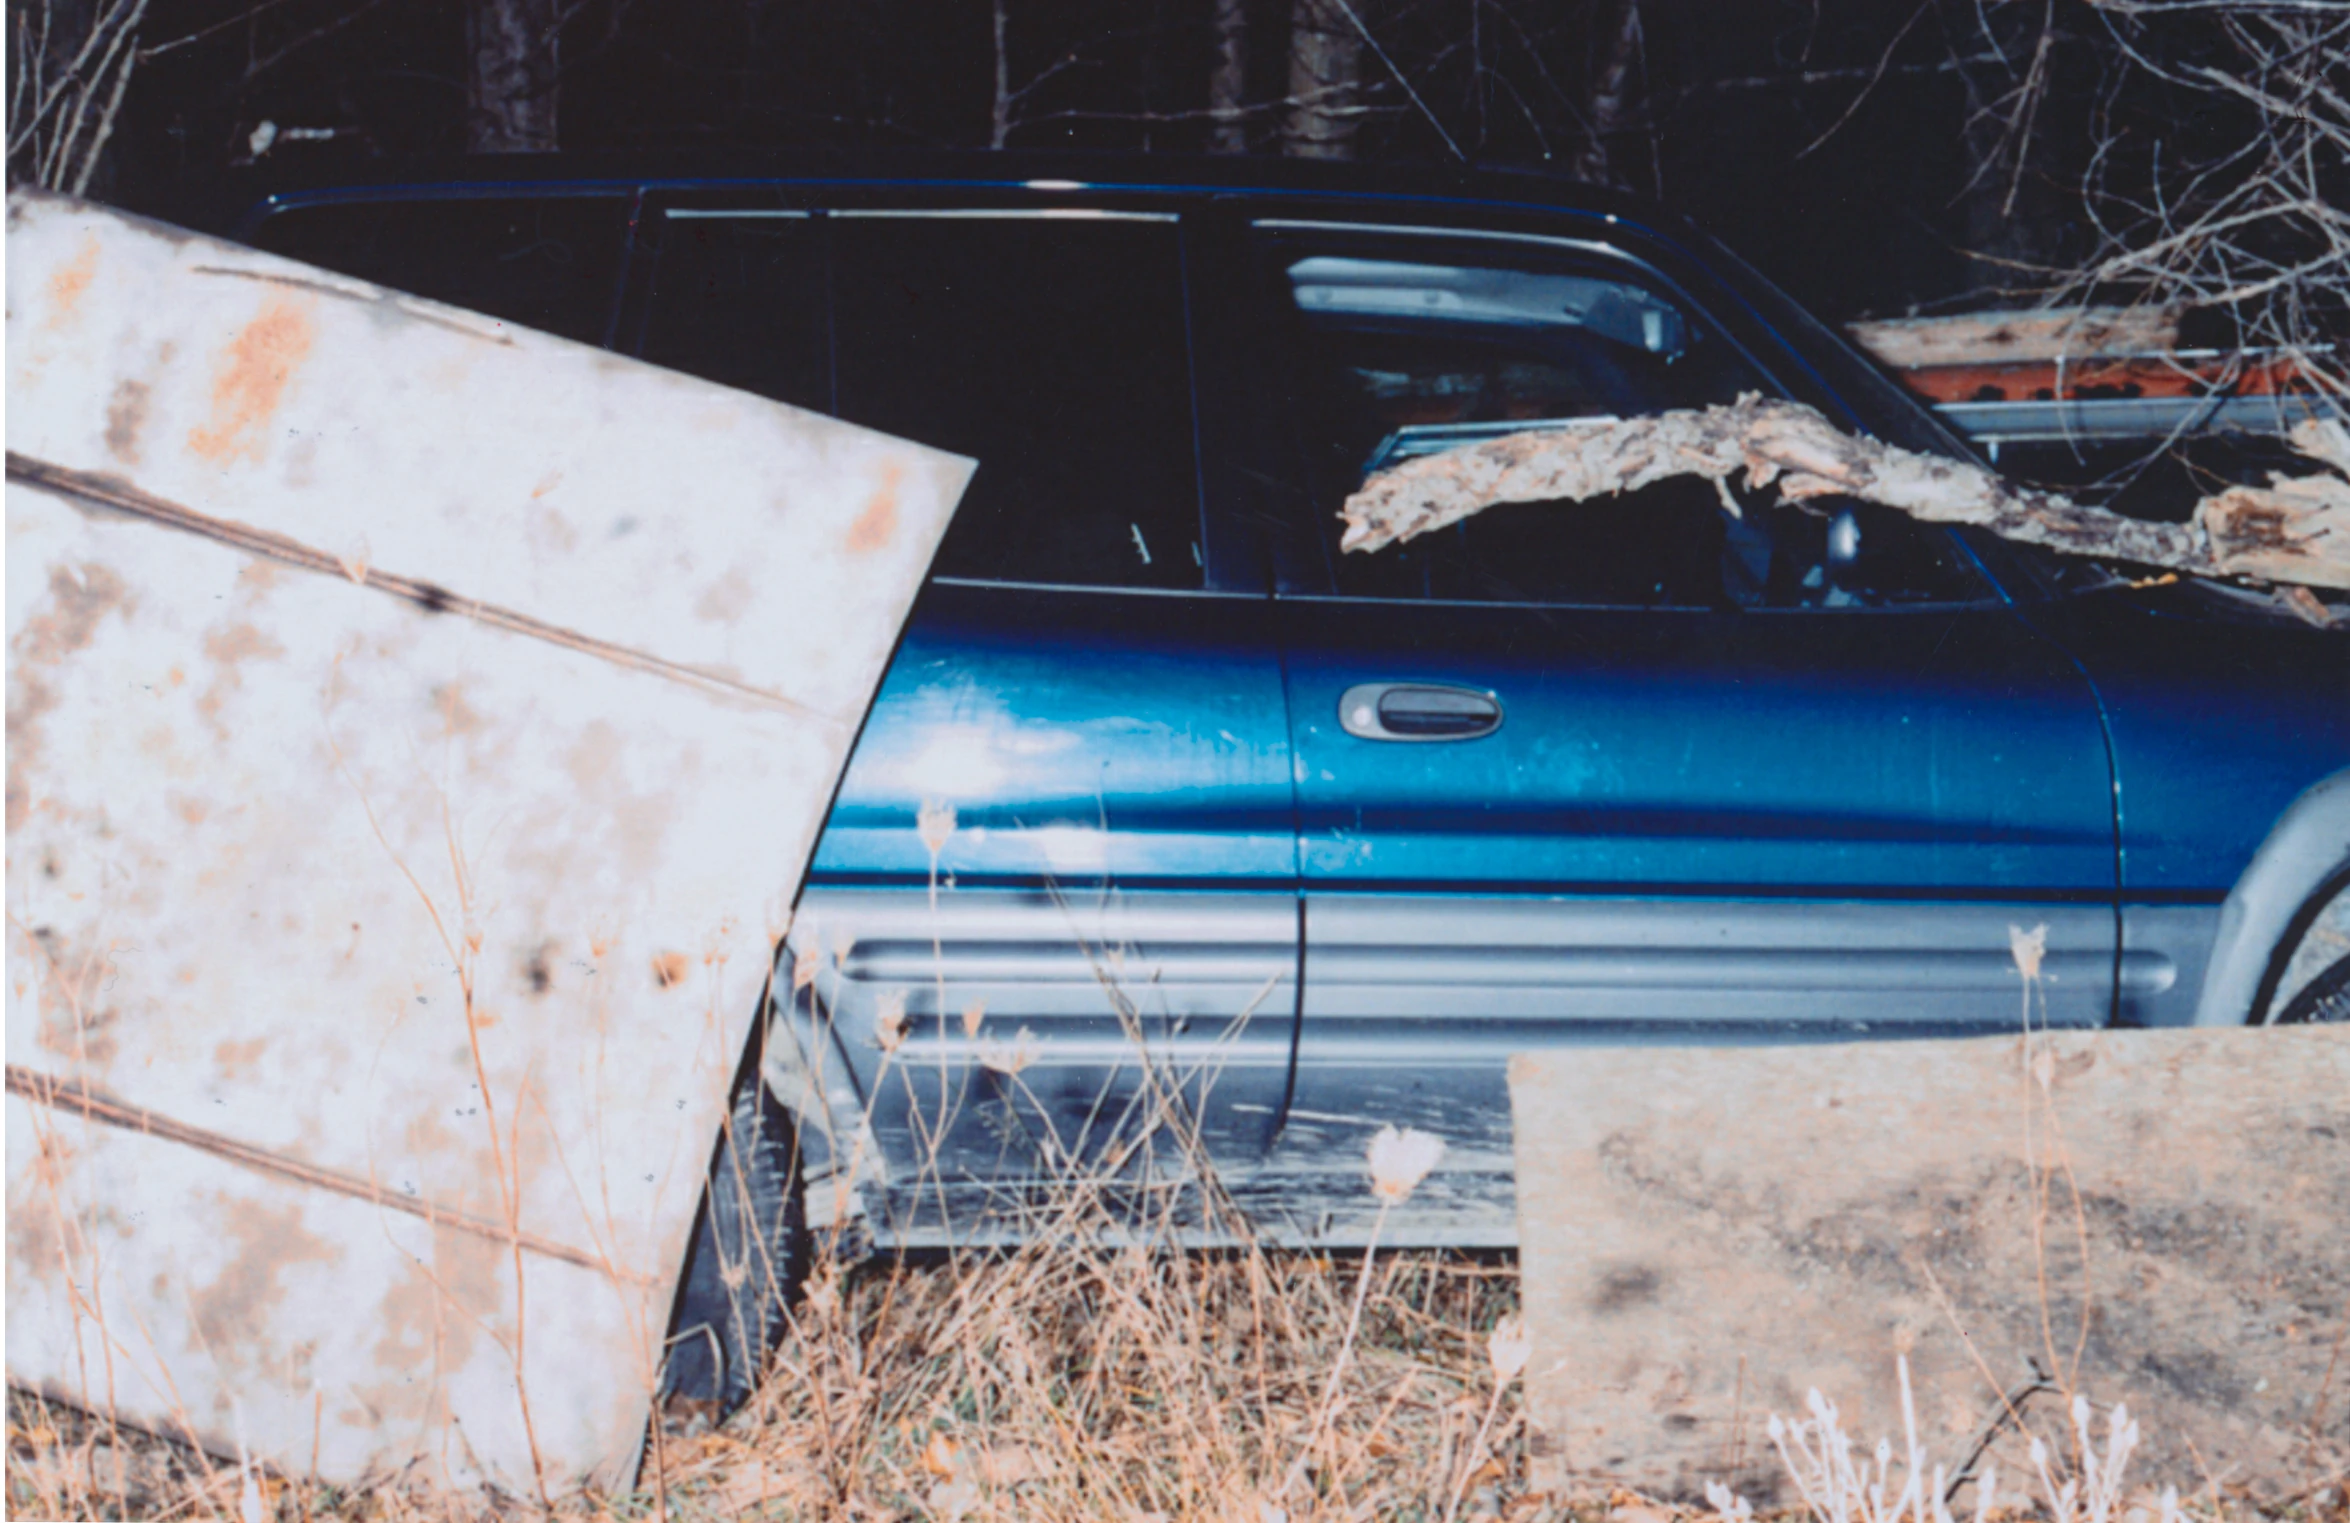
|
| 138 | Toyota RAV4 front passenger side view | 5 | 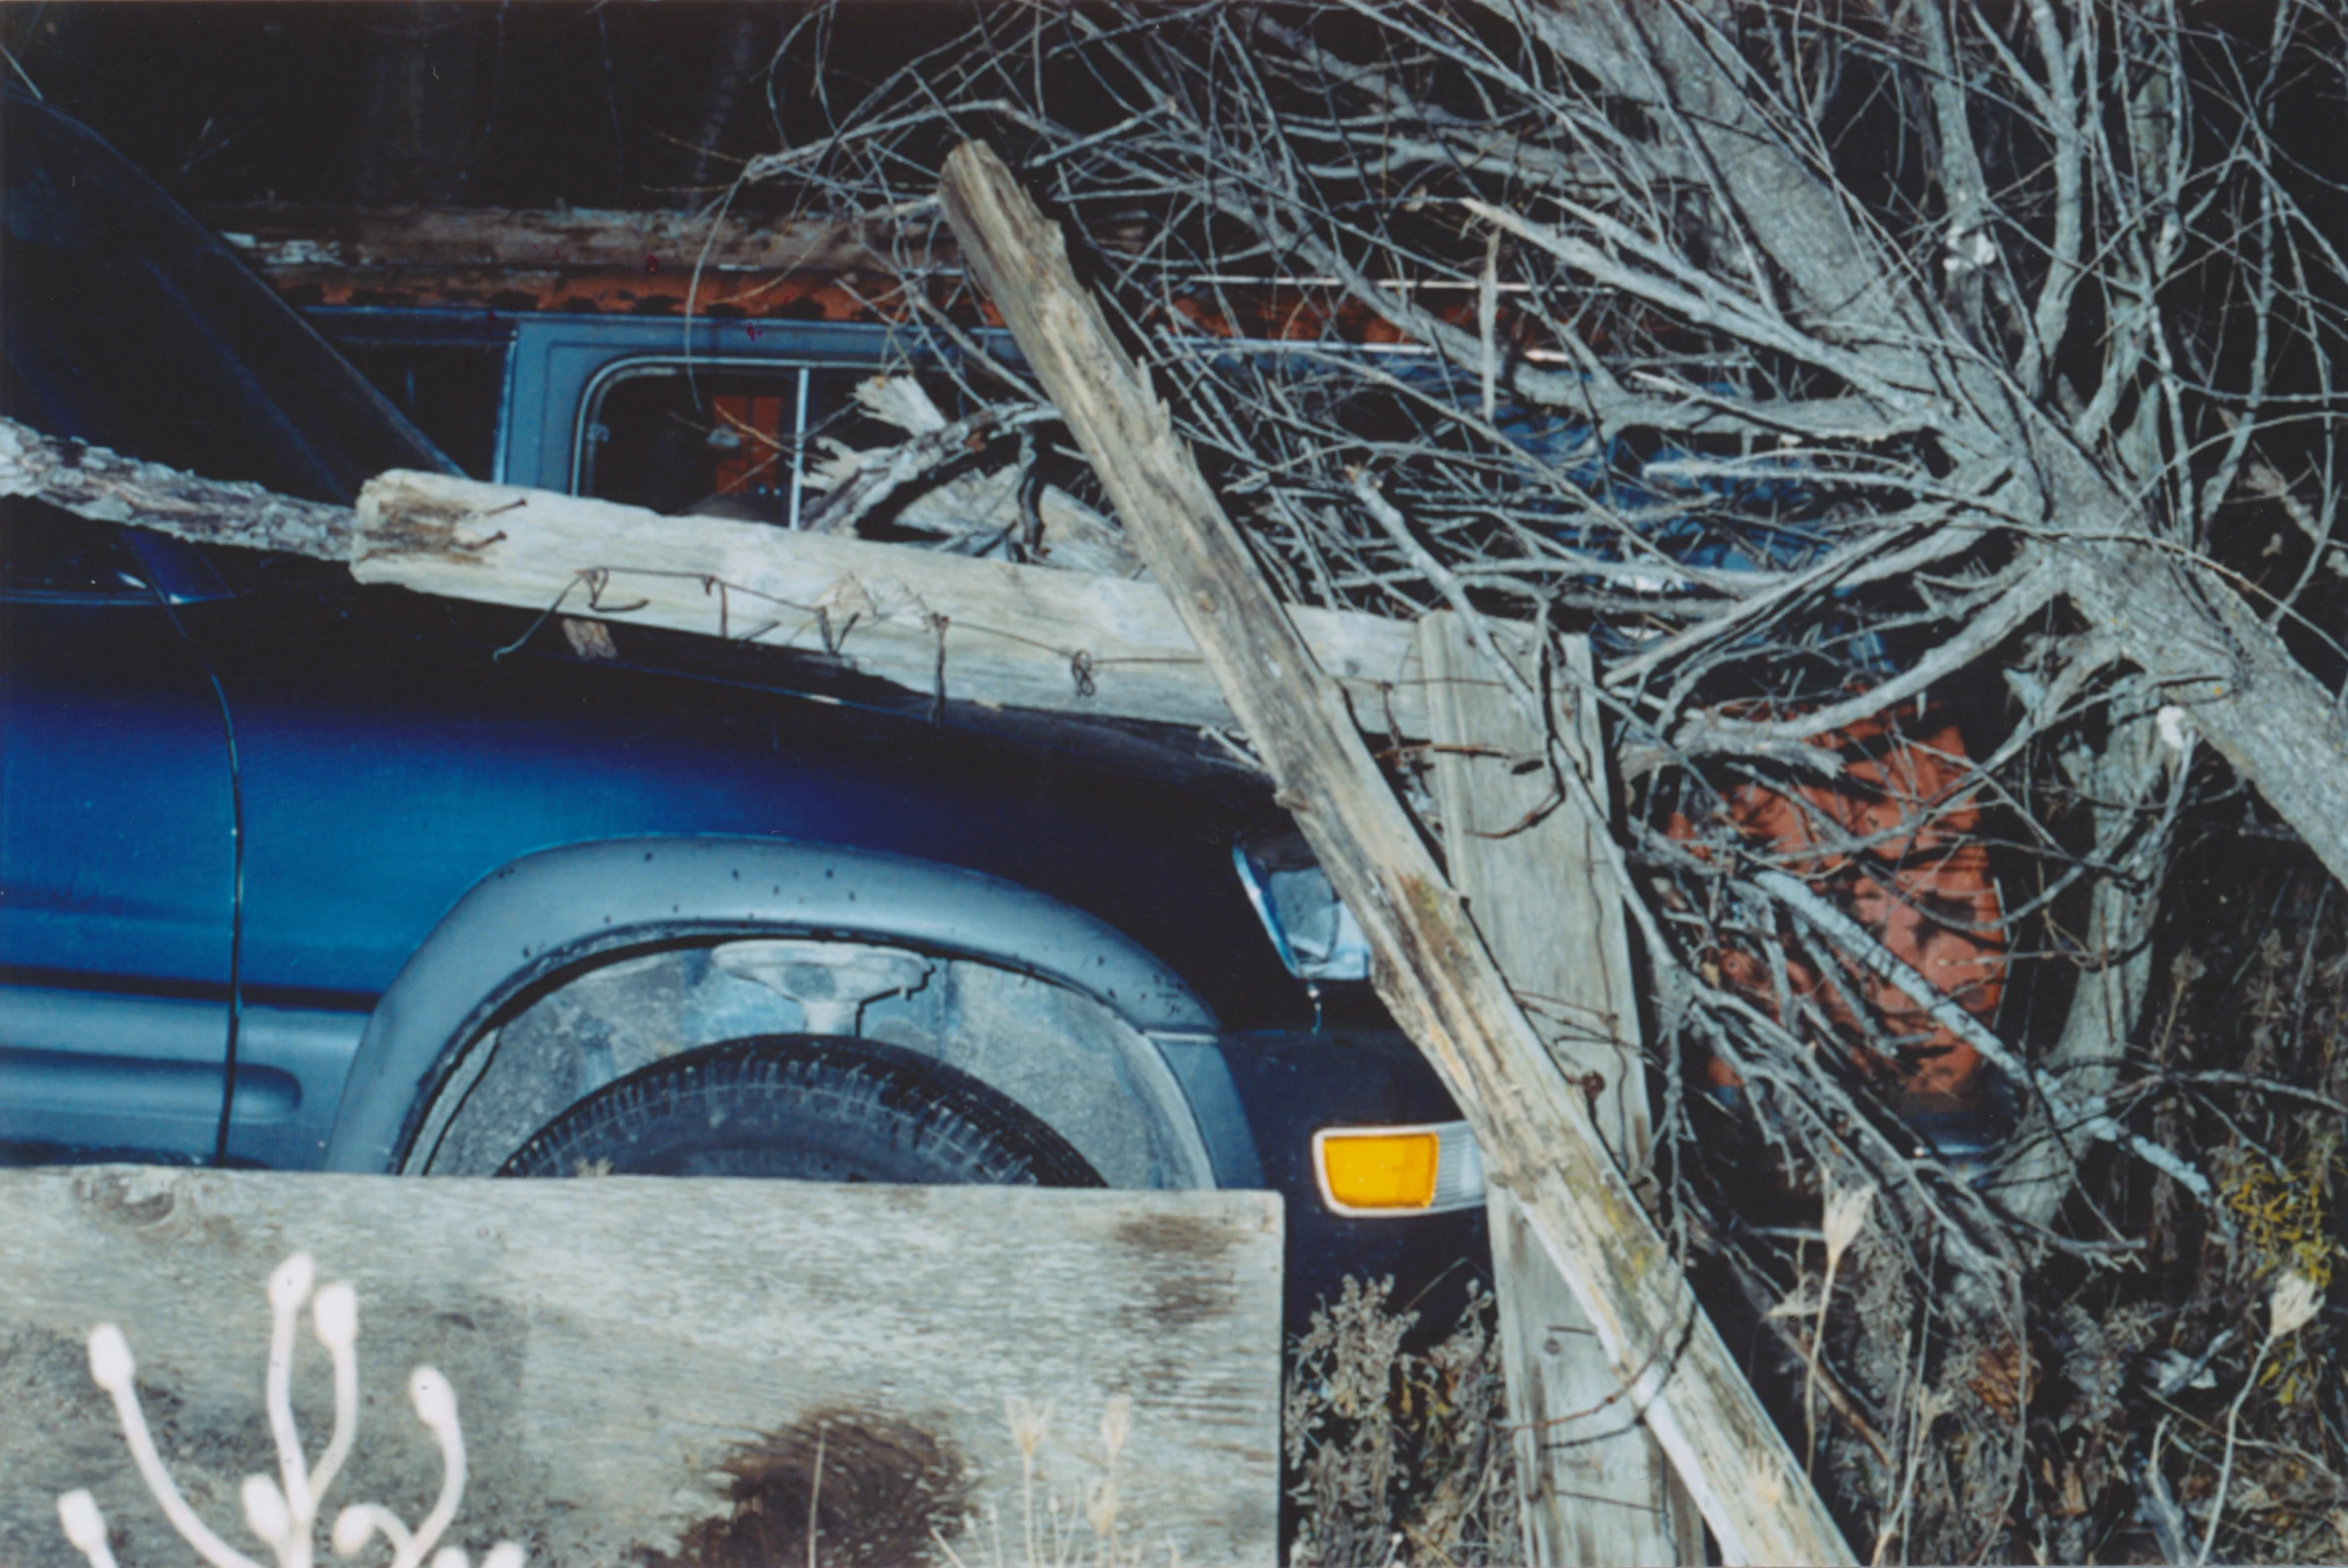
|
| 139 | Vehicle where license plates were found | 5 | 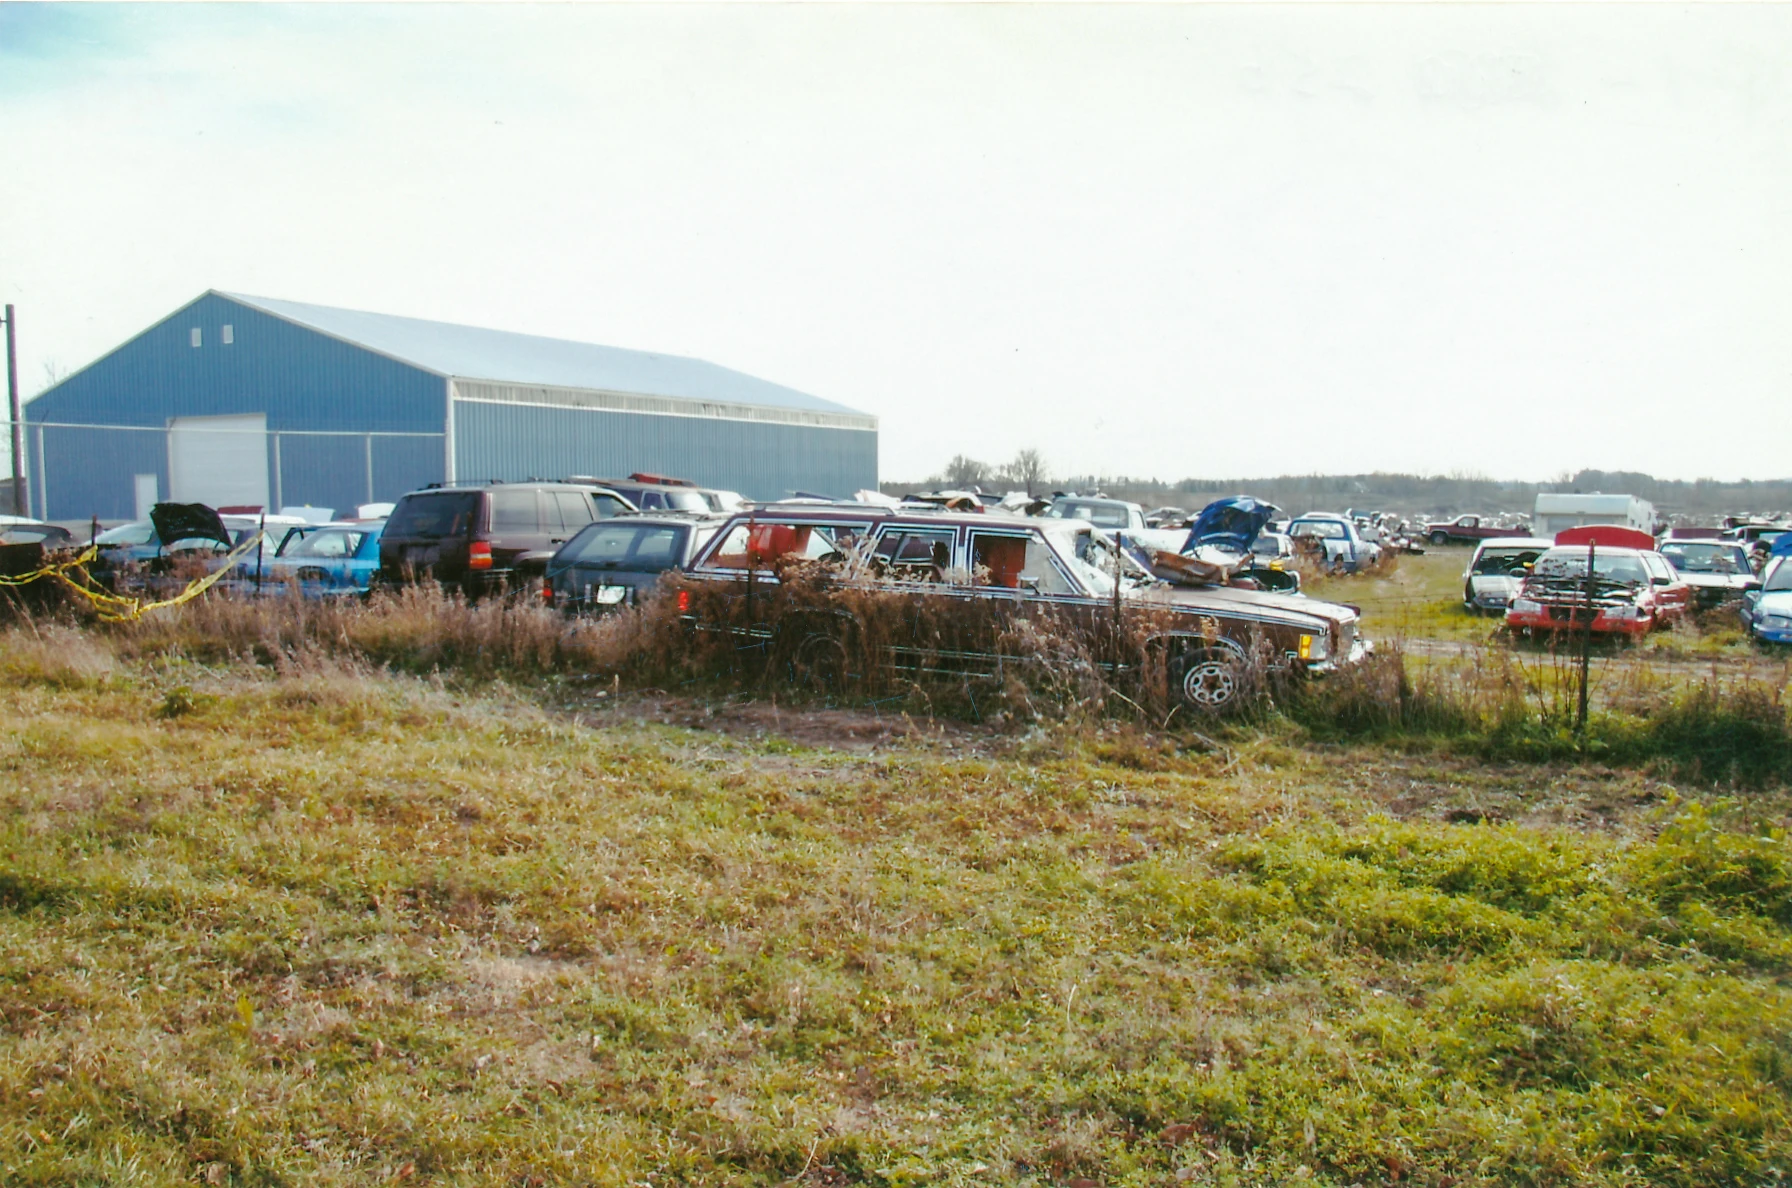
|
| 140 | Vehicle where license plates were found | 5 | 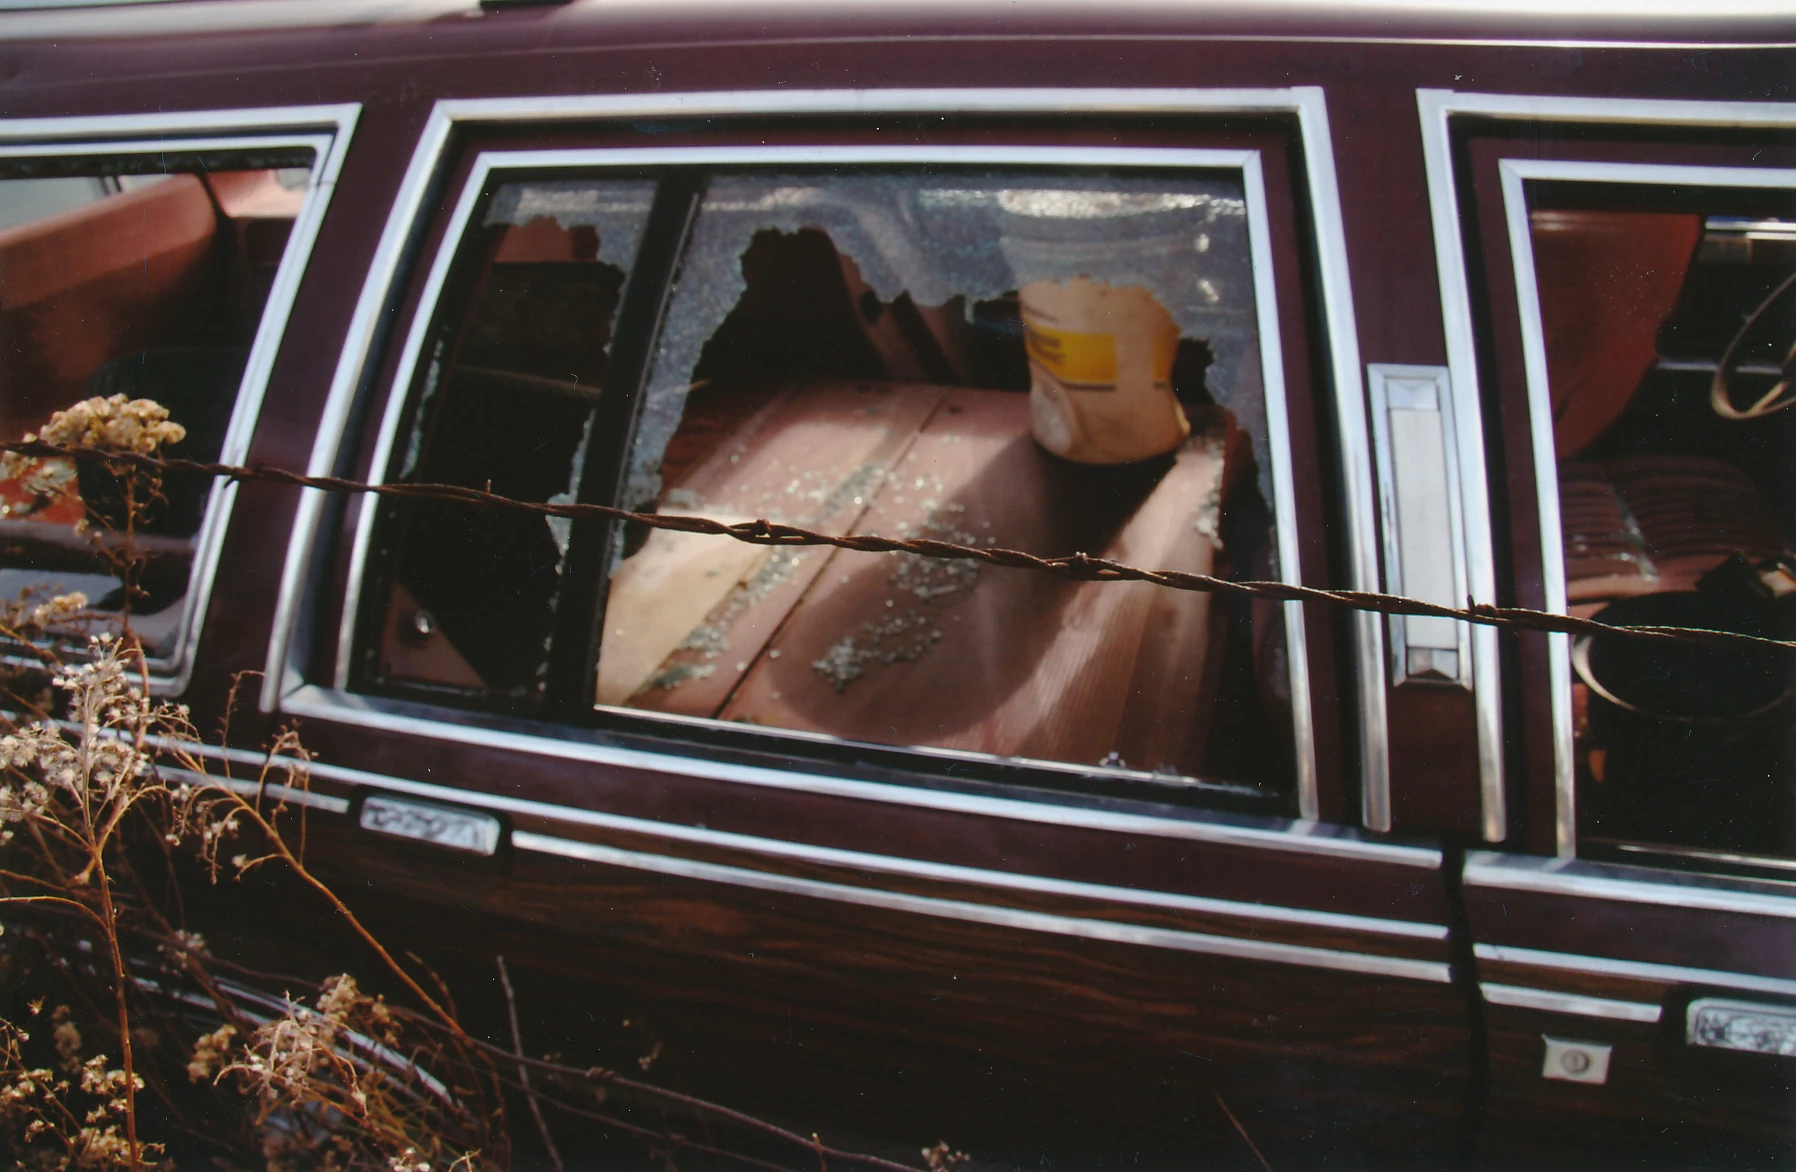
|
| 141 | License plates as found in vehicle | 5 | 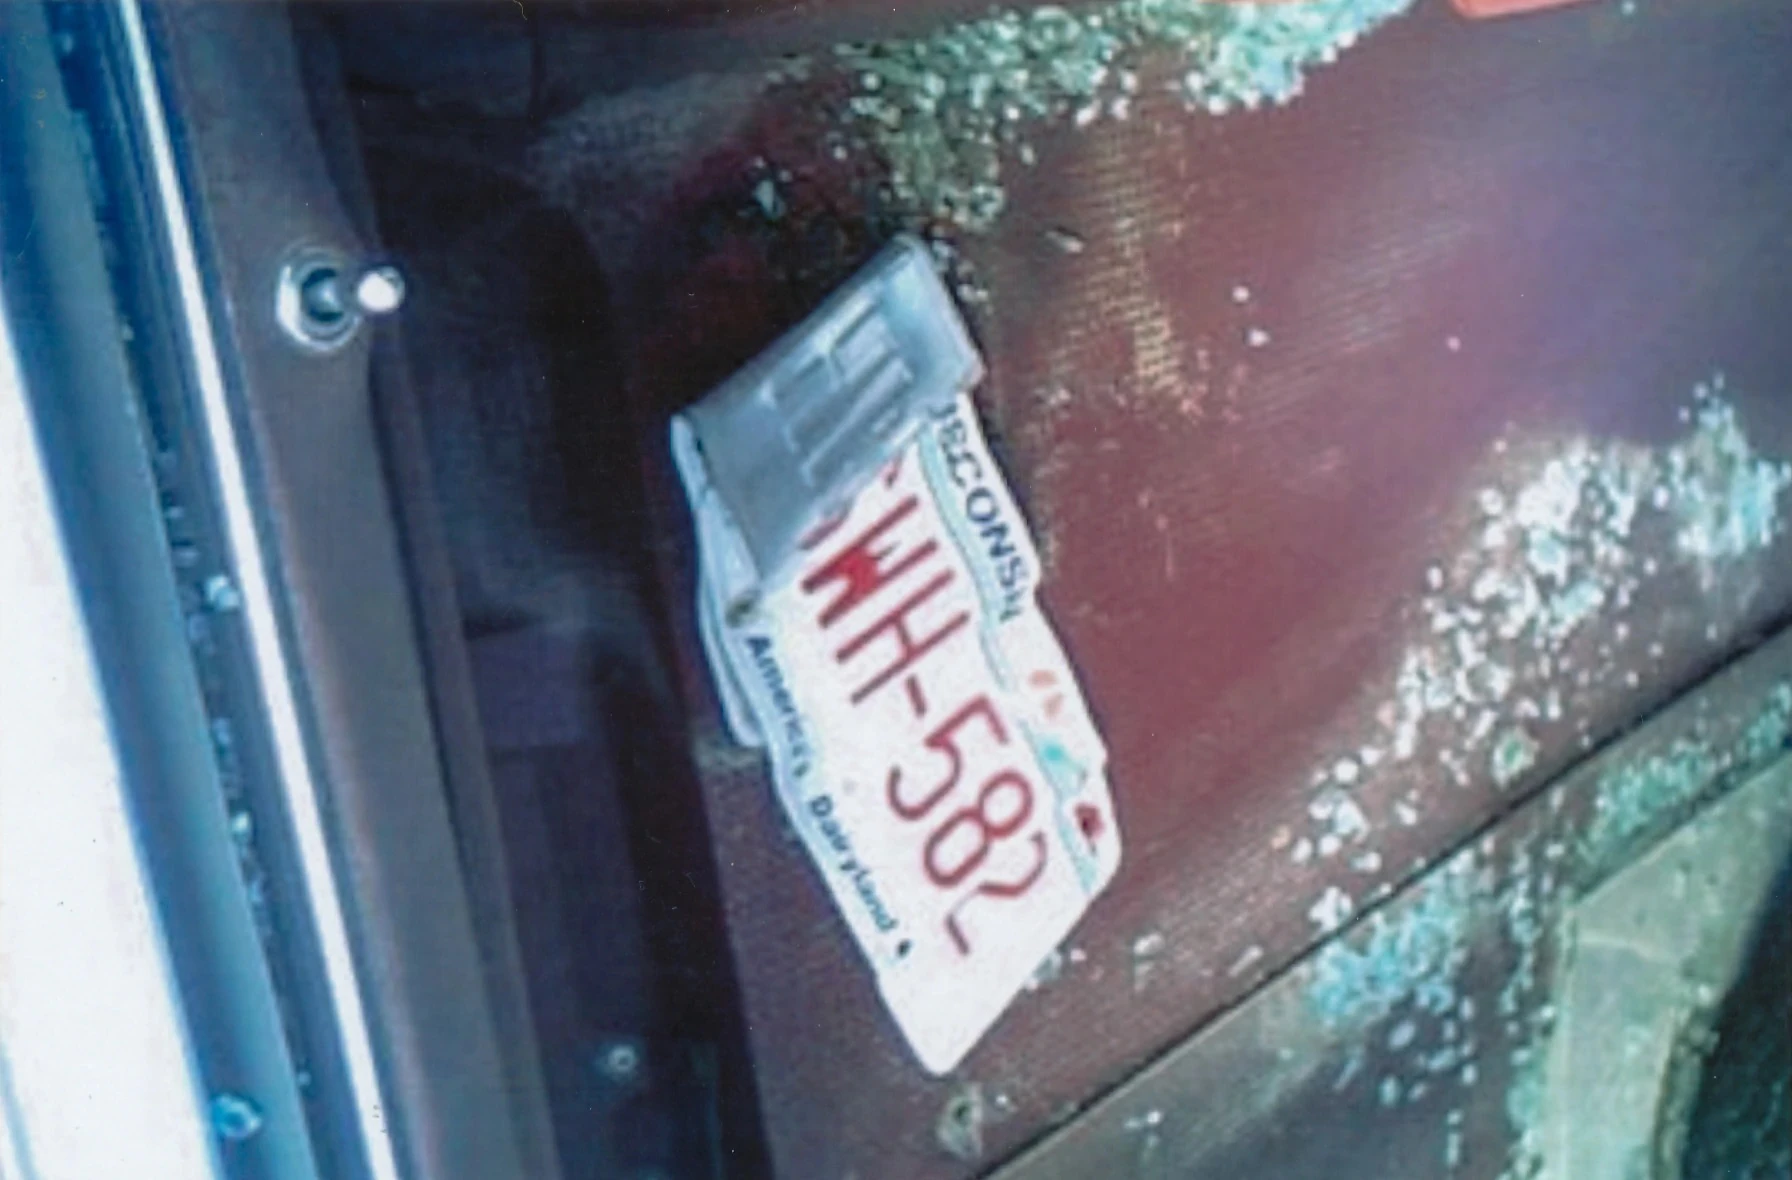
|
| 143 | RAV4 area as viewed from near pond | 5 | 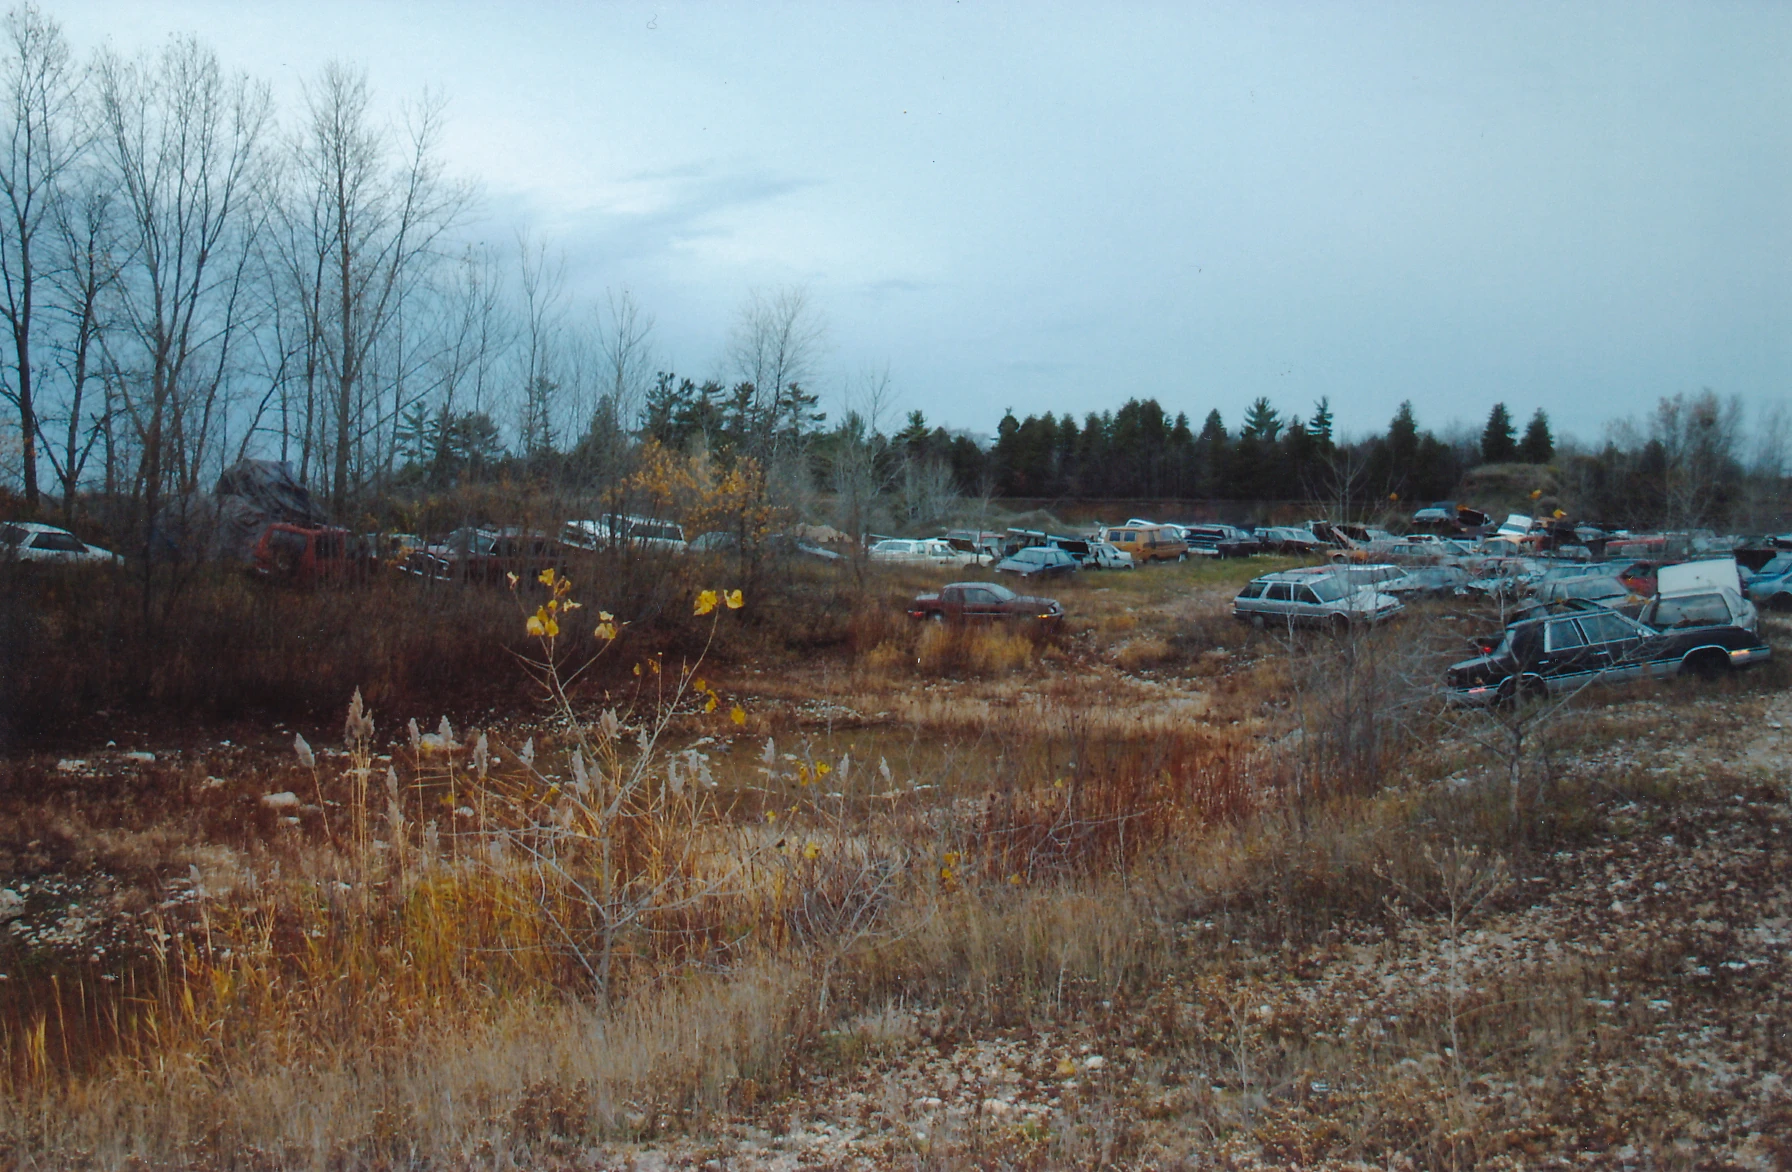
|
| 144 | RAV4 area as viewed from near pond | 5 | 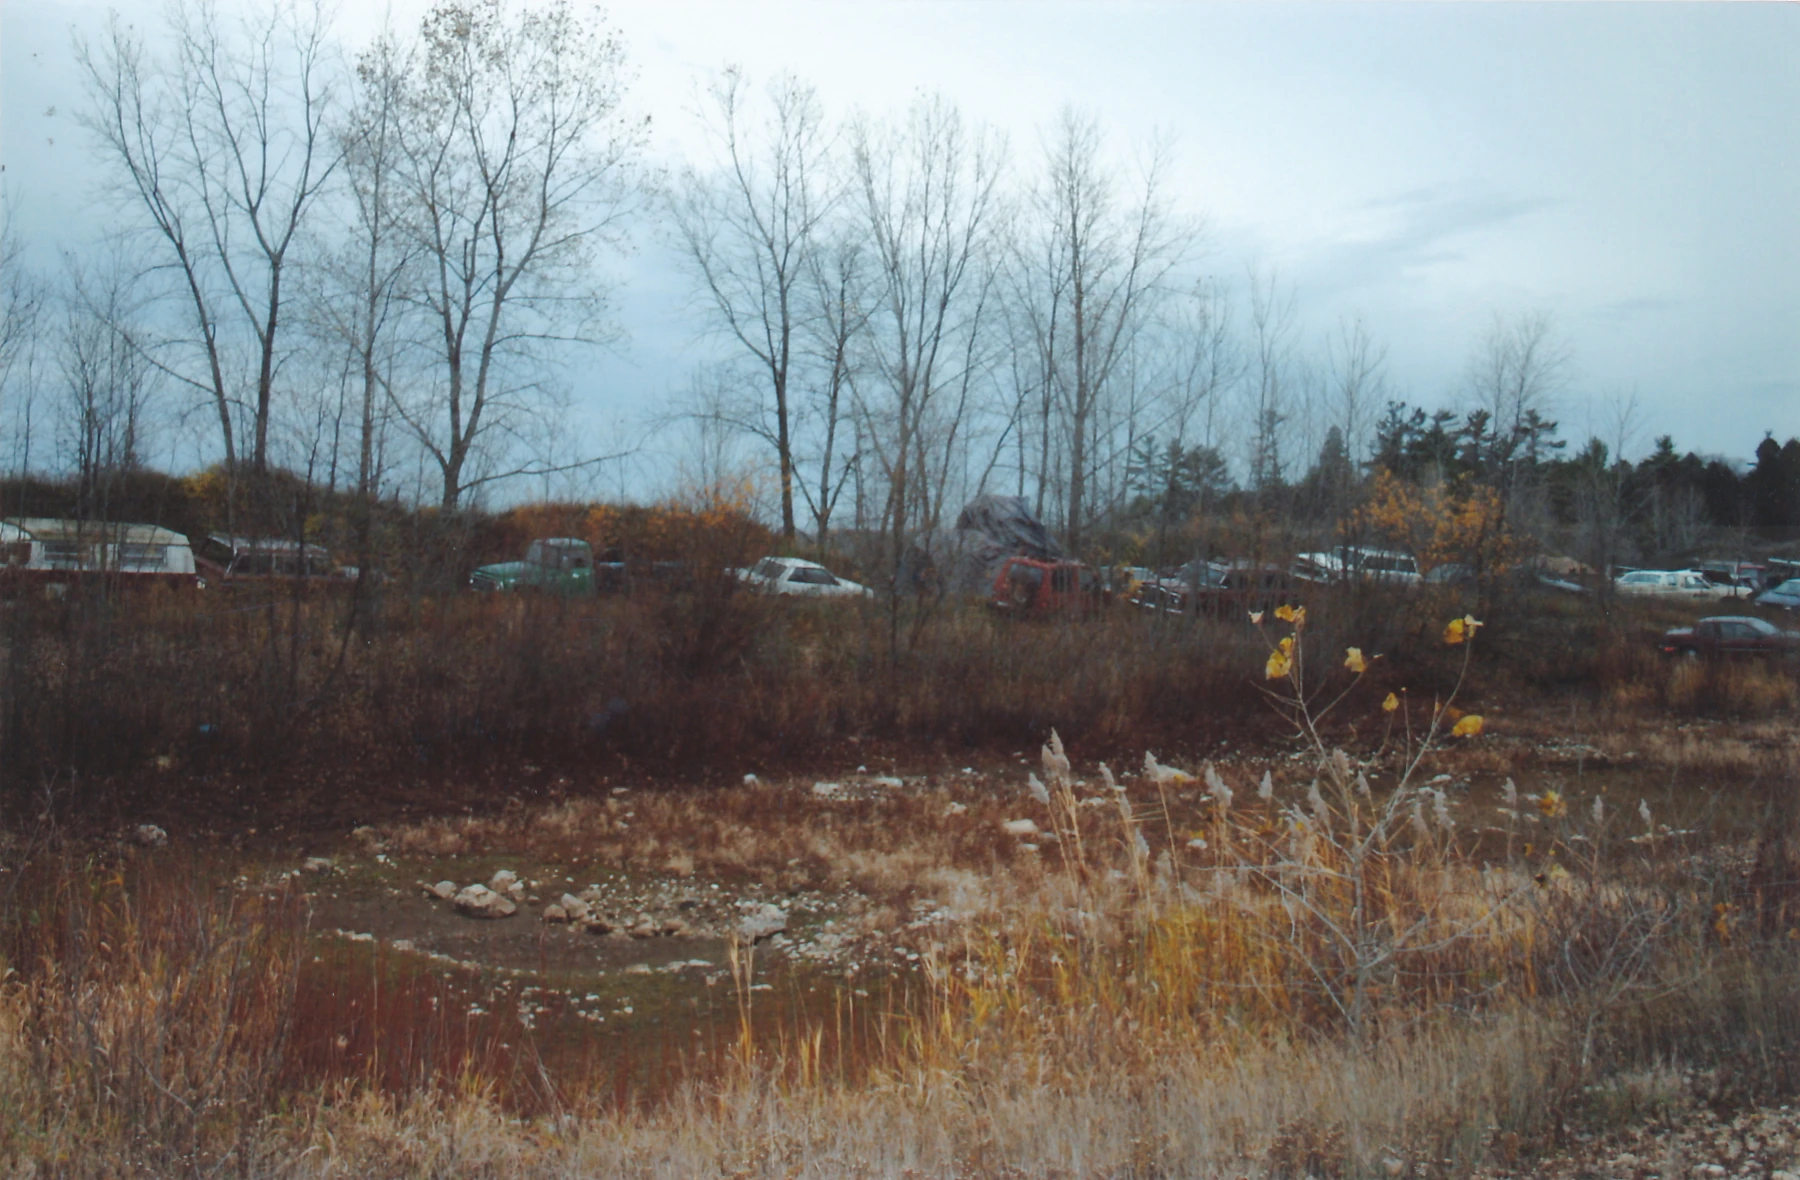
|
| 145 | Aluminium smelter on Avery property | 5, 18 | 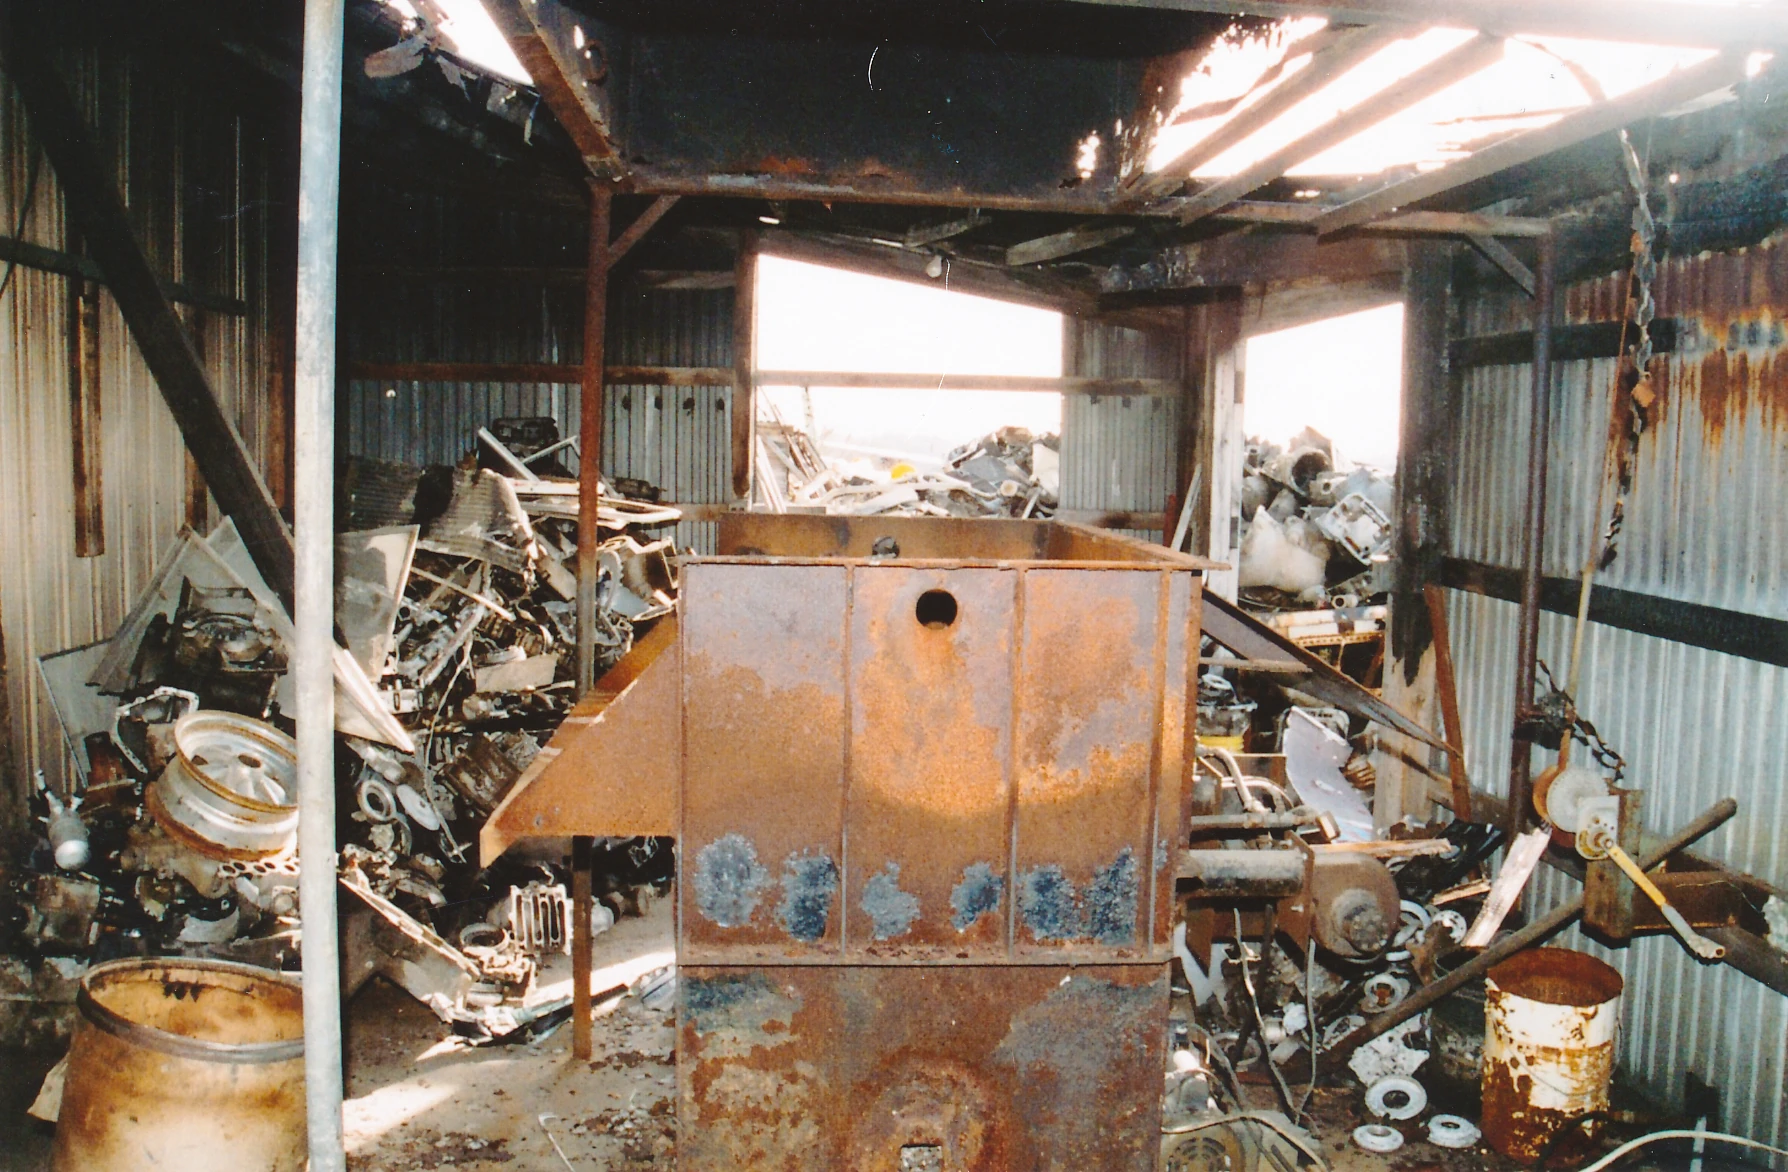
|
| 148 | Notebook from Avery residence with "back to patio door" note | 5 | 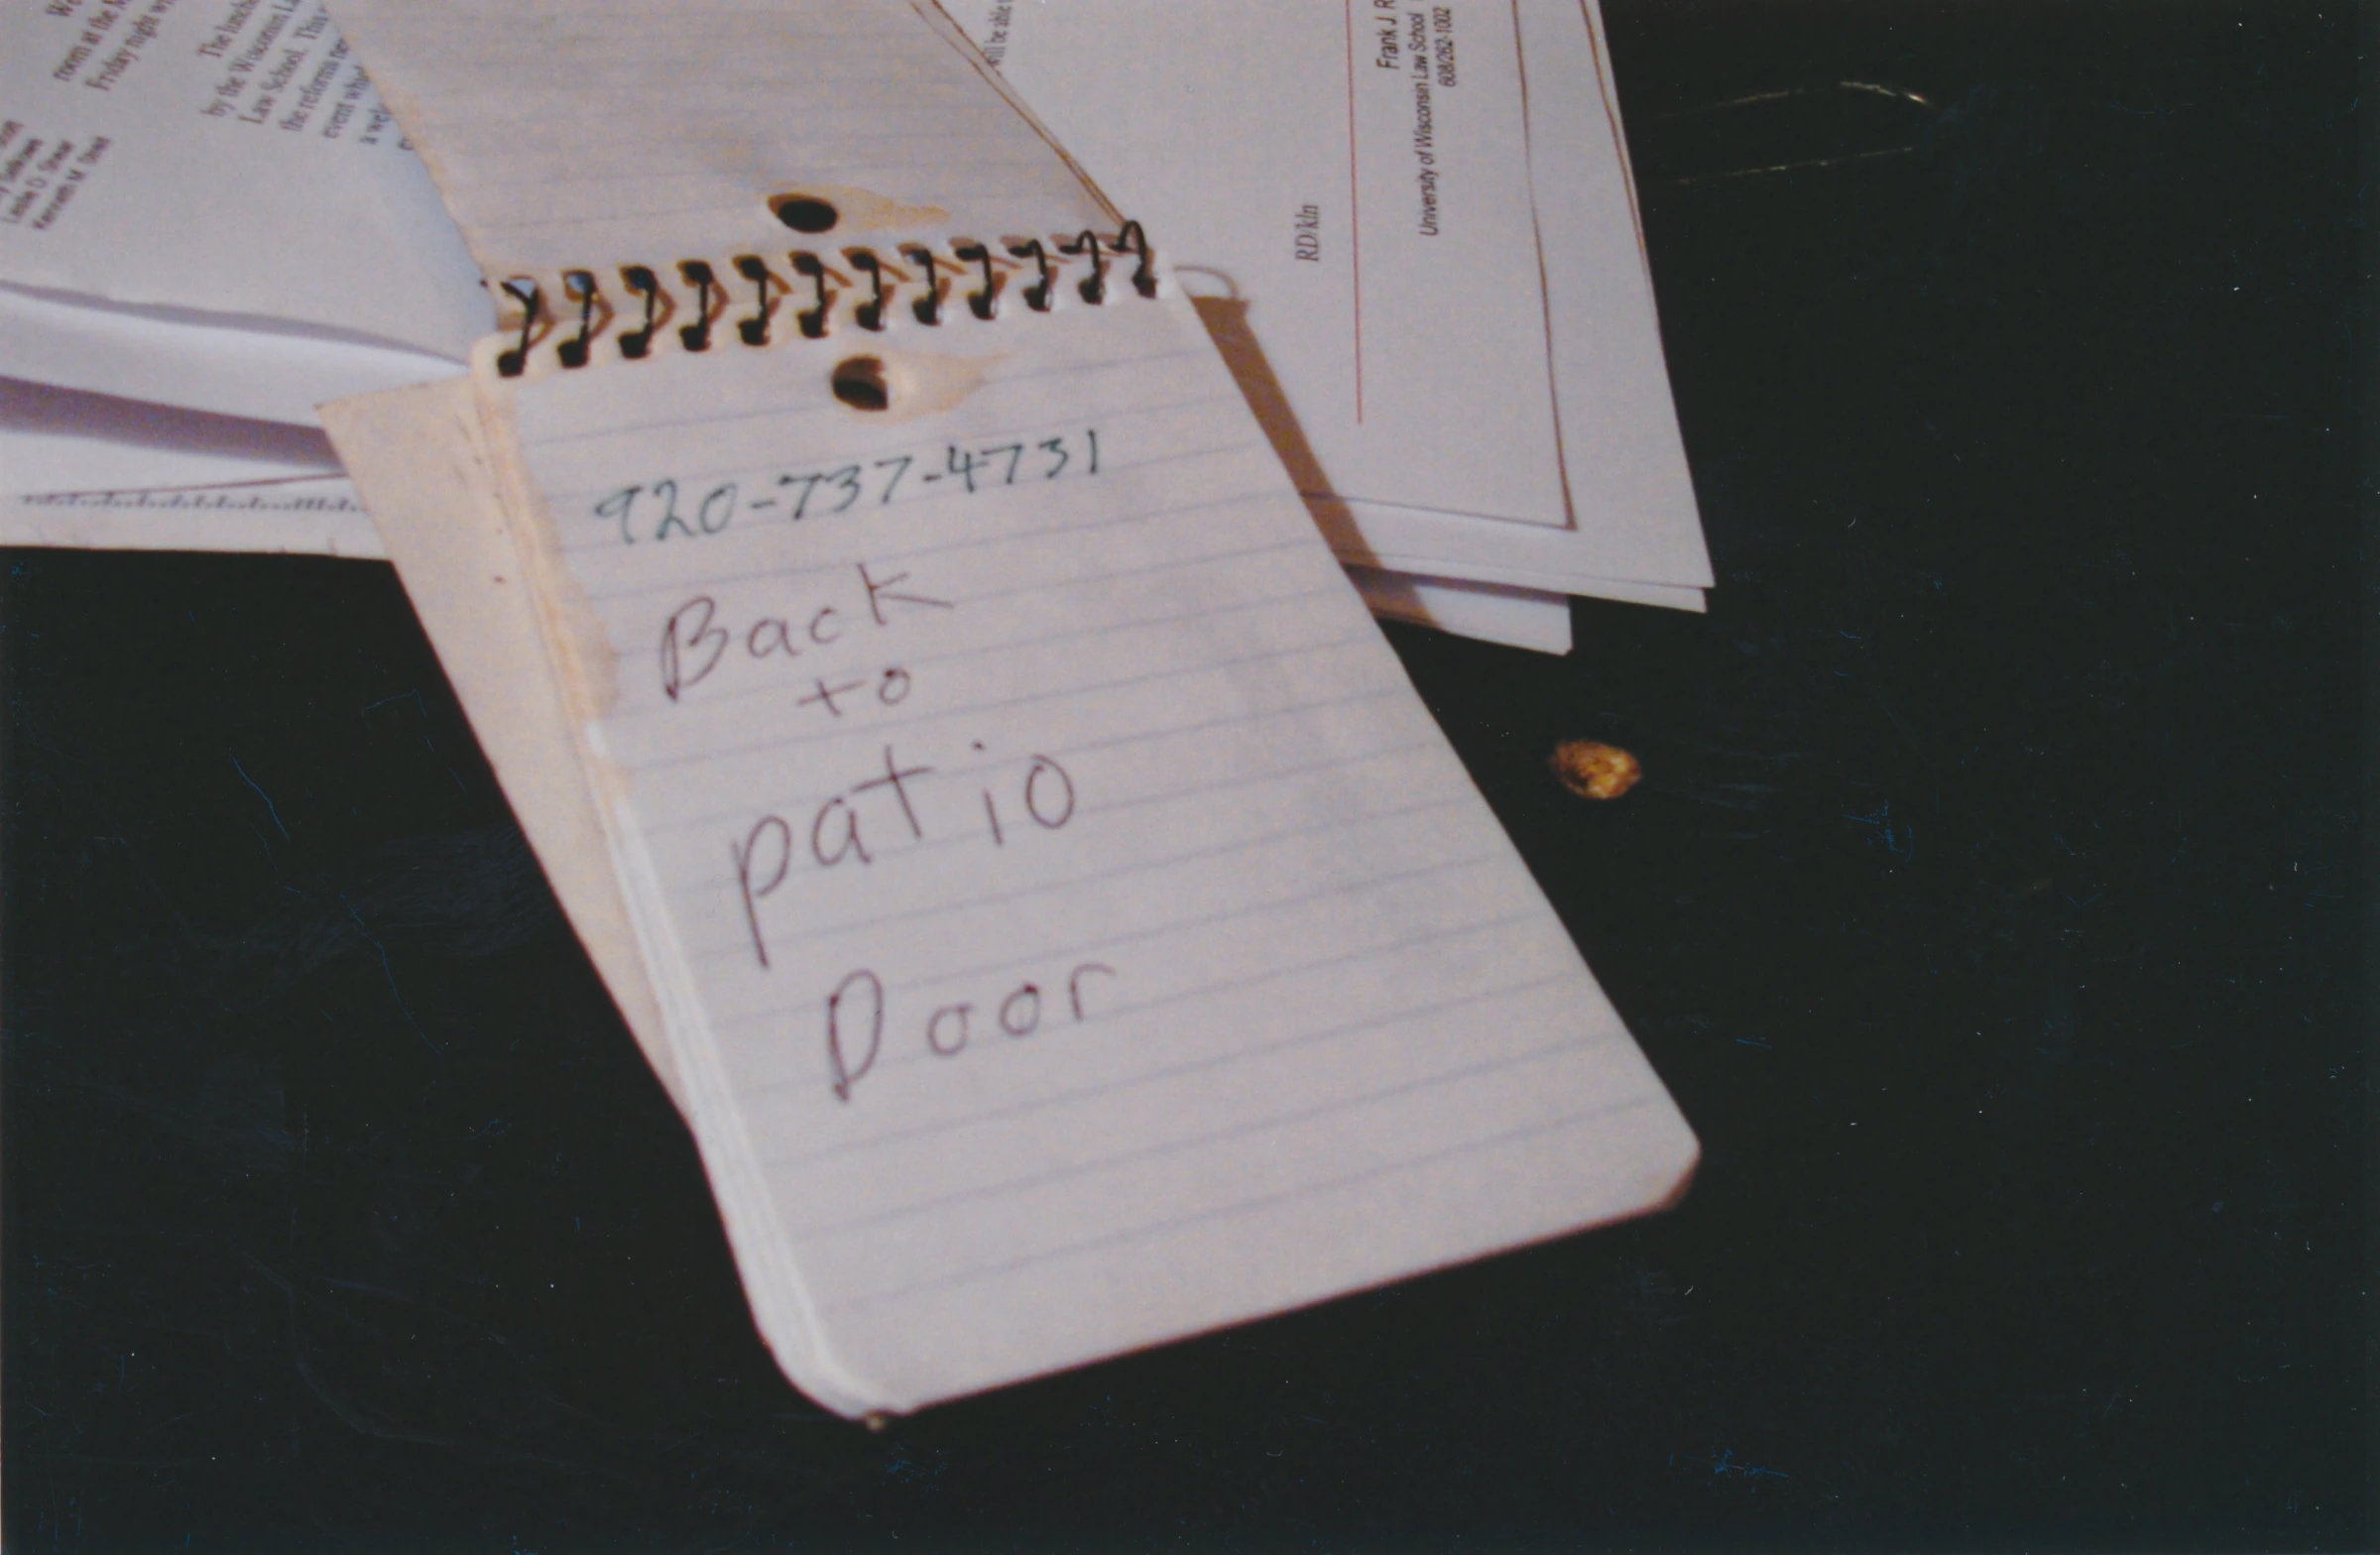
|
| 149 | Paper from Avery residence with Halbach's phone number and Zander rd written on it. | 5 | 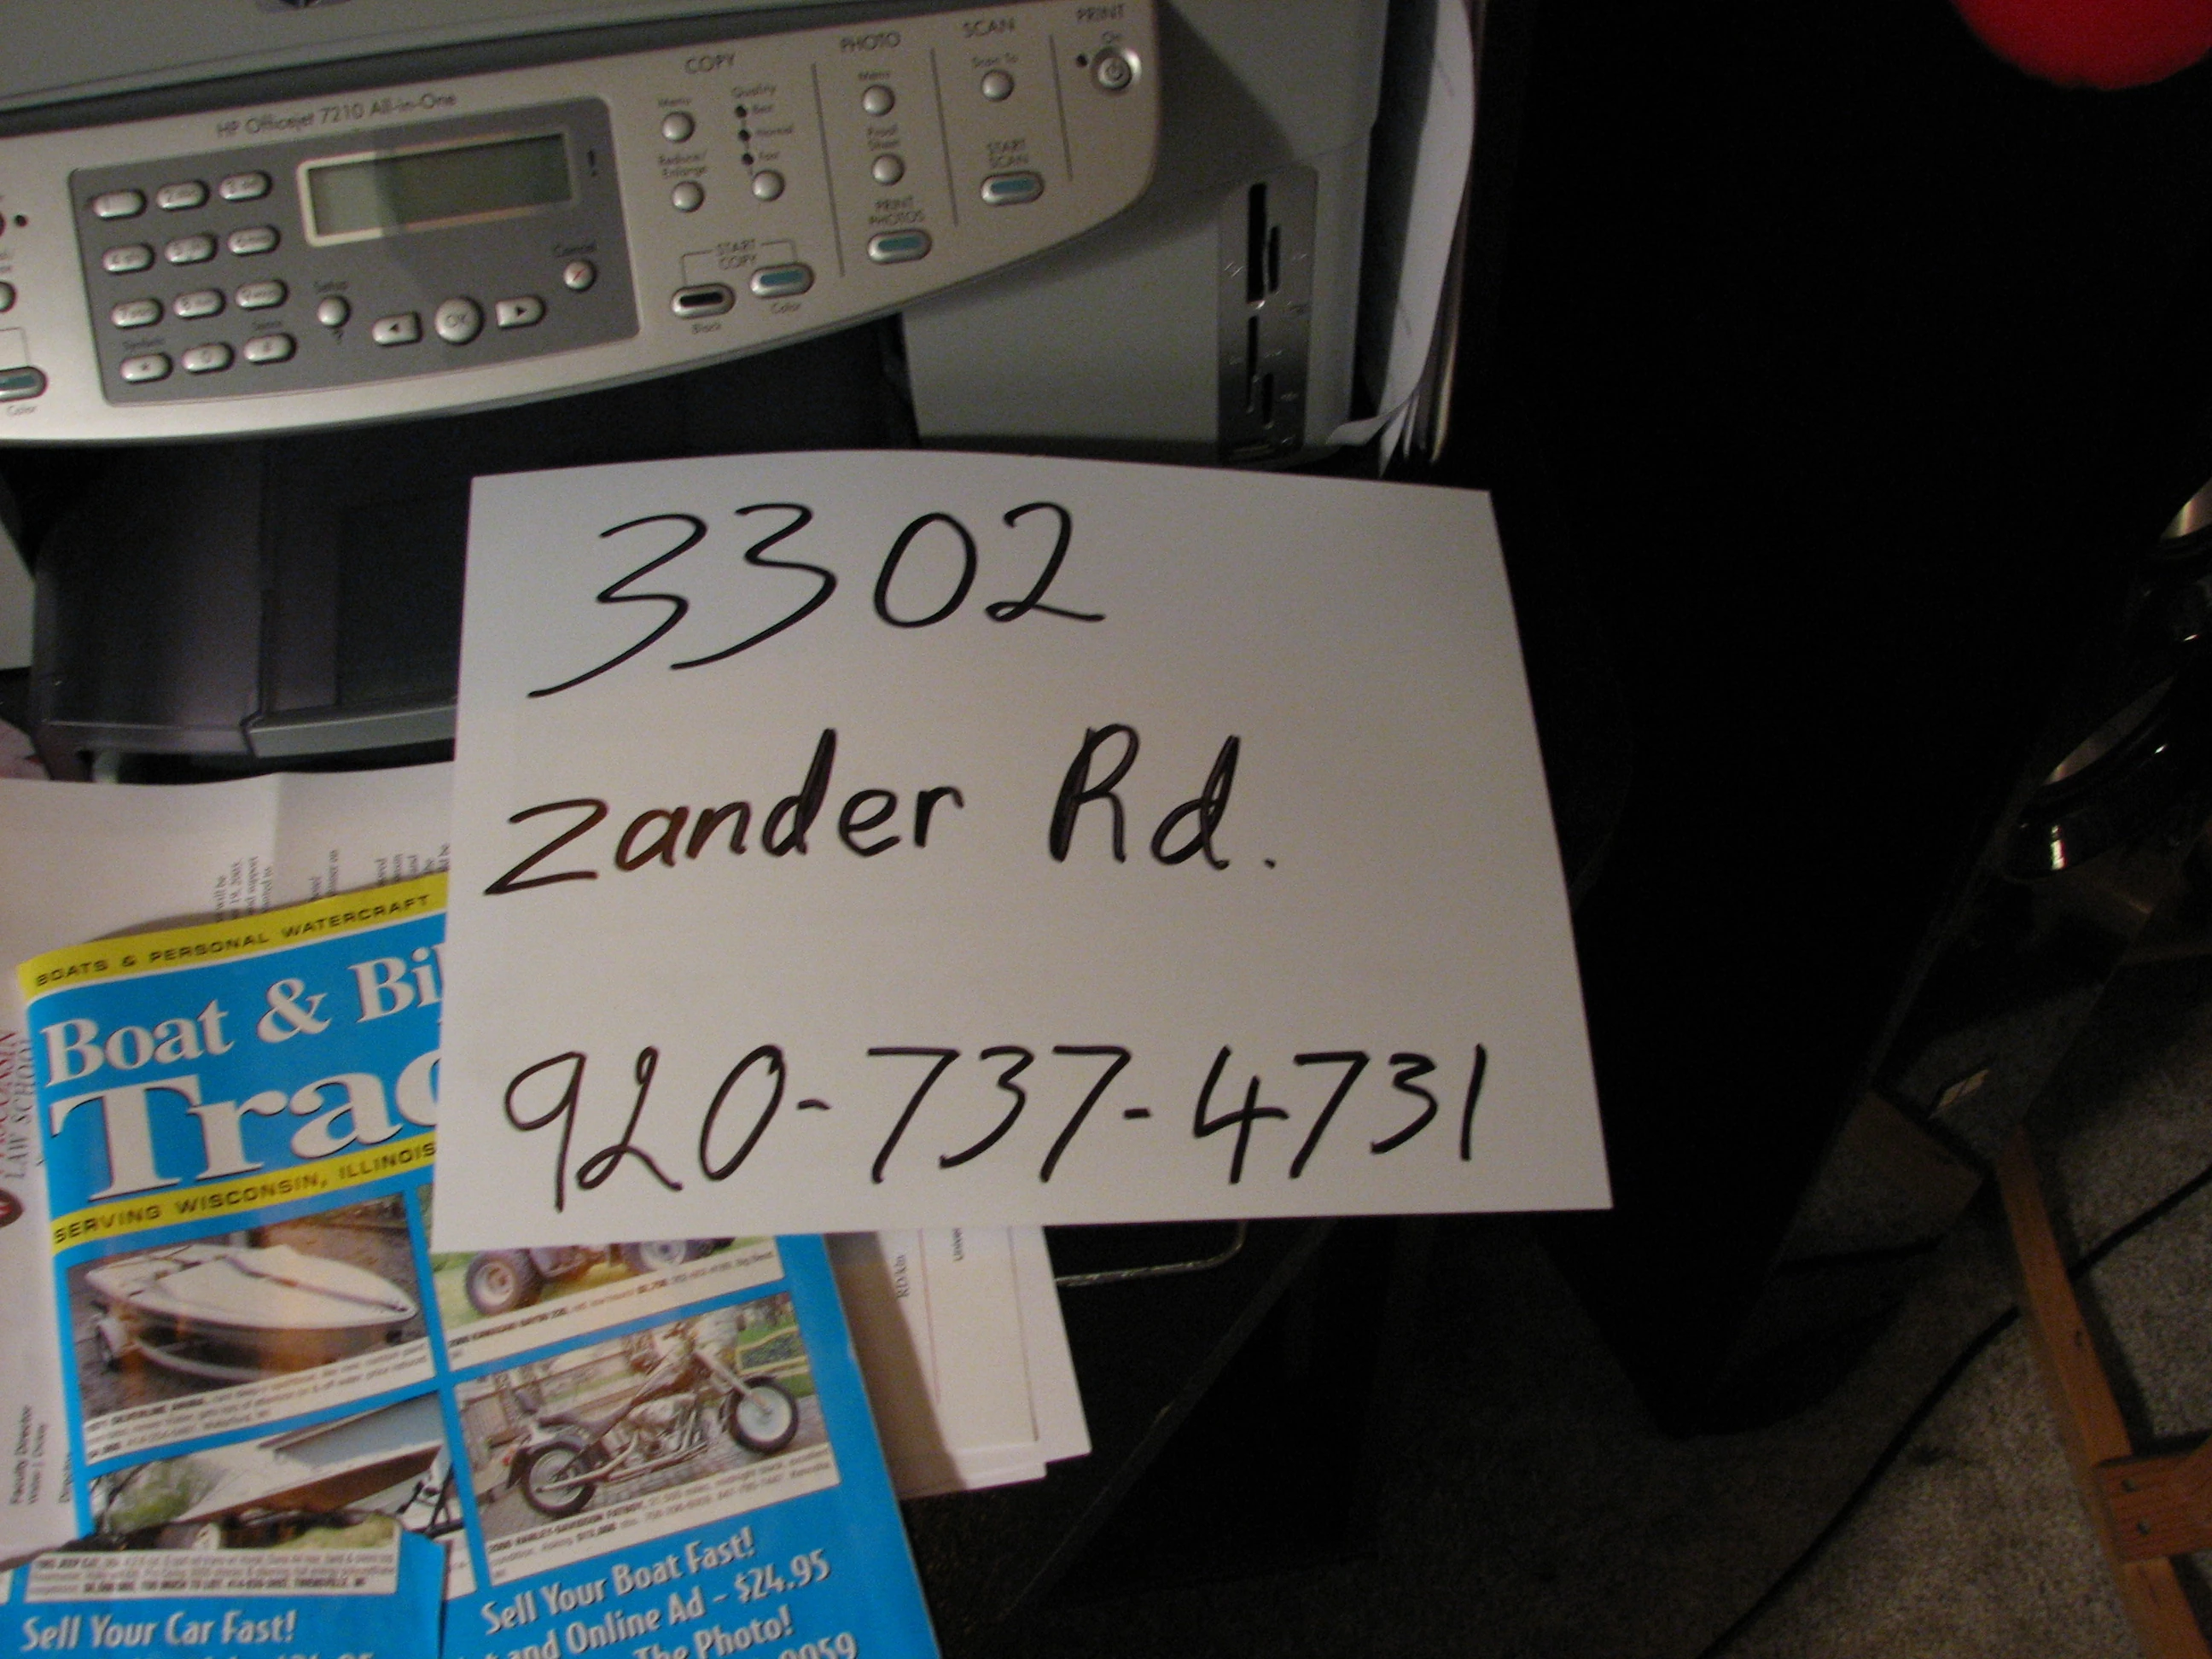
|
| 150 | AutoTrader issue from Avery's trailer | 5 | 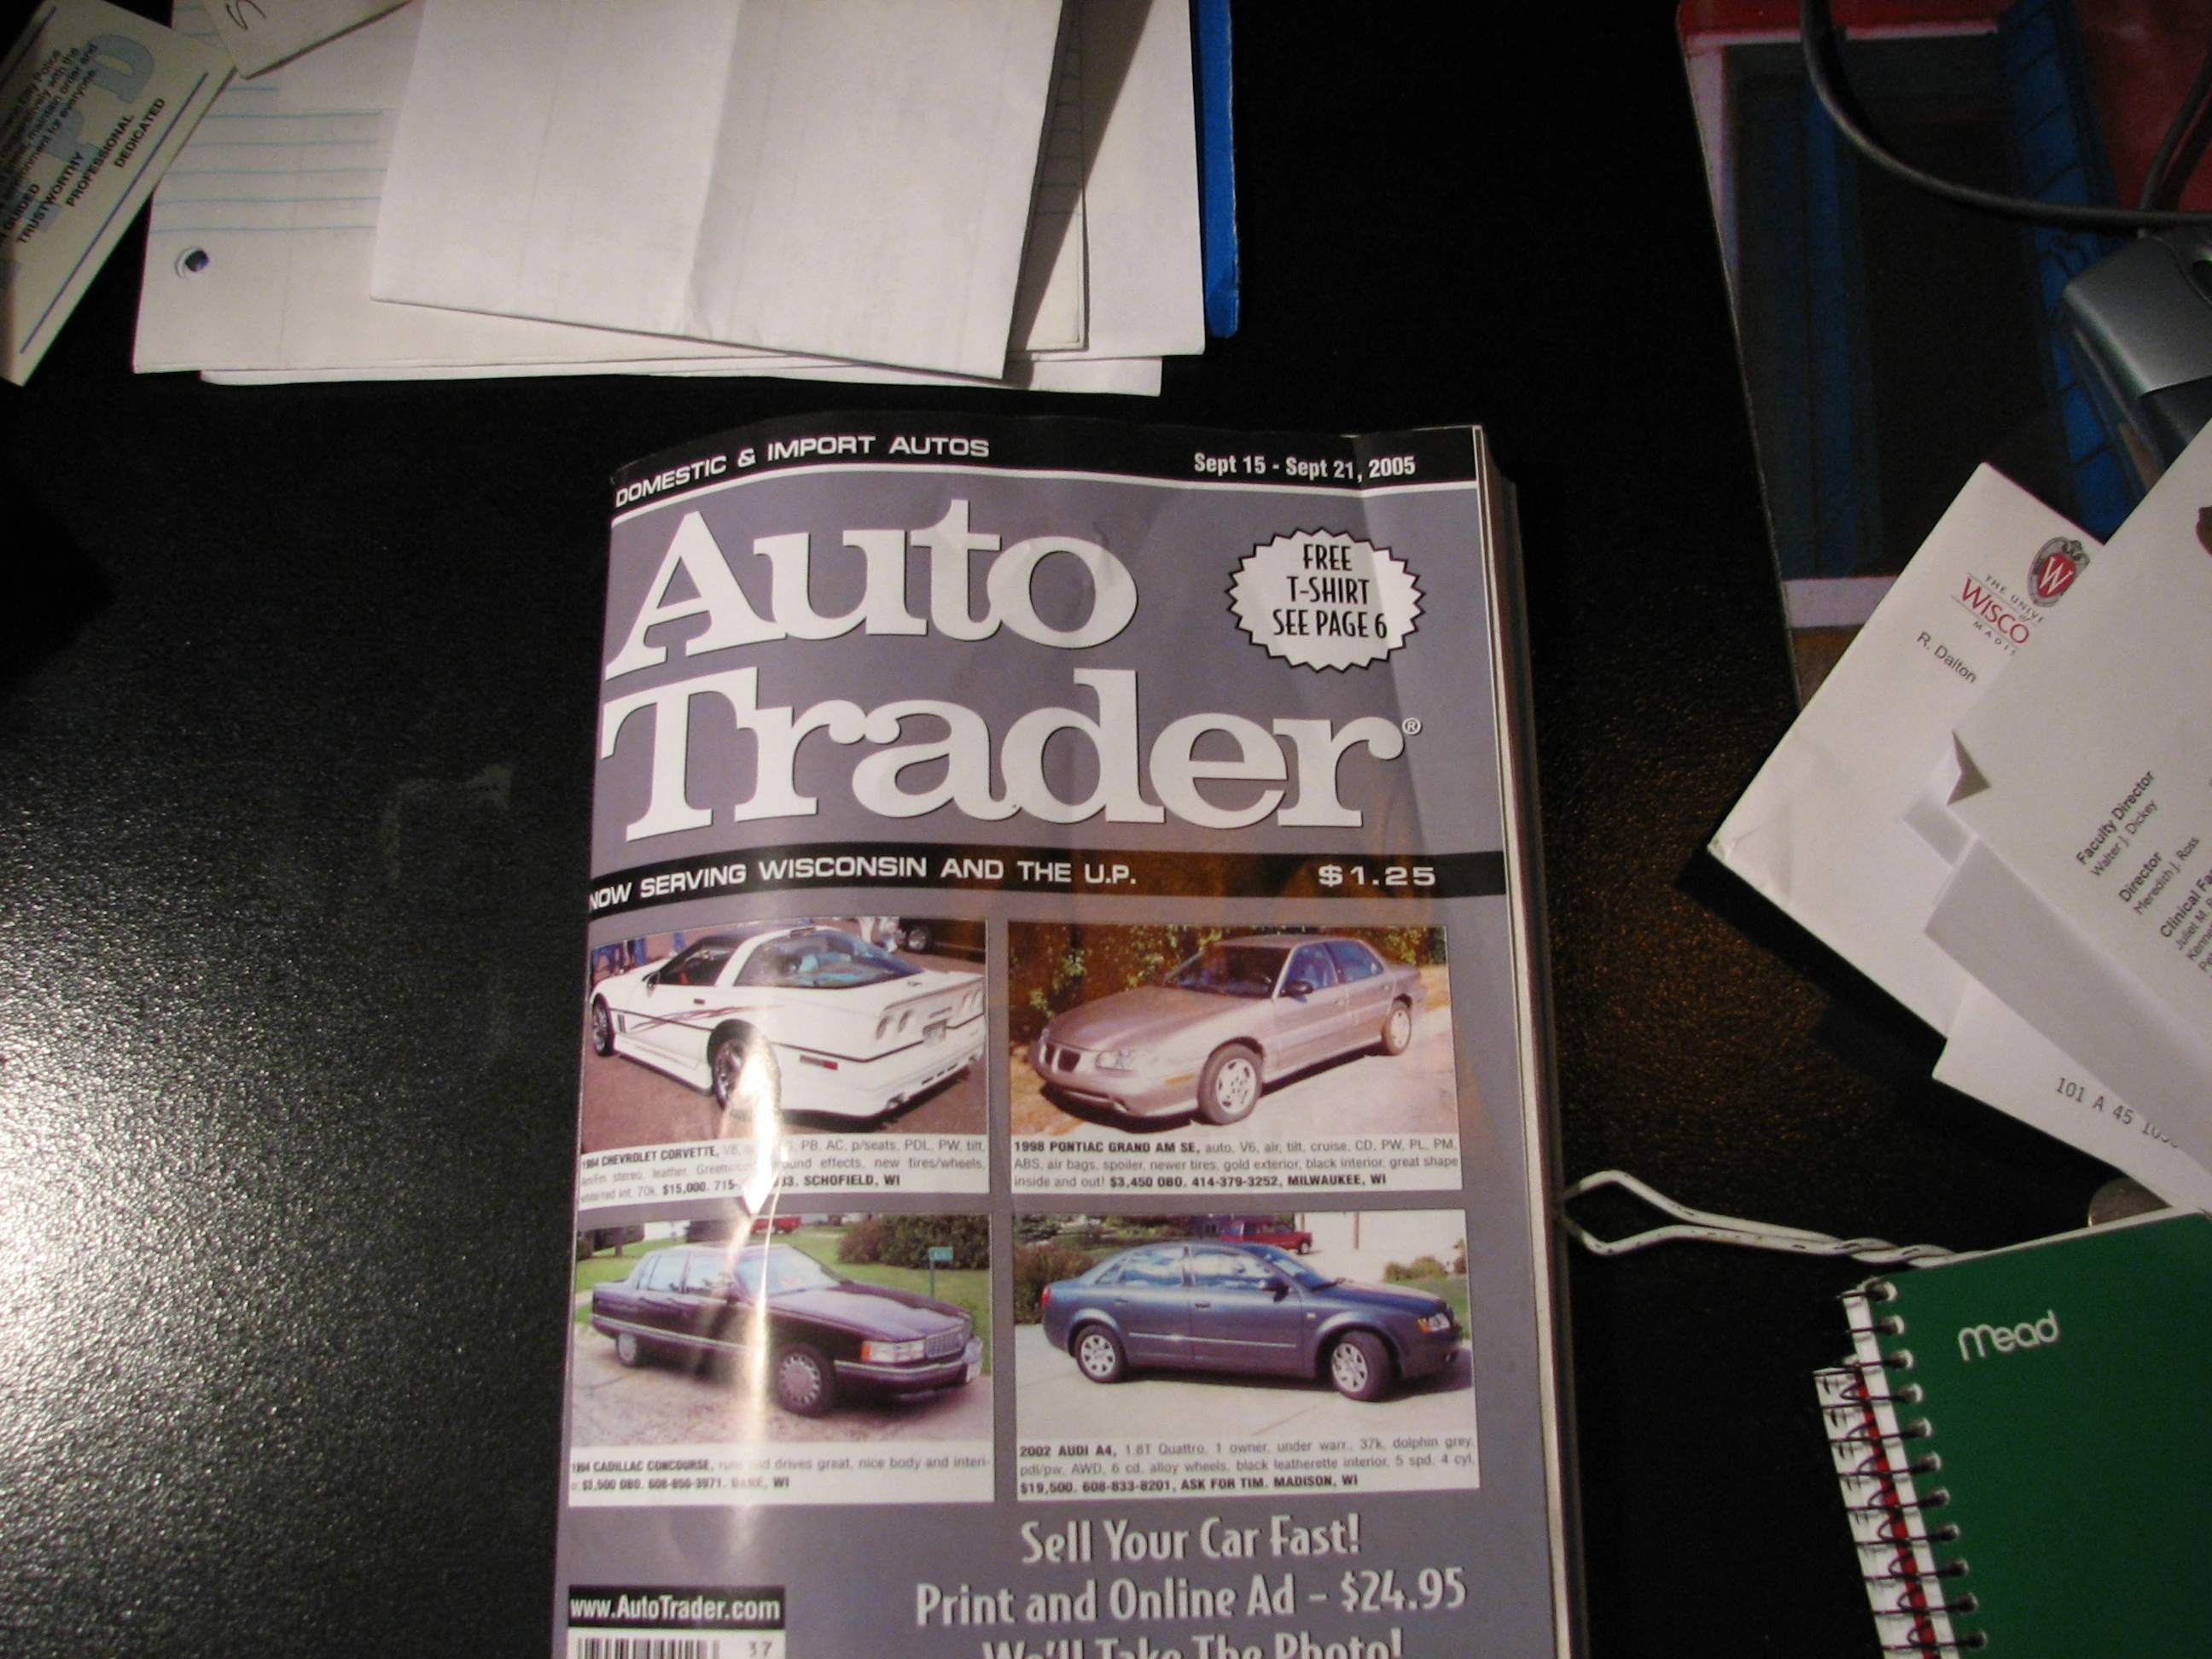
|
| 151 | Bill of sale for AutoTrader evidence photo | 5 | 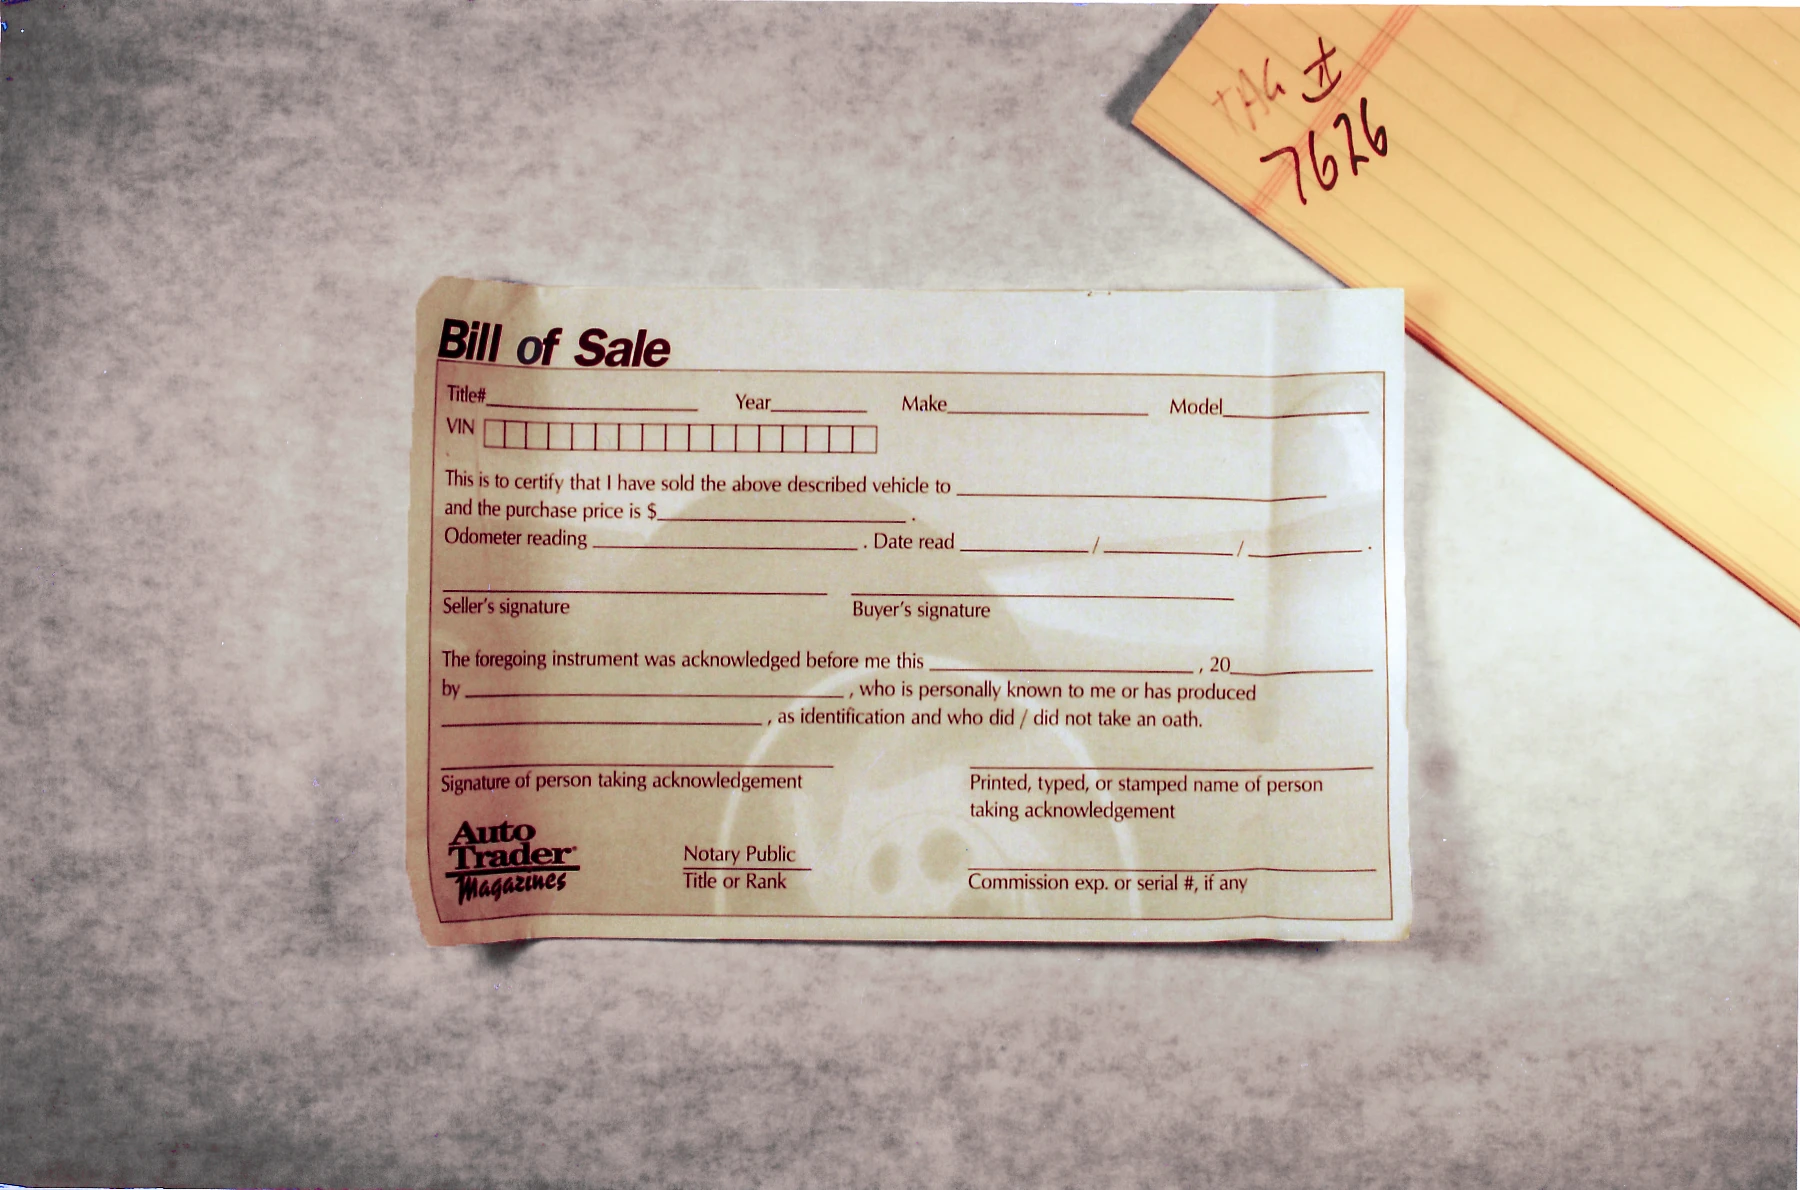
|
| 154 | Remains of burned cell phone in Avery burn barrel | 6 | 
|
| 155 | Remains of burned cell phone in Avery burn barrel | 6 | 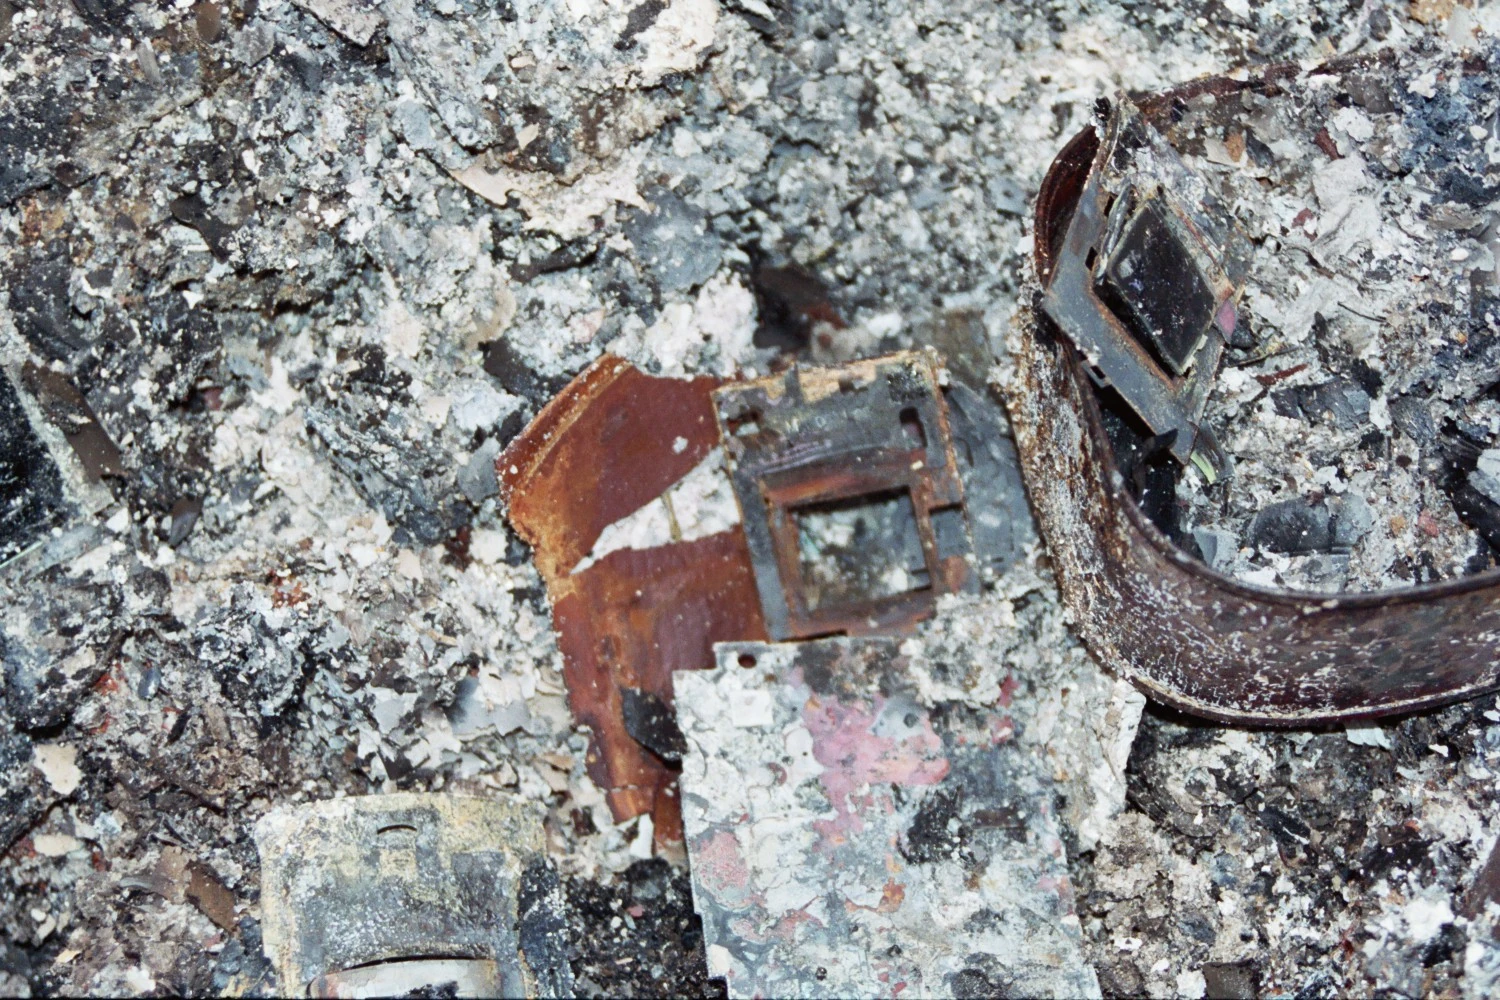
|
| 156 | Remains of burned cell phone in Avery burn barrel | 6 | 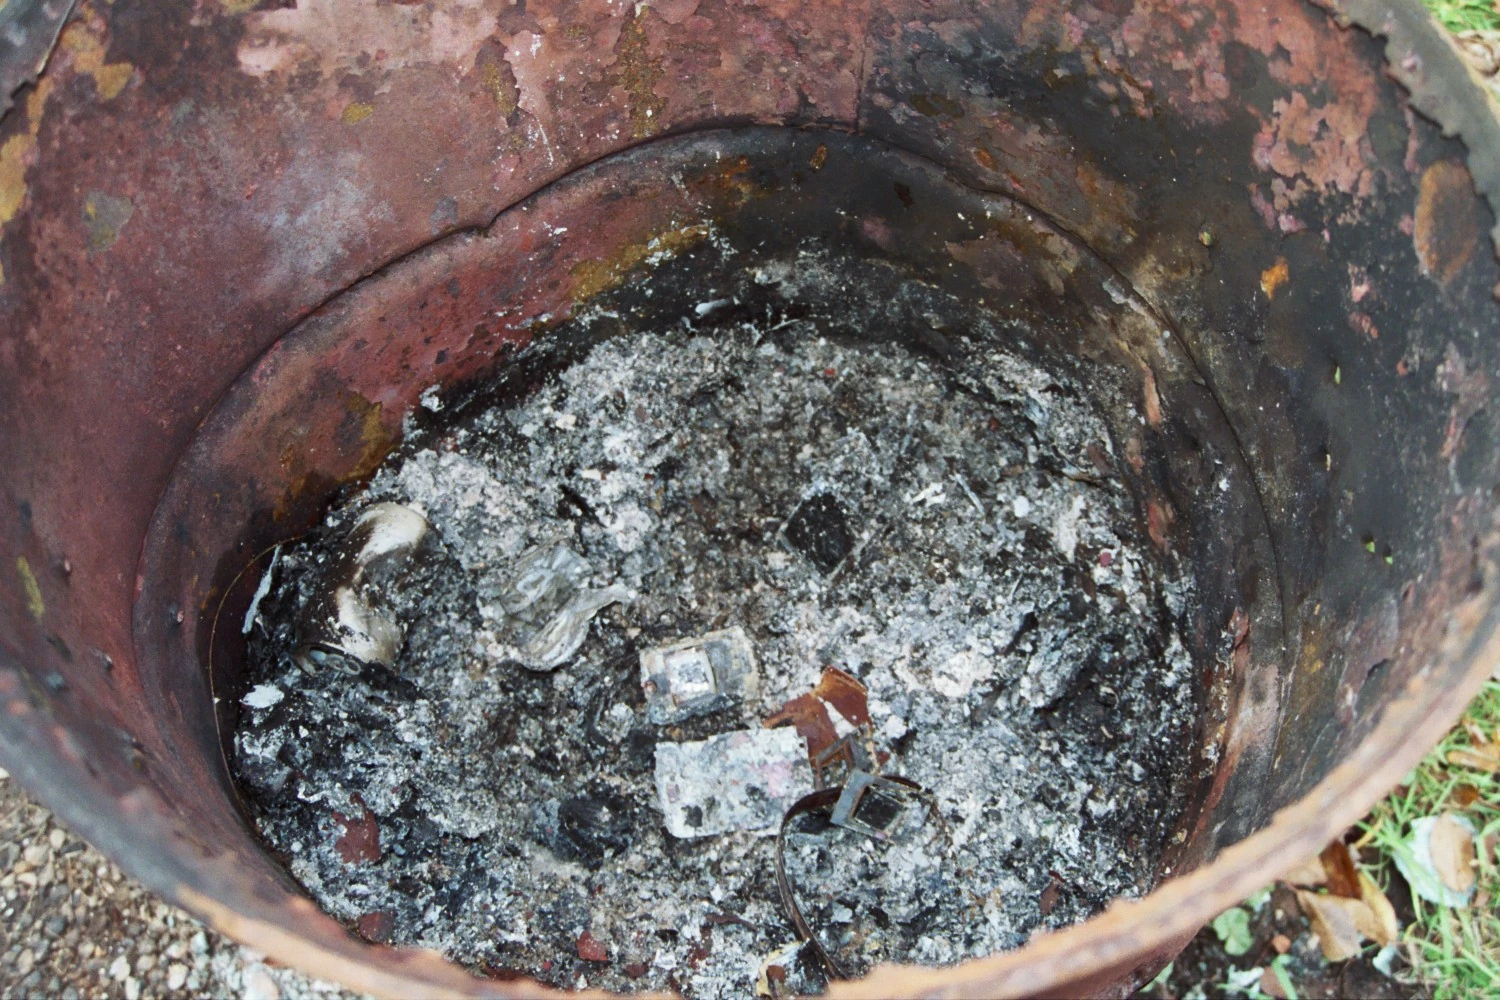
|
| 158 | Wheel rim with wires next to Avery burn barrel | 7 | 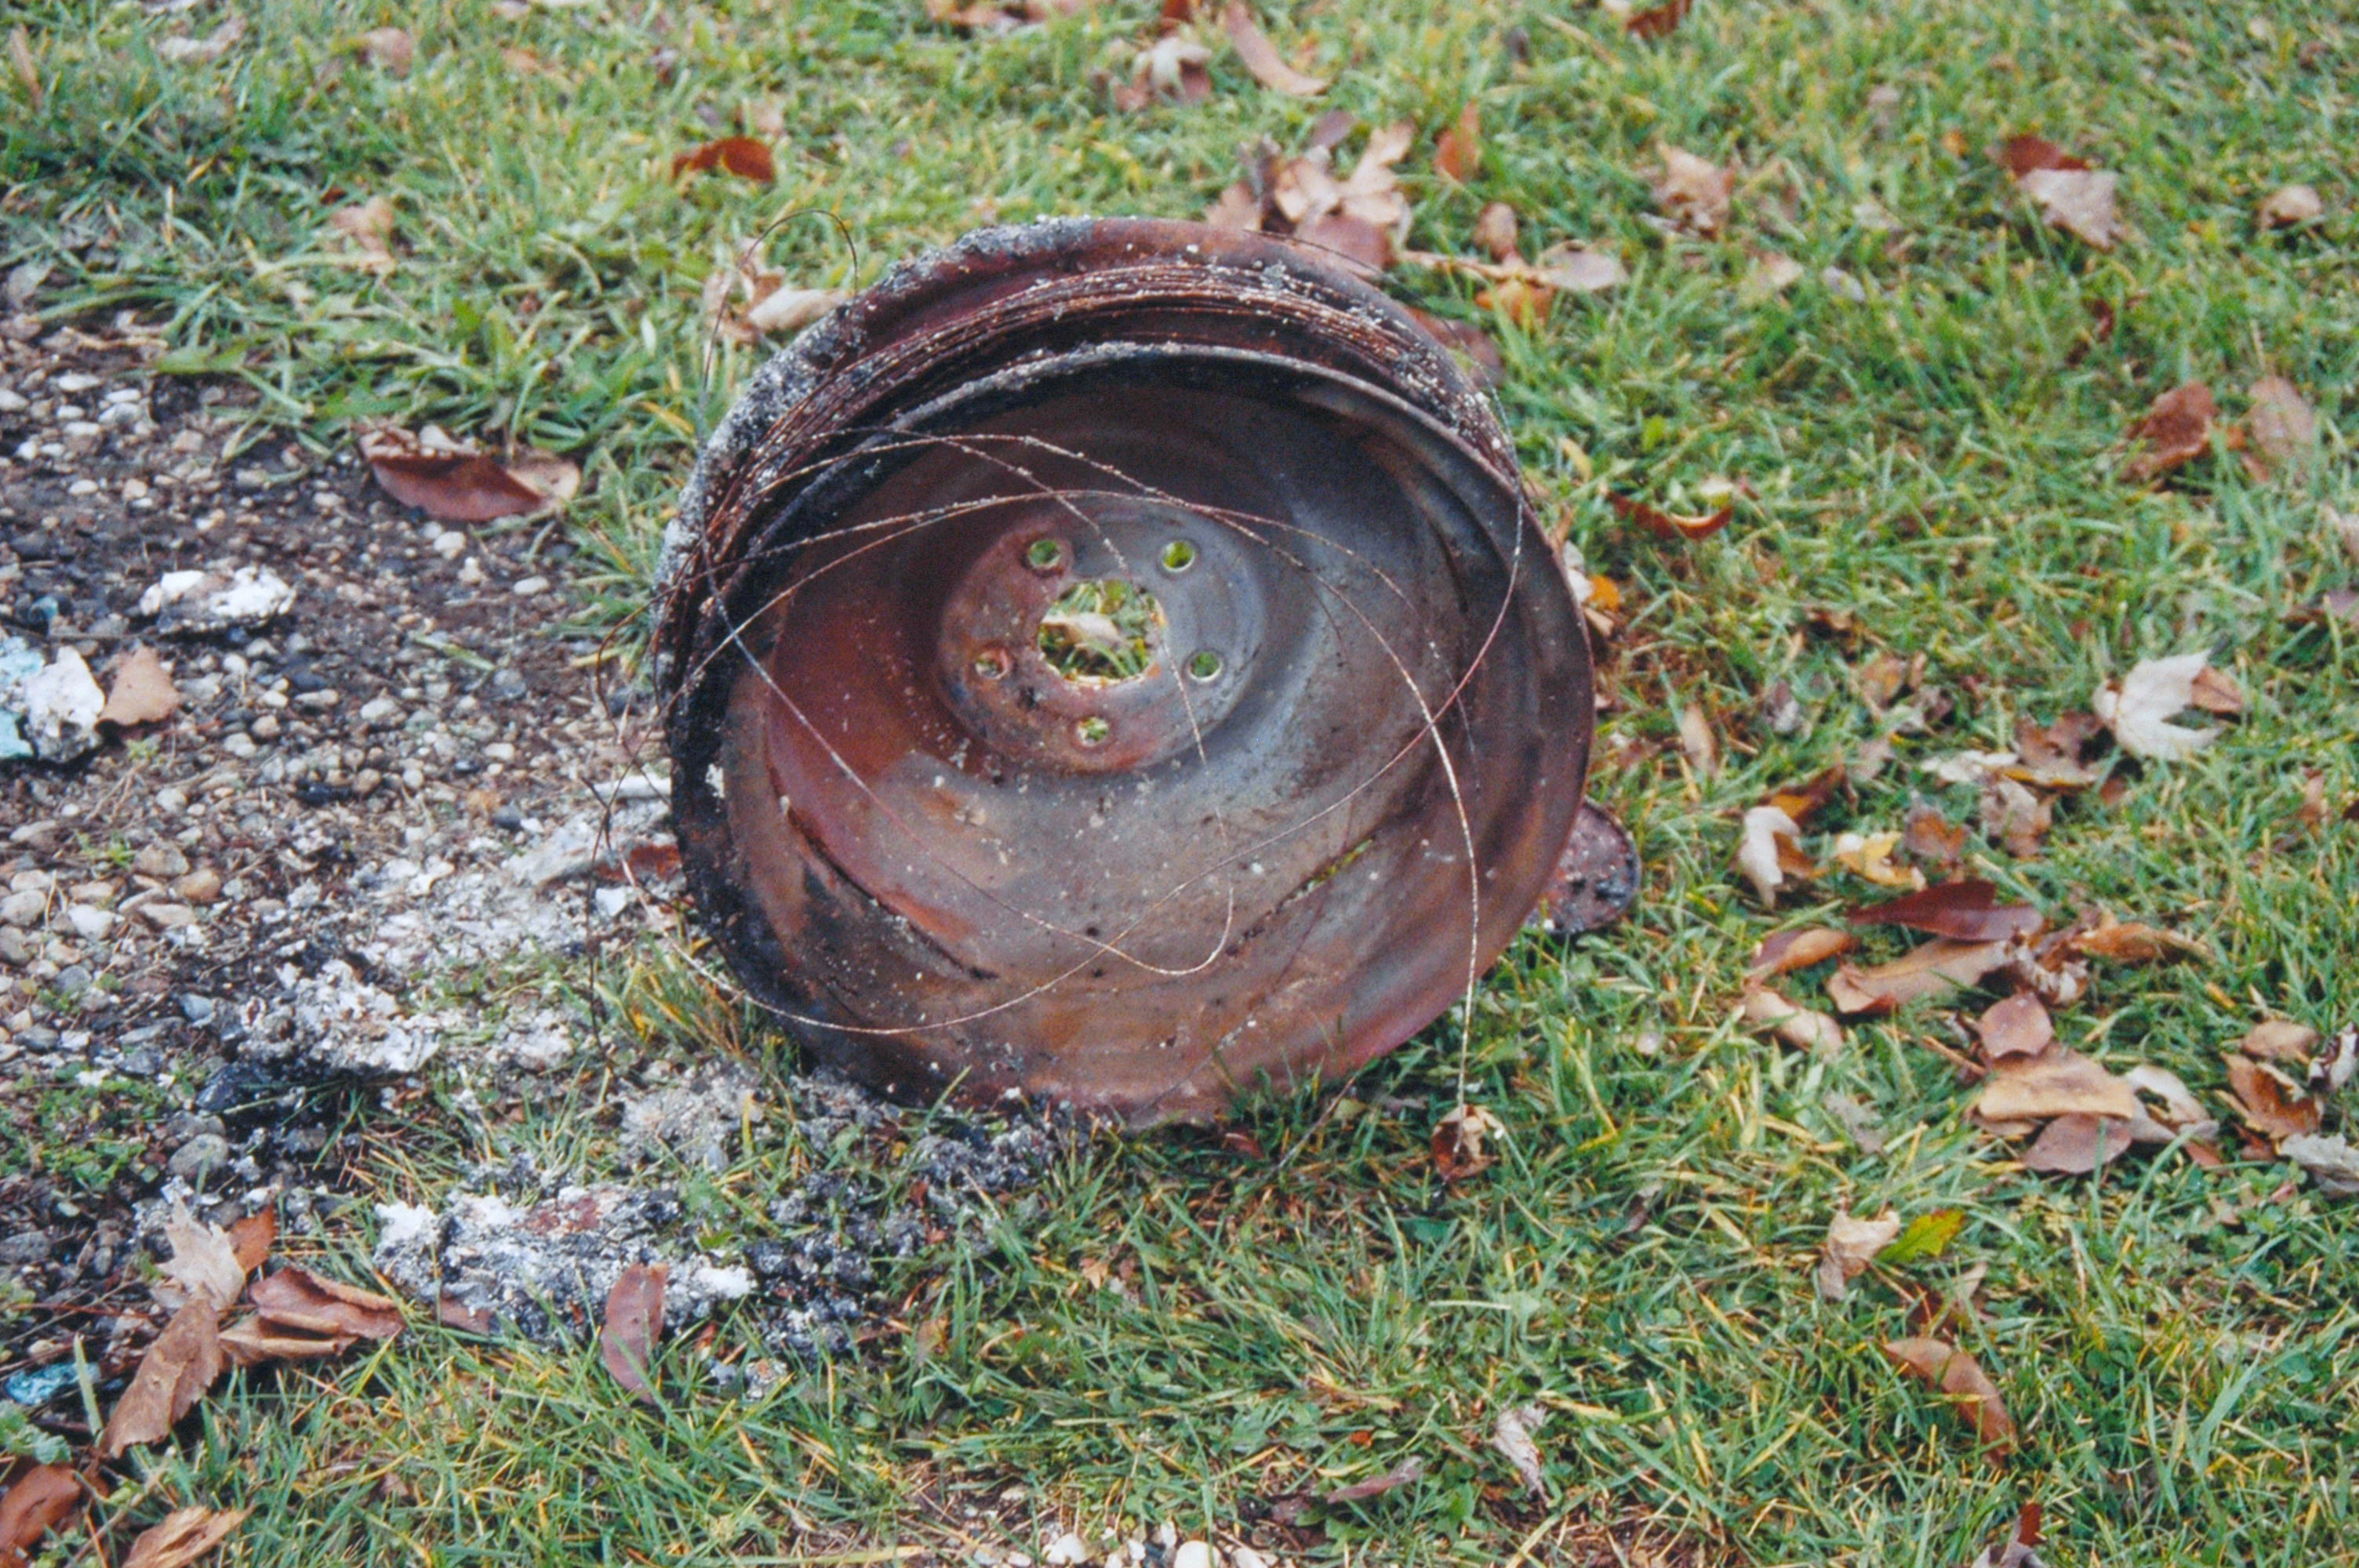
|
| 161 | Area where RAV4 was found from car crusher point of view | 6 | 
|
| 162 | Area where RAV4 was found from car crusher point of view | 6 | 
|
| 163 | Headboard of Steven Avery's bed | 6 | 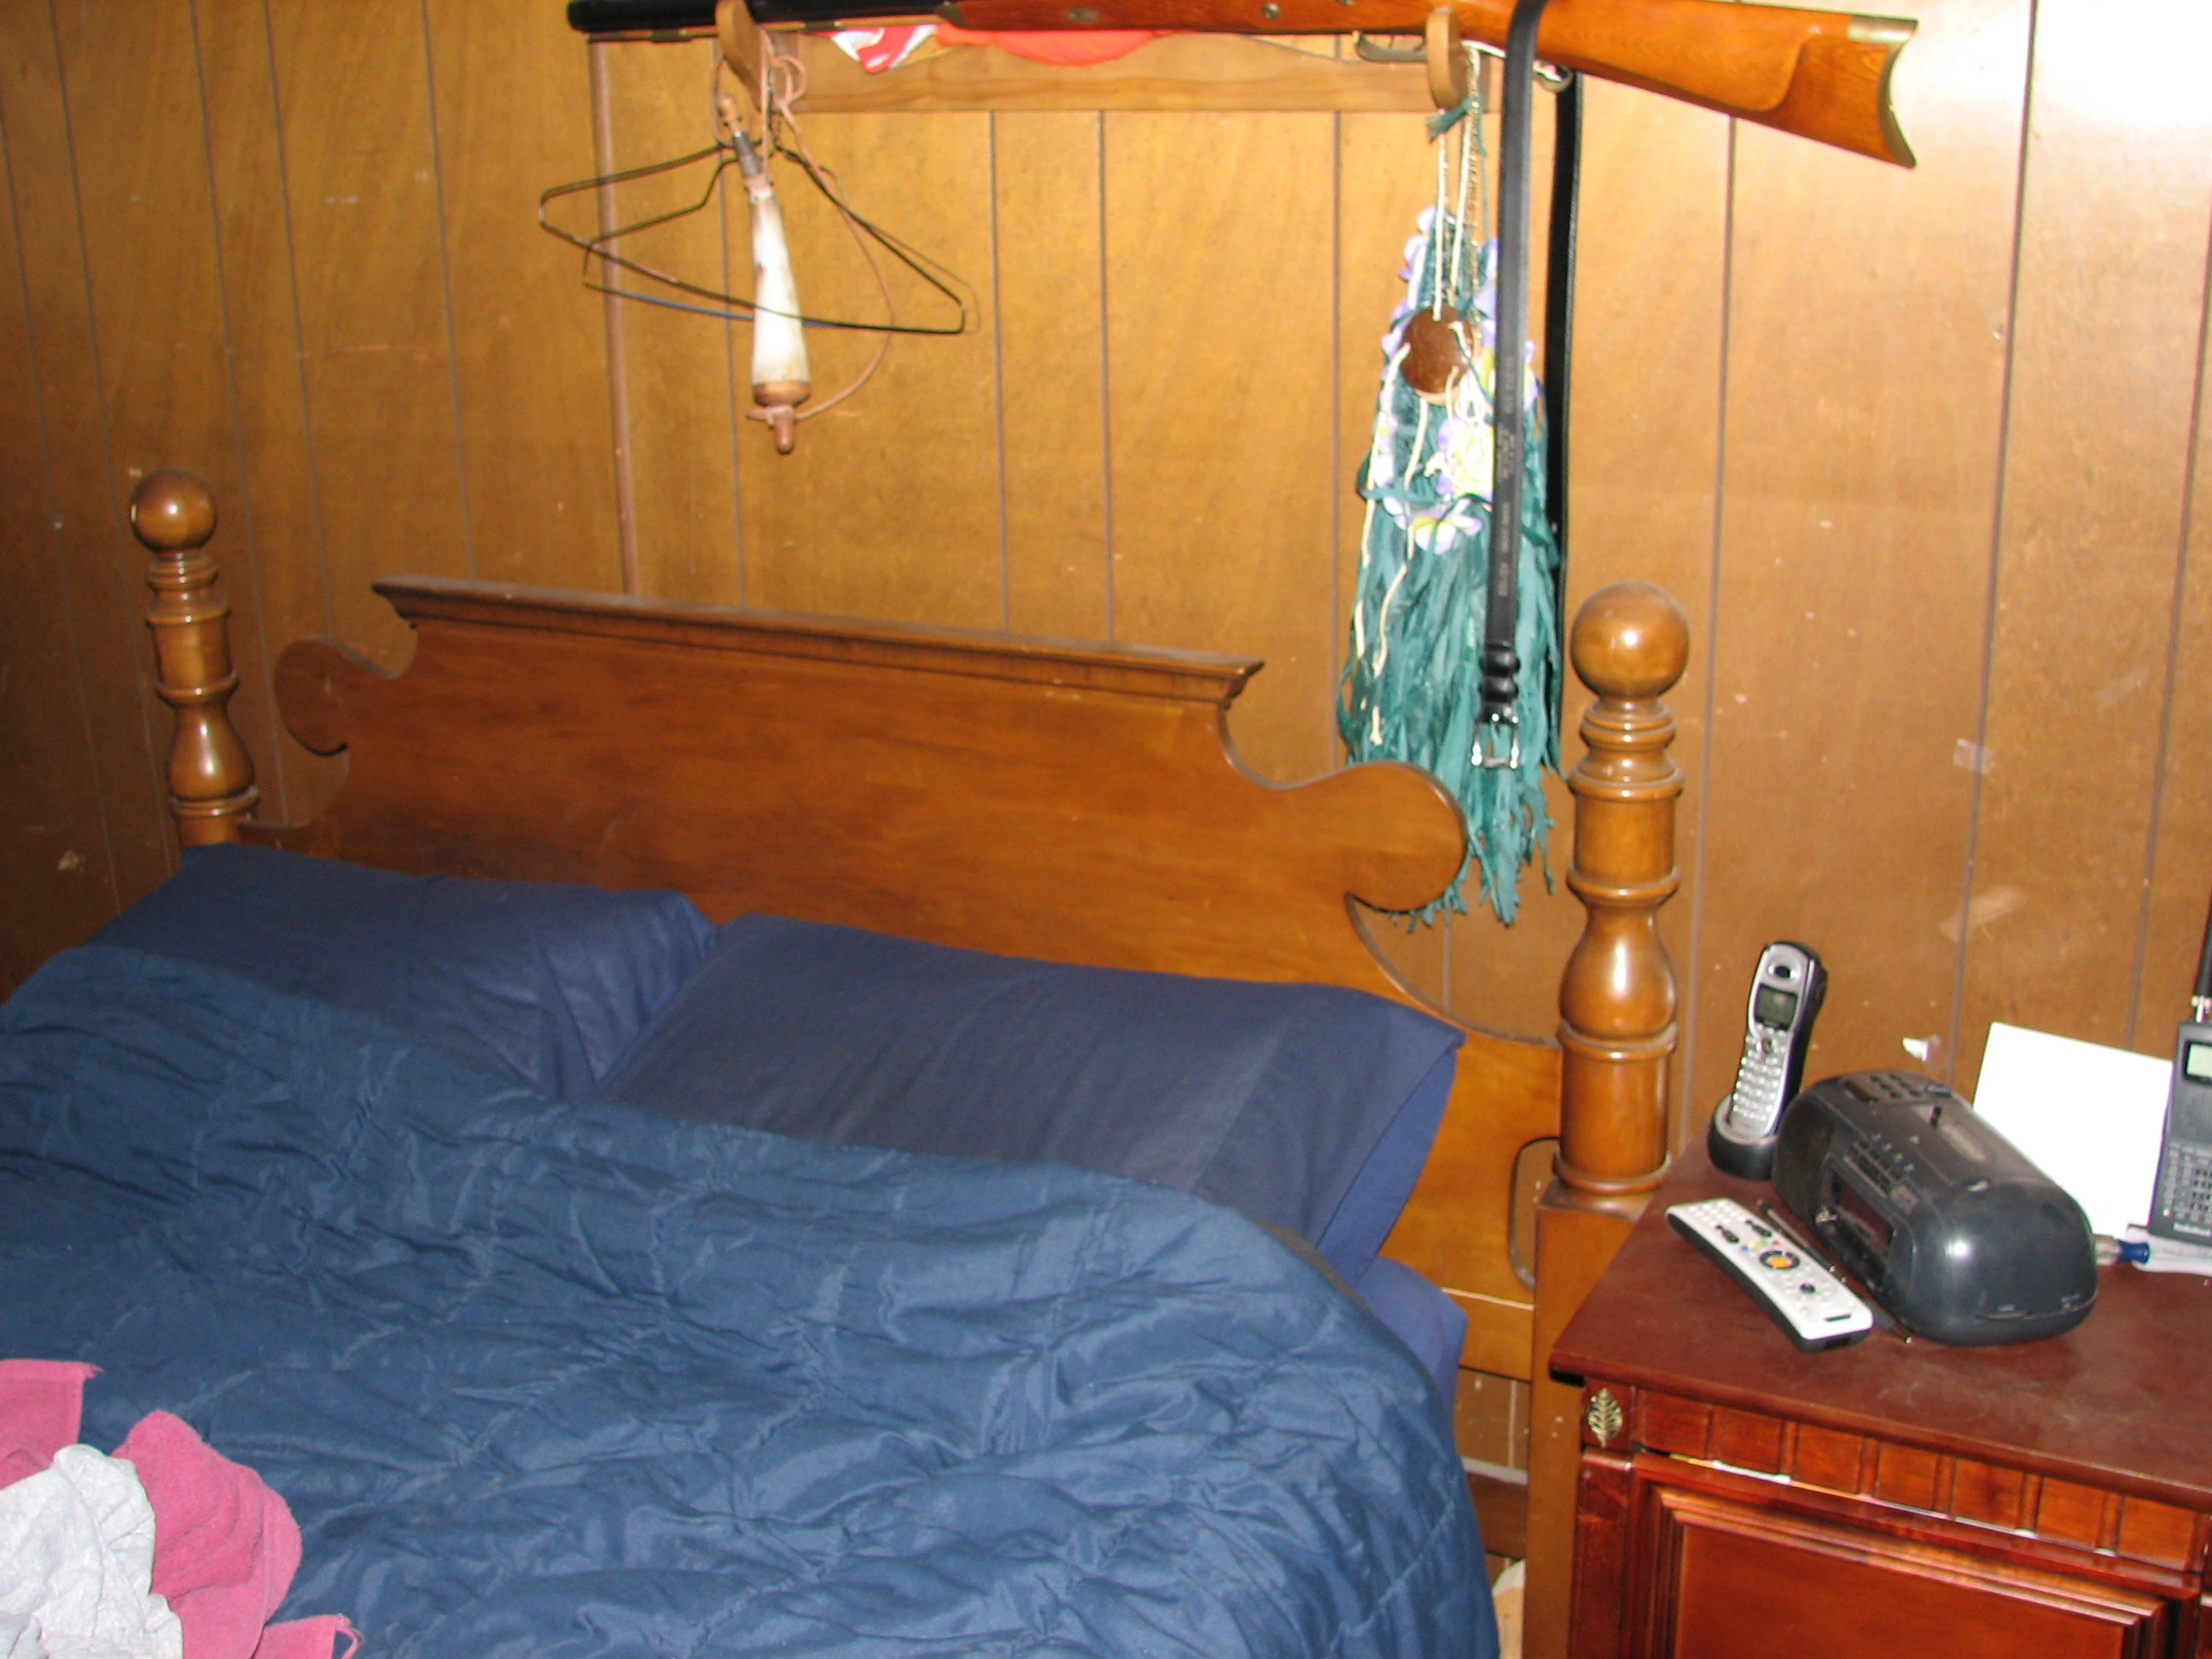
|
| 164 | .22 caliber rifle from Steven Avery's bedroom | 7 | 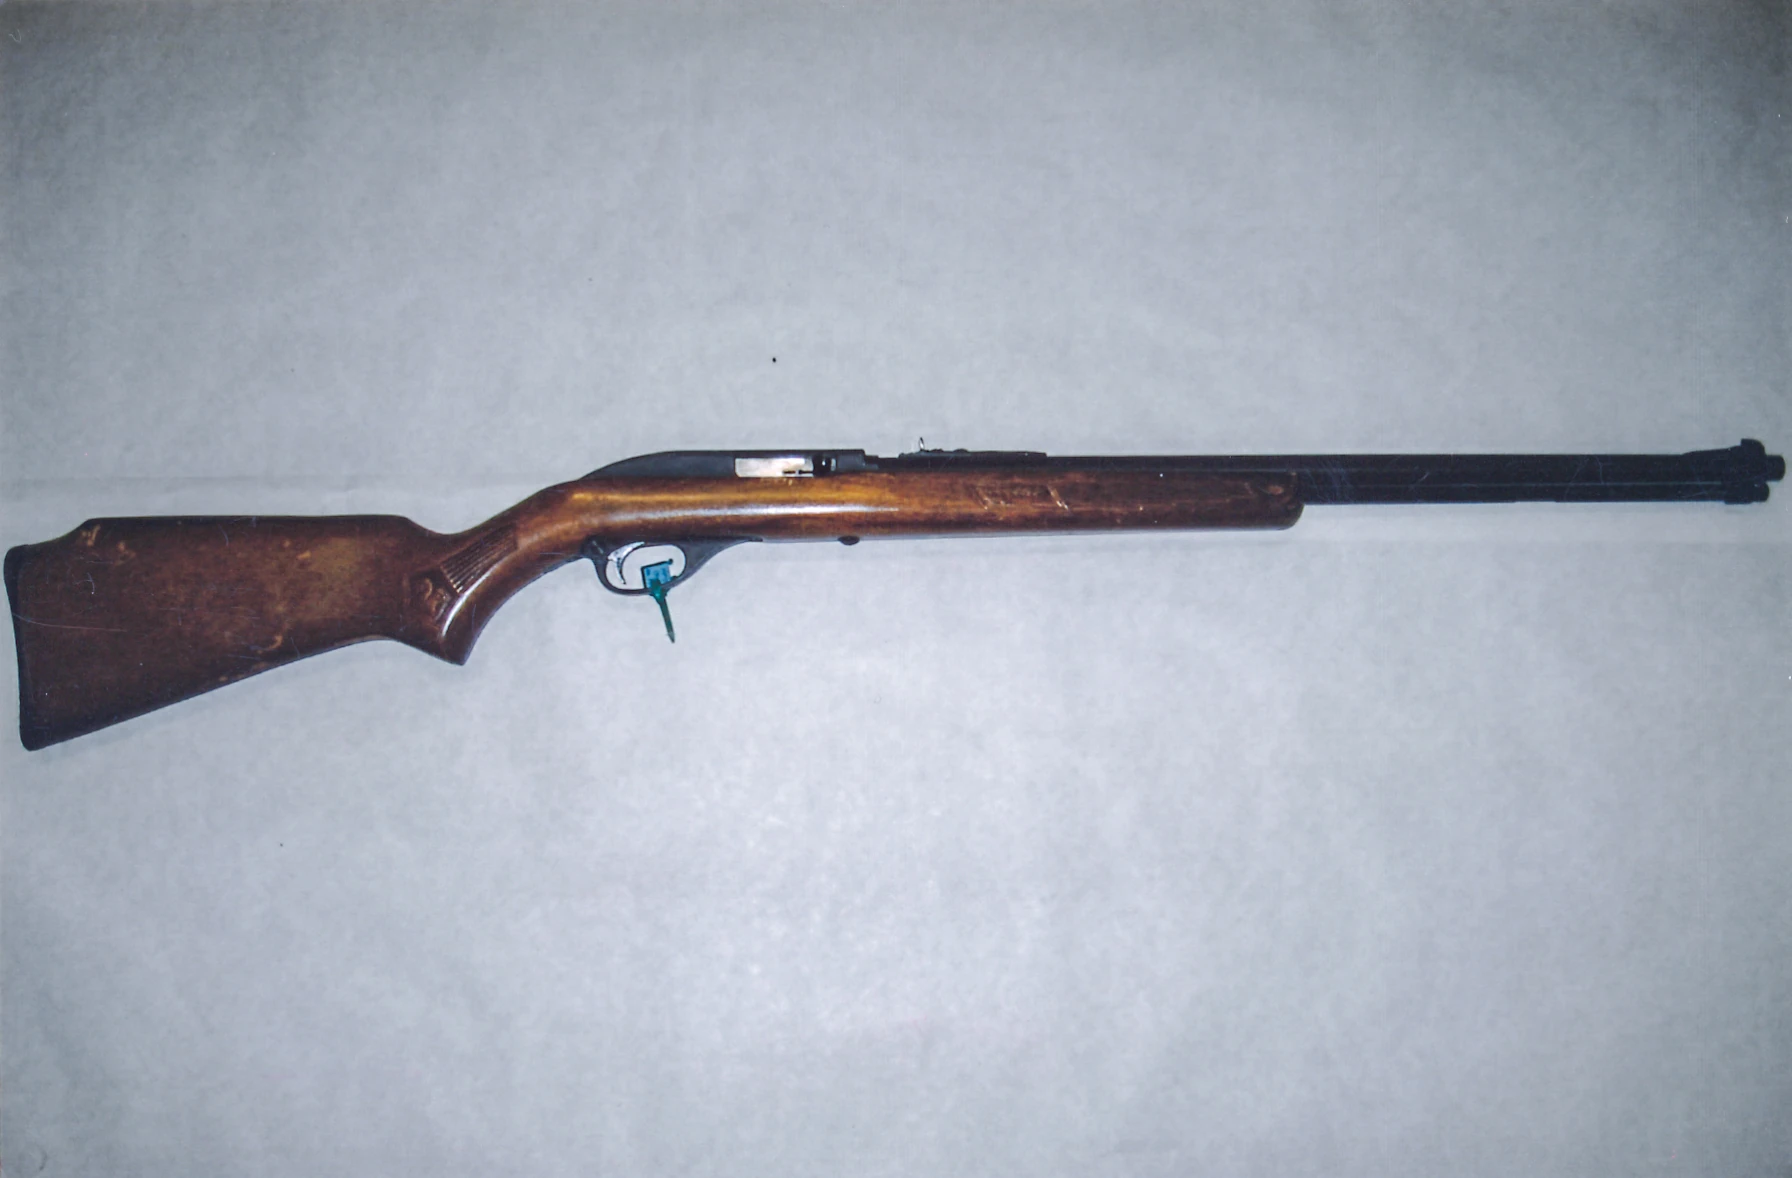
|
| 165 | .50 caliber rifle from Steven Avery's bedroom | 7 | 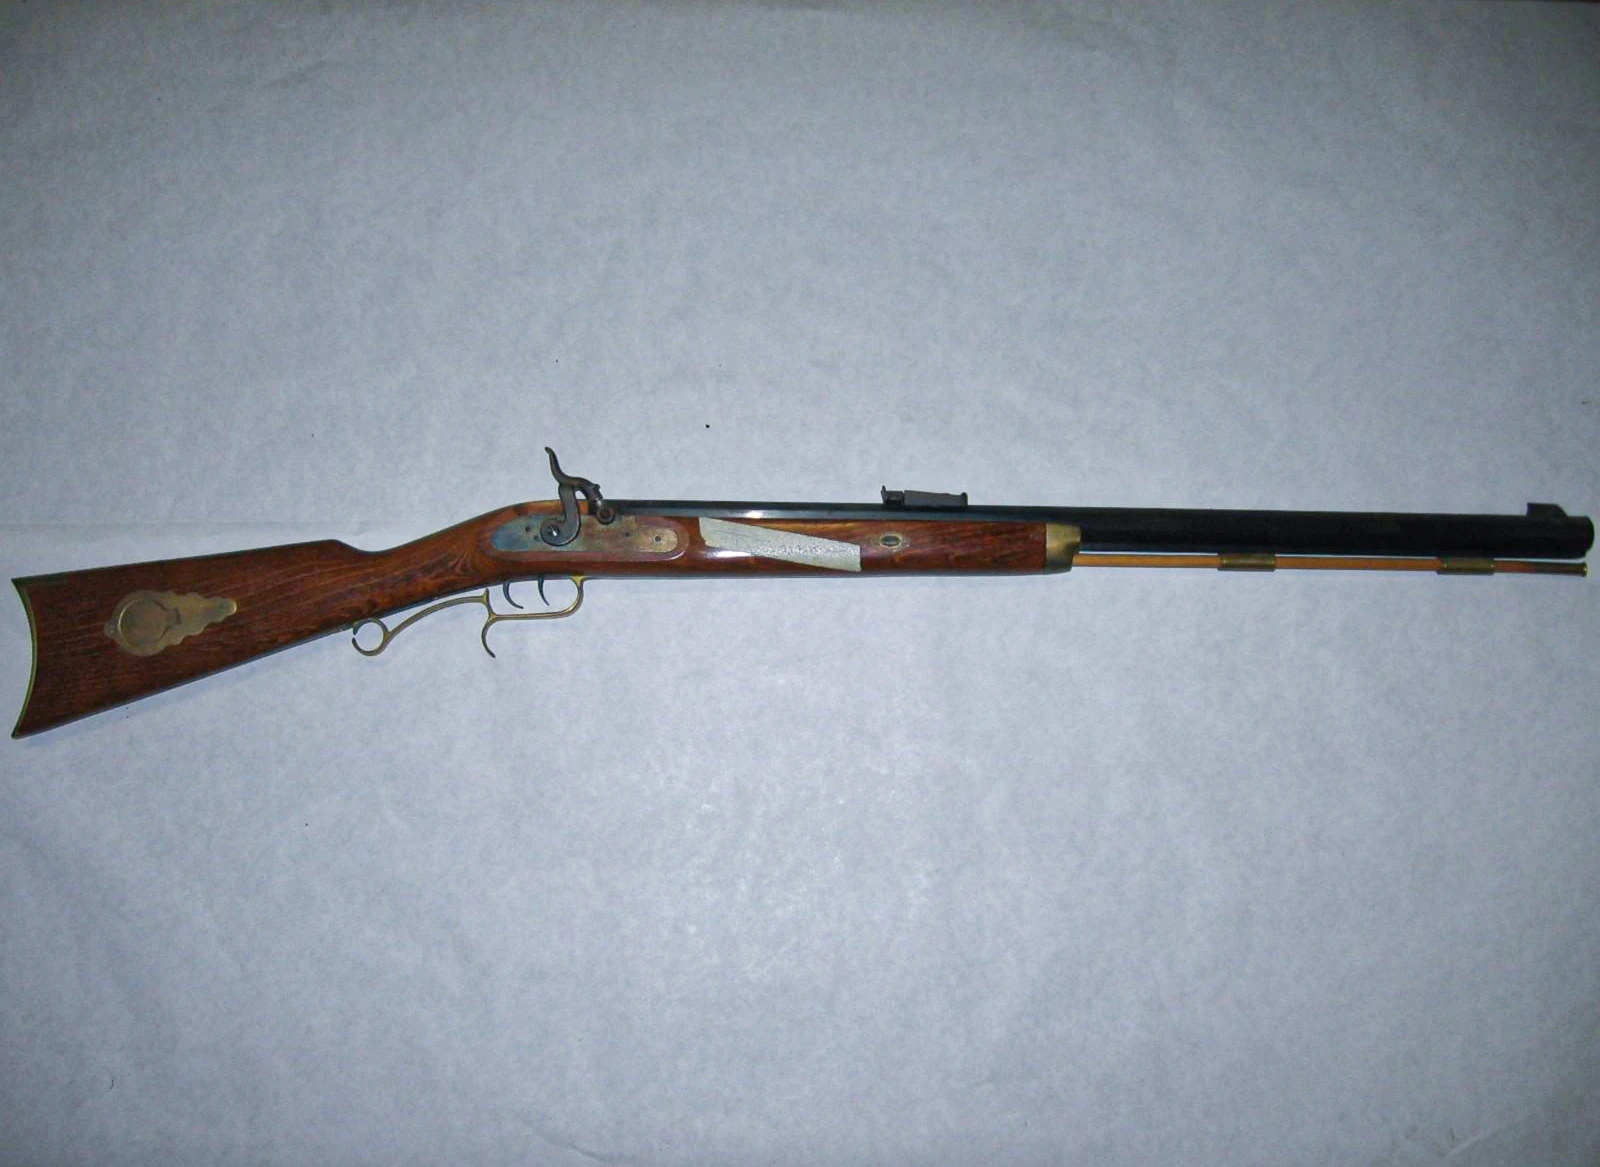
|
| 166 | Gun rack from Steven's bedroom | 6 | 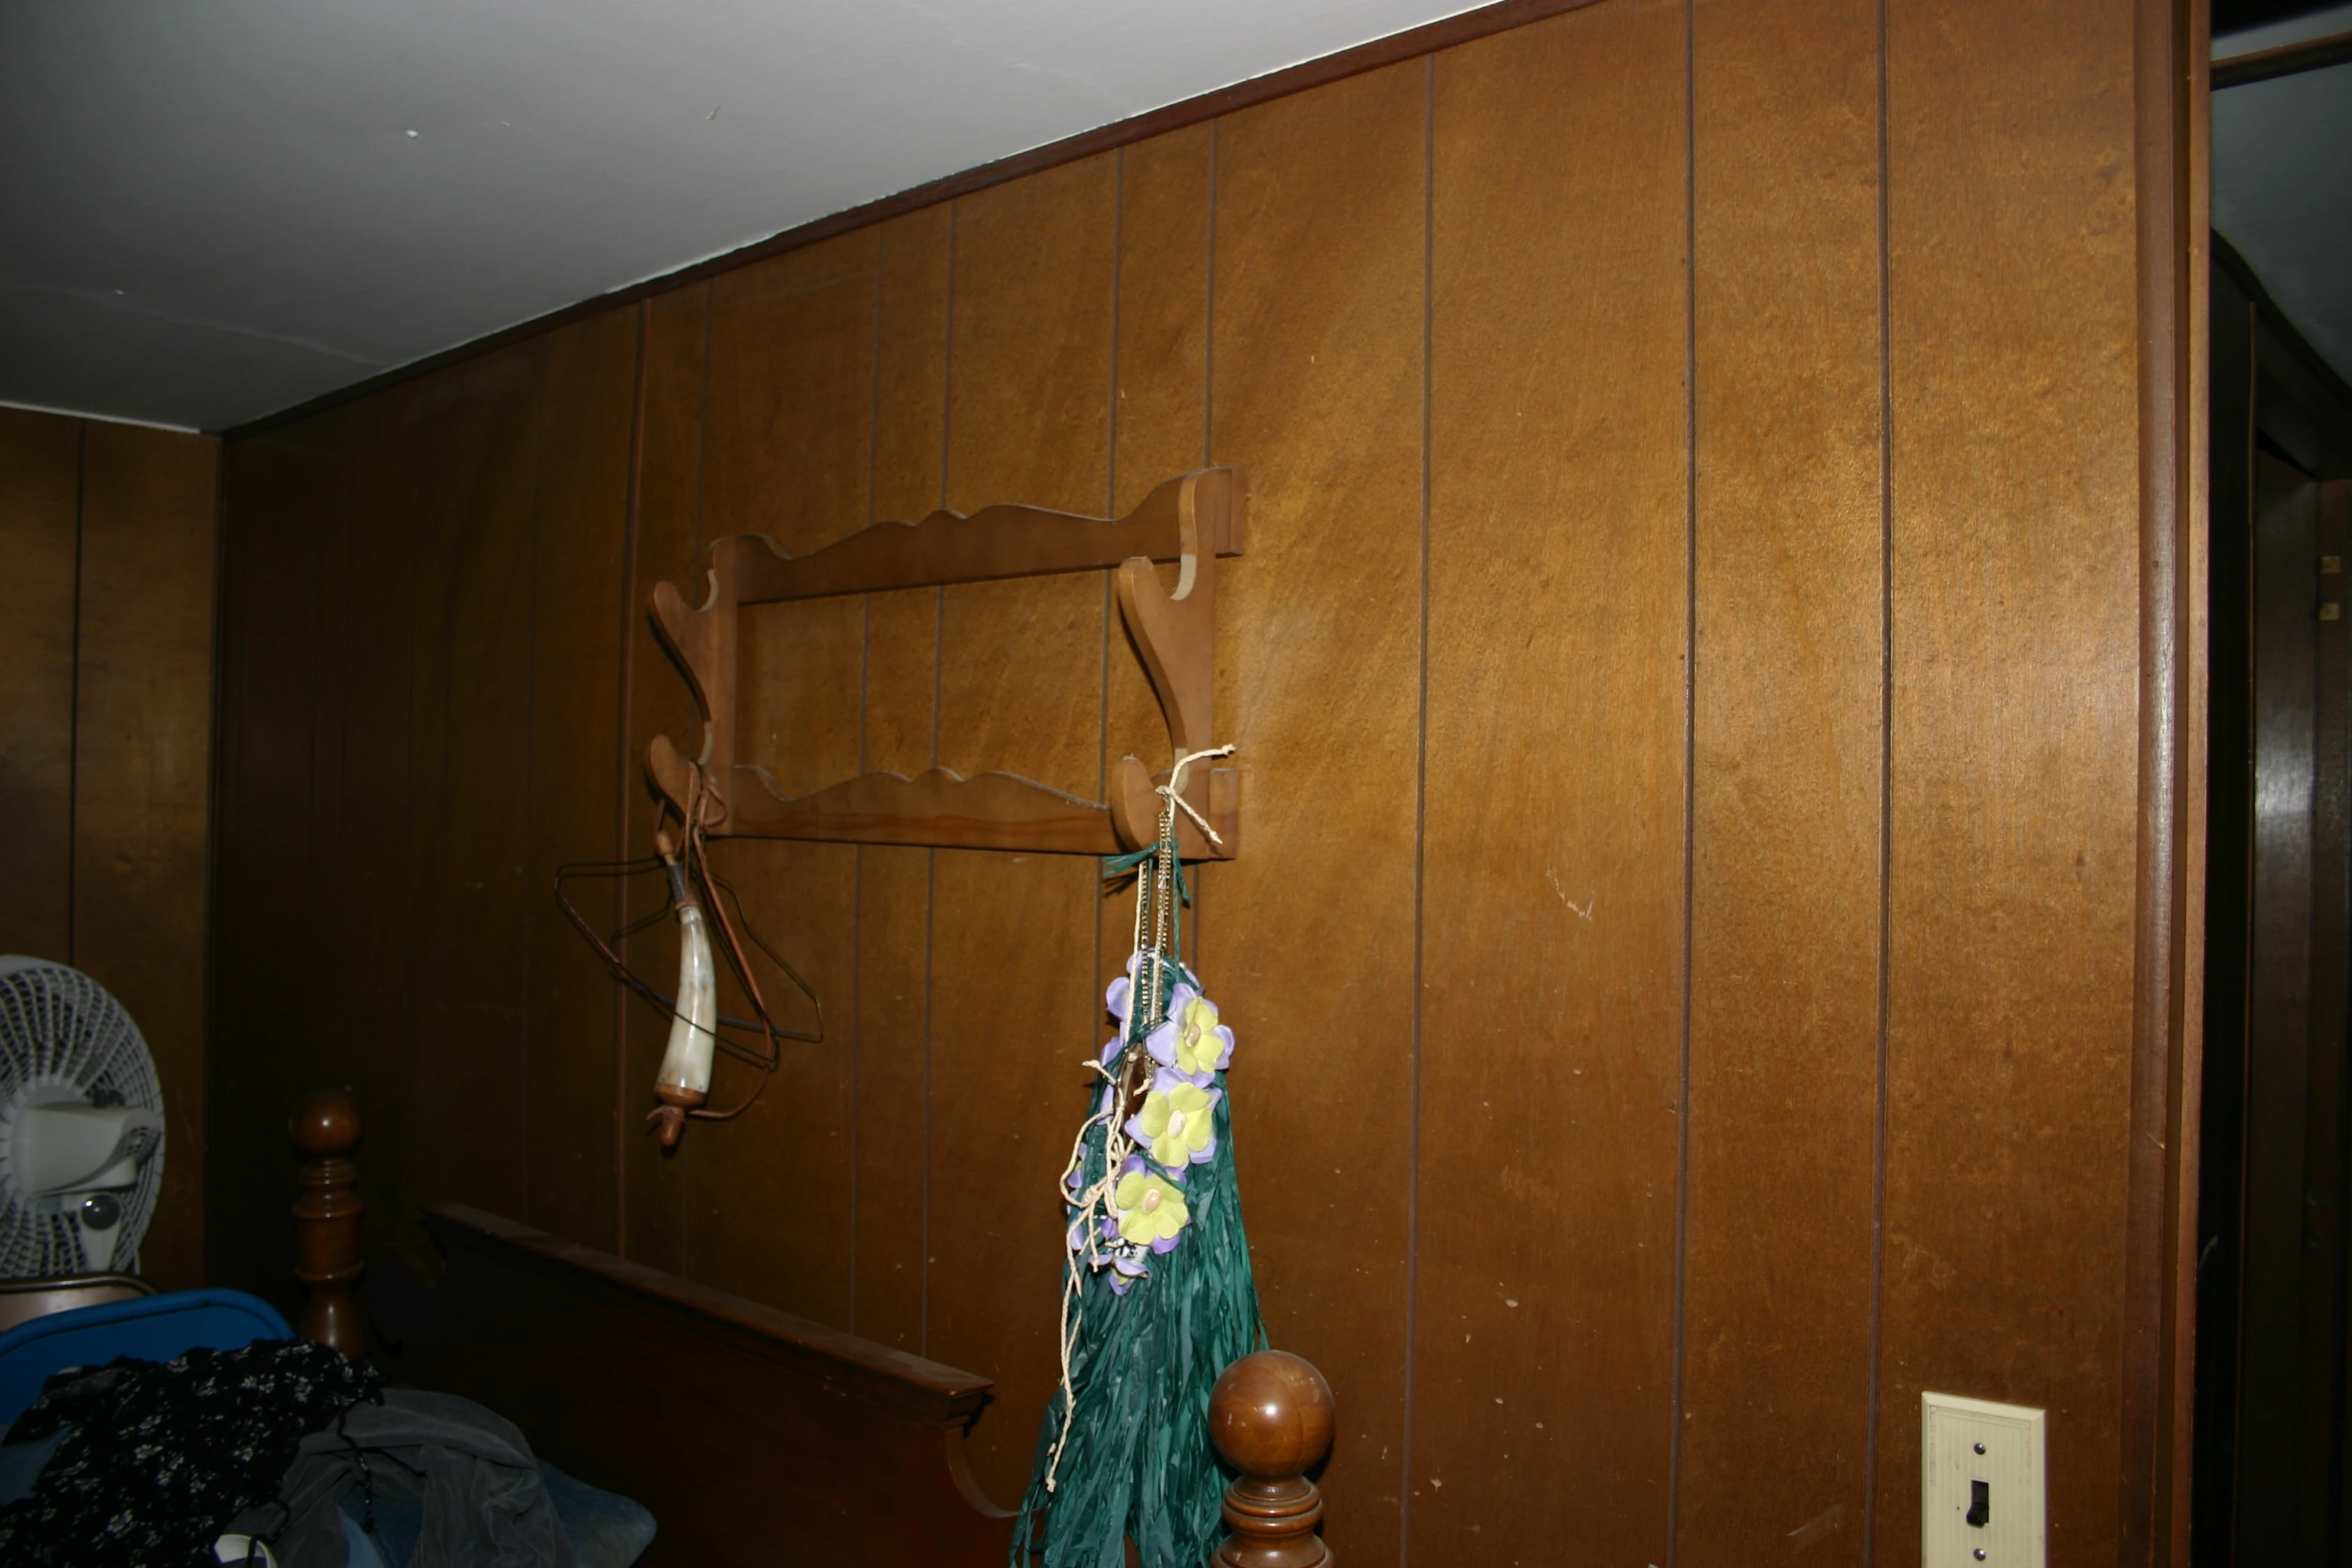
|
| 167 | Gun rack evidence photo | 6 | 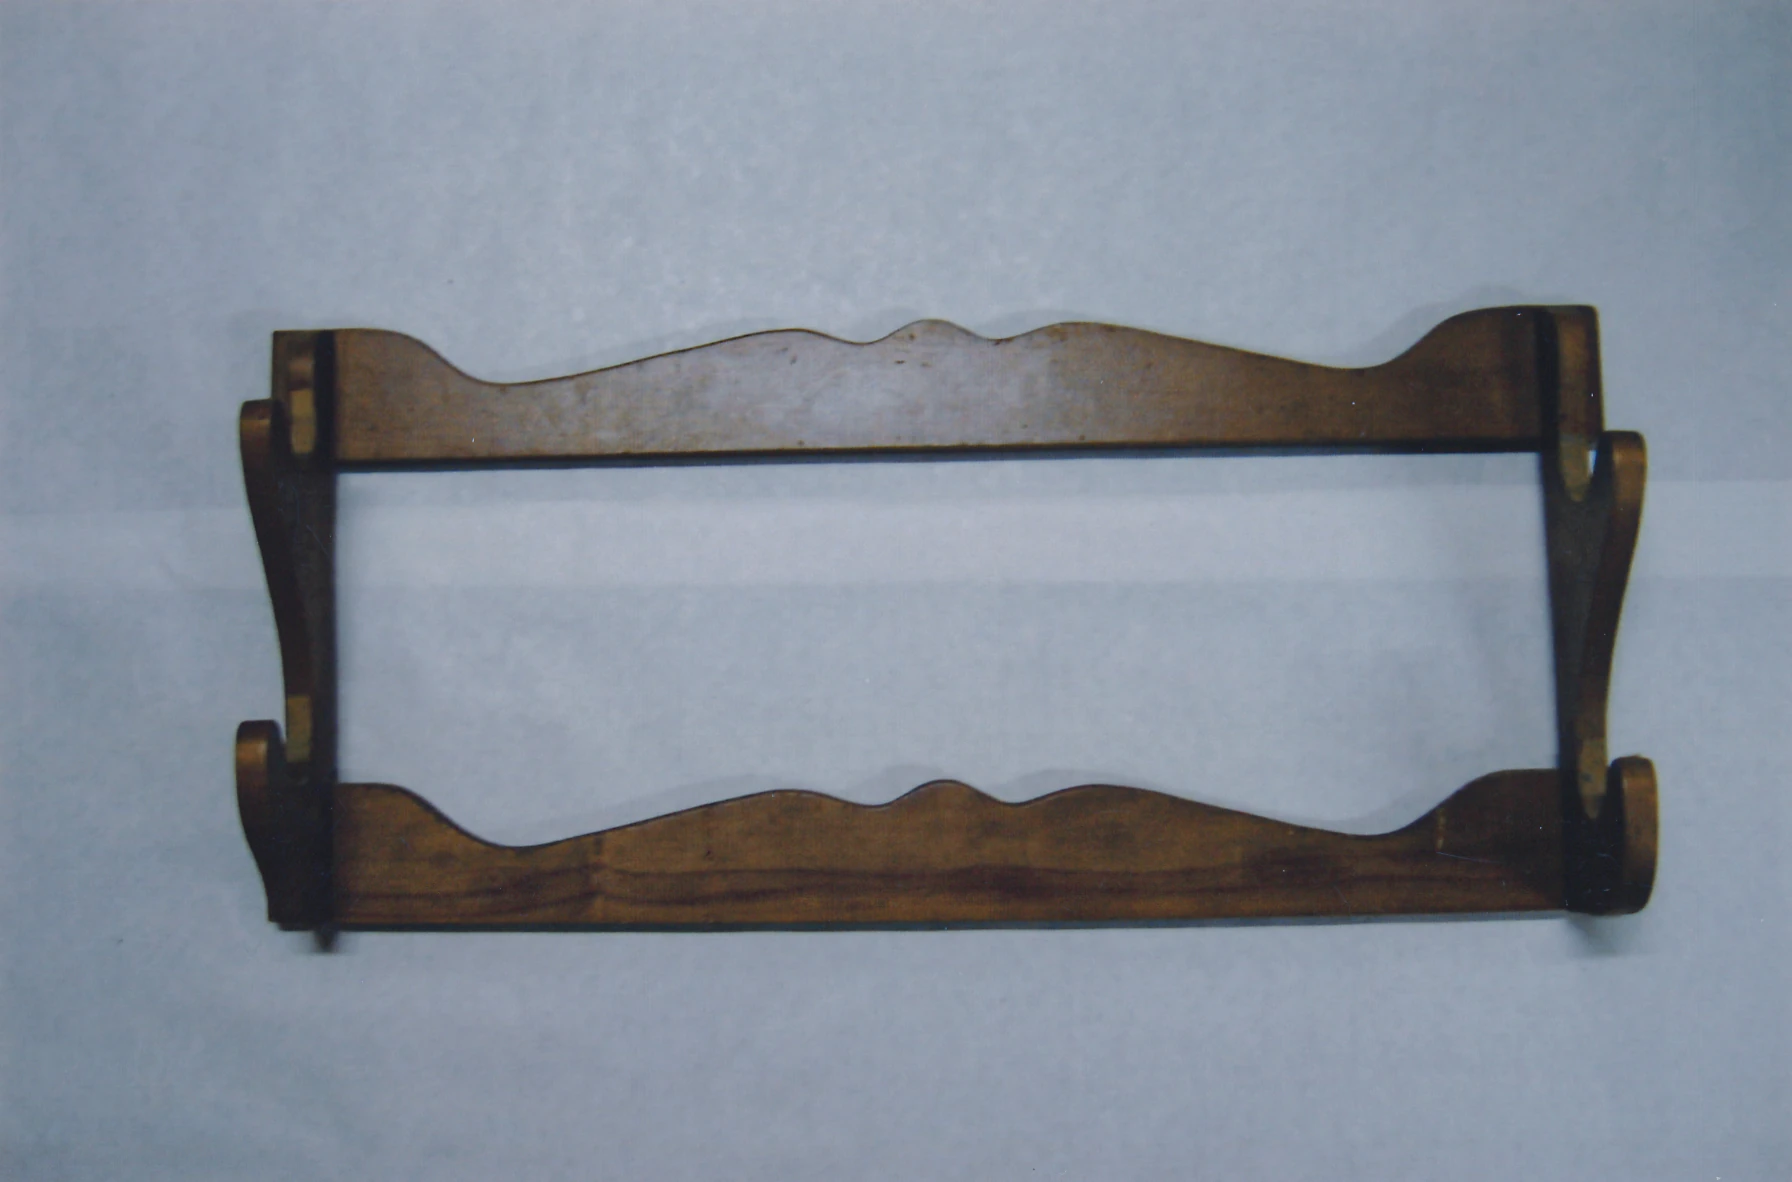
|
| 168 | Record cabinet evidence photo | 6 | 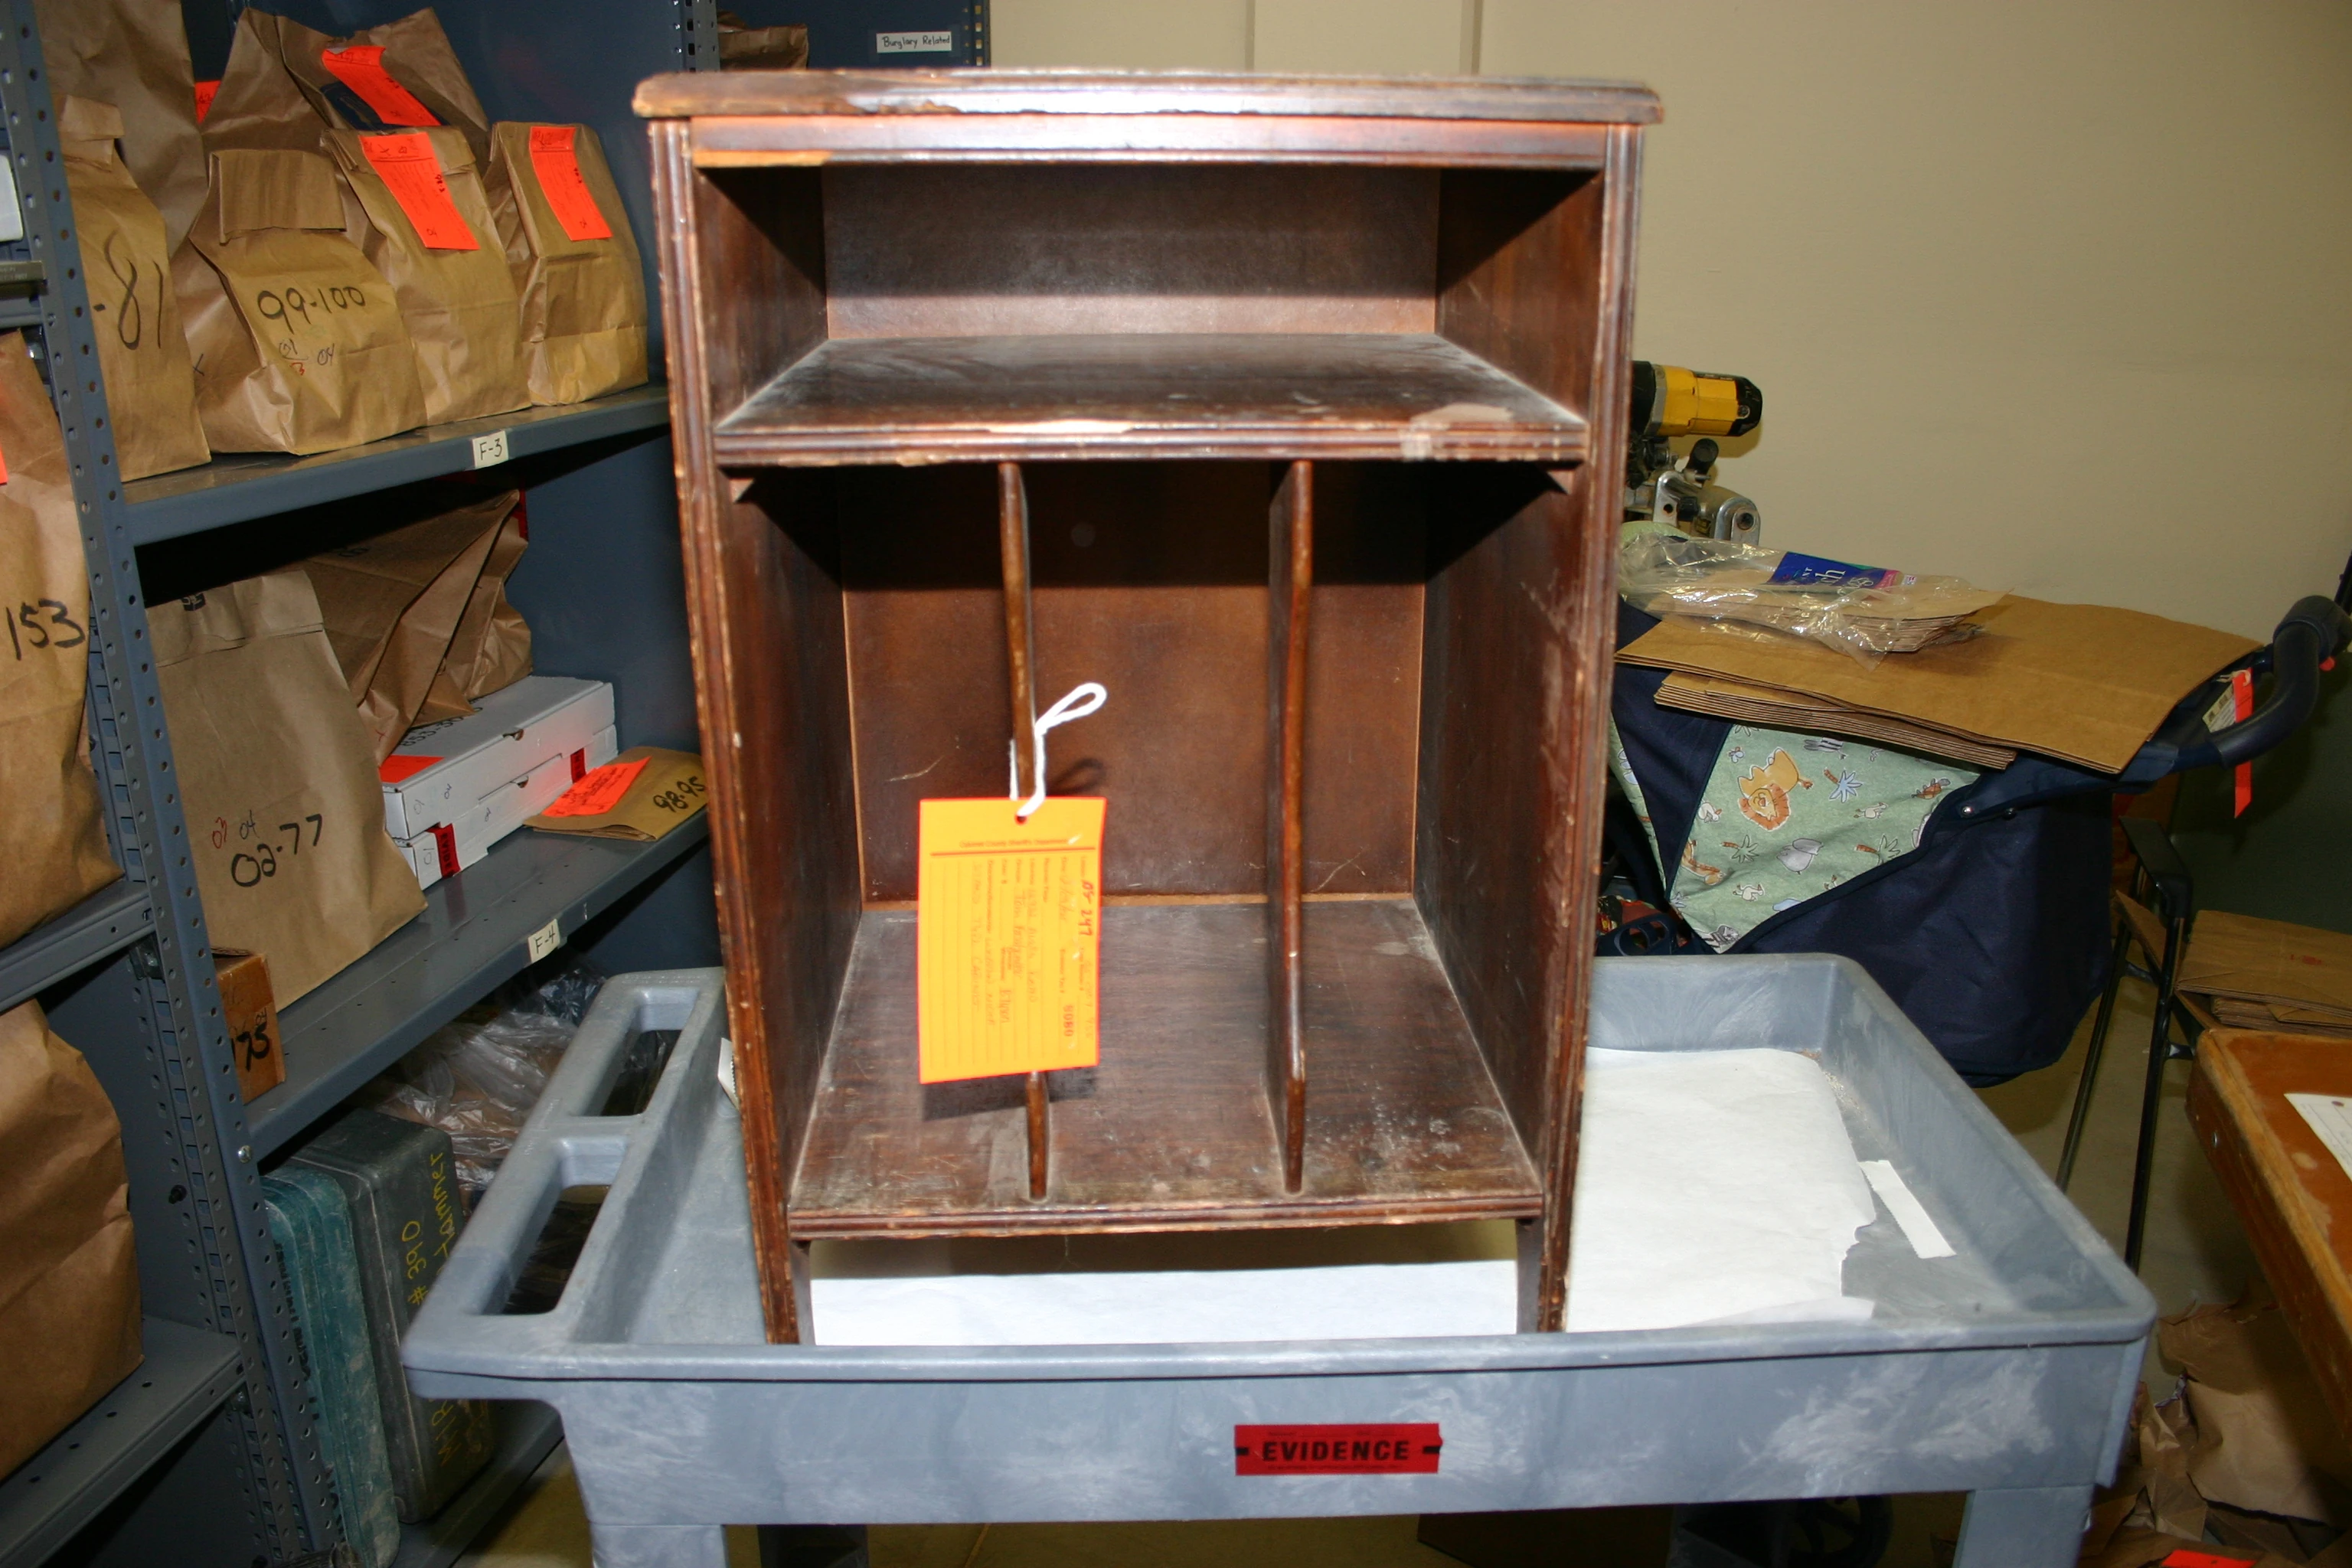
|
| 169 | Loose back panel of record cabinet | 6 | 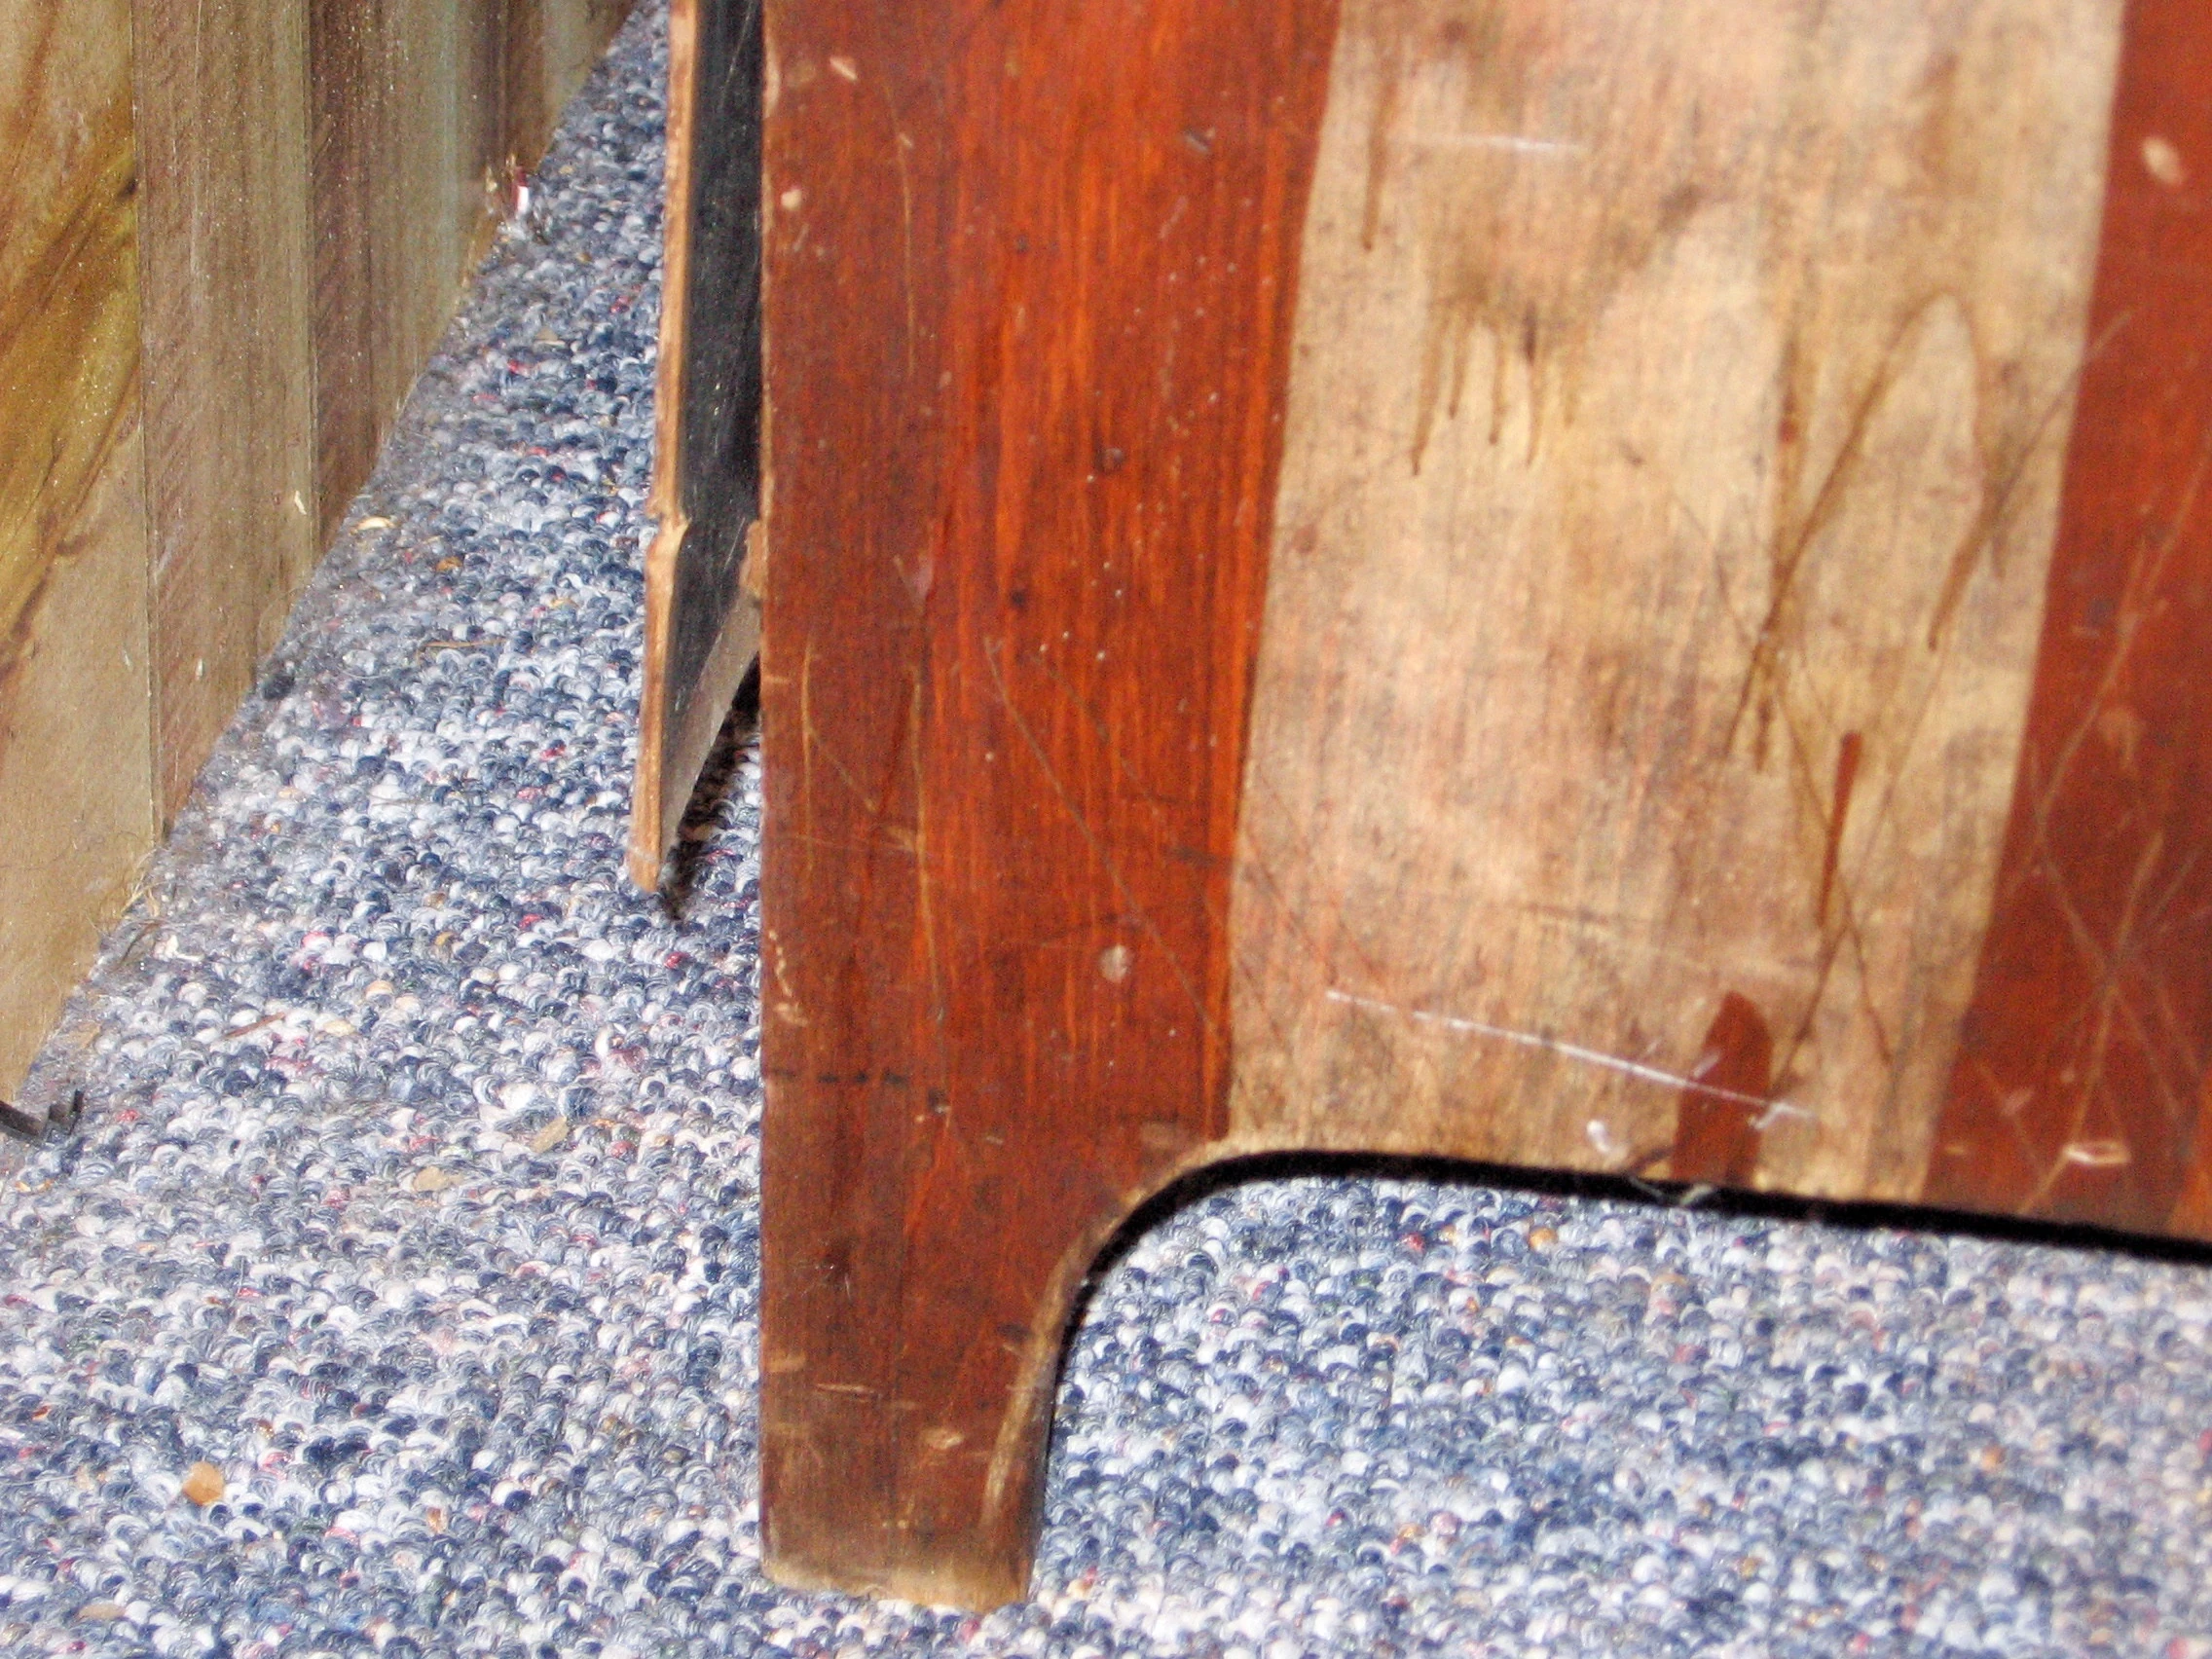
|
| 170 | Nightstand from Steven's bedroom | 6 | 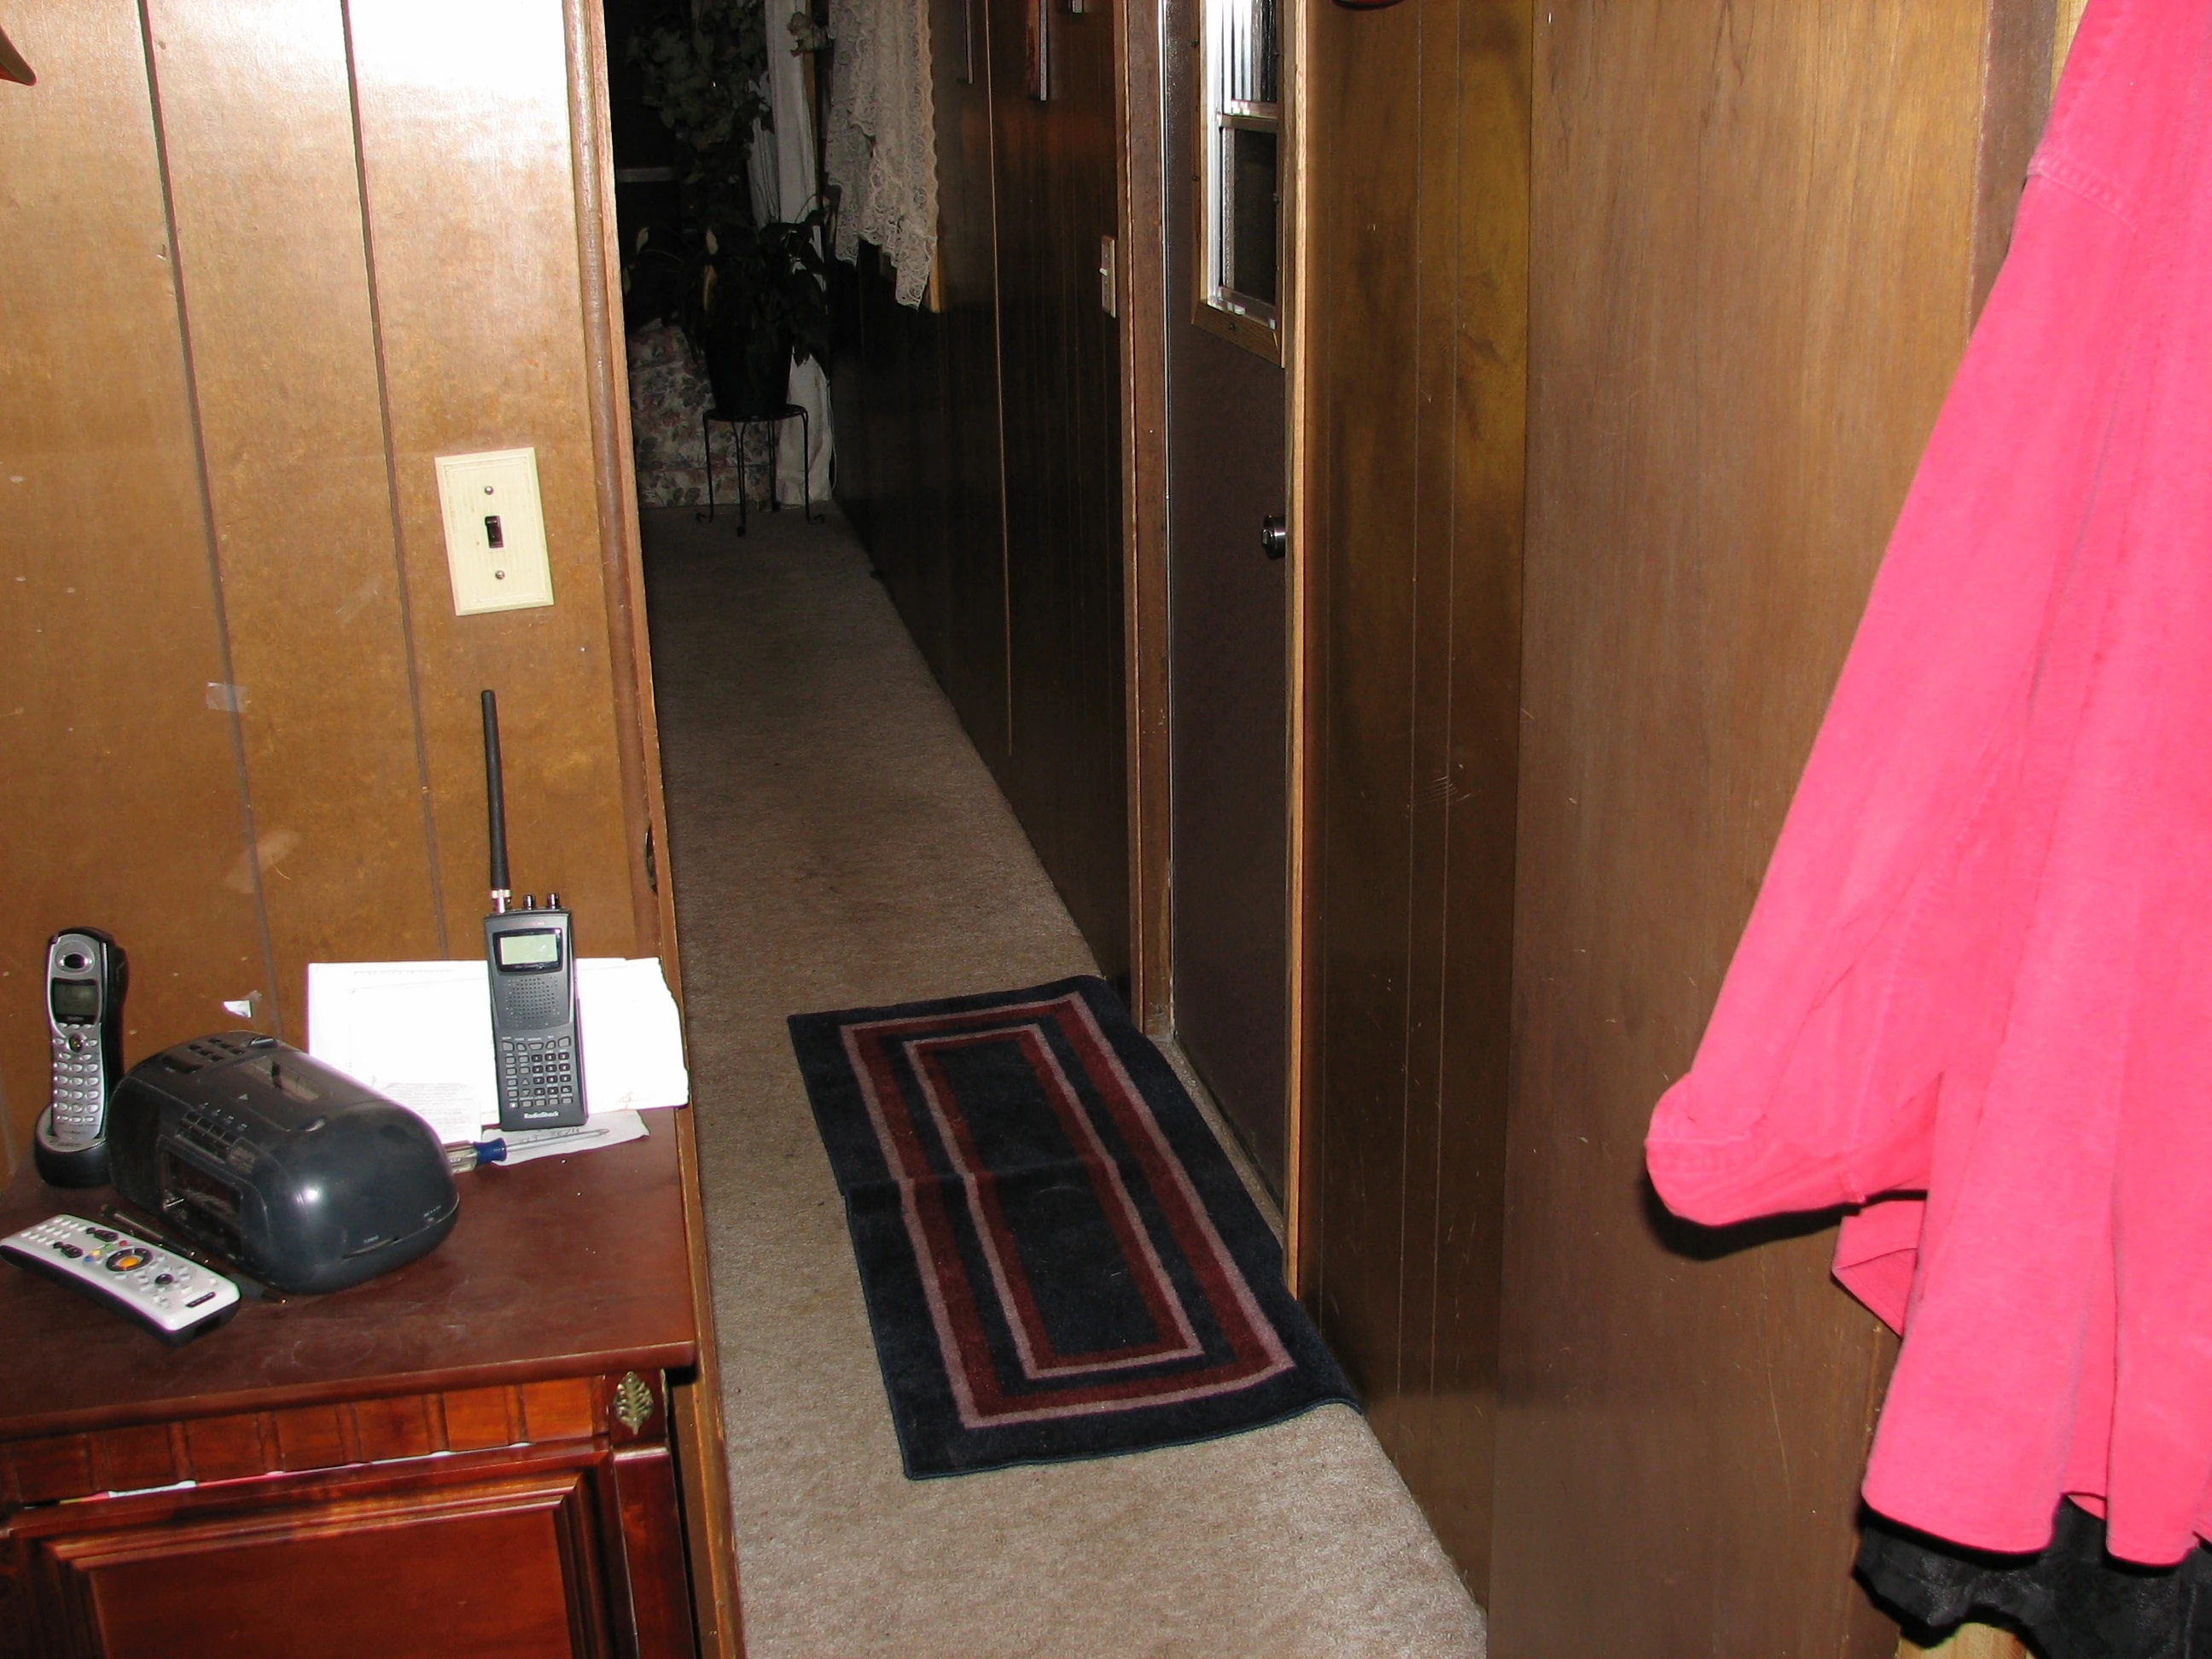
|
| 171 | Nightstand evidence photo | 6 | 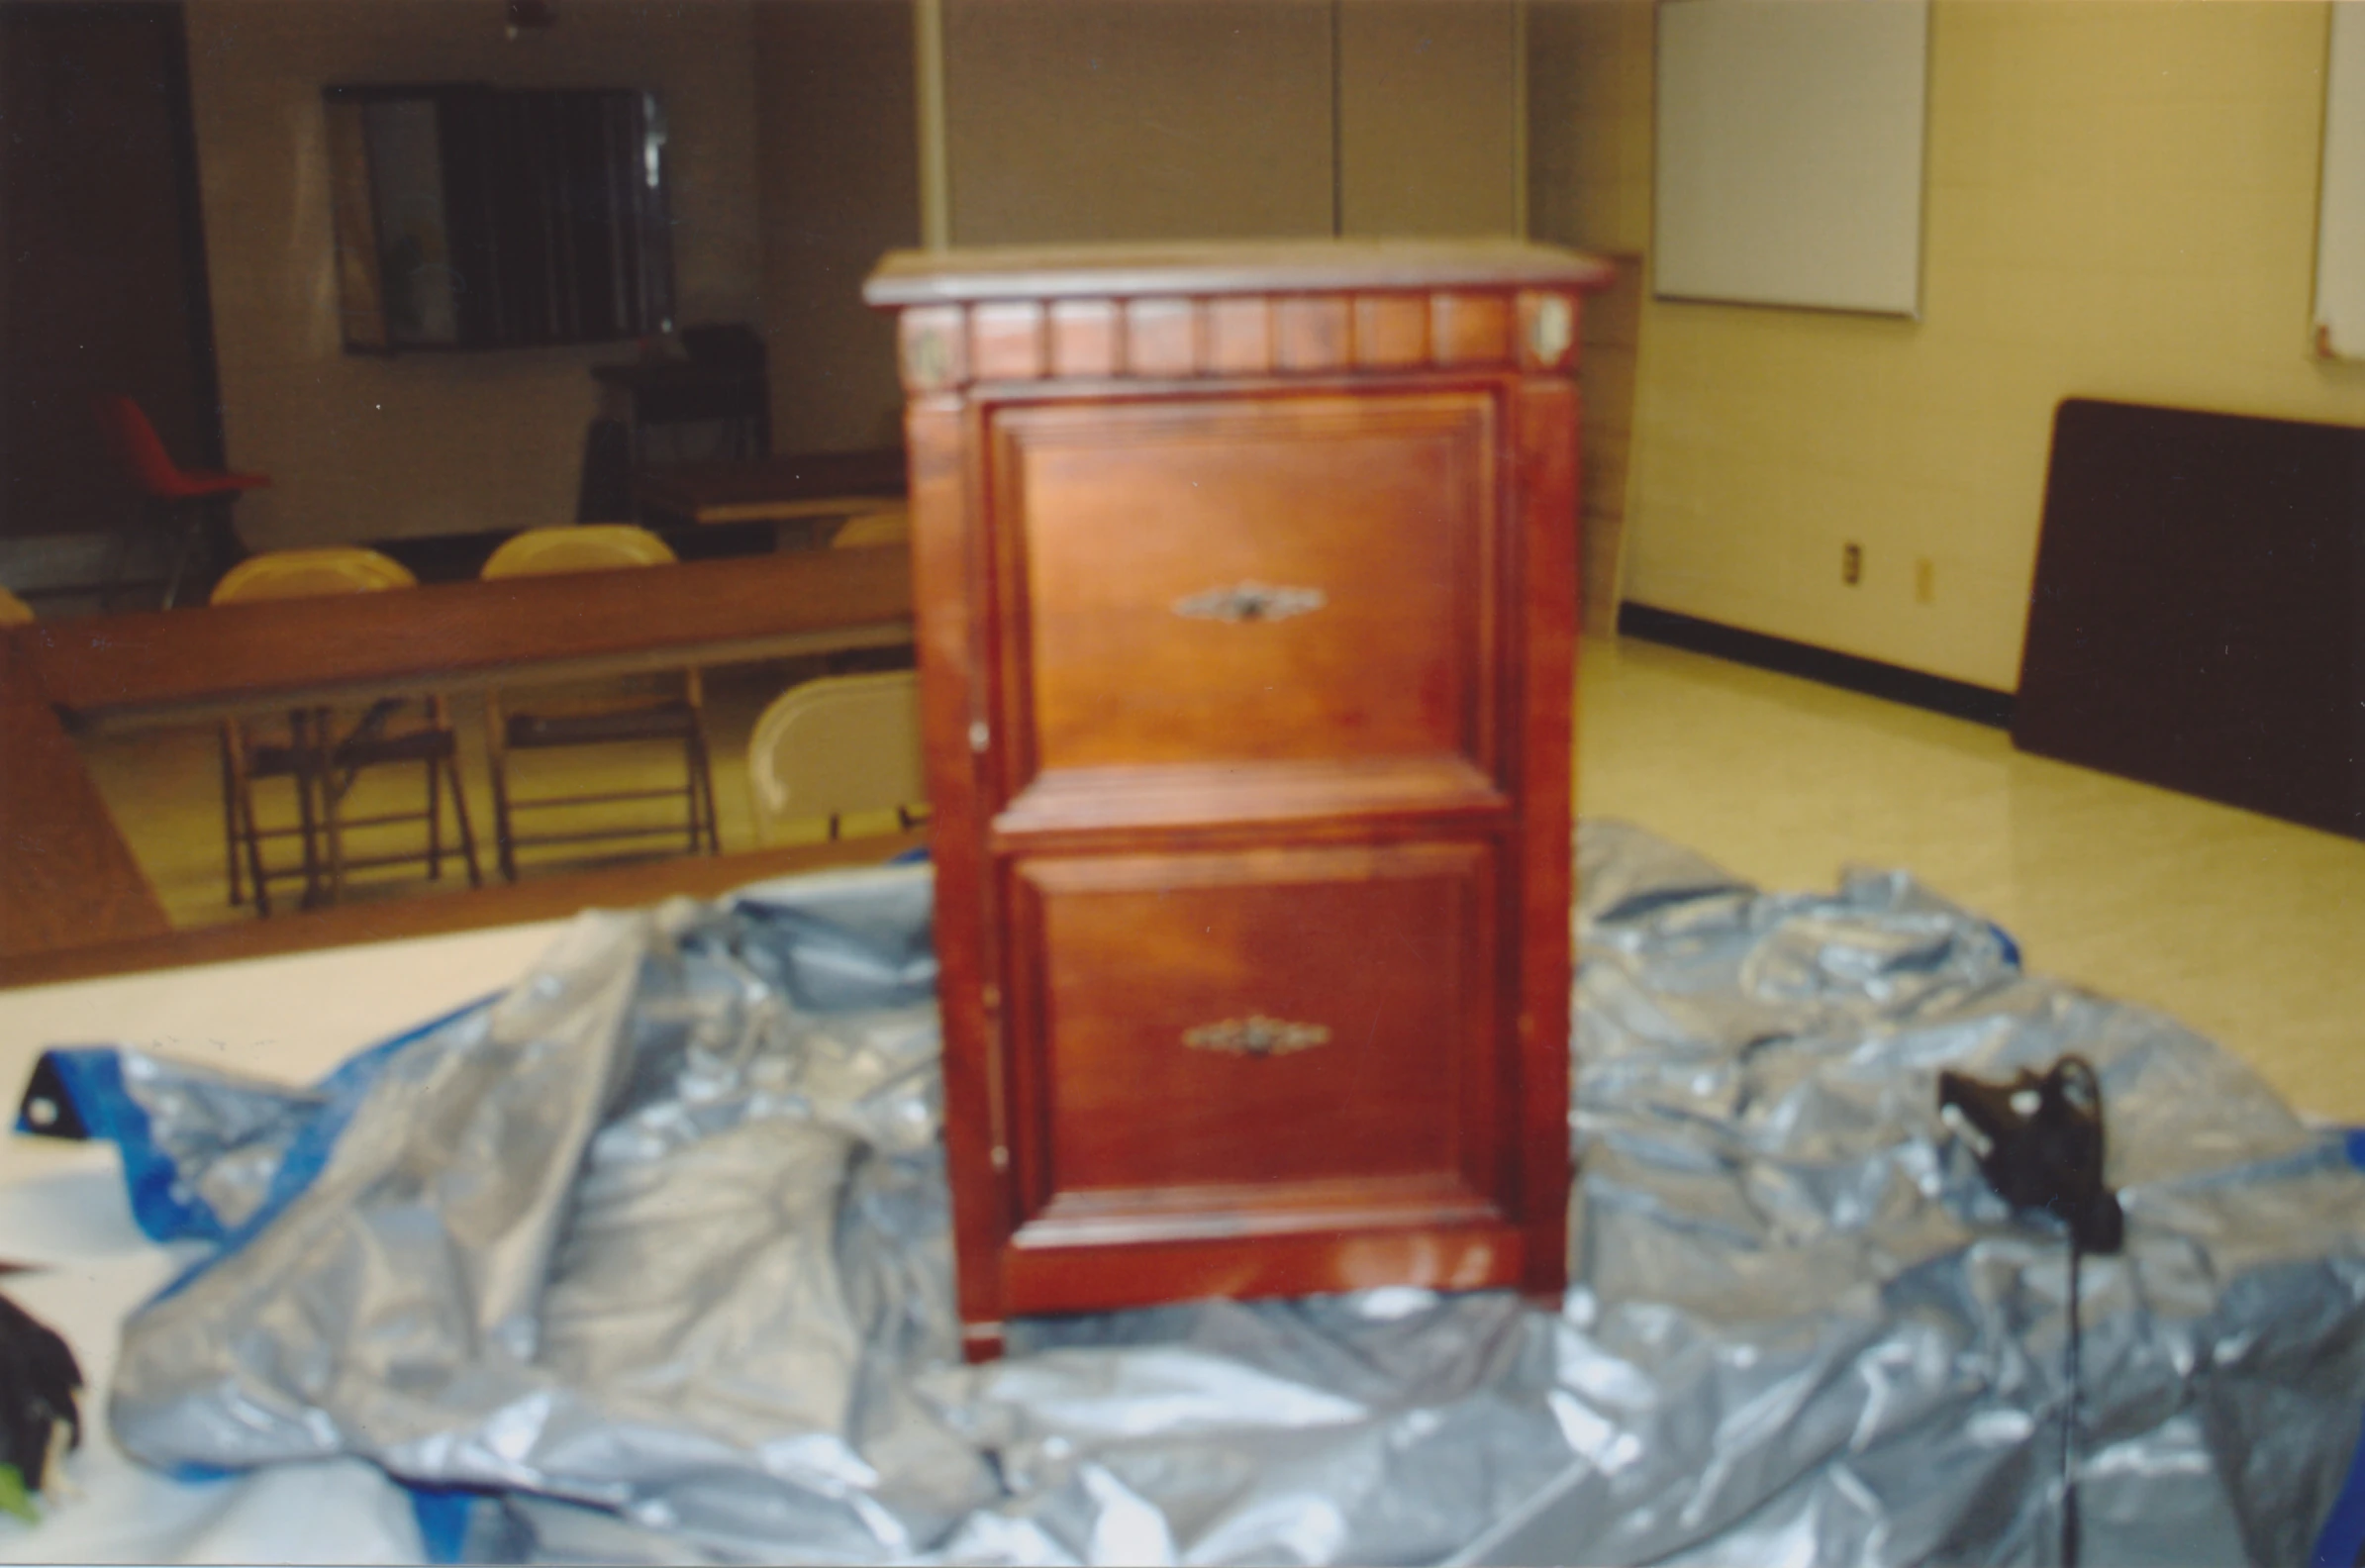
|
| 172 | Steven Avery's bedroom | 6 | 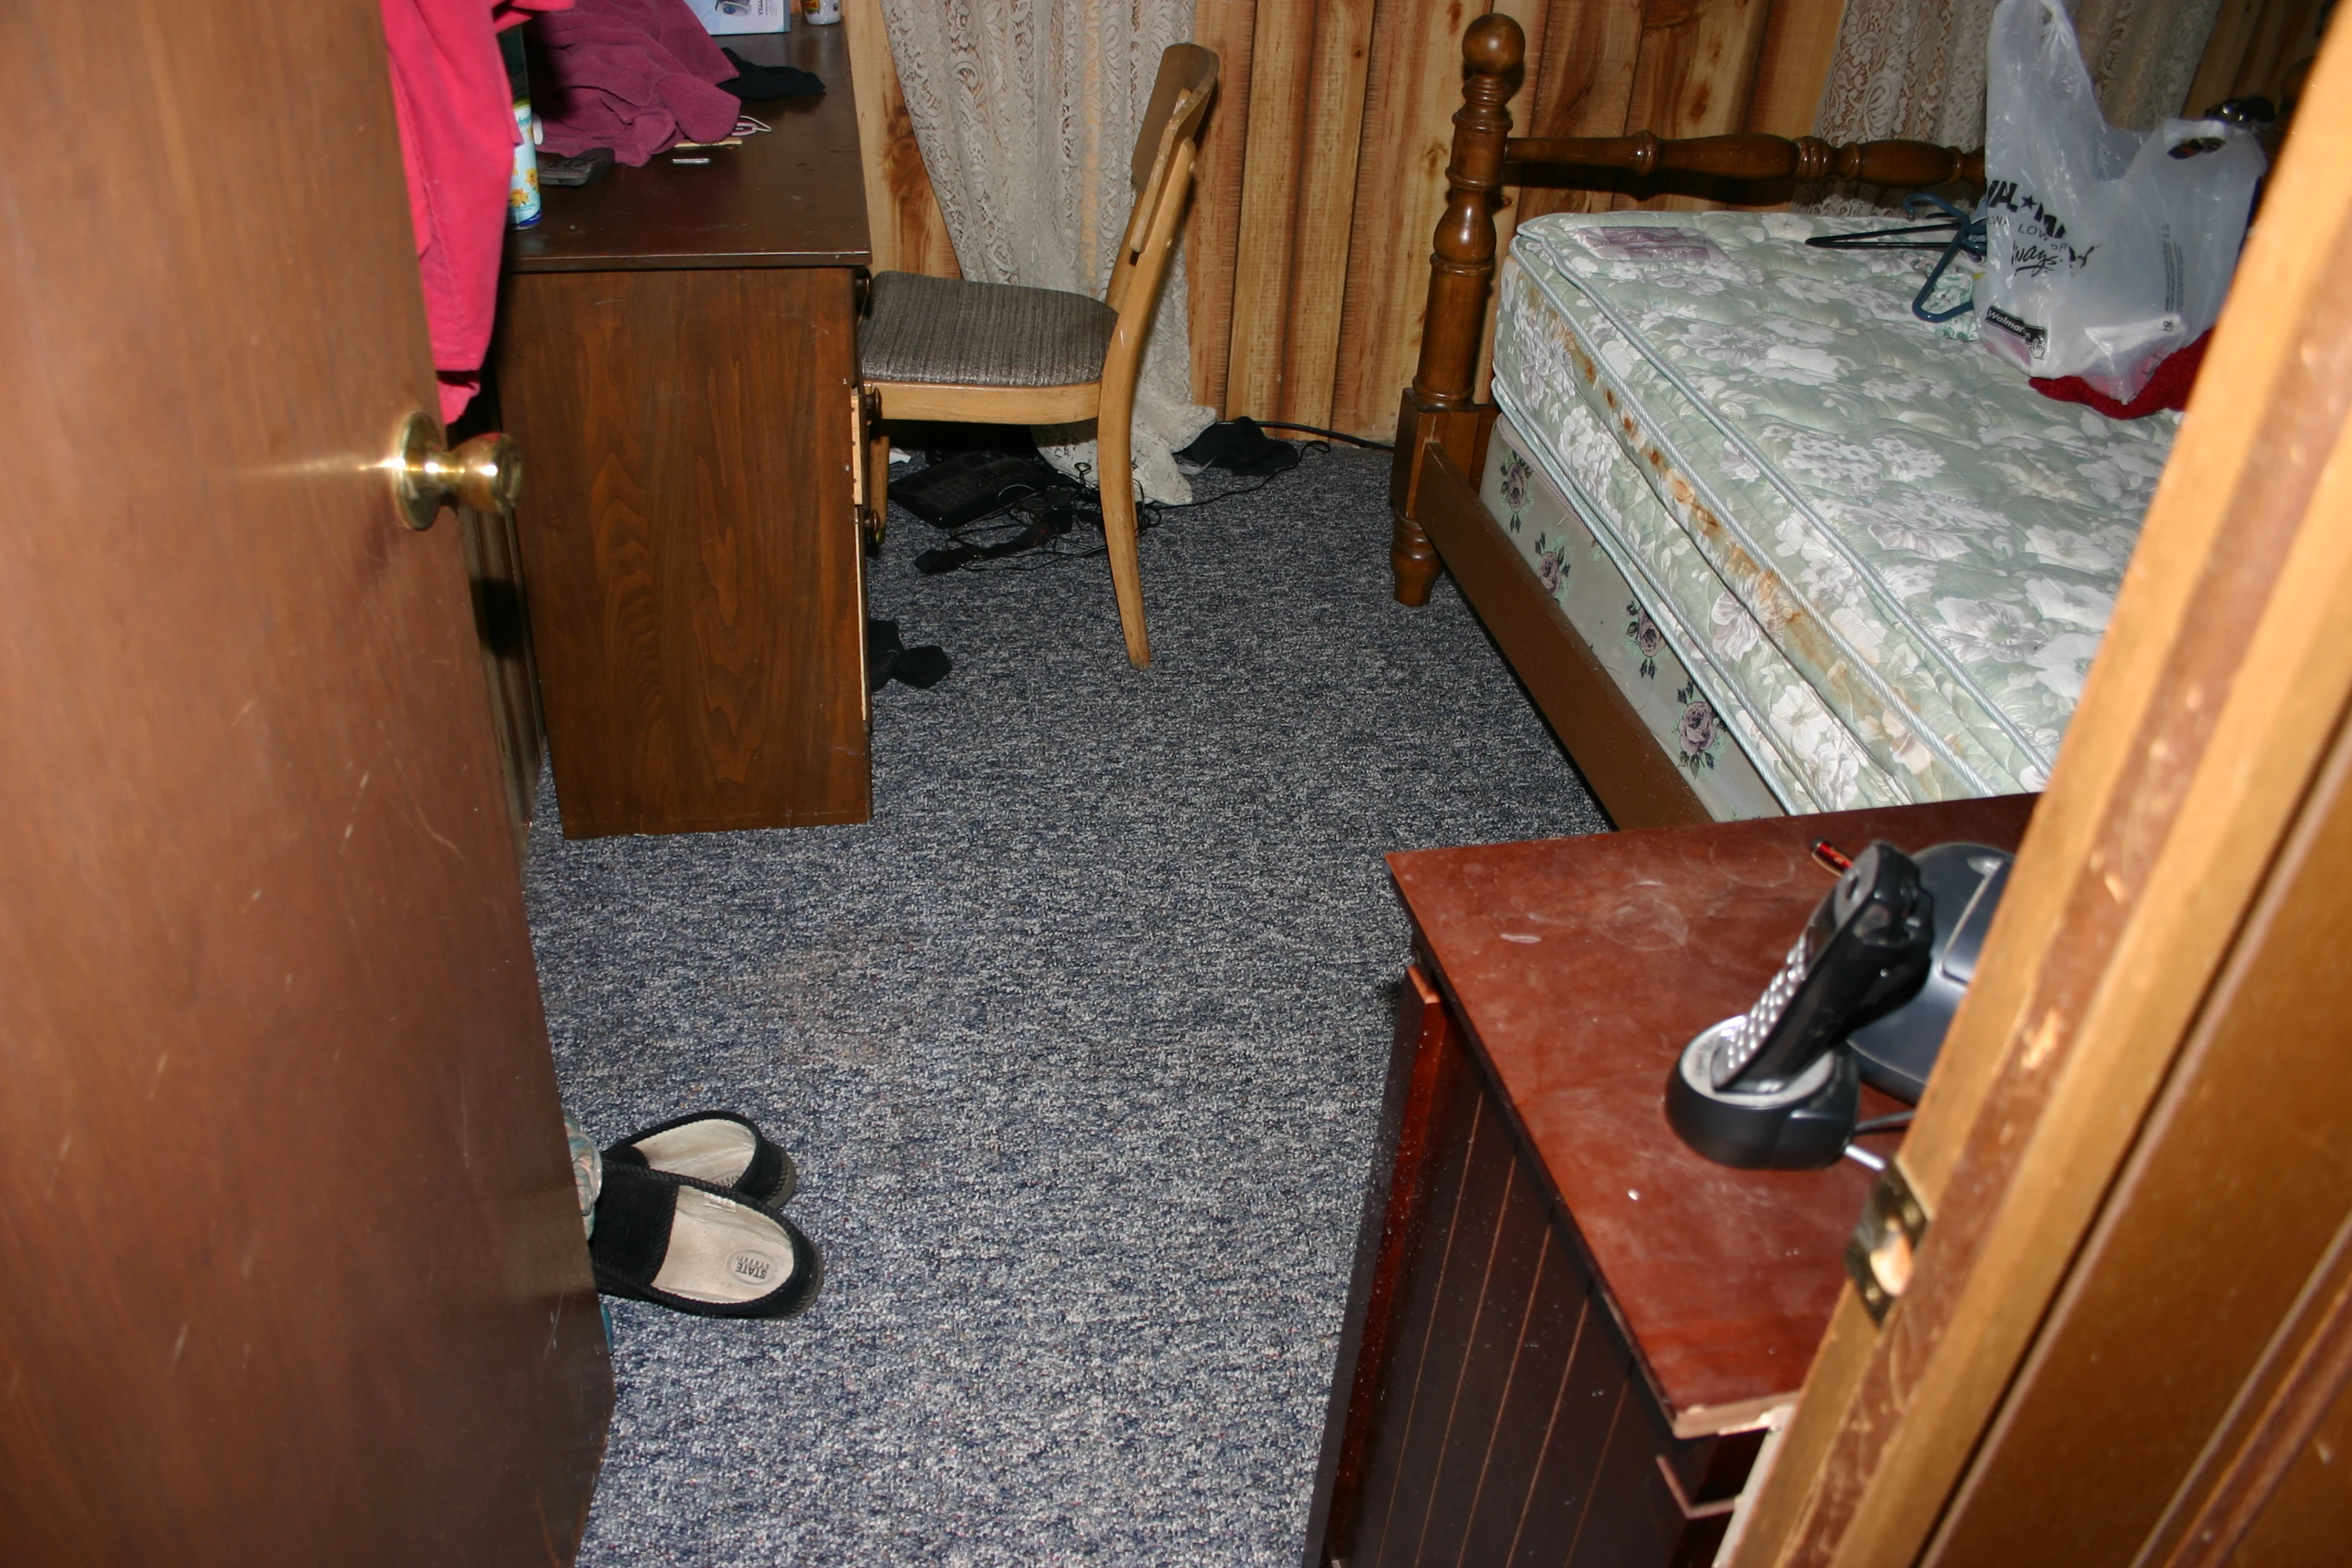
|
| 173 | Handcuffs evidence photo | 6 | 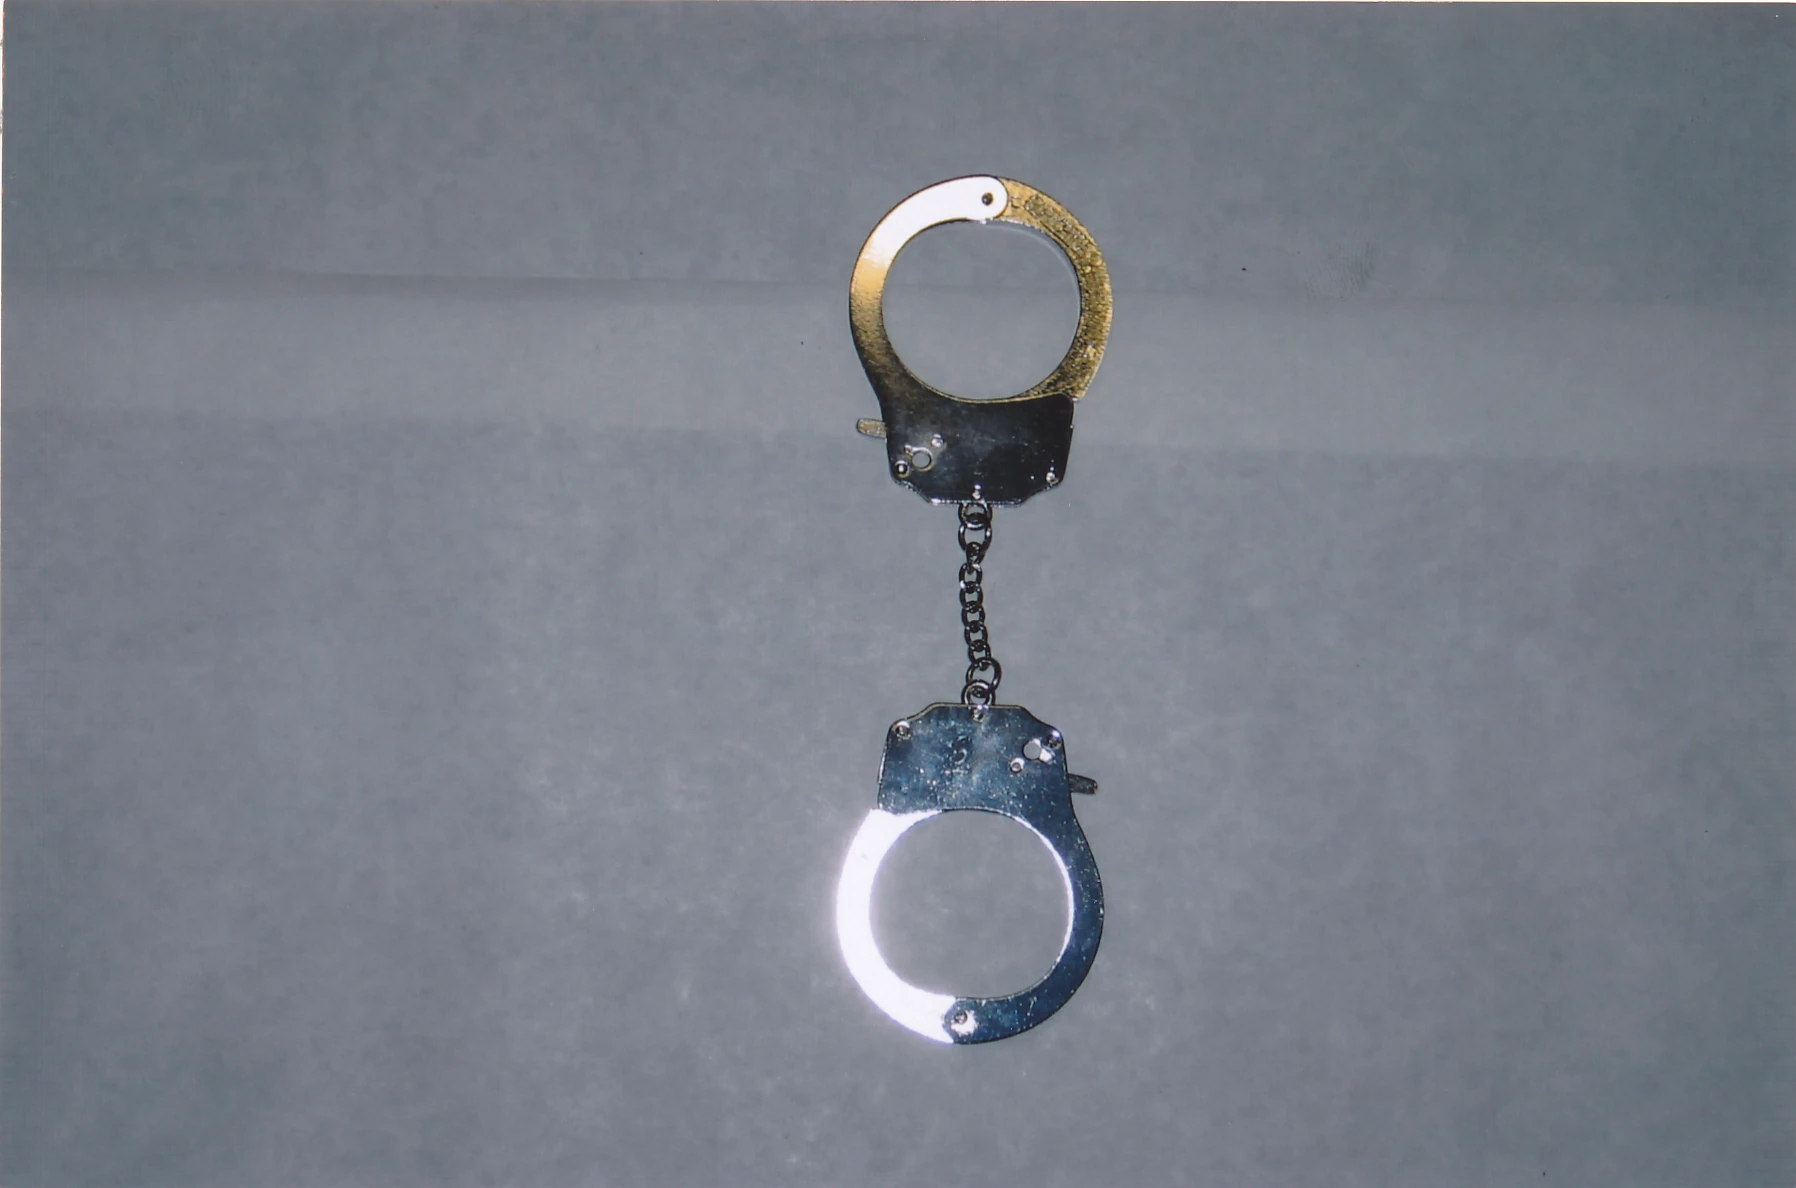
|
| 174 | Leg irons evidence photo | 6 | 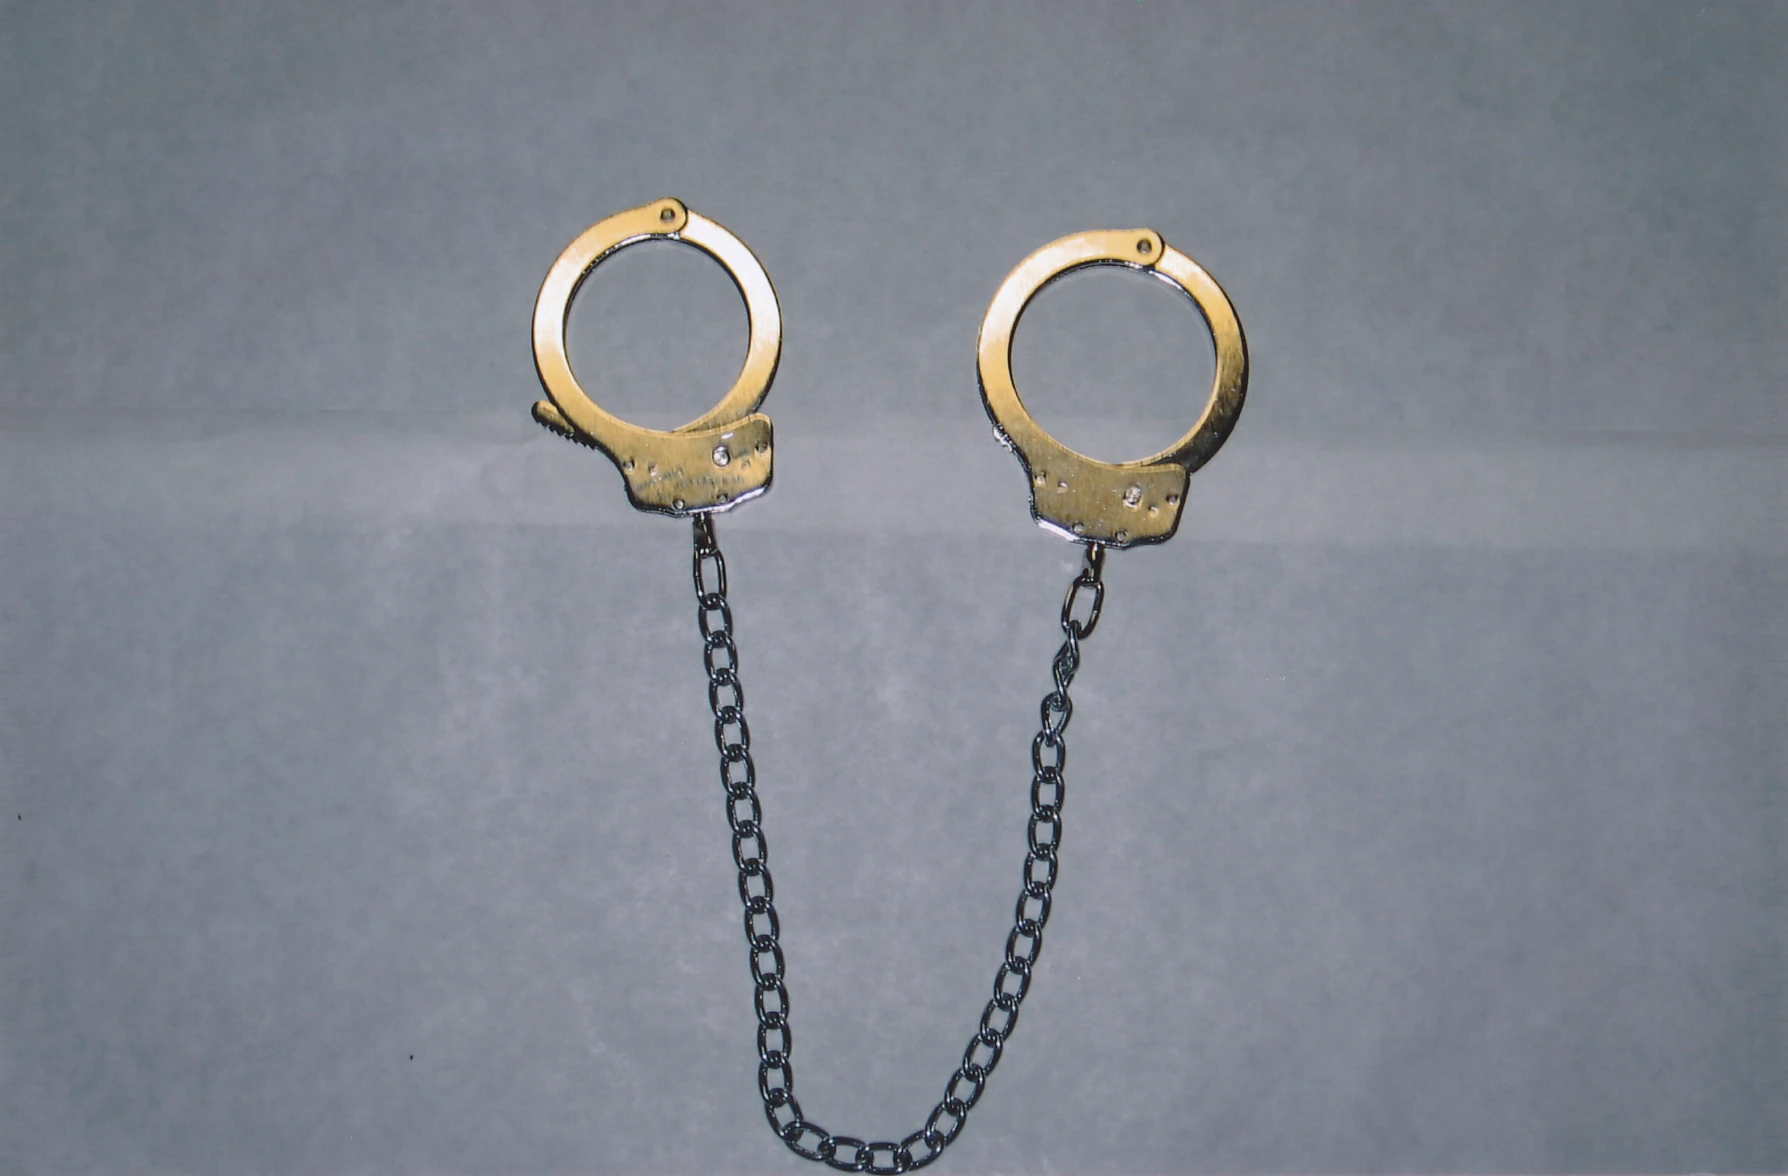
|
| 175 | Steven's living room, computer area | 6 | 
|
| 176 | "Back to patio door" evidence photo | 6 | 
|
| 177 | For sale sign from Avery's trailer | 6 | 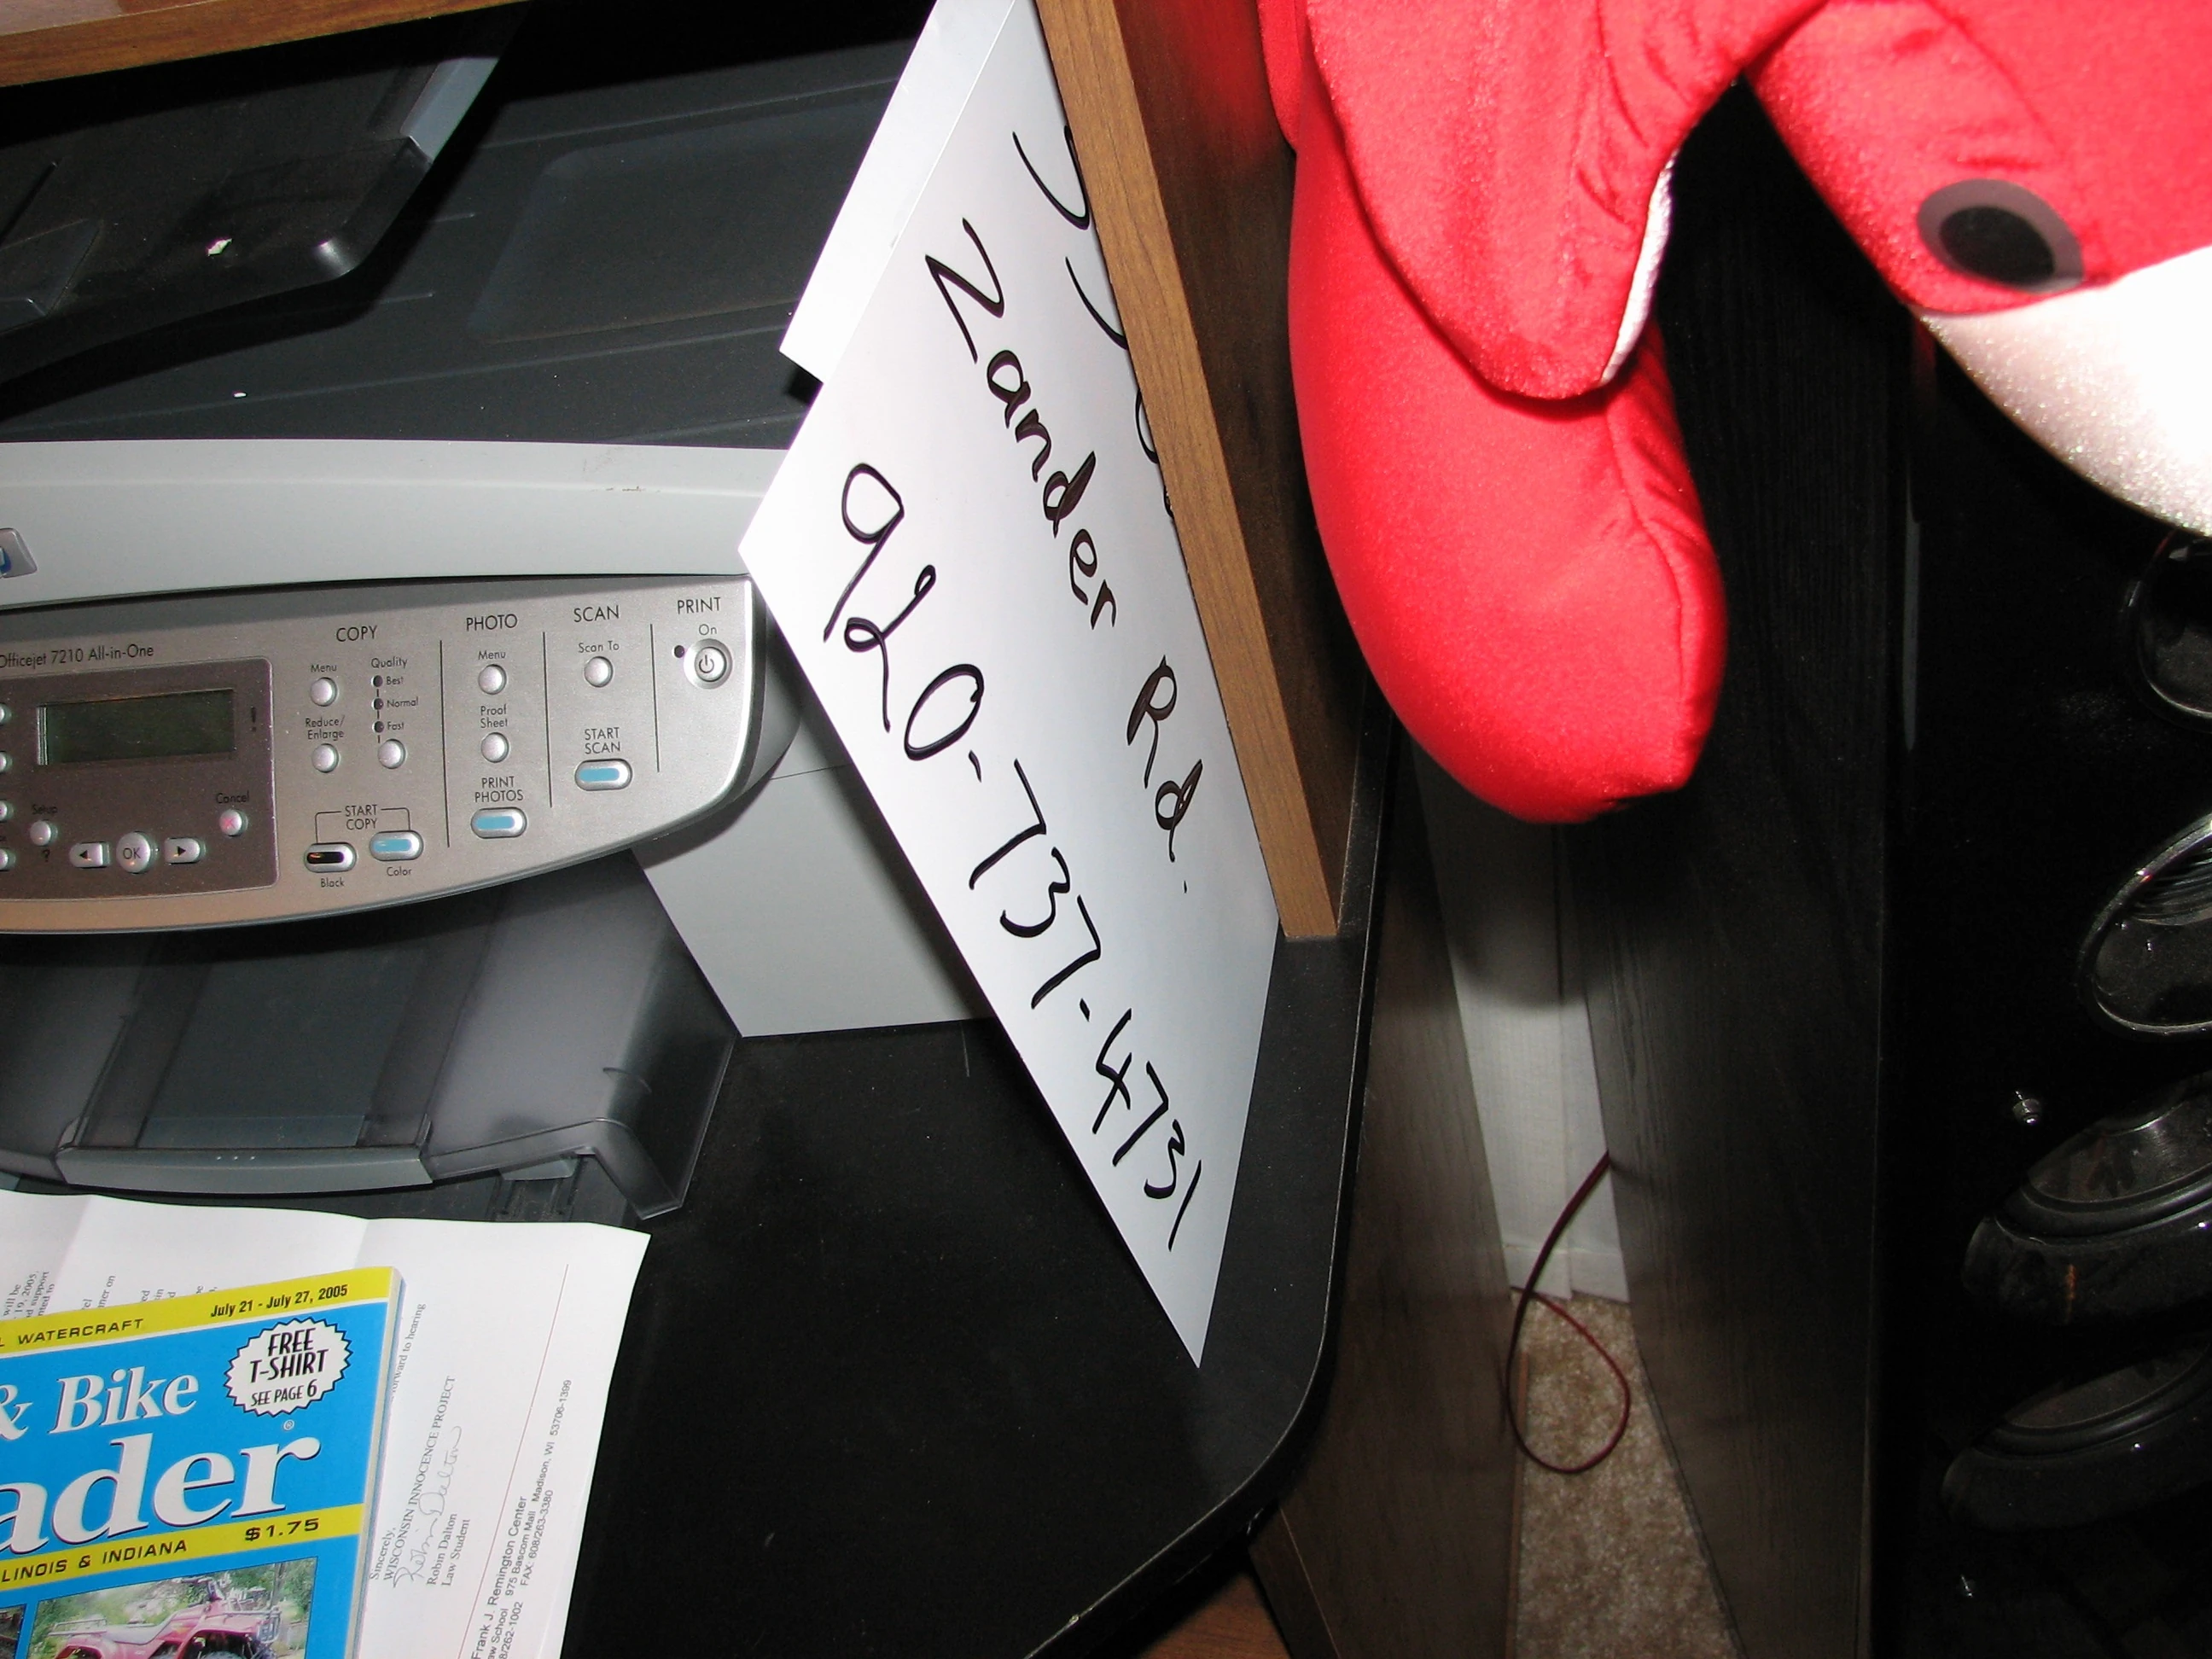
|
| 178 | For sale sign (front) | 6 | 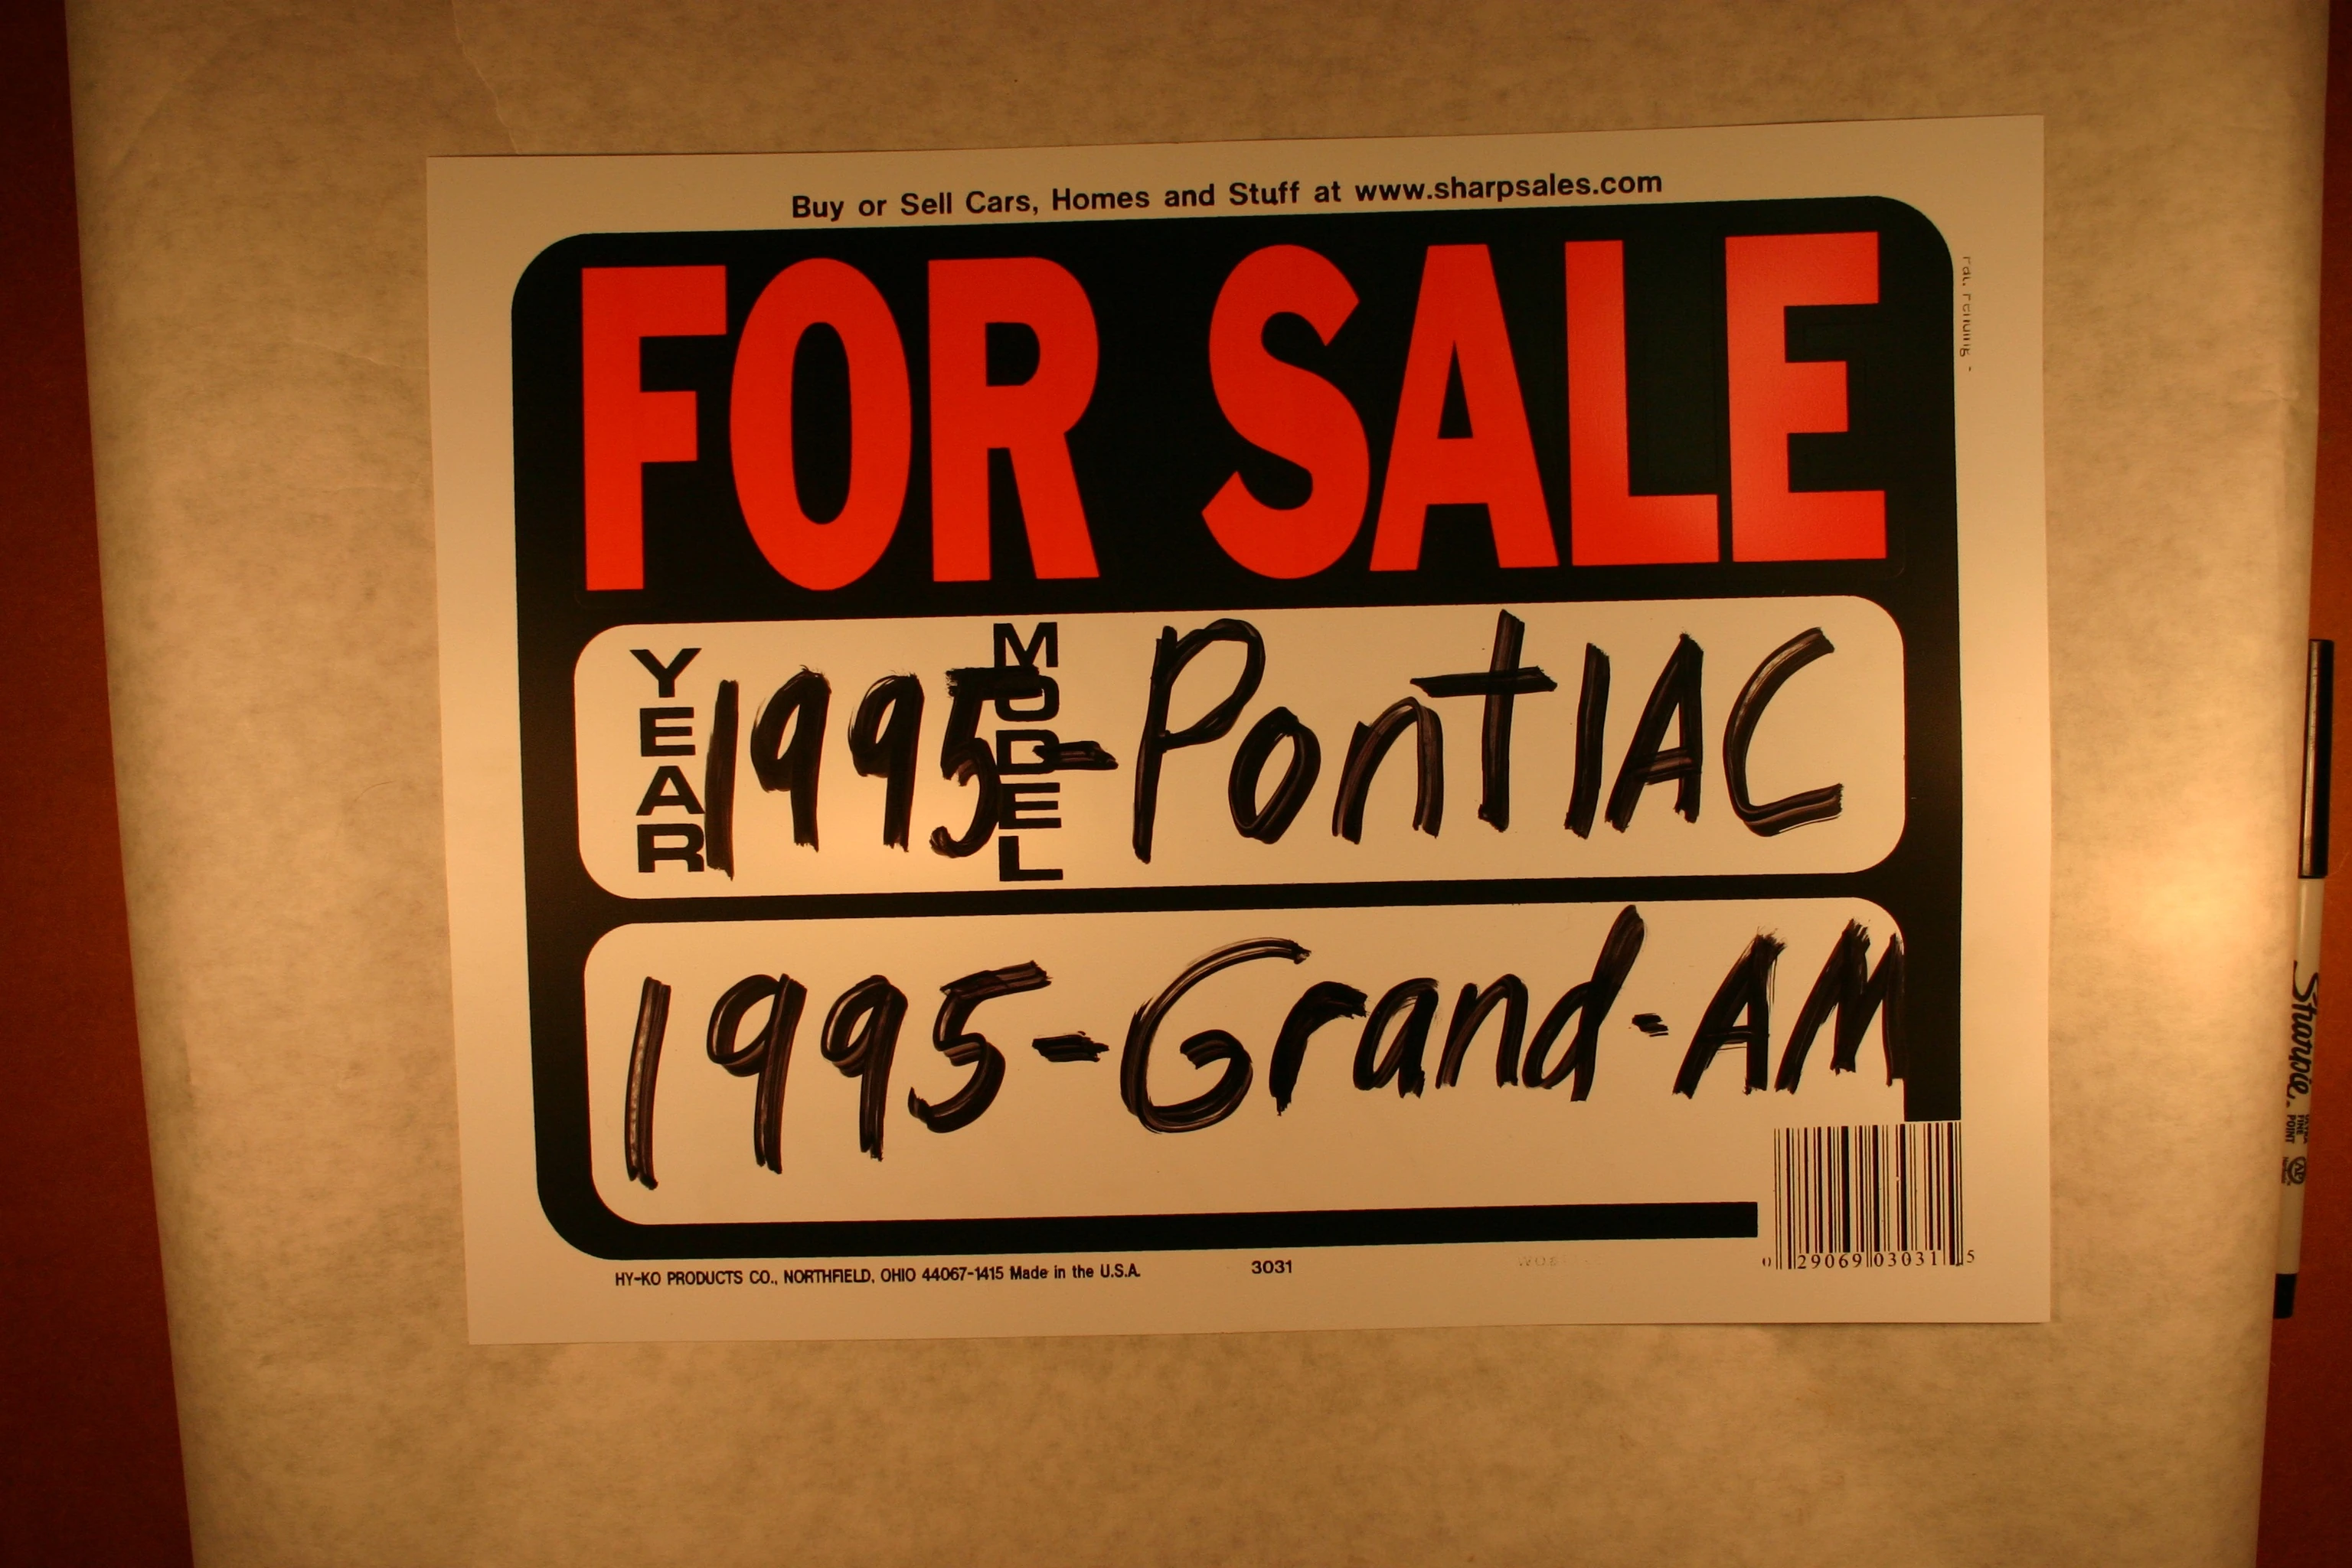
|
| 179 | For sale sign (back) | 6 | 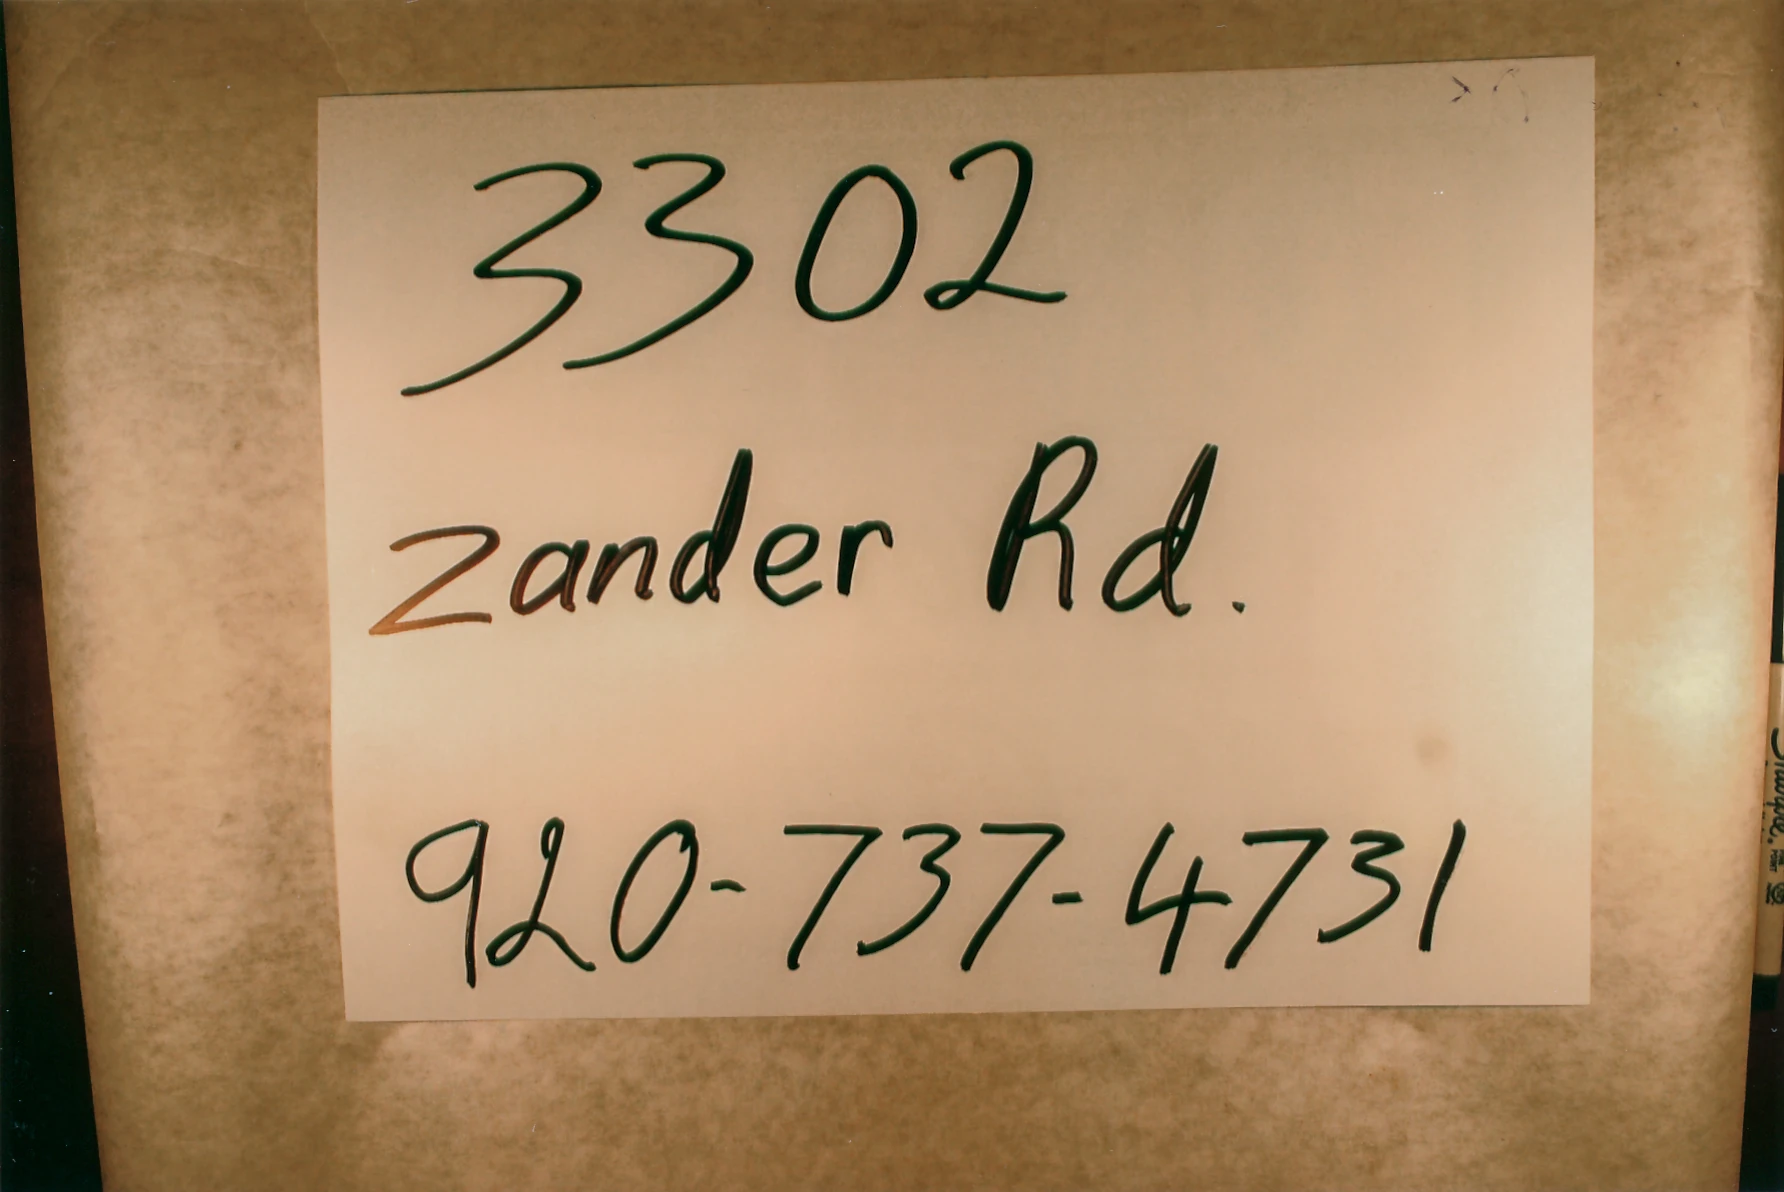
|
| 180 | AutoTrader issue | 6 | 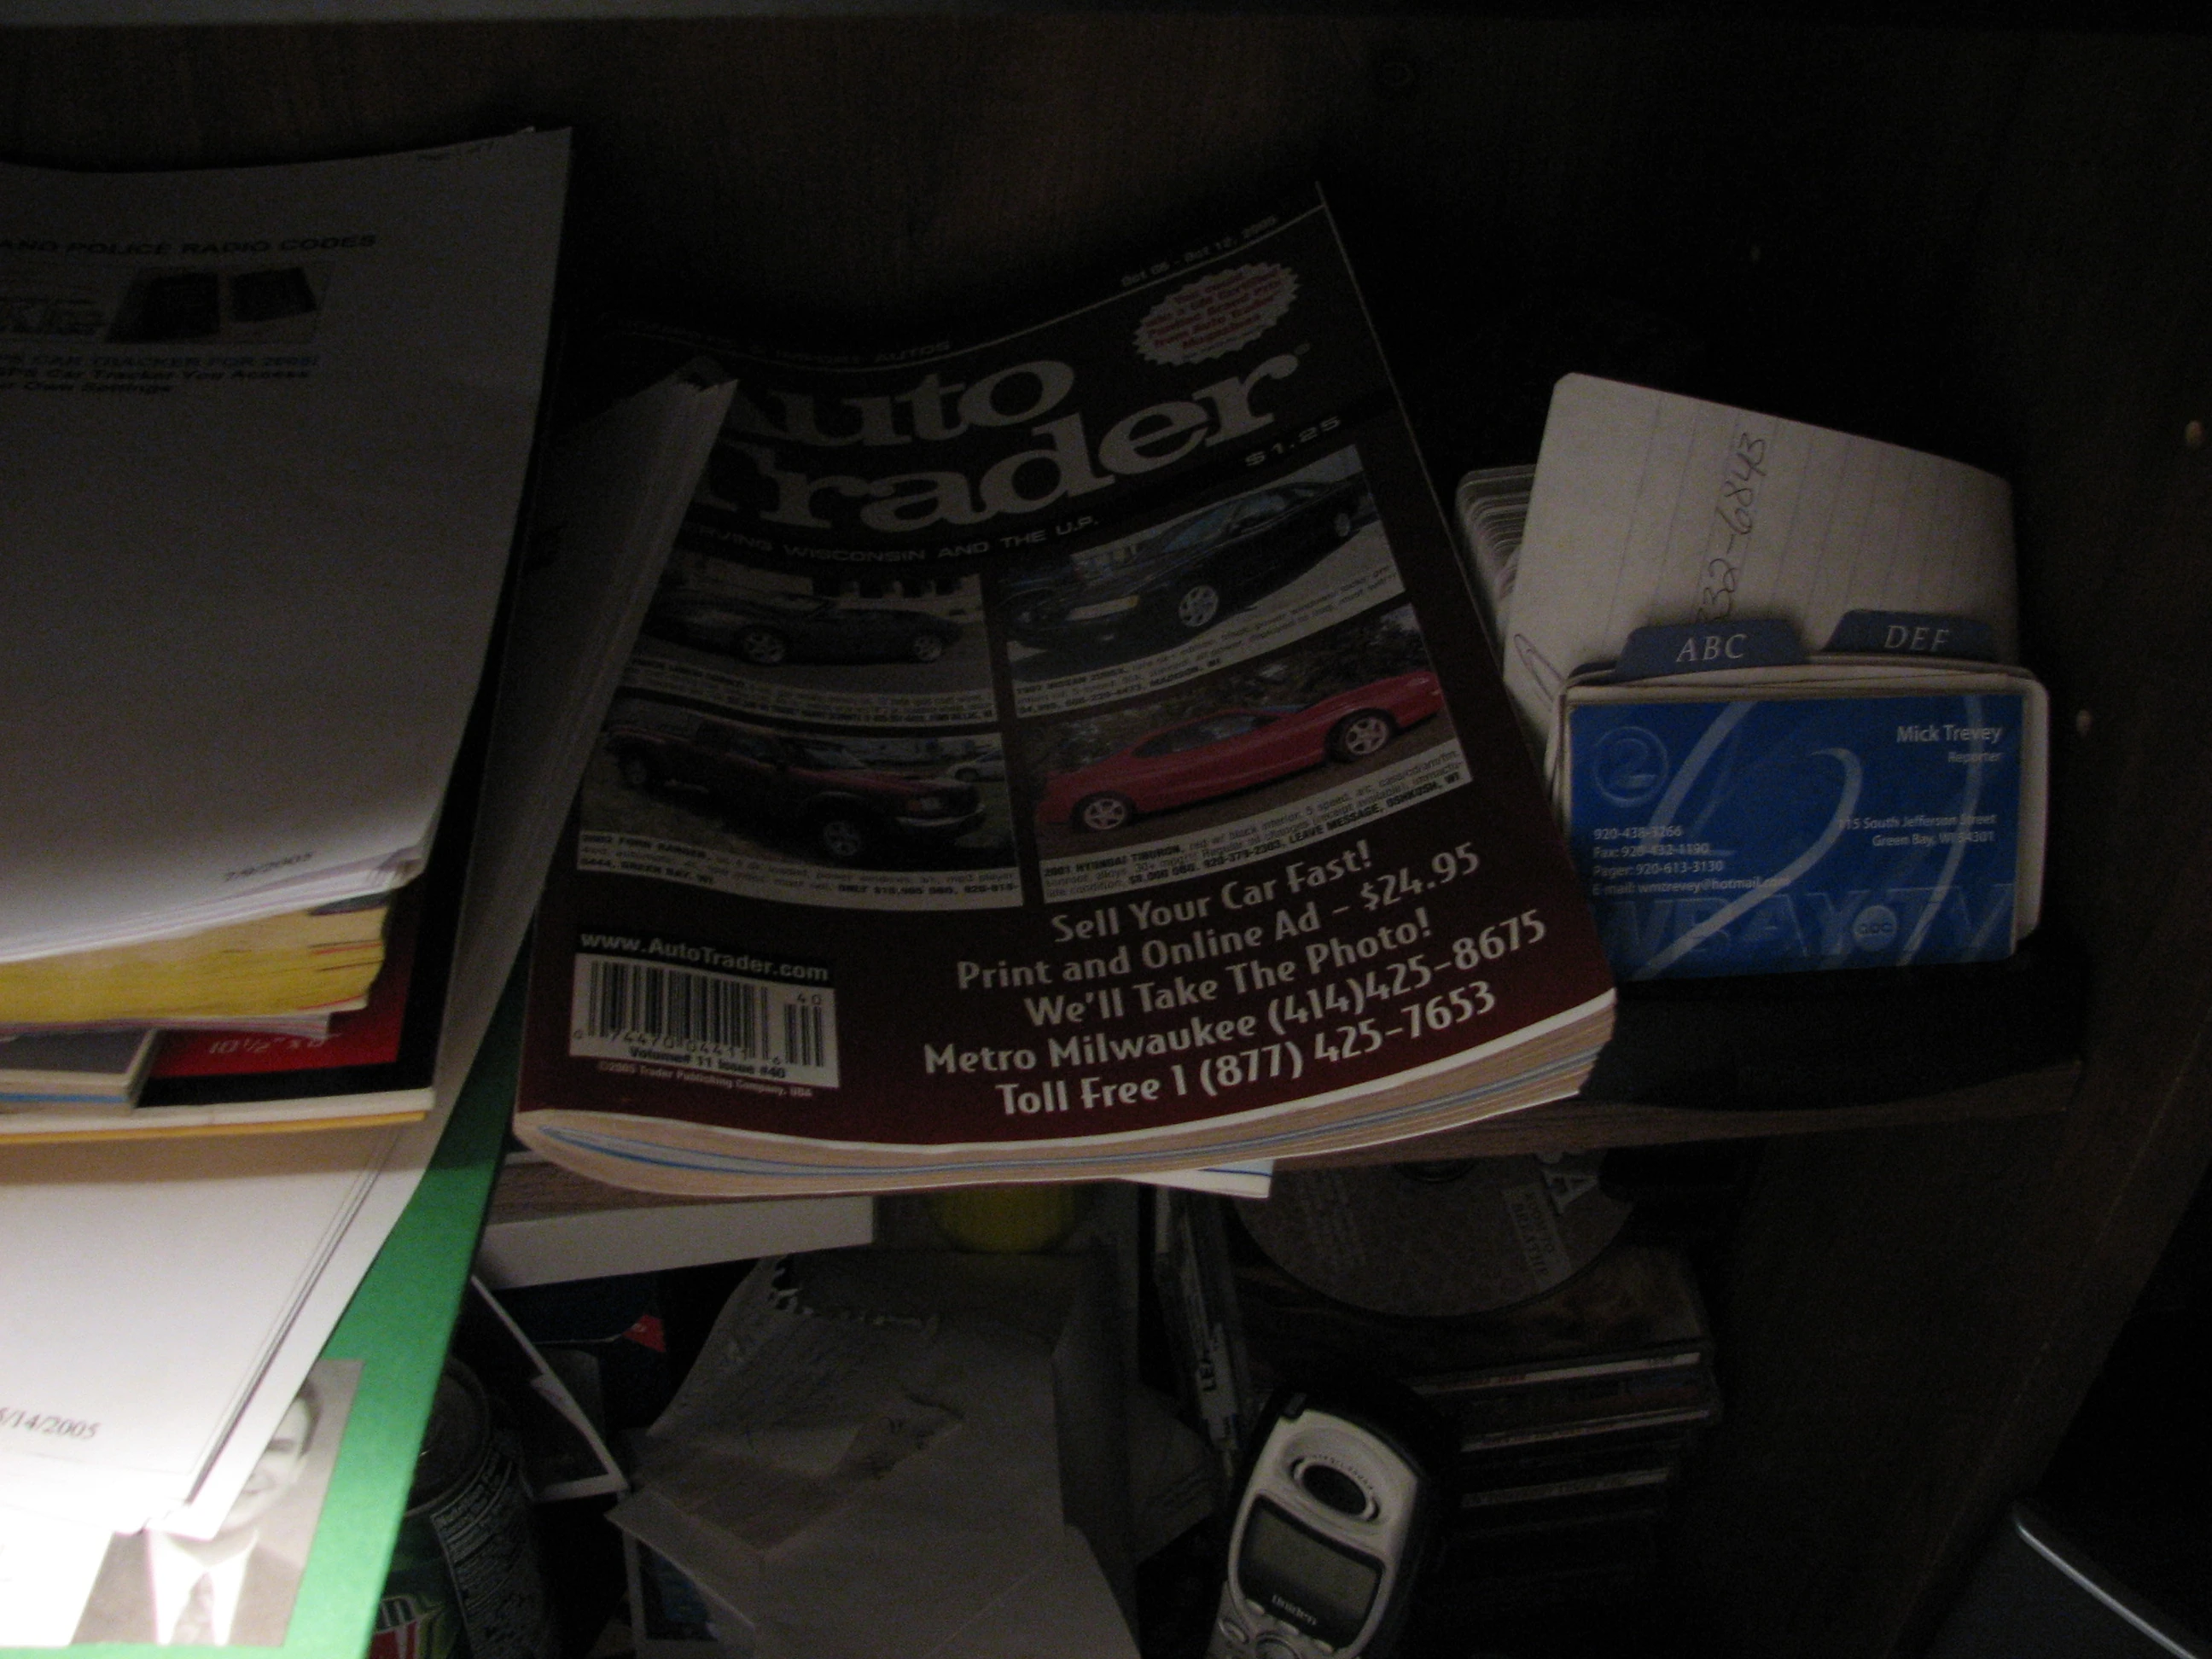
|
| 181 | AutoTrader issue evidence photo | 6 | 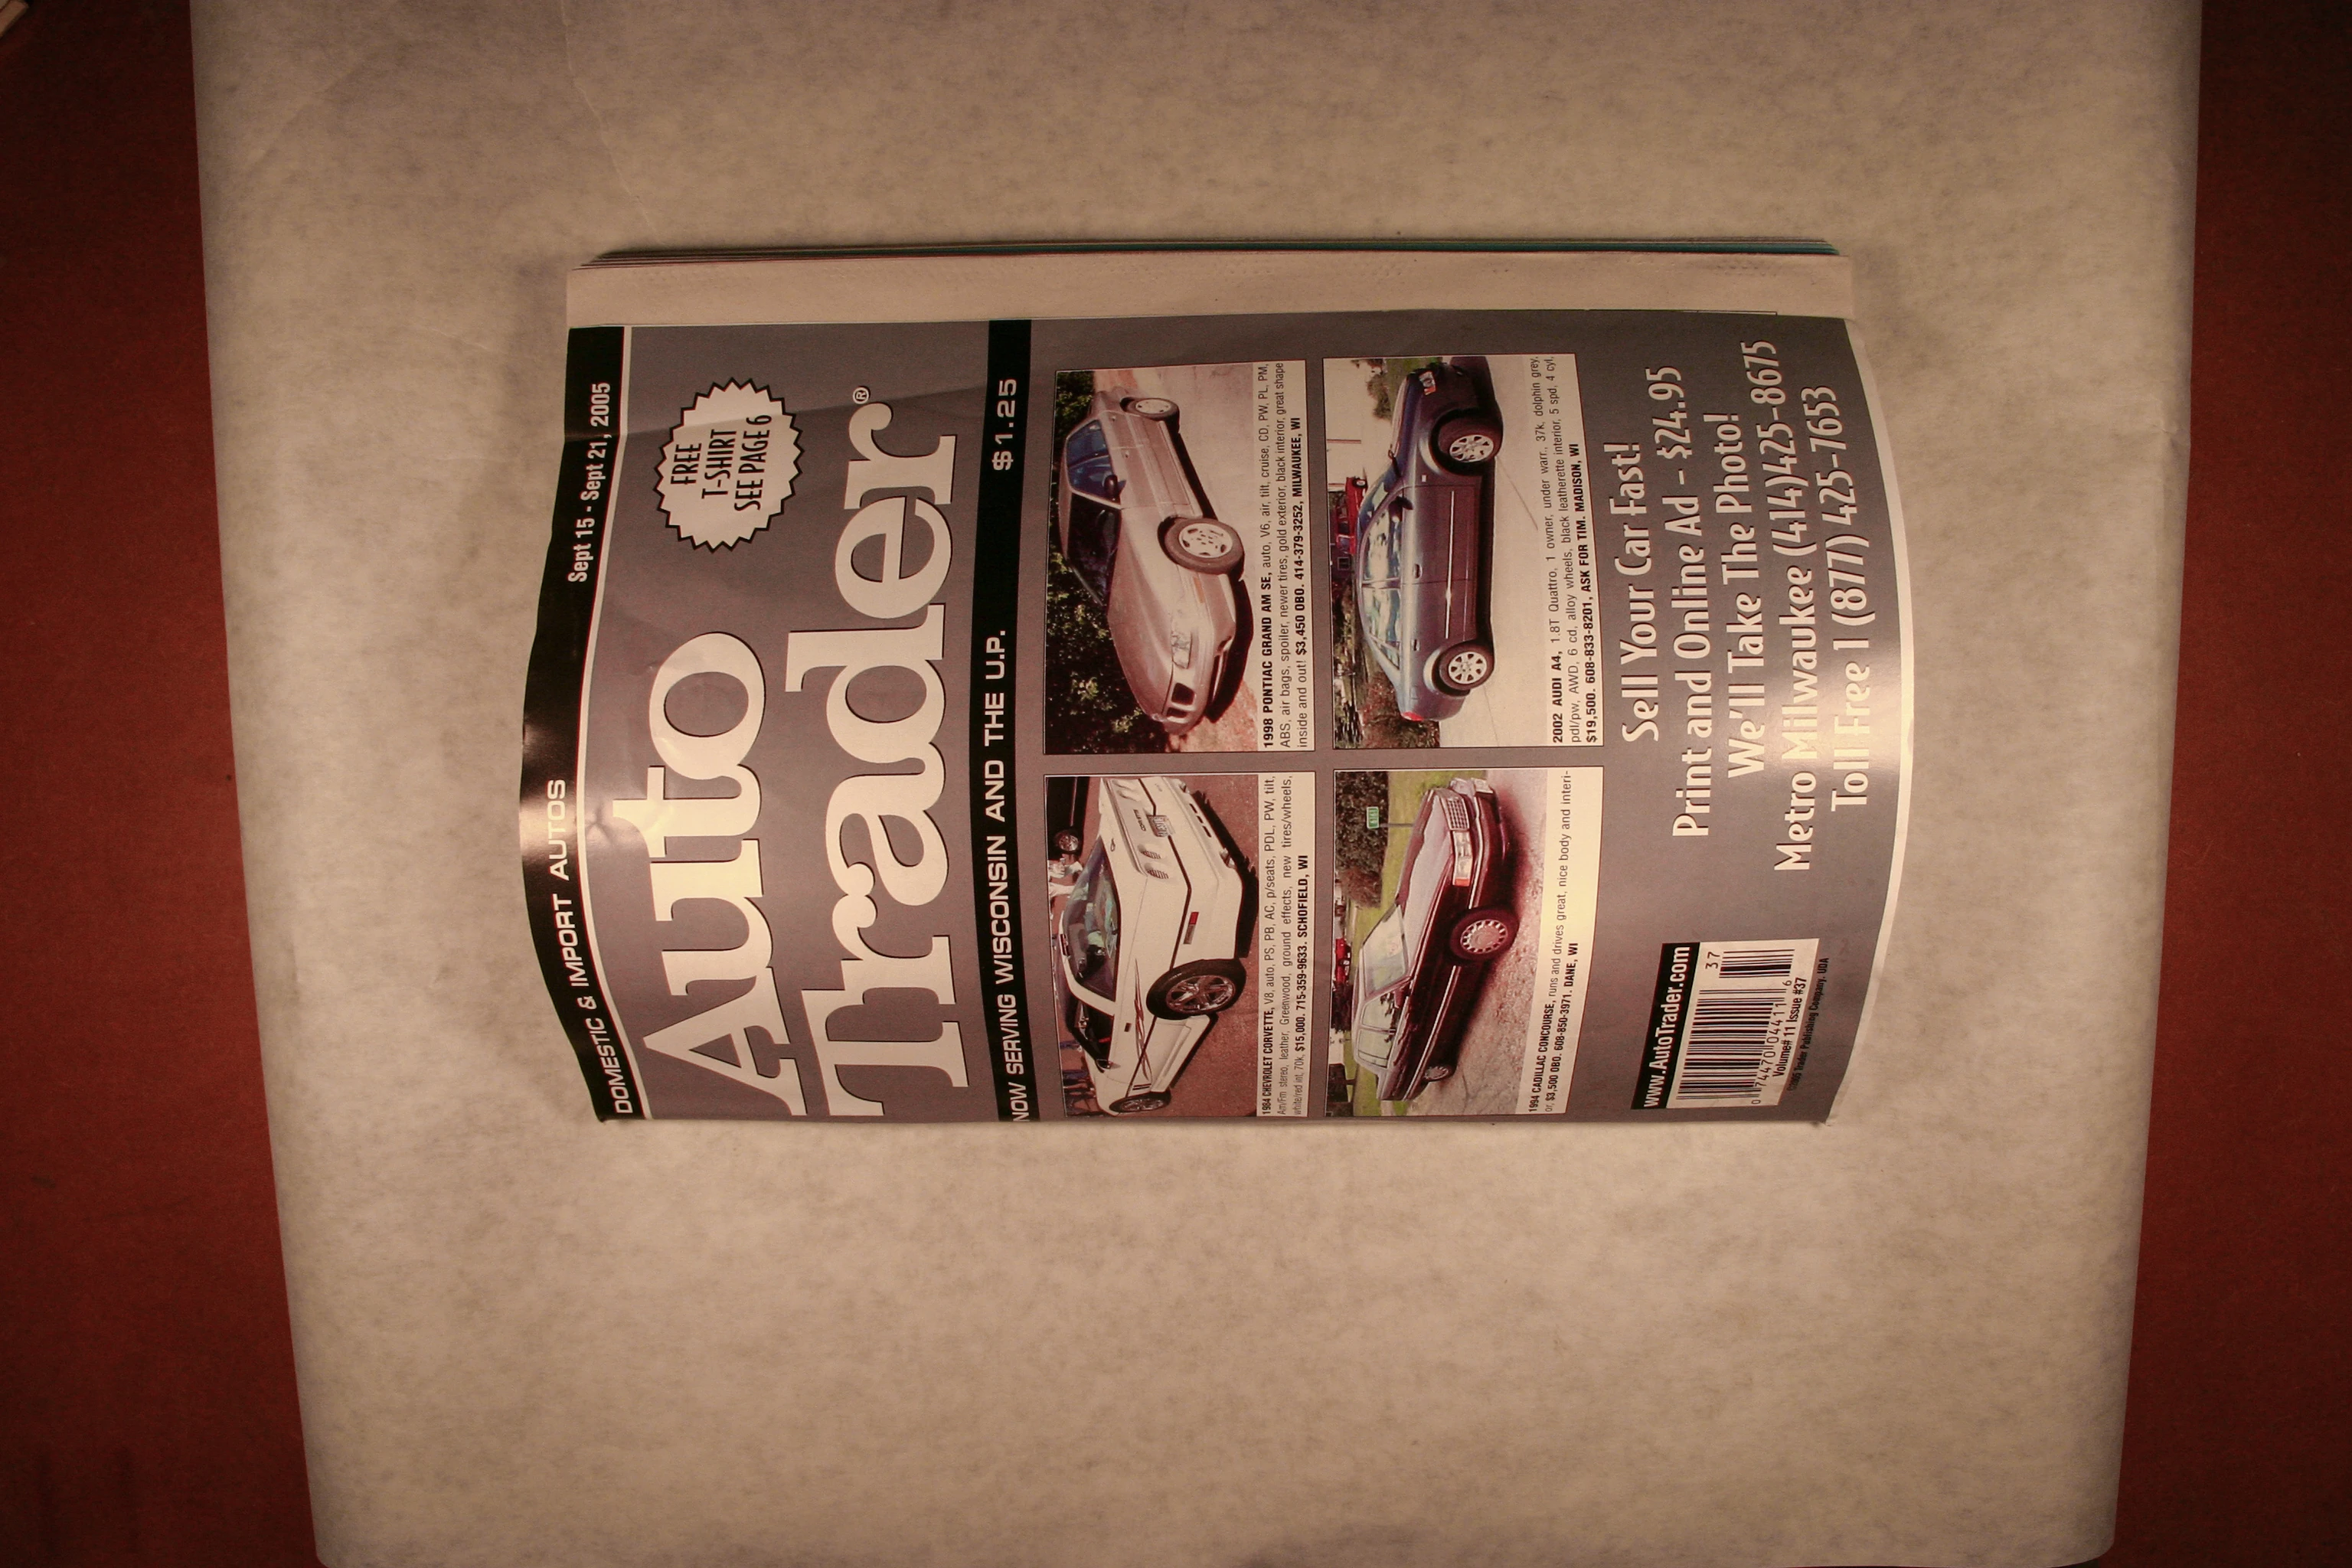
|
| 182 | Bill of sale for AutoTrader from Avery's trailer | 6 | 
|
| 183 | Bleach bottle evidence photo | 6 | 
|
| 184 | Carpet cleaning machine from Avery's trailer | 6 | 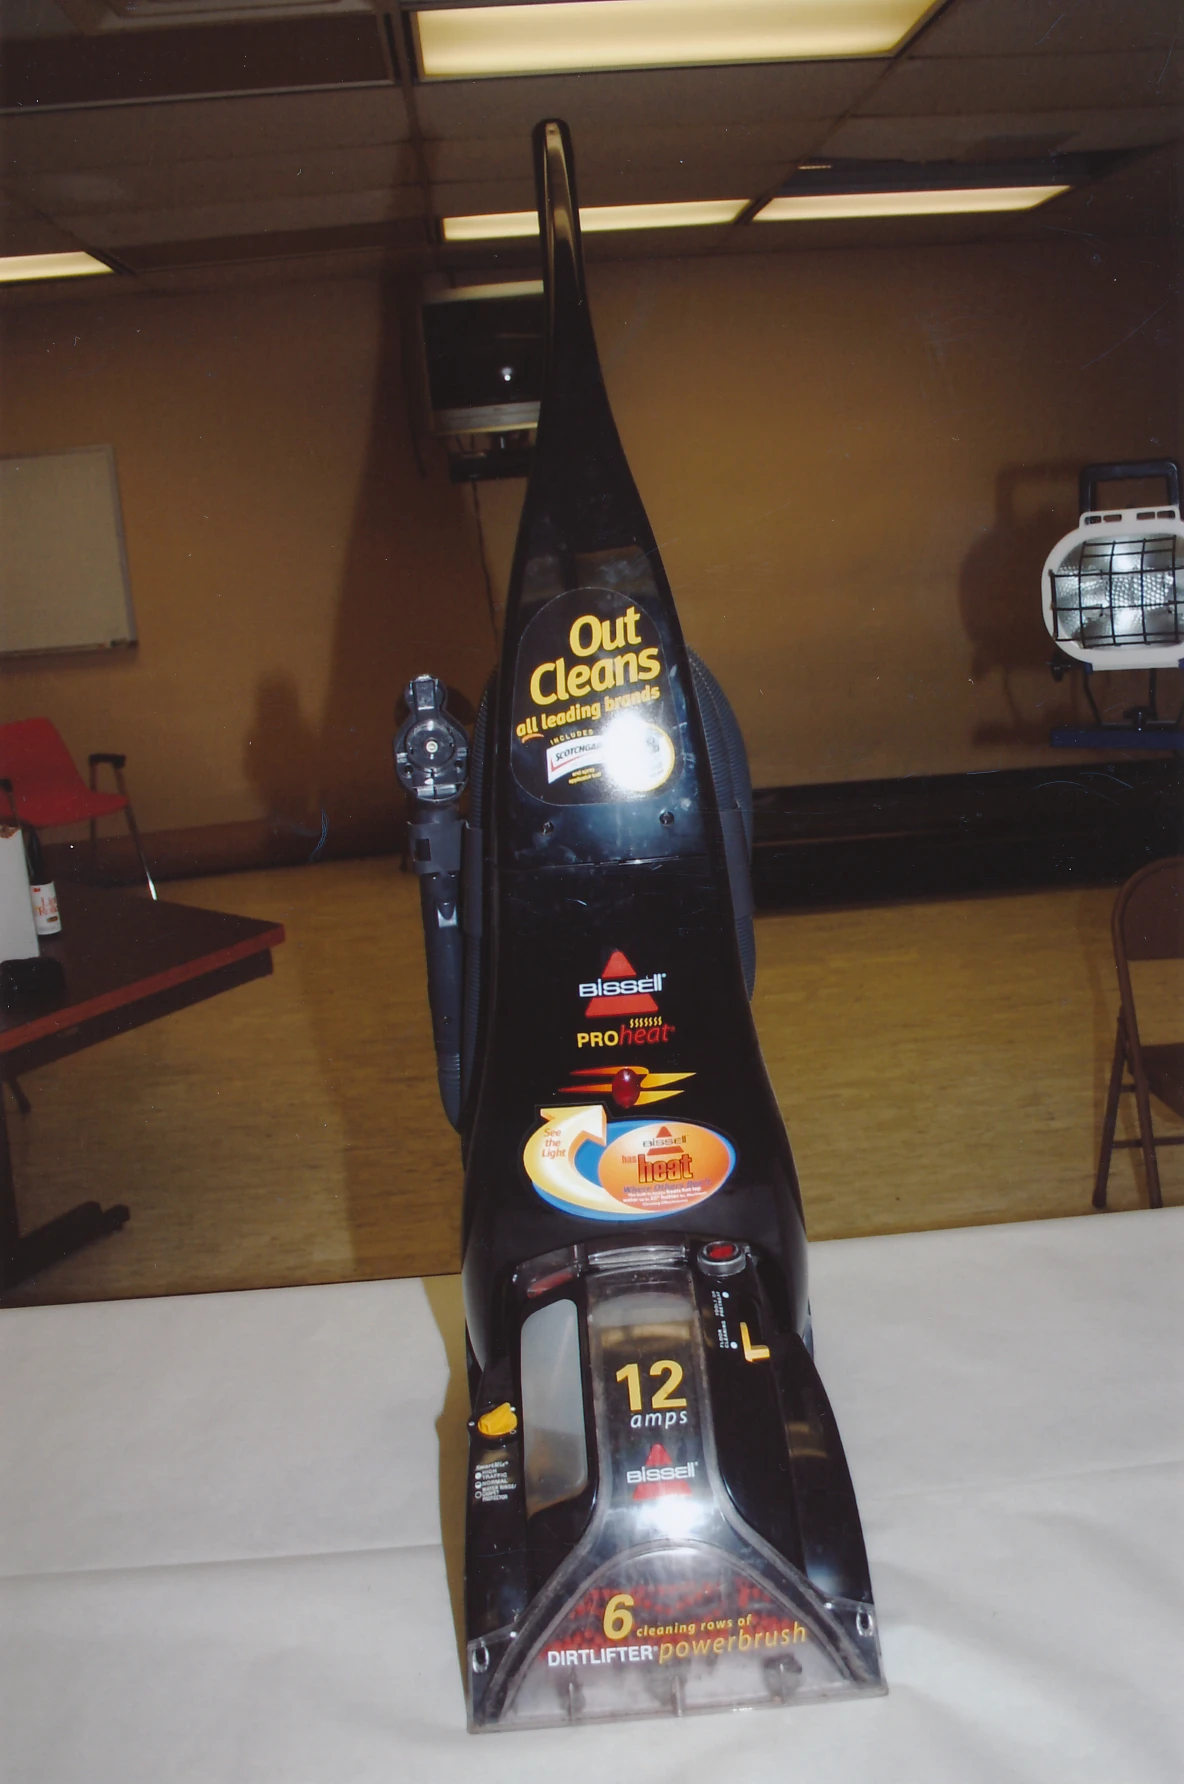
|
| 185 | Steven Avery's blood on laundry room floor | 6 | 
|
| 186 | Steven Avery's blood on laundry room floor | 6 | 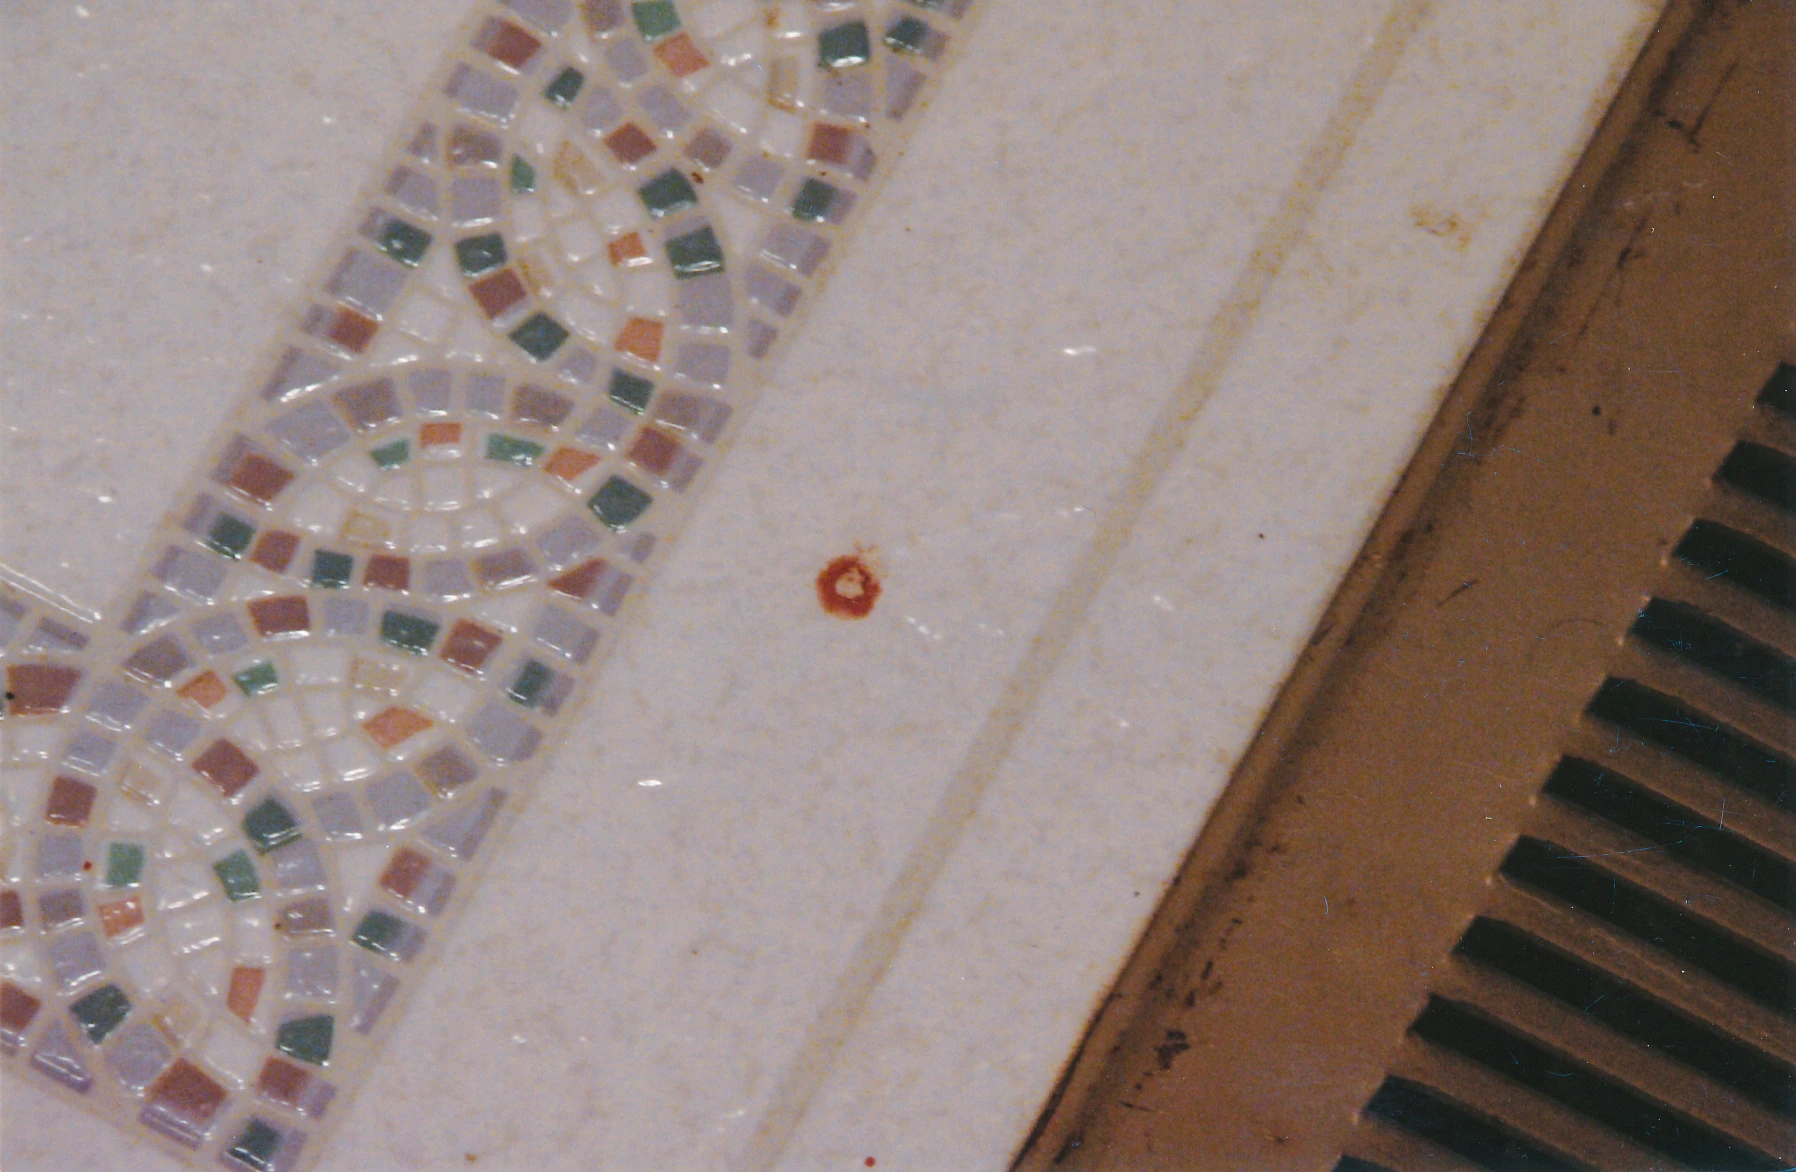
|
| 188 | University of Wisconsin Law School envelope from Avery residence | 6 | 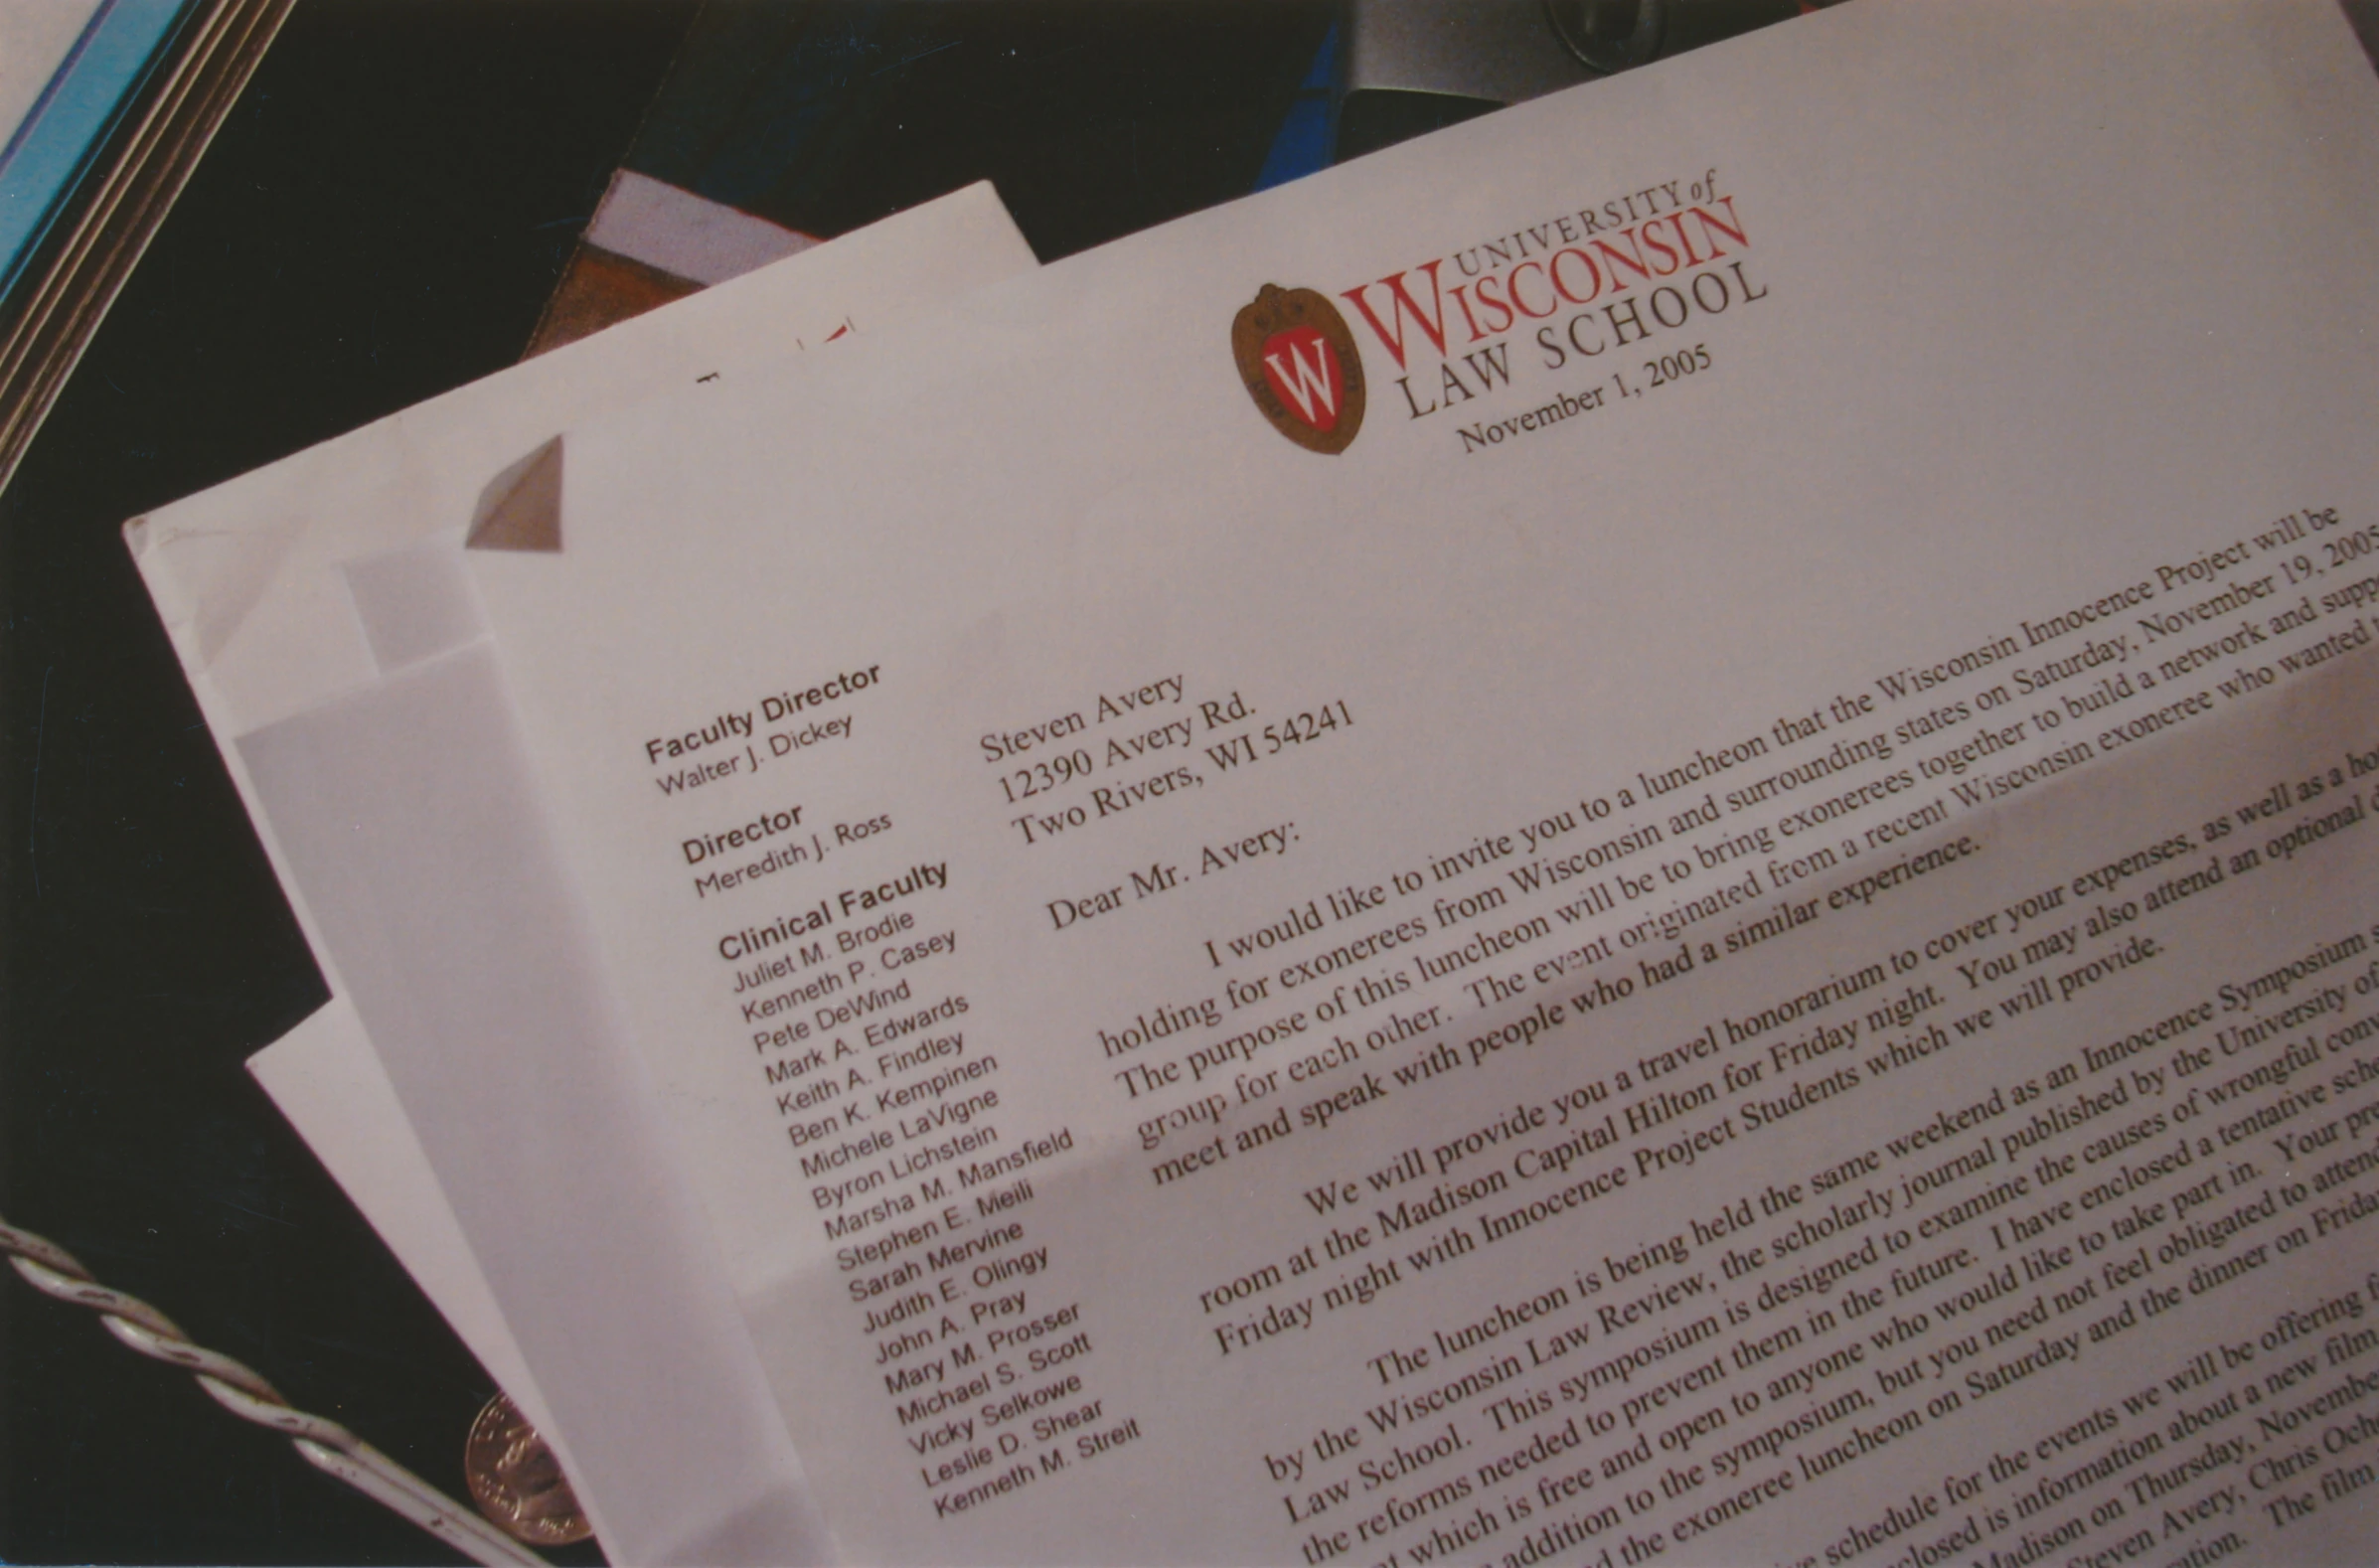
|
| 189 | Federal Defender Service envelope from Avery residence | 6 | 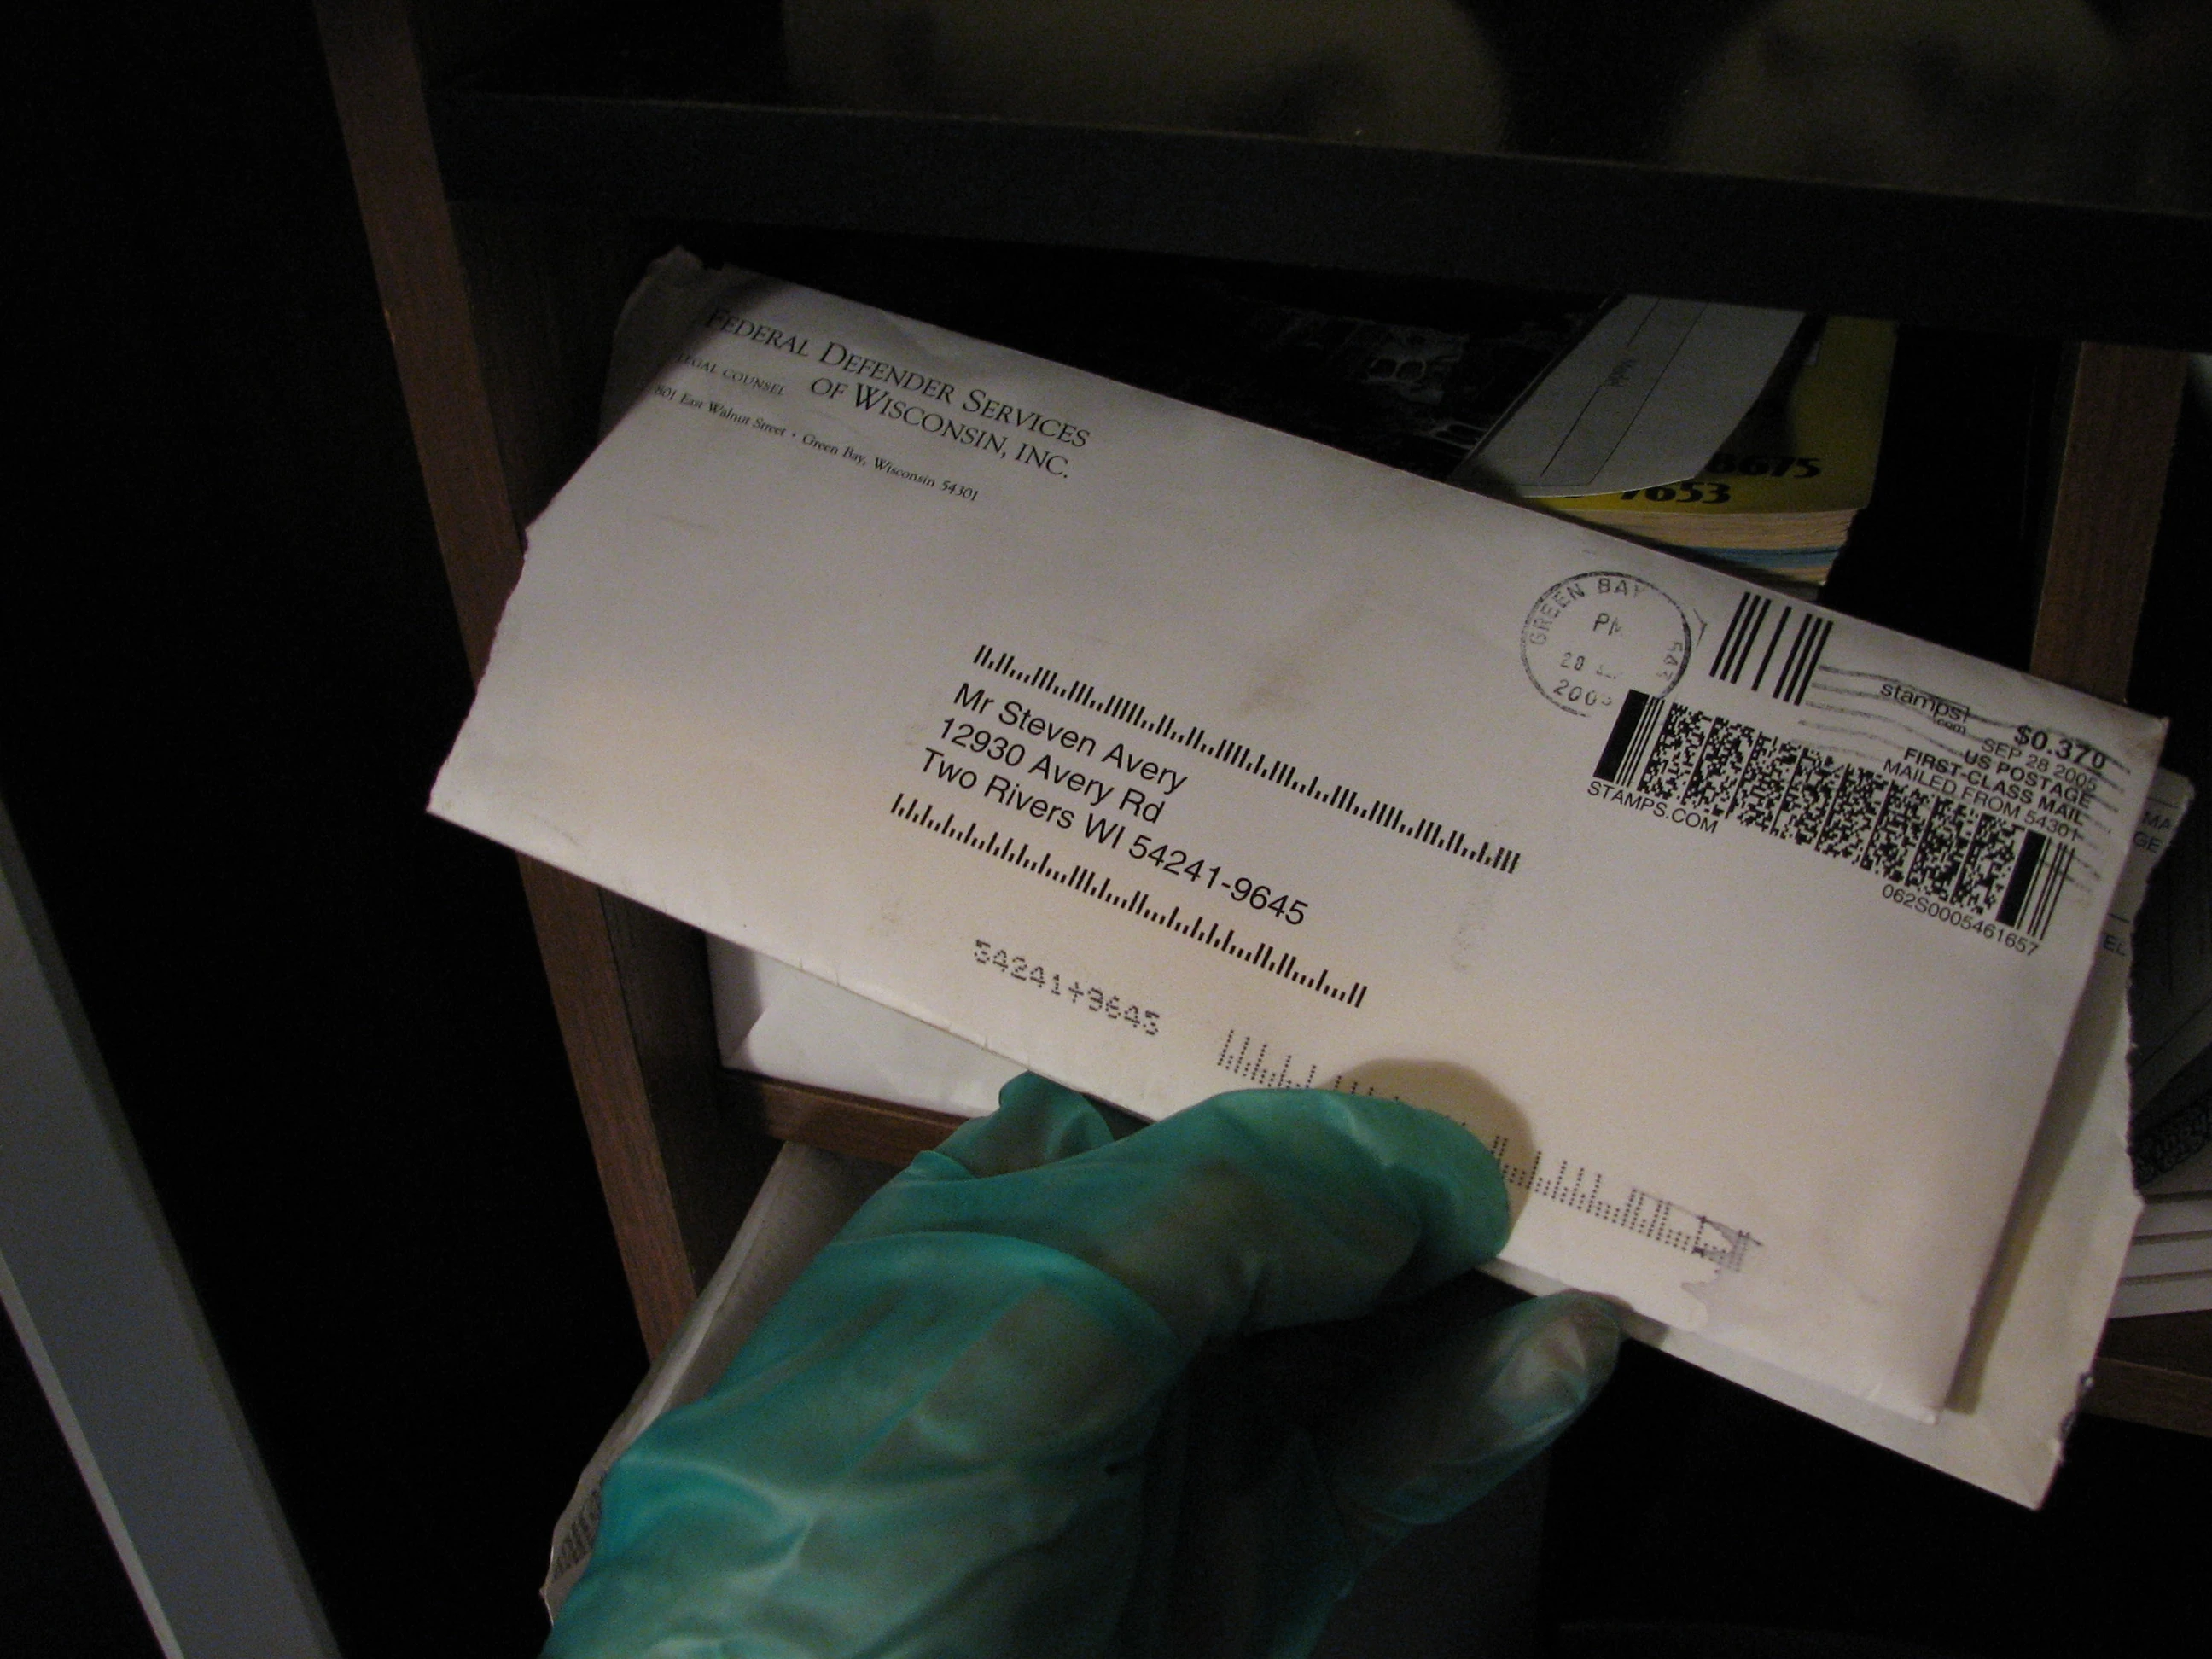
|
| 190 | University of Wisconsin Law School envelope from Avery residence | 6 | 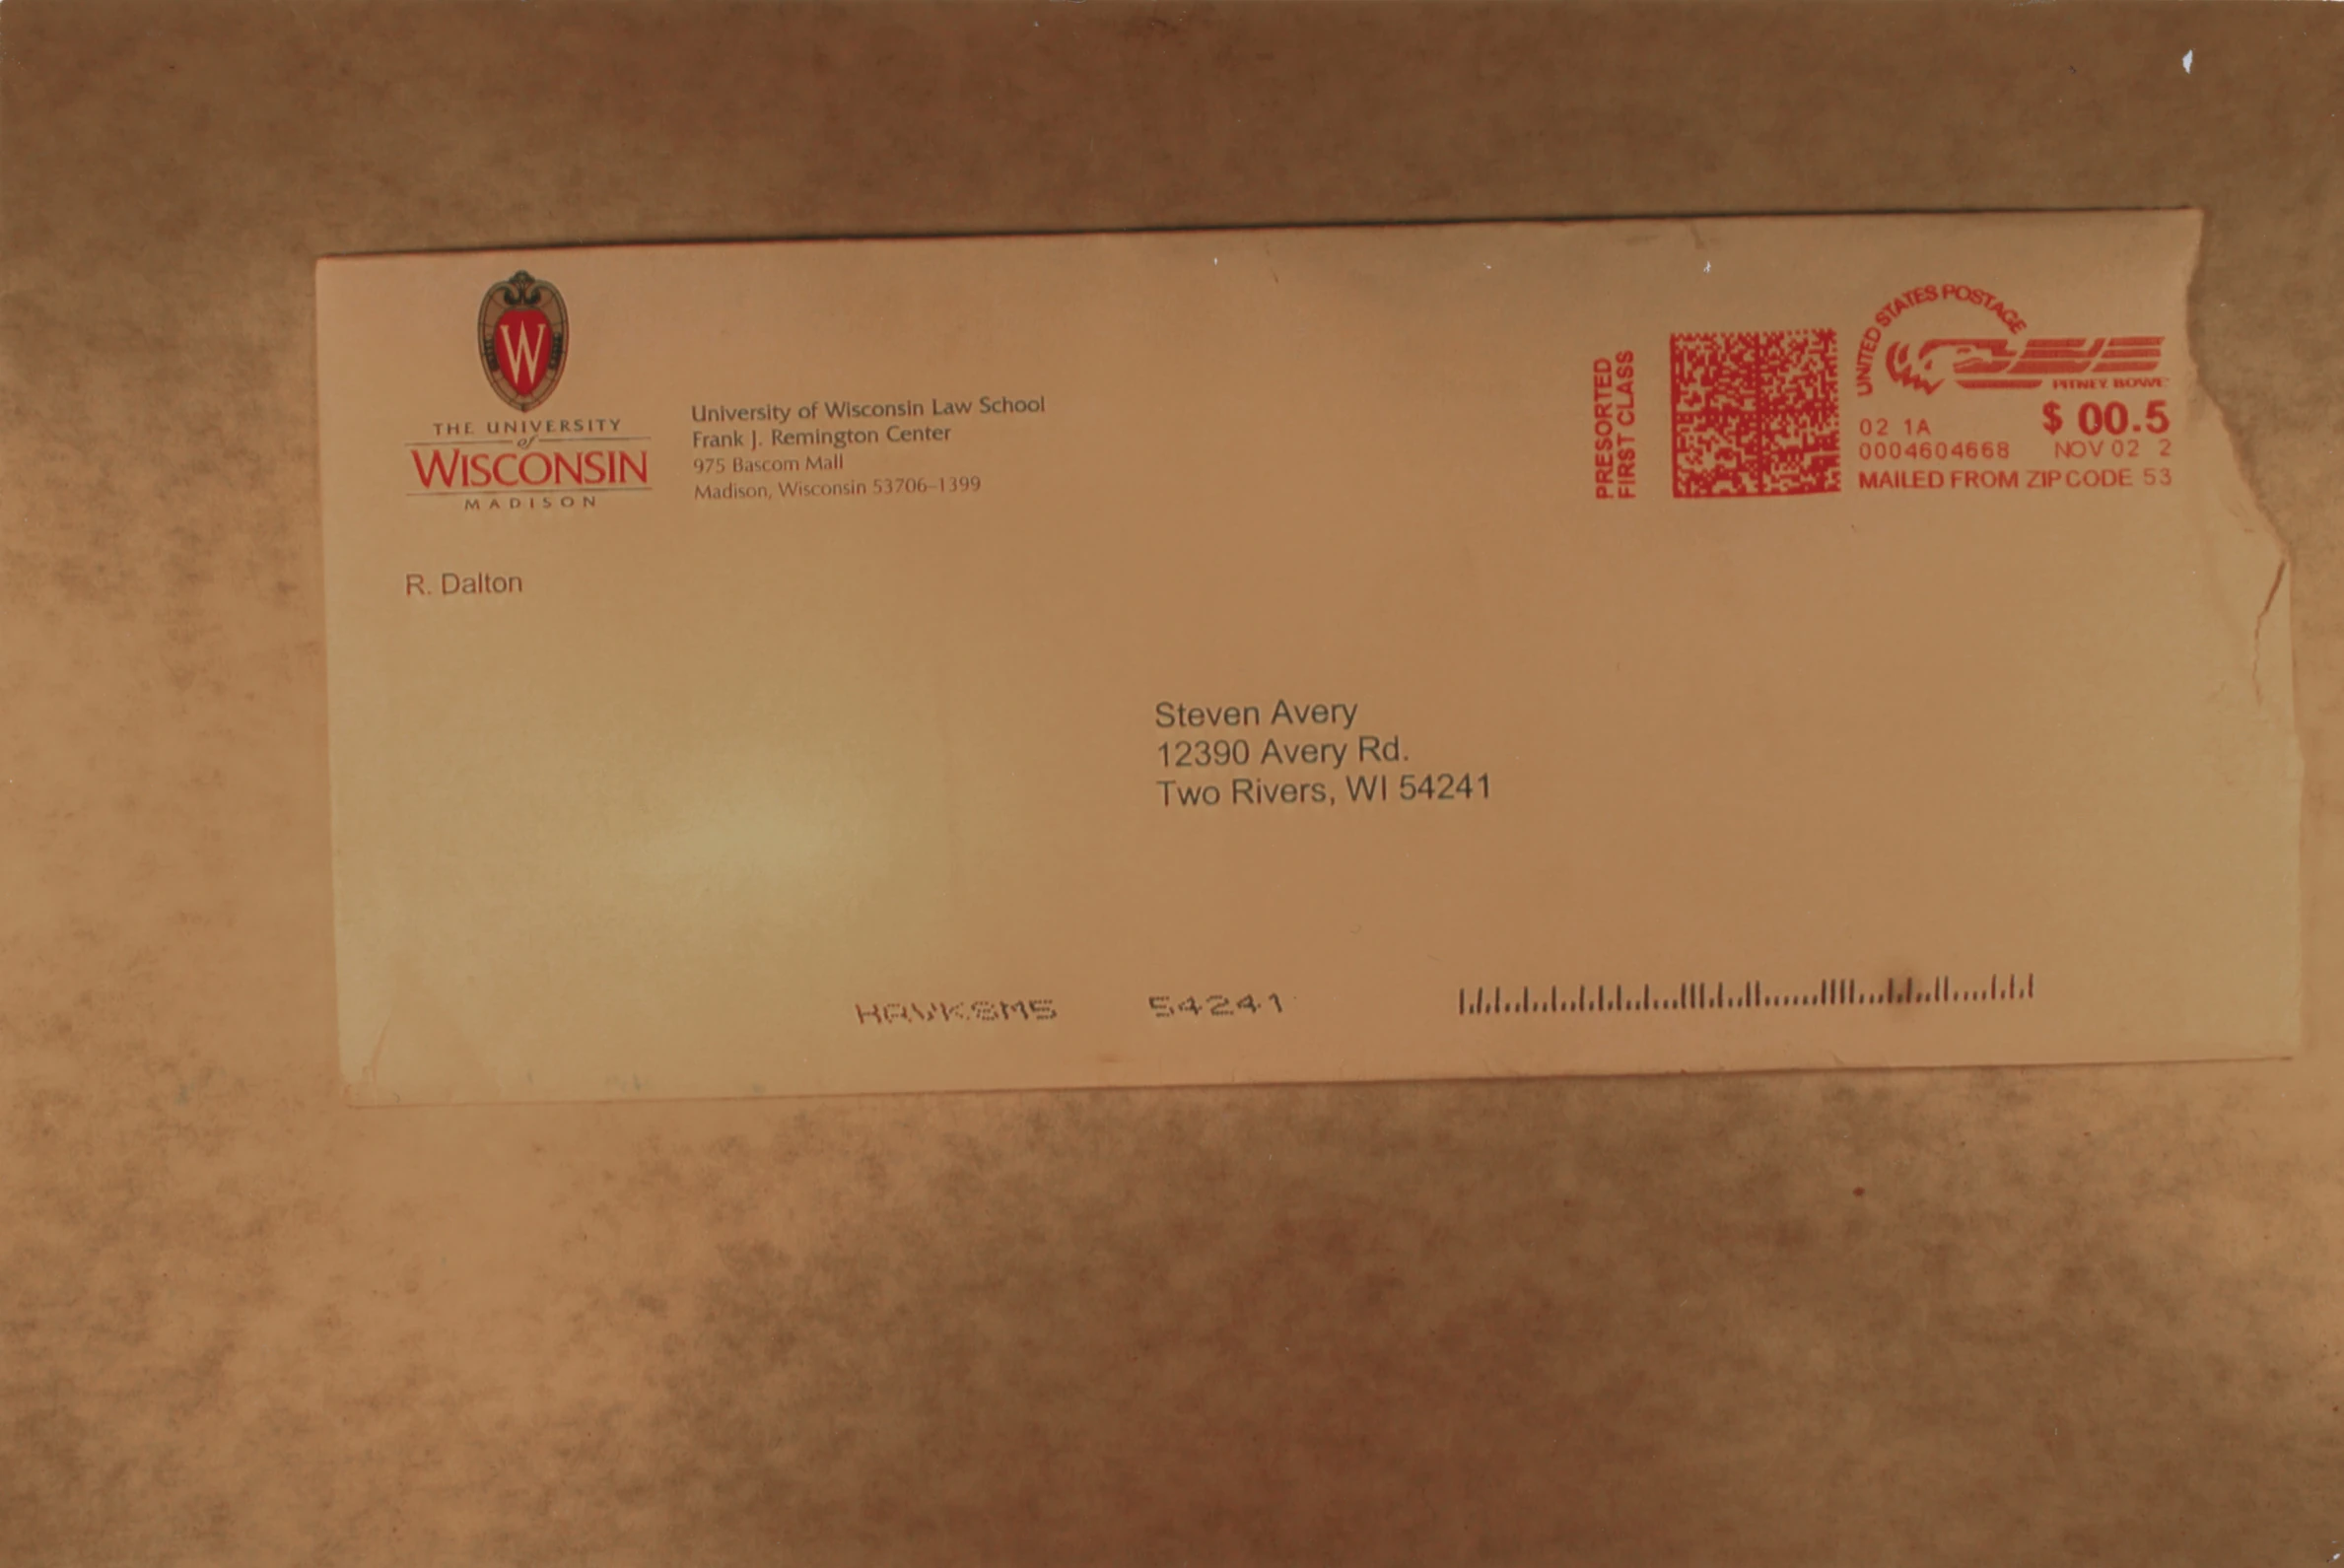
|
| 191 | Toyota RAV4 front | 6 | 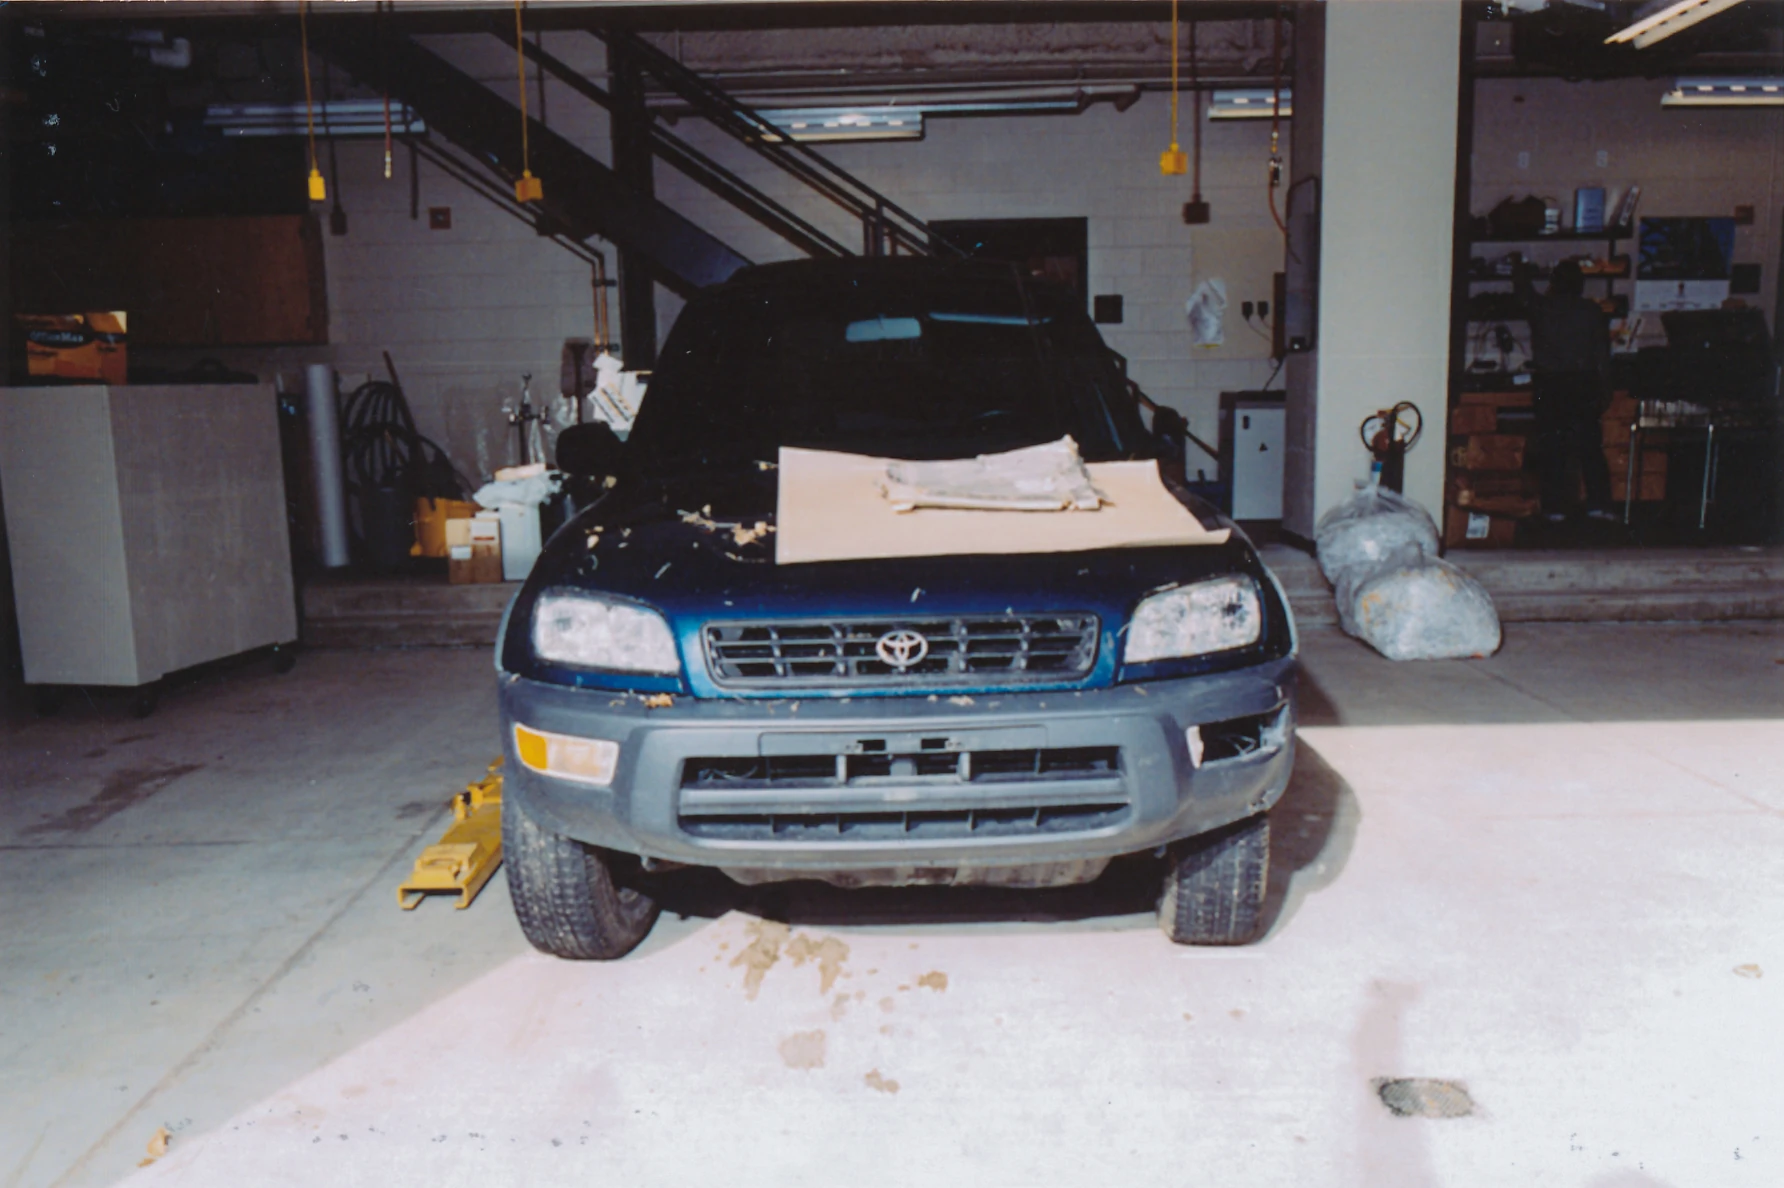
|
| 192 | Toyota RAV4 hood latch | 6 | 
|
| 193 | Cut on Steven Avery's finger | 6 | 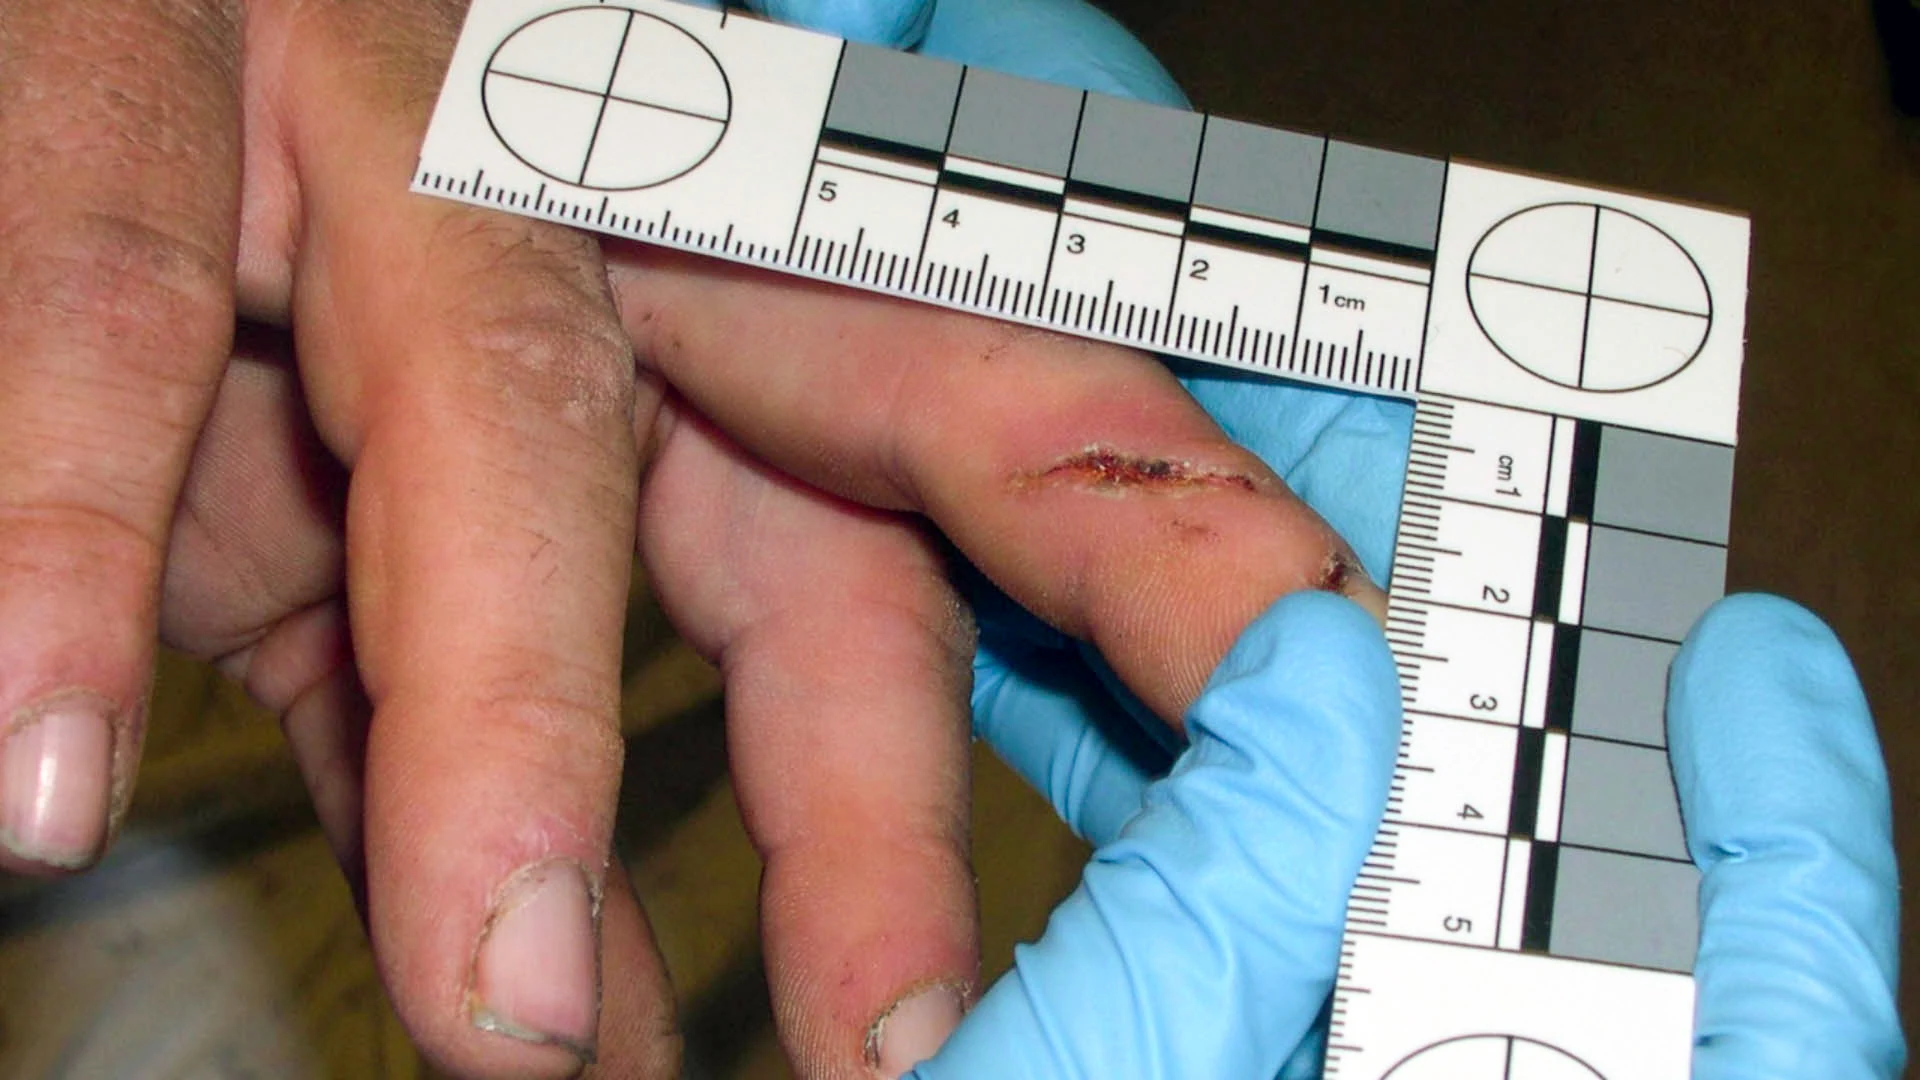
|
| 206 | Sink from Avery laundry room | 7 | 
|
| 207 | Washing machine from Avery laundry room | 7 | 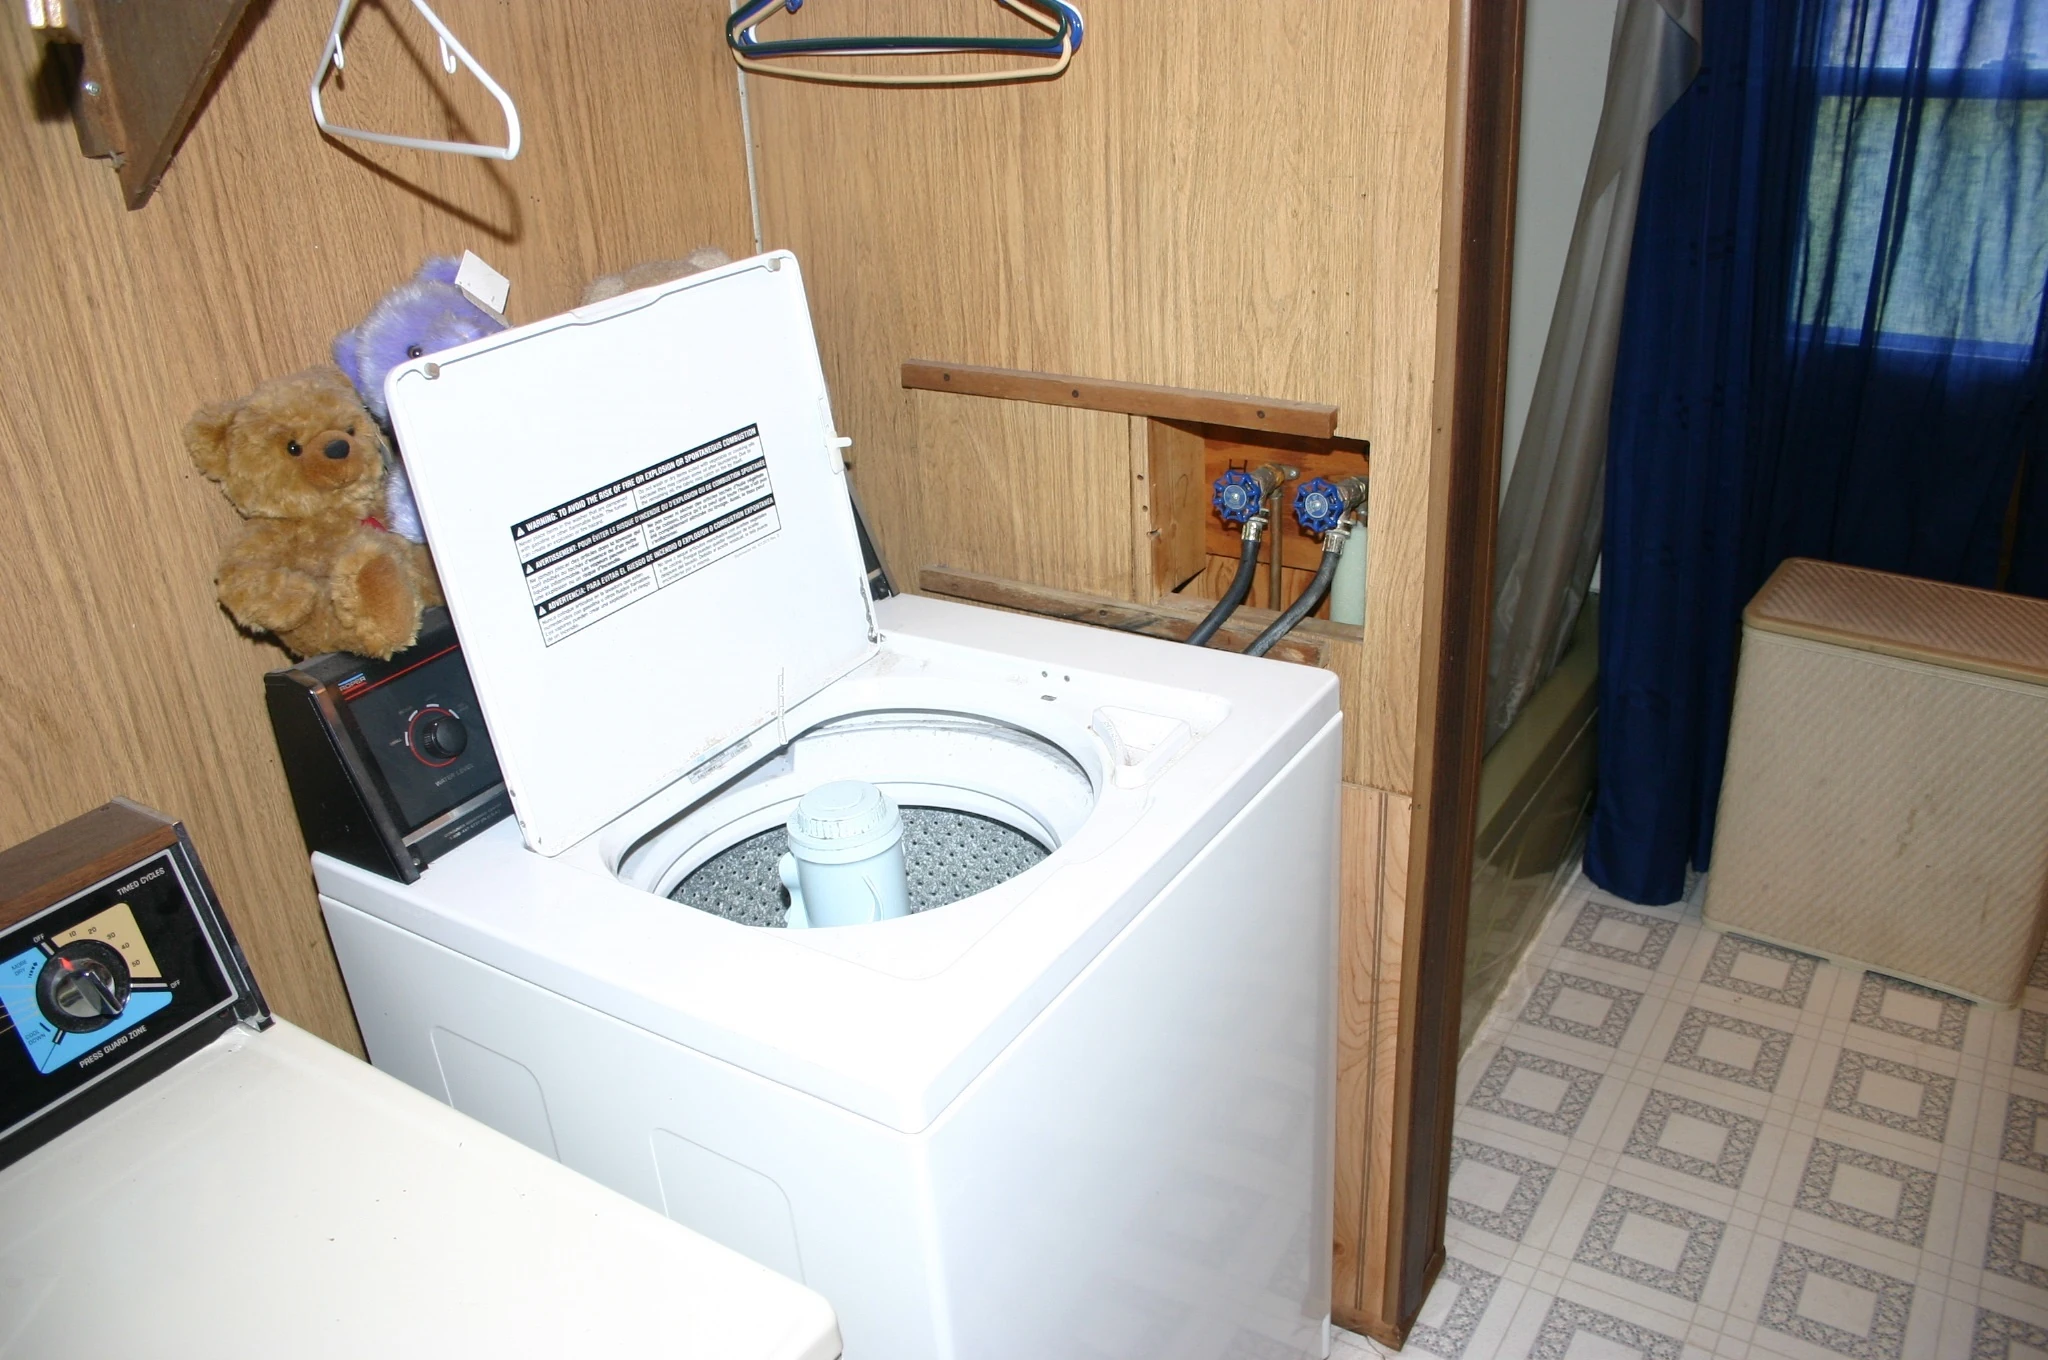
|
| 208 | Record cabinet from Avery bedroom | 7 | 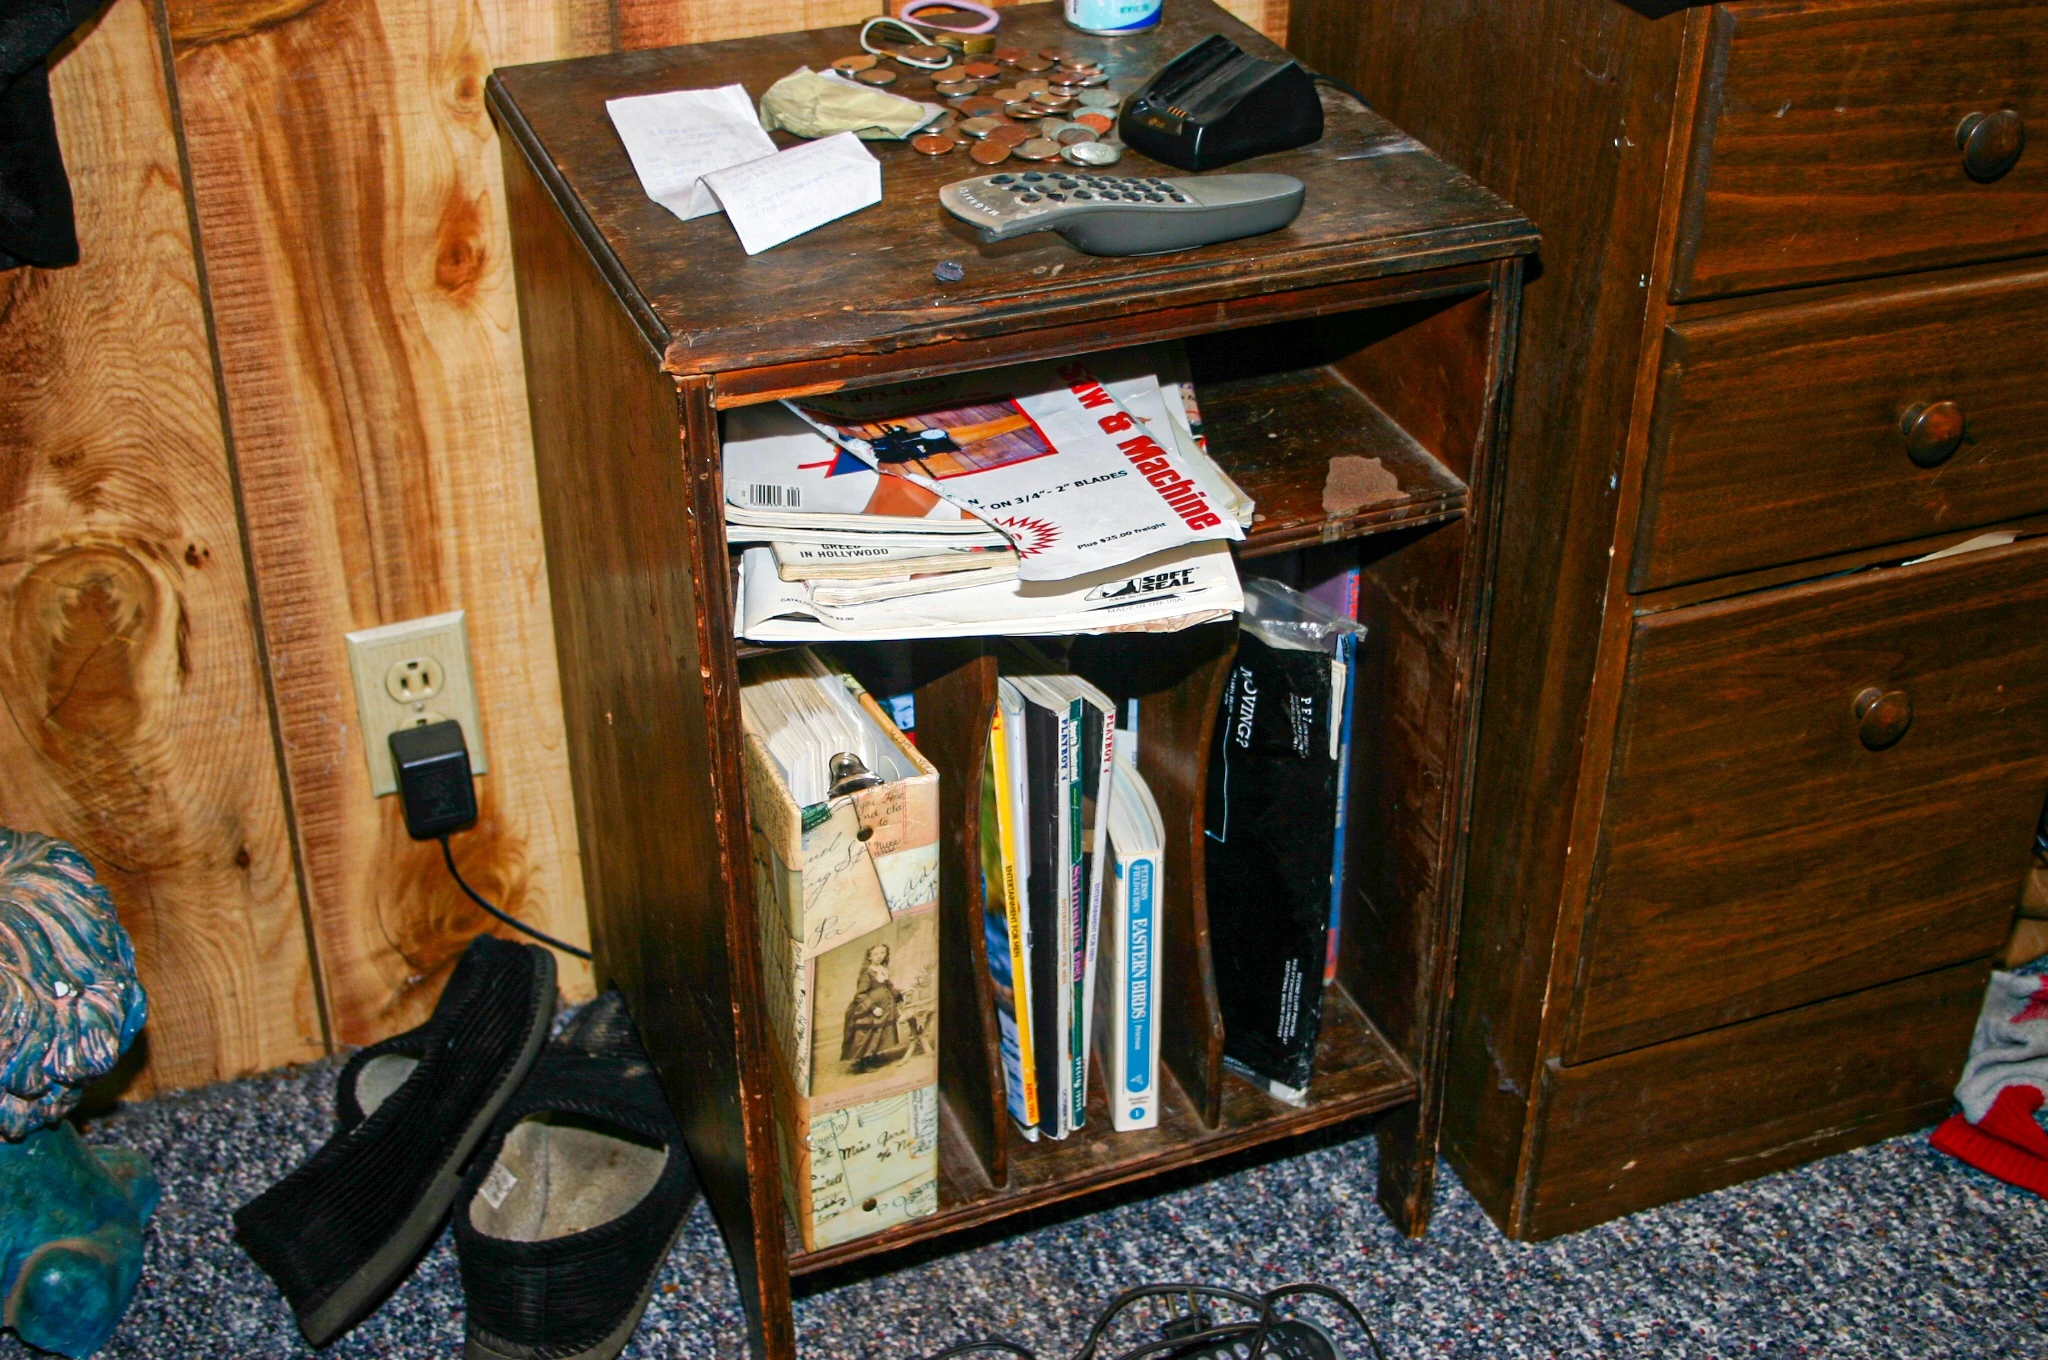
|
| 209 | Record cabinet from Avery bedroom | 7 | 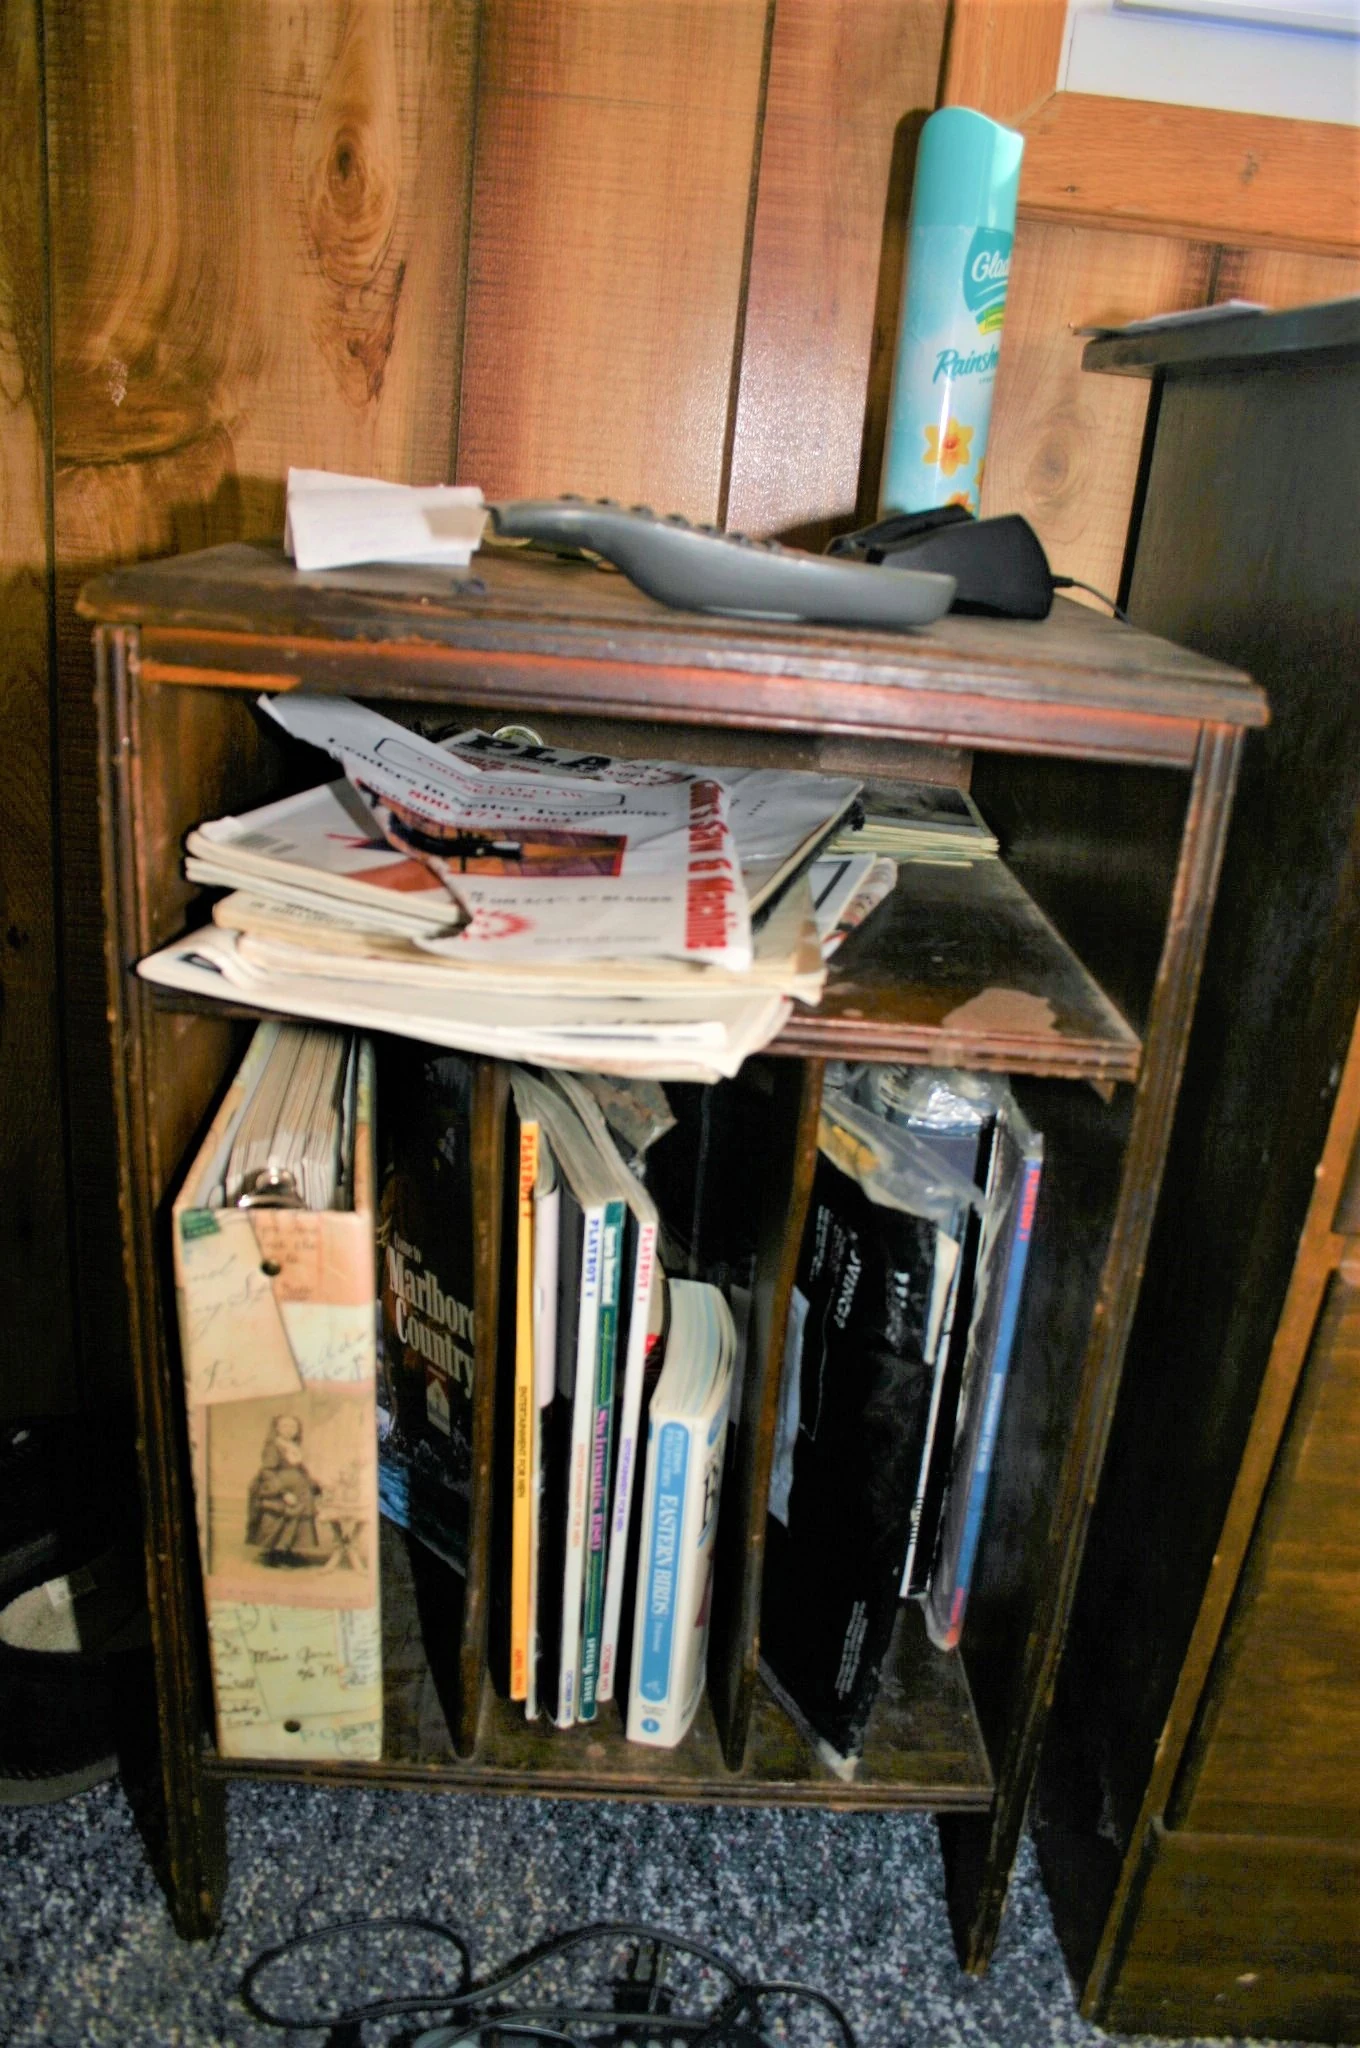
|
| 210 | Toyota RAV4 car key as found in Avery bedroom | 7 | 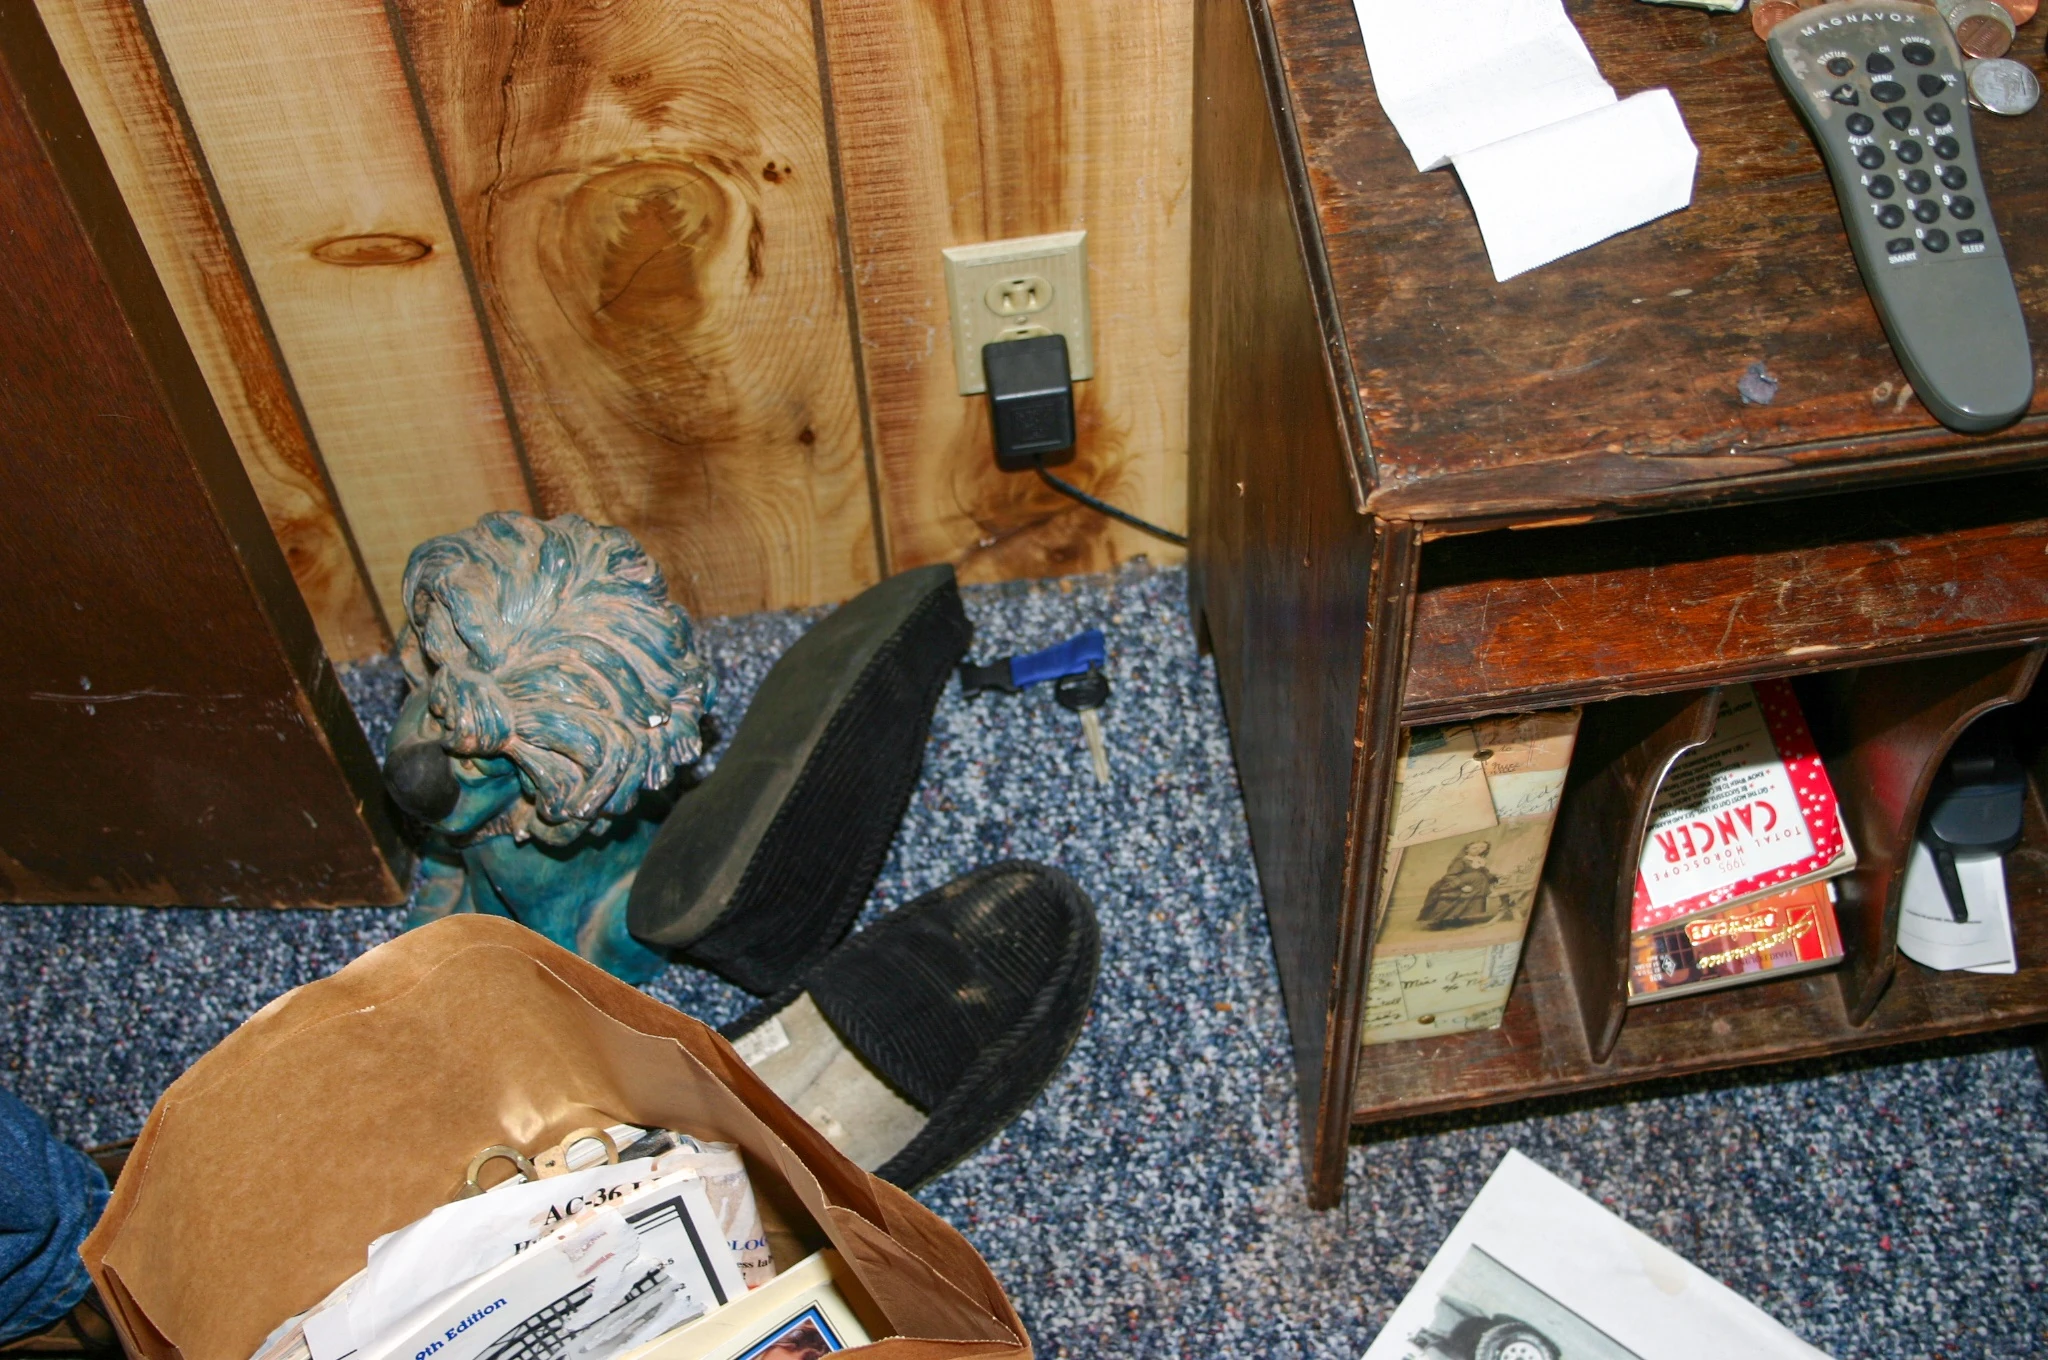
|
| 217 | Avery residence living room with police scanner | 8 | 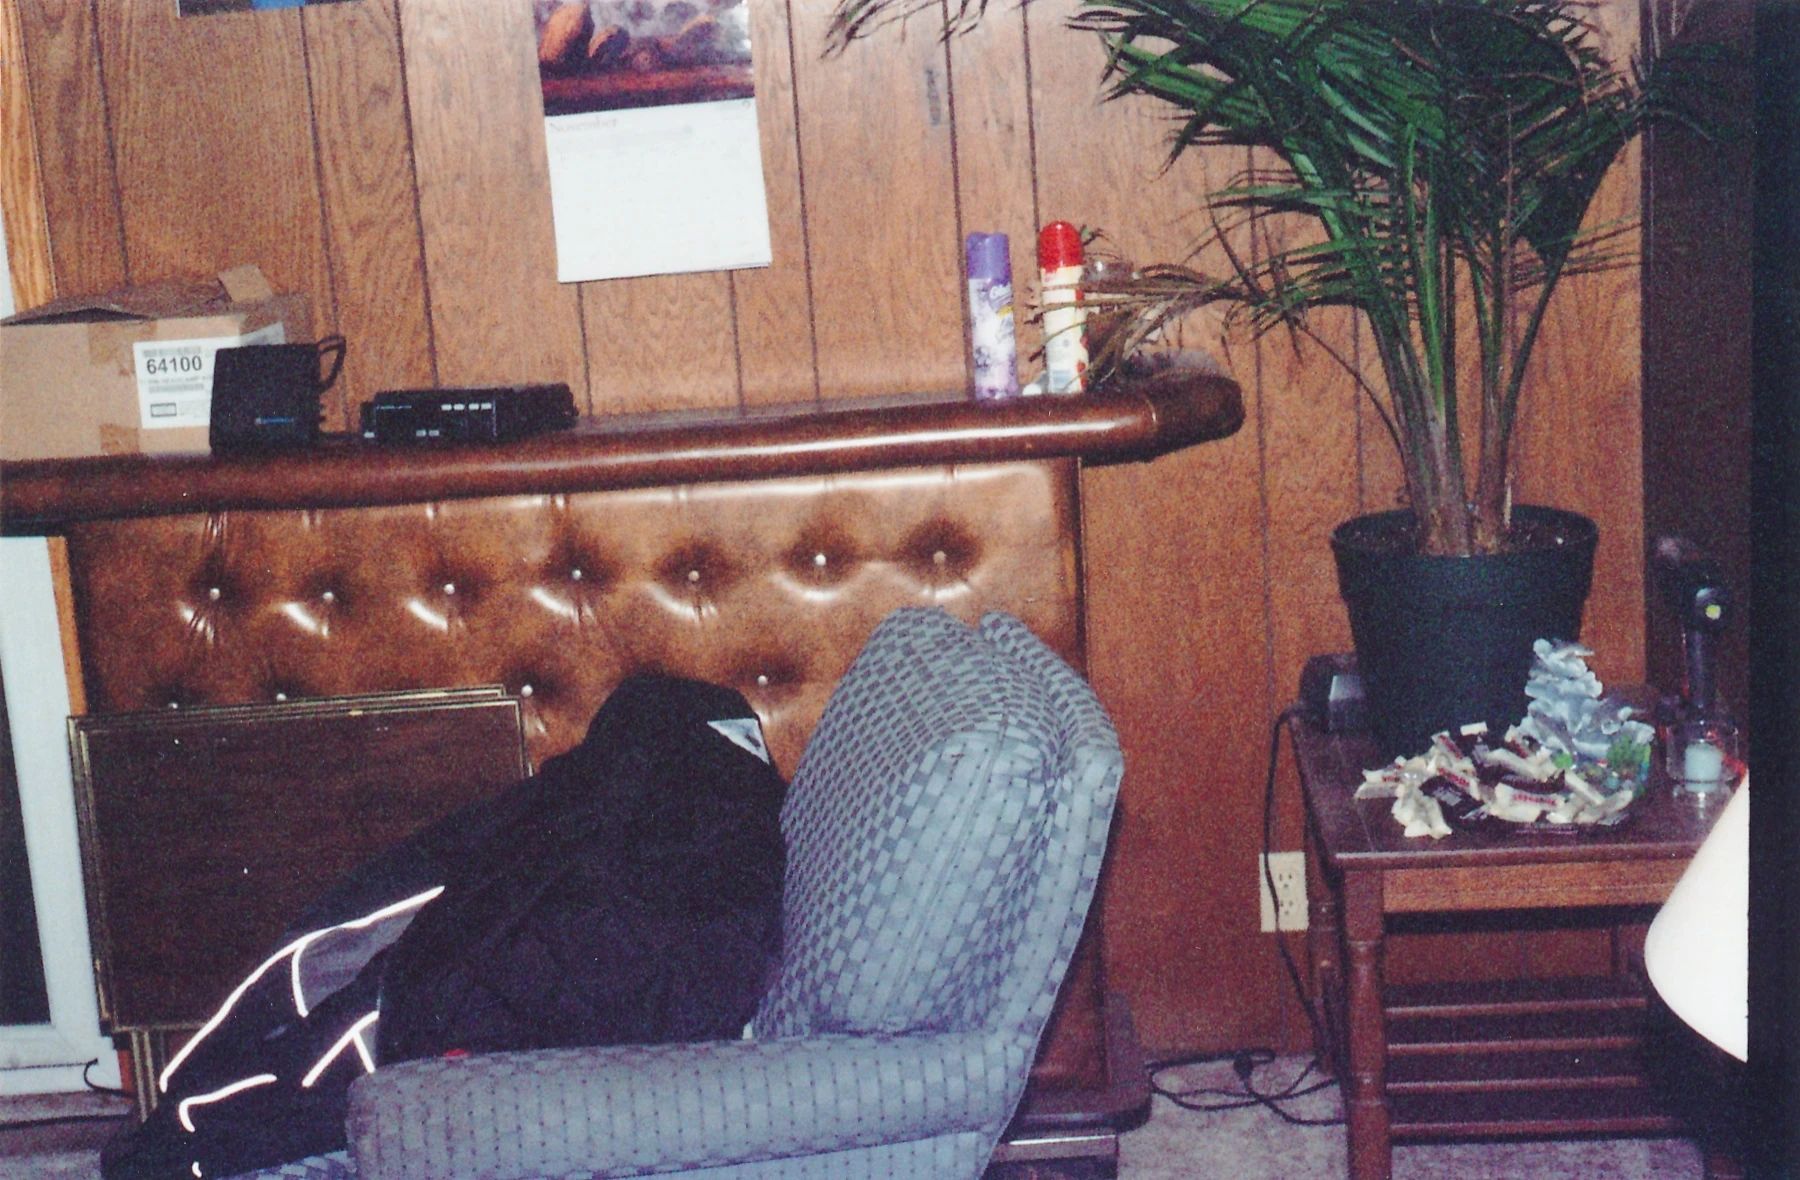
|
| 219 | Toyota RAV4 car key | 9 | 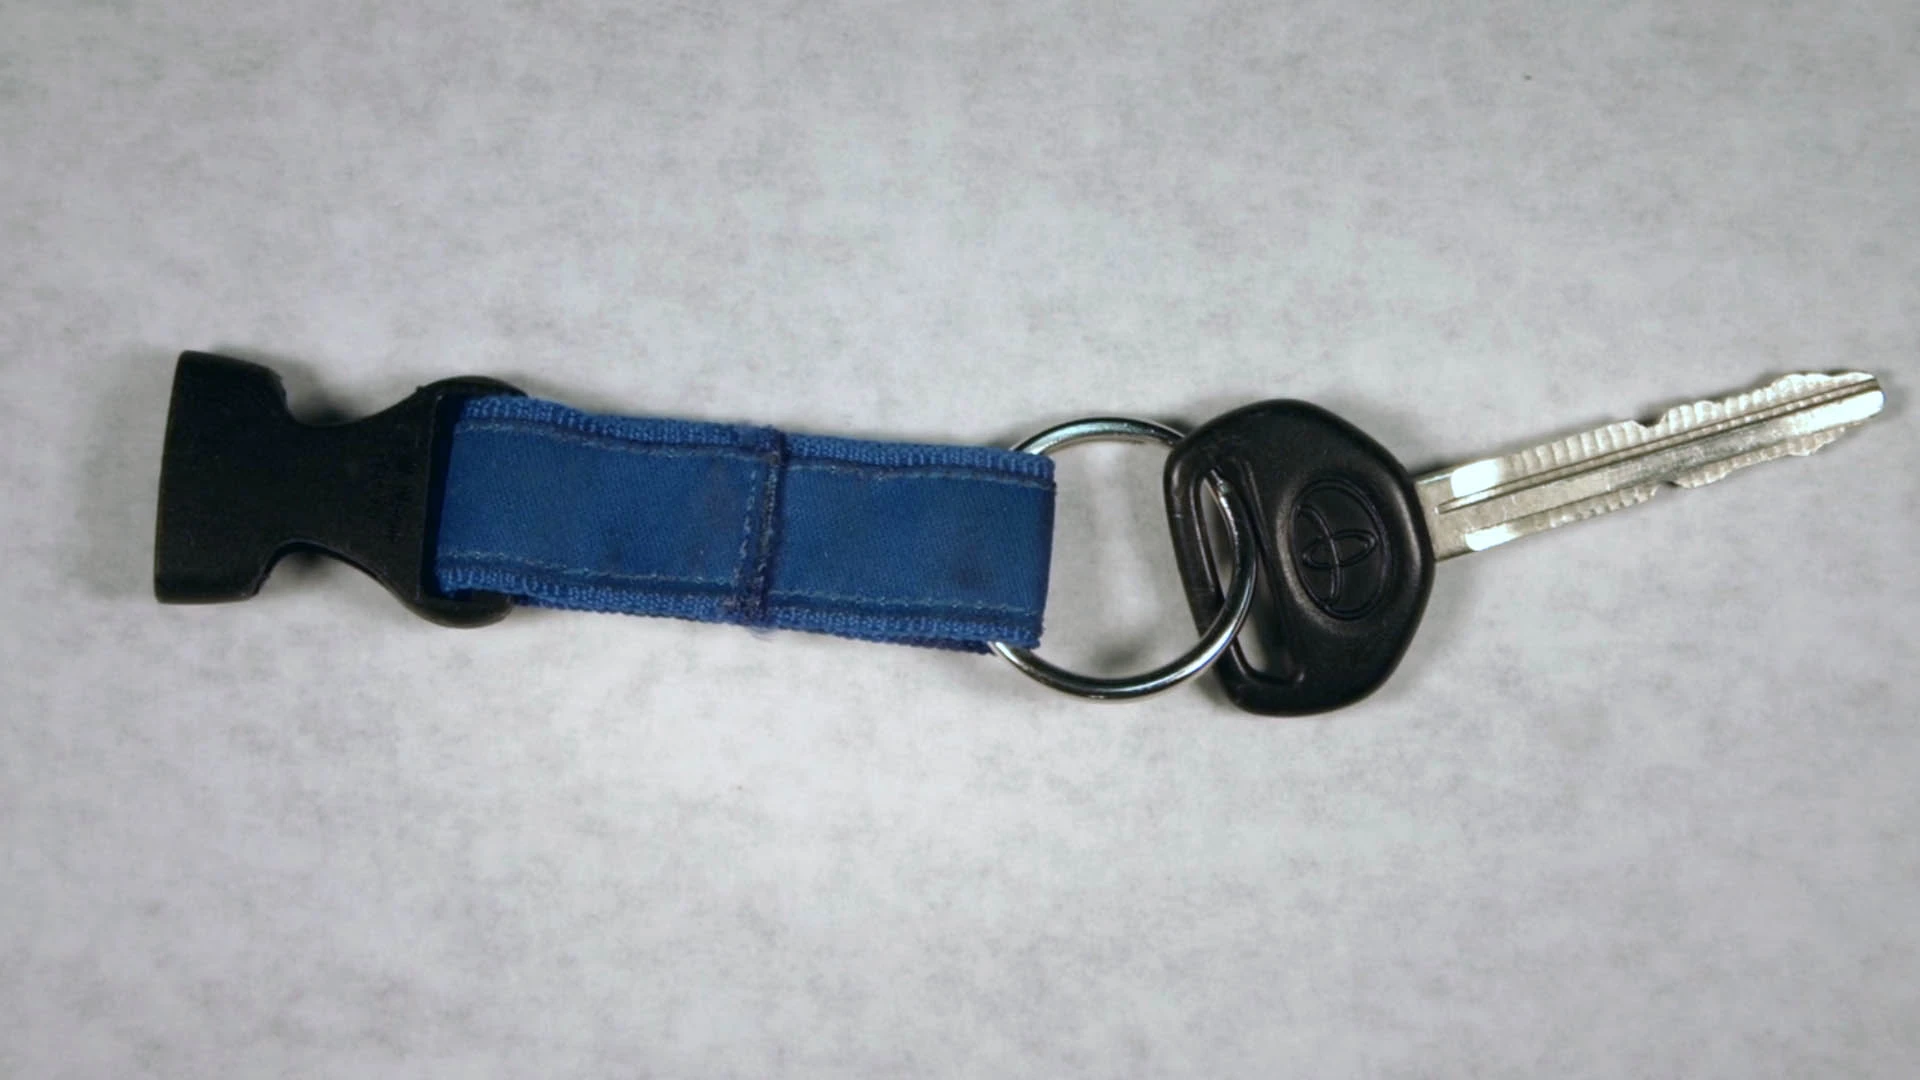
|
| 220 | box with eleven shell casings | 9 | 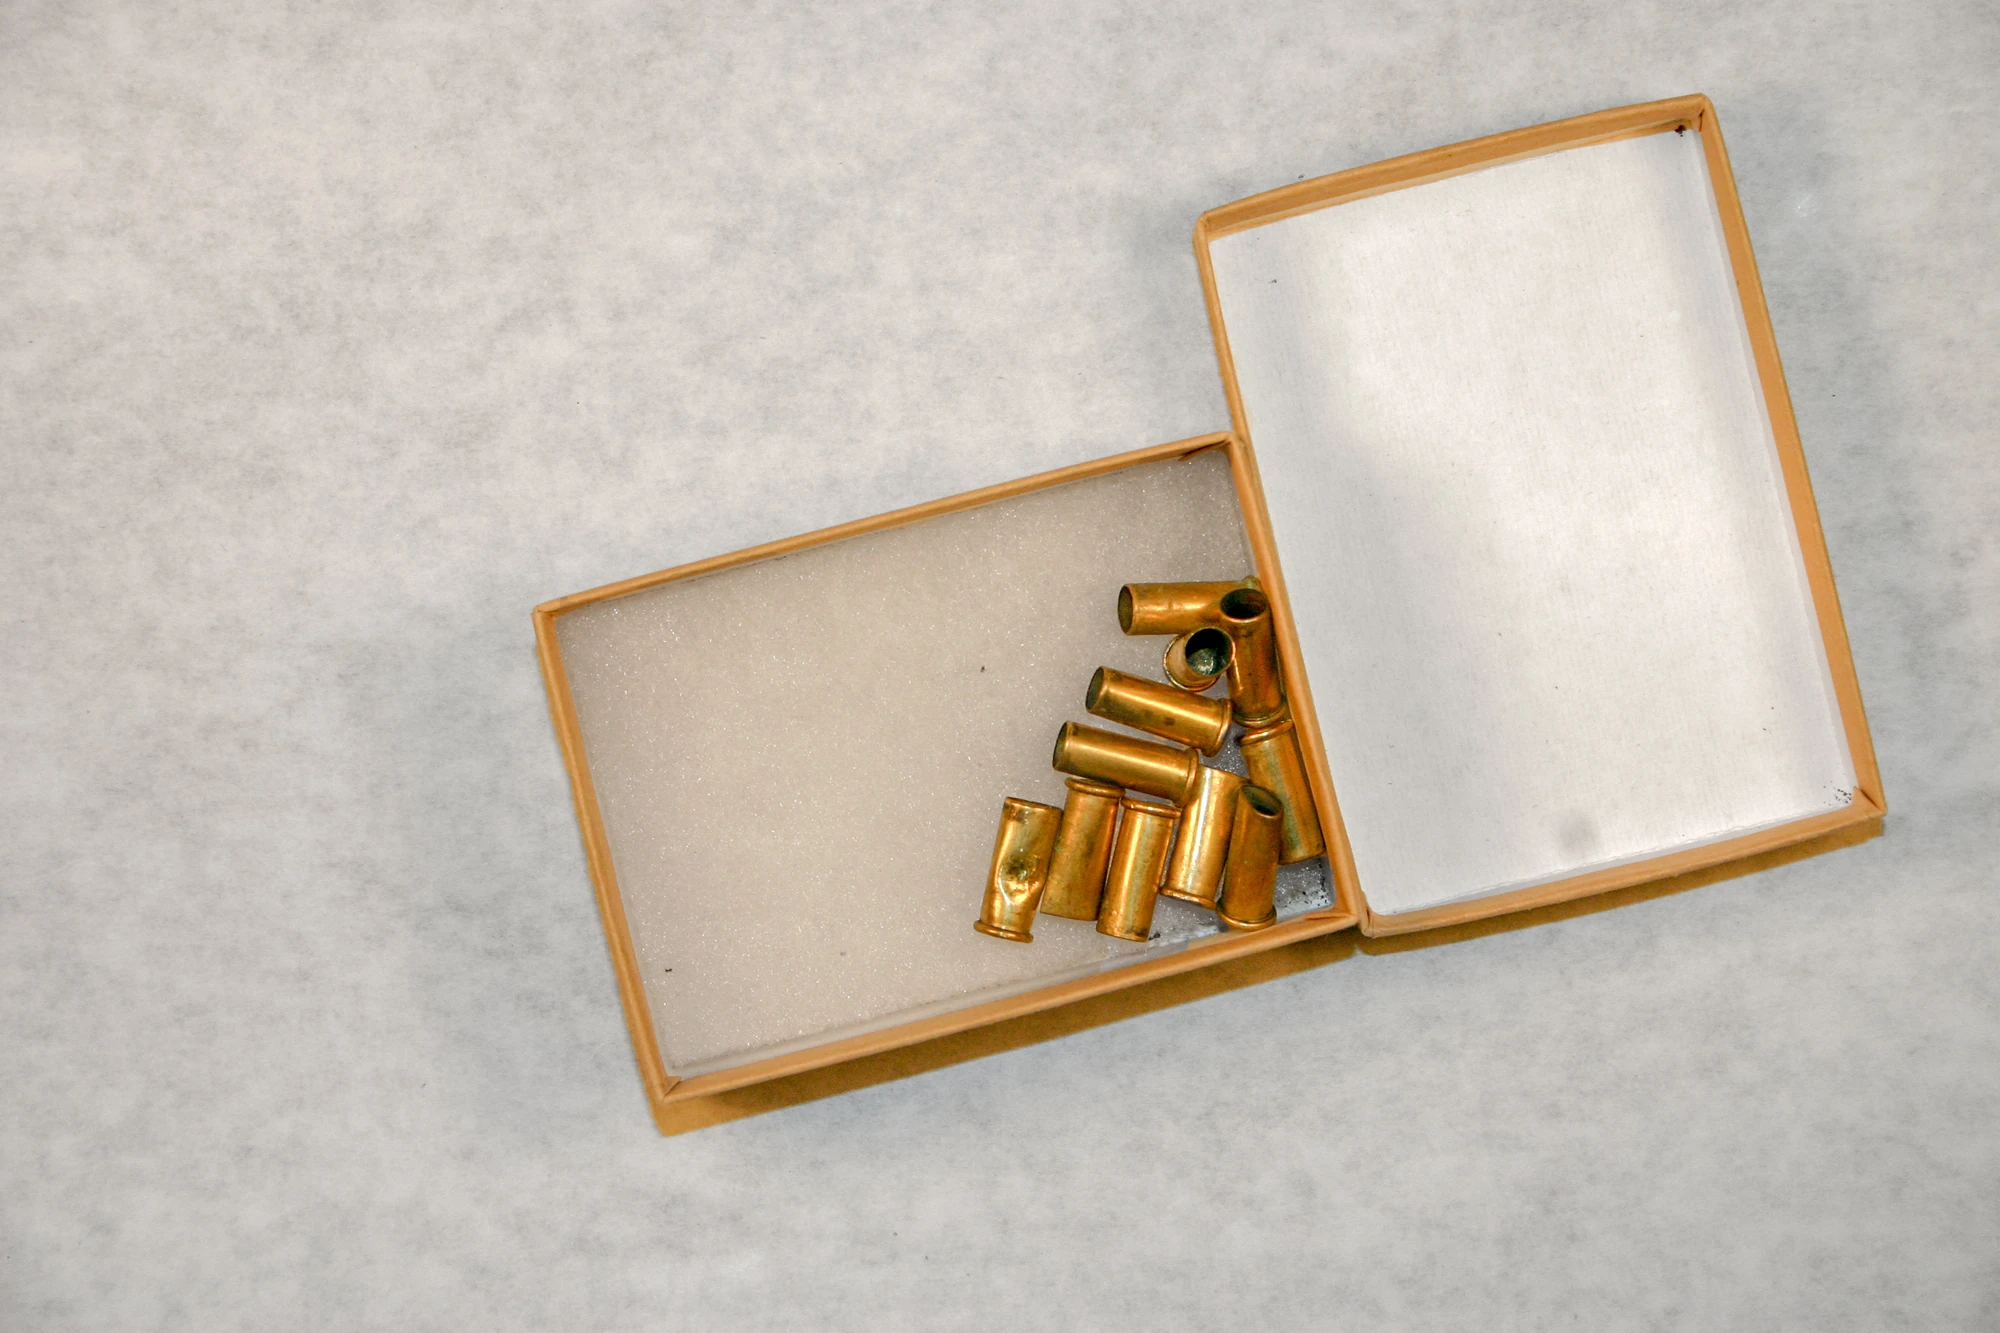
|
| 221 | .22 shell casing from Avery's garage | 8 | 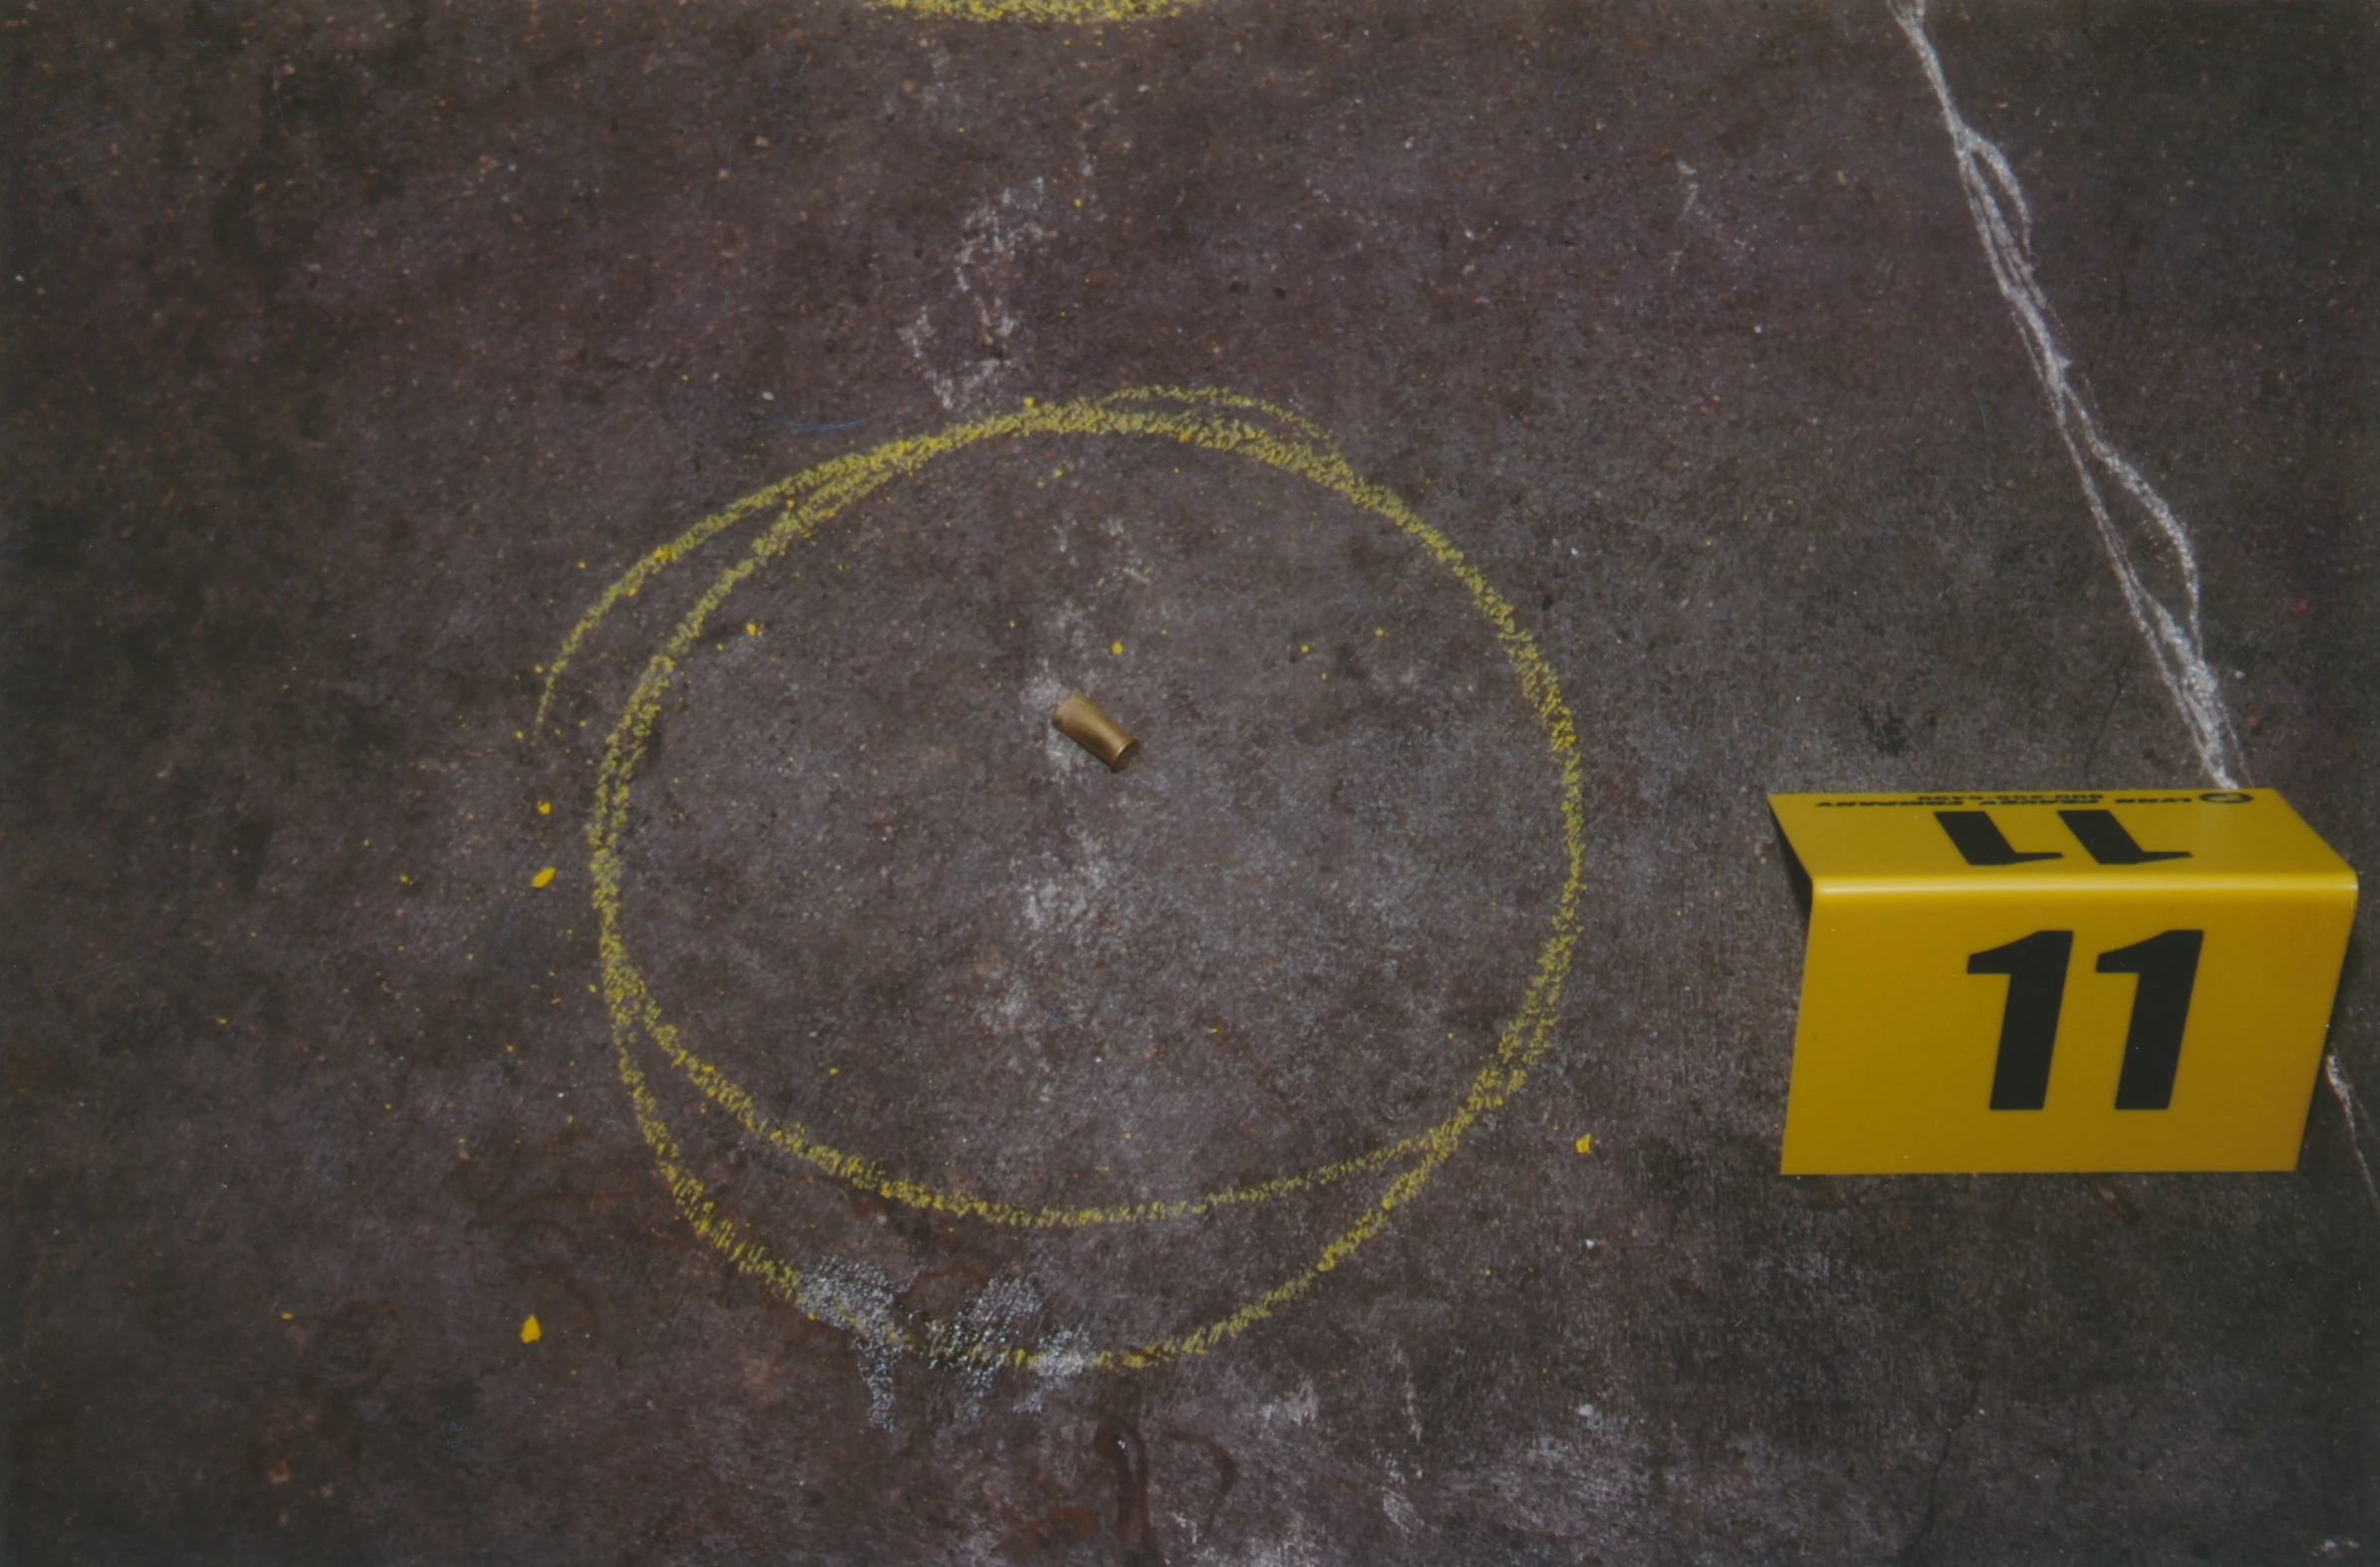
|
| 222 | .22 shell casing from Avery's garage | 8 | 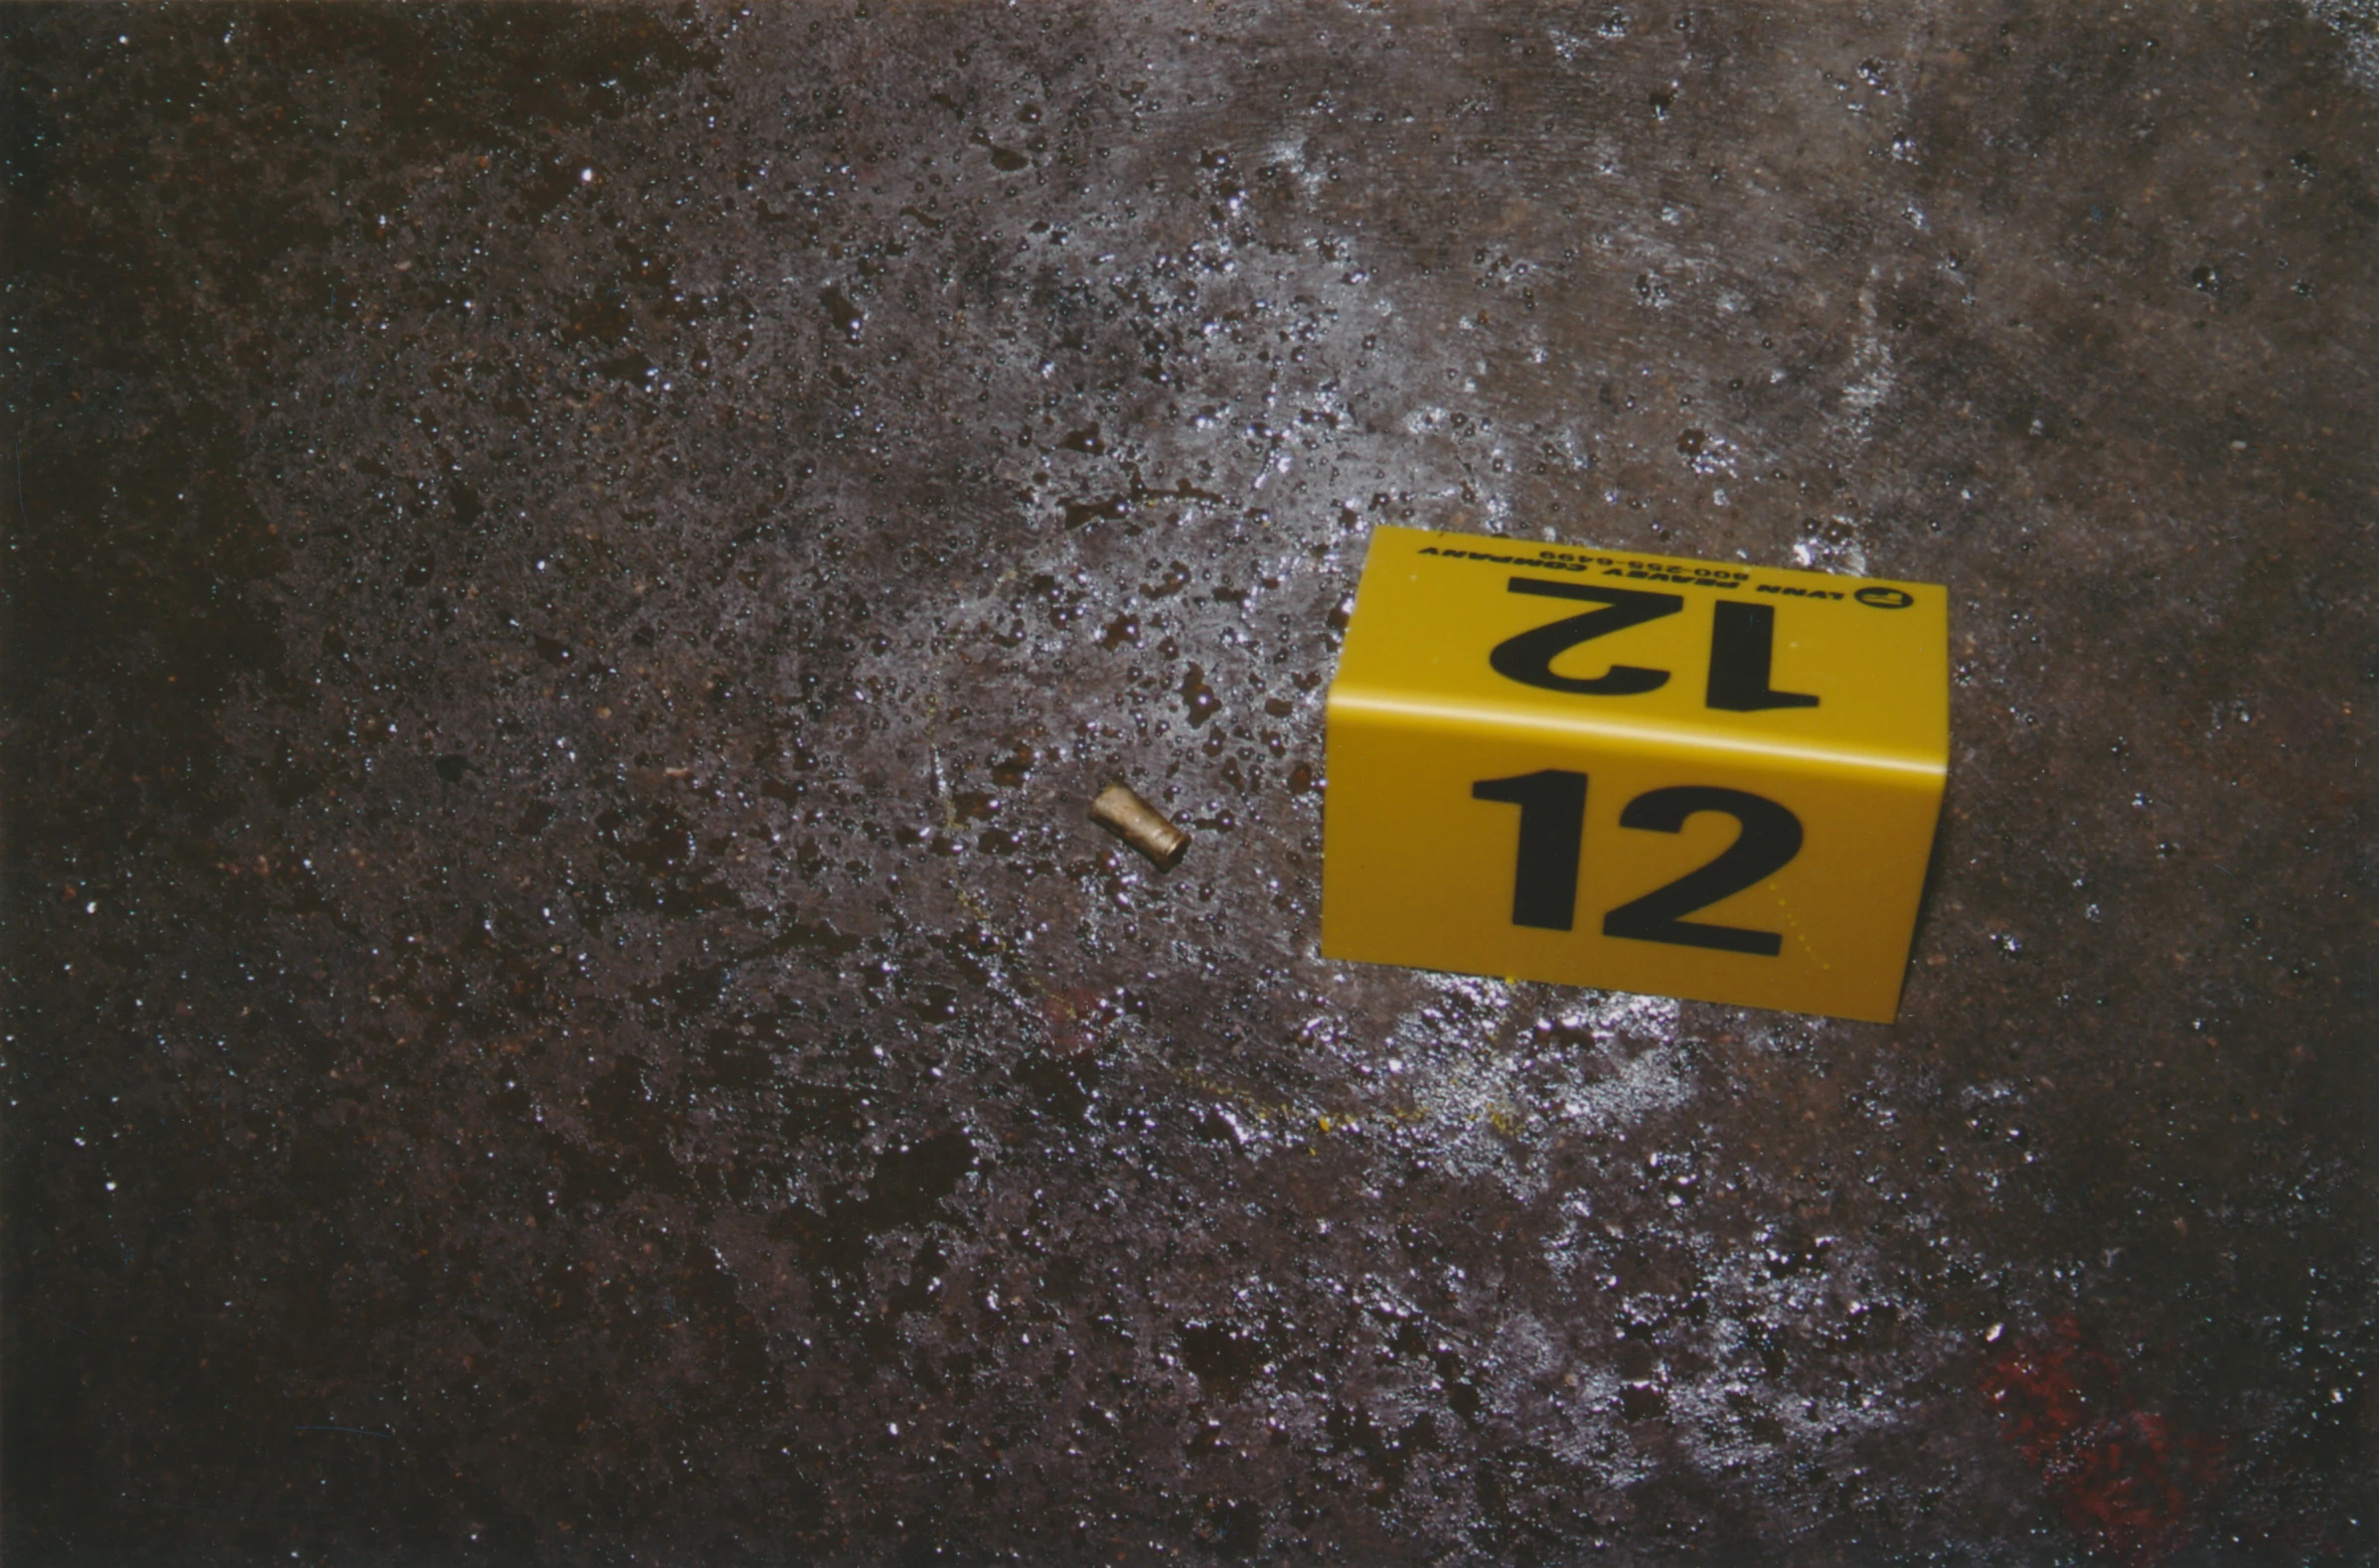
|
| 223 | .22 shell casing from Avery's garage | 8 | 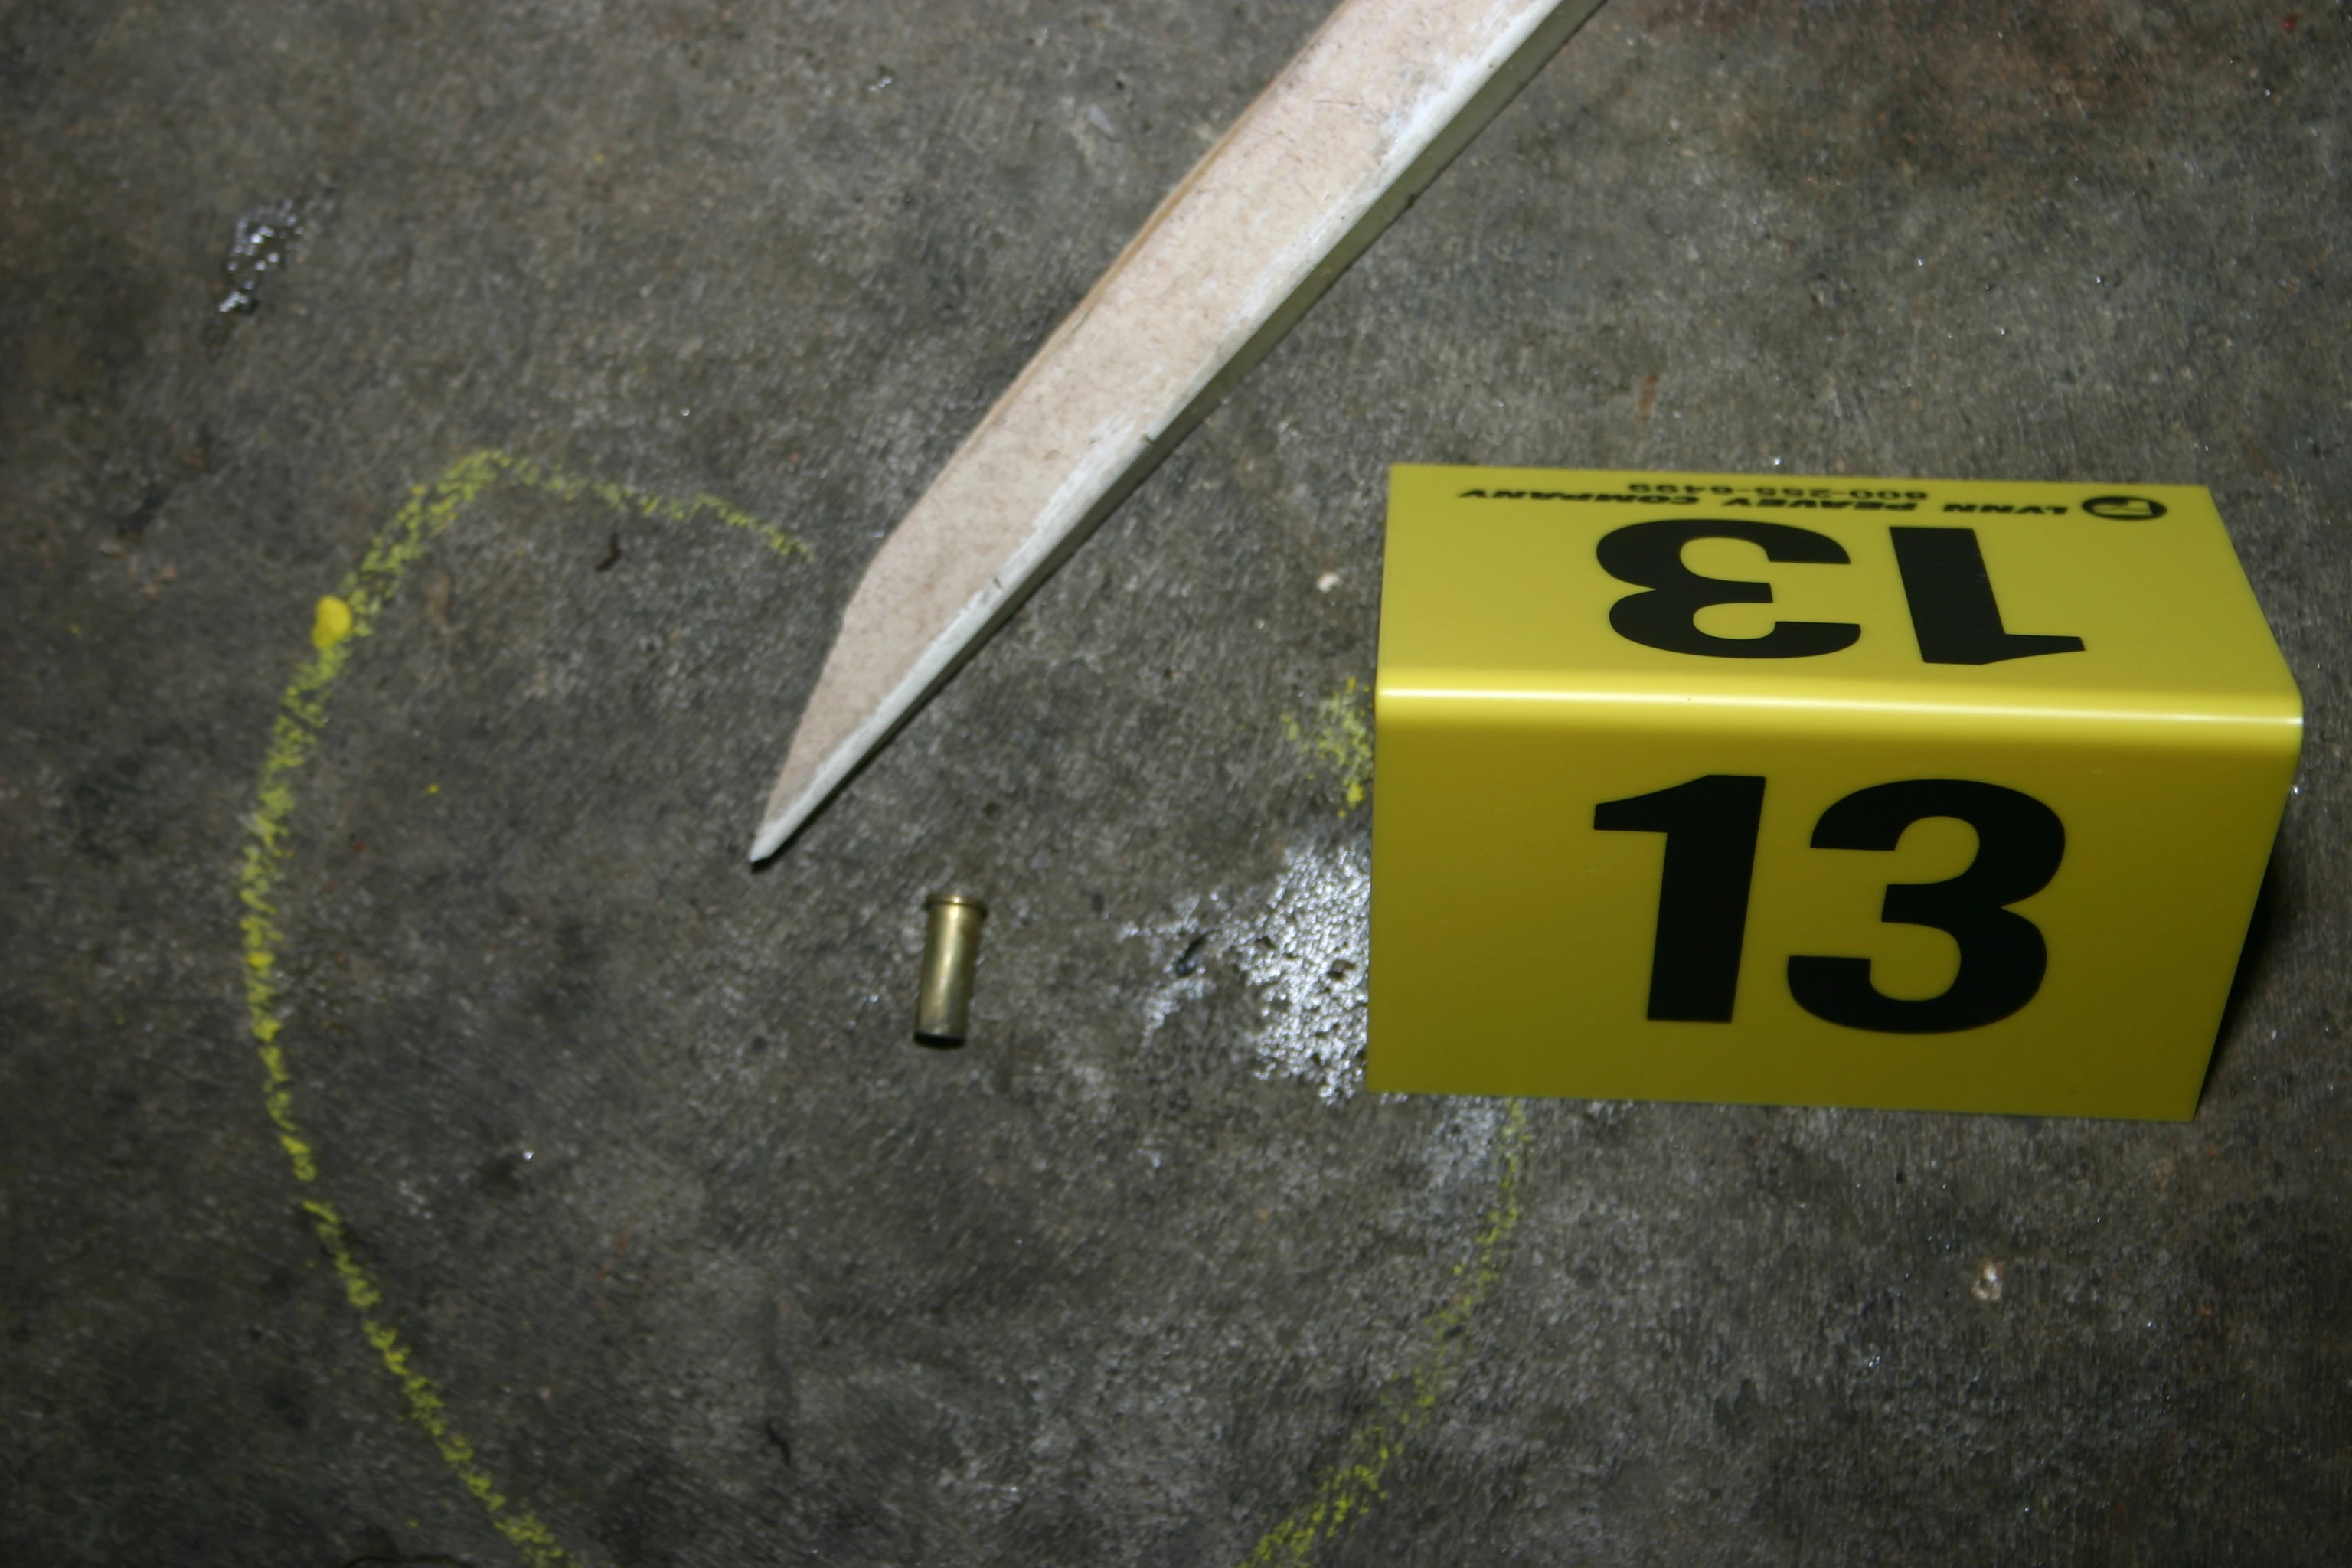
|
| 224 | .22 shell casing from Avery's garage | 8 | 
|
| 225 | .22 shell casing from Avery's garage | 8 | 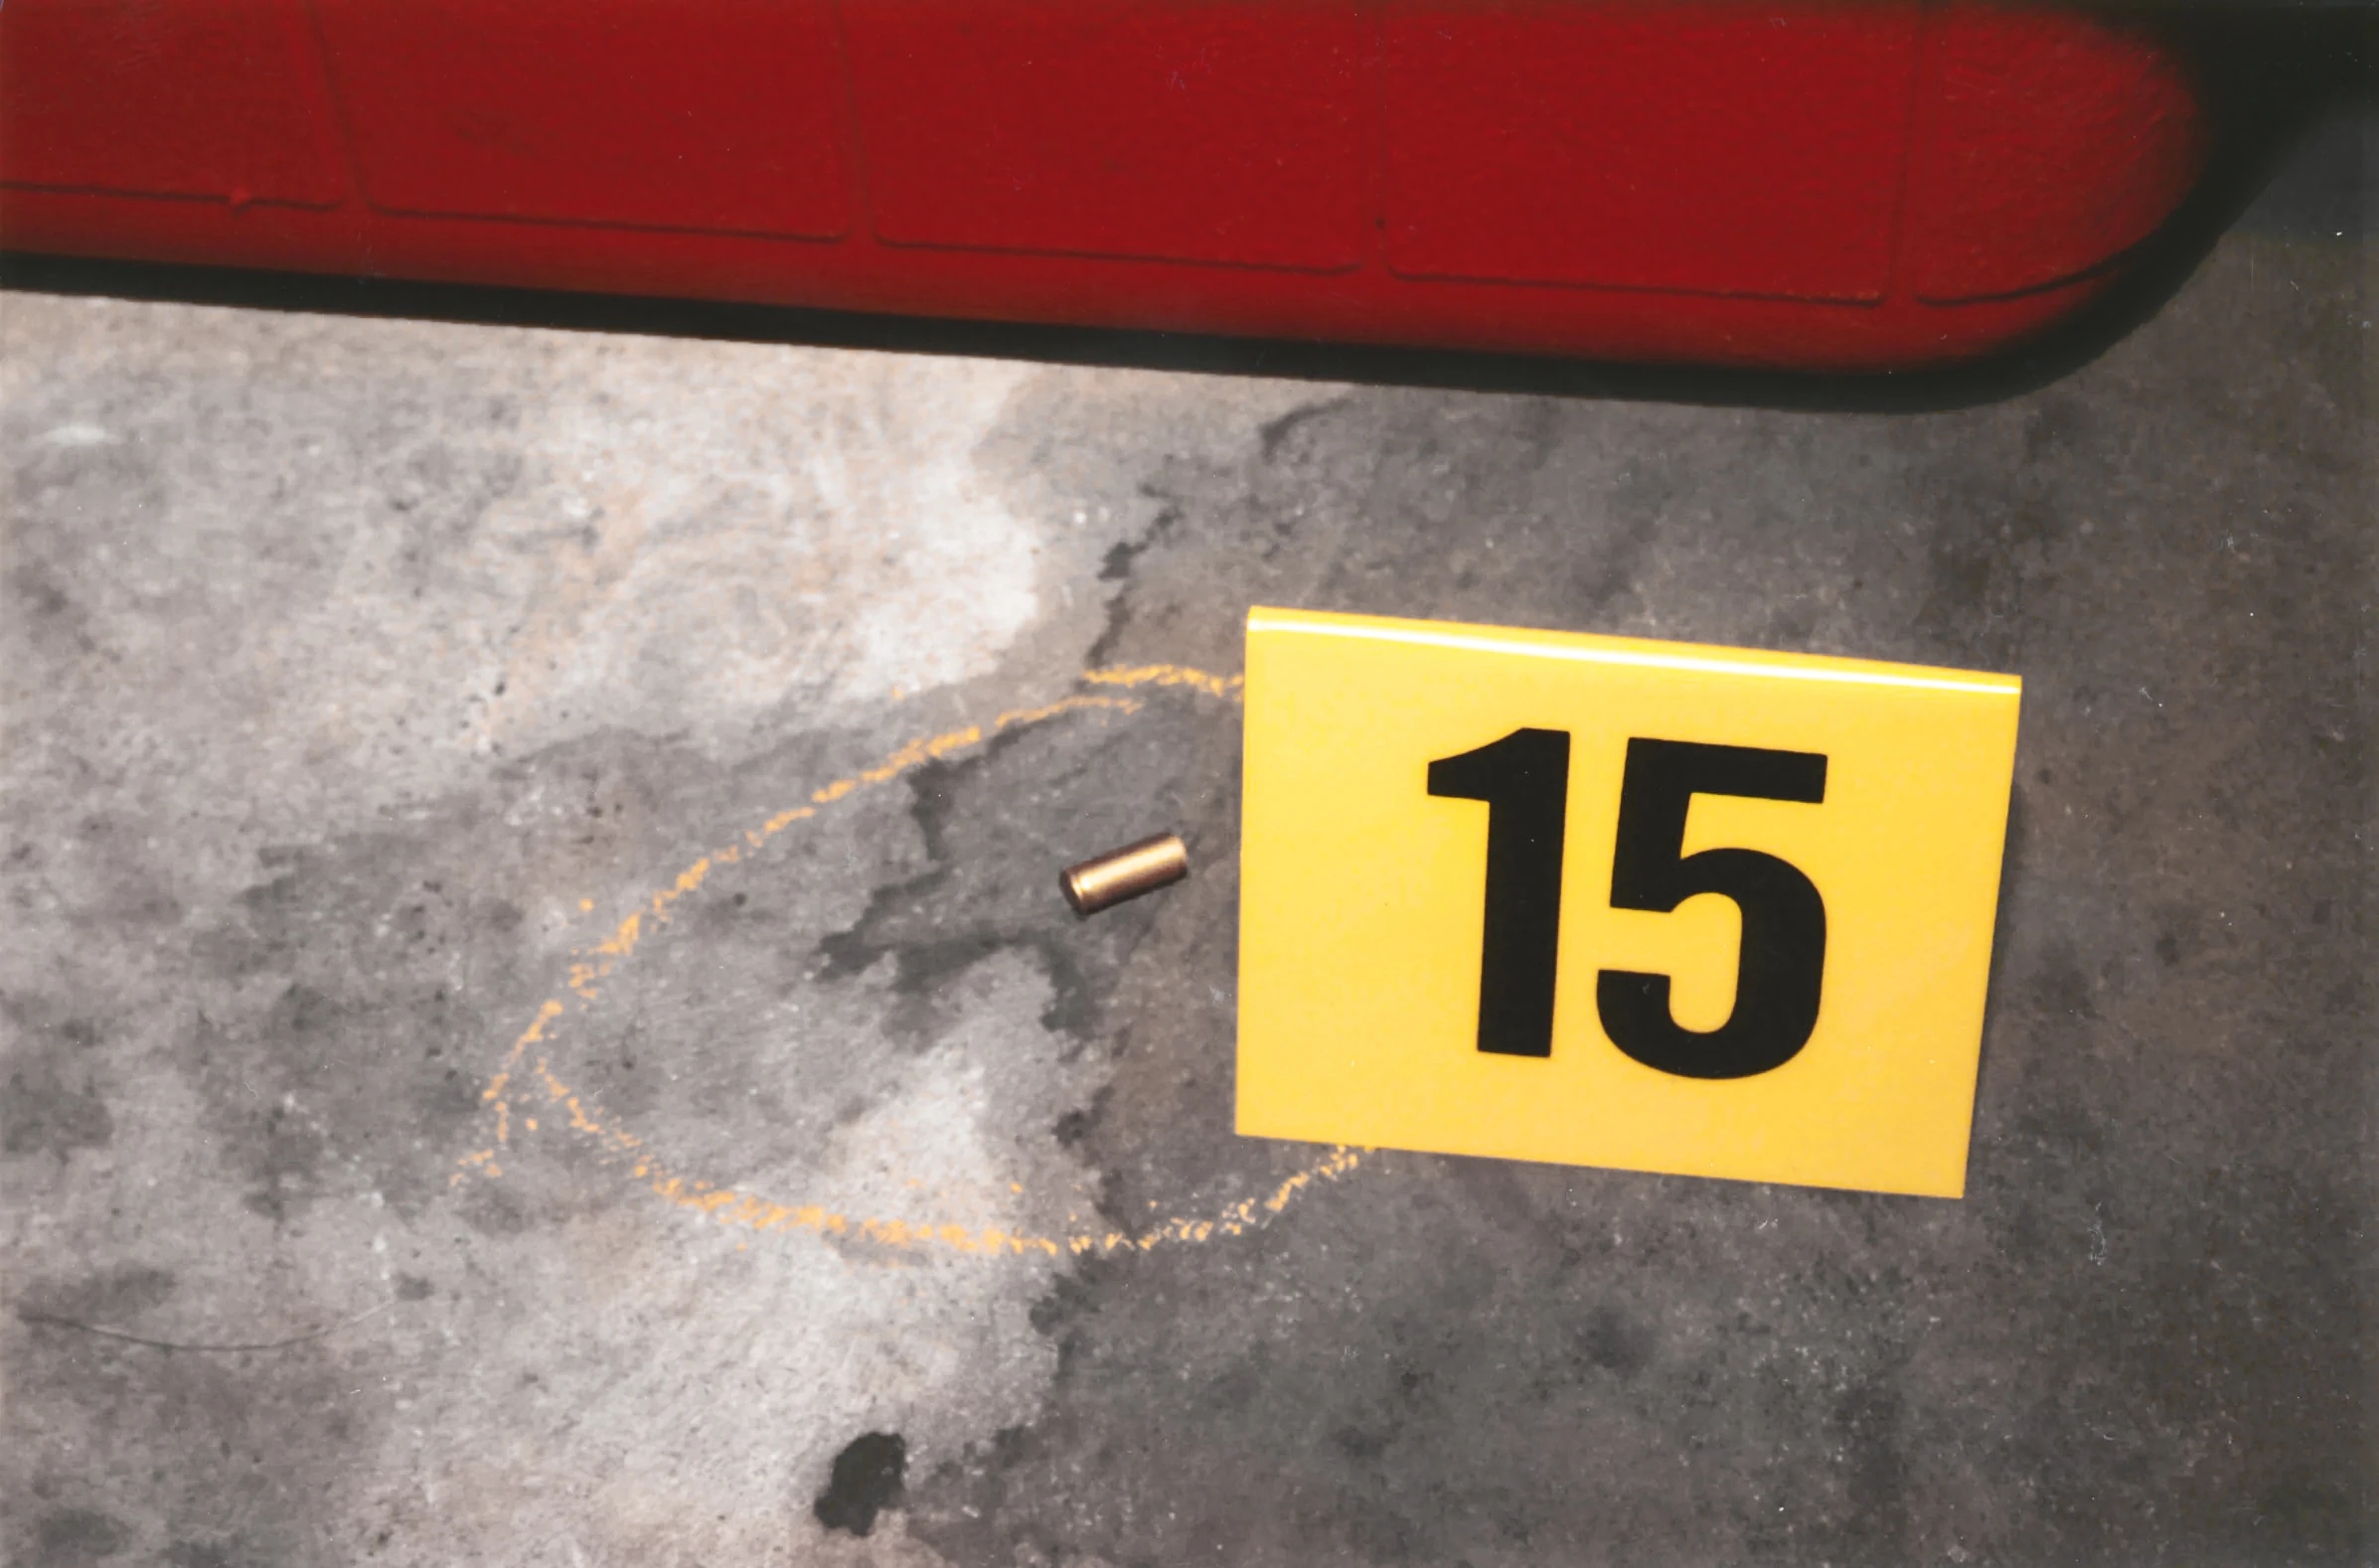
|
| 226 | .22 shell casing from Avery's garage | 8 | 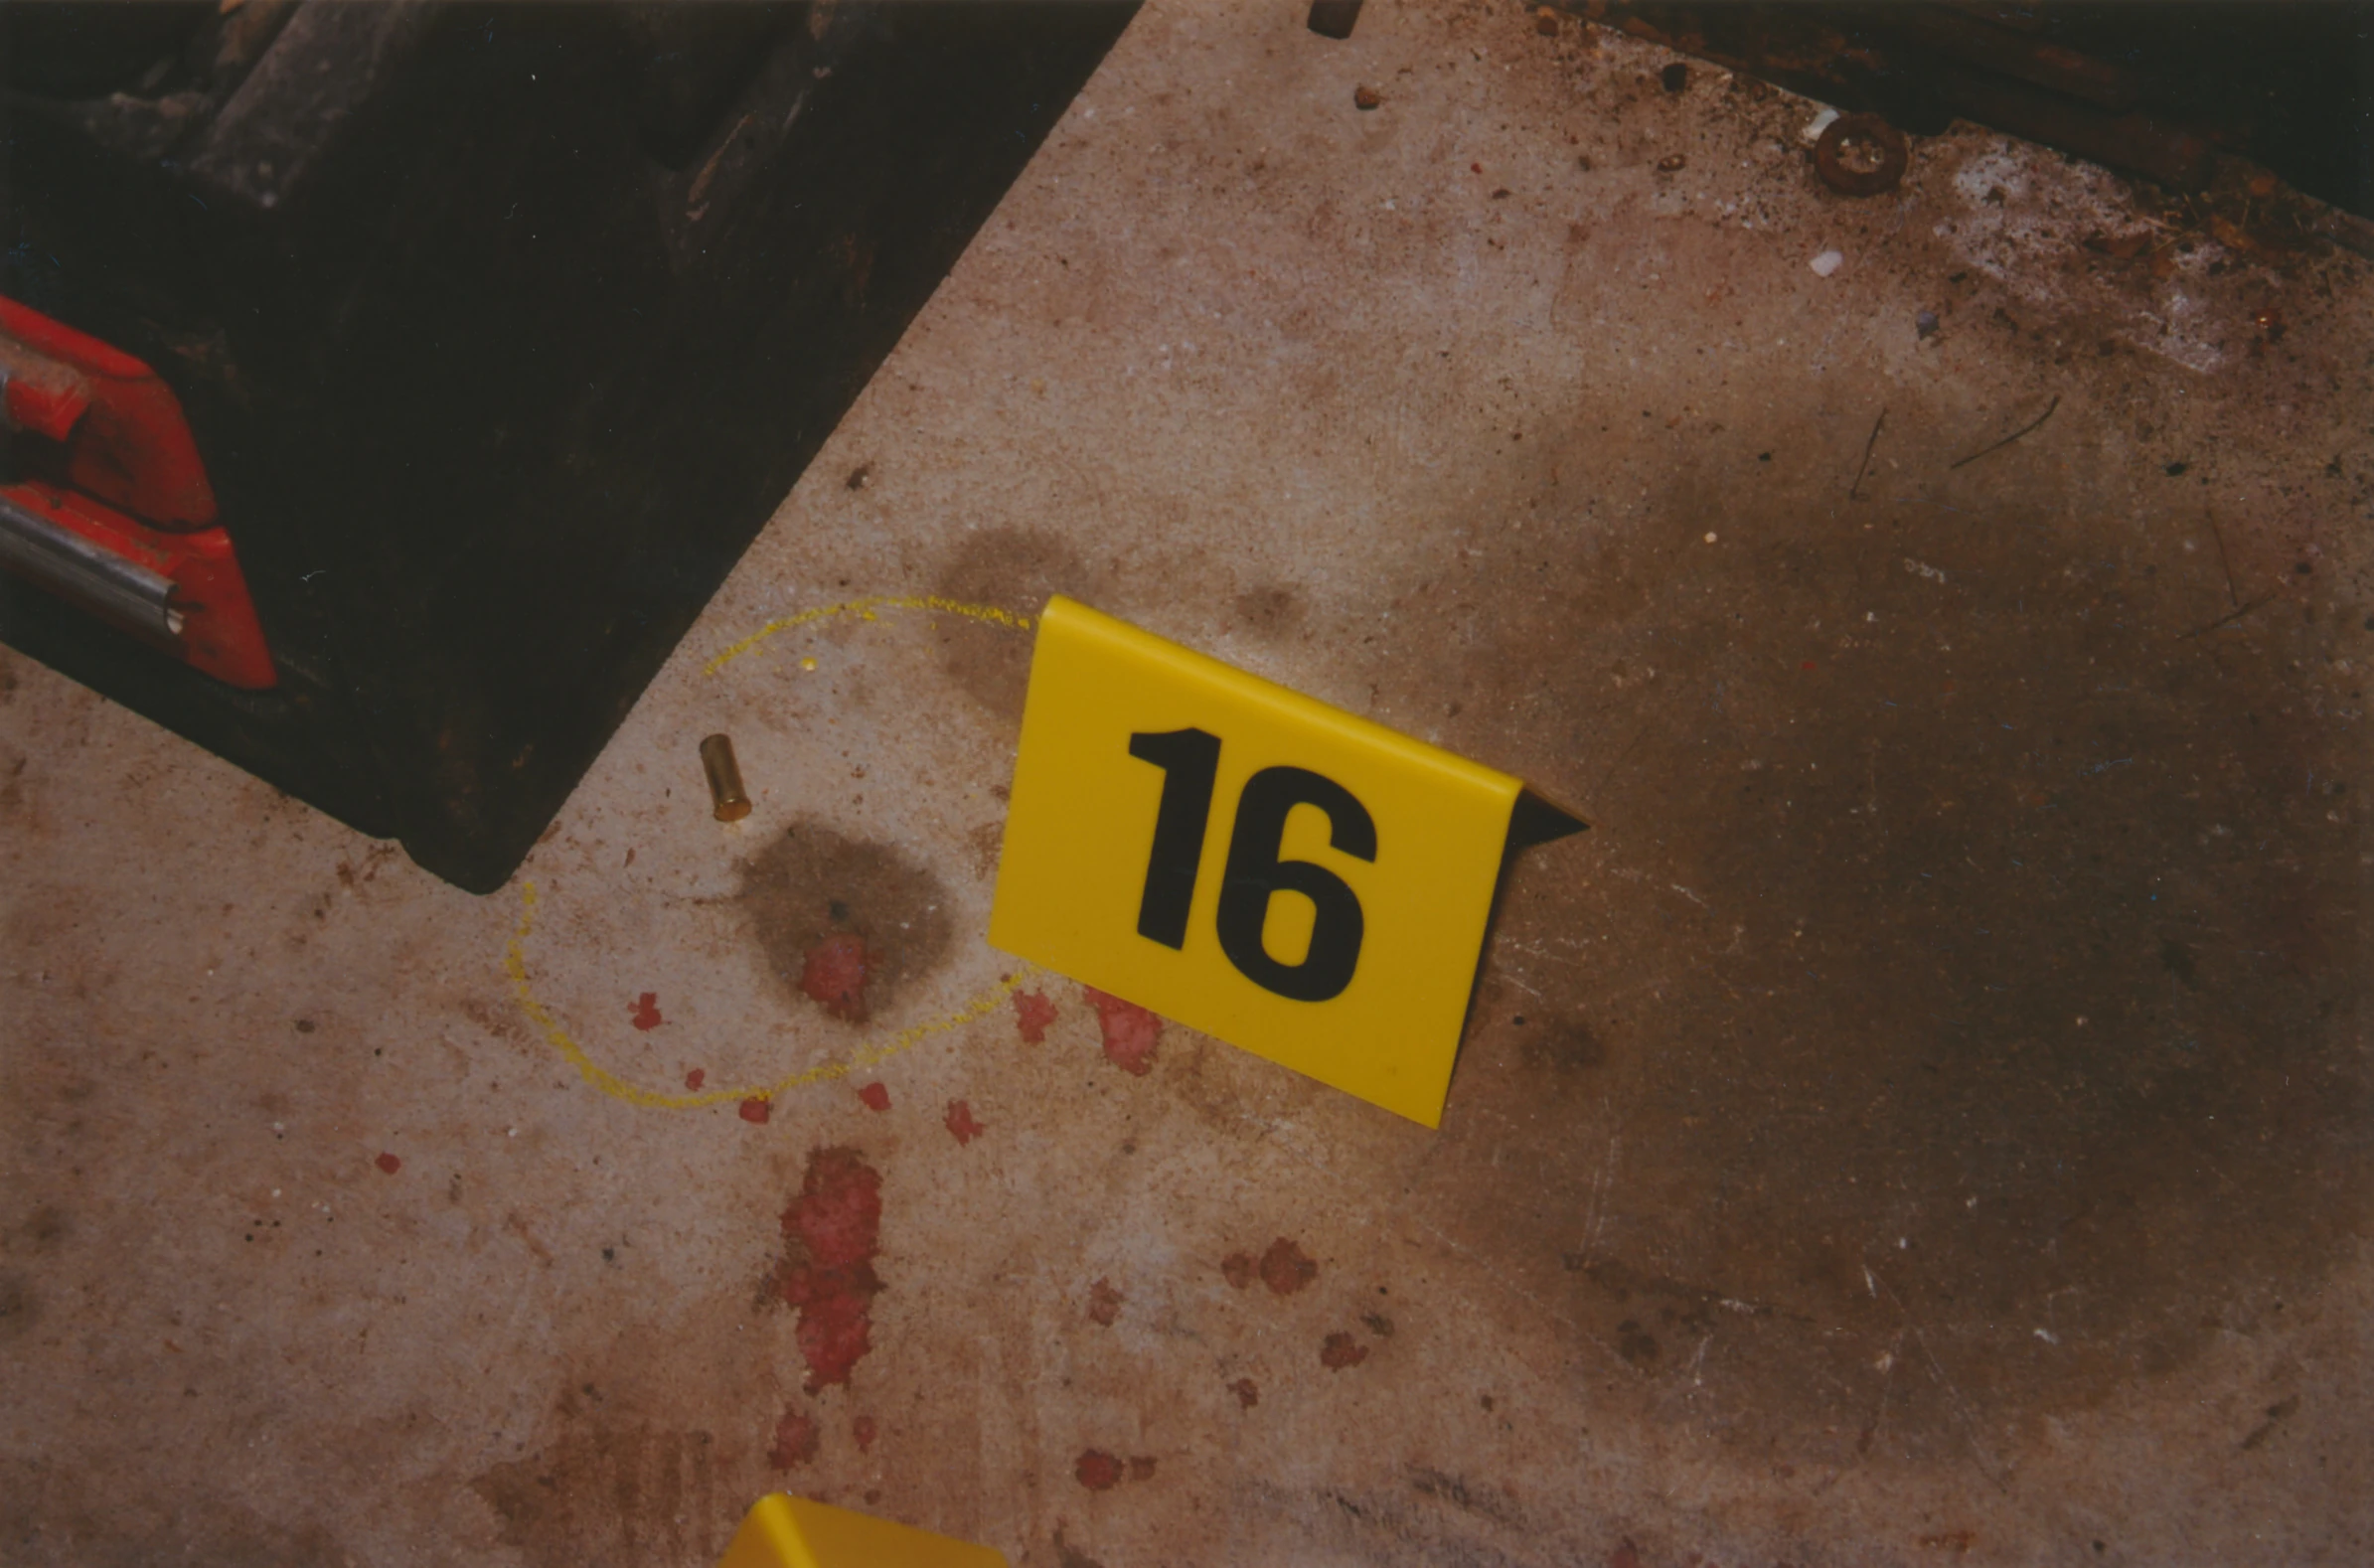
|
| 227 | Avery garage with overhead door | 8 | 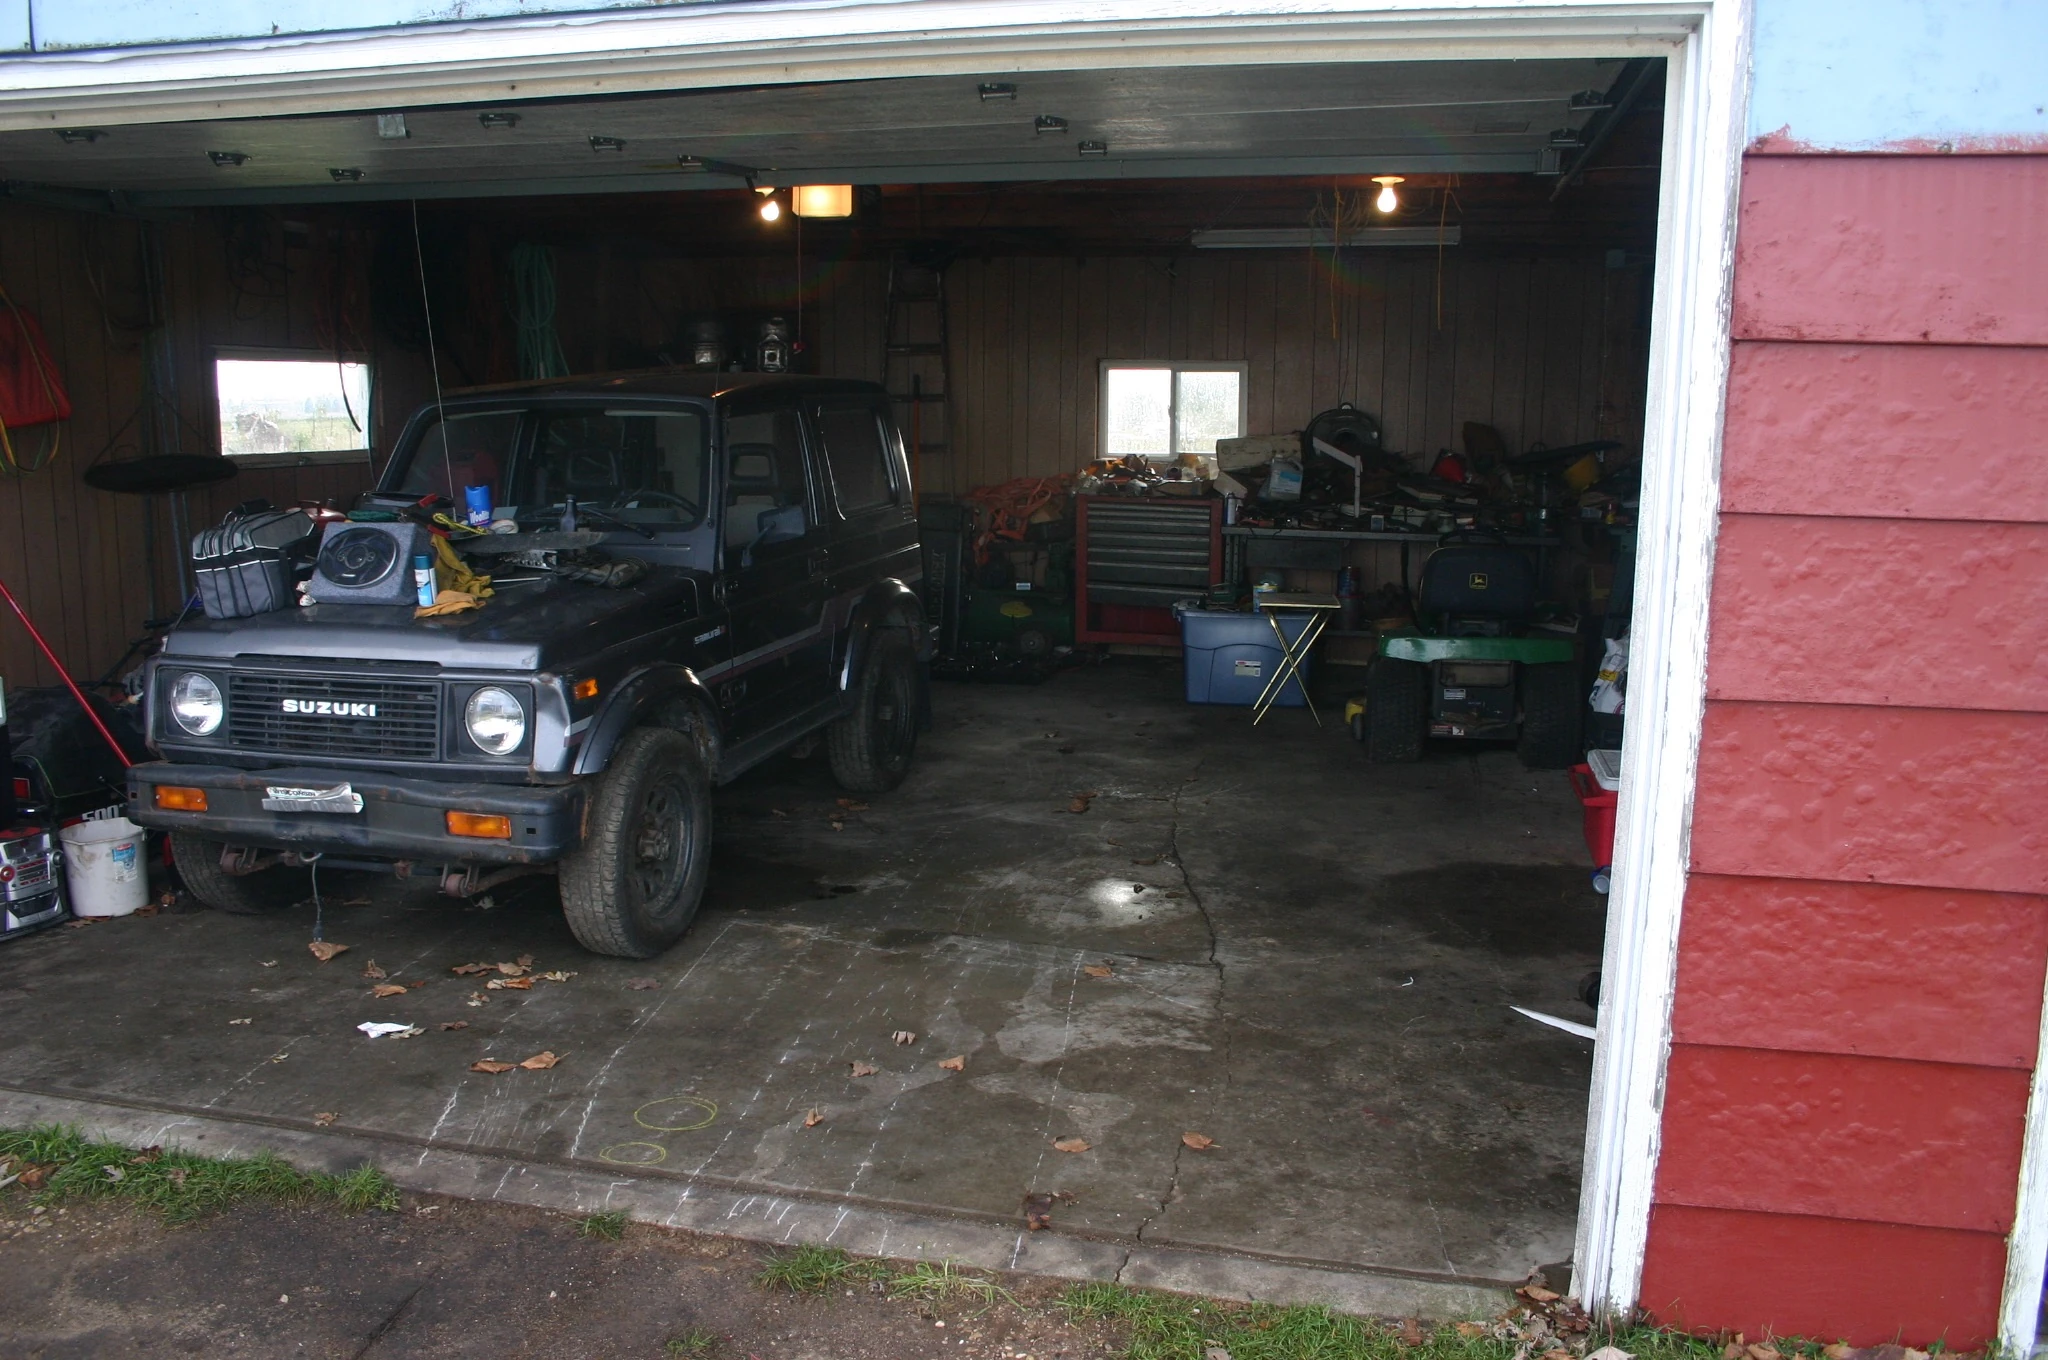
|
| 228 | electrical cords hanging in Avery garage | 8 | 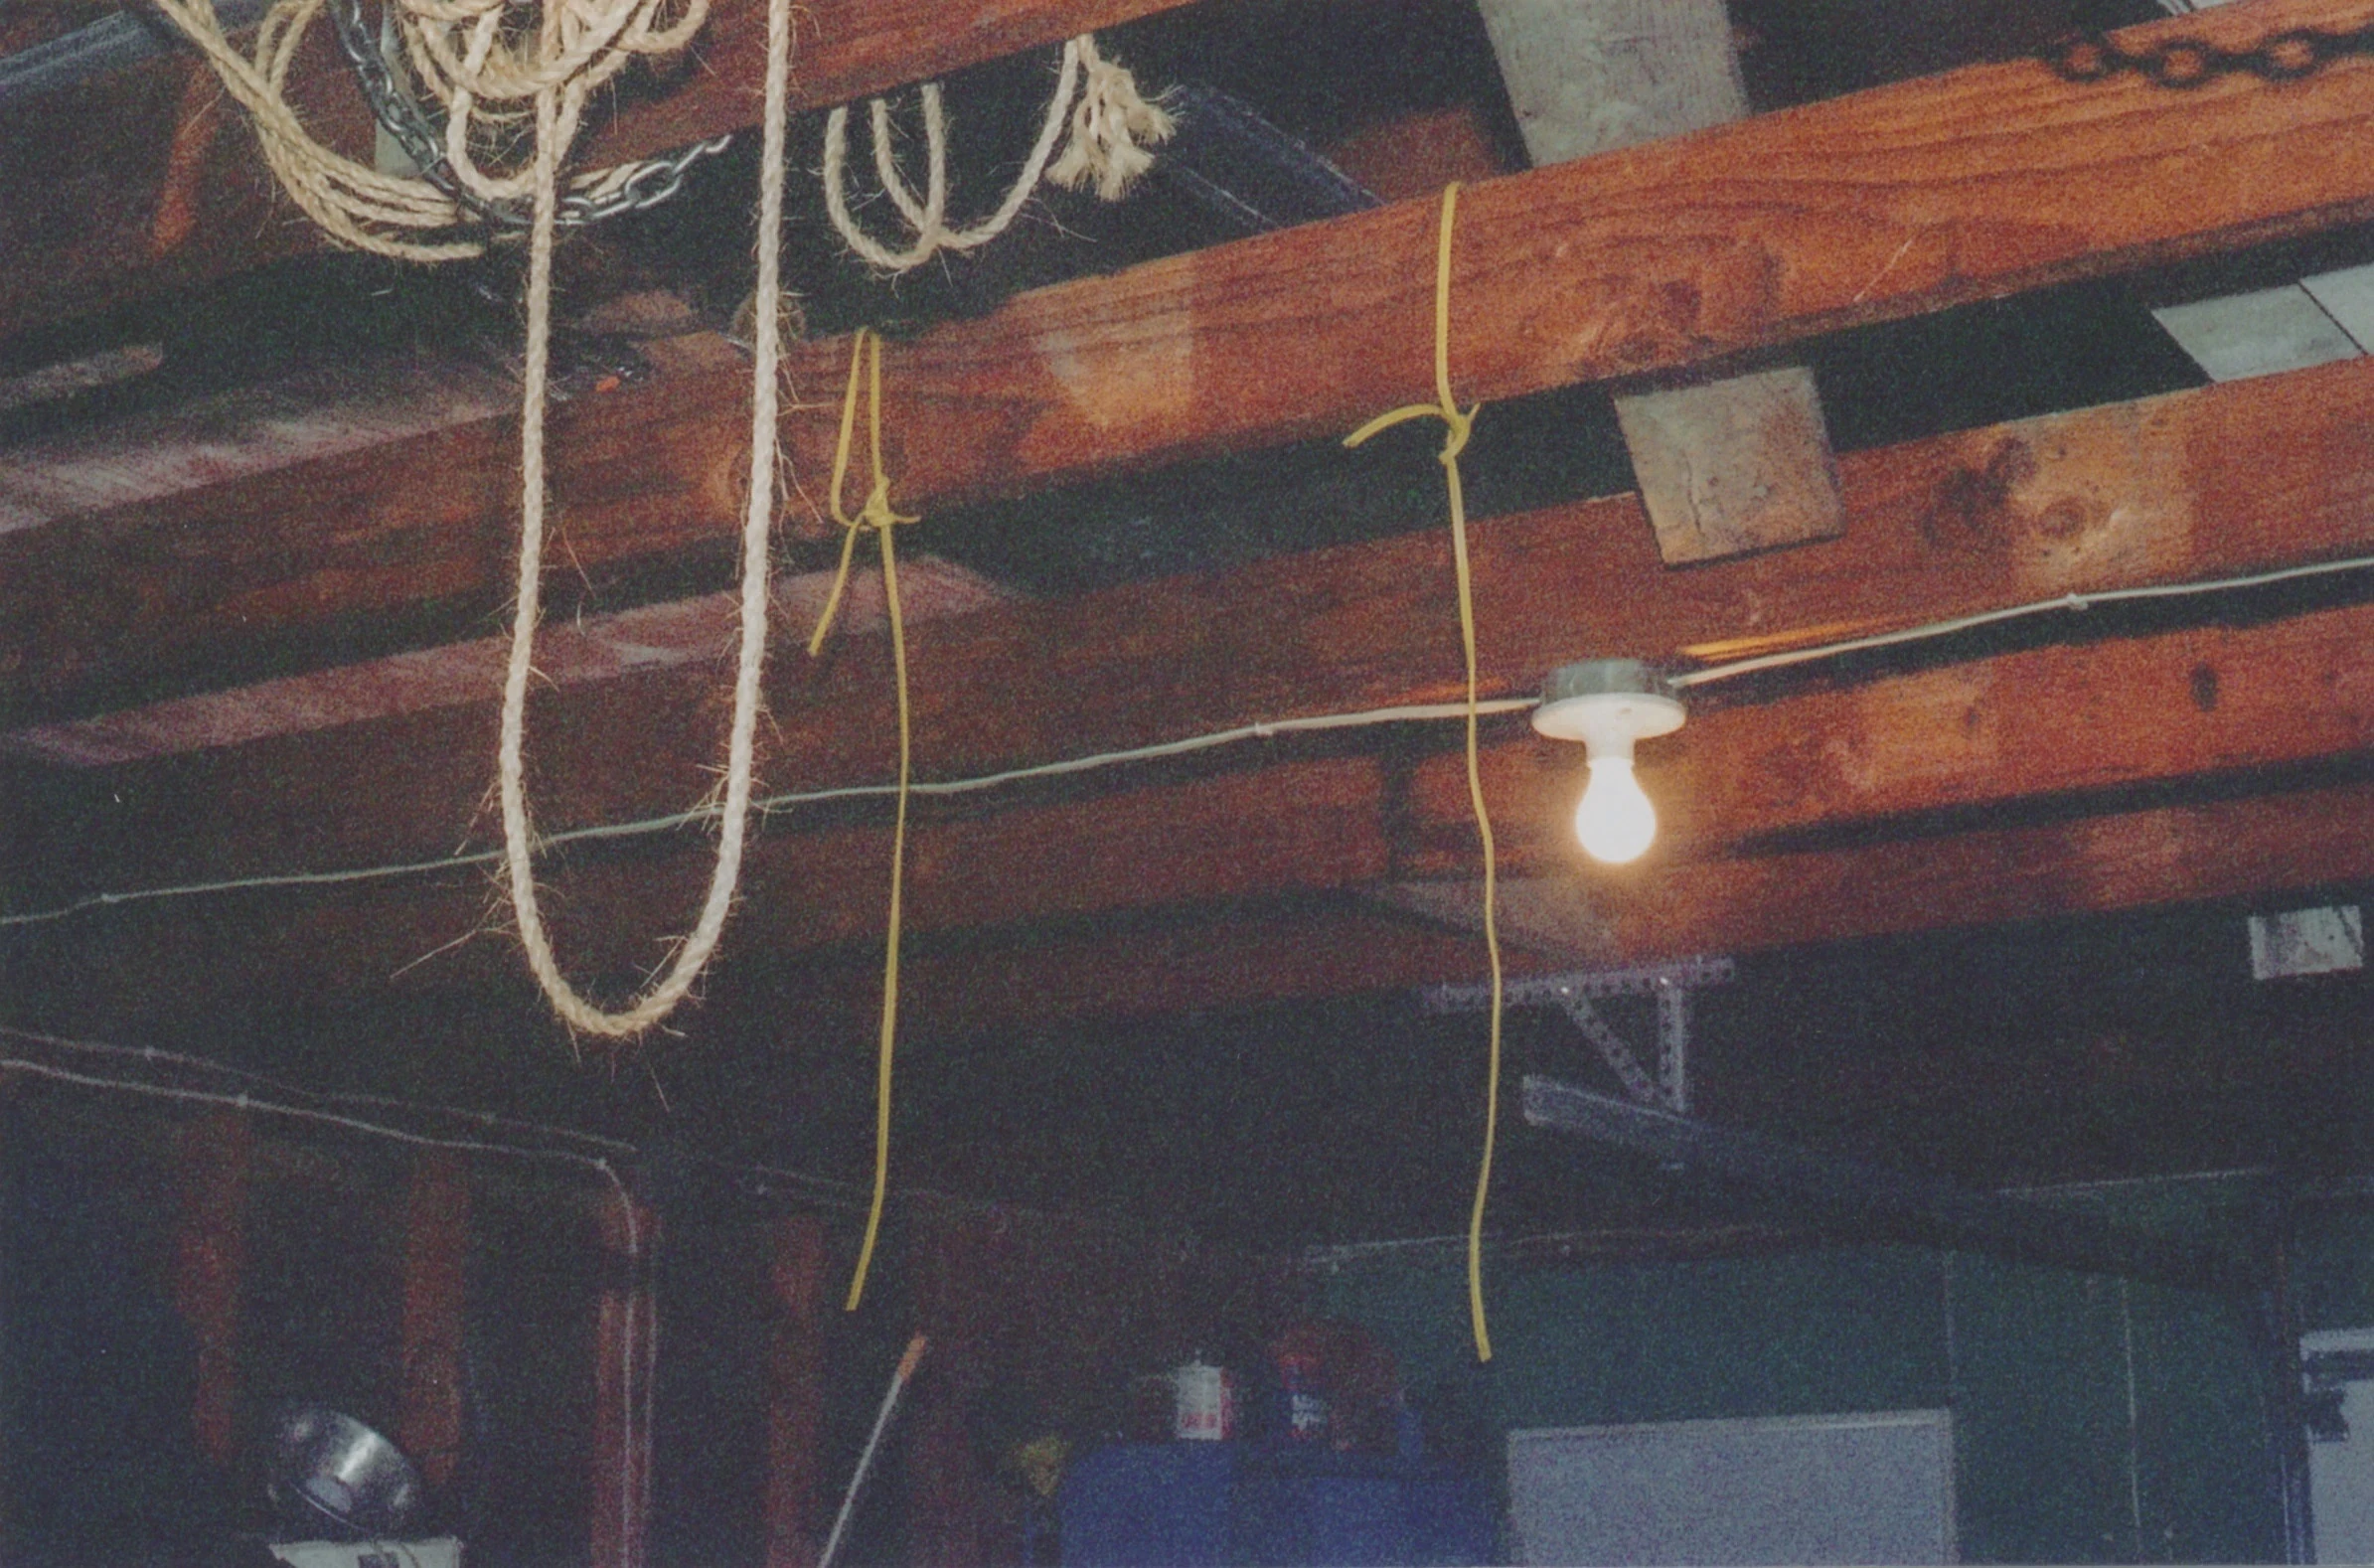
|
| 229 | electrical cords evidence photo | 8 | 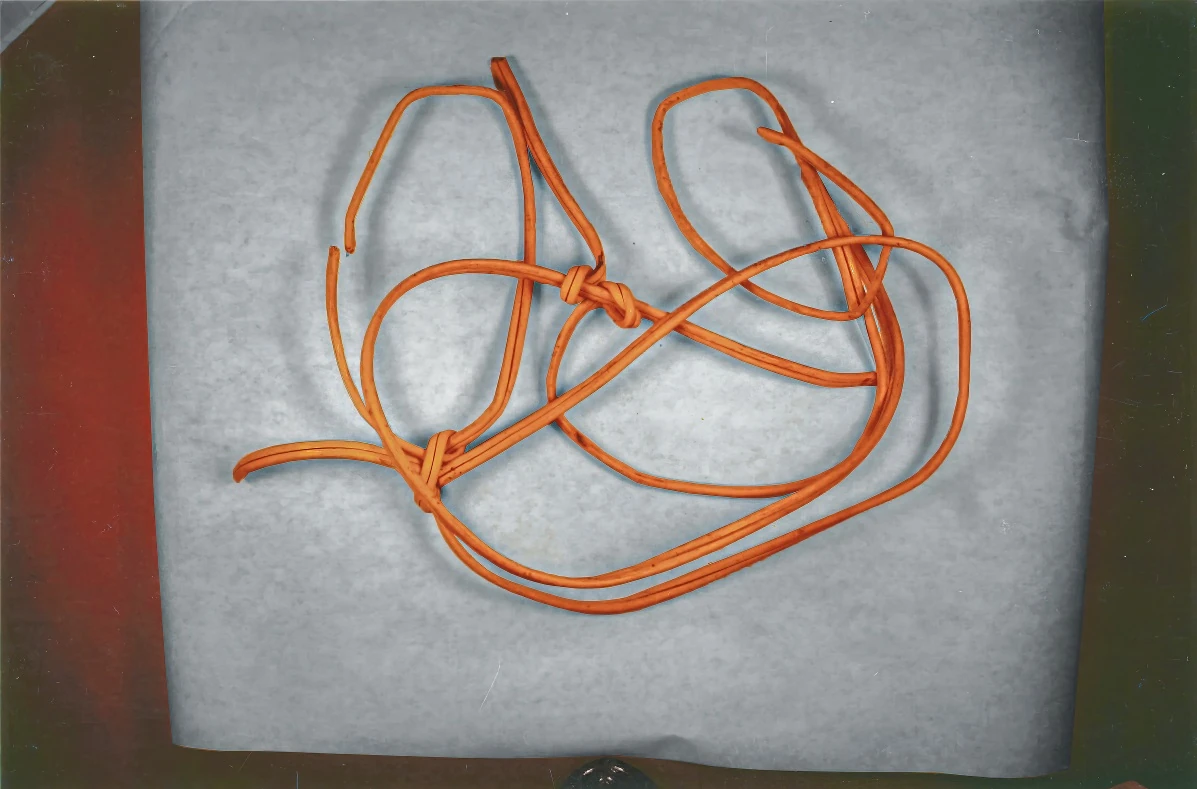
|
| 230 | Suzuki Samari | 9 | 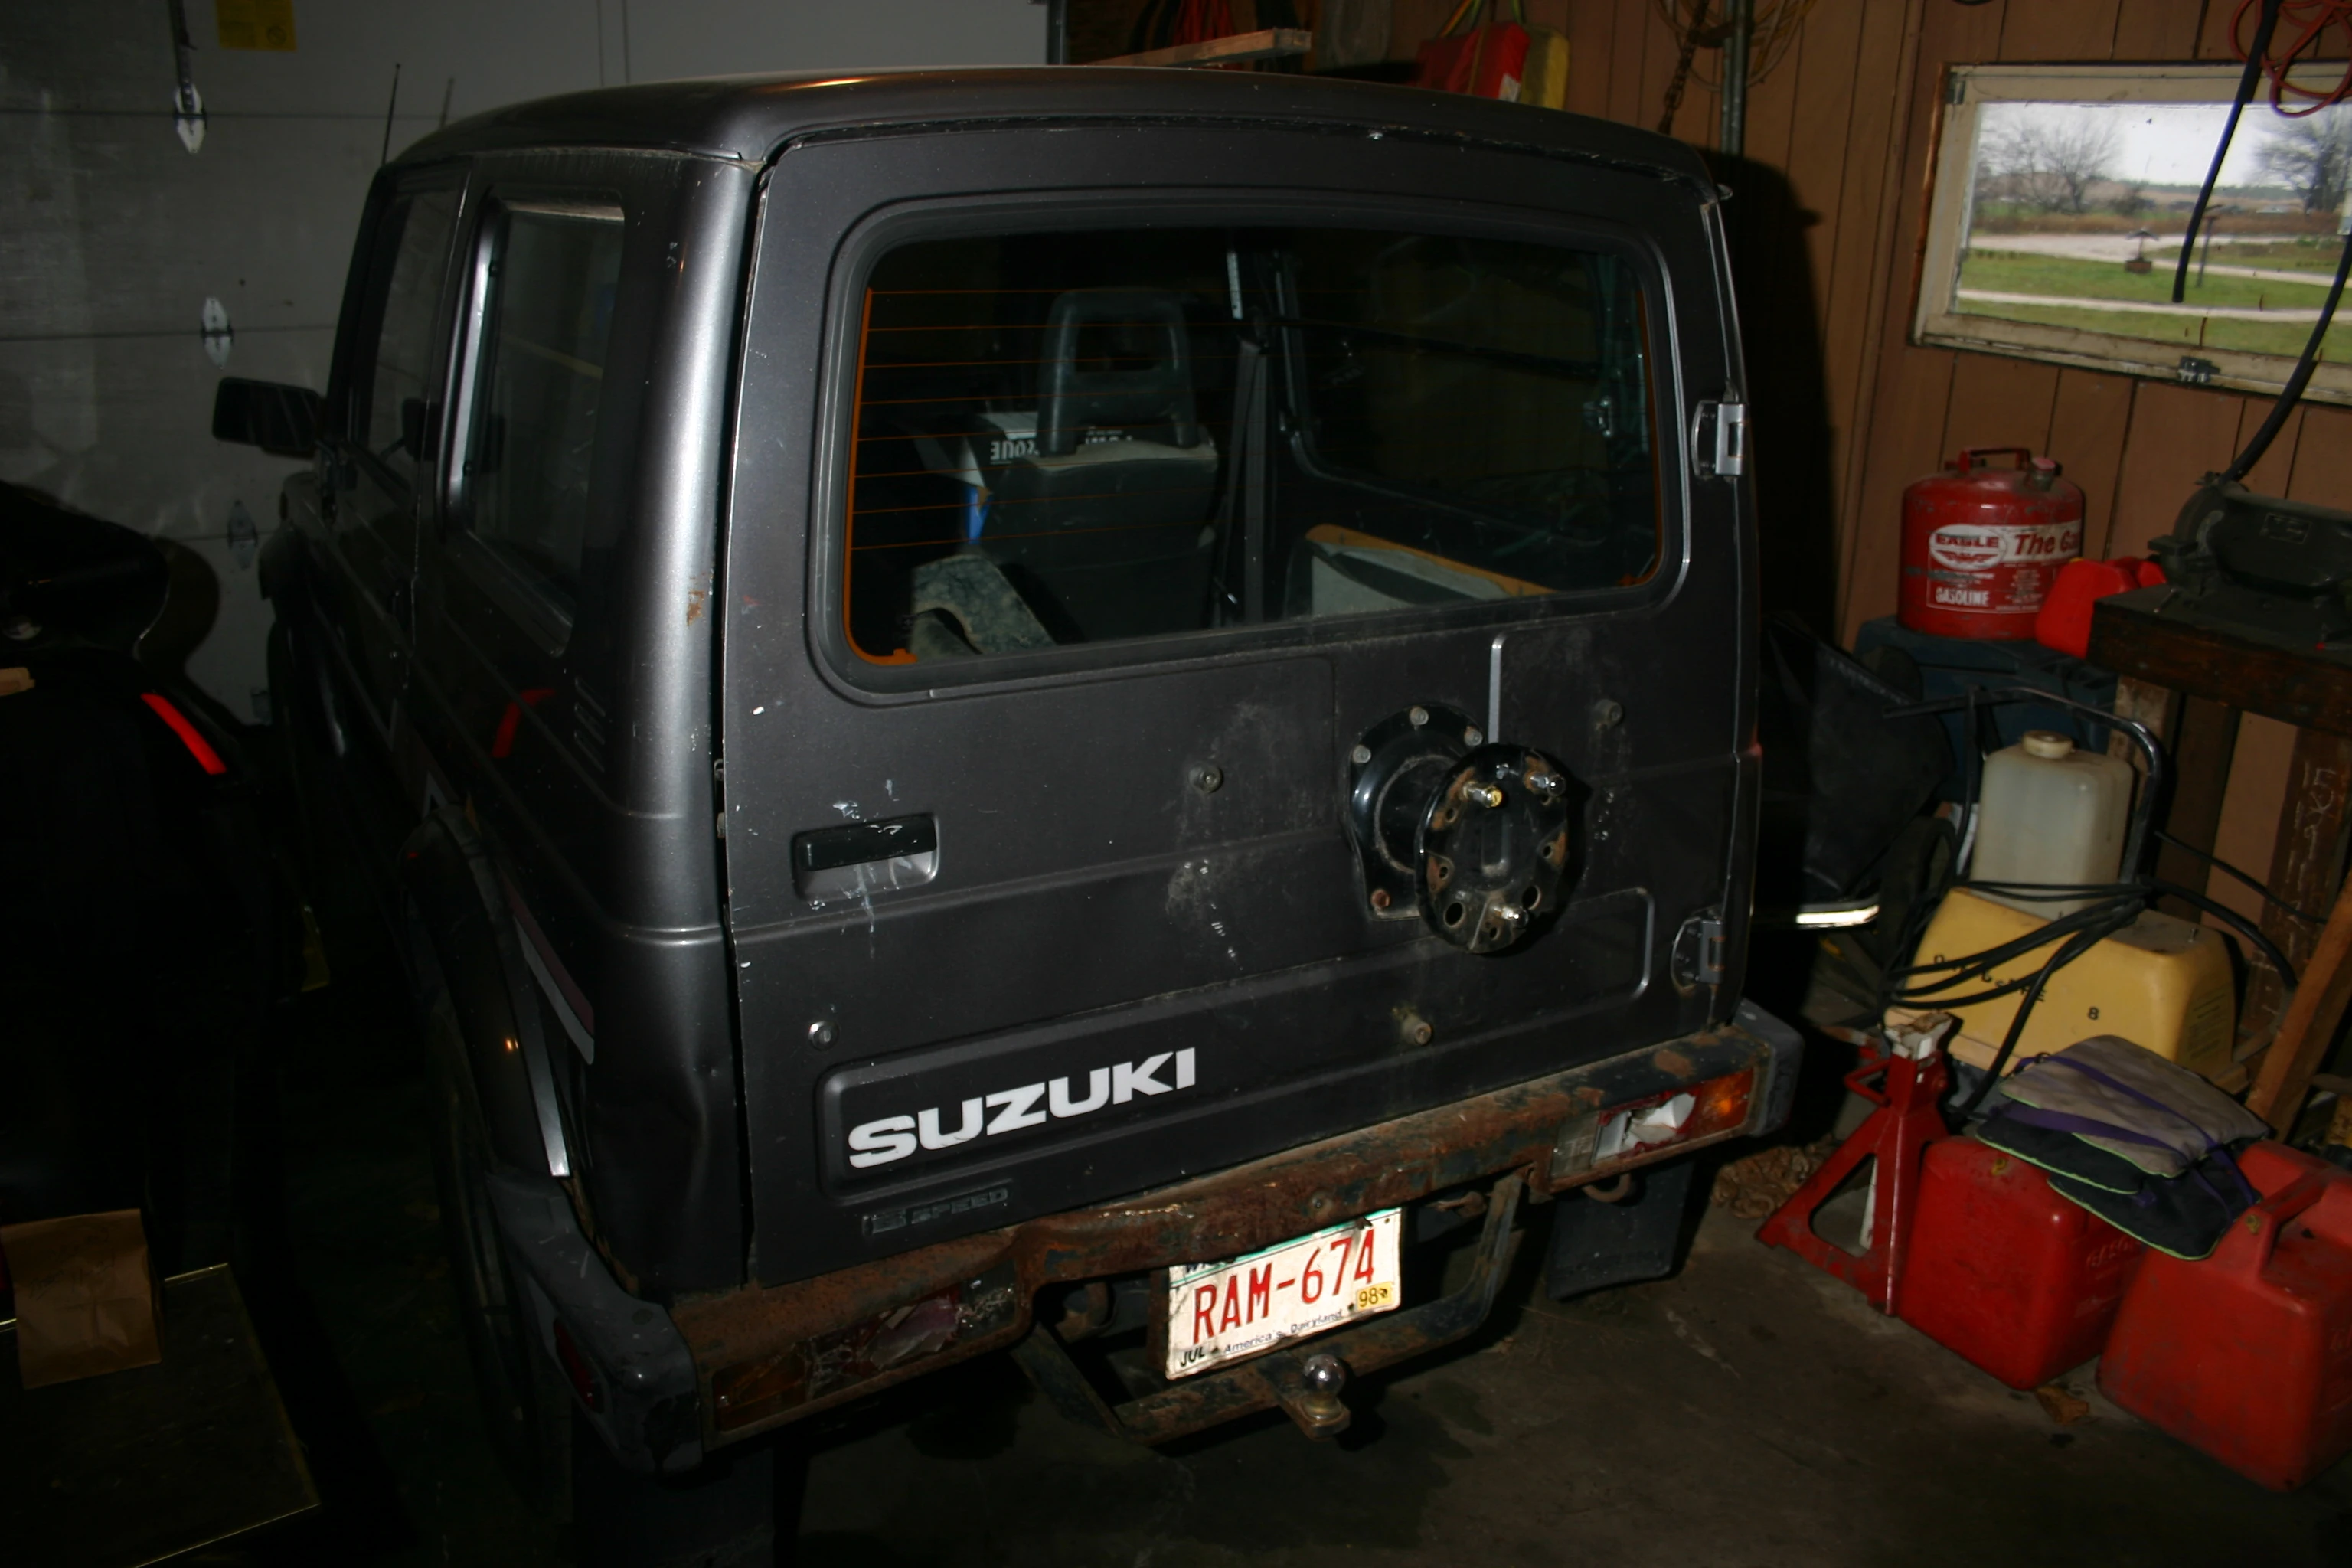
|
| 231 | Suzuki Samari and snowmobile | 9 | 
|
| 232 | Steven Avery's garage, rear area | 9 | 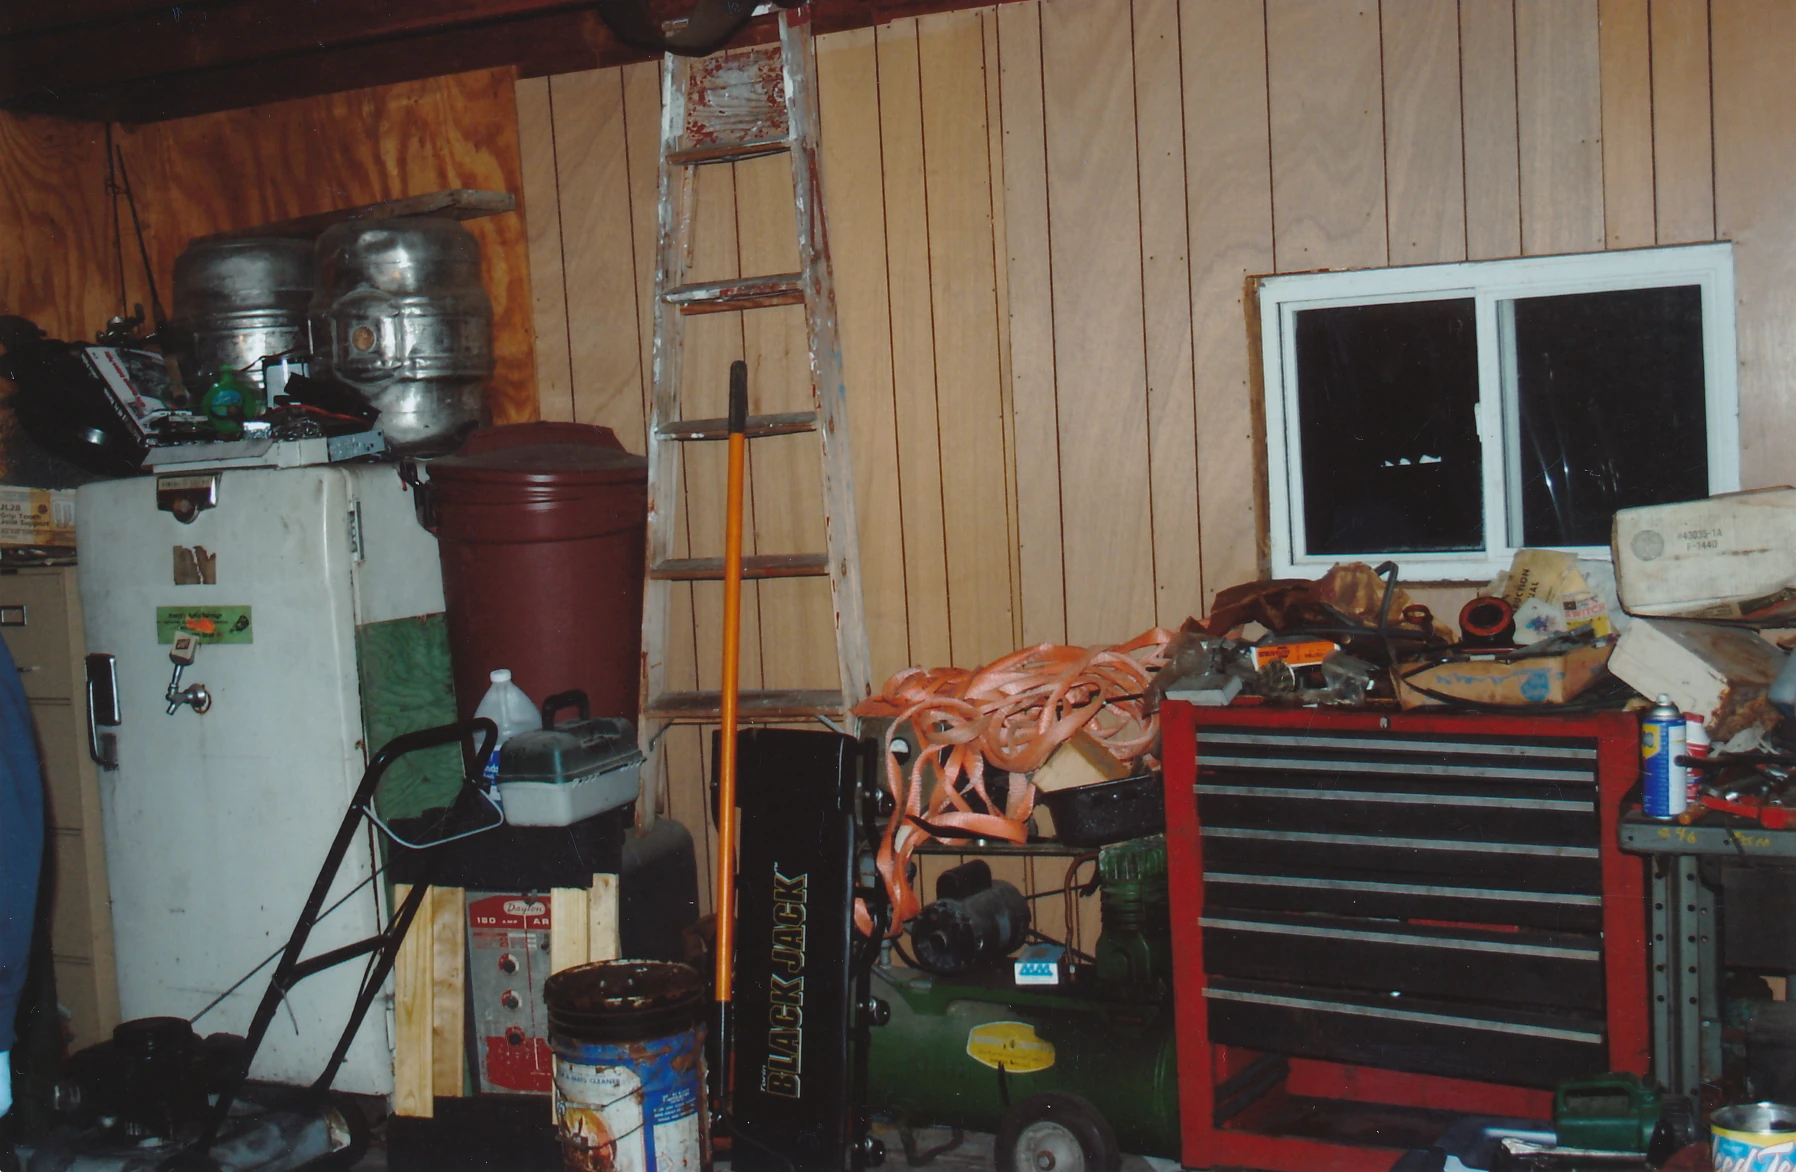
|
| 233 | Steven Avery's garage, rear more western area | 9 | 
|
| 234 | Steven Avery's garage, western side | 9 | 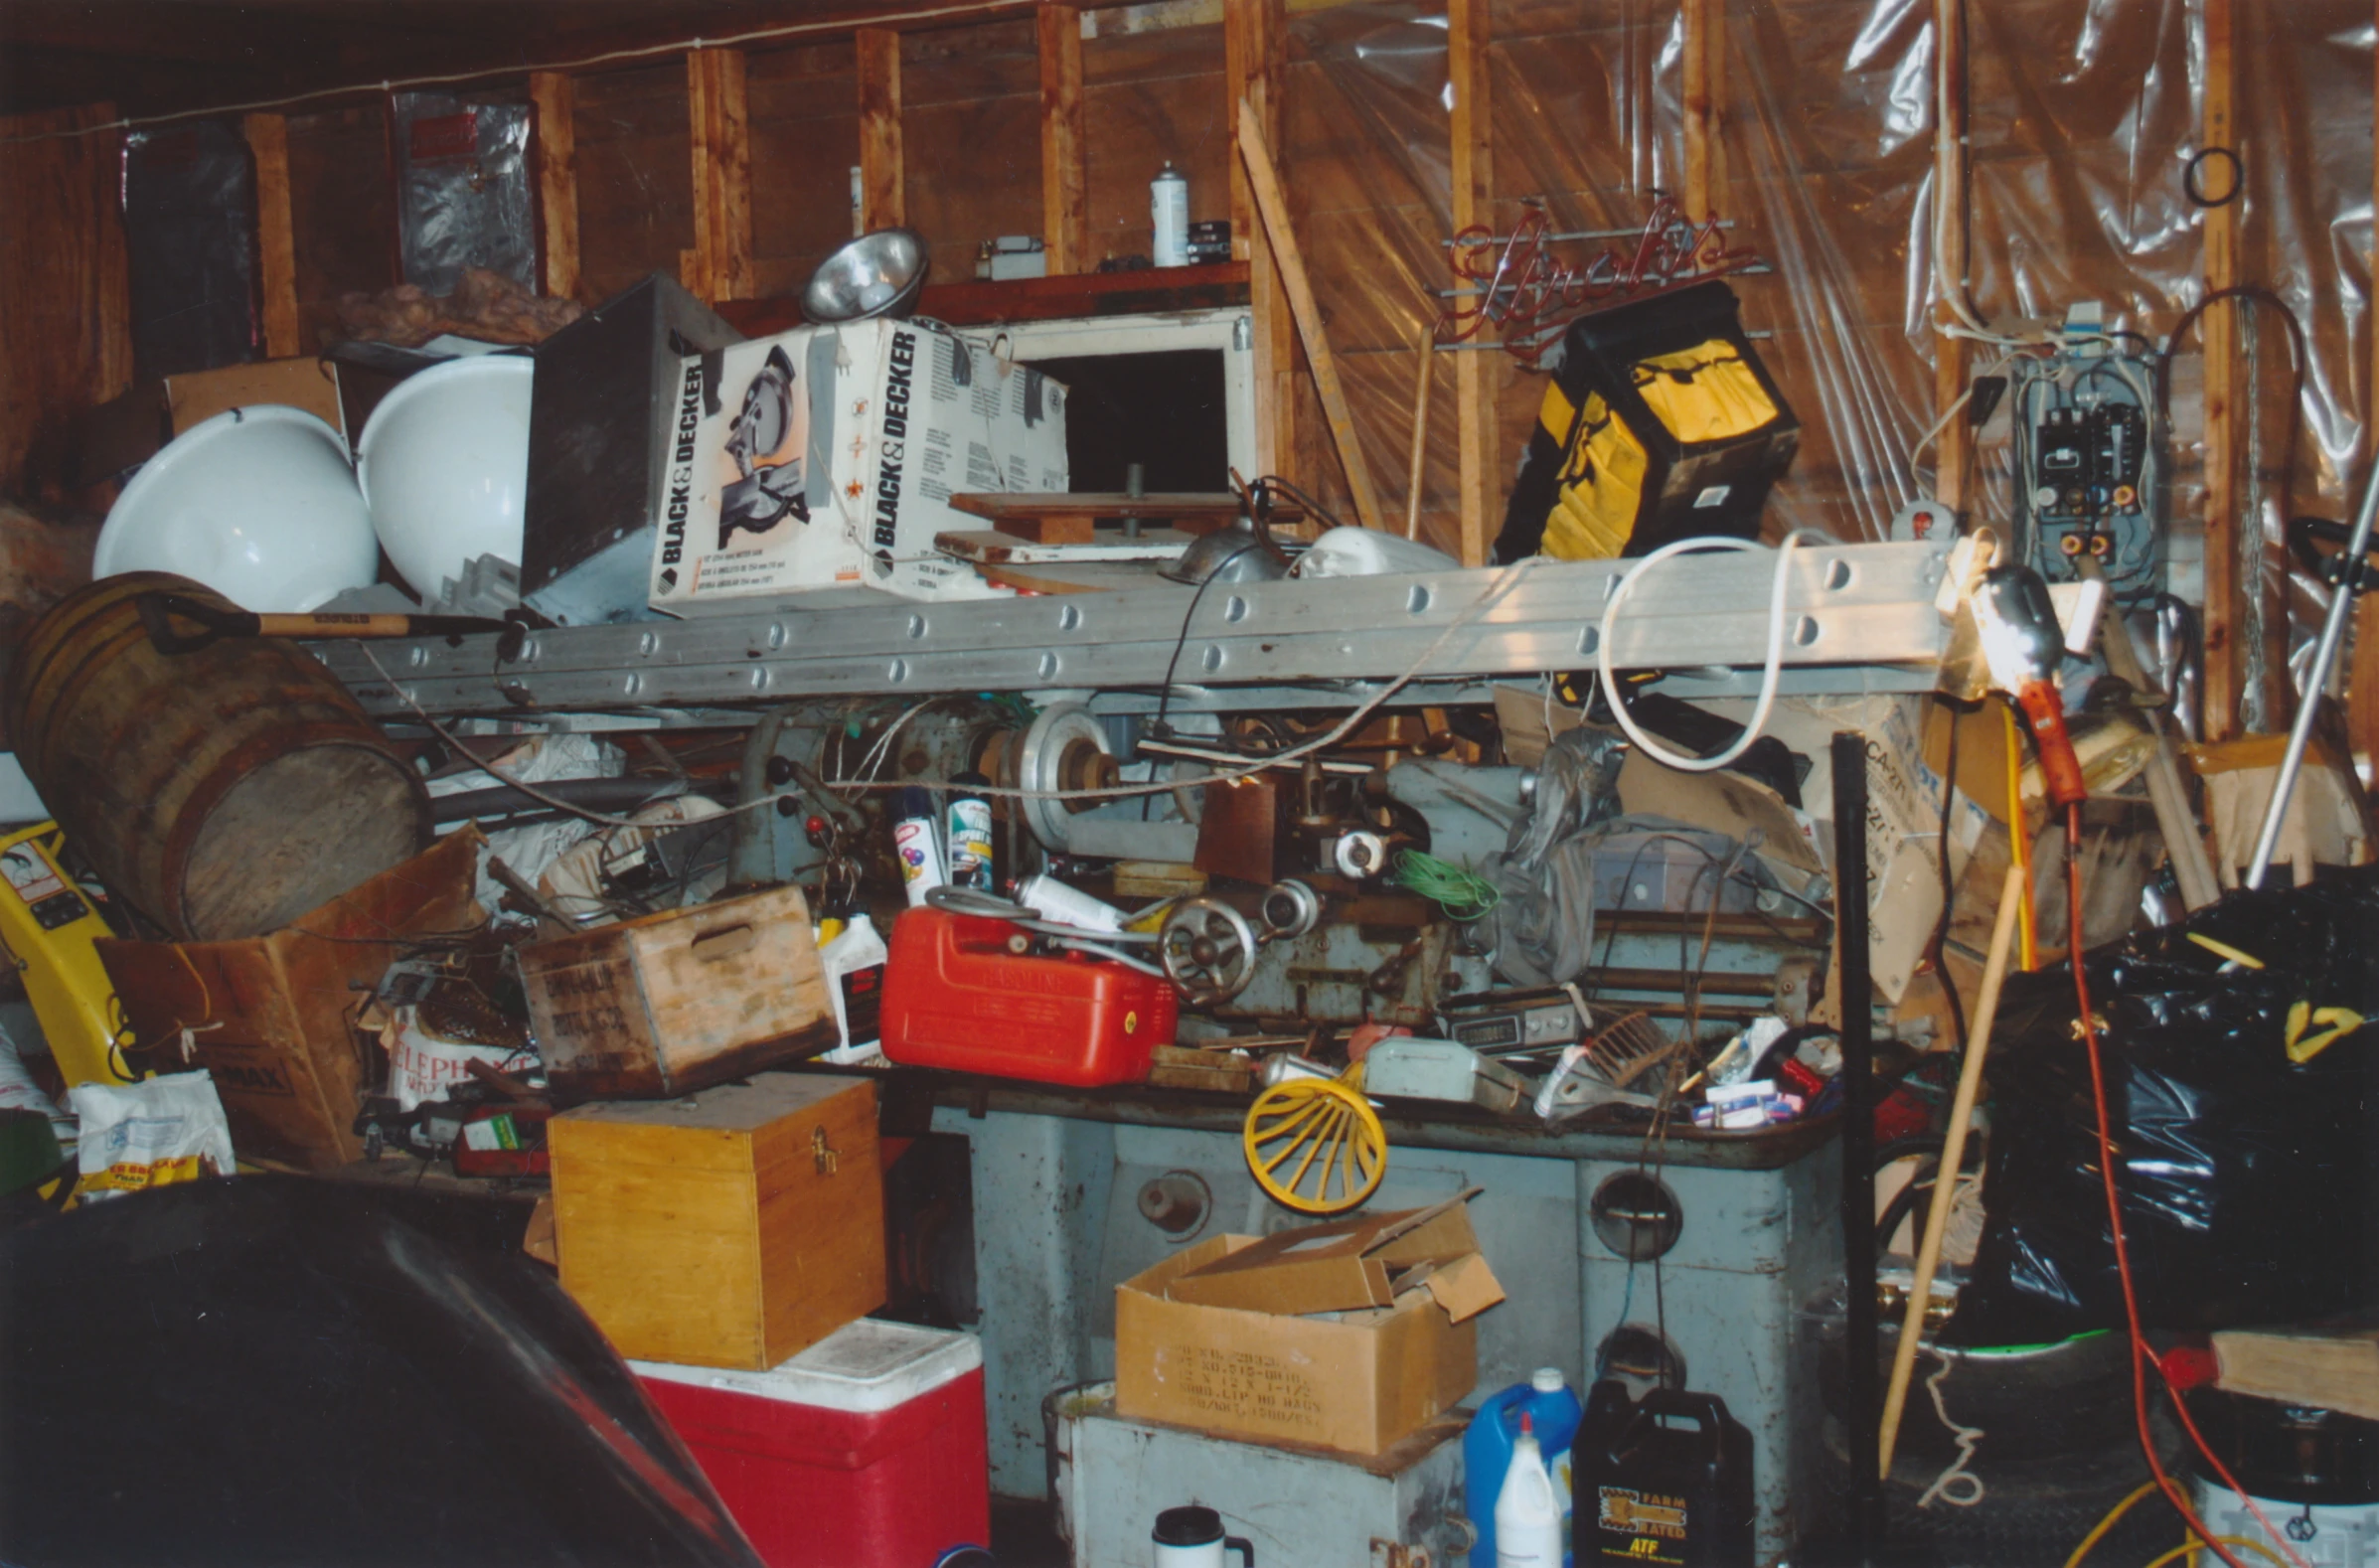
|
| 235 | Steven Avery's garage, west wall | 9 | 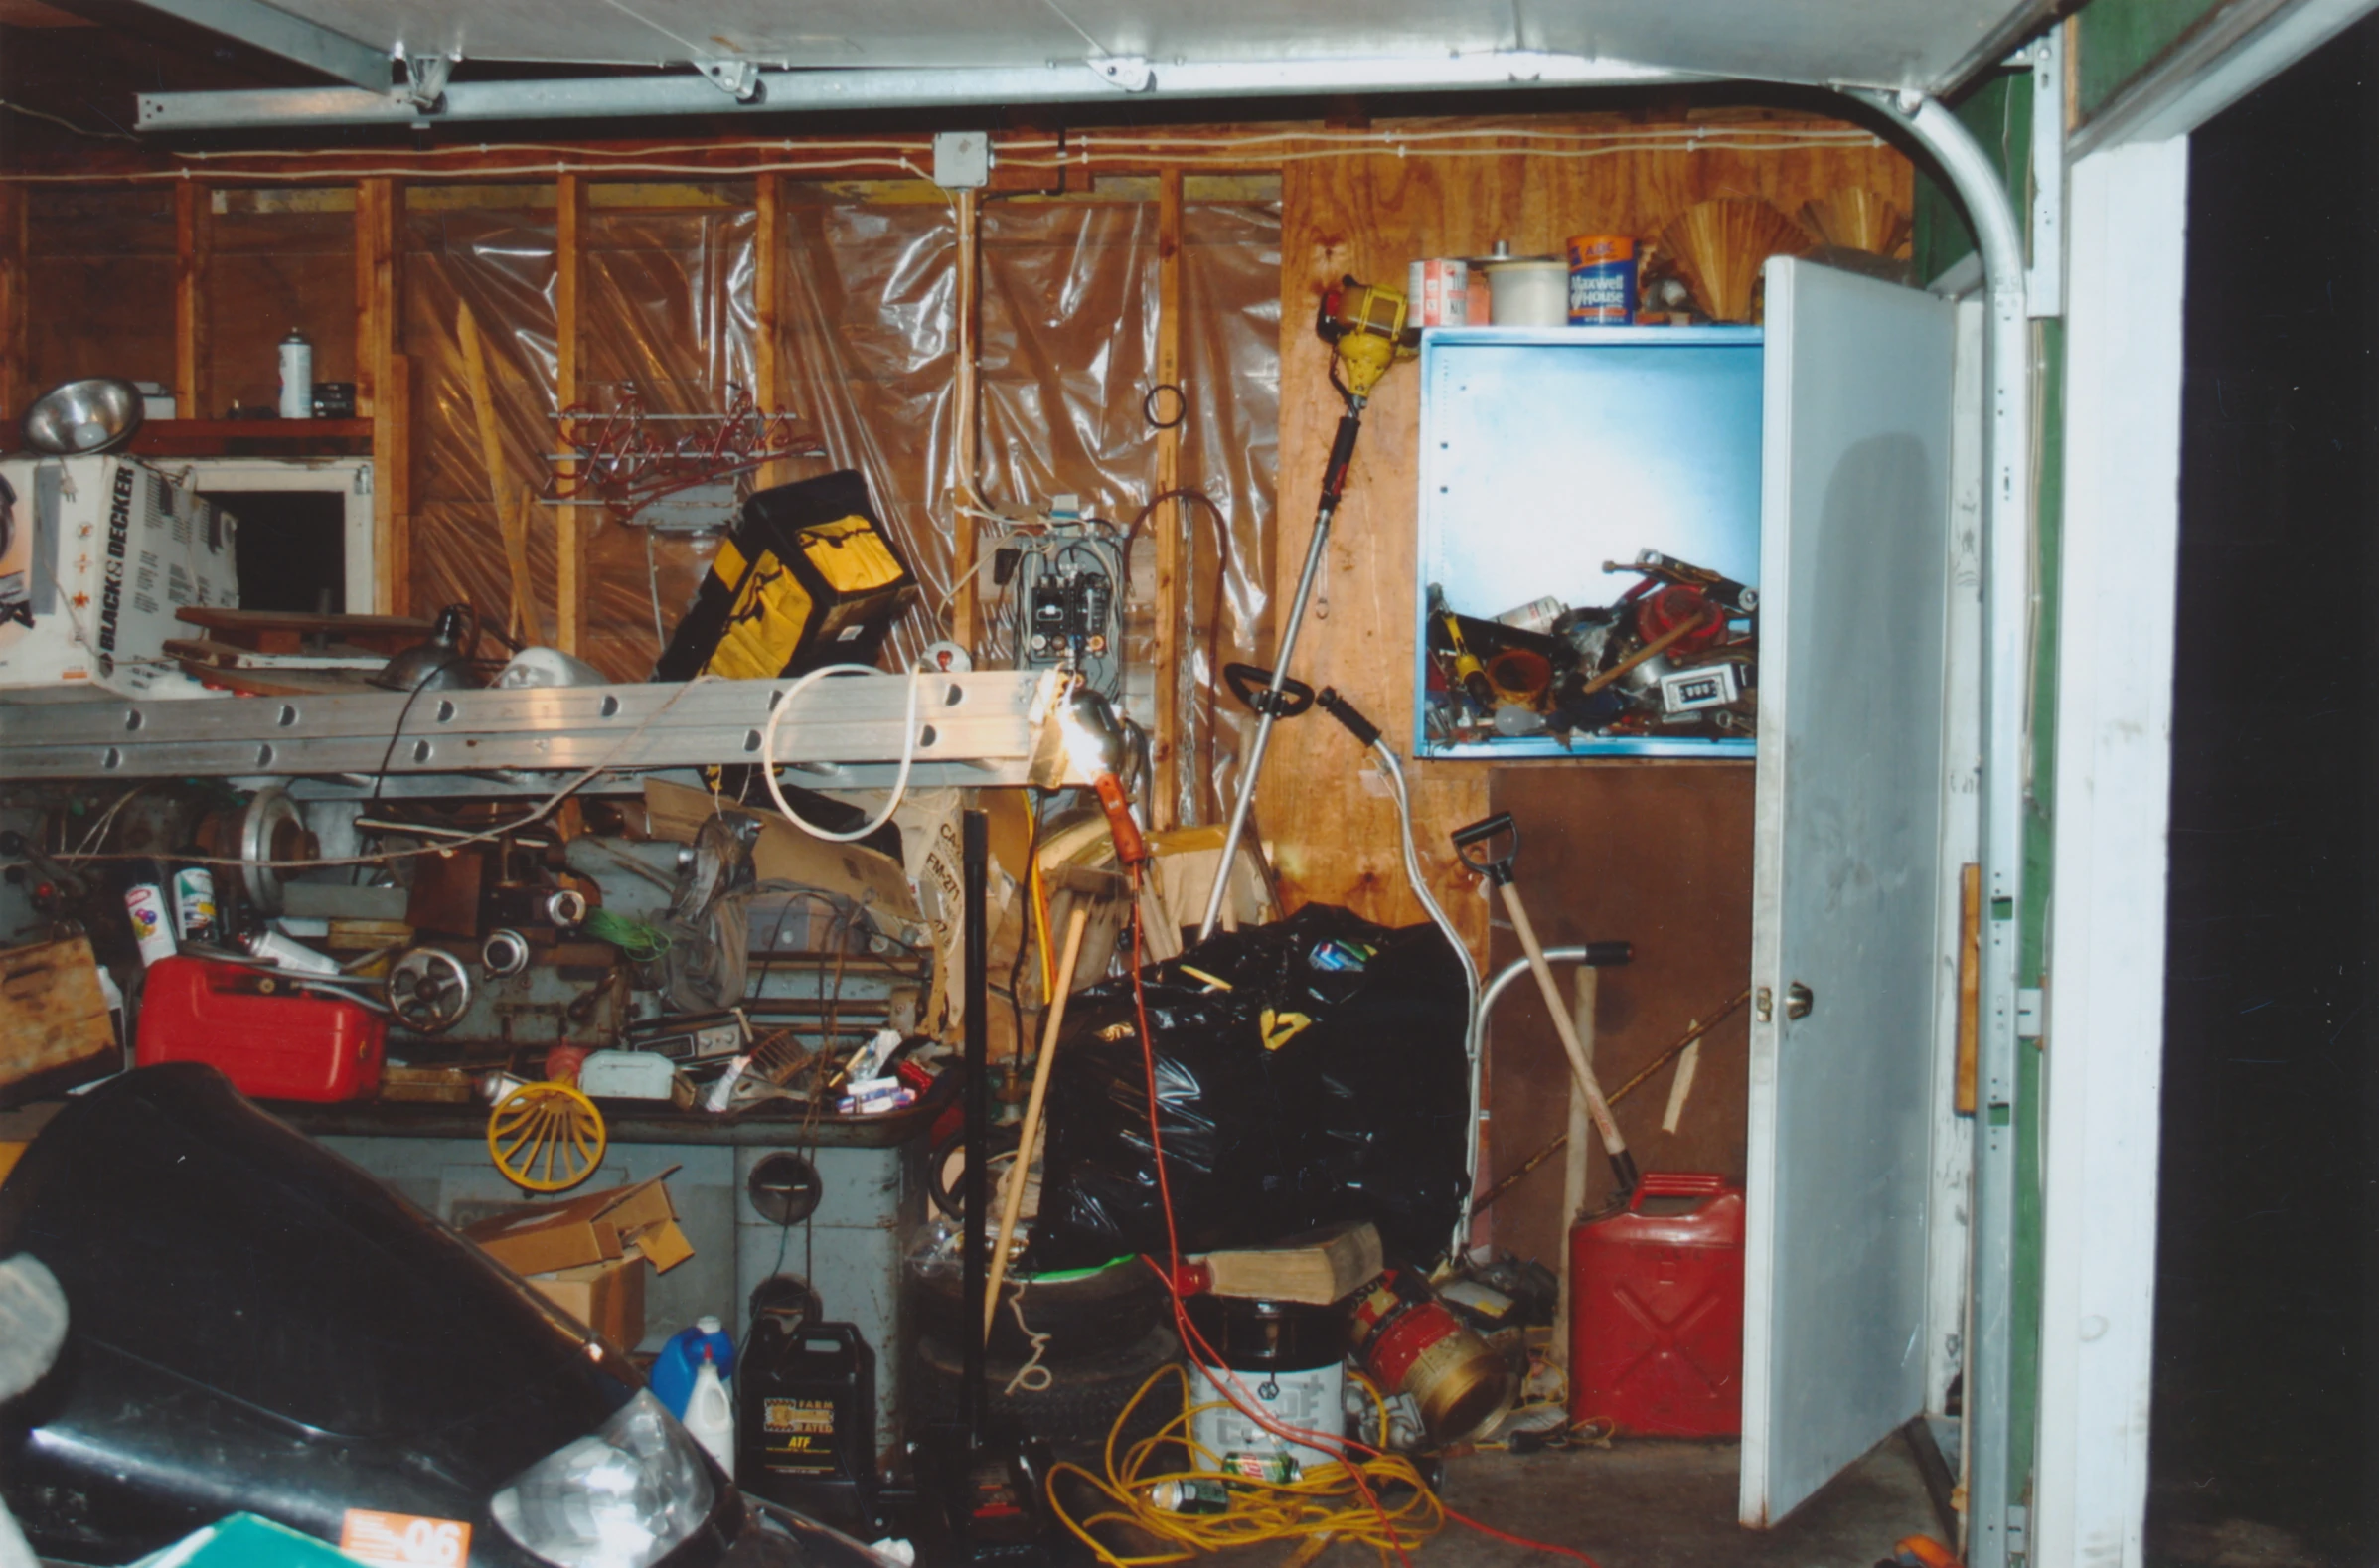
|
| 236 | Steven Avery's garage, eastern side | 9 | 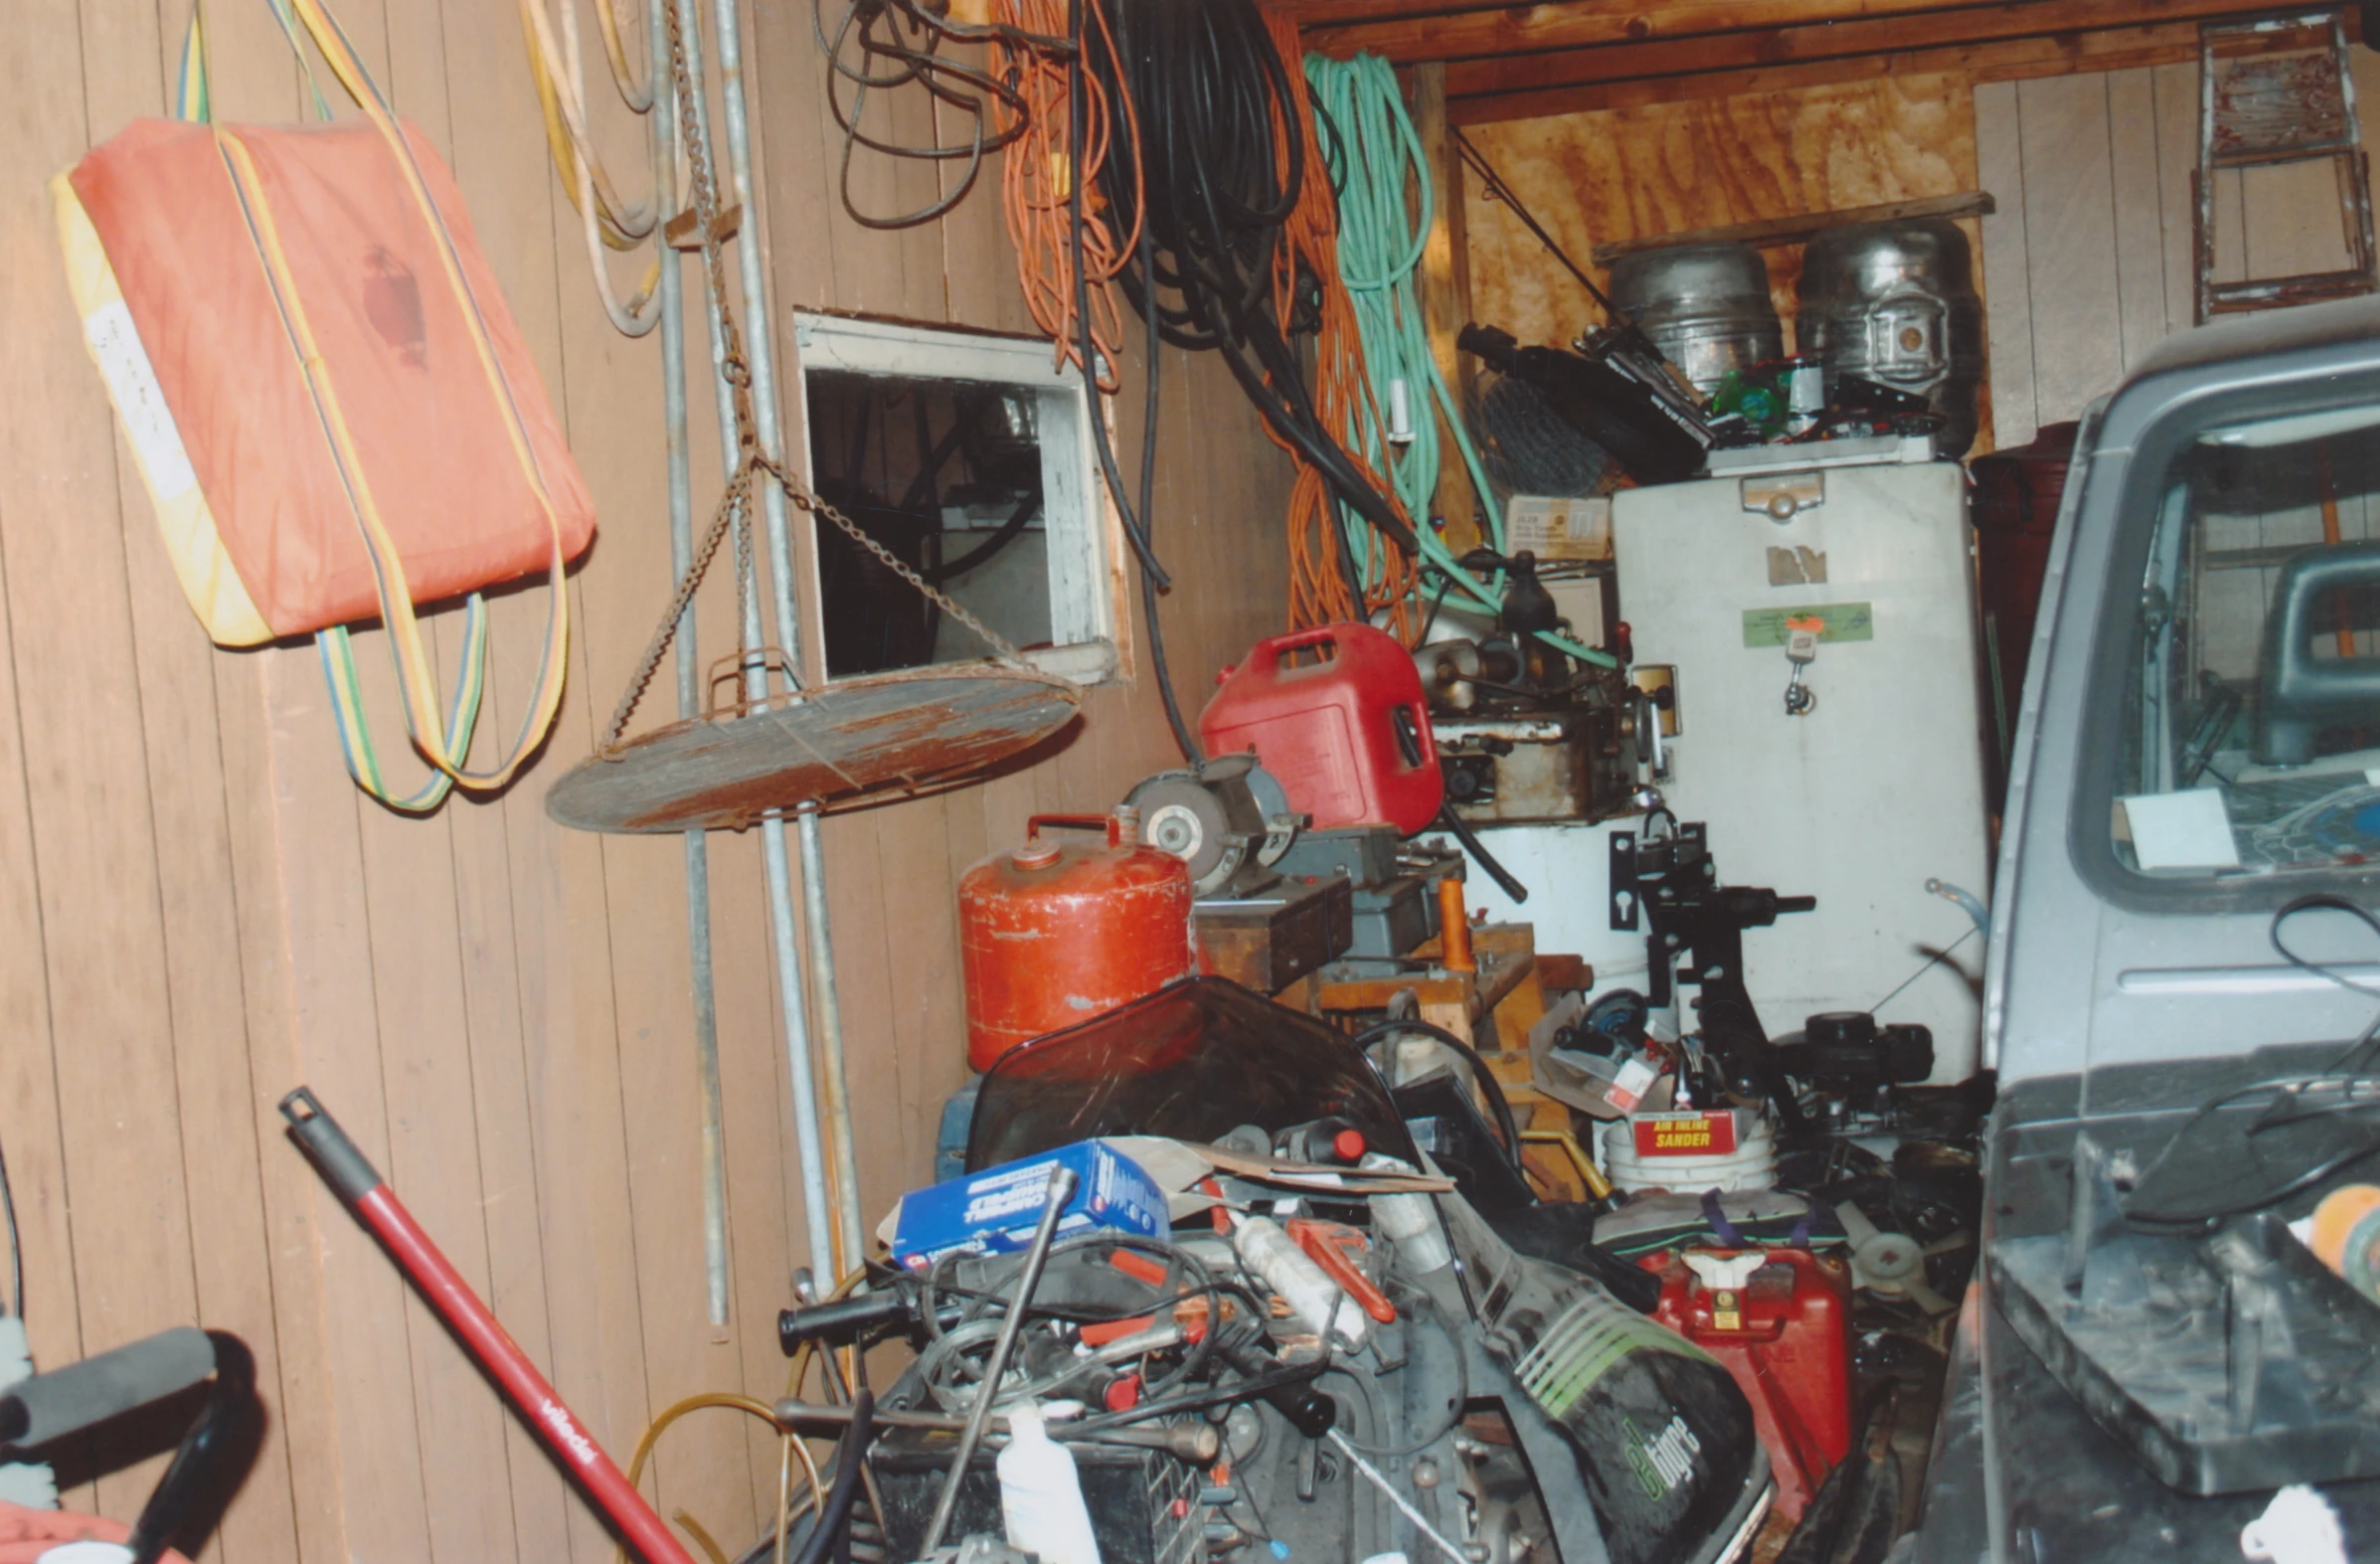
|
| 237 | Steven Avery's garage floor | 9 | 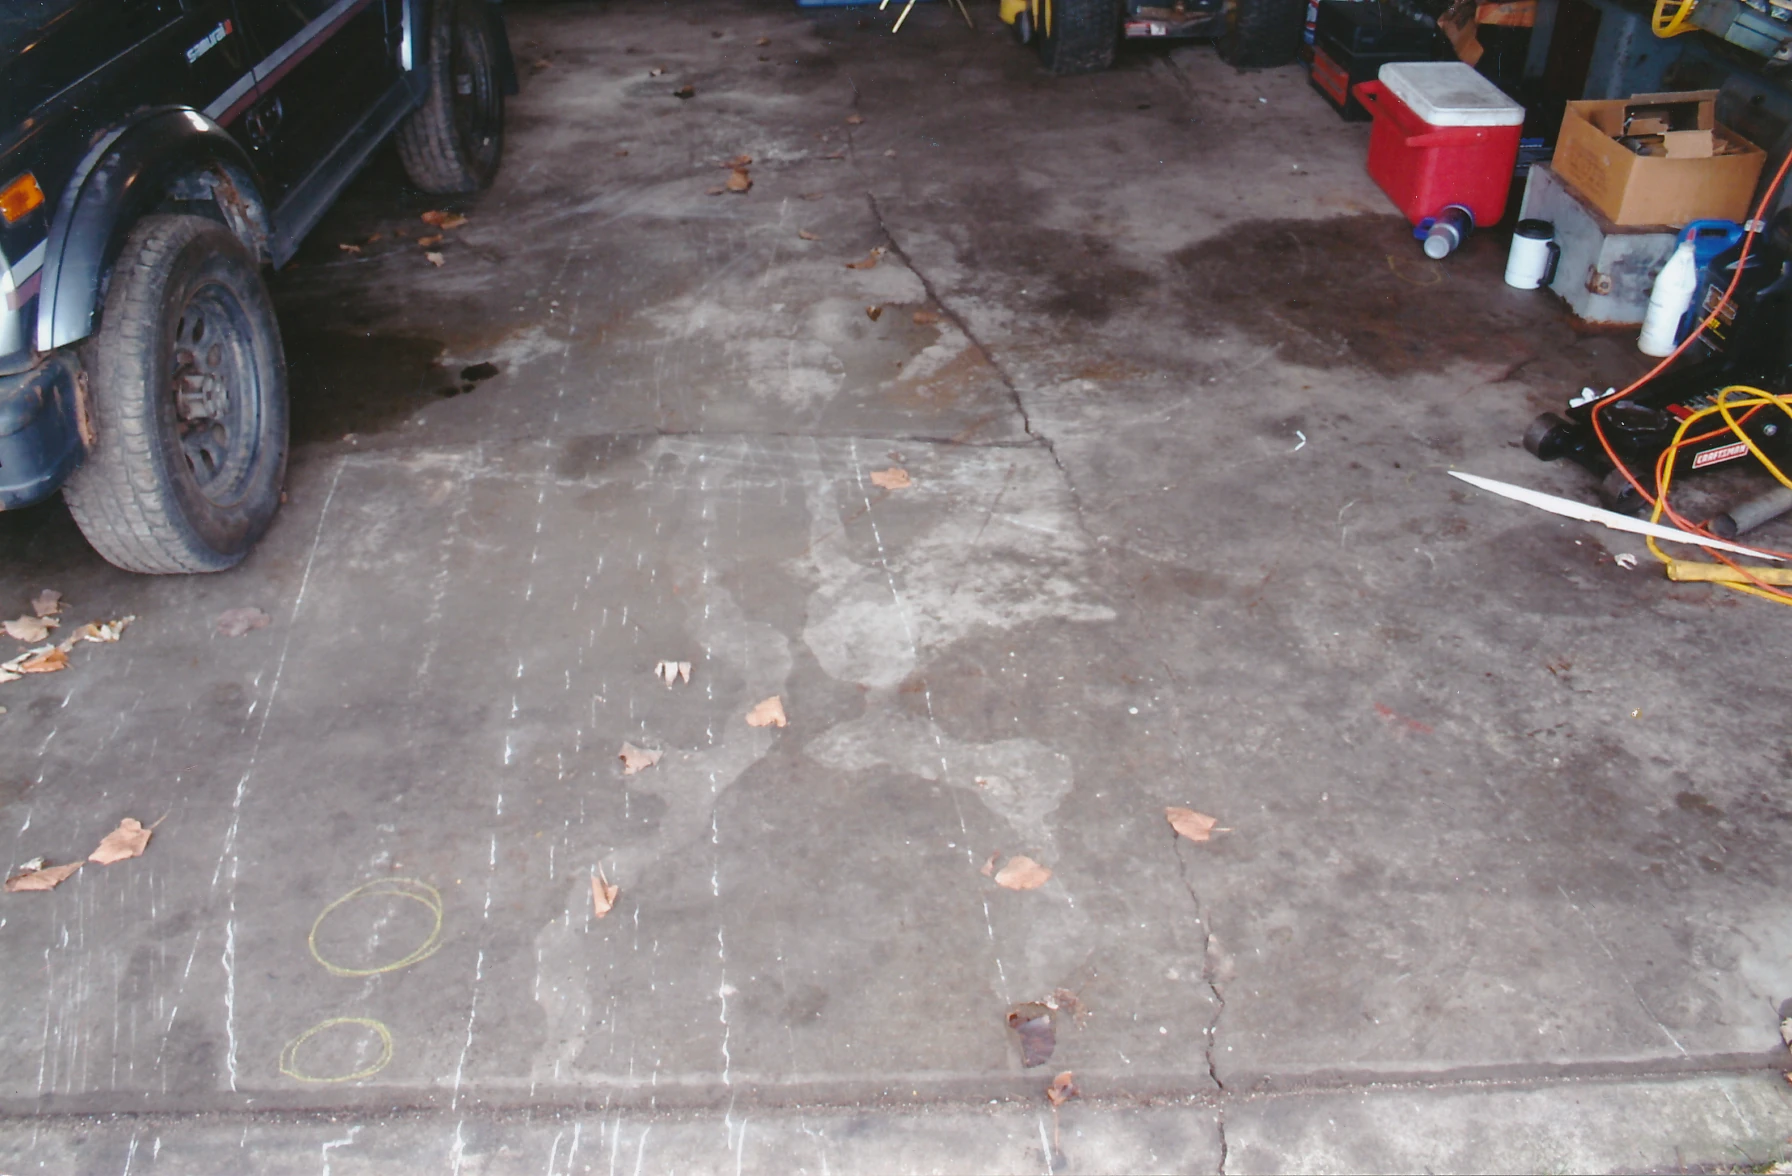
|
| 238 | Steven Avery's garage floor | 9 | 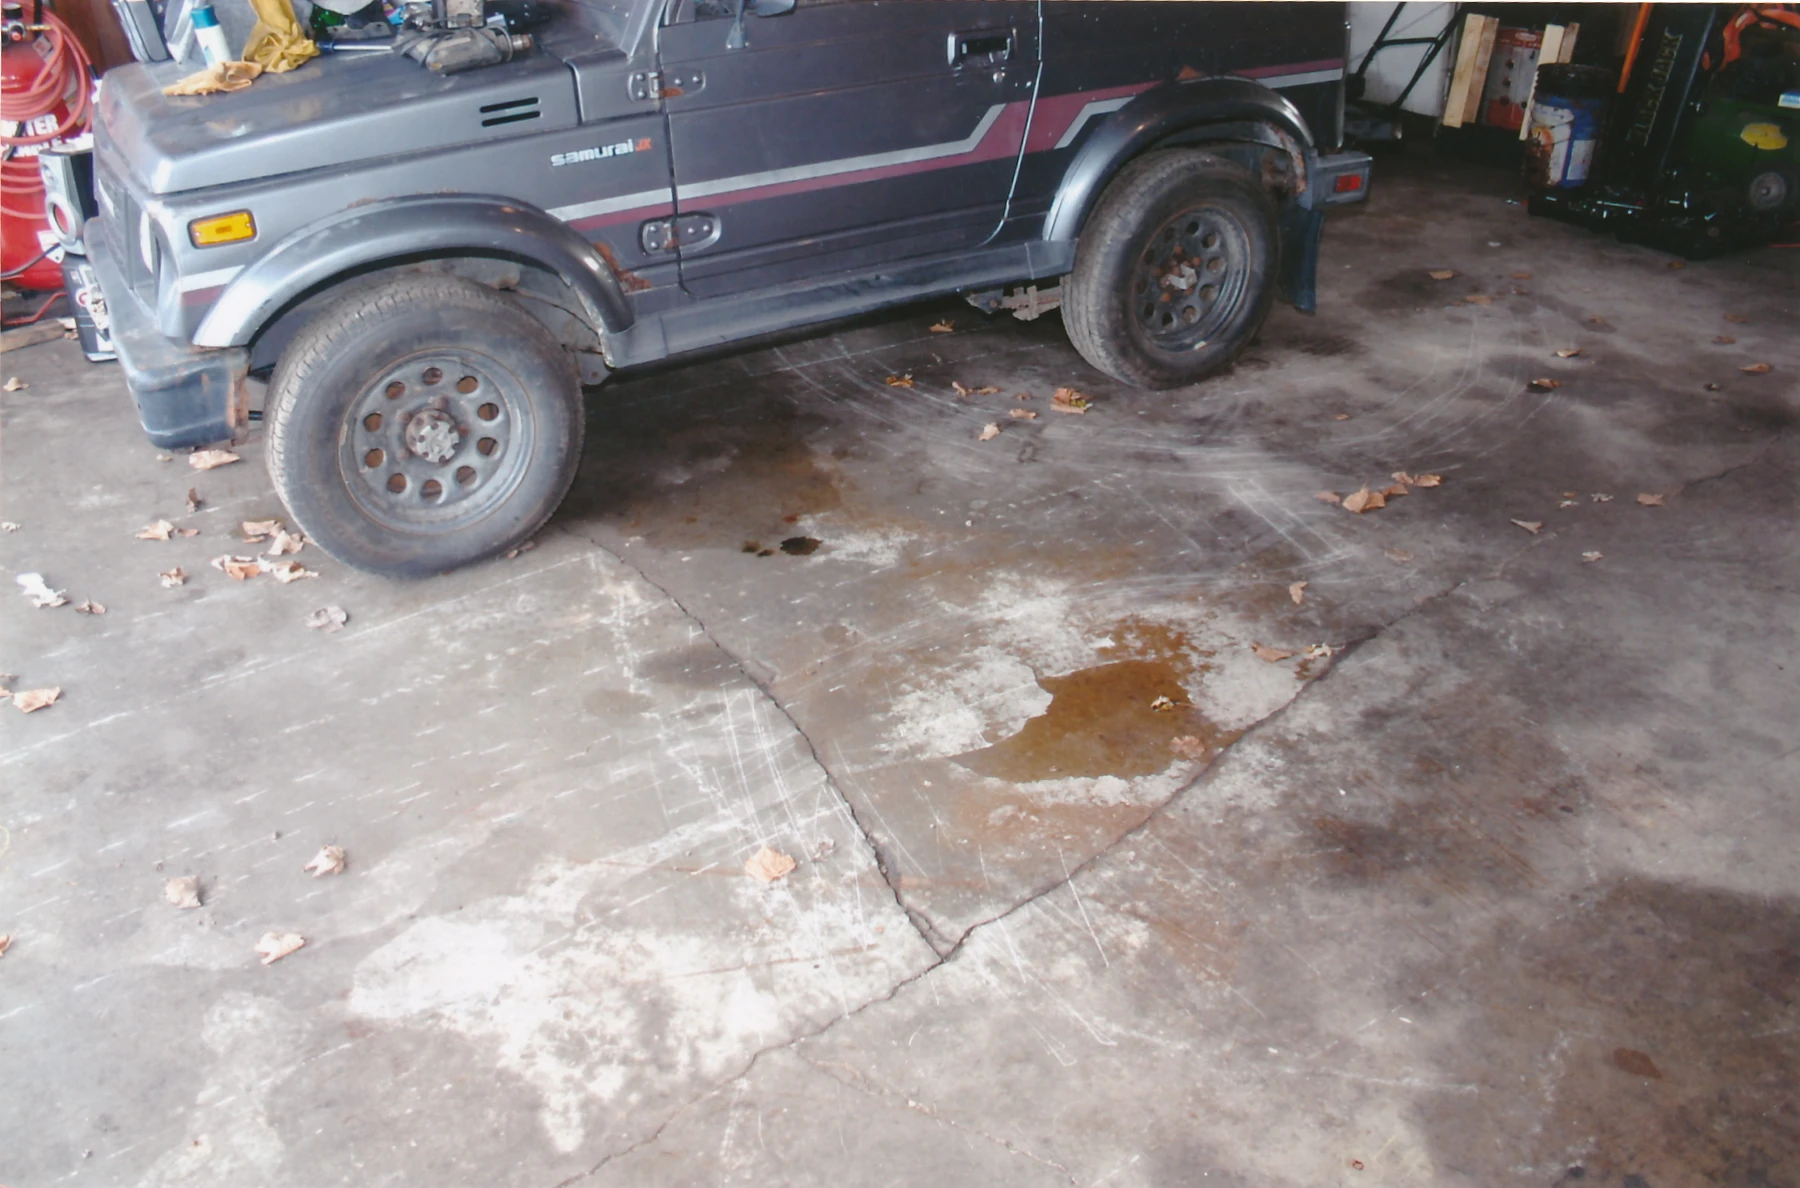
|
| 239 | Steven Avery's garage floor | 9 | 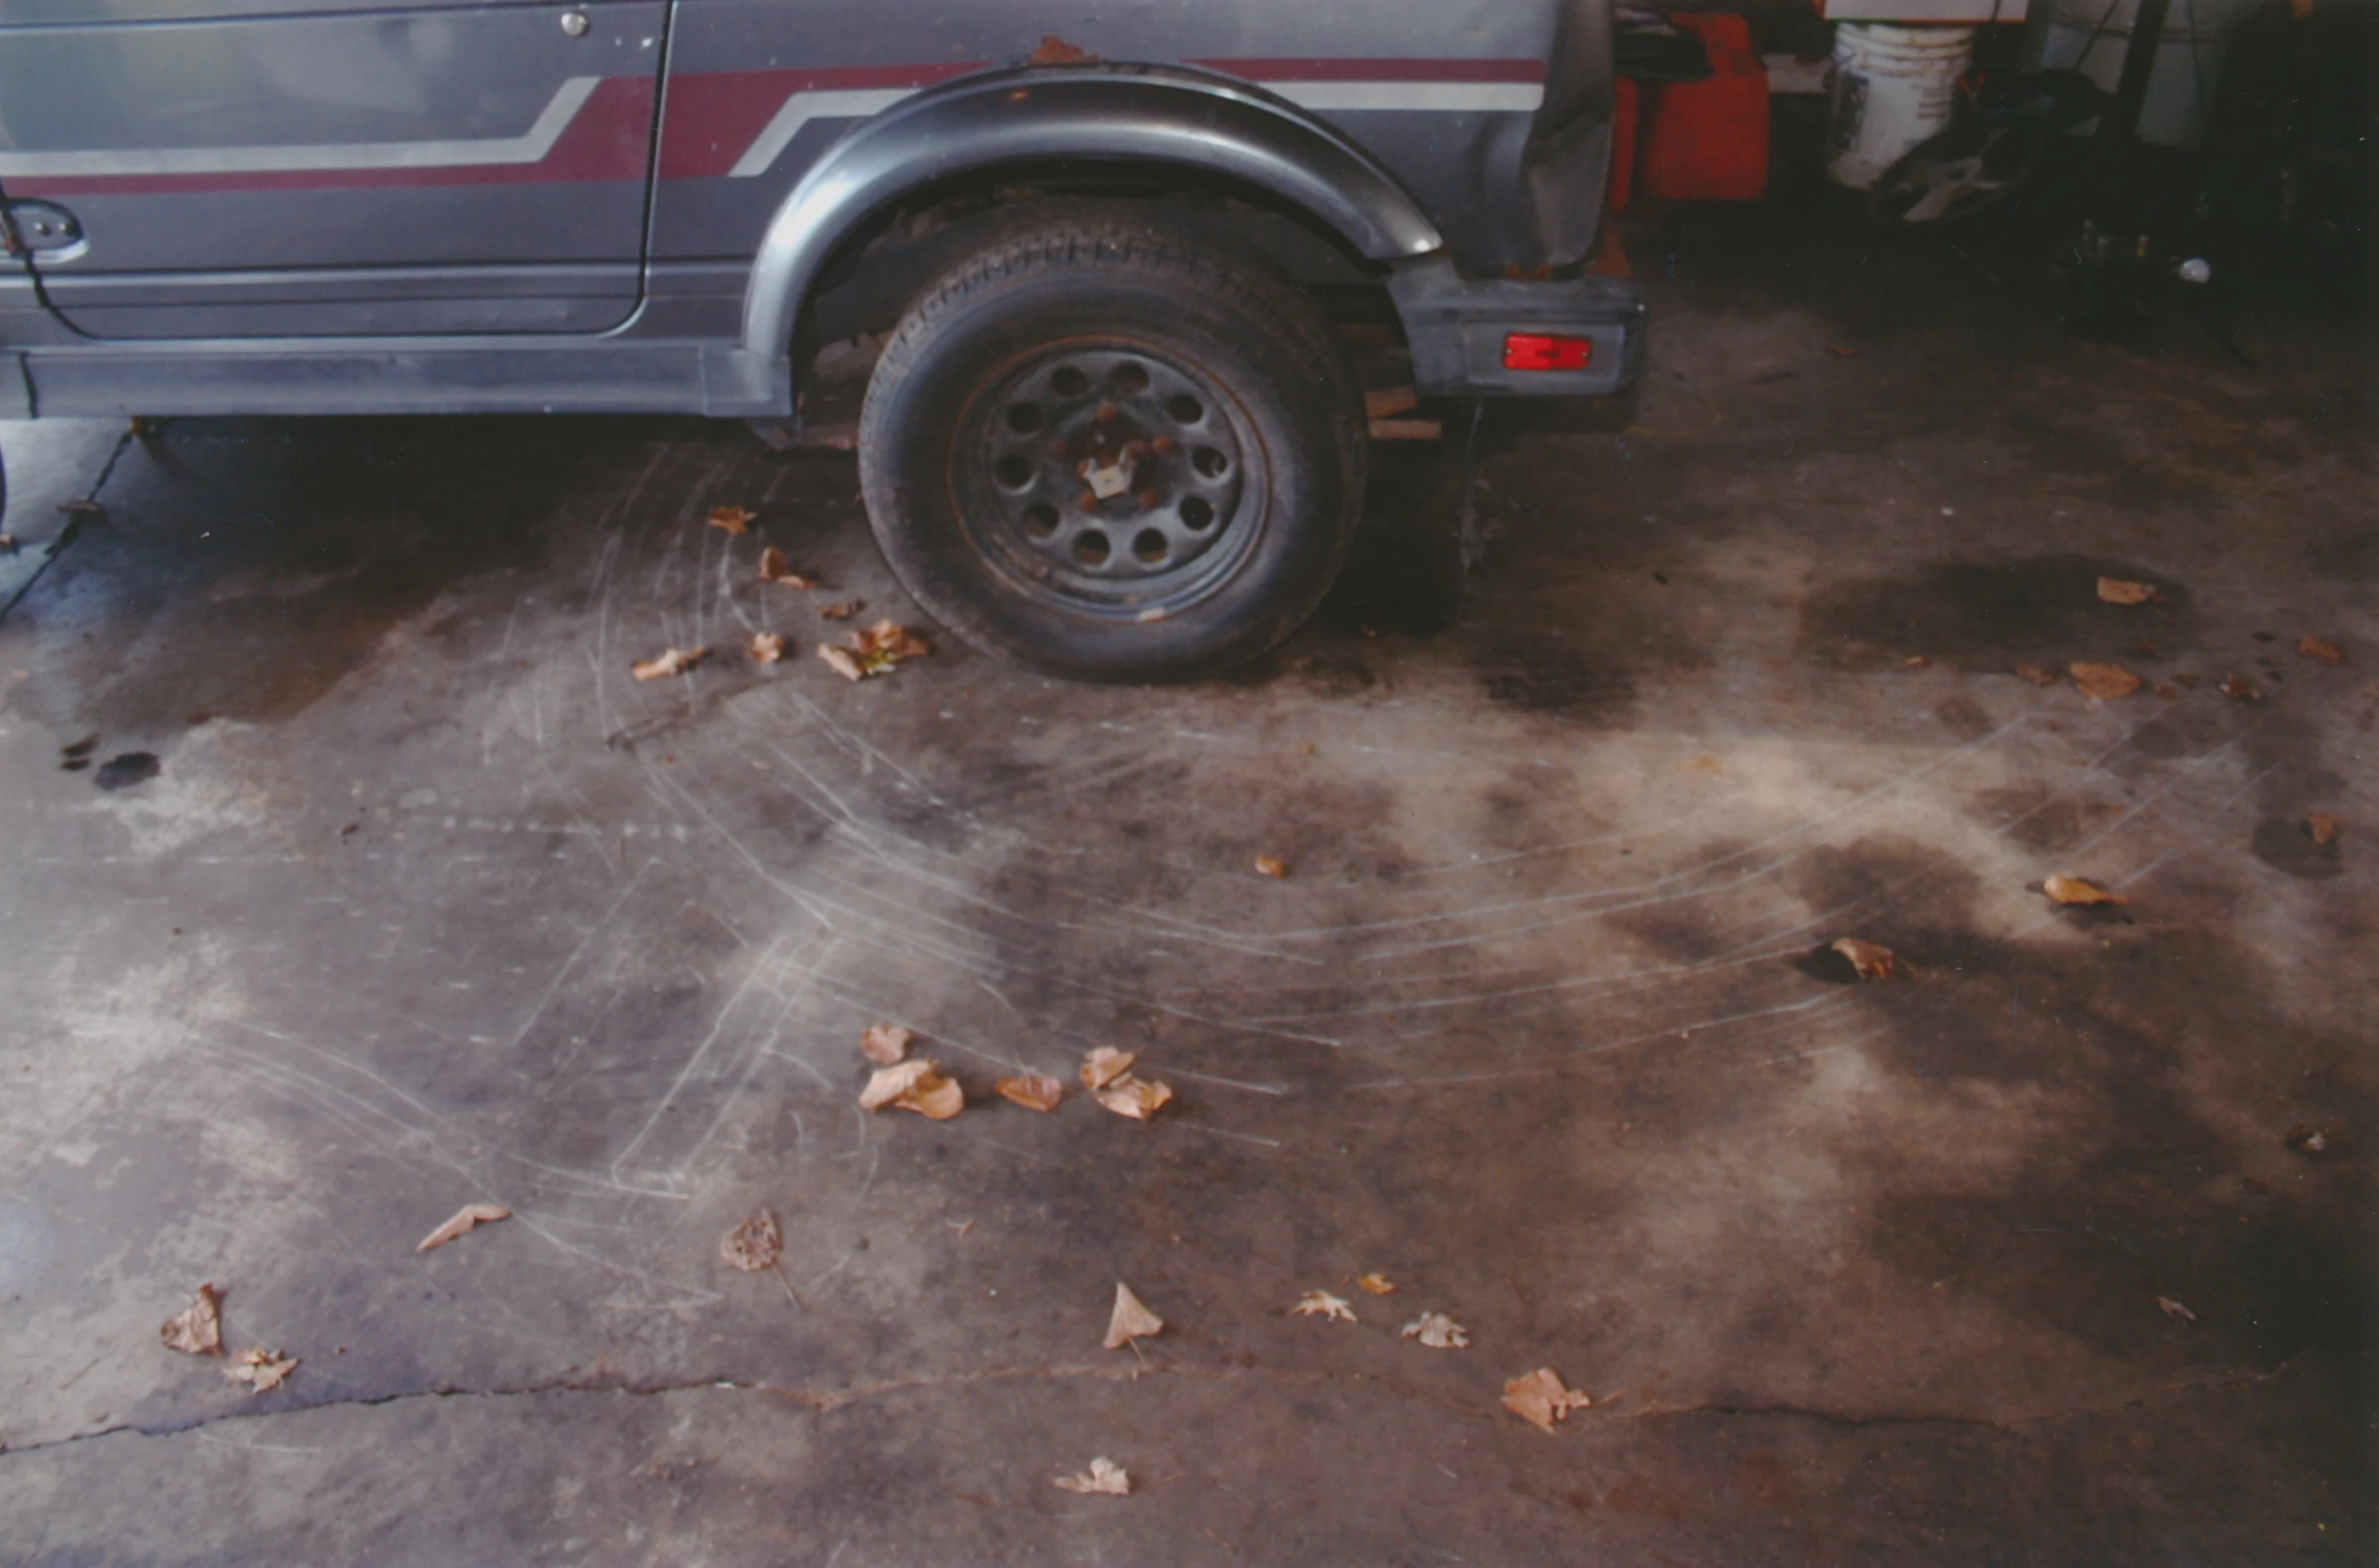
|
| 240 | Steven Avery's garage floor near entrance | 9 | 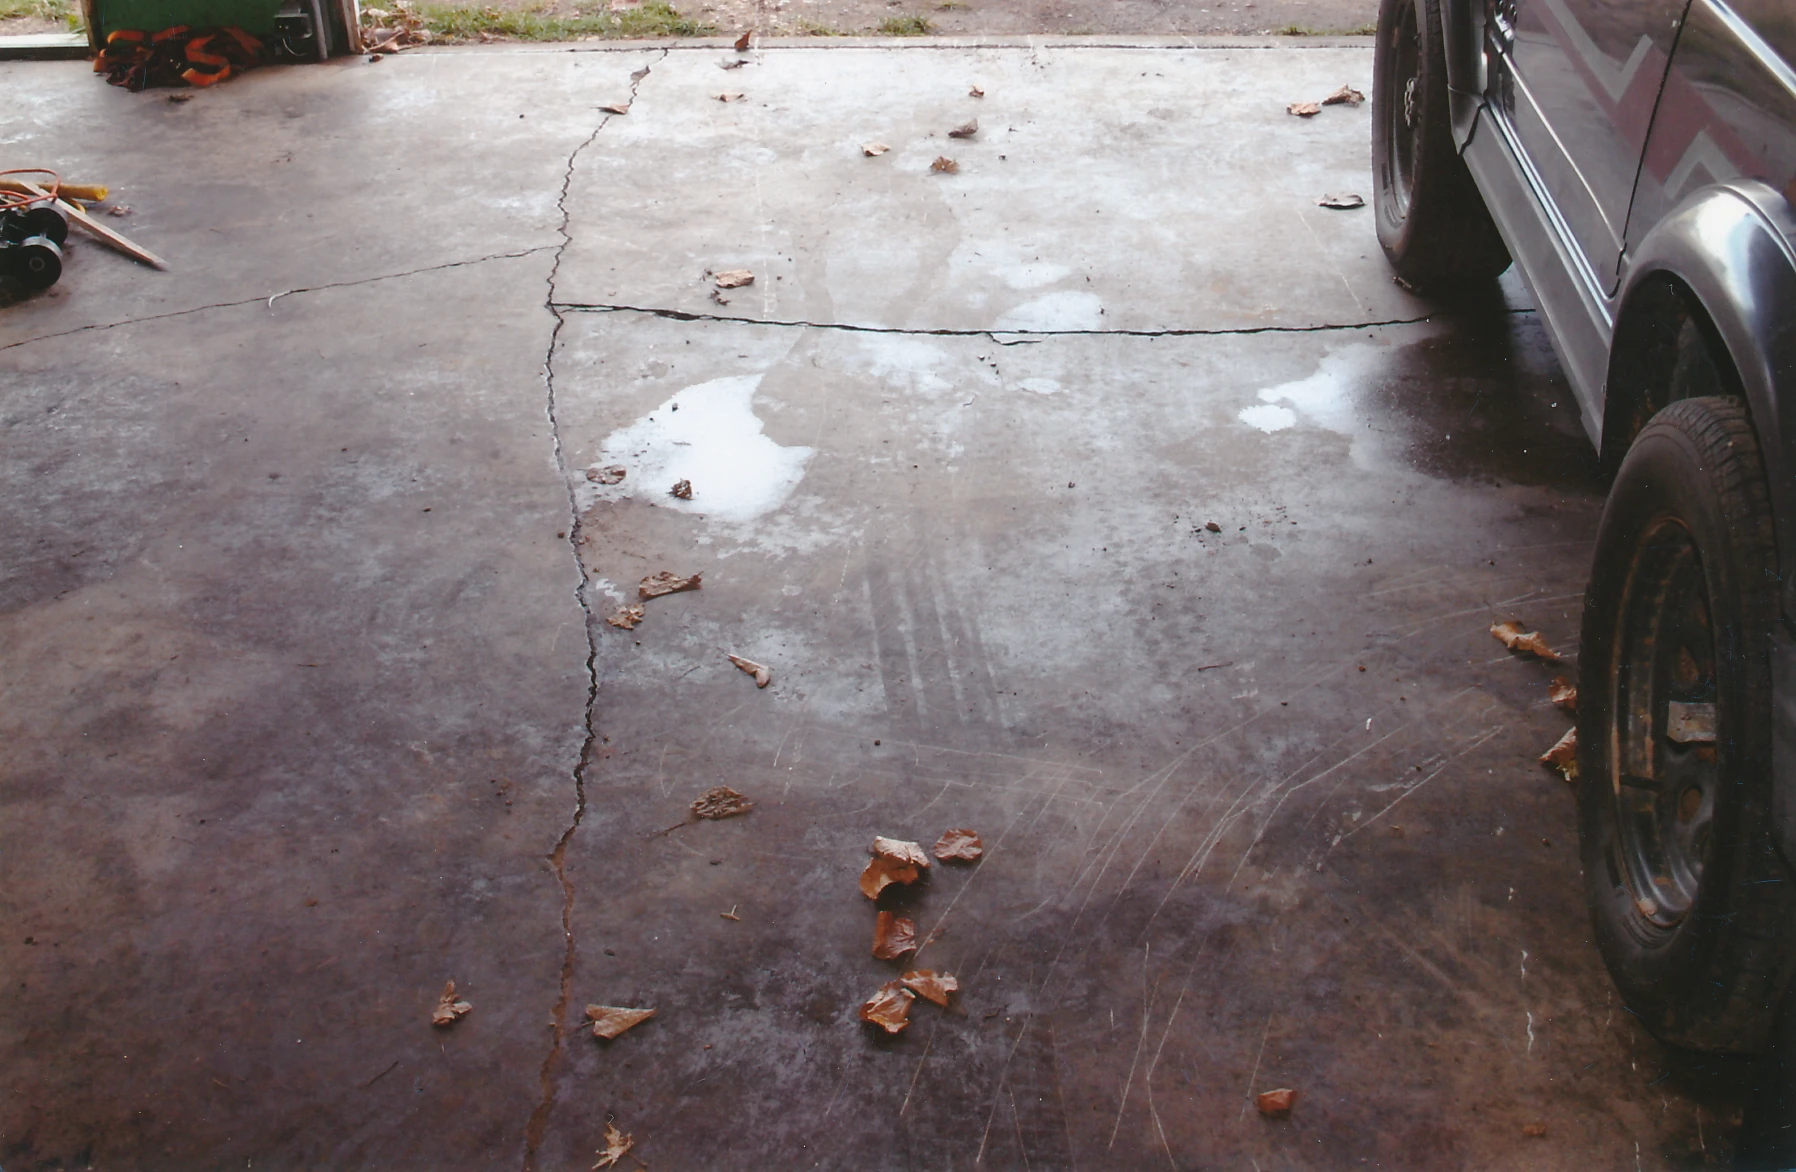
|
| 241 | Steven Avery's garage floor with evidence markers | 9 | 
|
| 242 | Steven Avery's garage floor with evidence markers (close-up) | 9 | 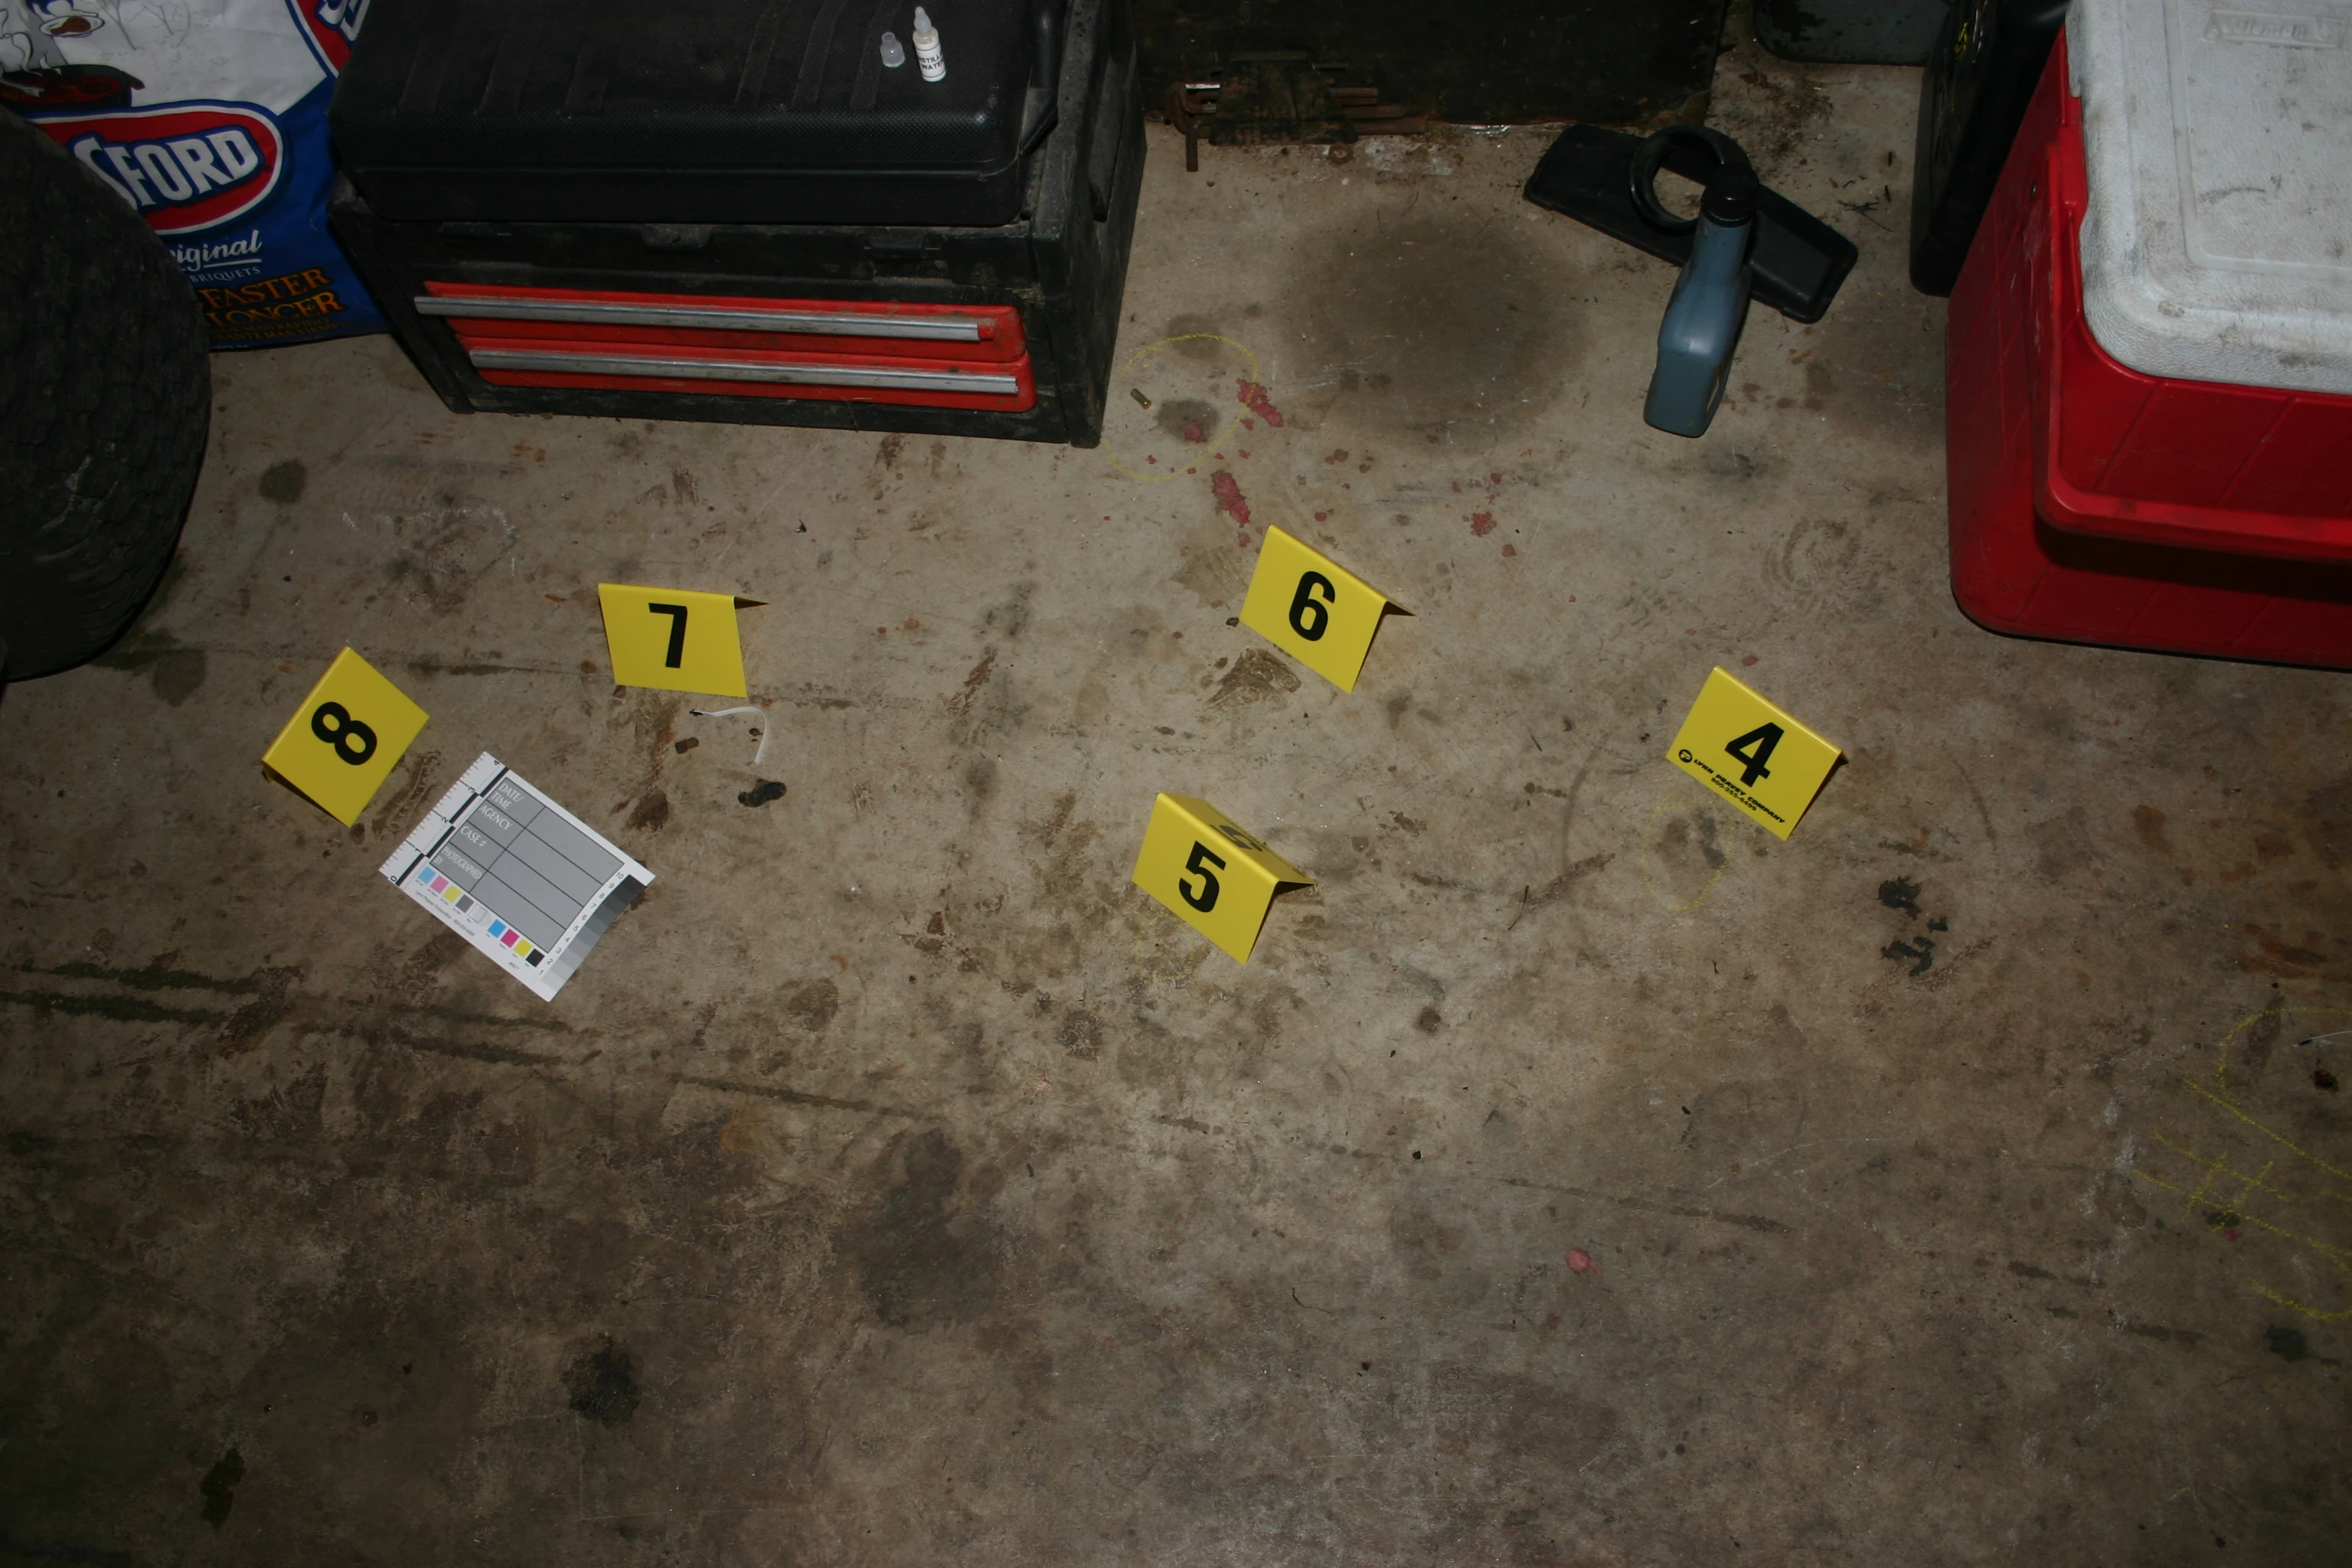
|
| 243 | Steven Avery's garage floor with evidence markers (close-up) | 9 | 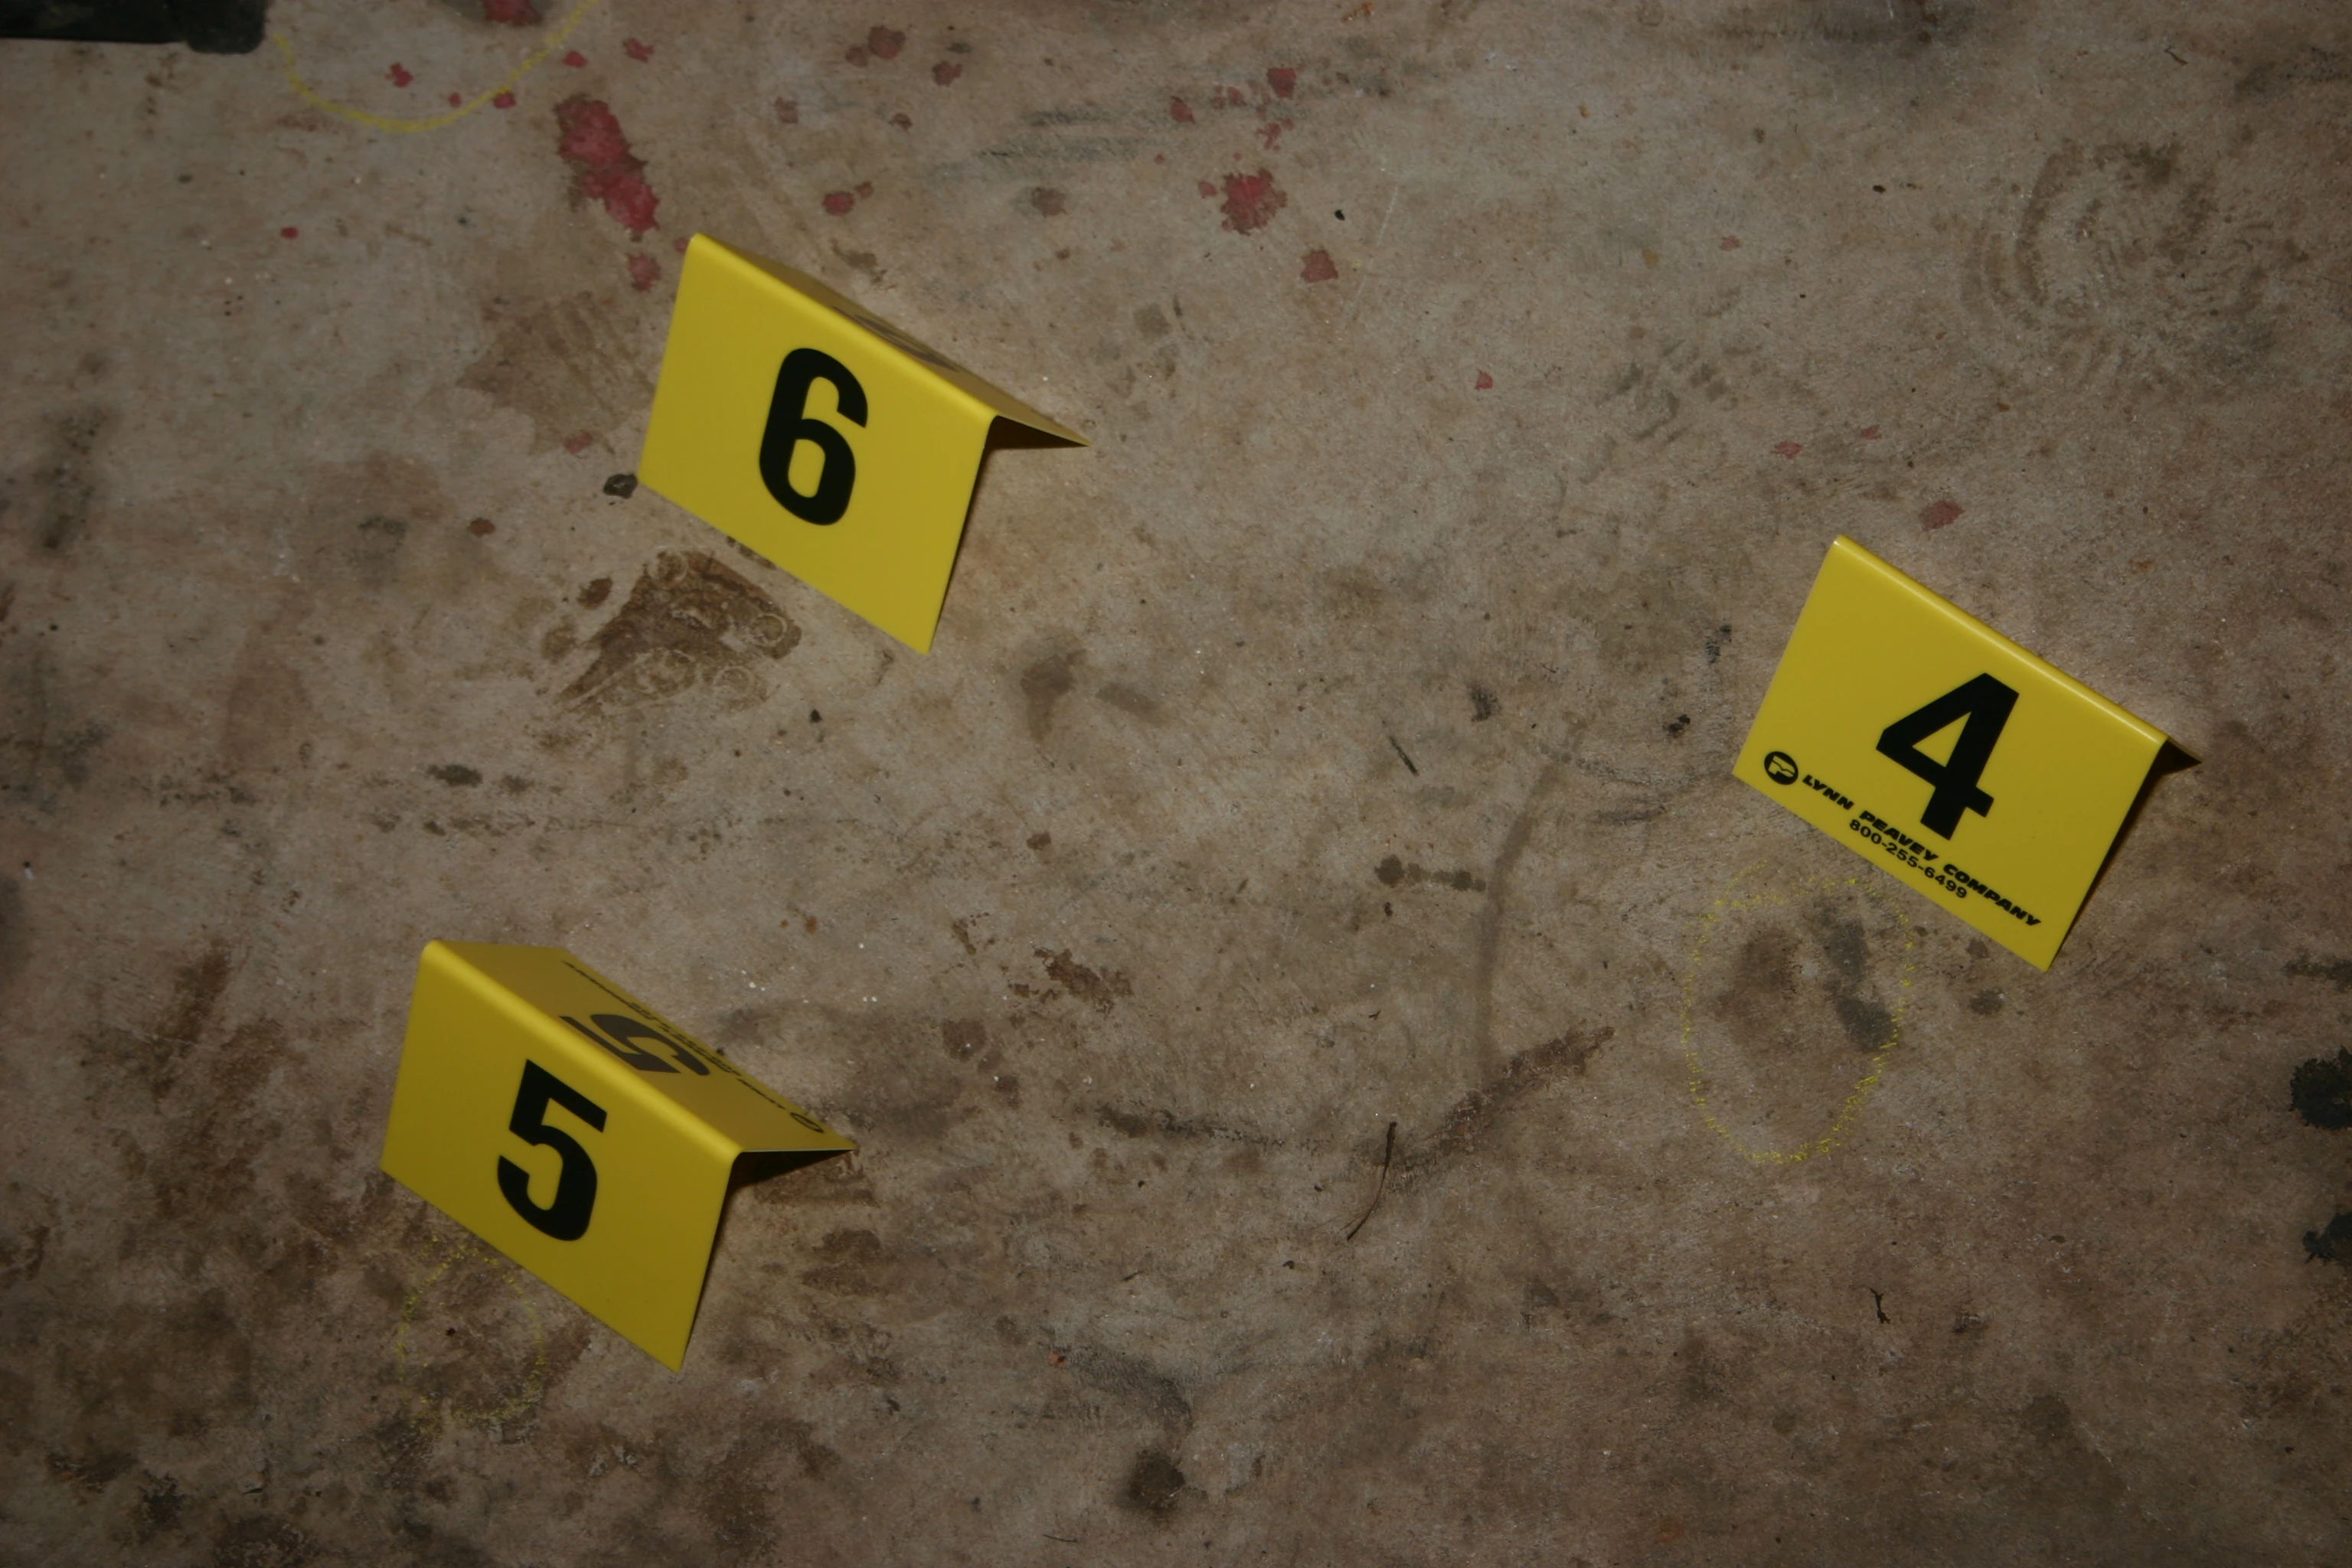
|
| 244 | Steven Avery's garage floor with evidence markers (close-up) | 9 | 
|
| 245 | Teresa Halbach missing person poster | 9 | 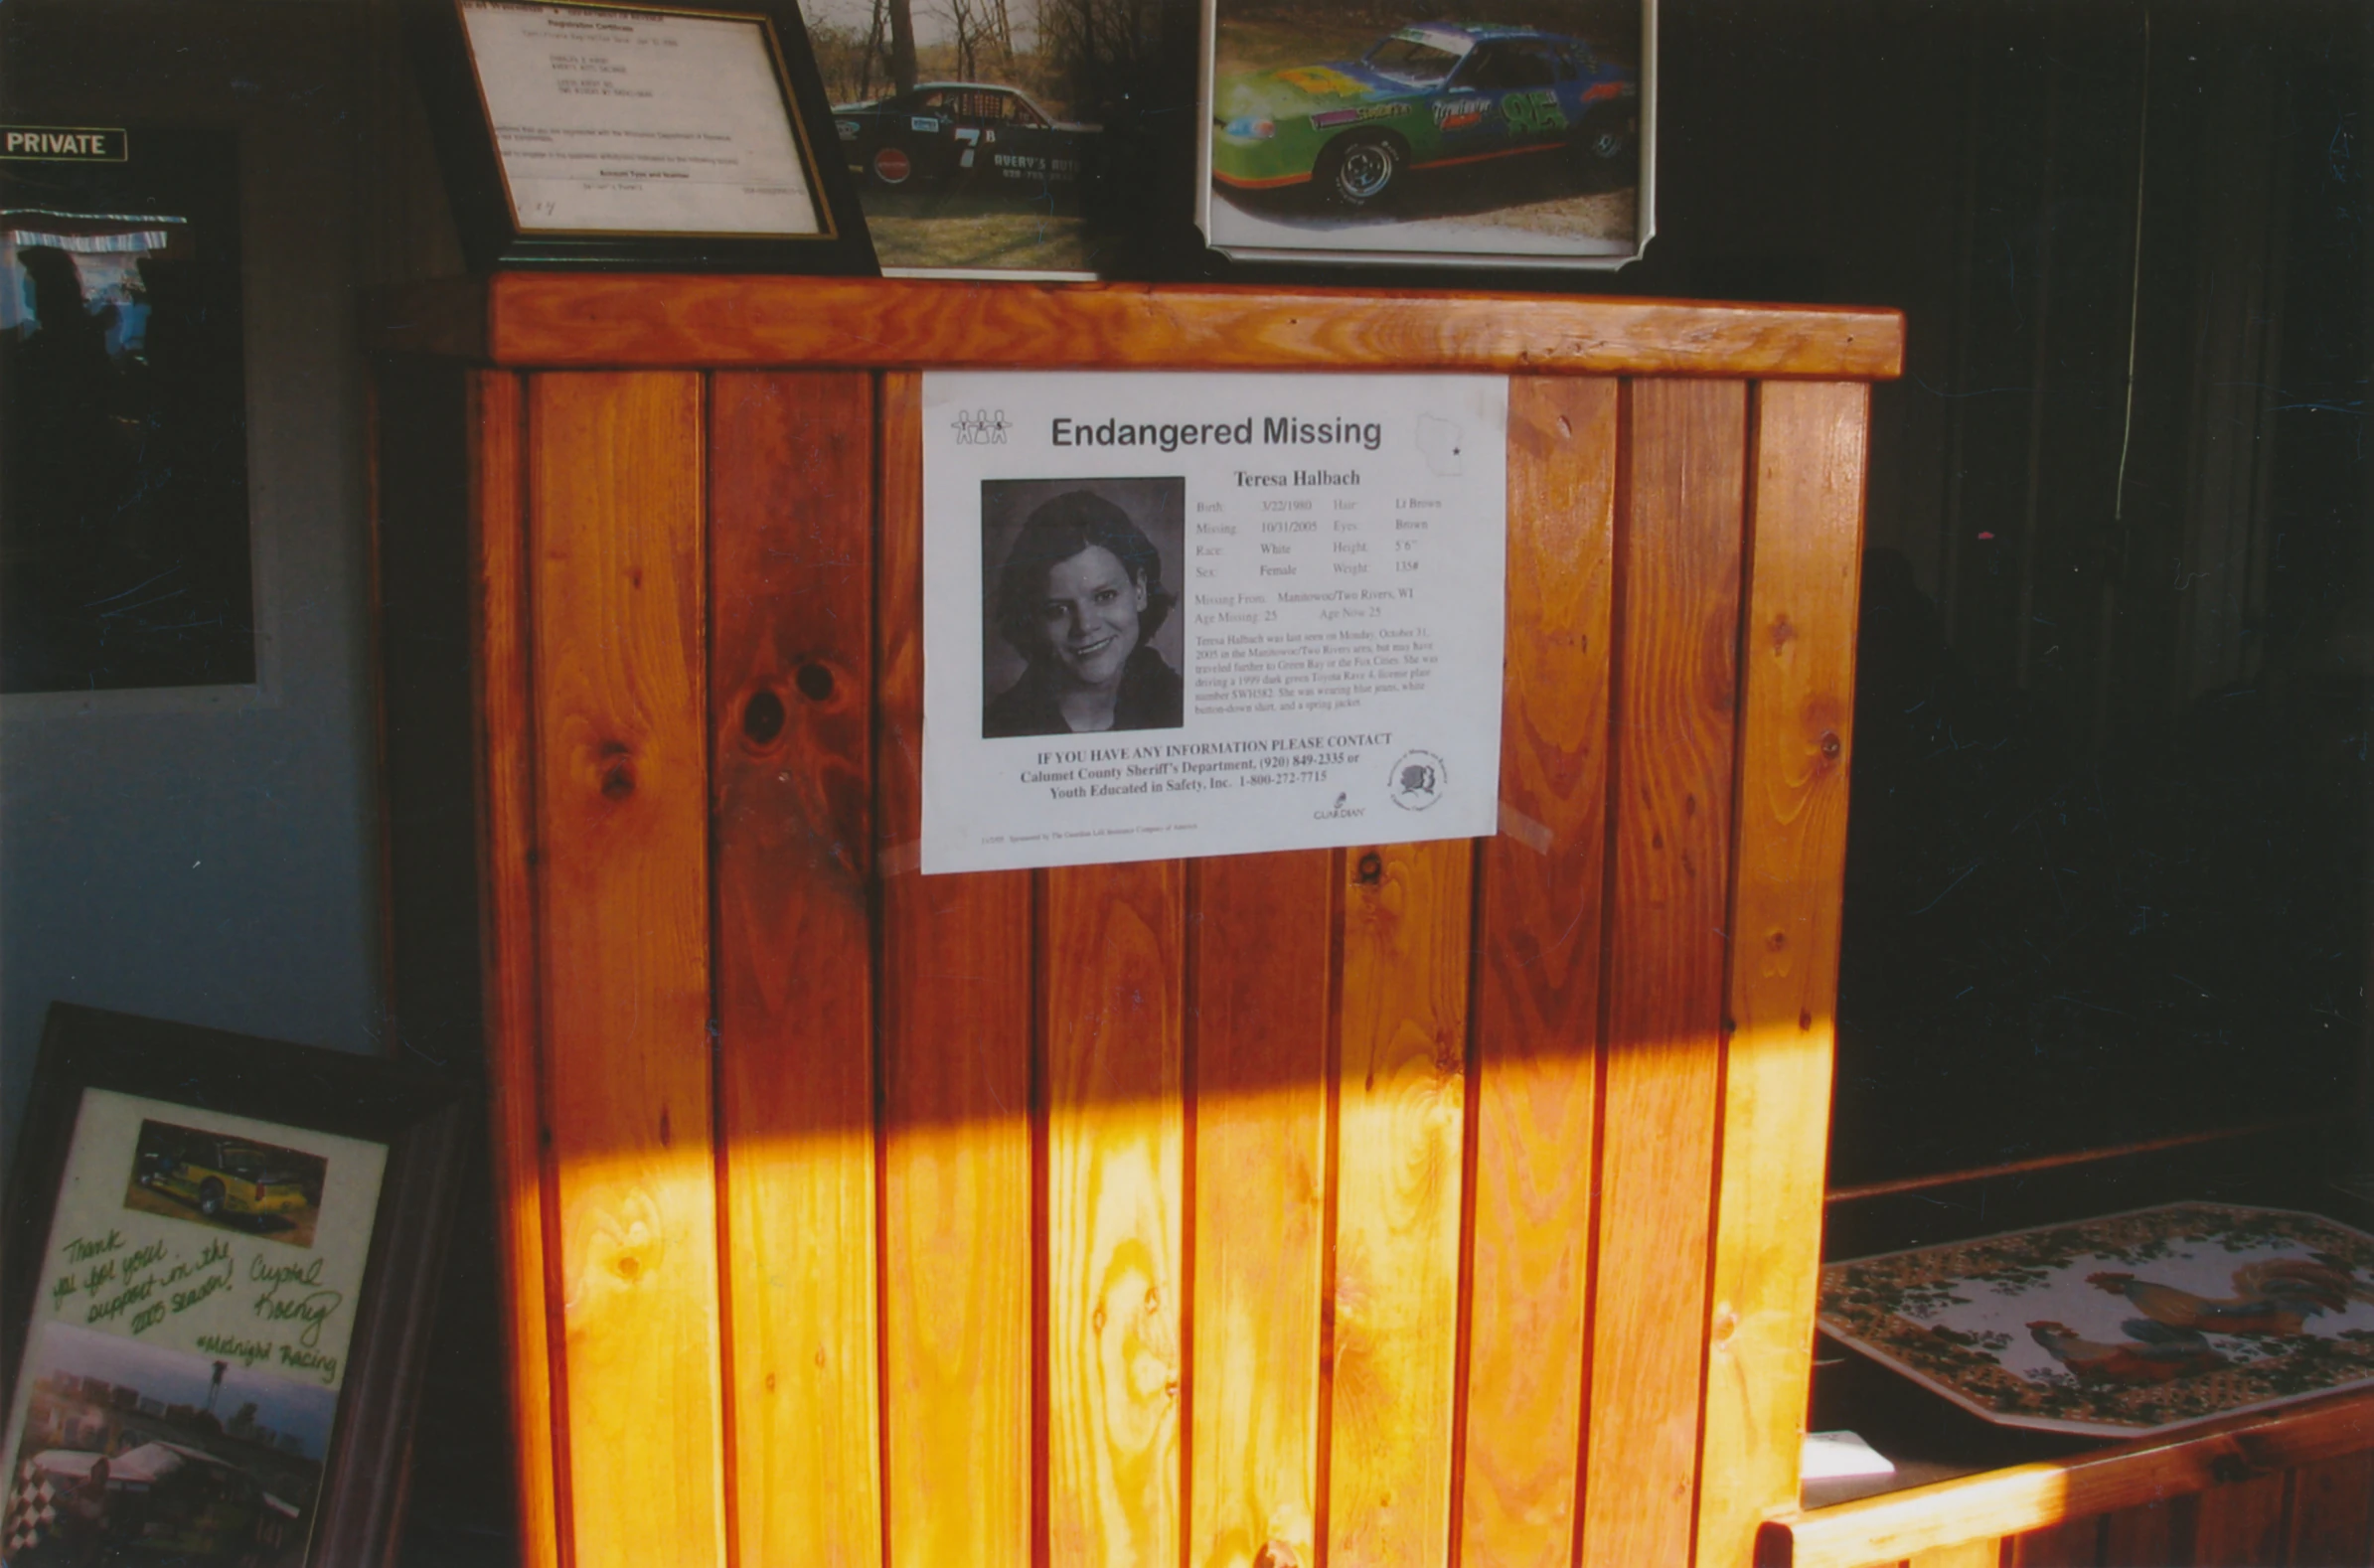
|
| 246 | .22 caliber bullet pack recovered from Avery bedroom | 9 | 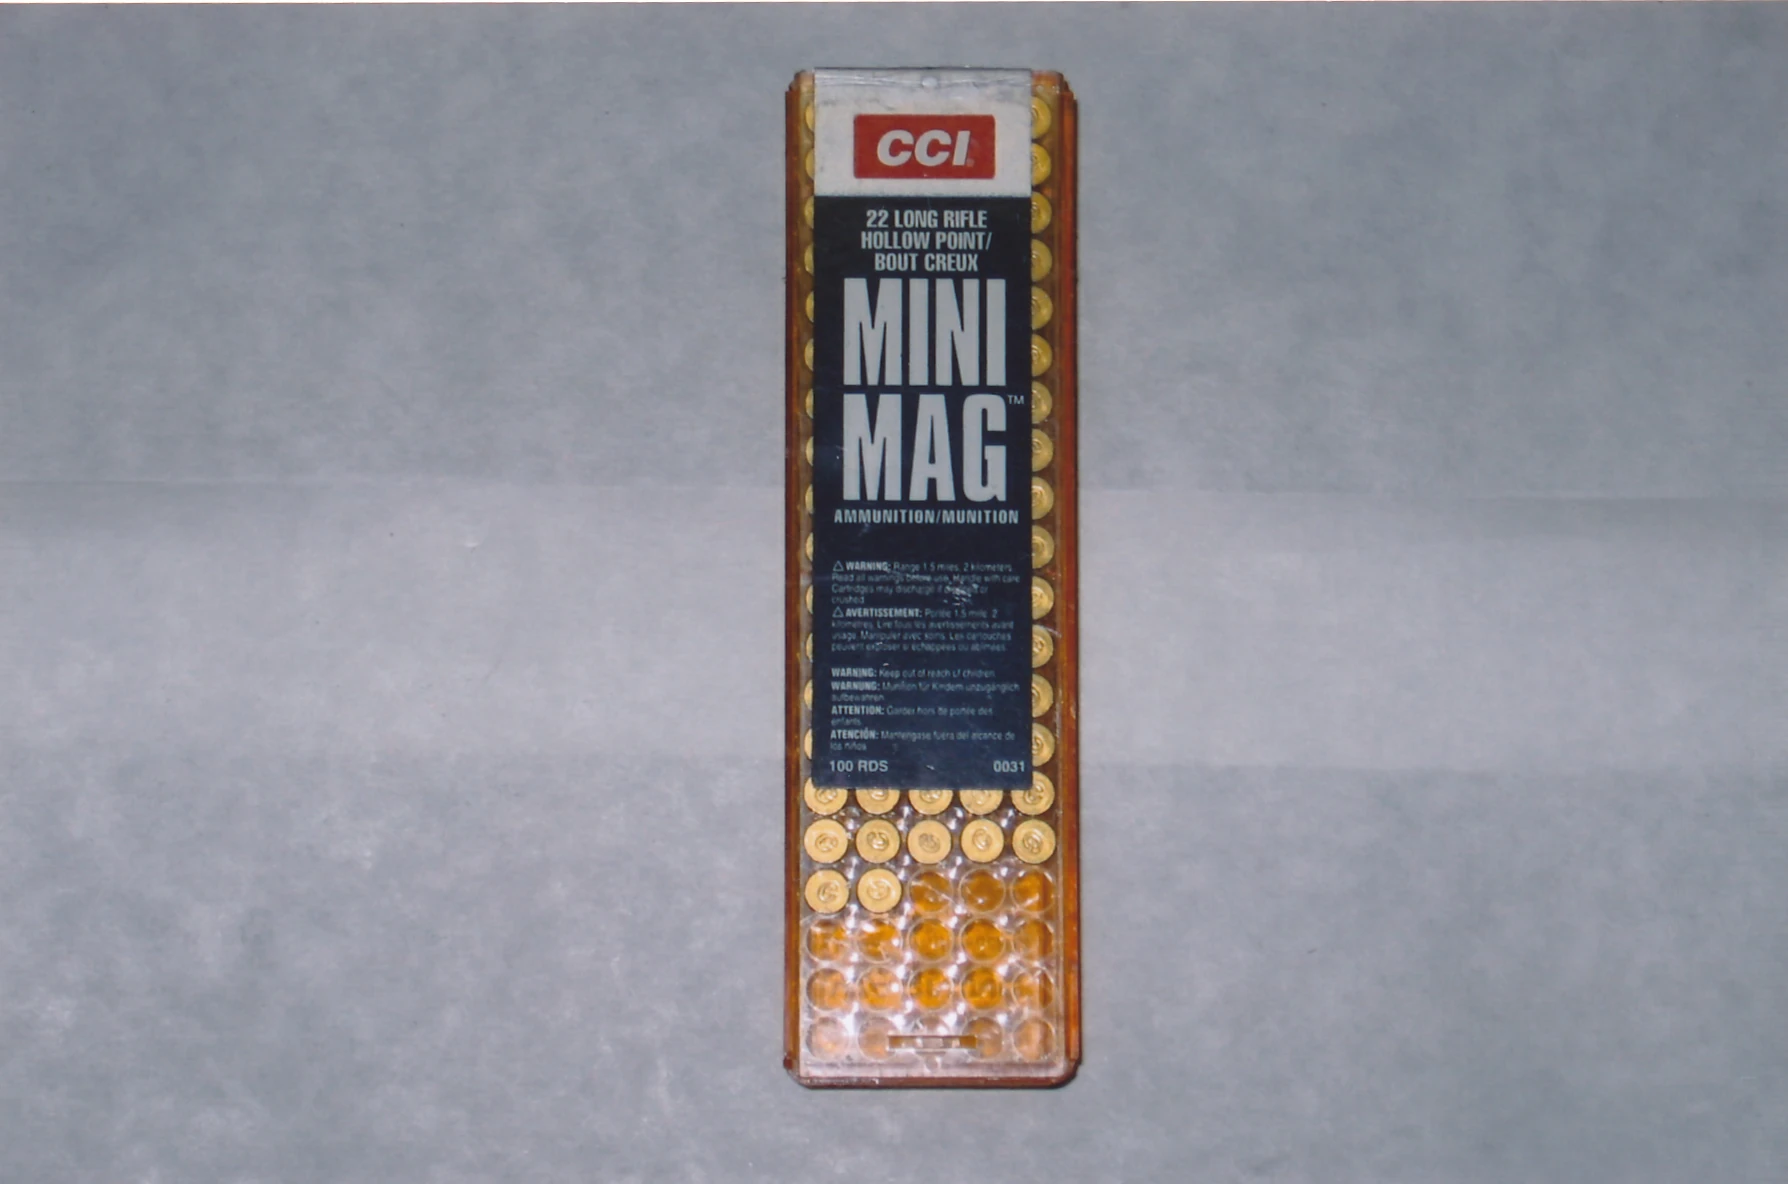
|
| 262 | Engine hoist | 9 | 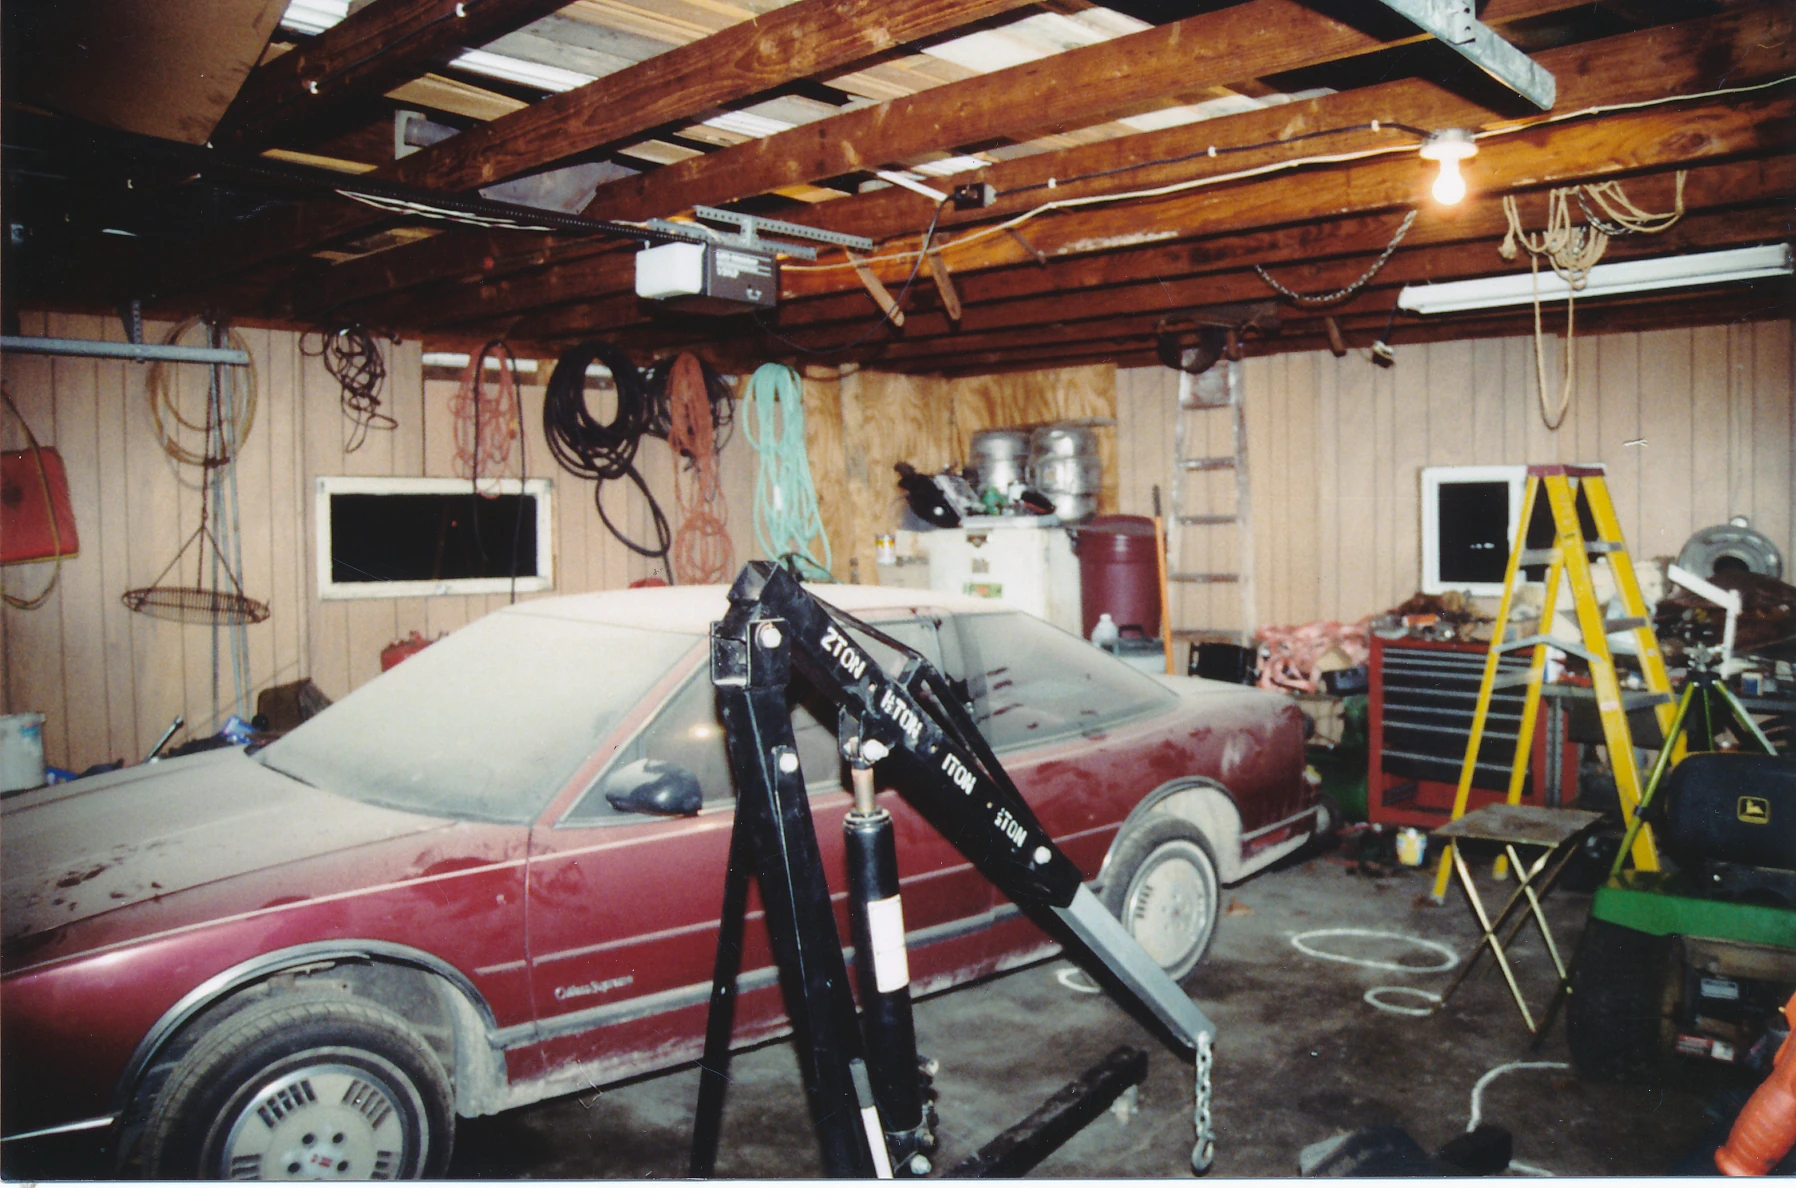
|
| 263 | Engine hoist | 9 | 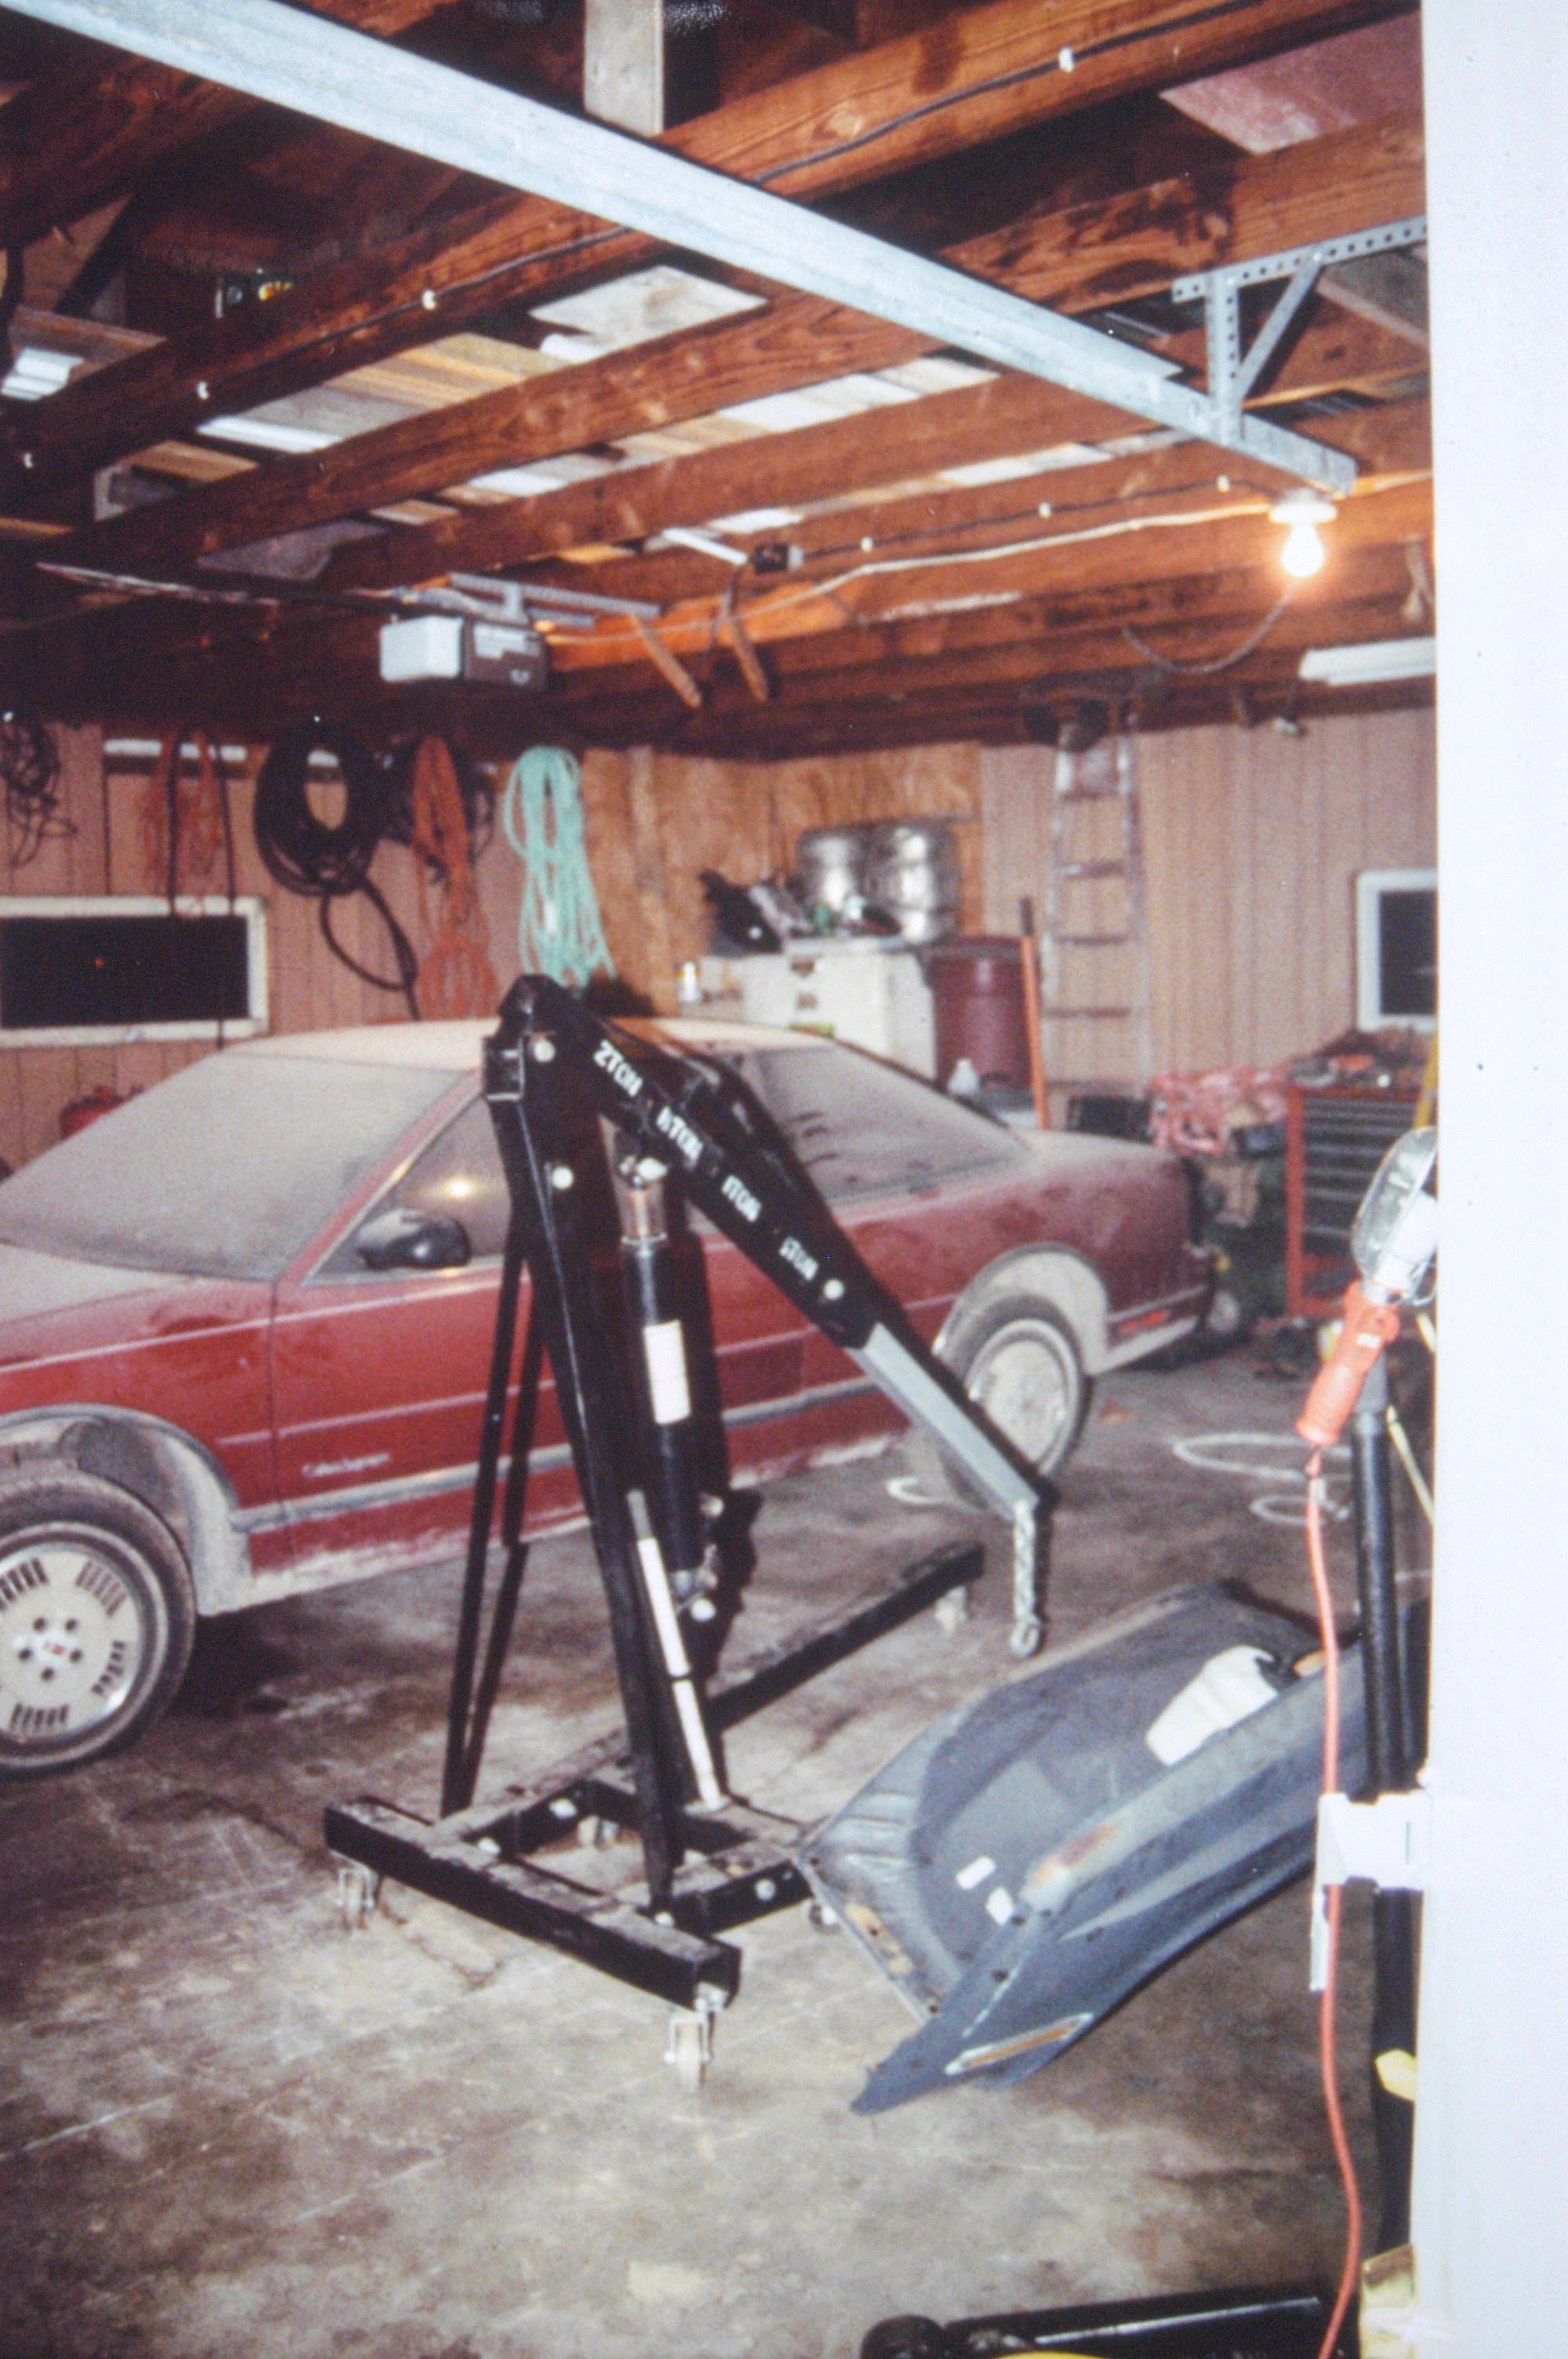
|
| 265 | Steven Avery's garage with evidence markers | 9 | 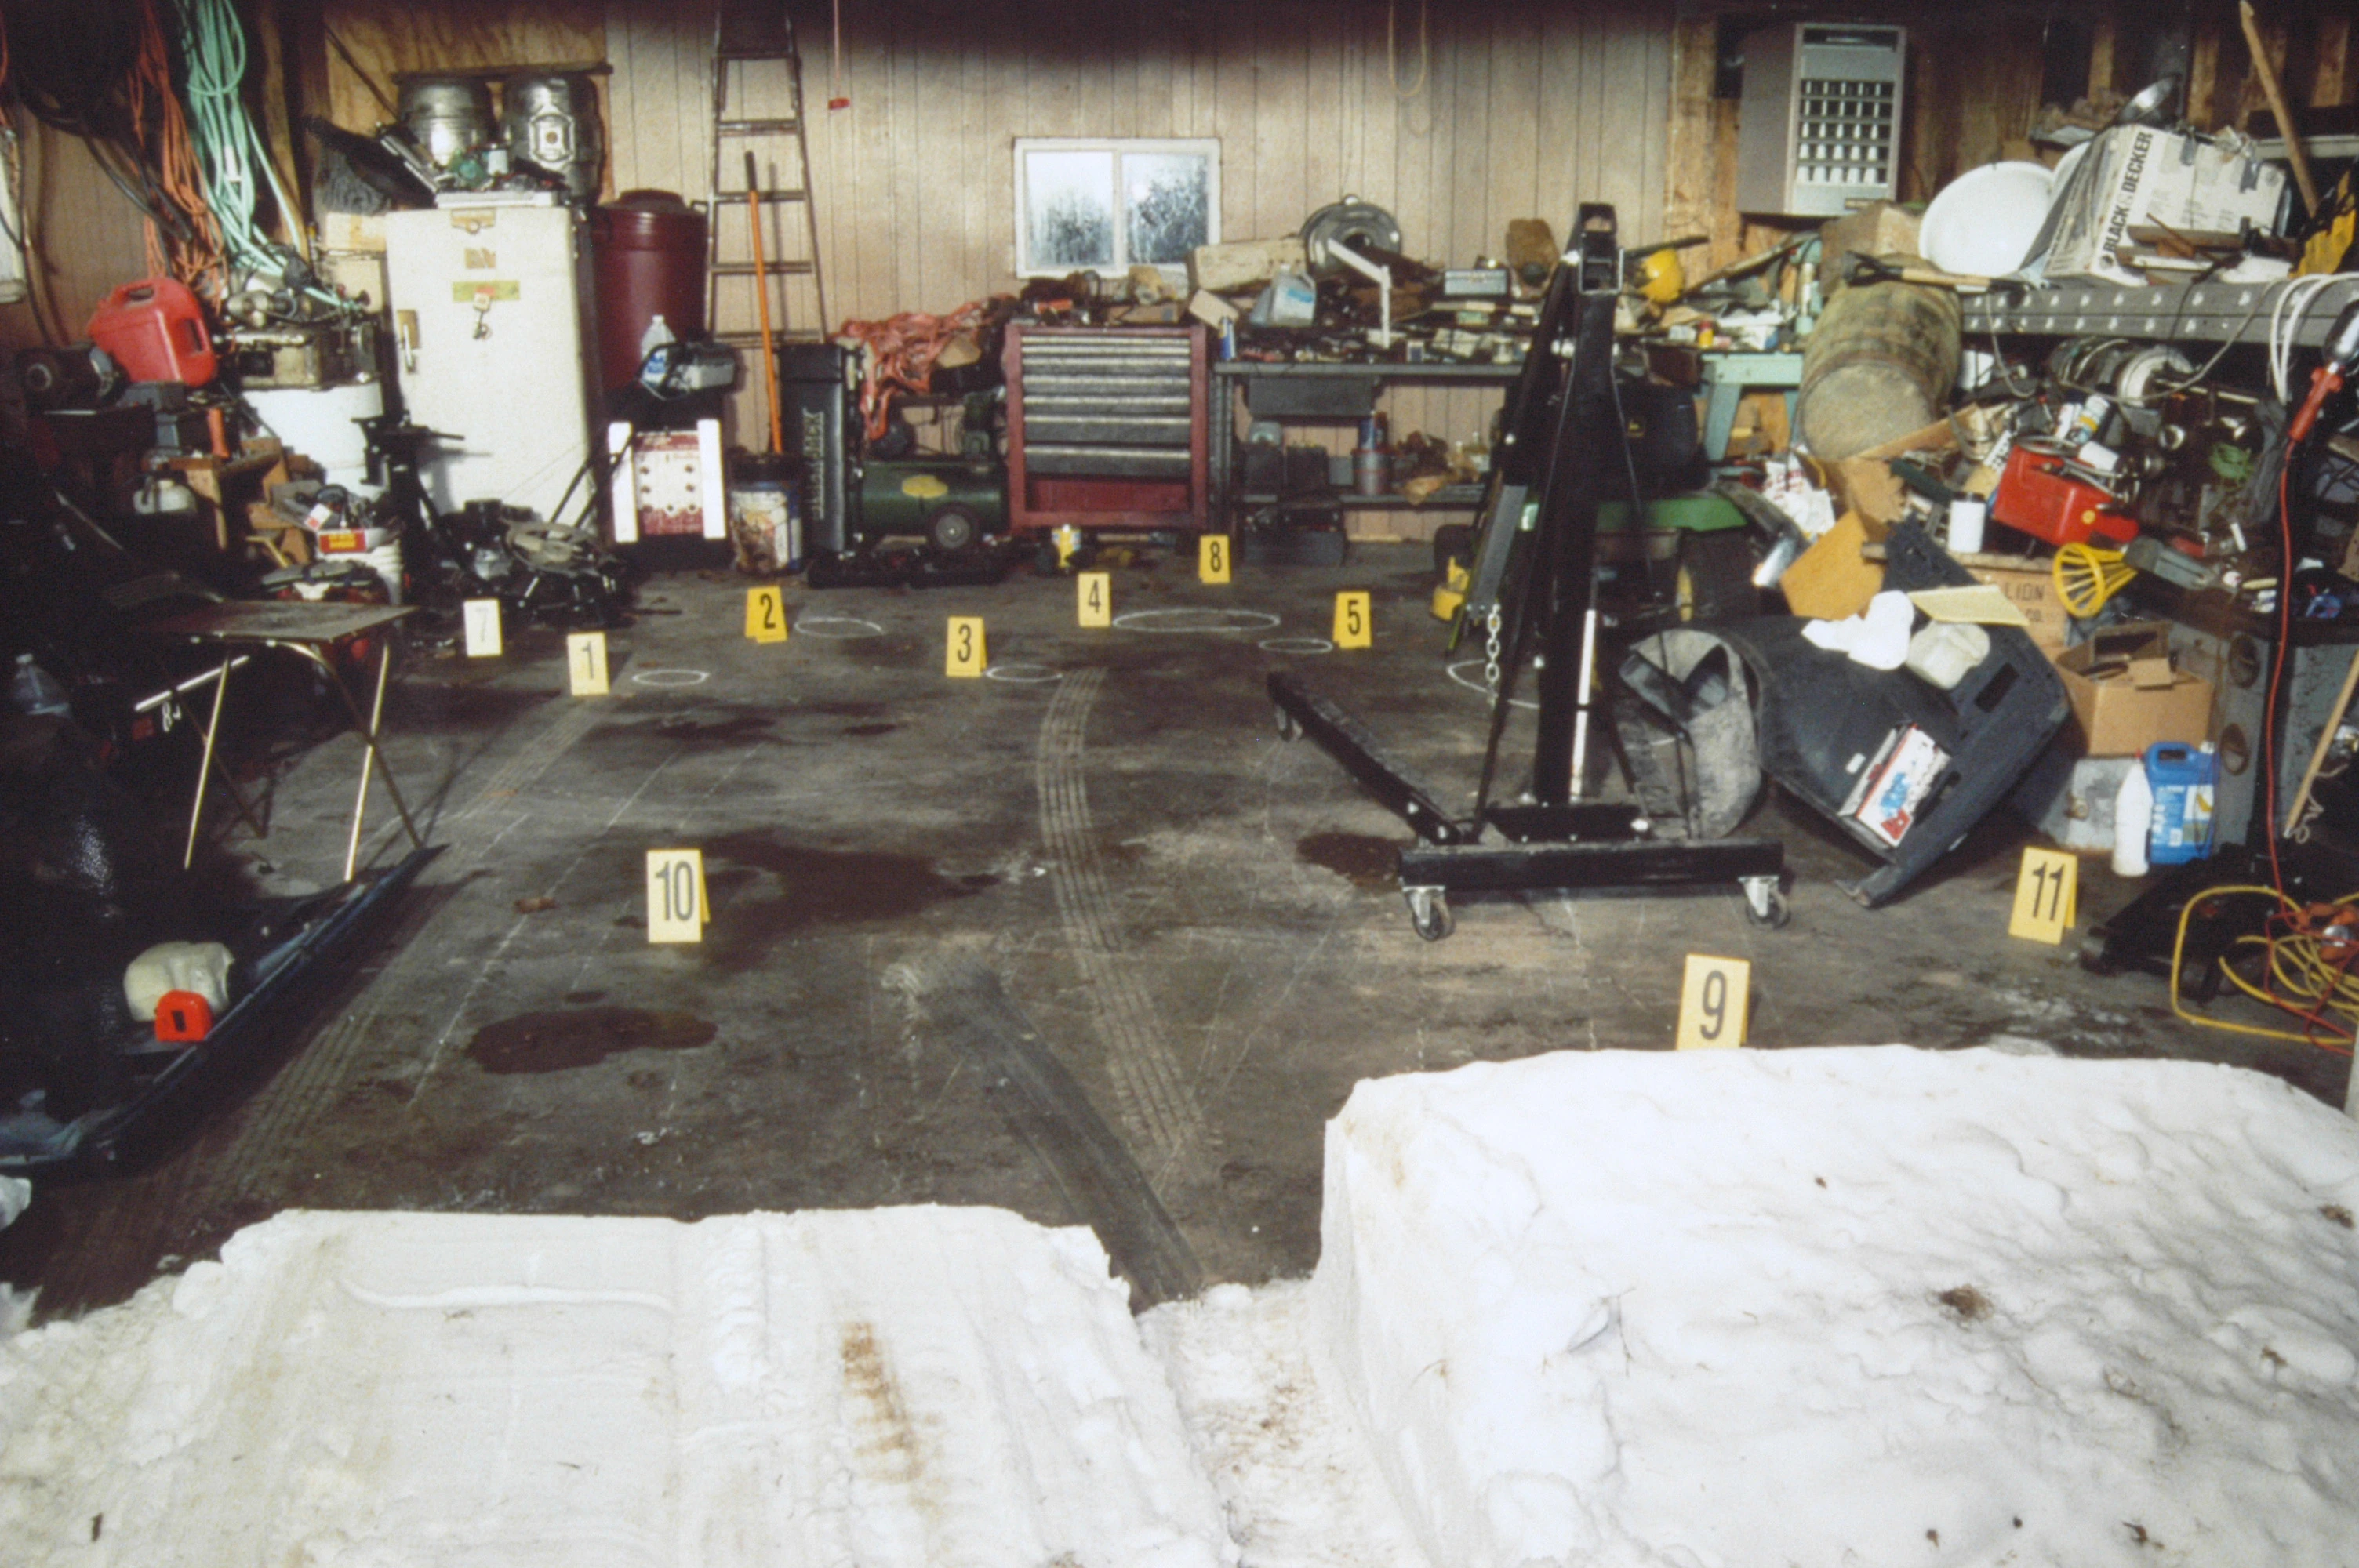
|
| 266 | Blackjack brand car creeper and air compressor | 9 | 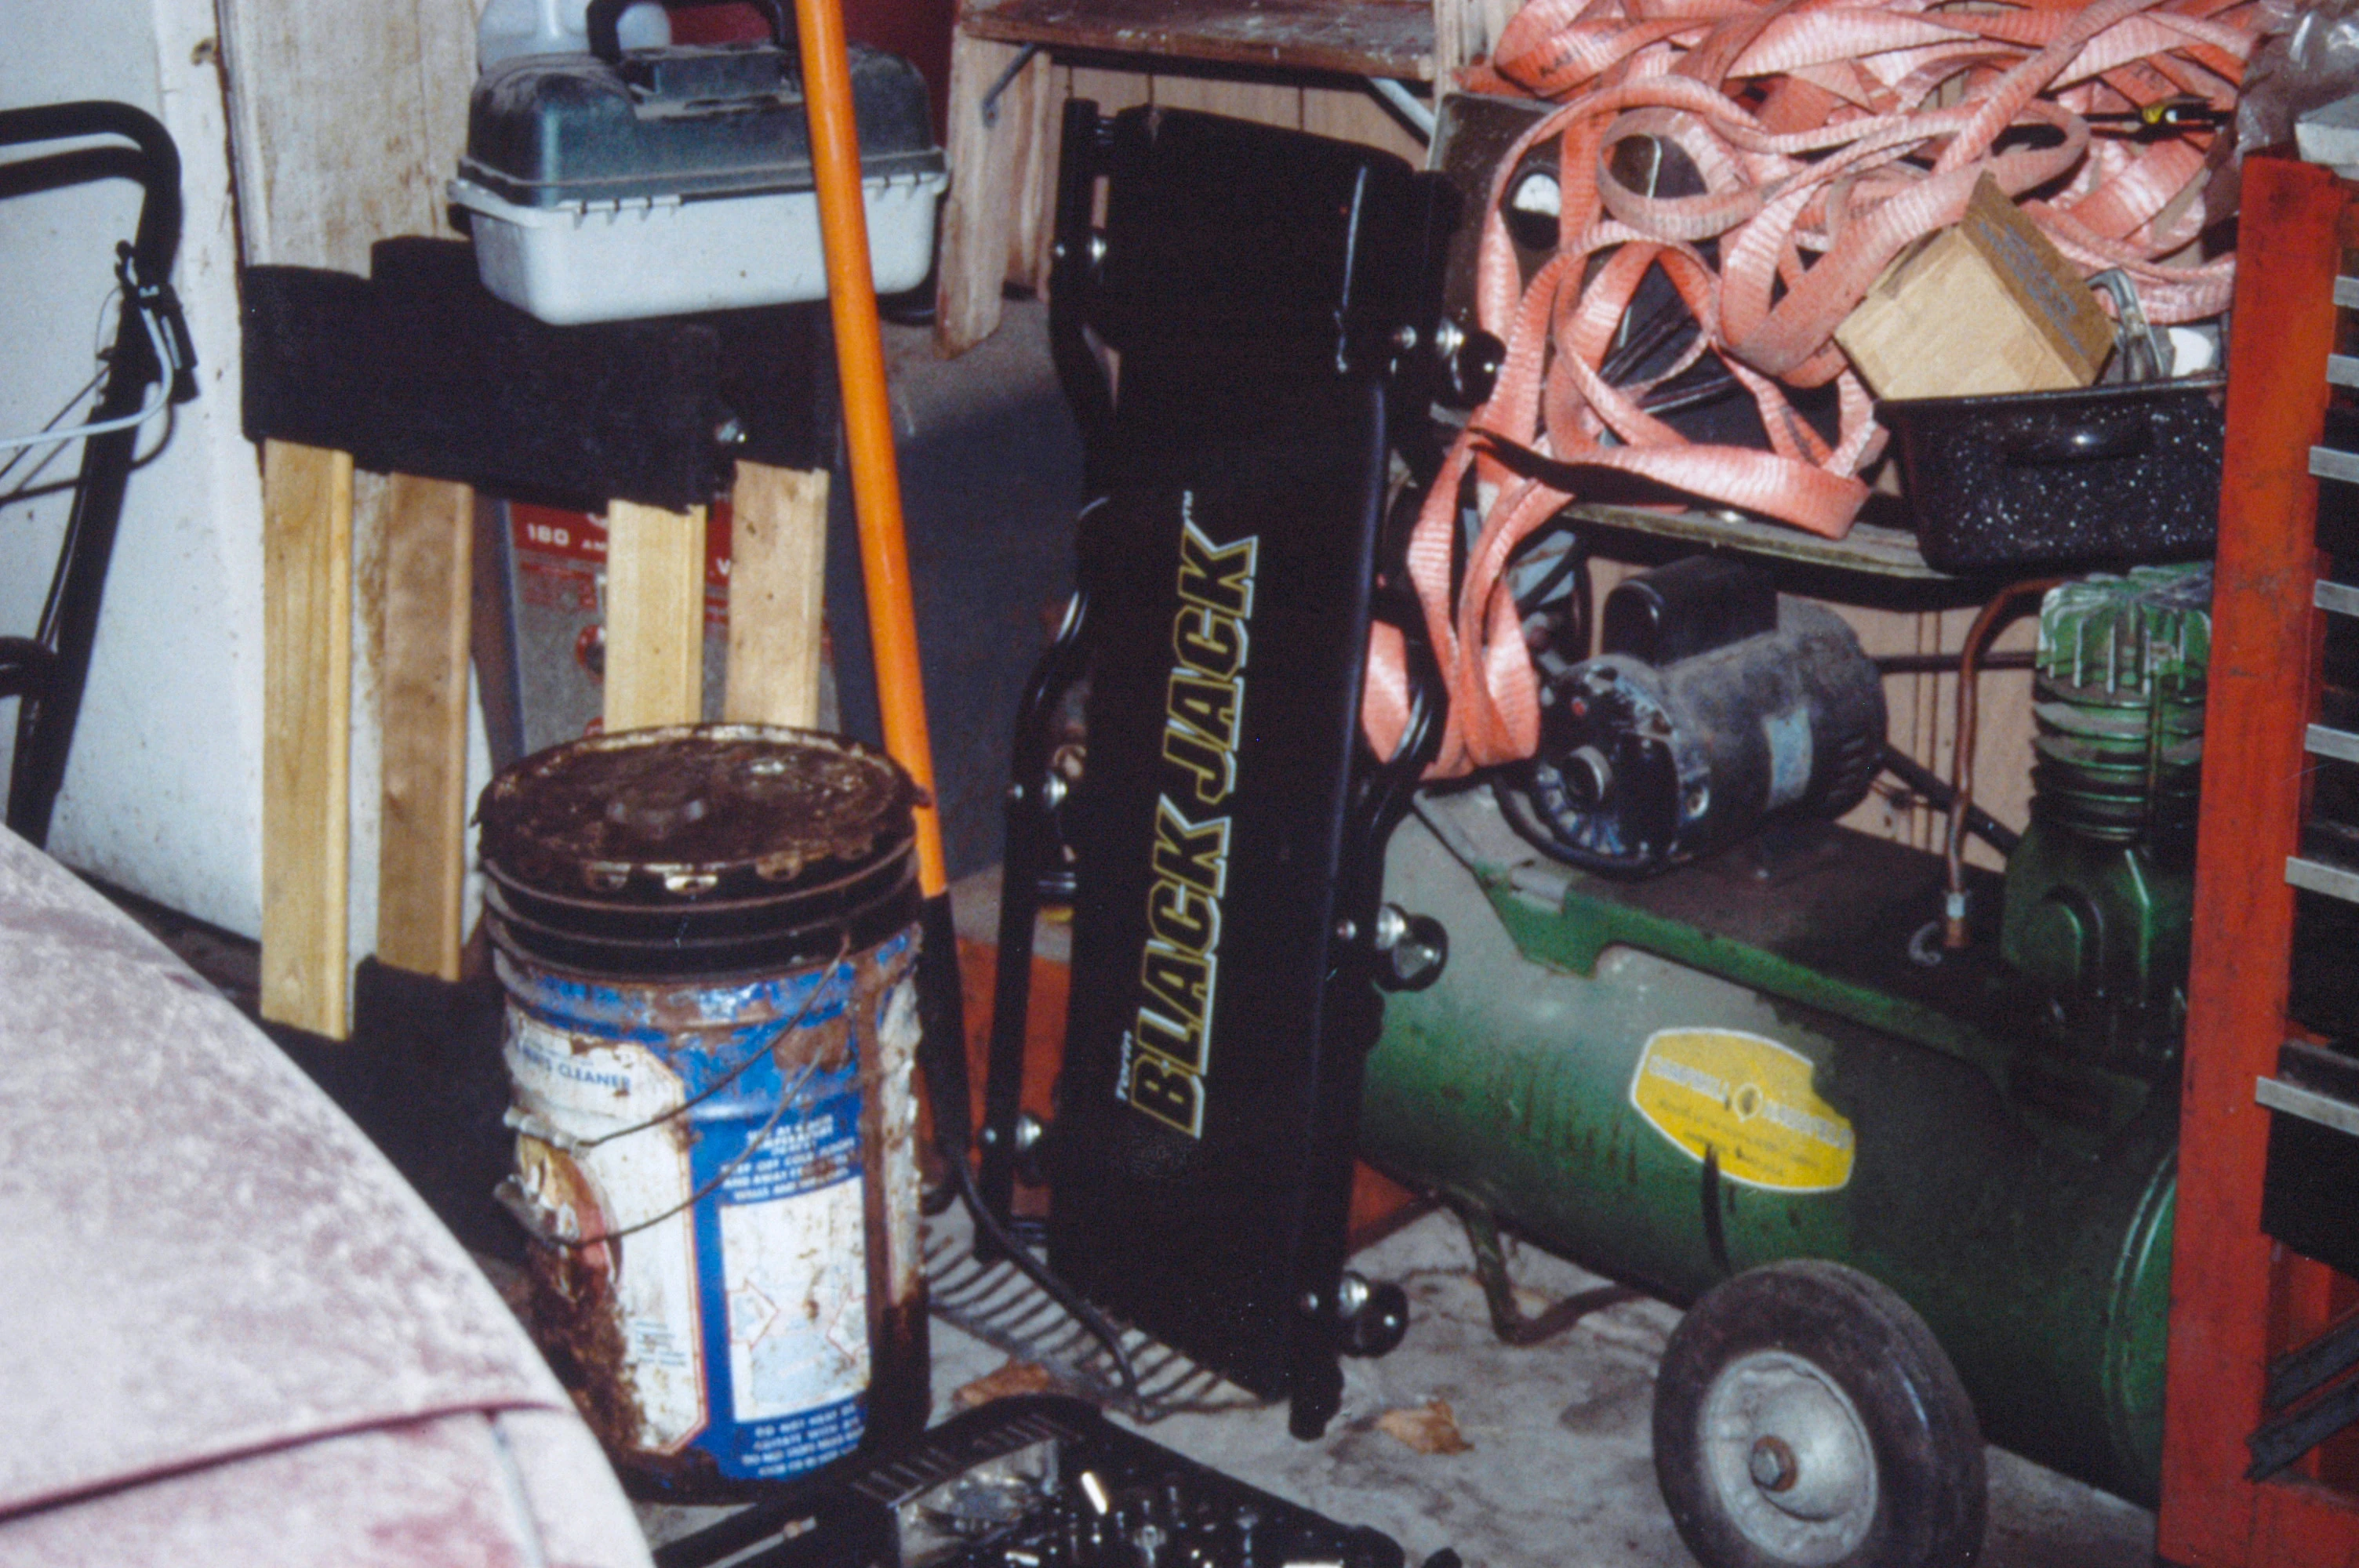
|
| 267 | Paint thinner jug recovered from Avery garage | 9 | 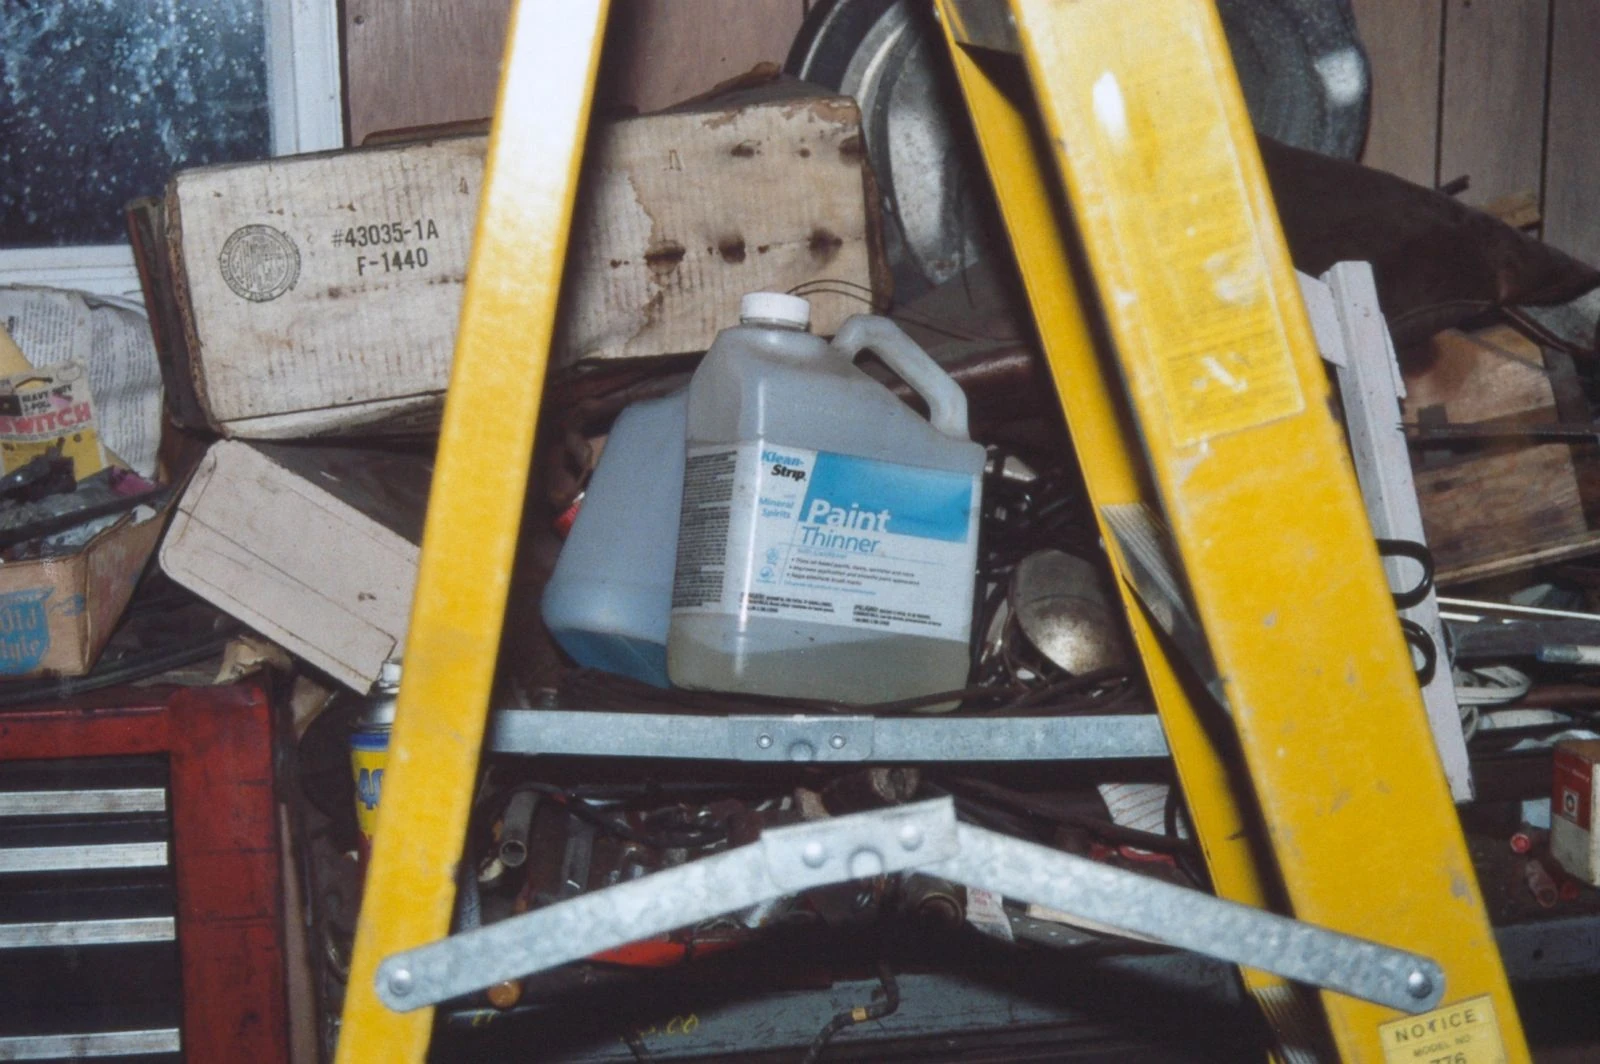
|
| 268 | Bullet FK in crack in Avery garage floor | 9 | 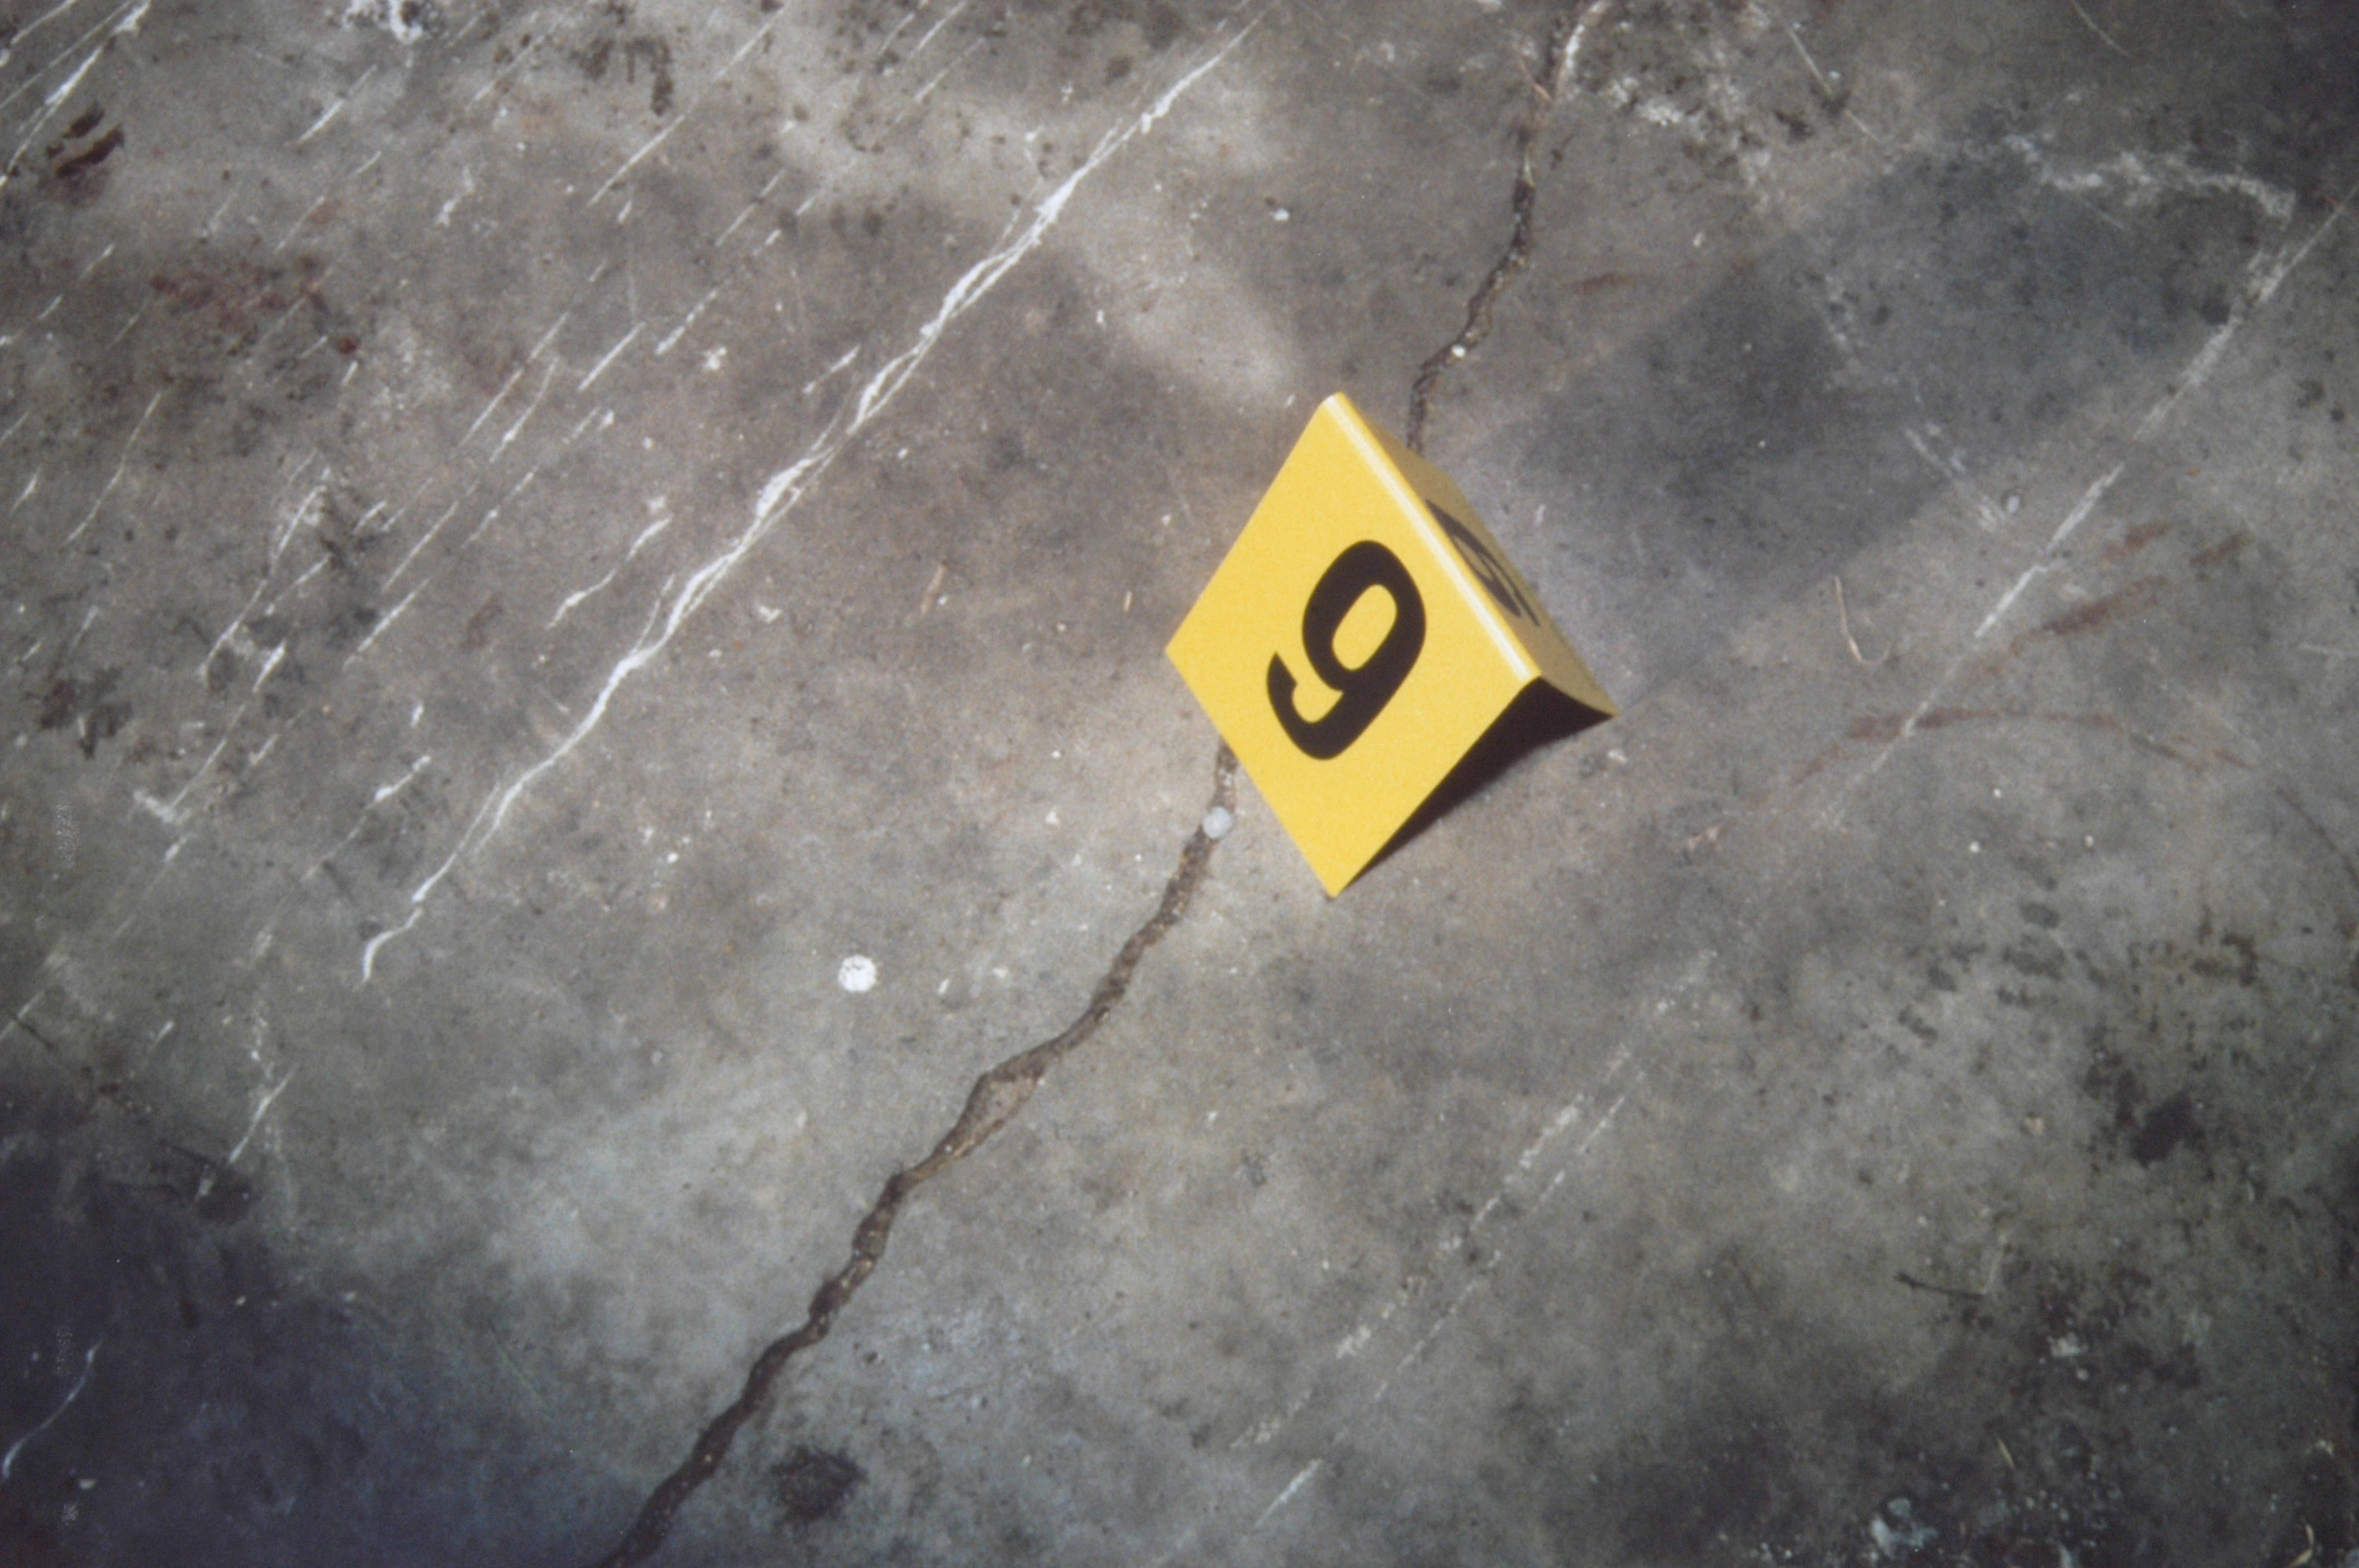
|
| 269 | Bullet FK in crack in Avery garage floor (close-up) | 9 | 
|
| 270 | Bullet FL discovery | 9 | 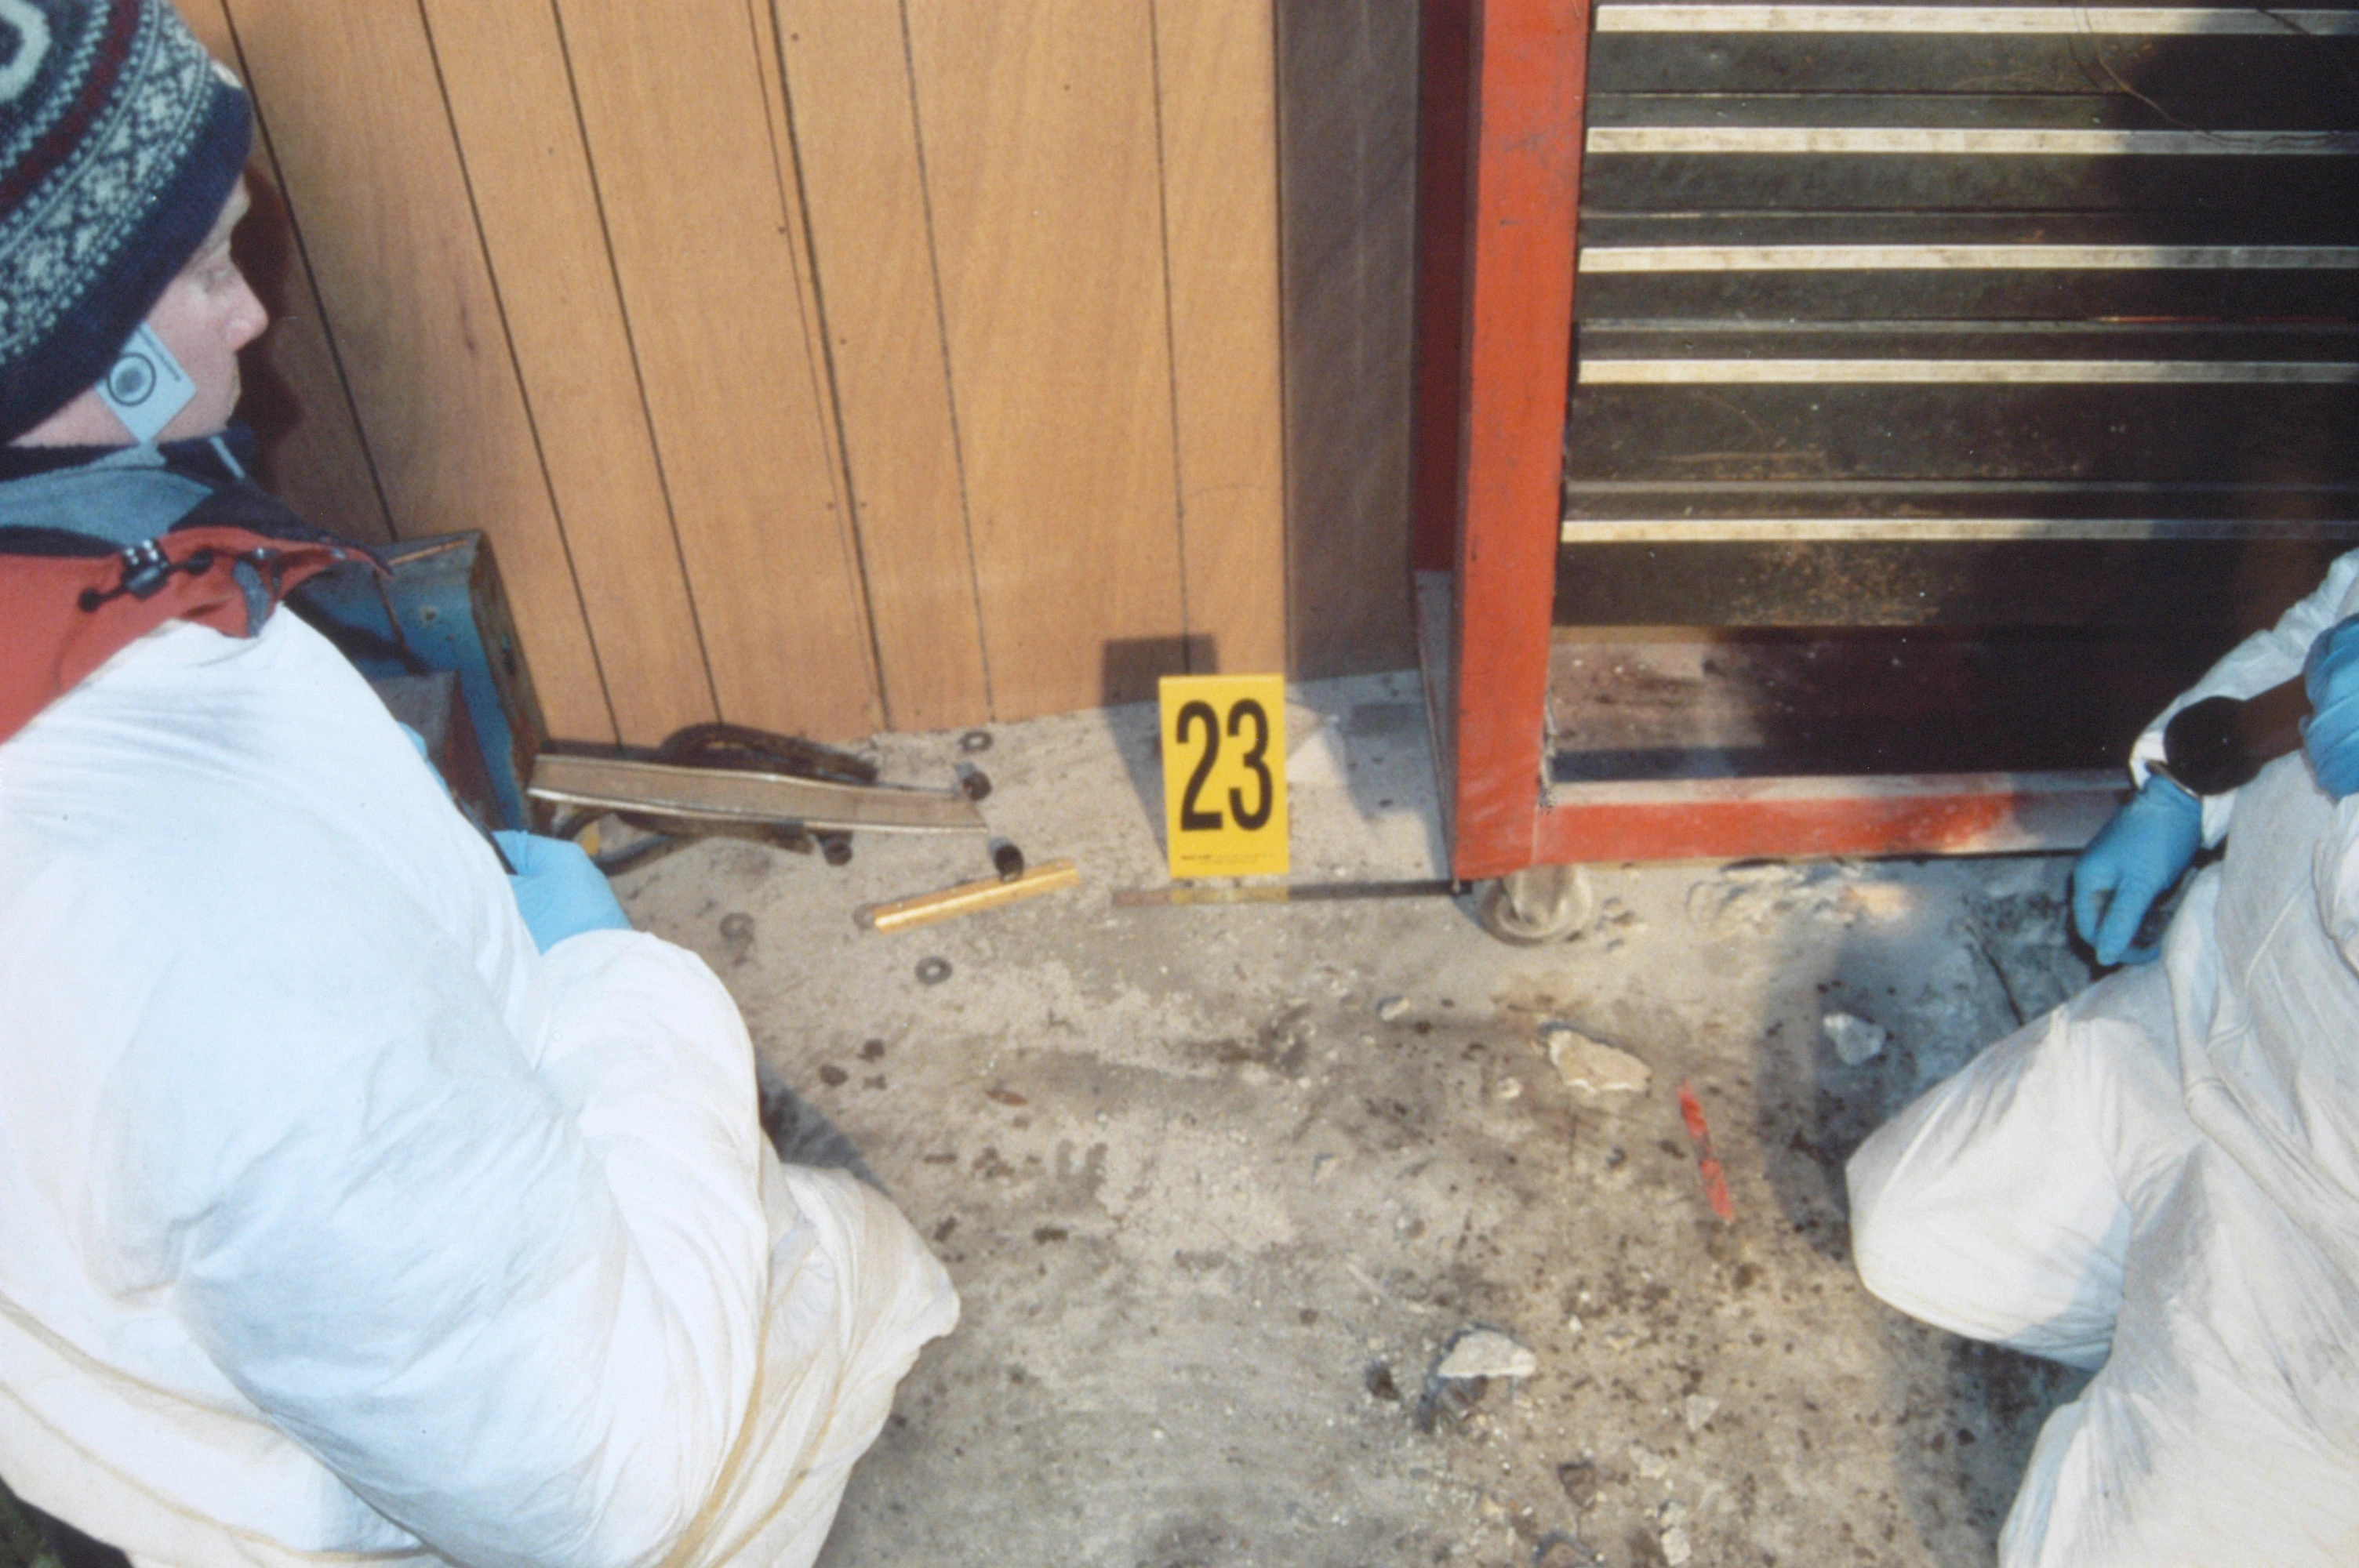
|
| 271 | Bullet FL | 9 | 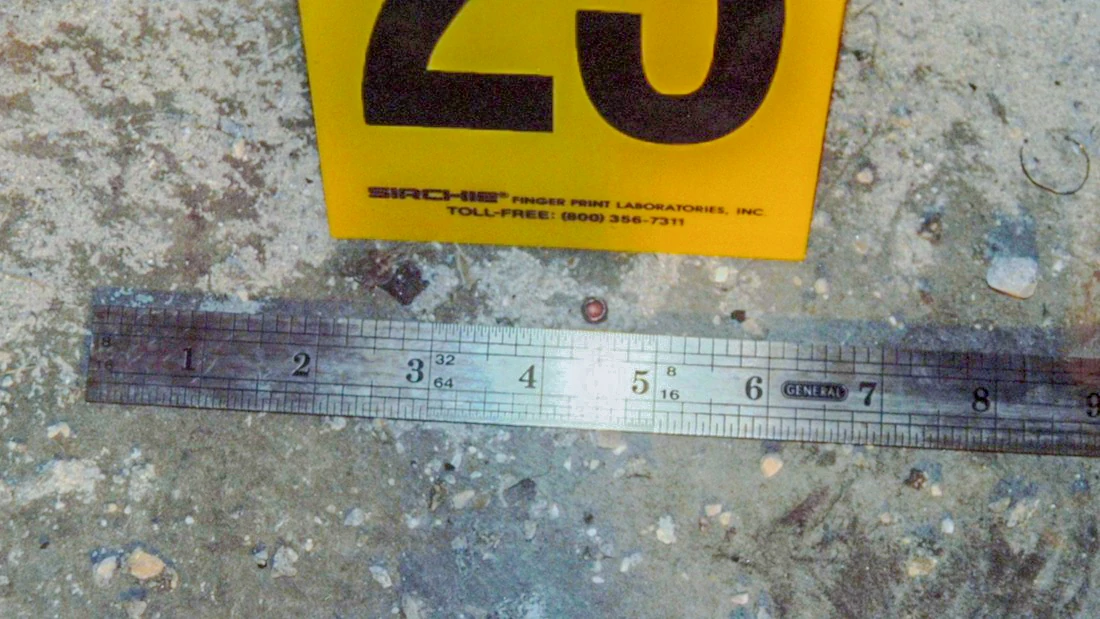
|
| 272 | Bullet FL in evidence bag | 9 | 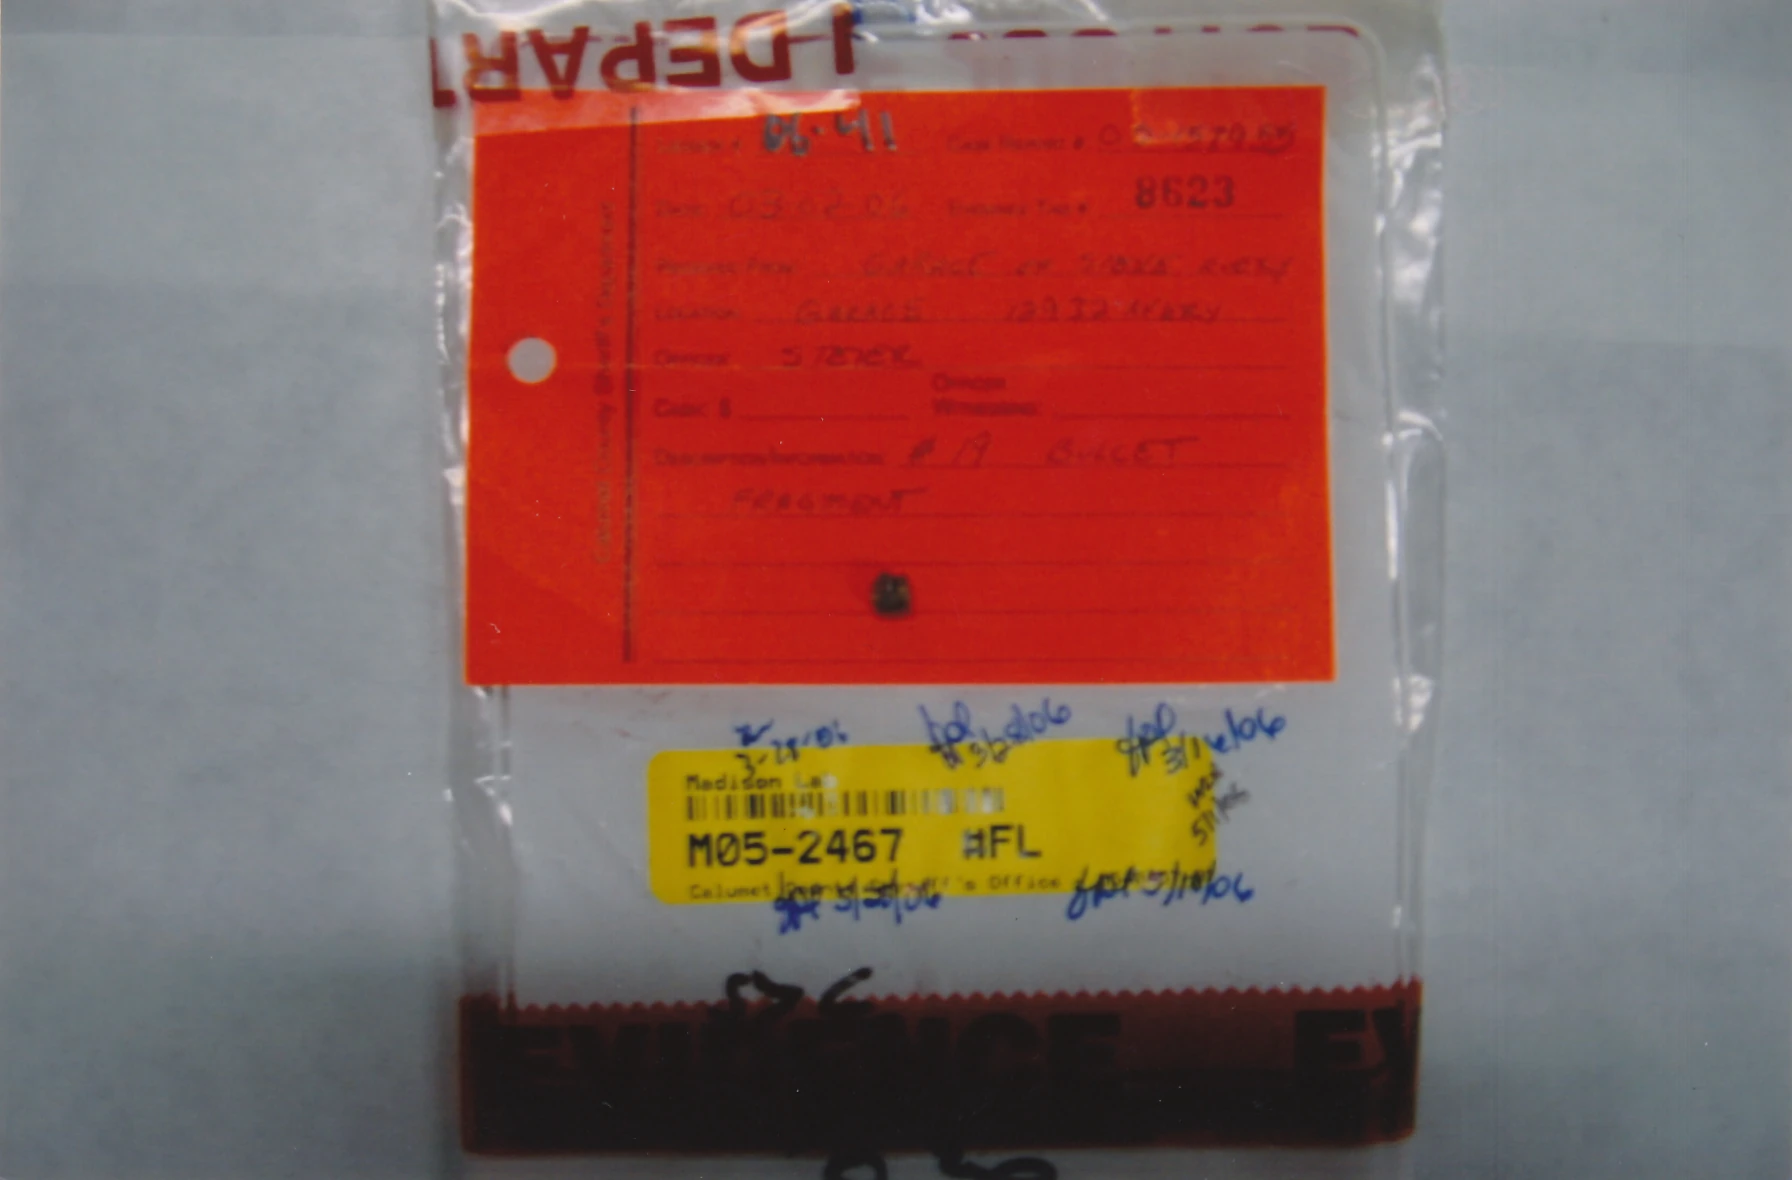
|
| 273 | Burn barrel contents processing | 9 | 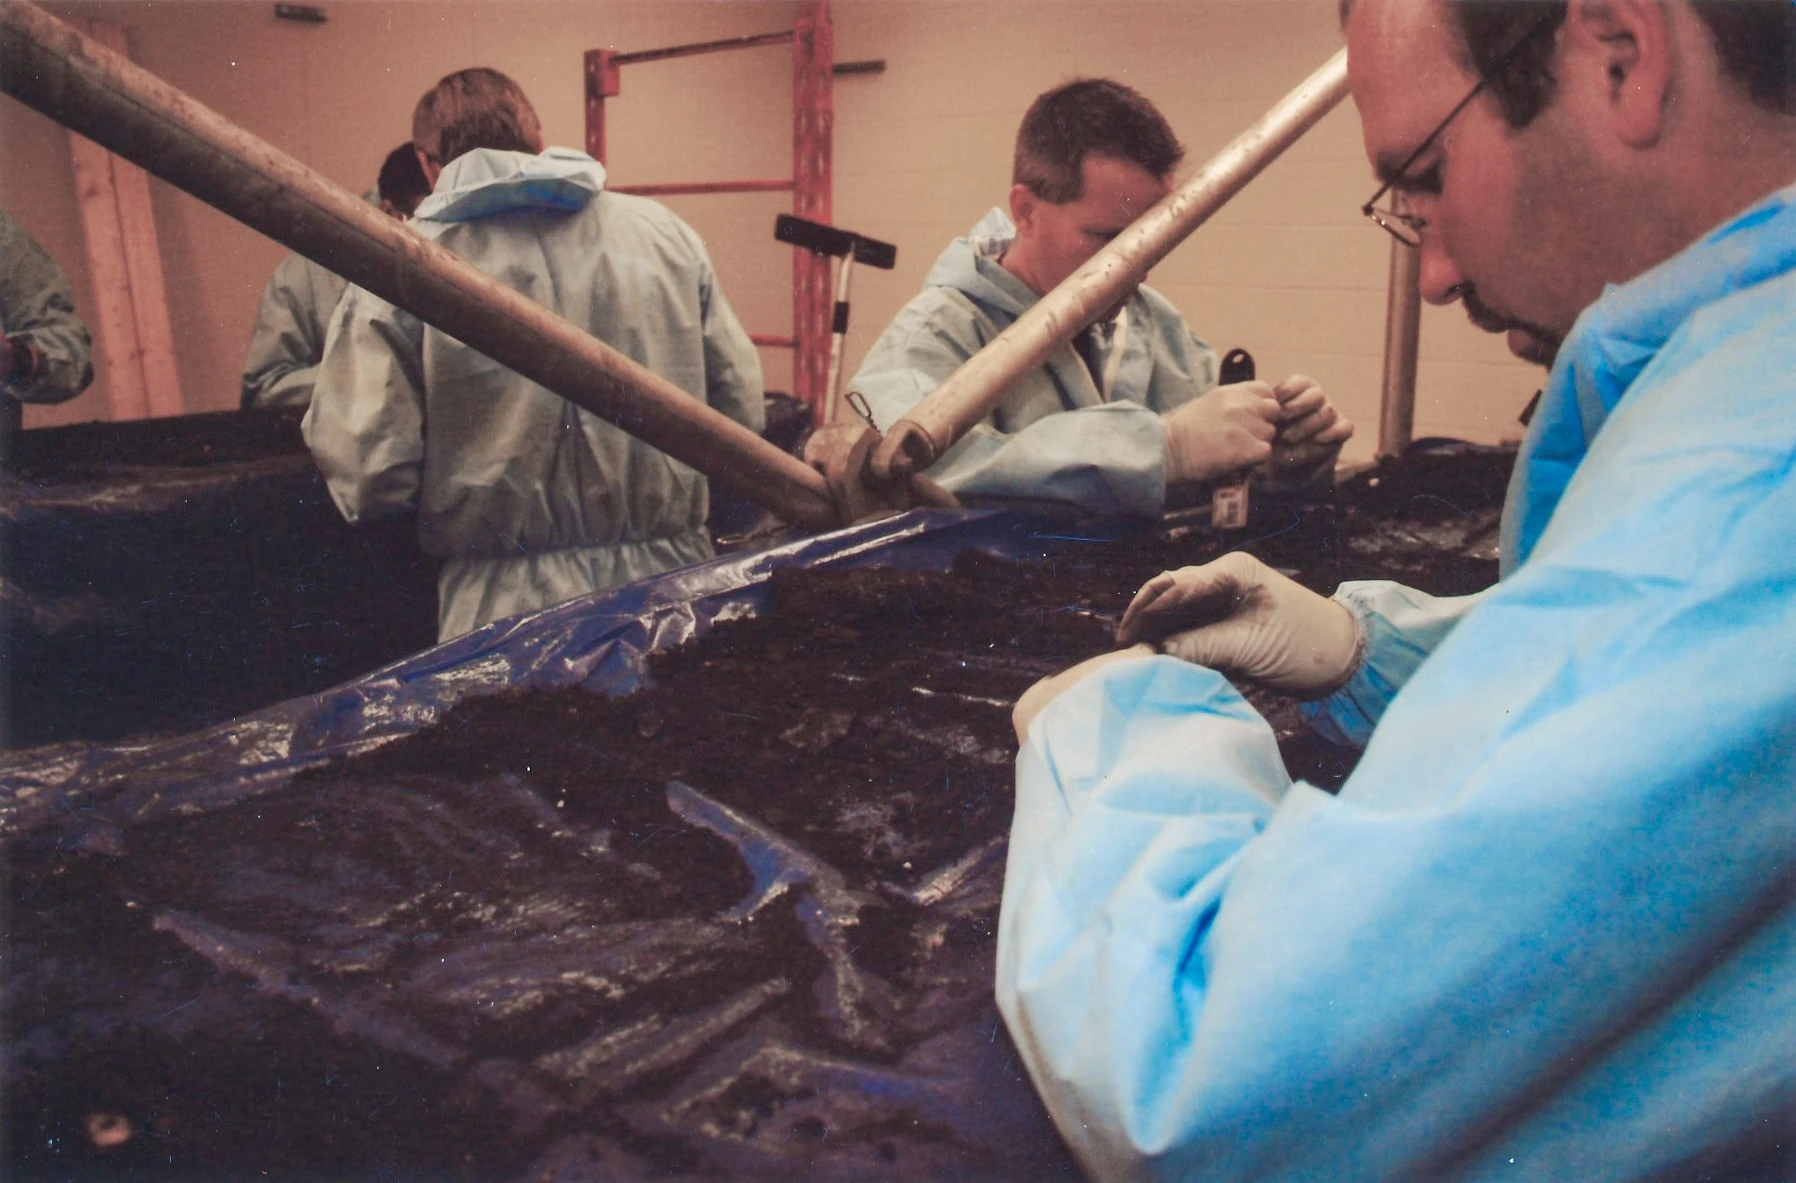
|
| 274 | Burn barrel contents processing | 9 | 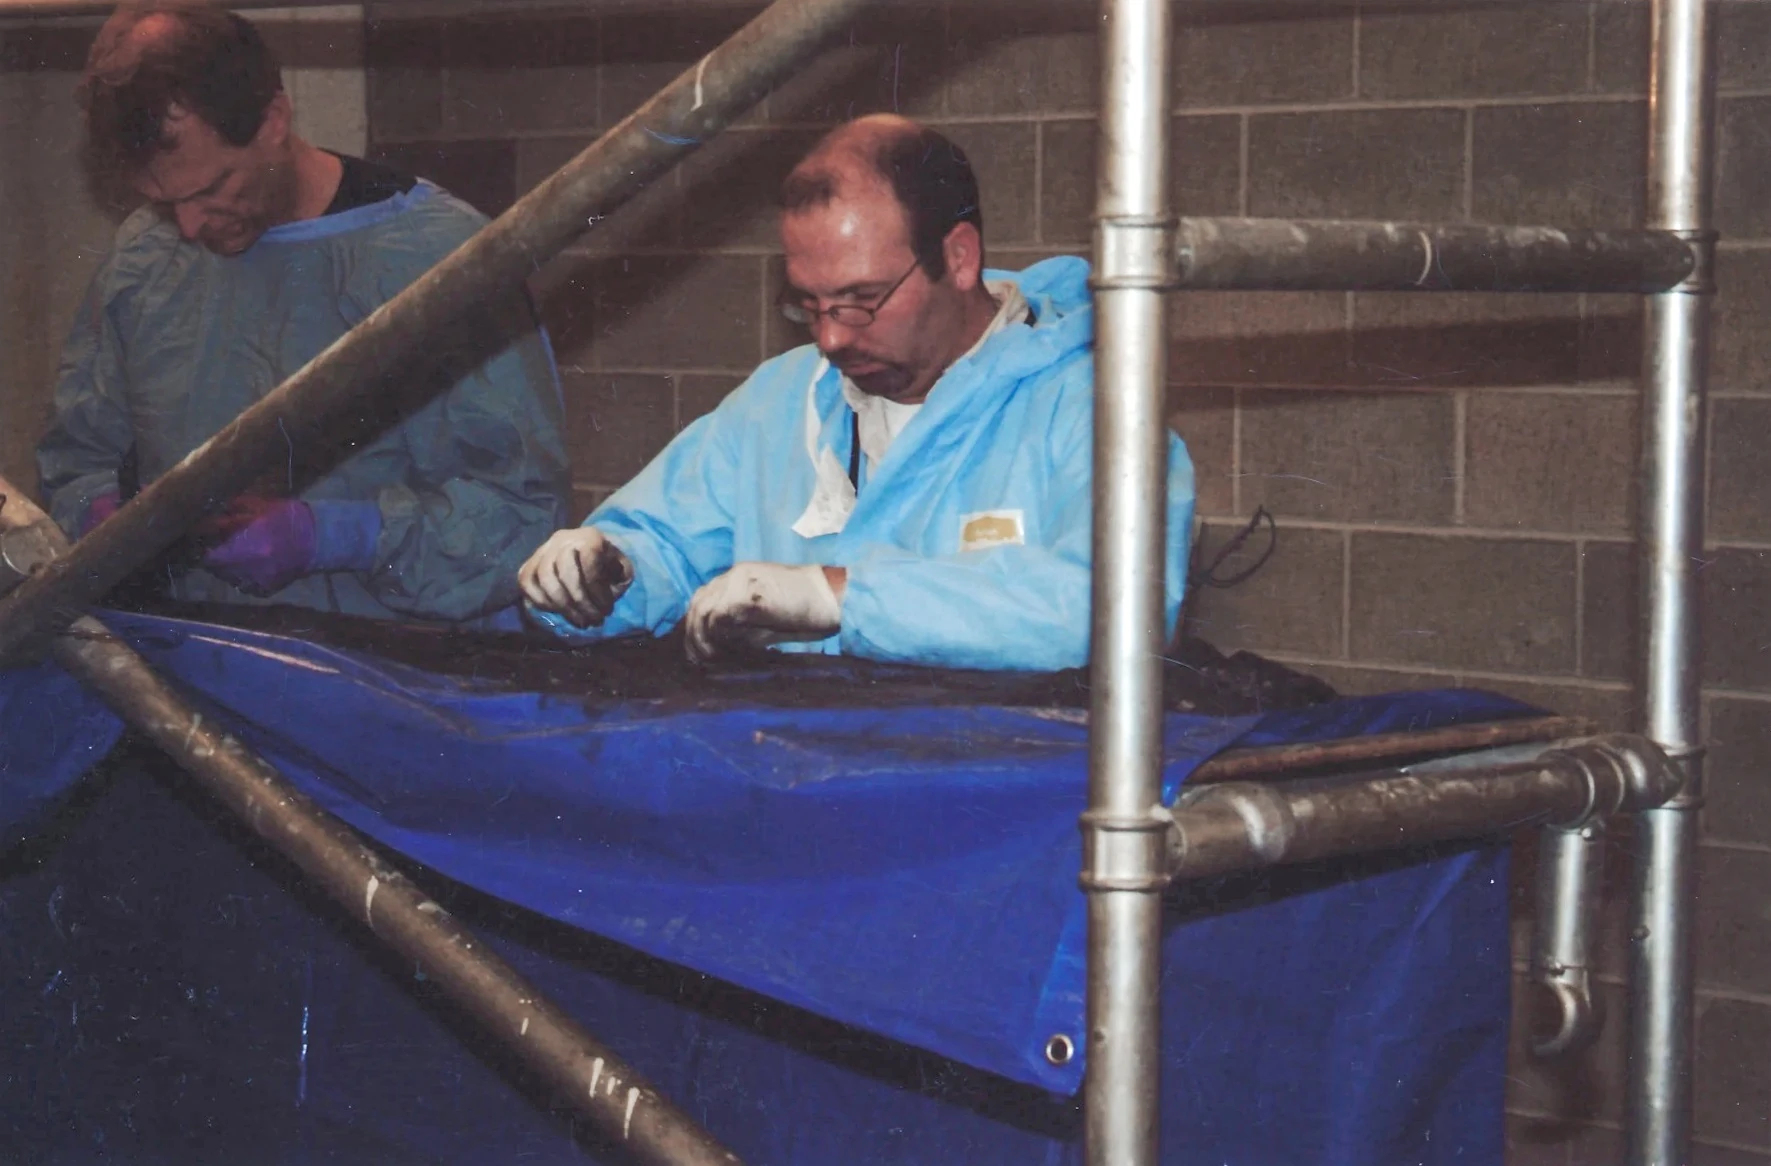
|
| 275 | Rivet from daisy fuentes jeans | 9 | 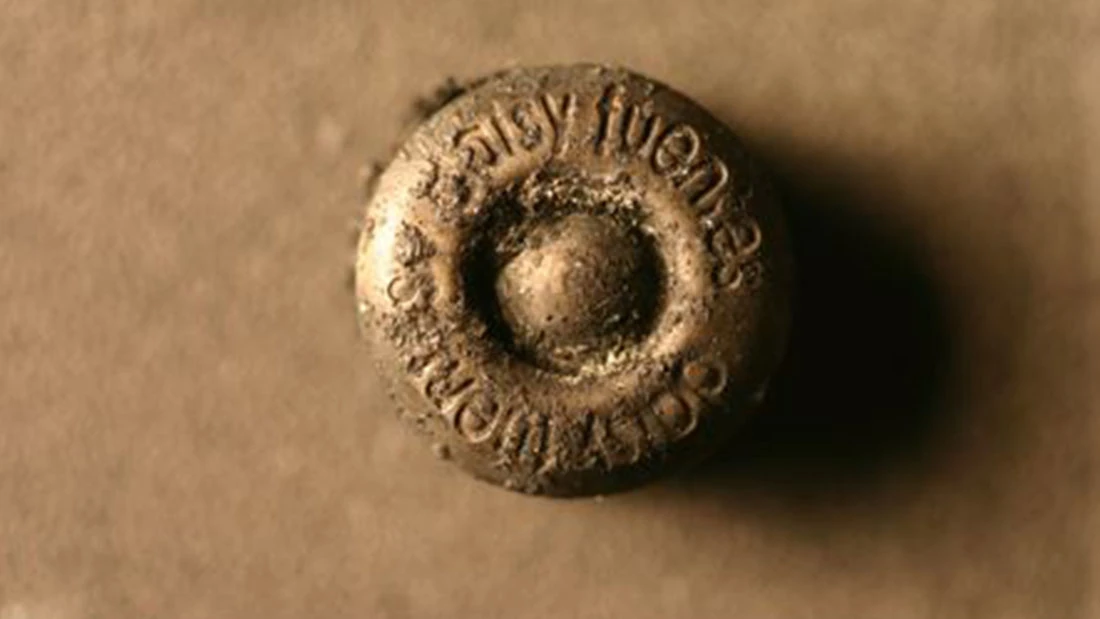
|
| 283 | .22 shell casing from Avery's garage | 9 | 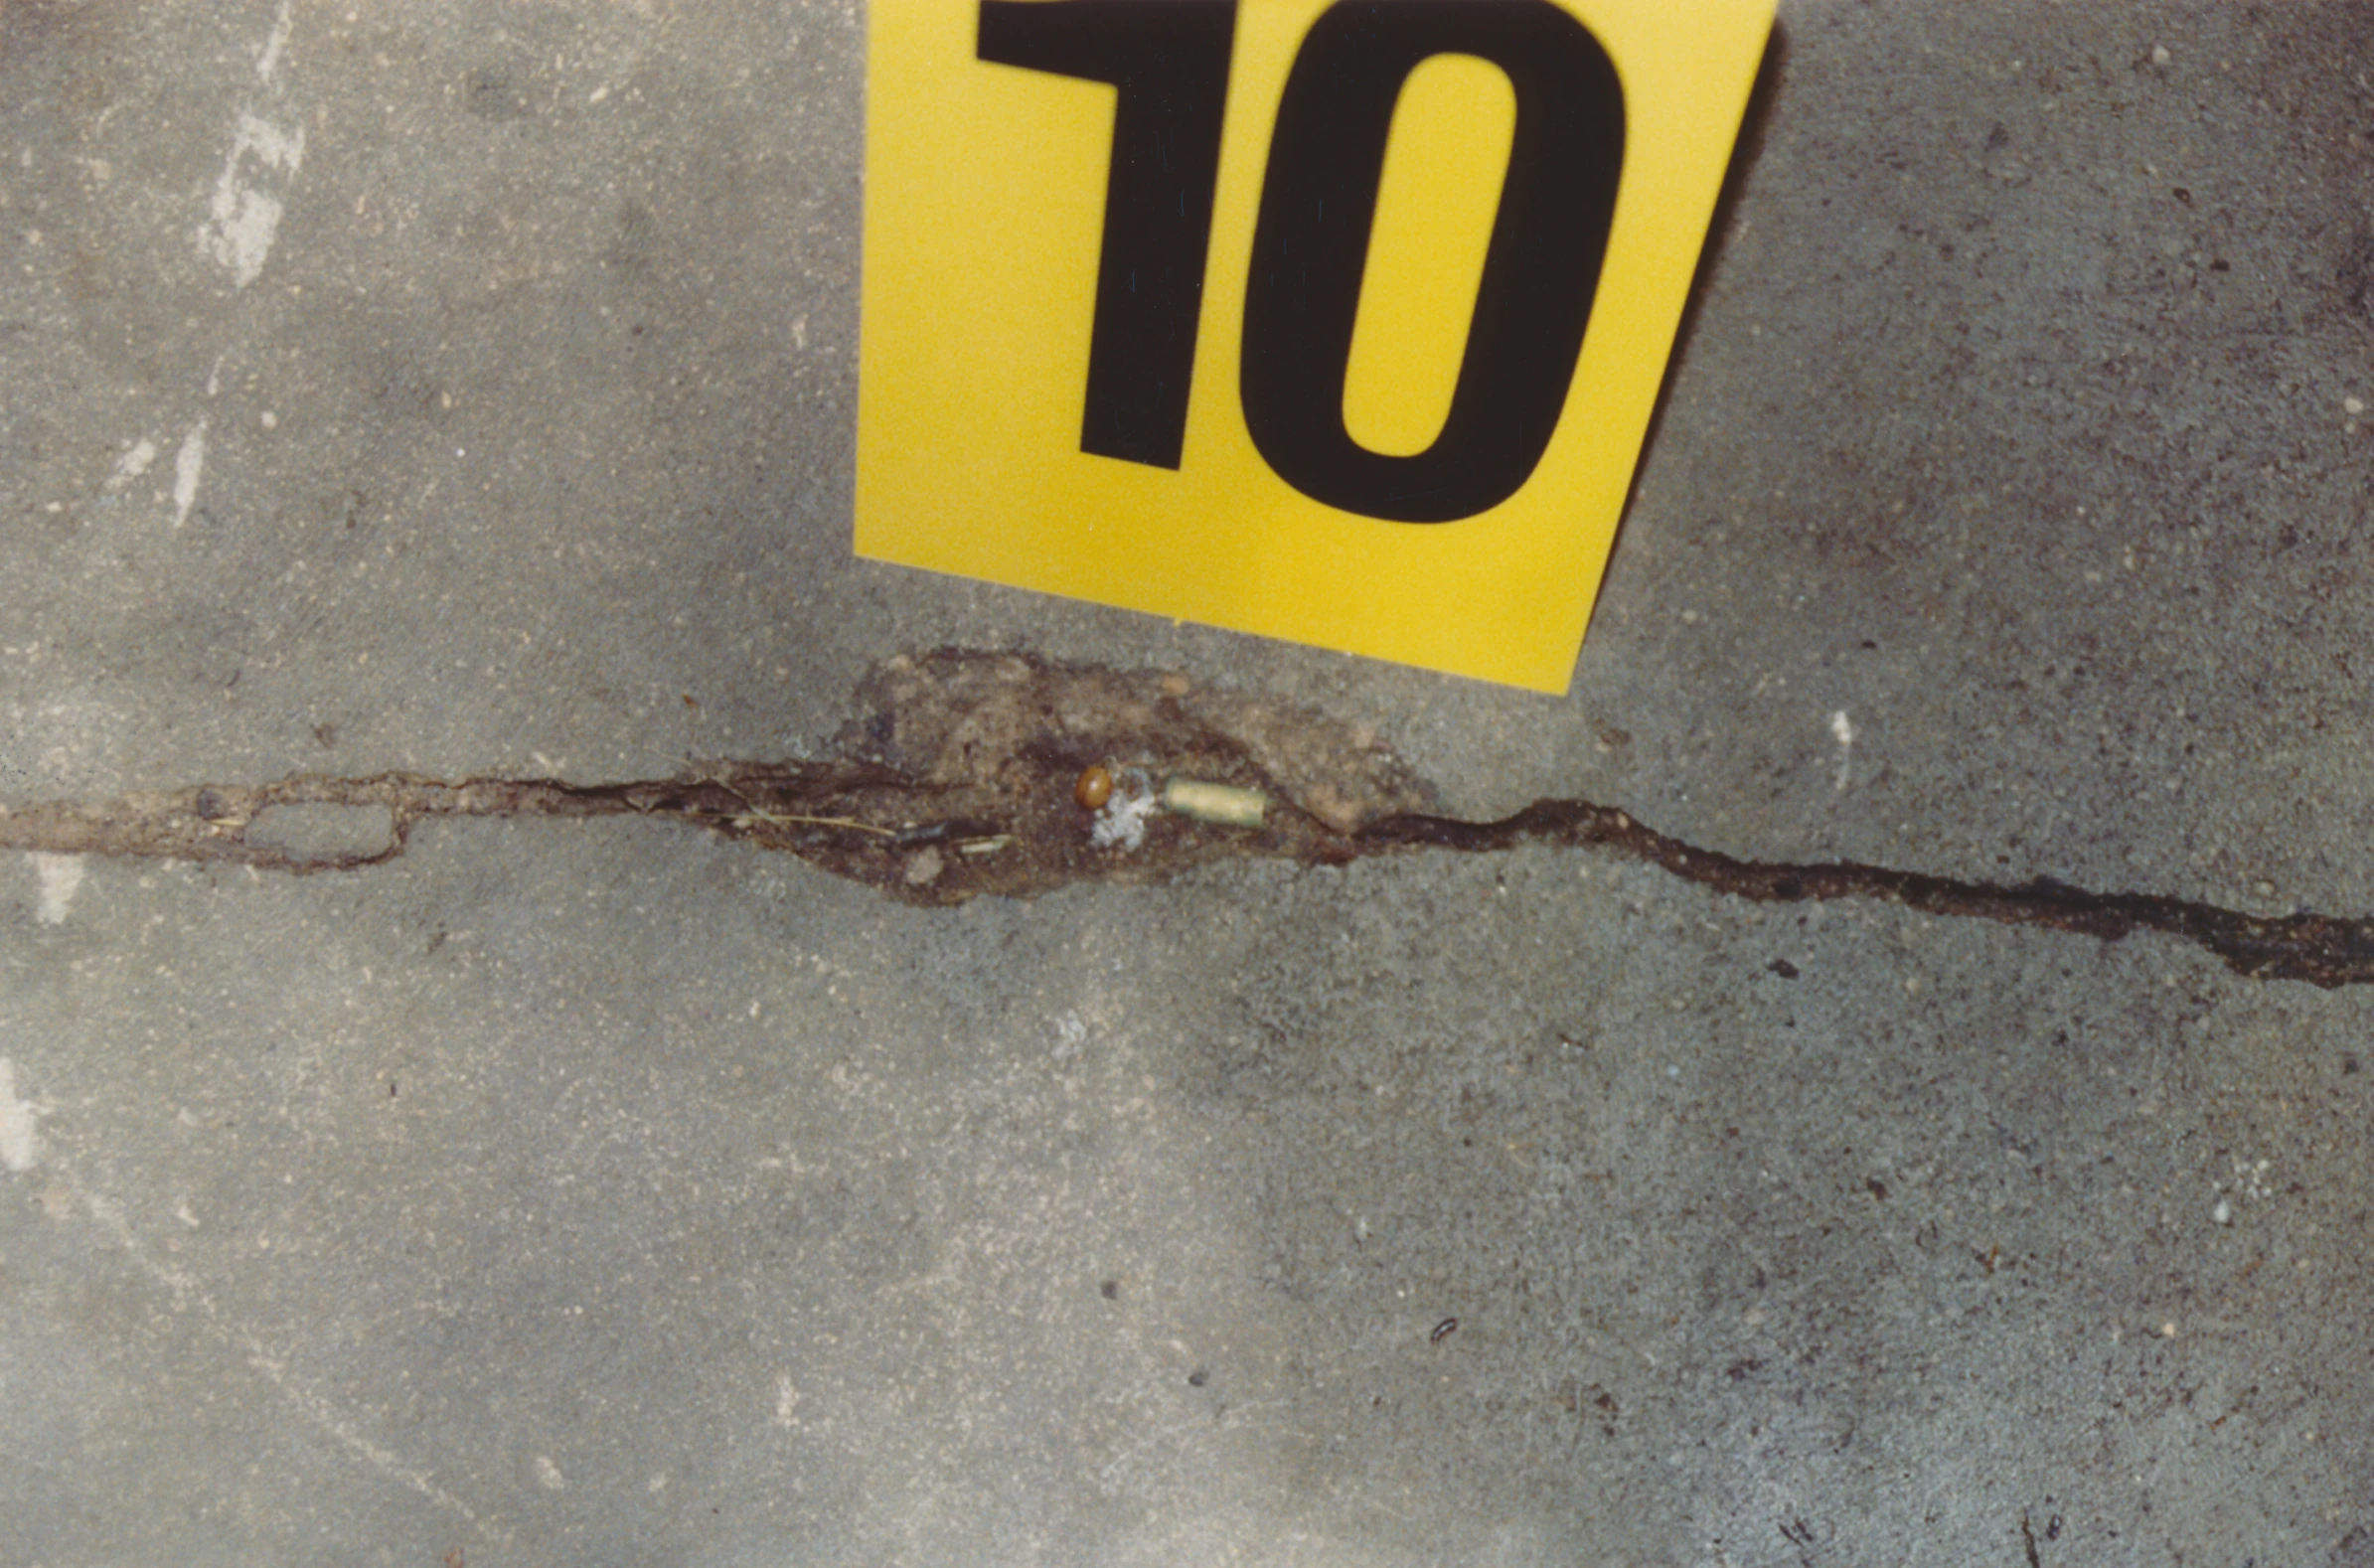
|
| 284 | .22 shell casing from Avery's garage | 9 | 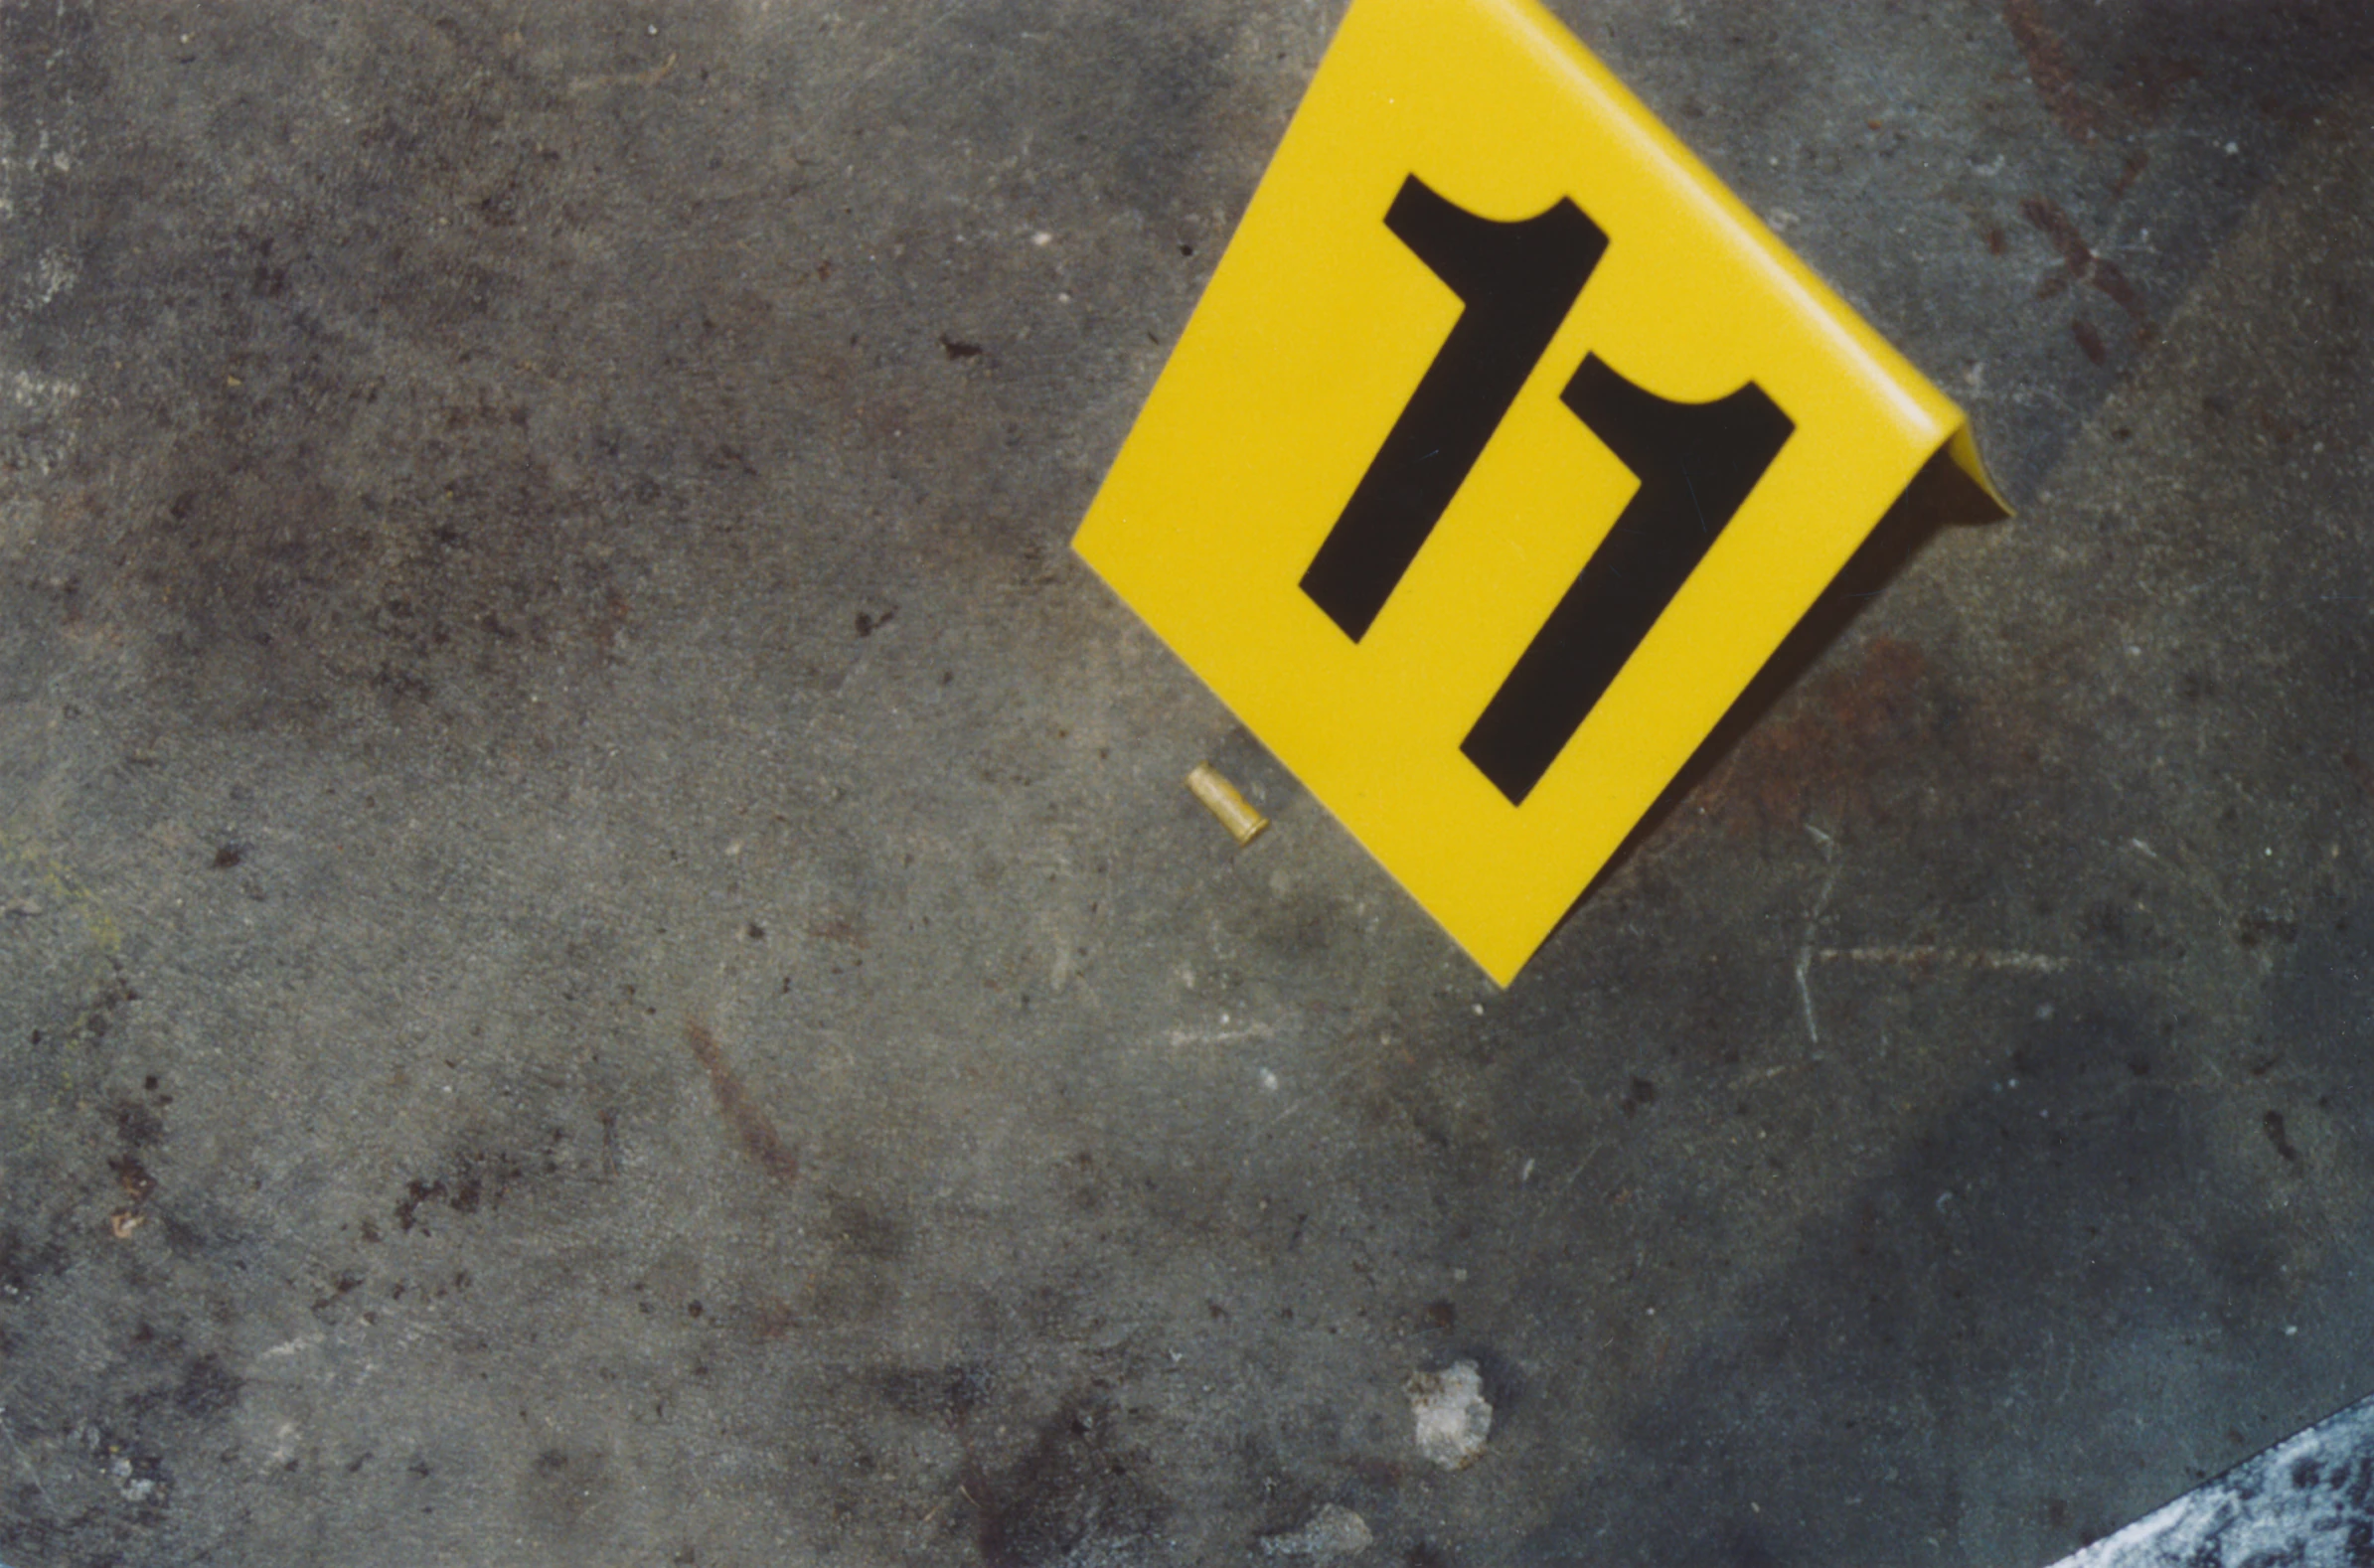
|
| 285 | Lanyard | 10 | 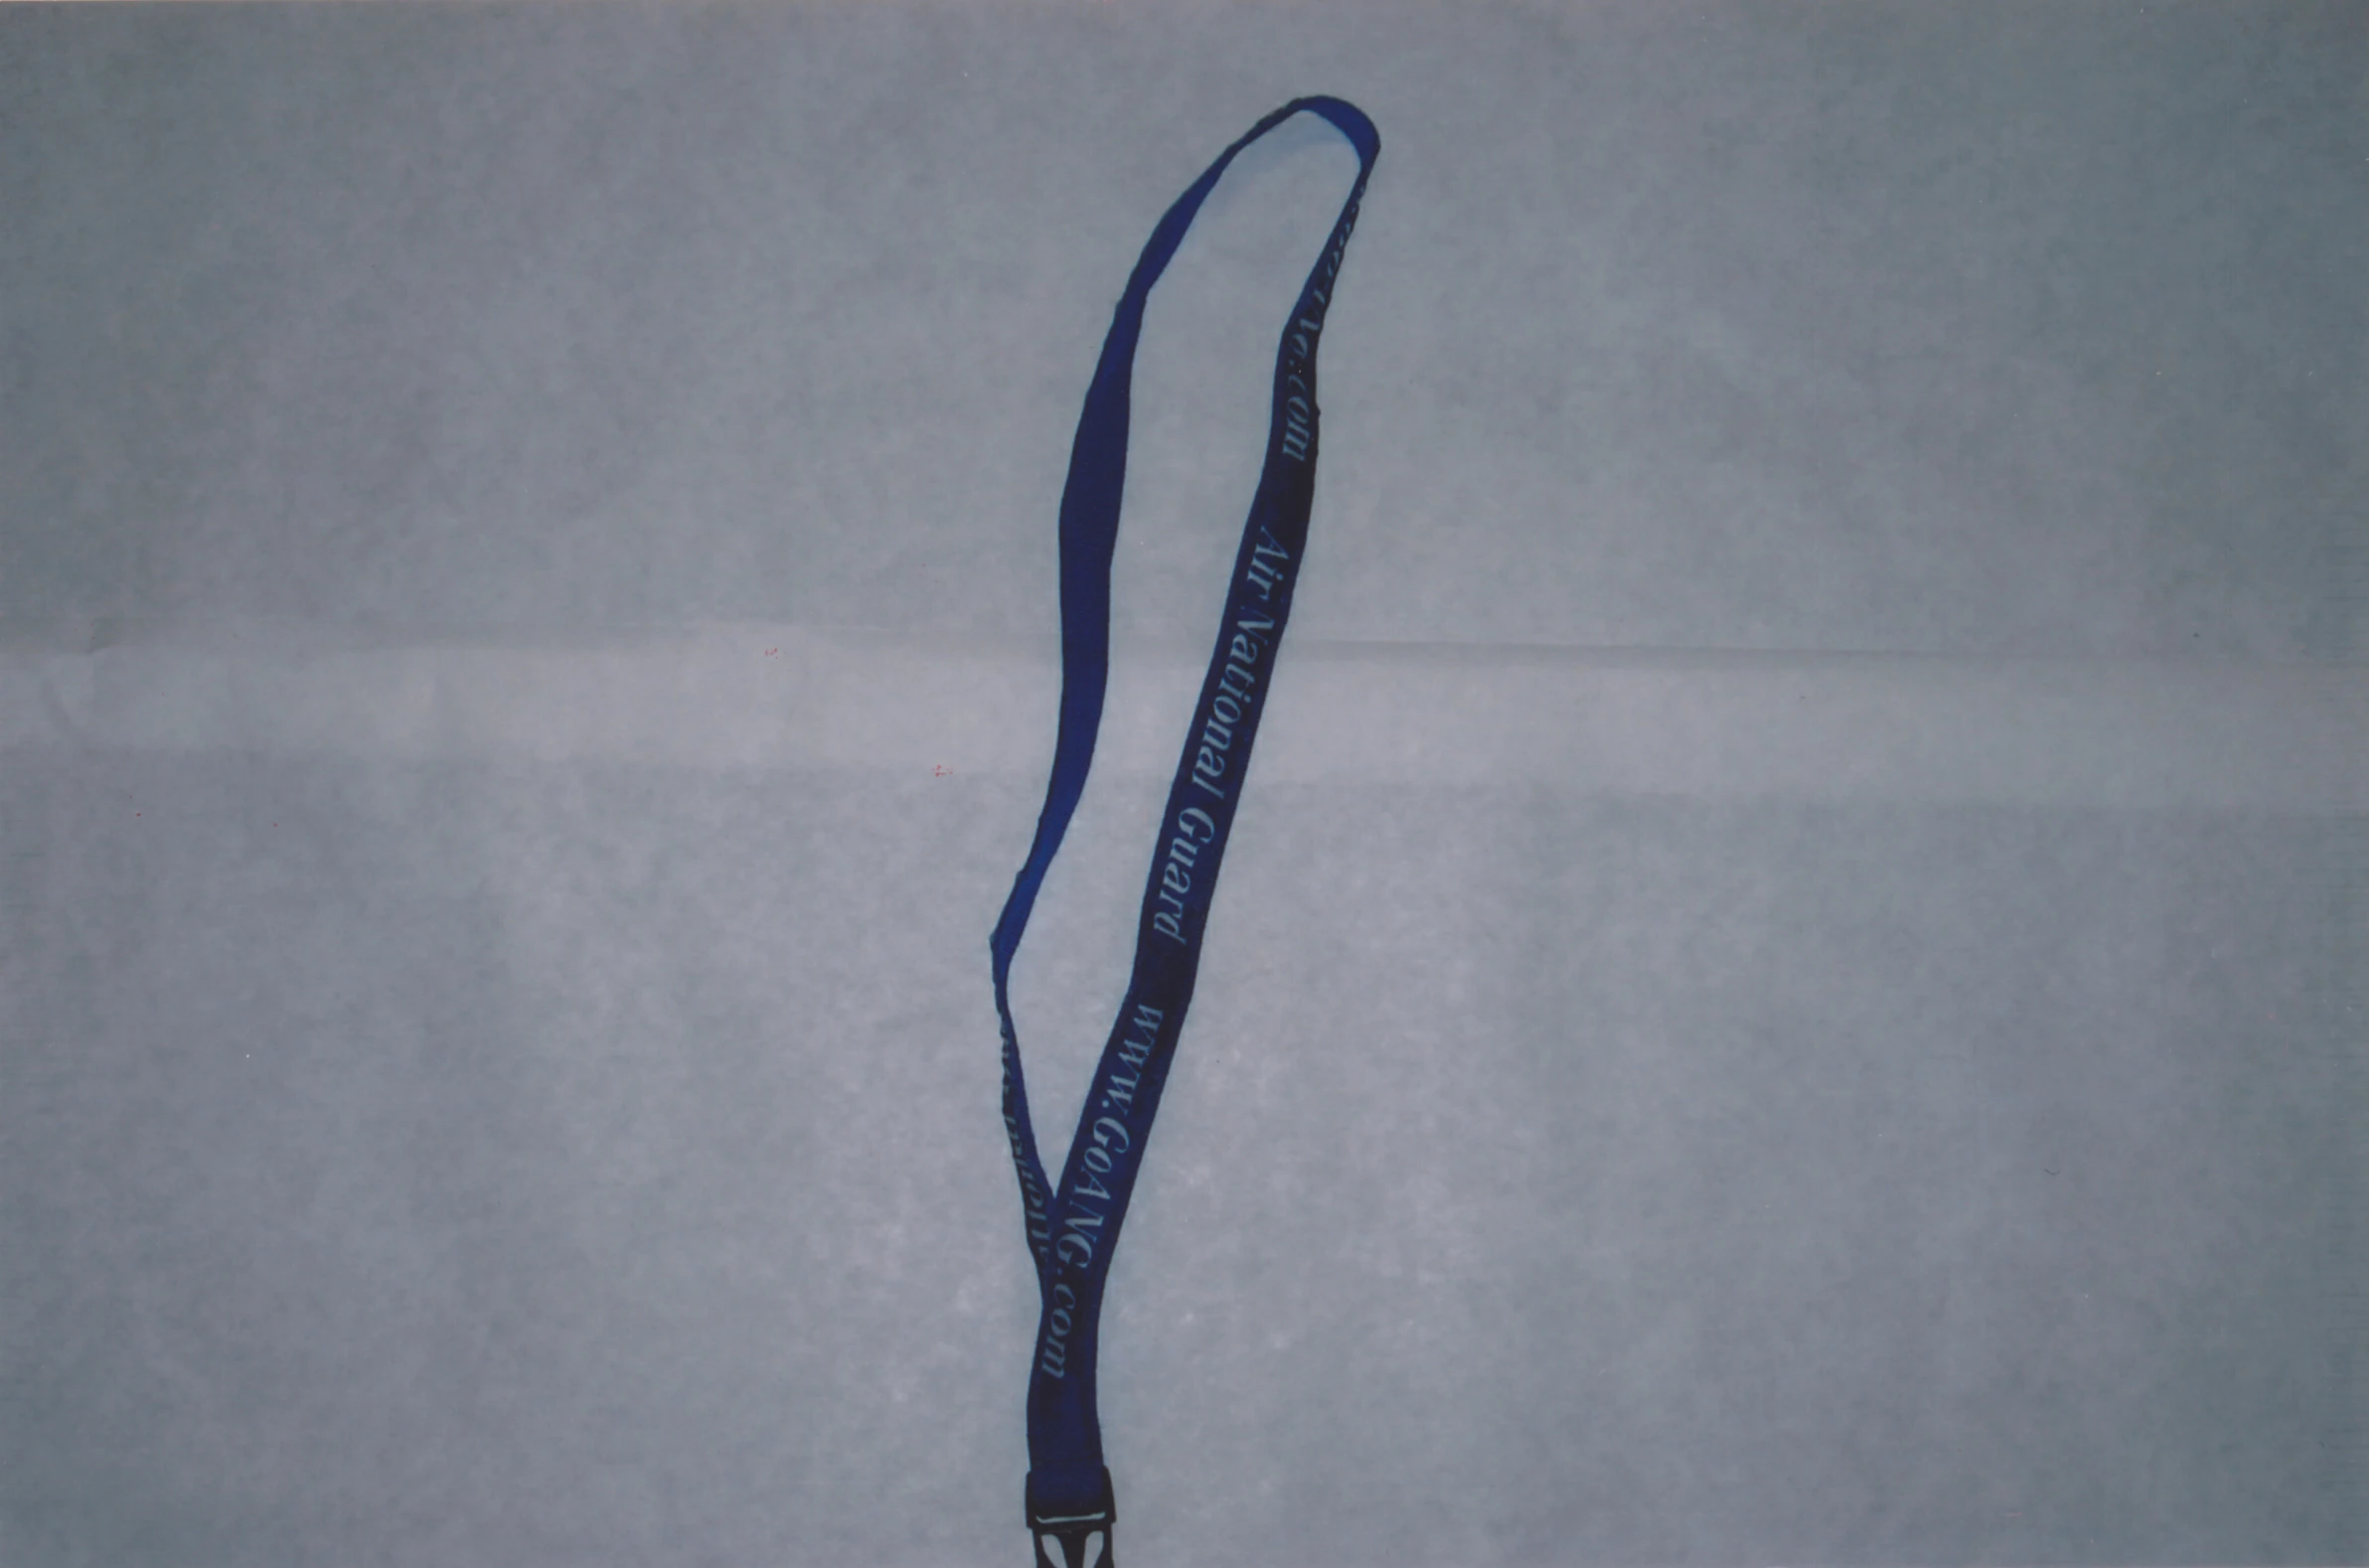
|
| 286 | Lanyard with the RAV4 key | 10 | 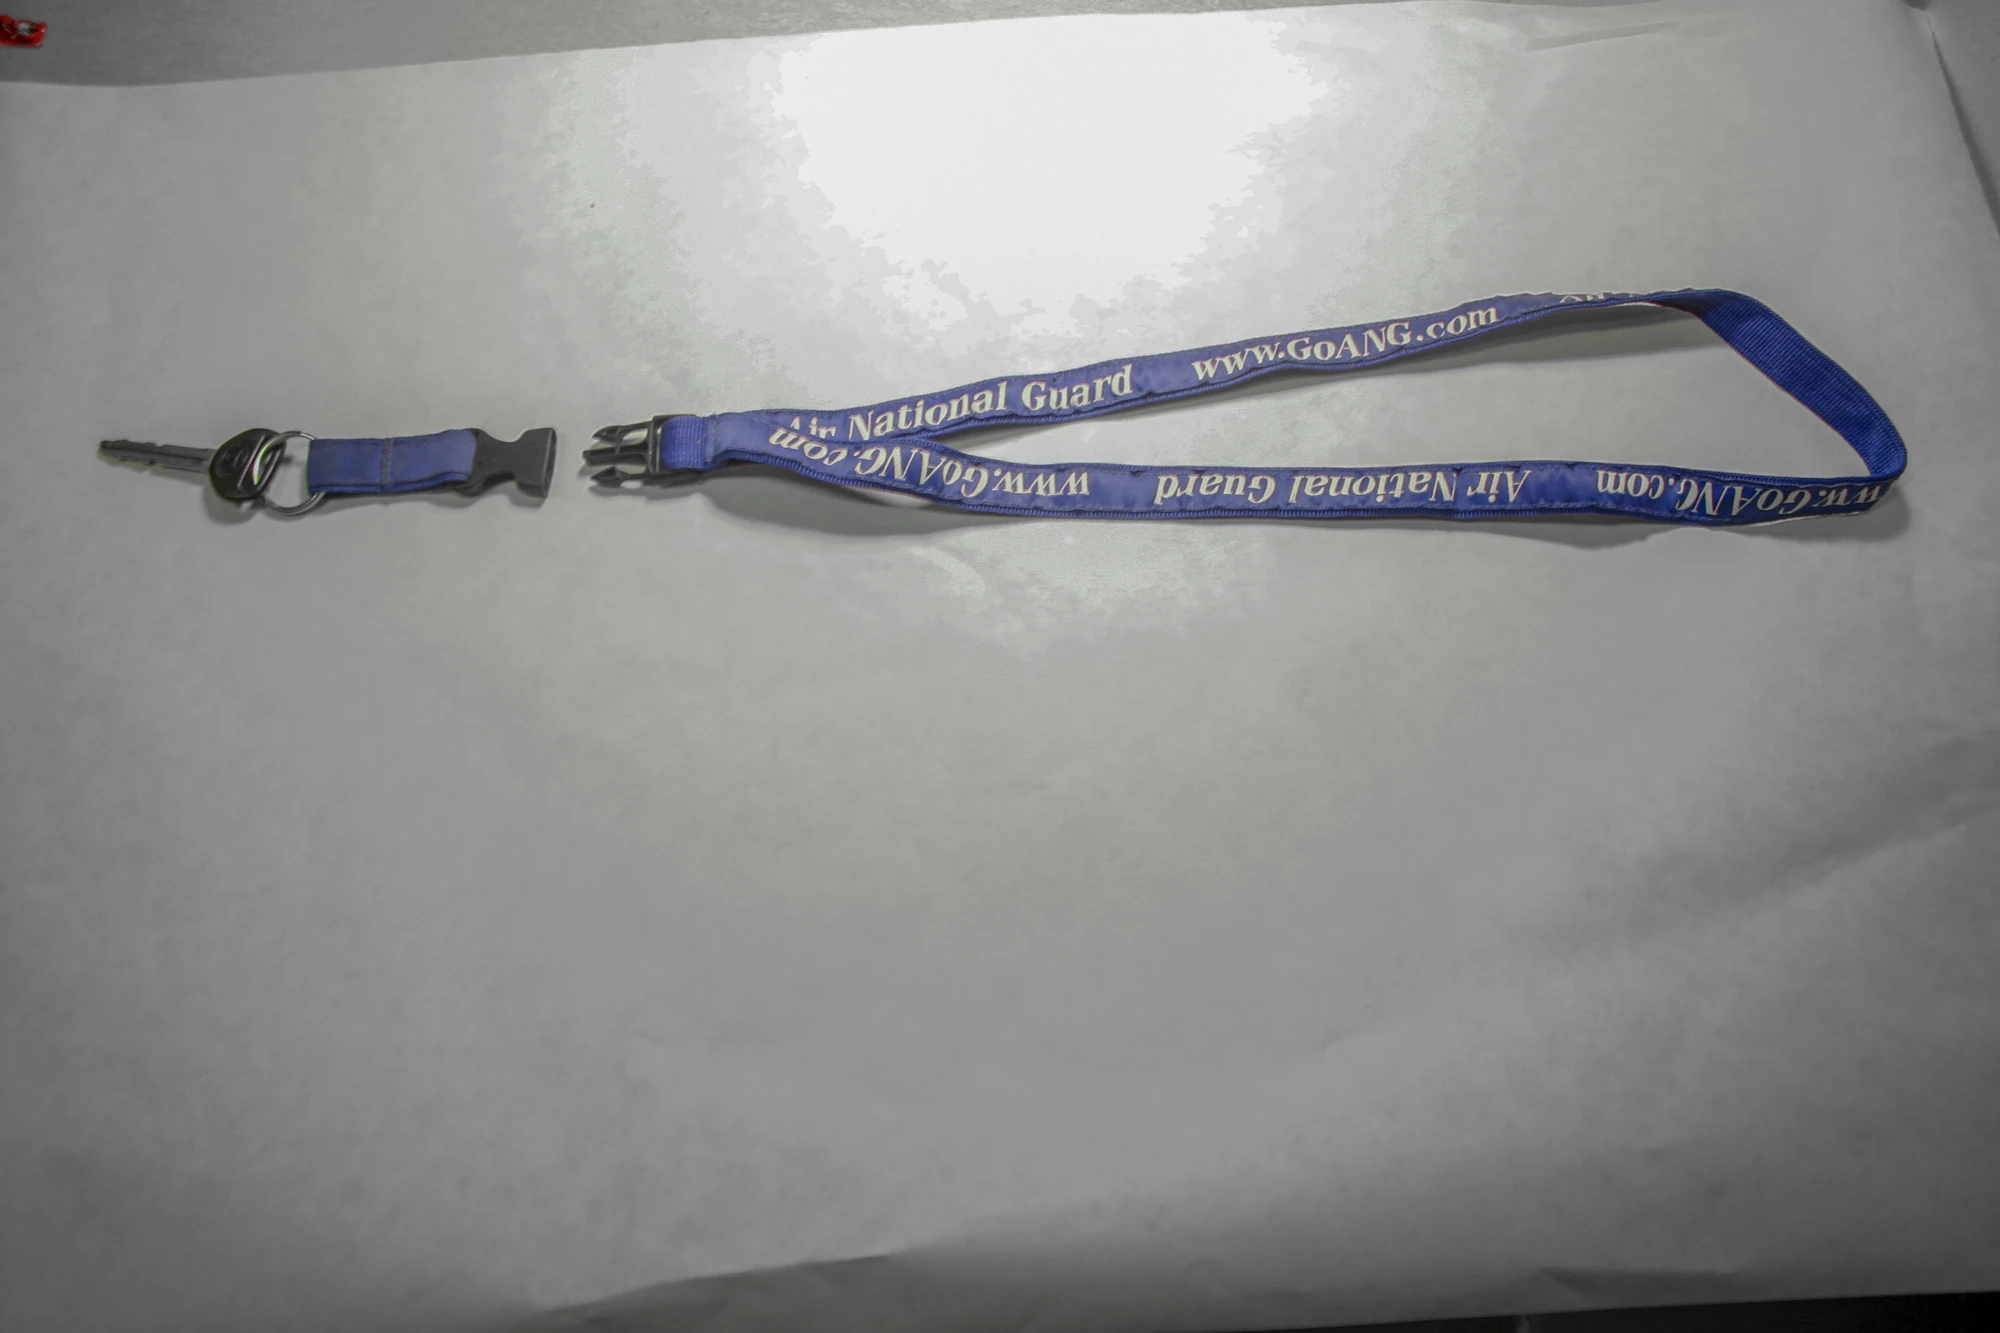
|
| 289 | Toyota RAV4 in evidence | 10 | 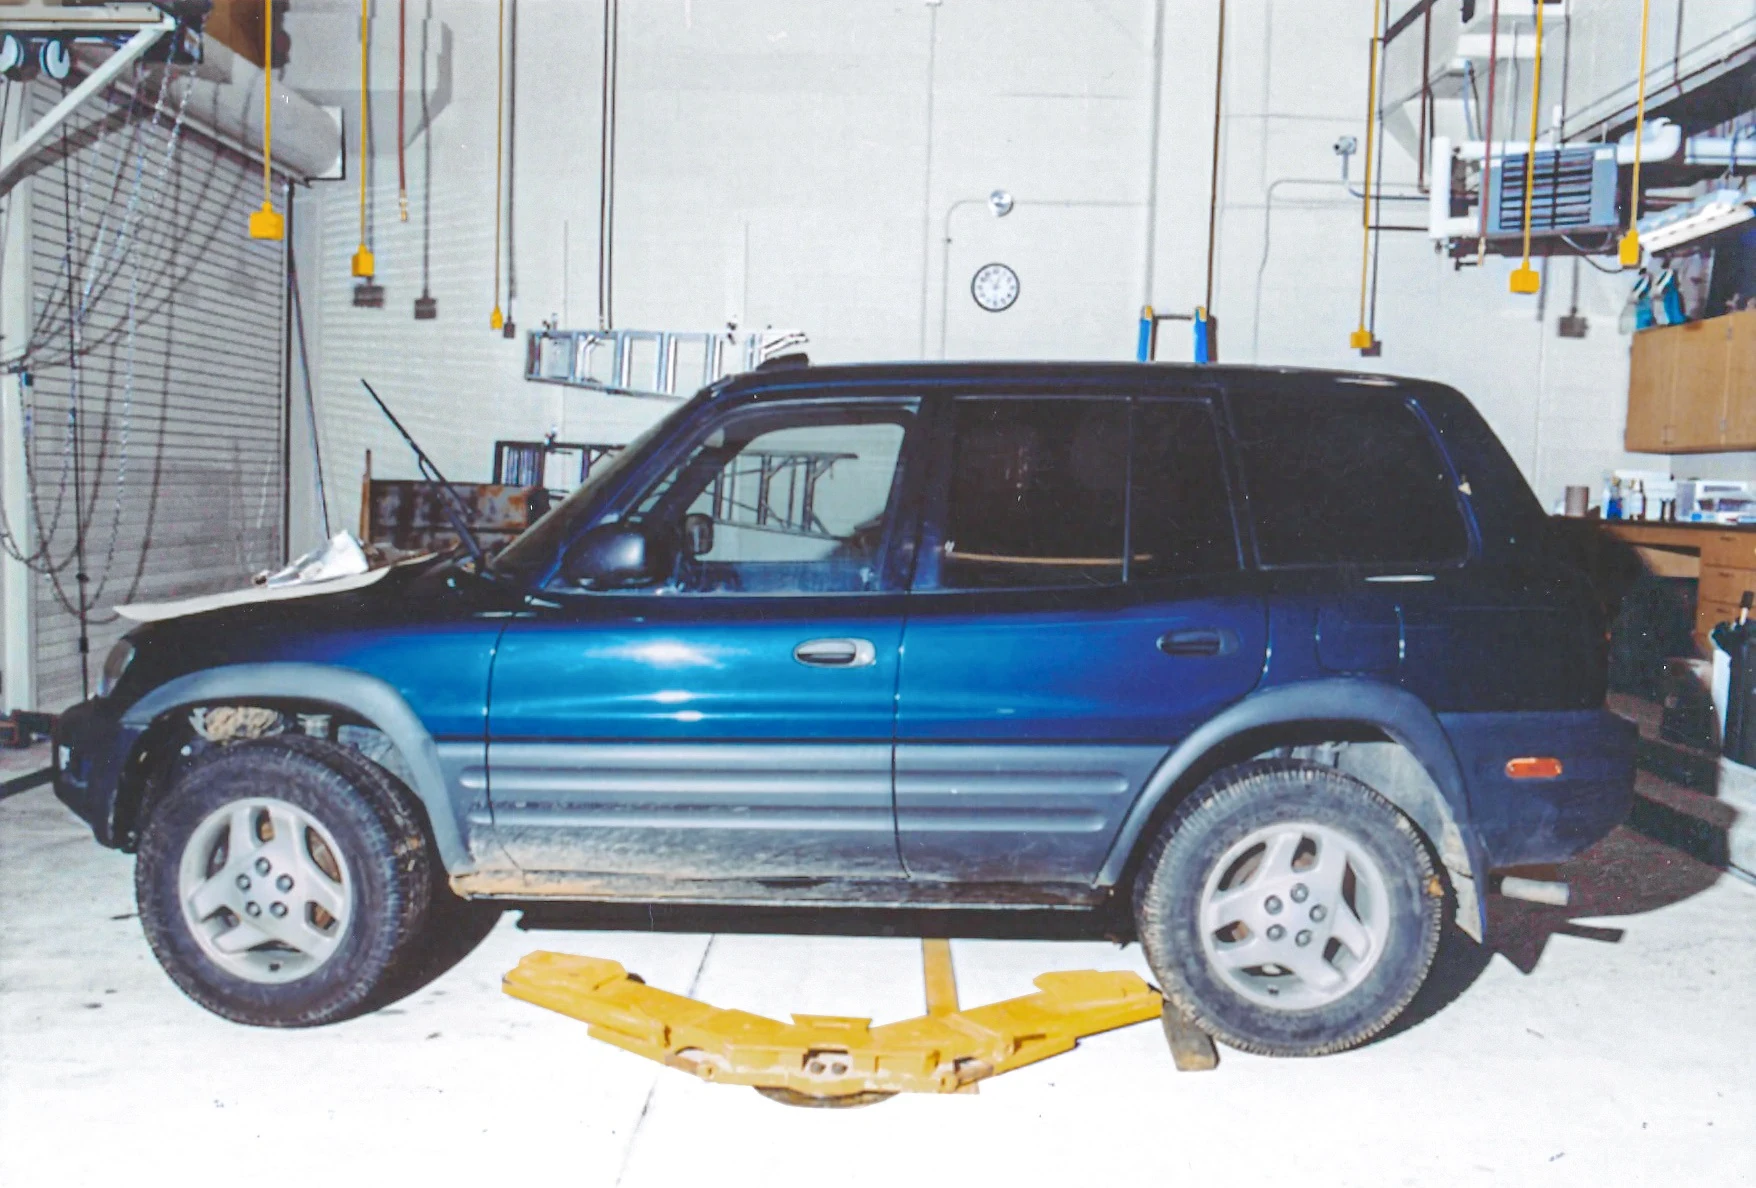
|
| 290 | Toyota RAV4 front driver's side | 10 | 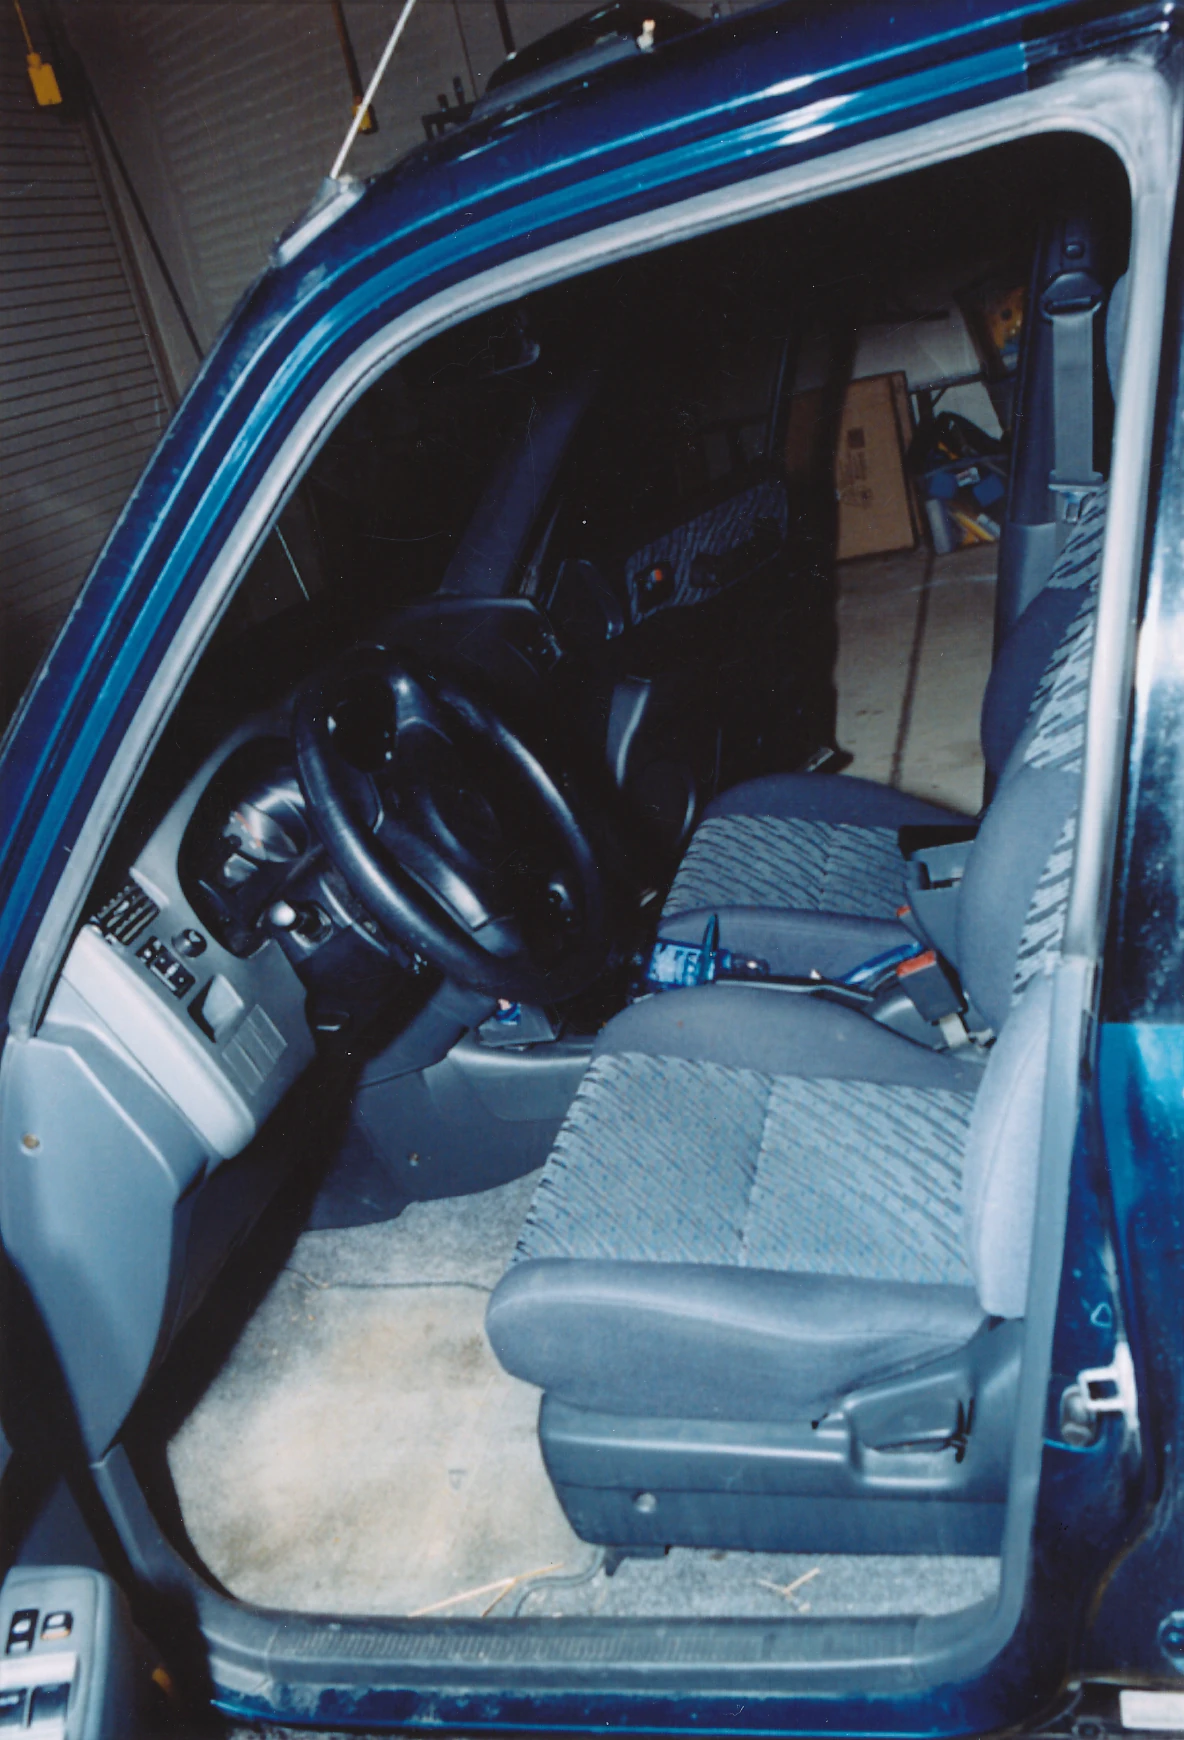
|
| 291 | Toyota RAV4 dashboard | 10 | 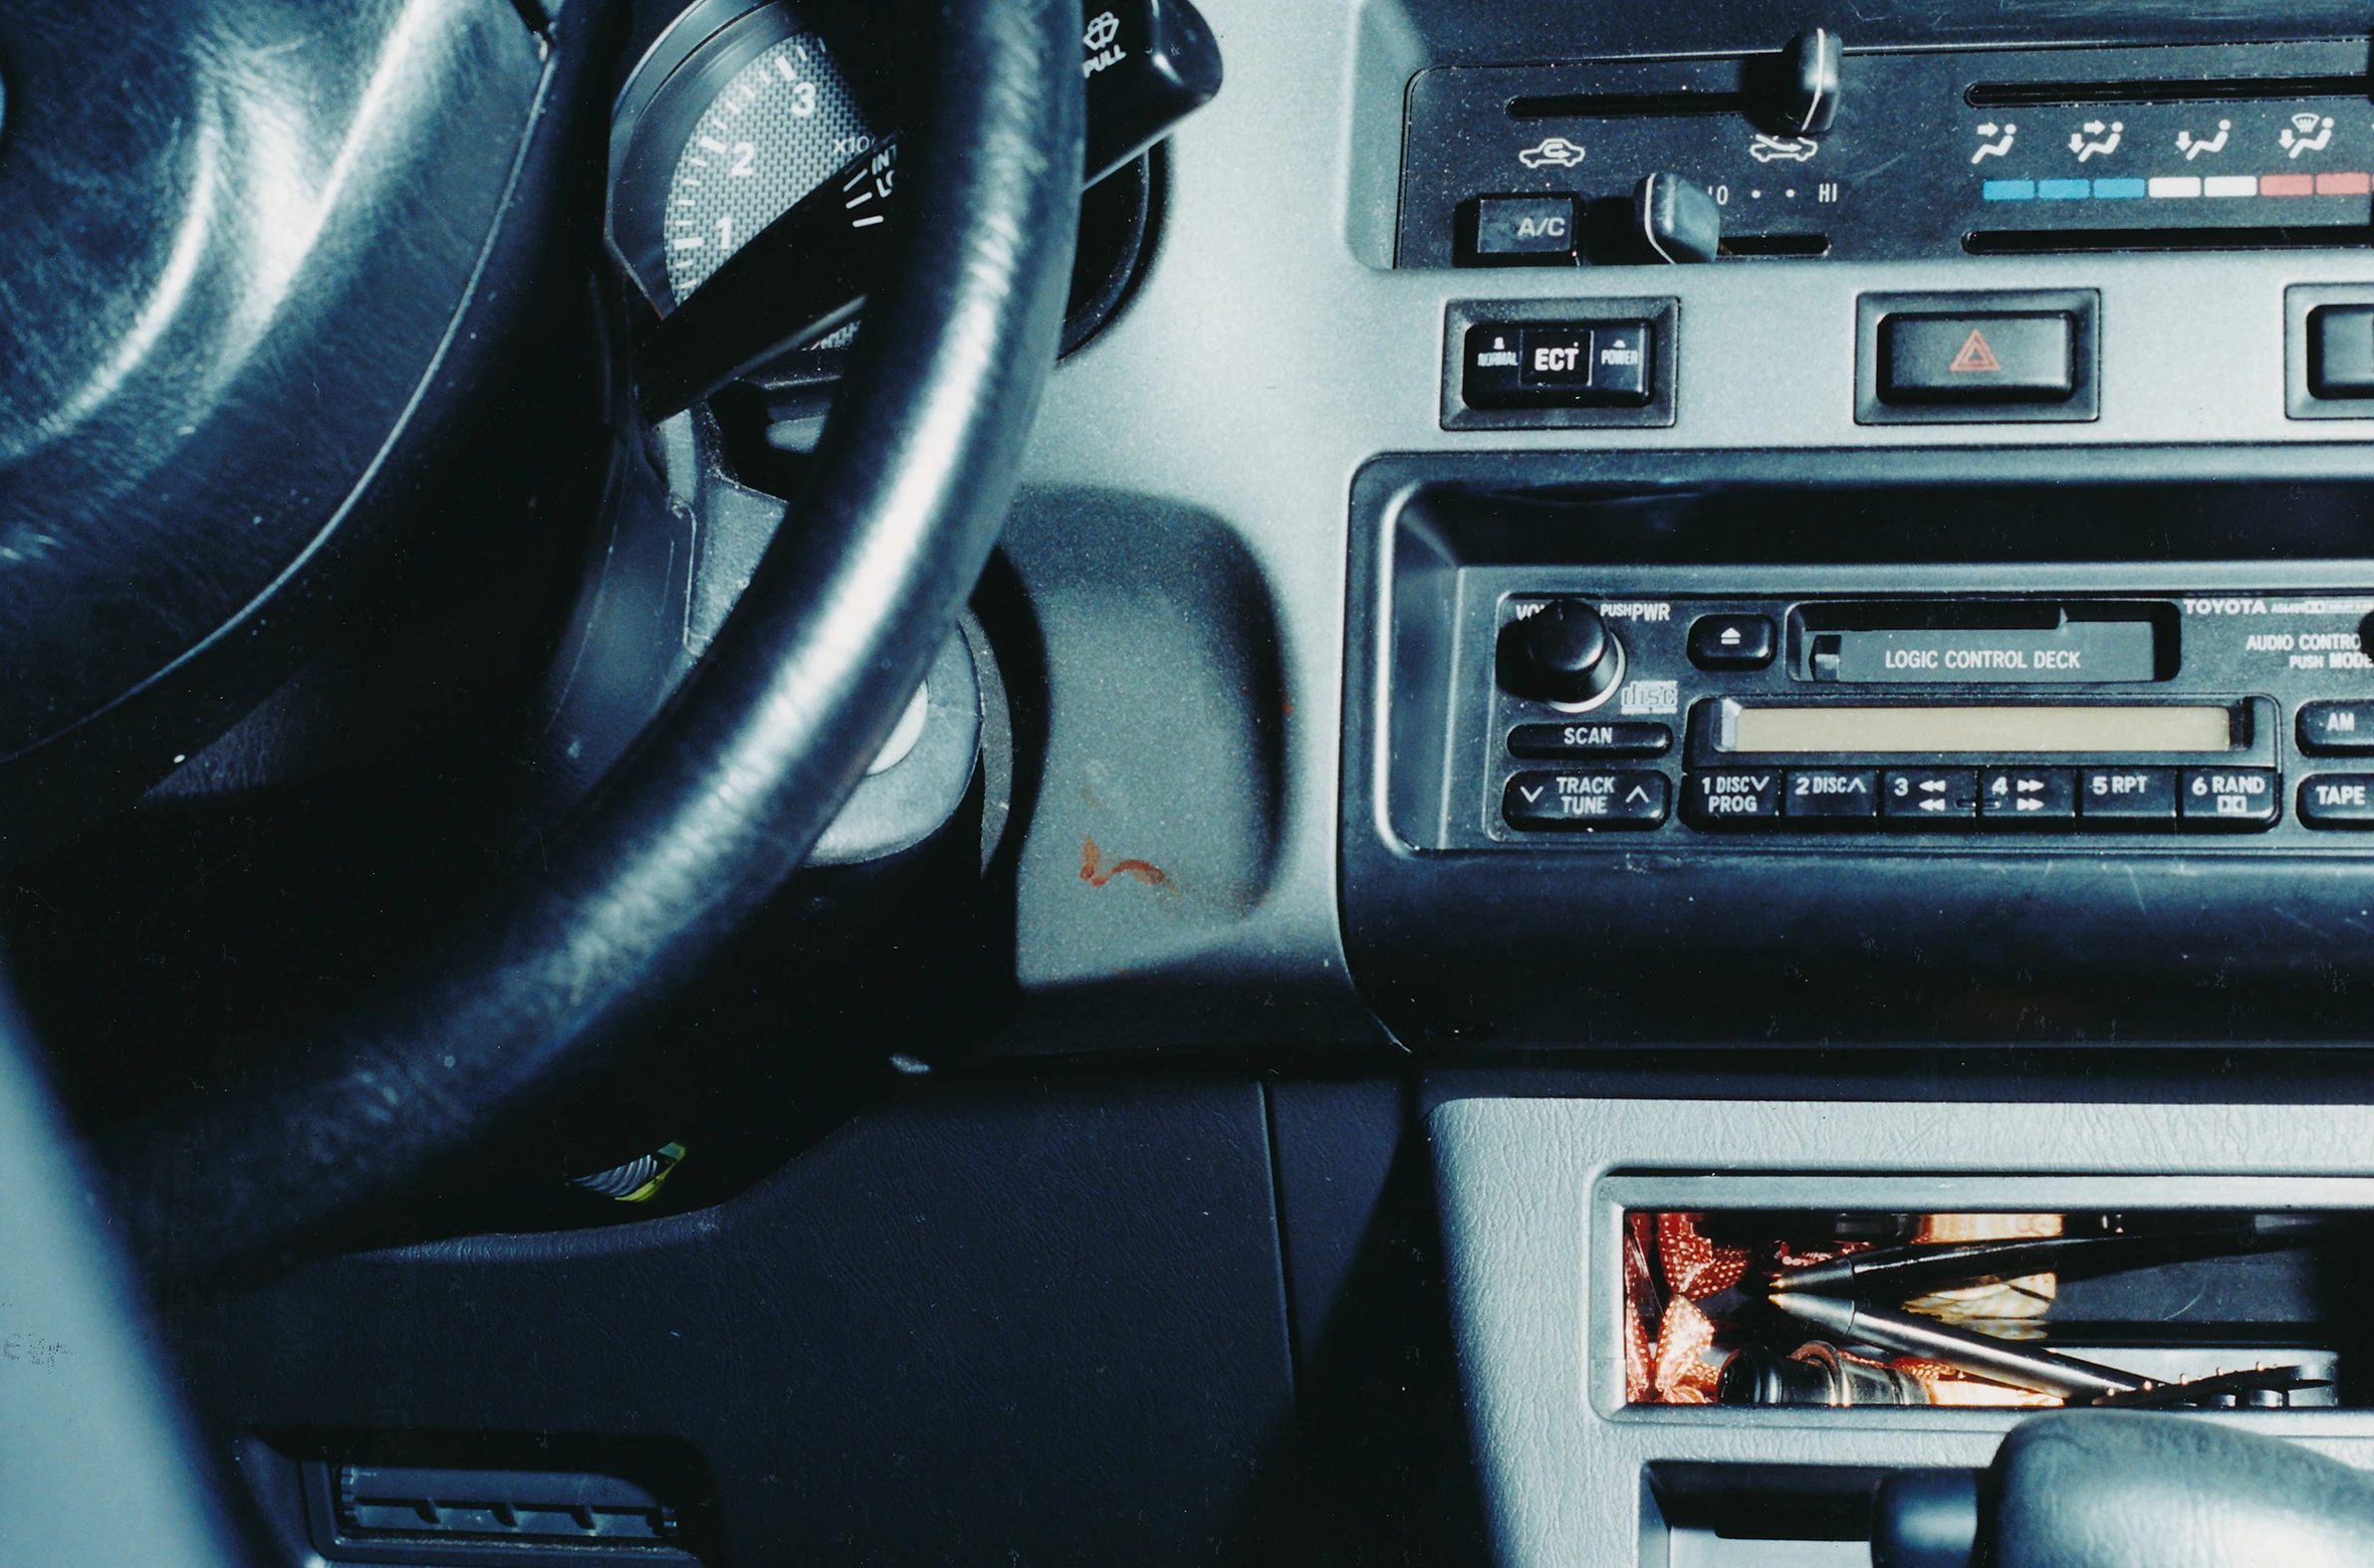
|
| 292 | Items on front passenger seat | 10 | 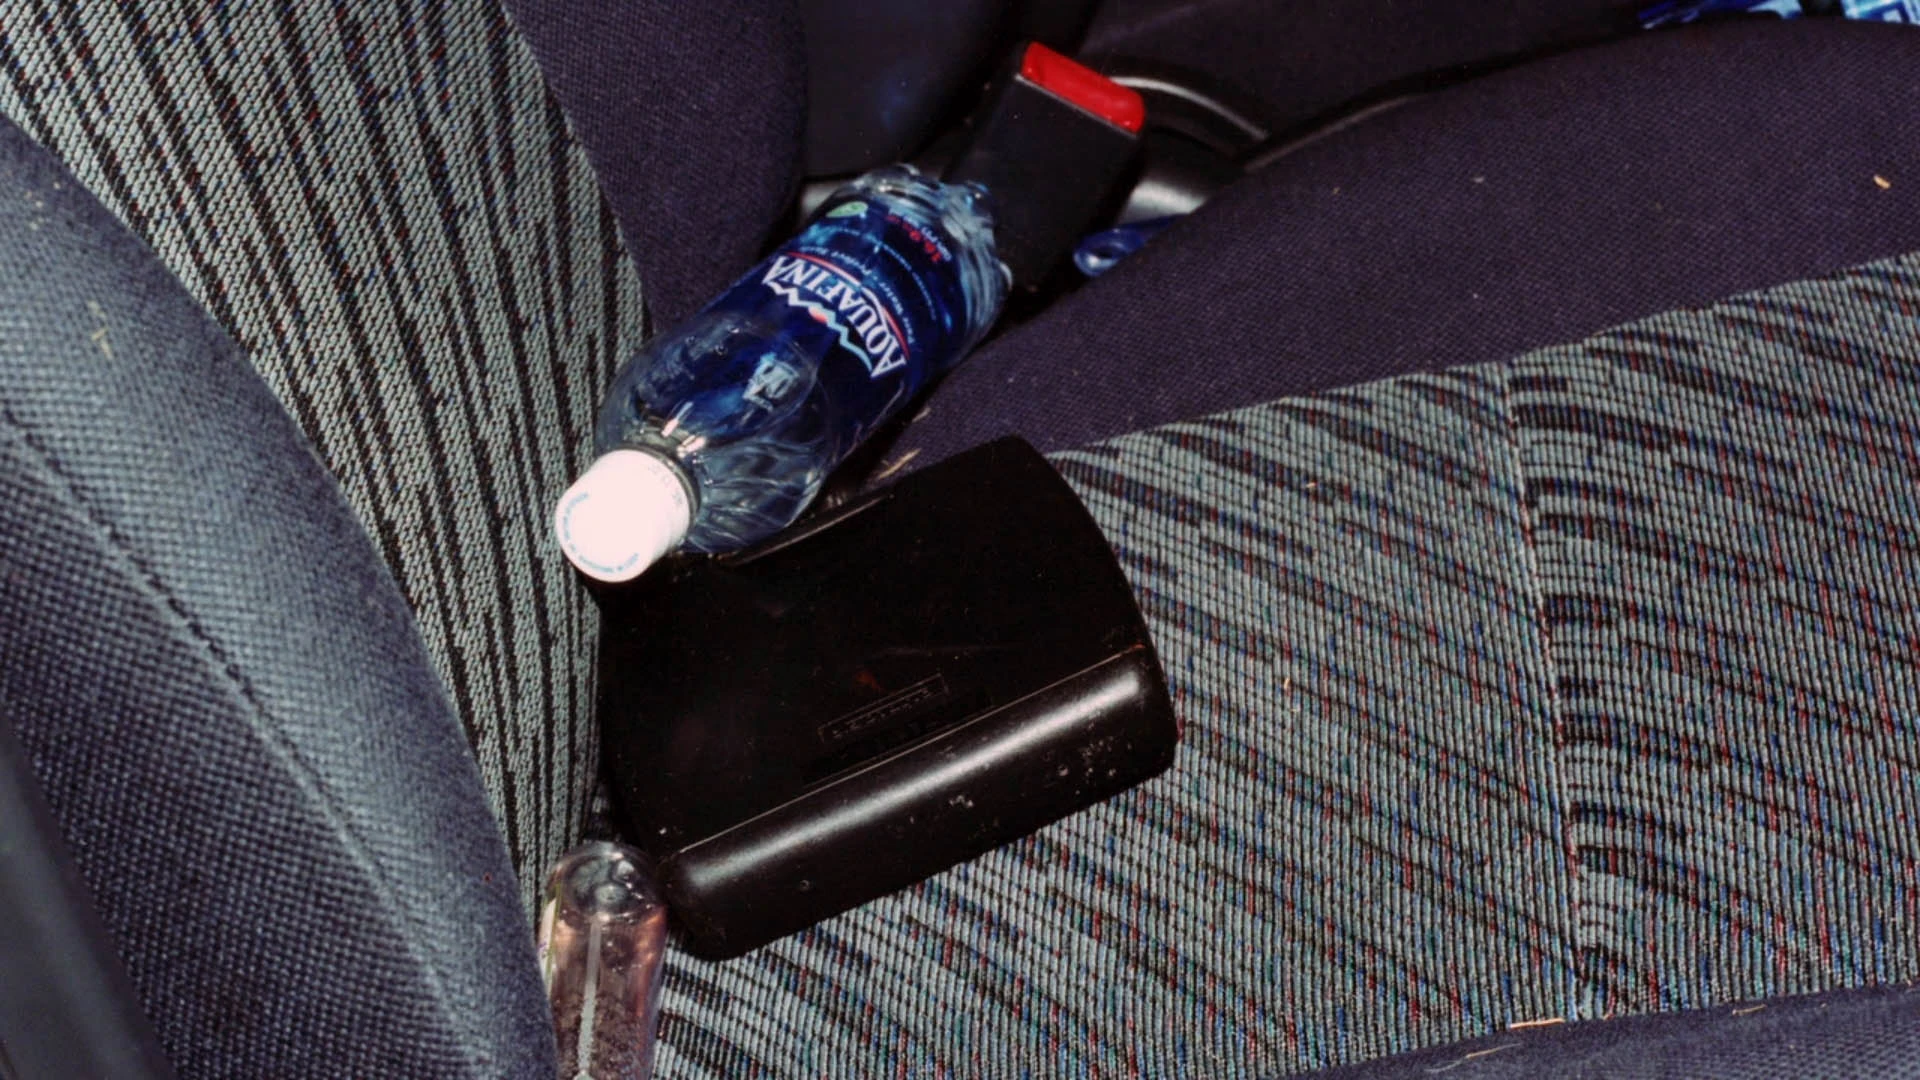
|
| 293 | Toyota RAV4 front passenger seat | 10 | 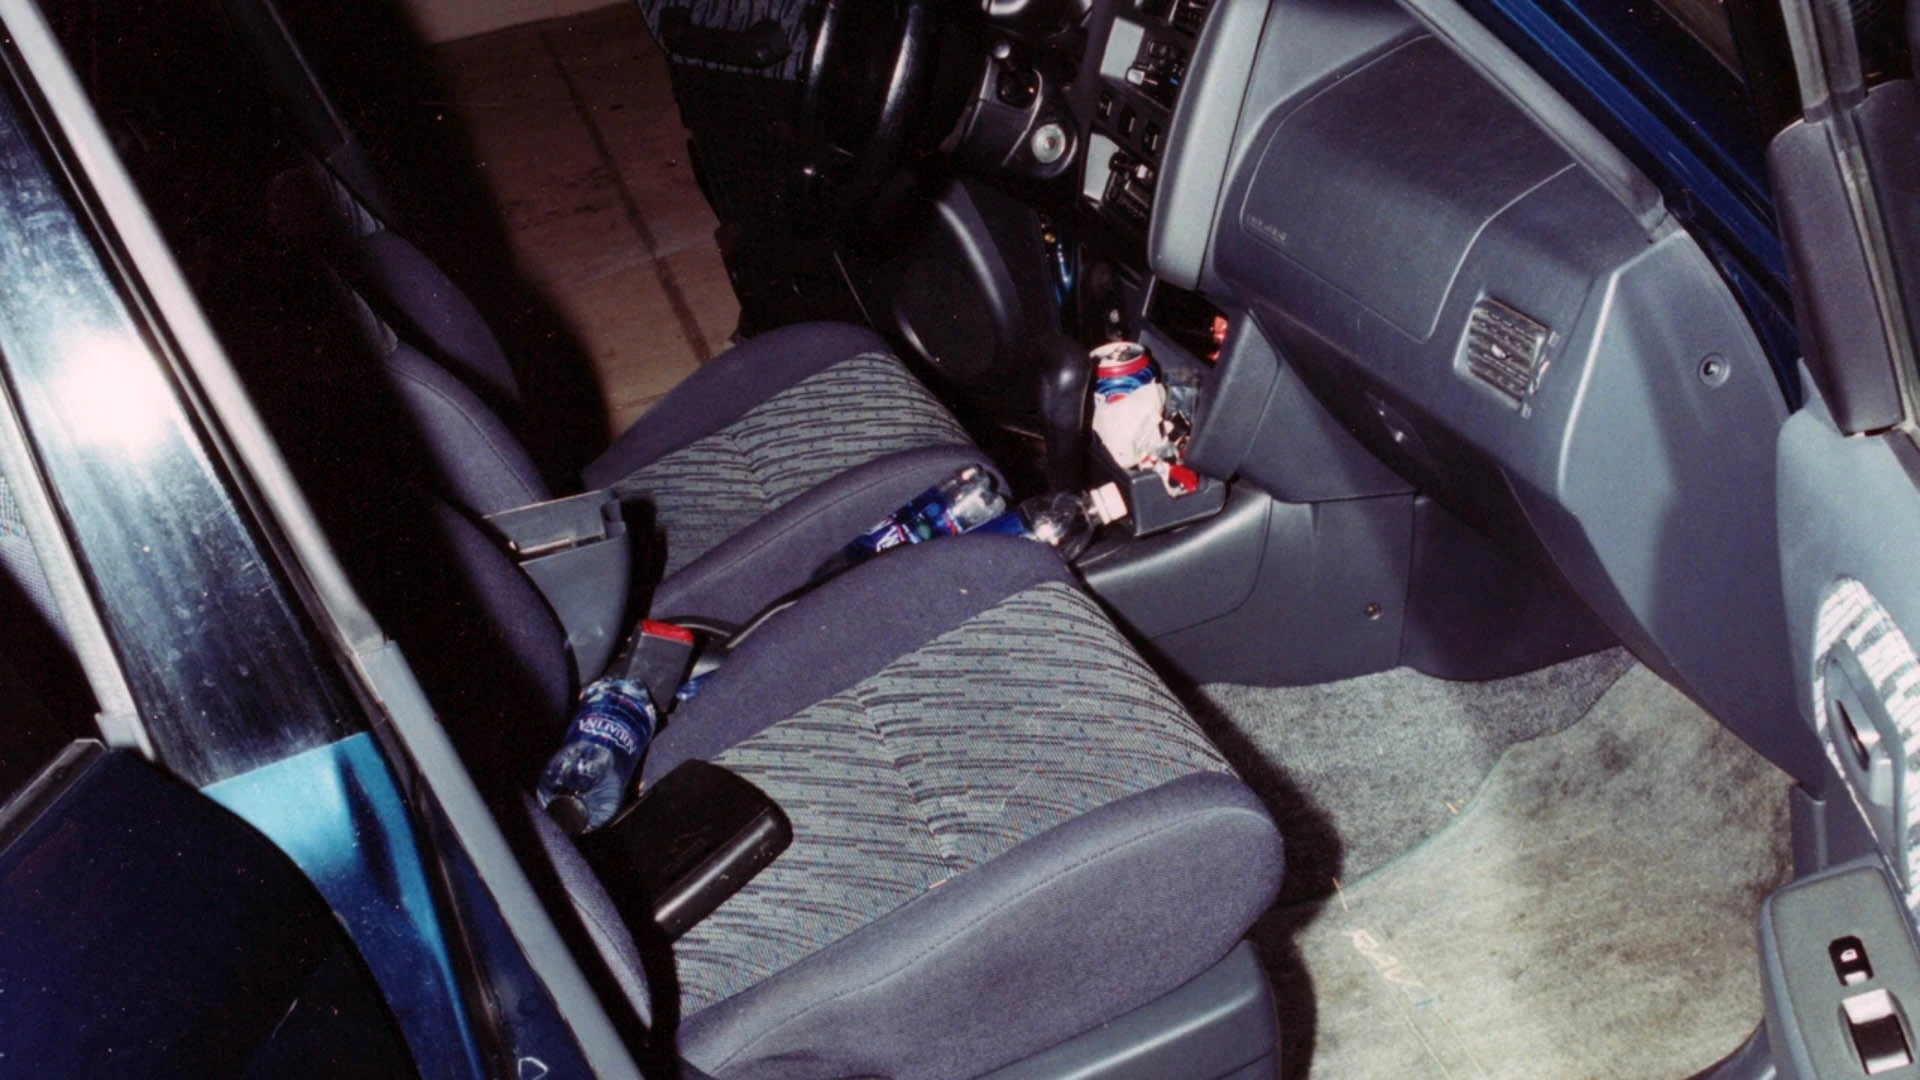
|
| 294 | Toyota RAV4 rear passenger seat door frame | 10 | 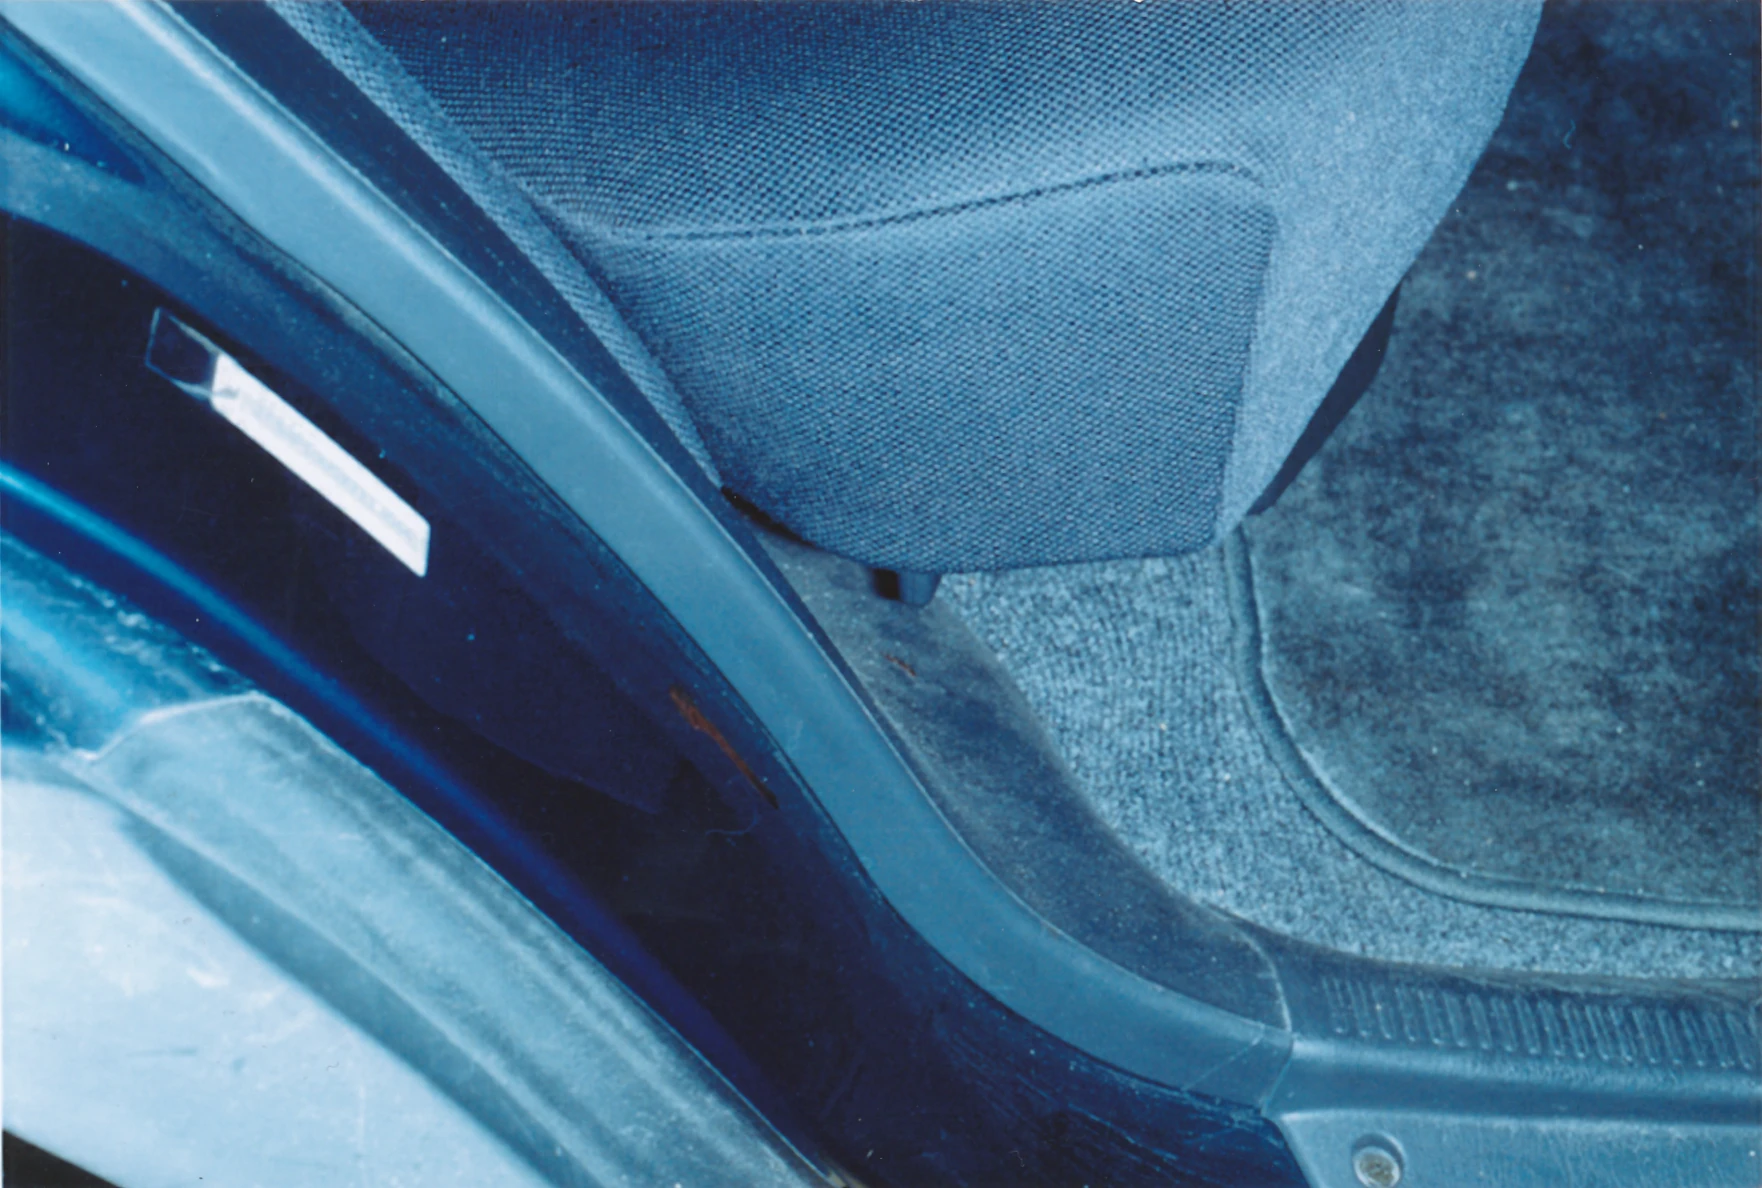
|
| 295 | Toyota RAV4 cargo area with stain | 10 | 
|
| 296 | Toyota RAV4 cargo area with stain | 10 | 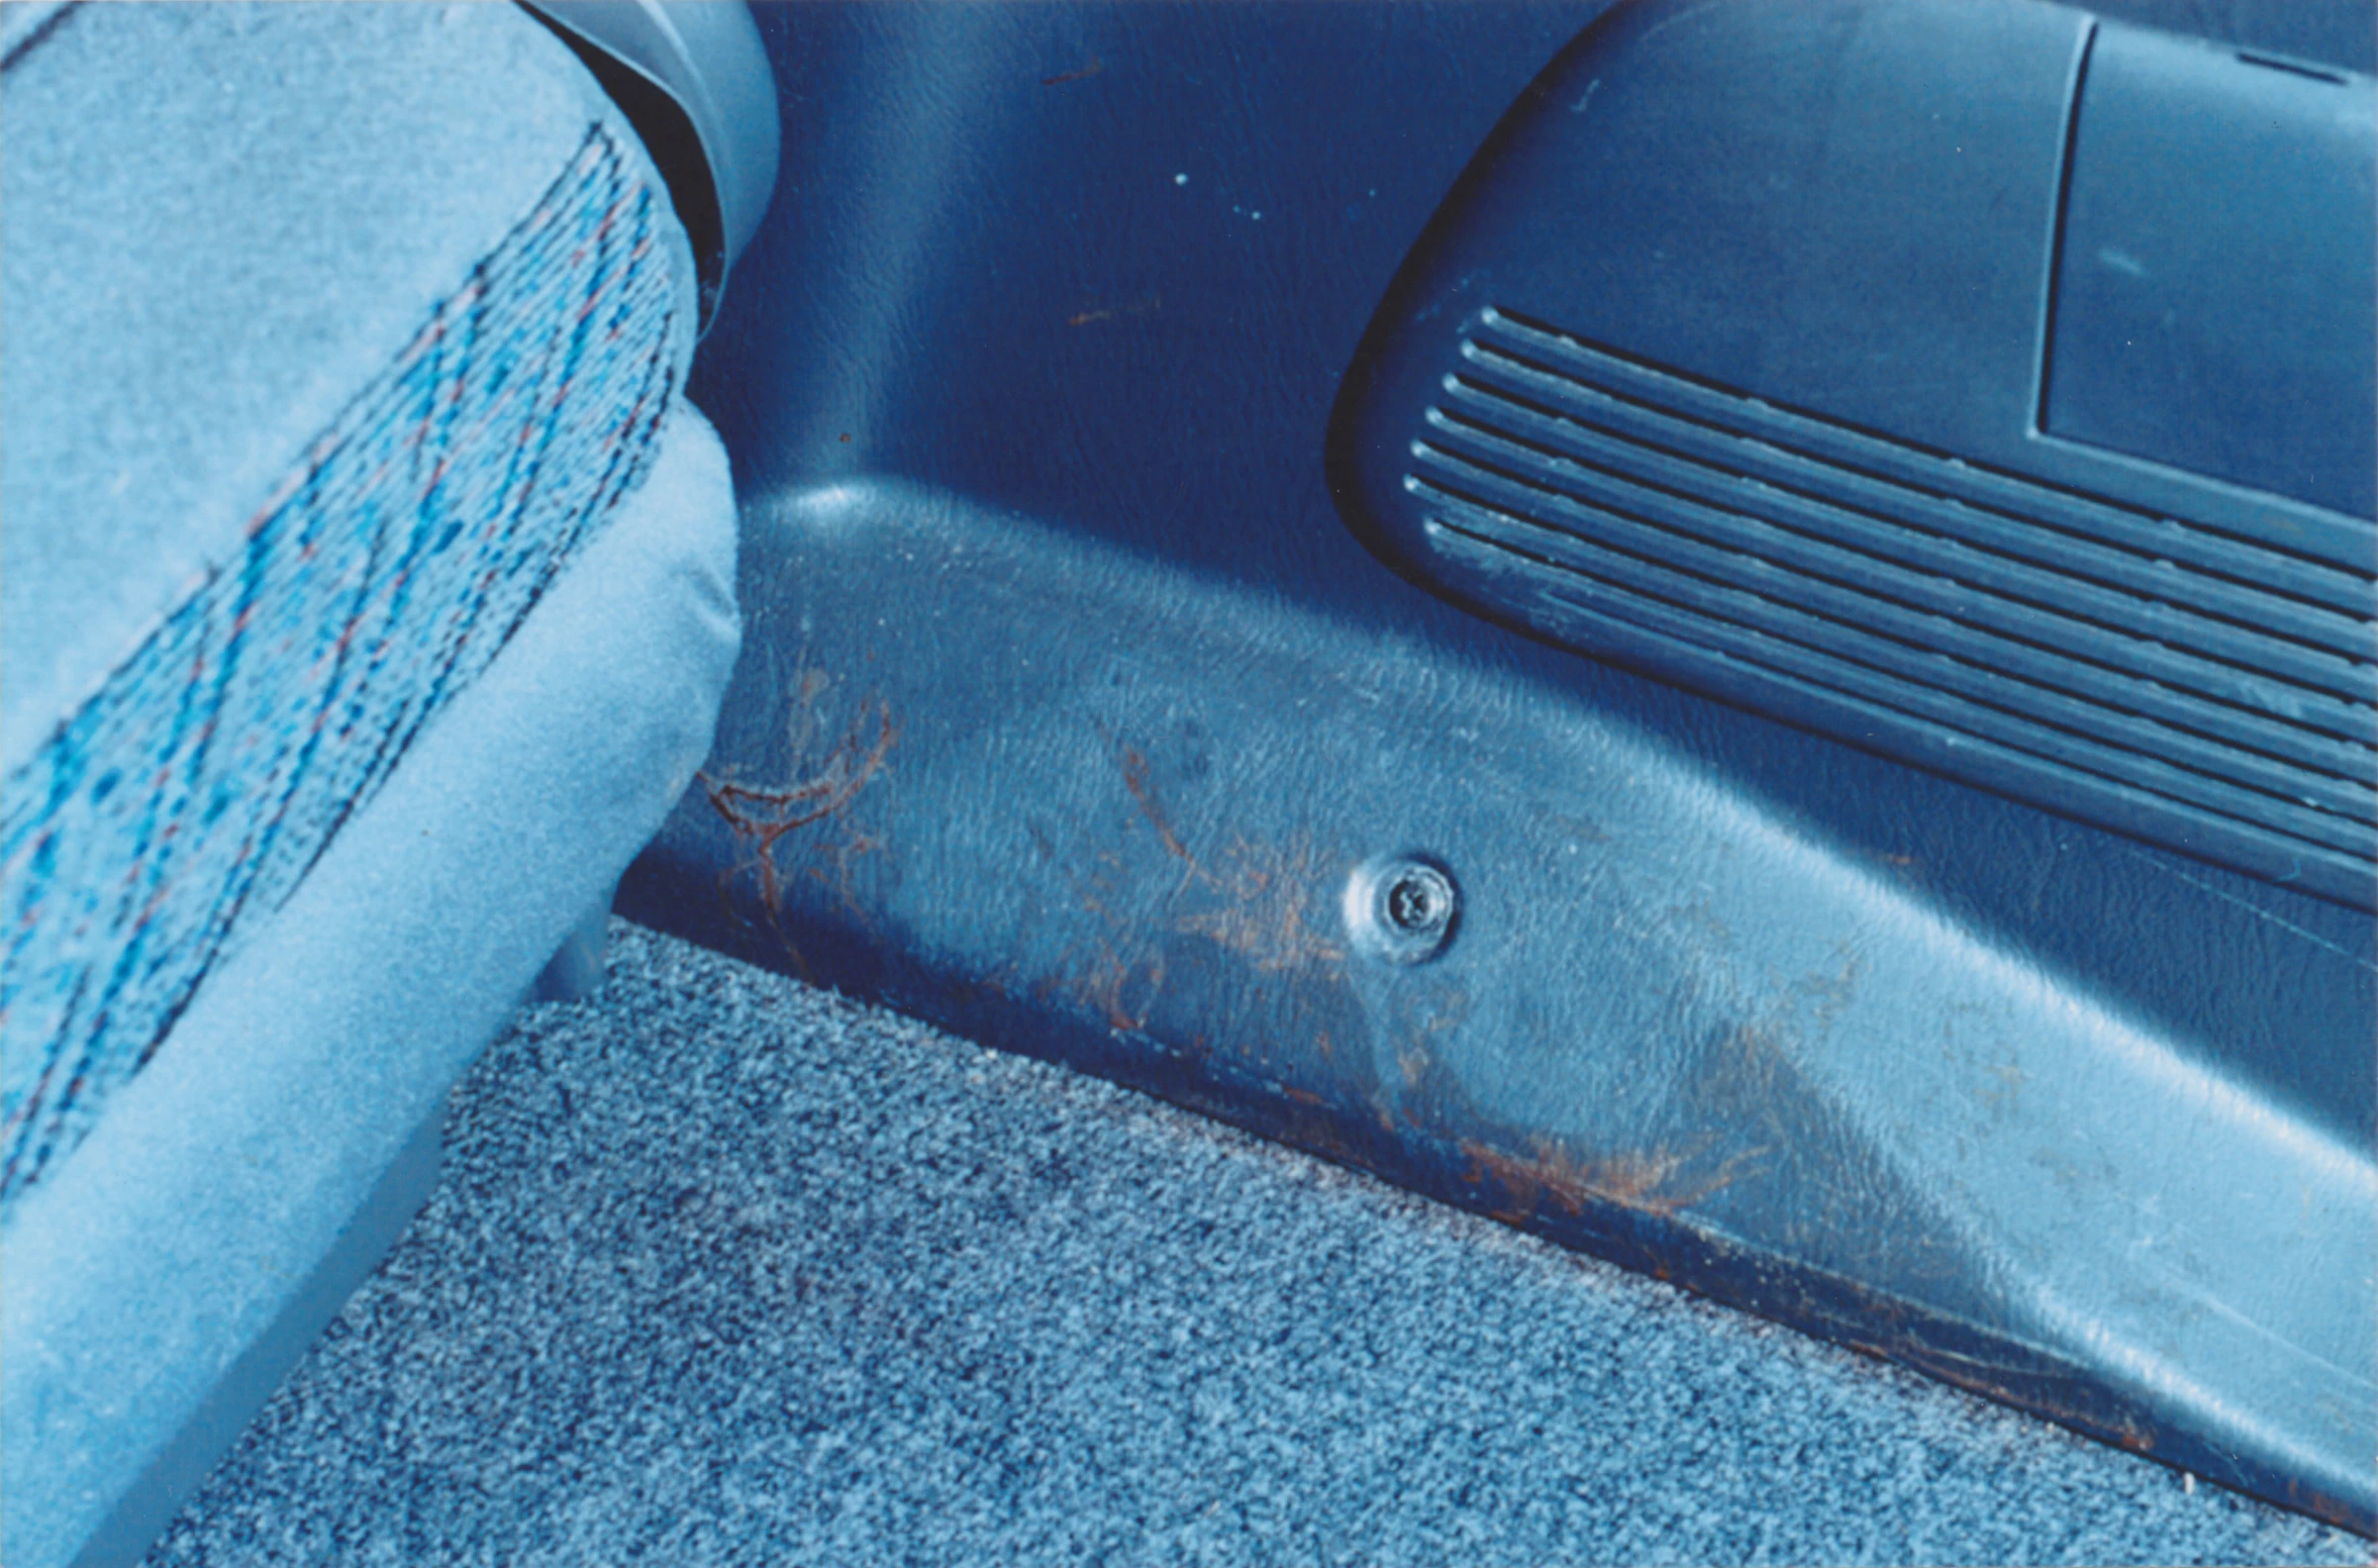
|
| 297 | Toyota RAV4 cargo area with stain | 10 | 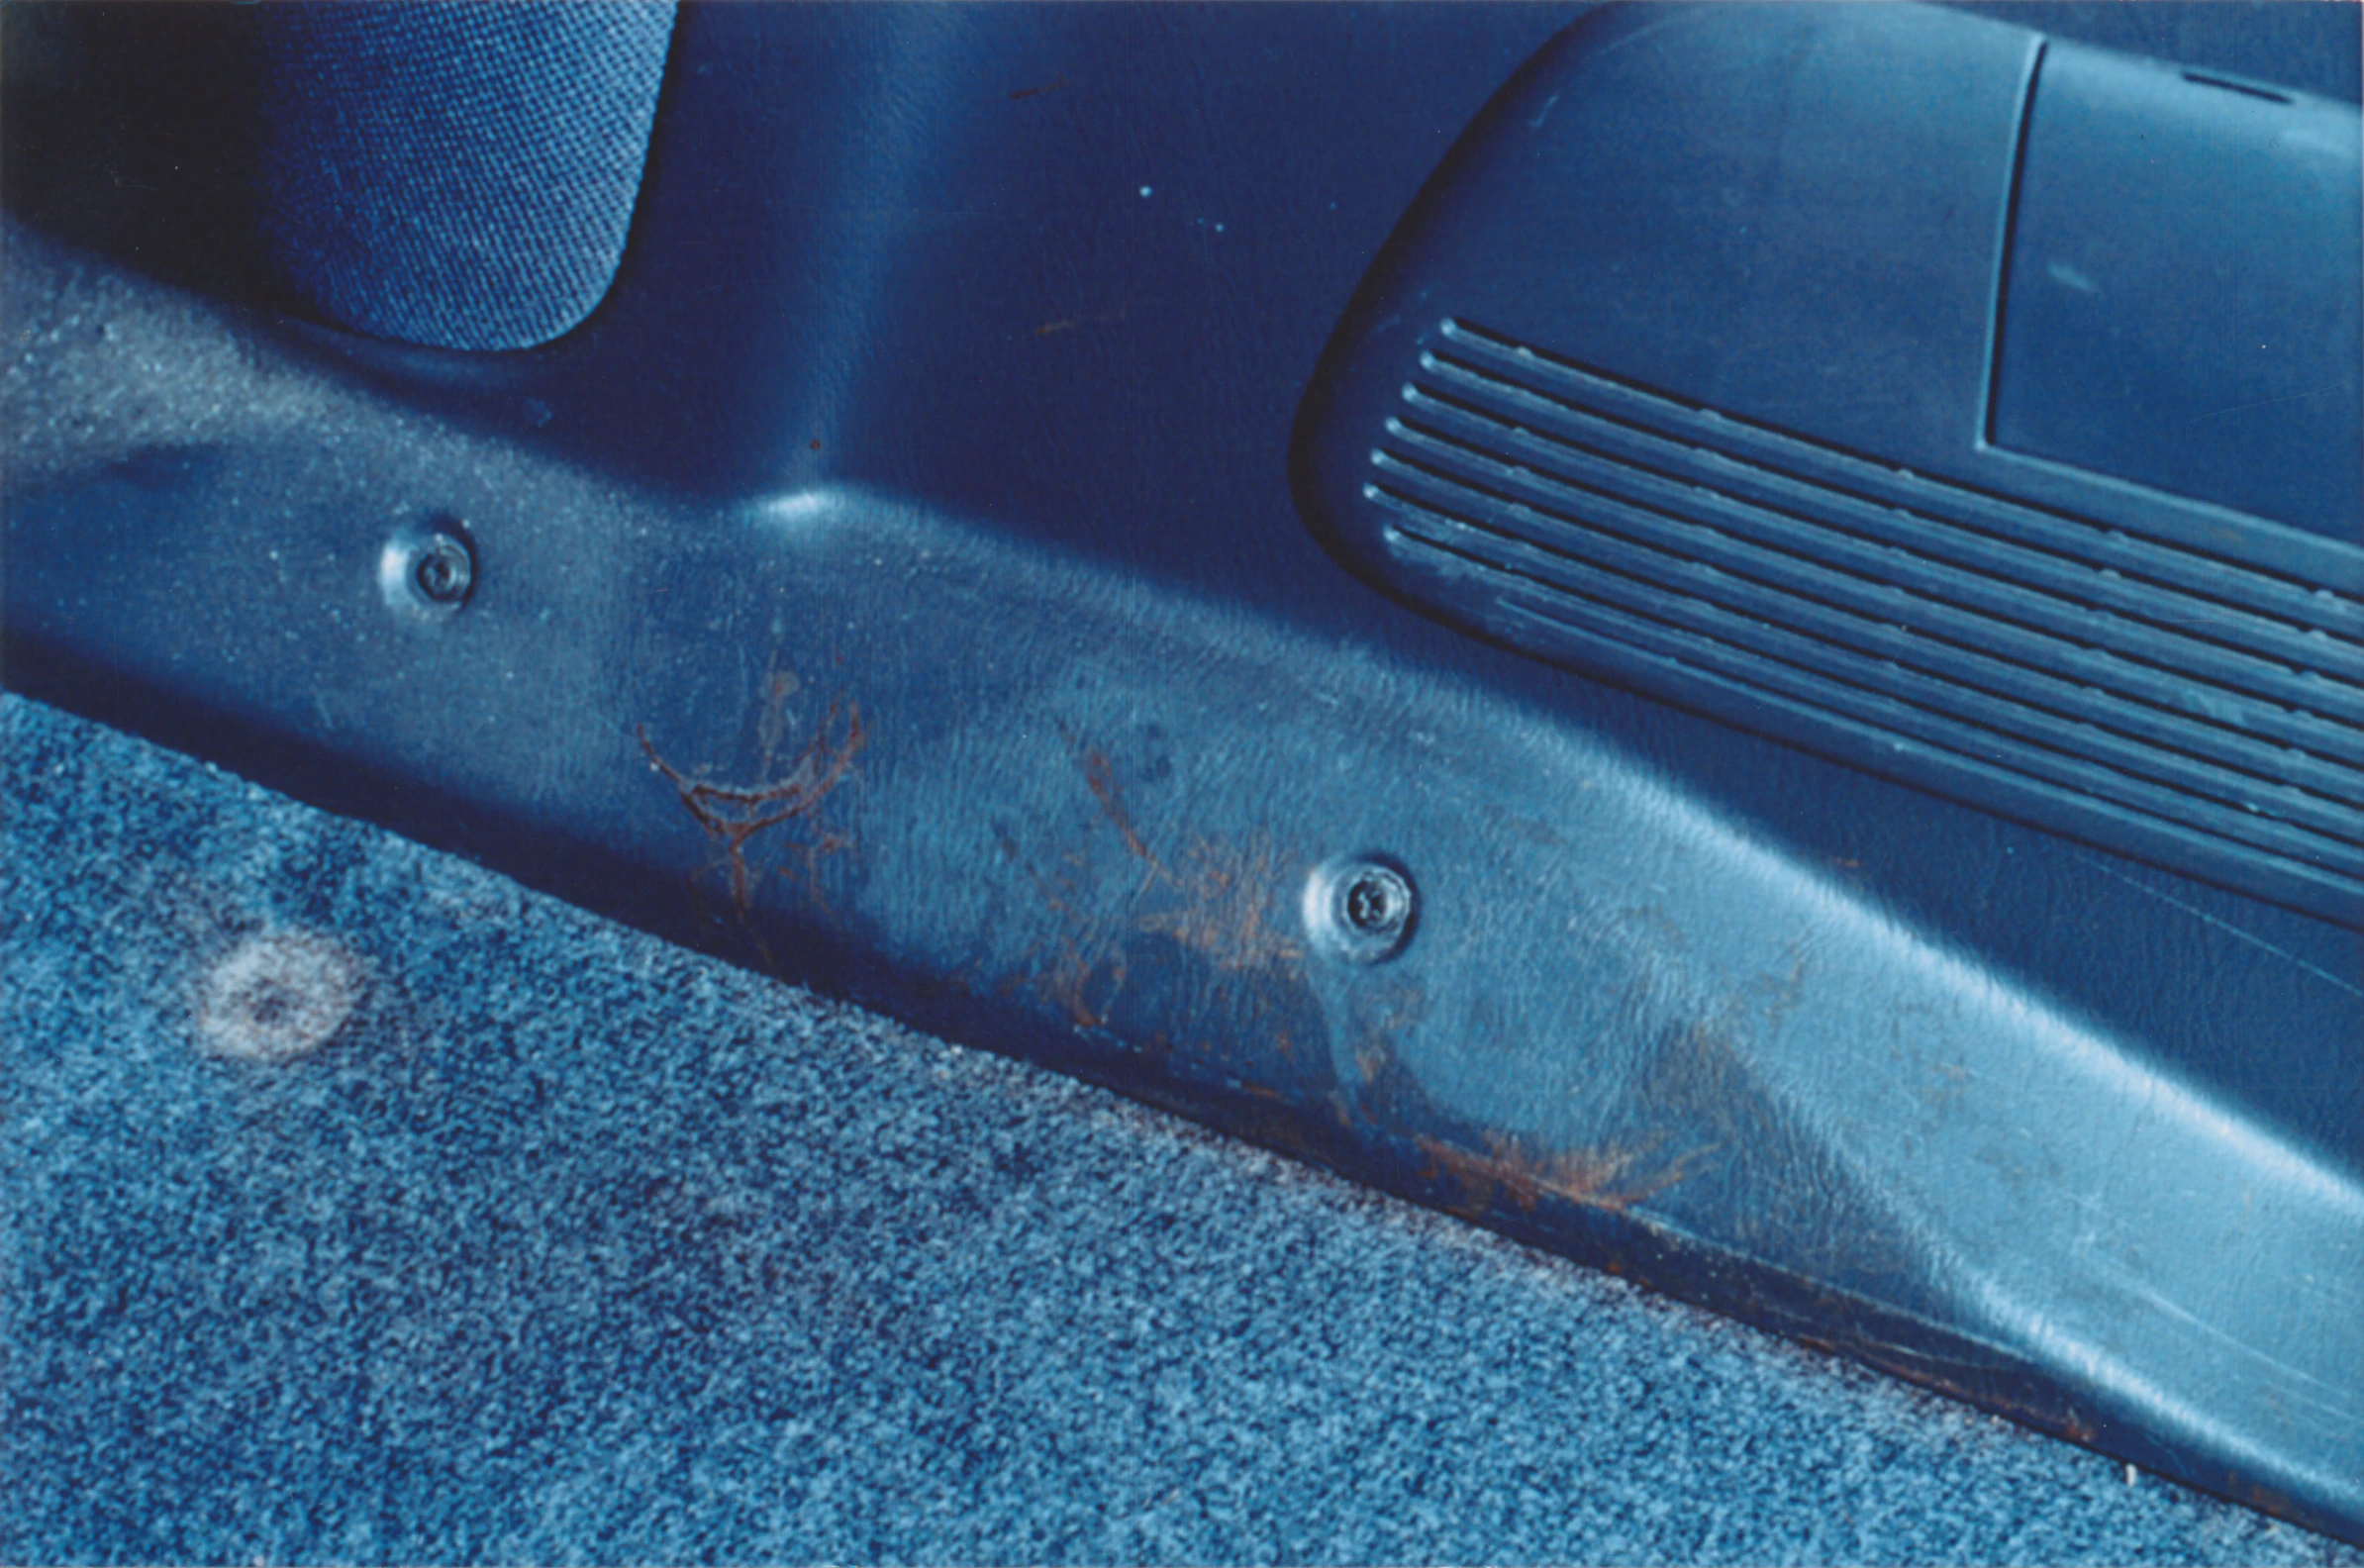
|
| 298 | Toyota RAV4 cargo door frame | 10 | 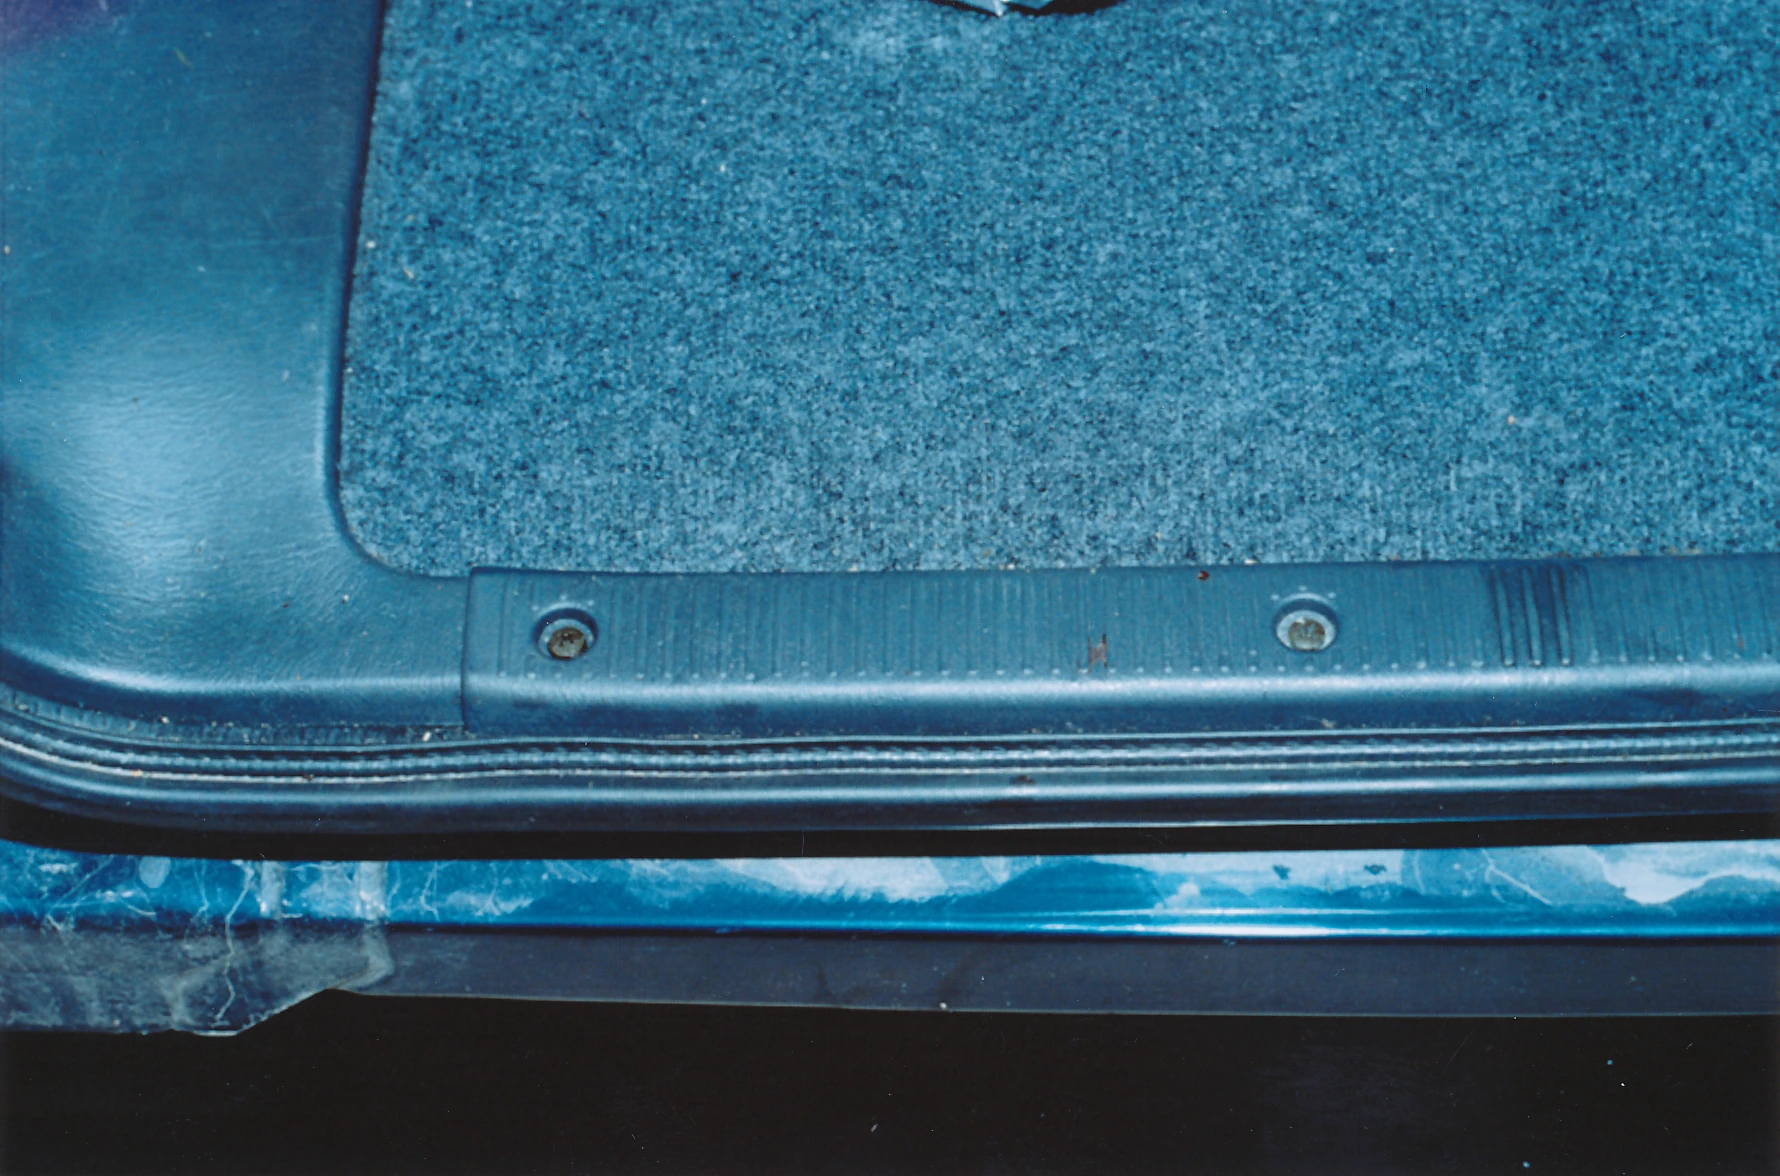
|
| 299 | Toyota RAV4 cargo door inside | 10 | 
|
| 300 | Toyota RAV4 cargo area overall view | 10 | 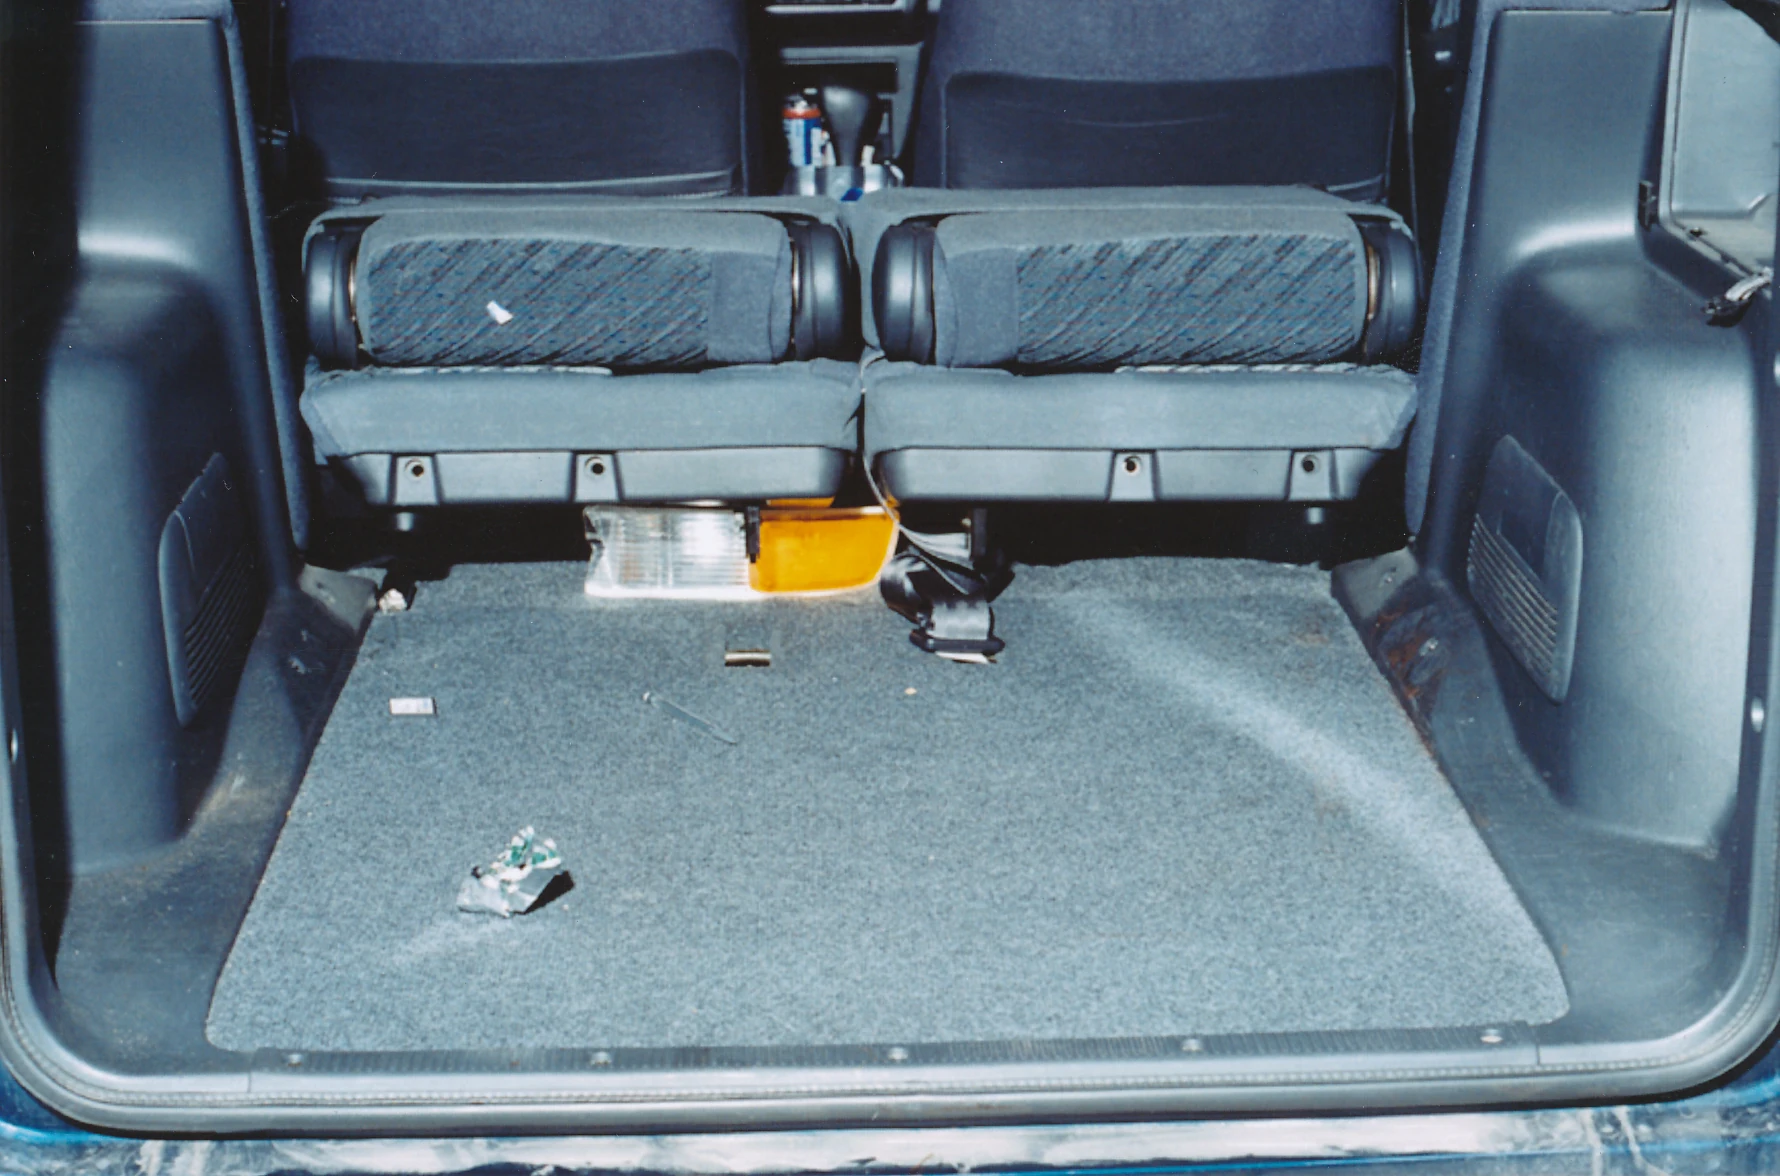
|
| 301 | Toyota RAV4 cargo area driver's side | 10 | 
|
| 302 | Toyota RAV4 disconnected battery | 10 | 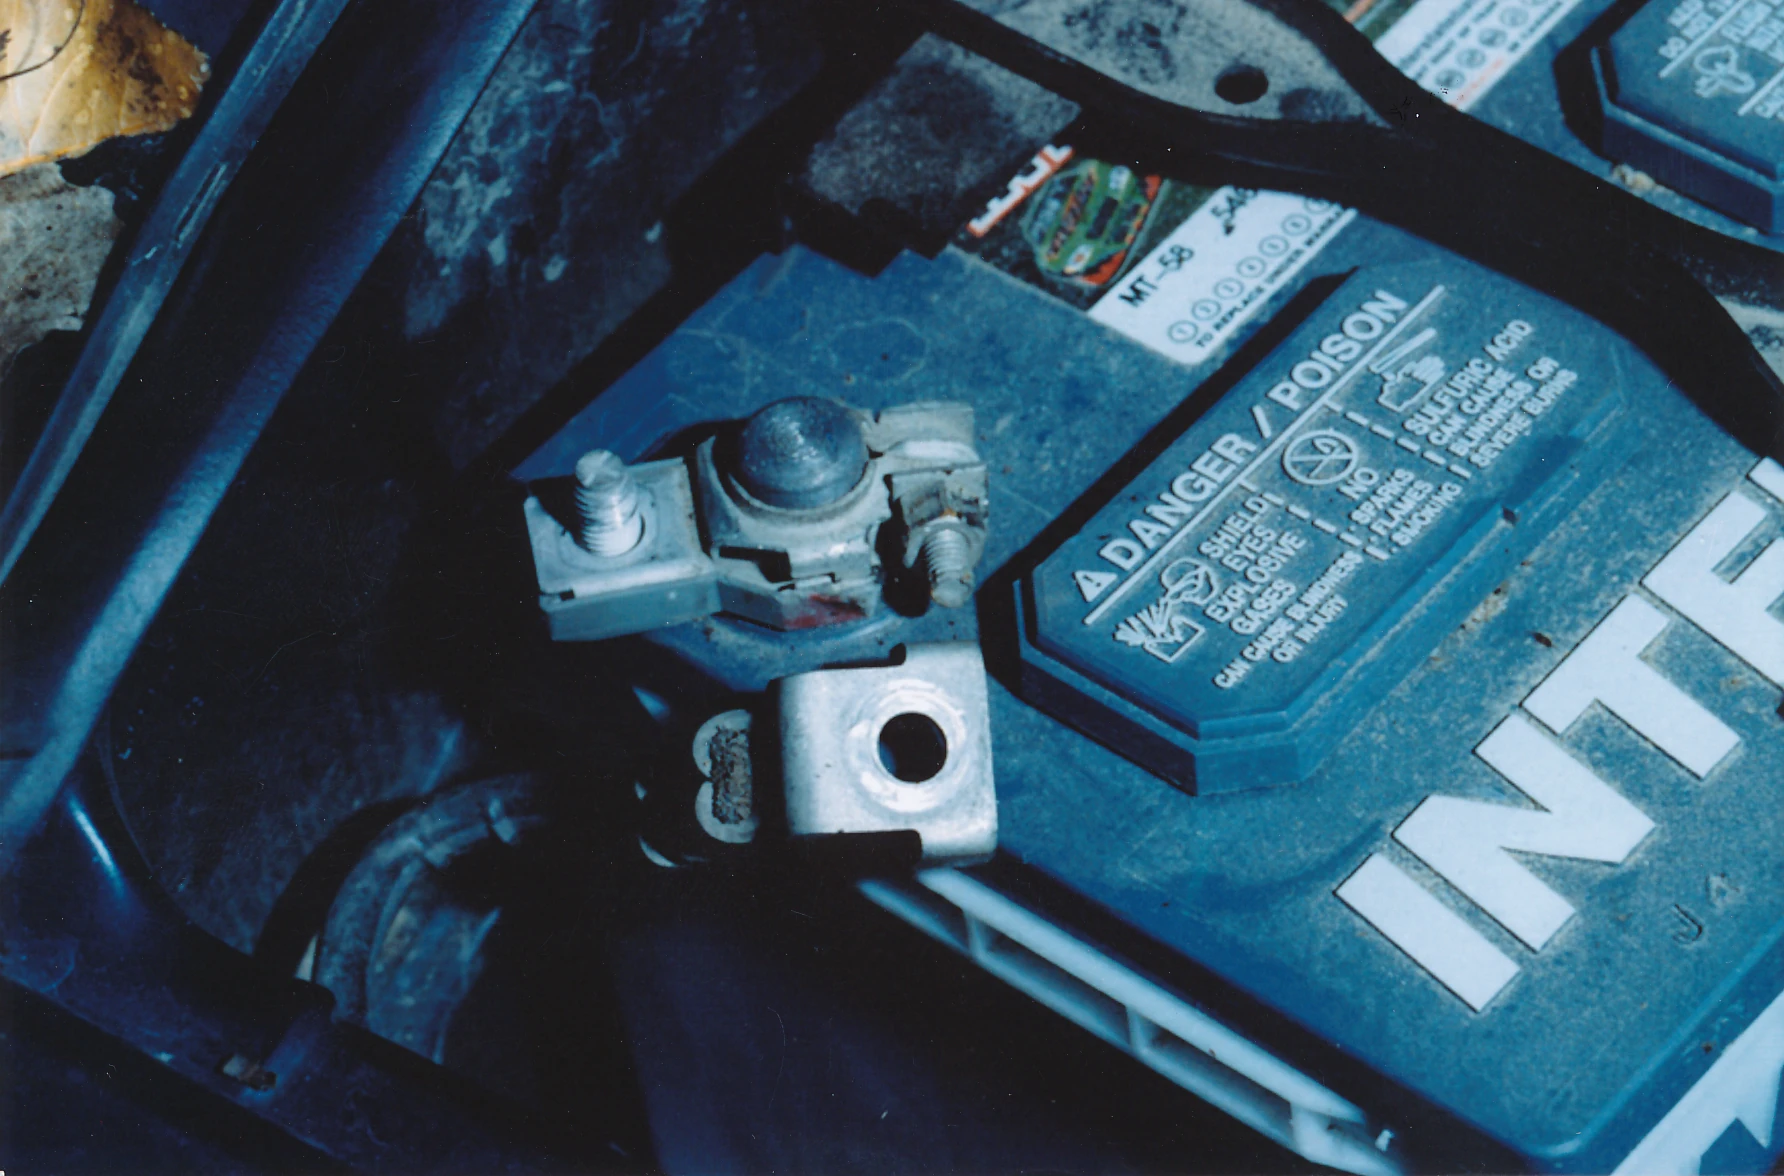
|
| 303 | Steven Avery's Pontiac Grand Am front view | 10 | 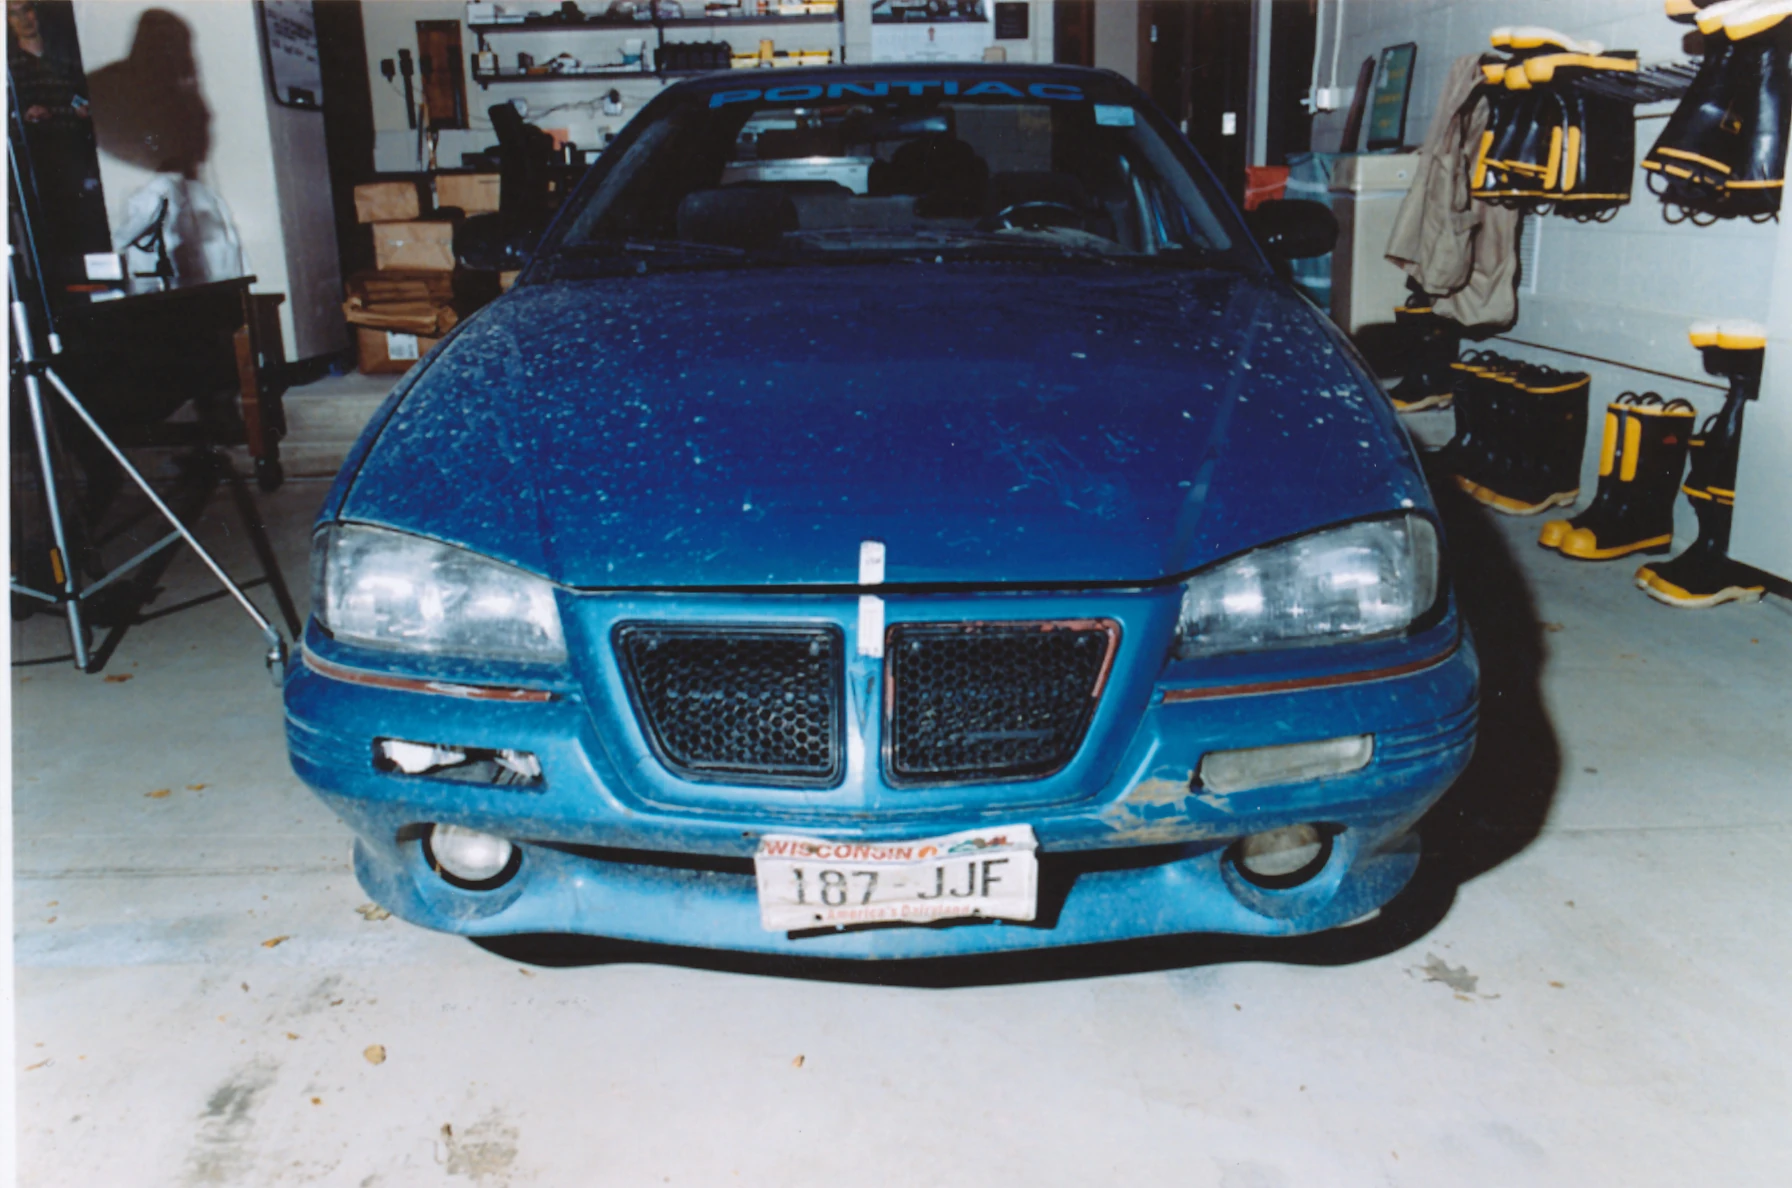
|
| 304 | Steven Avery's Pontiac Grand Am passenger side view | 10 | 
|
| 305 | Steven Avery's Pontiac Grand Am console | 10 | 
|
| 306 | Toyota RAV4 damaged headlight | 10 | 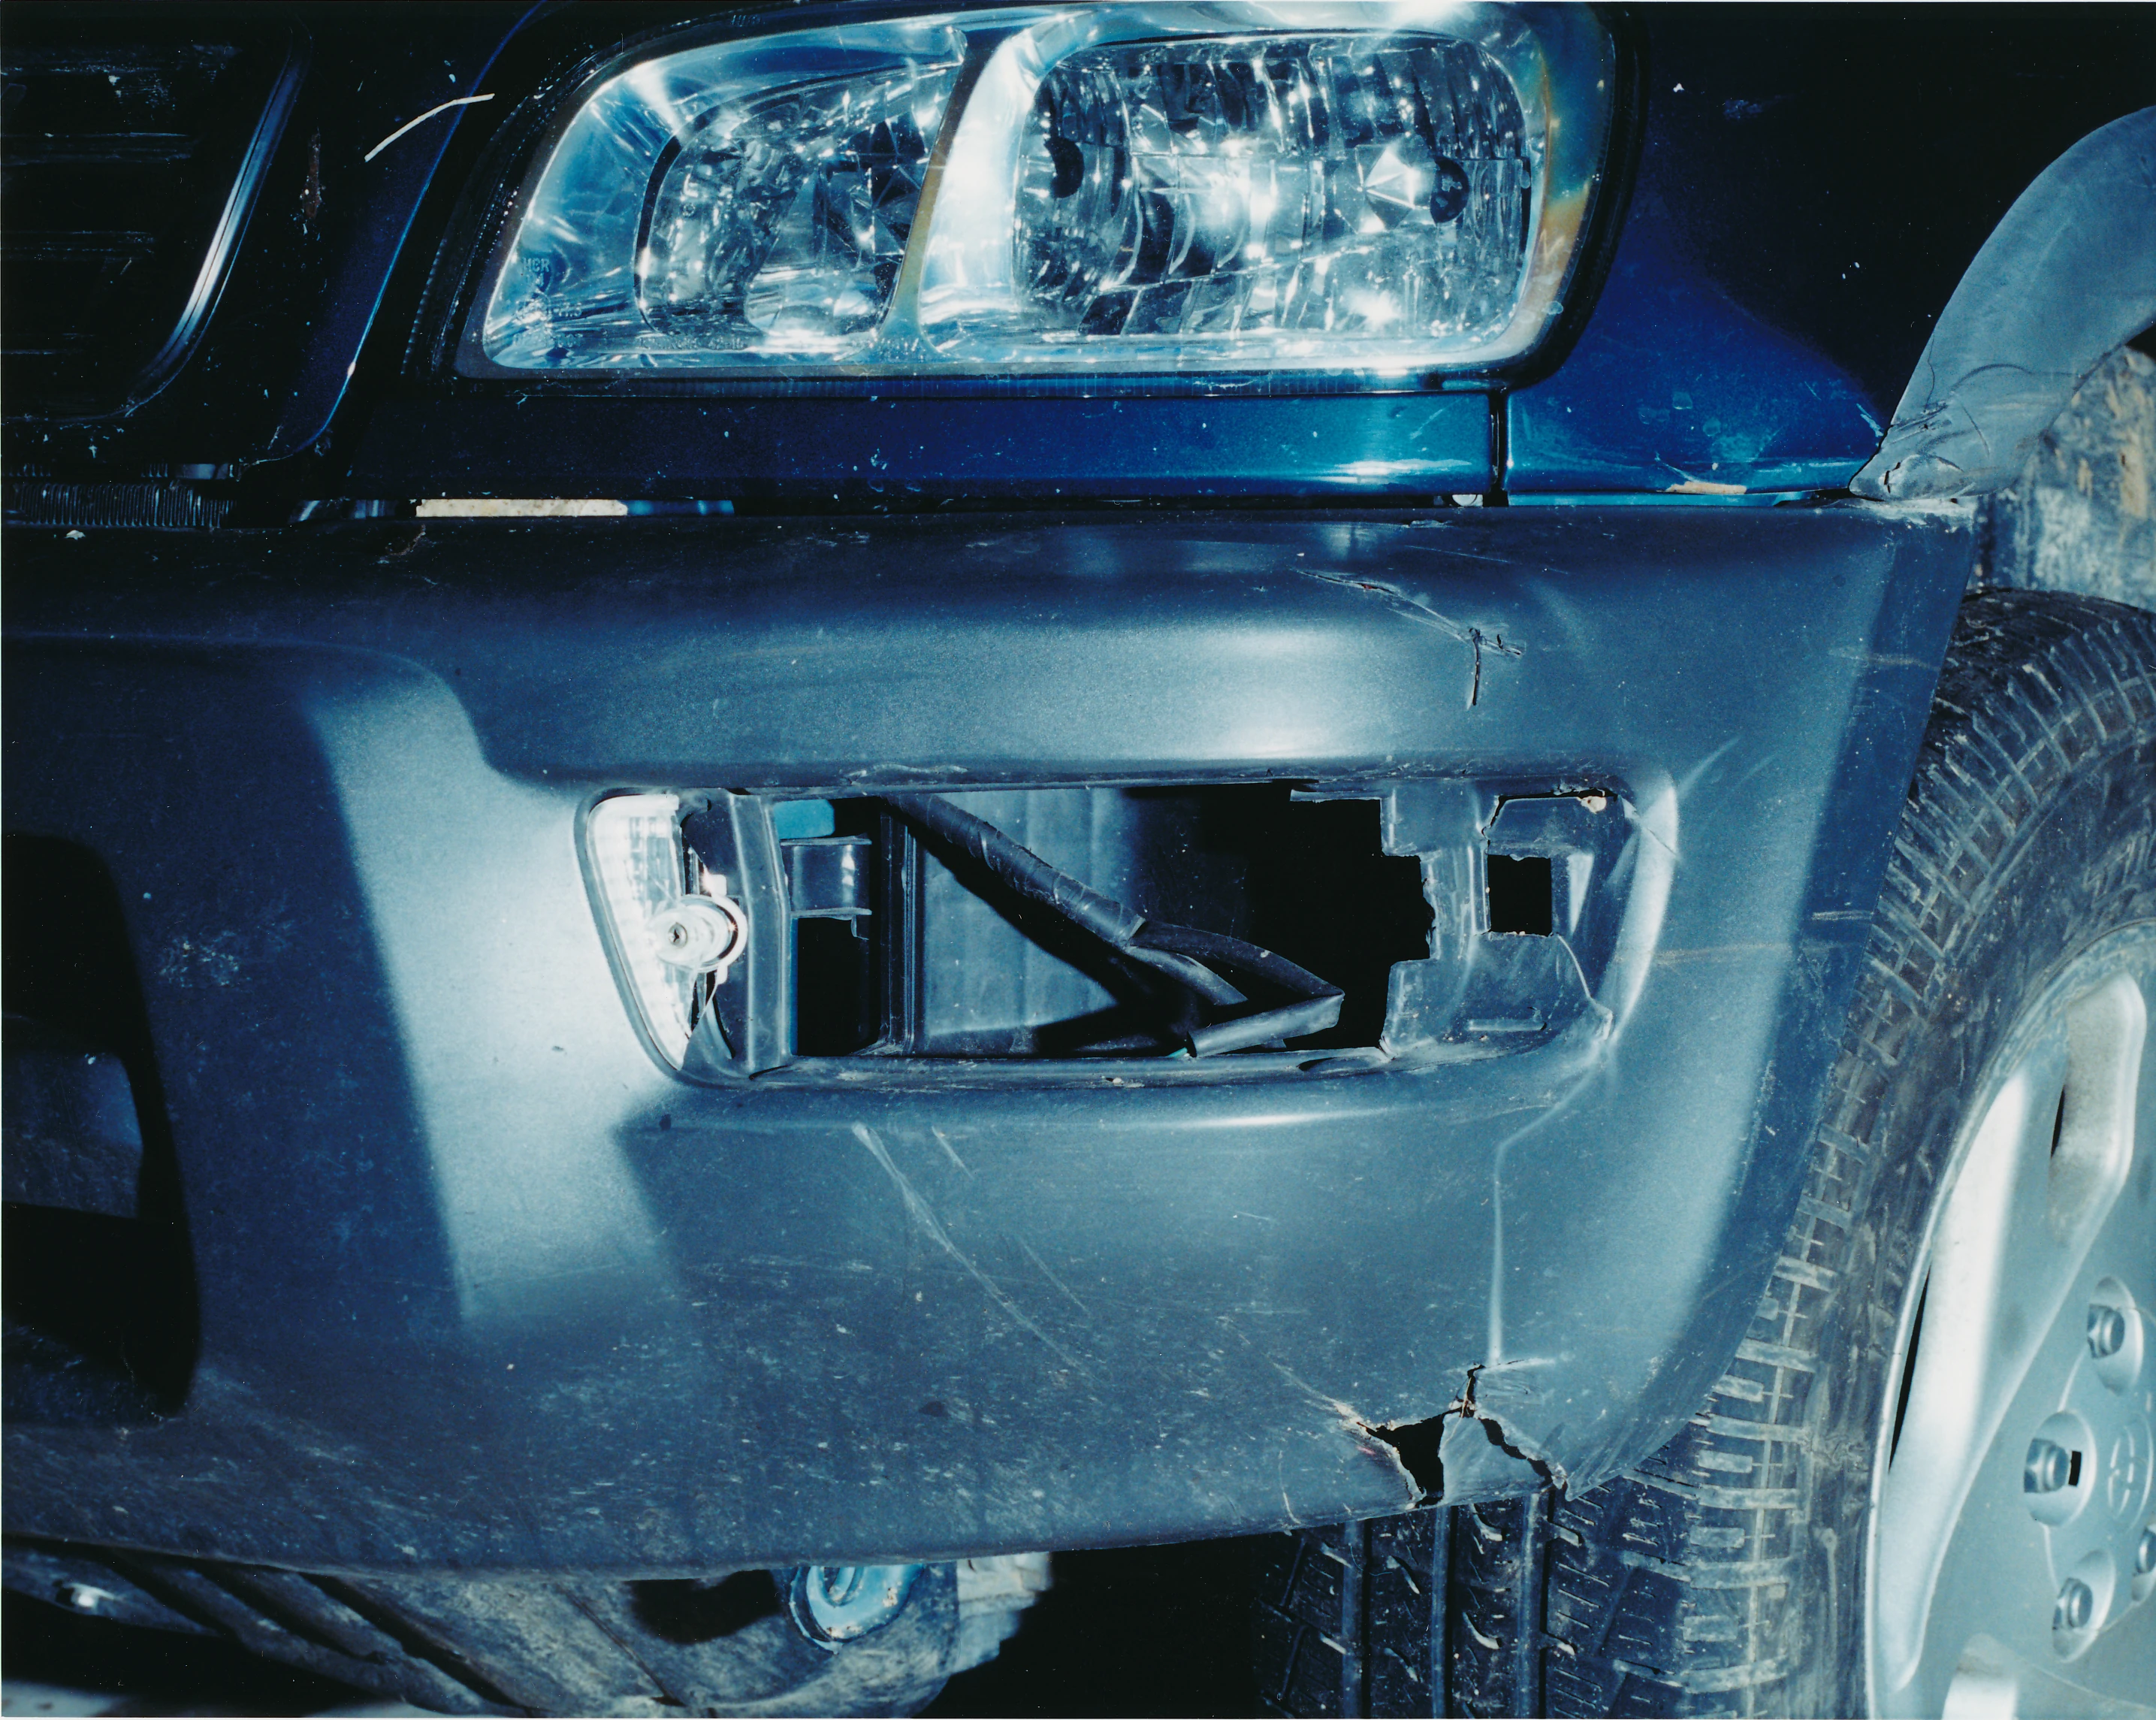
|
| 307 | Toyota RAV4 rear evidence photo | 10 | 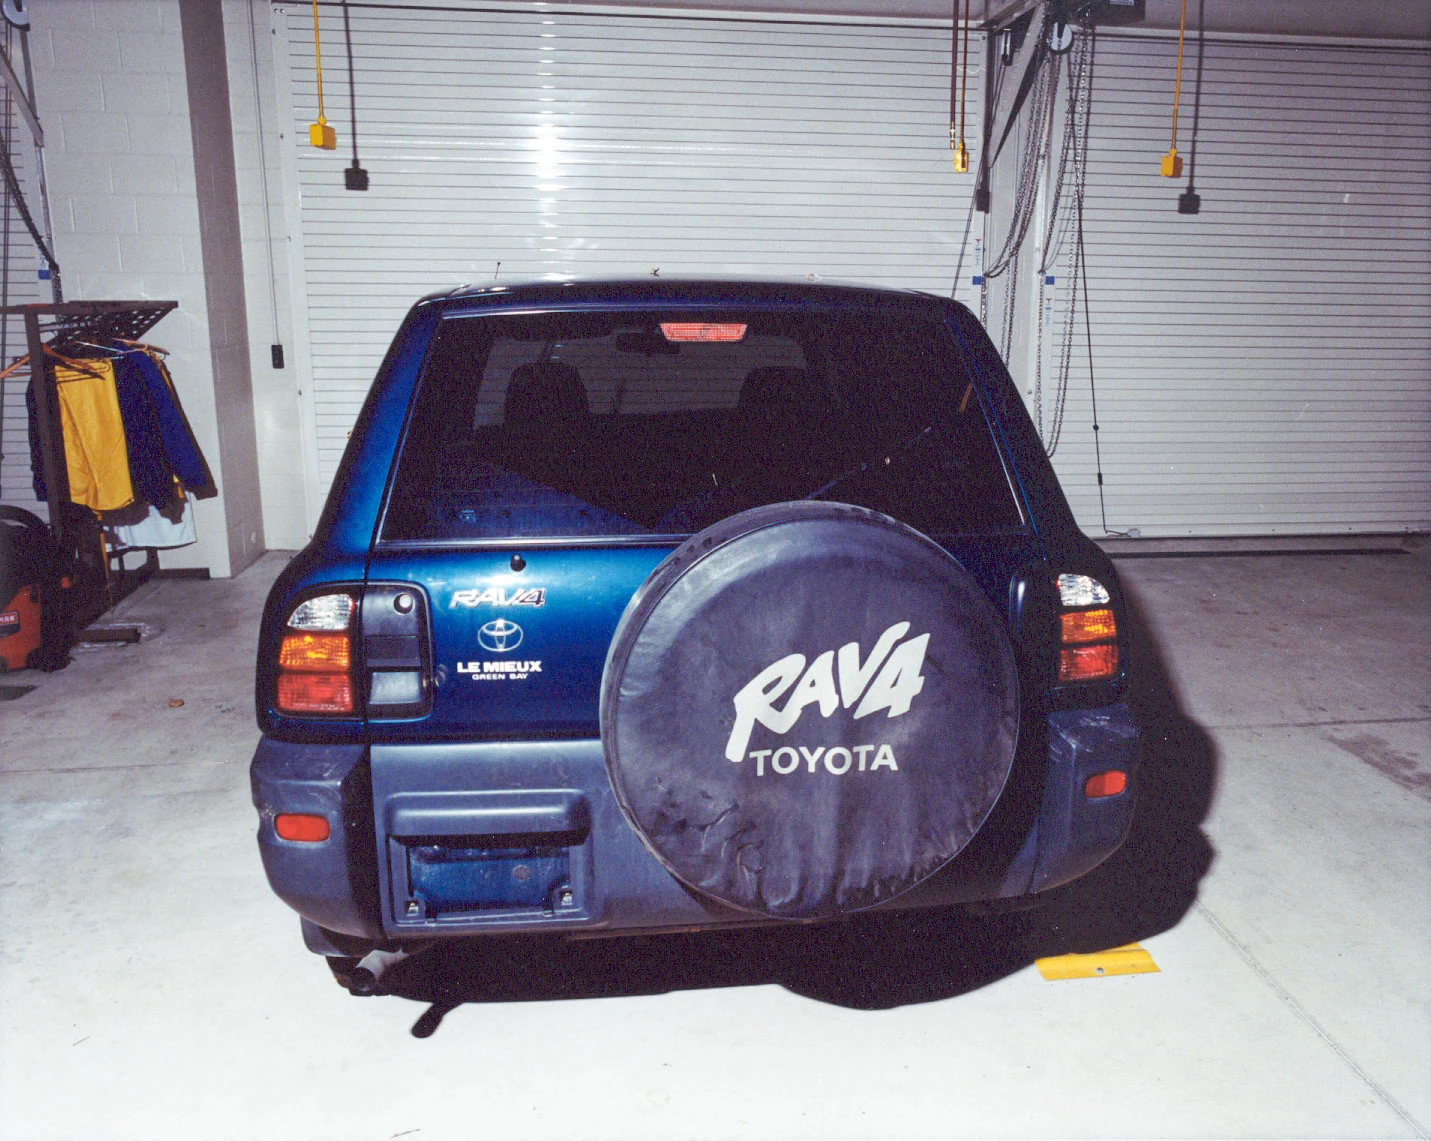
|
| 308 | wheel cover of Toyota RAV4 spare tire | 10 | 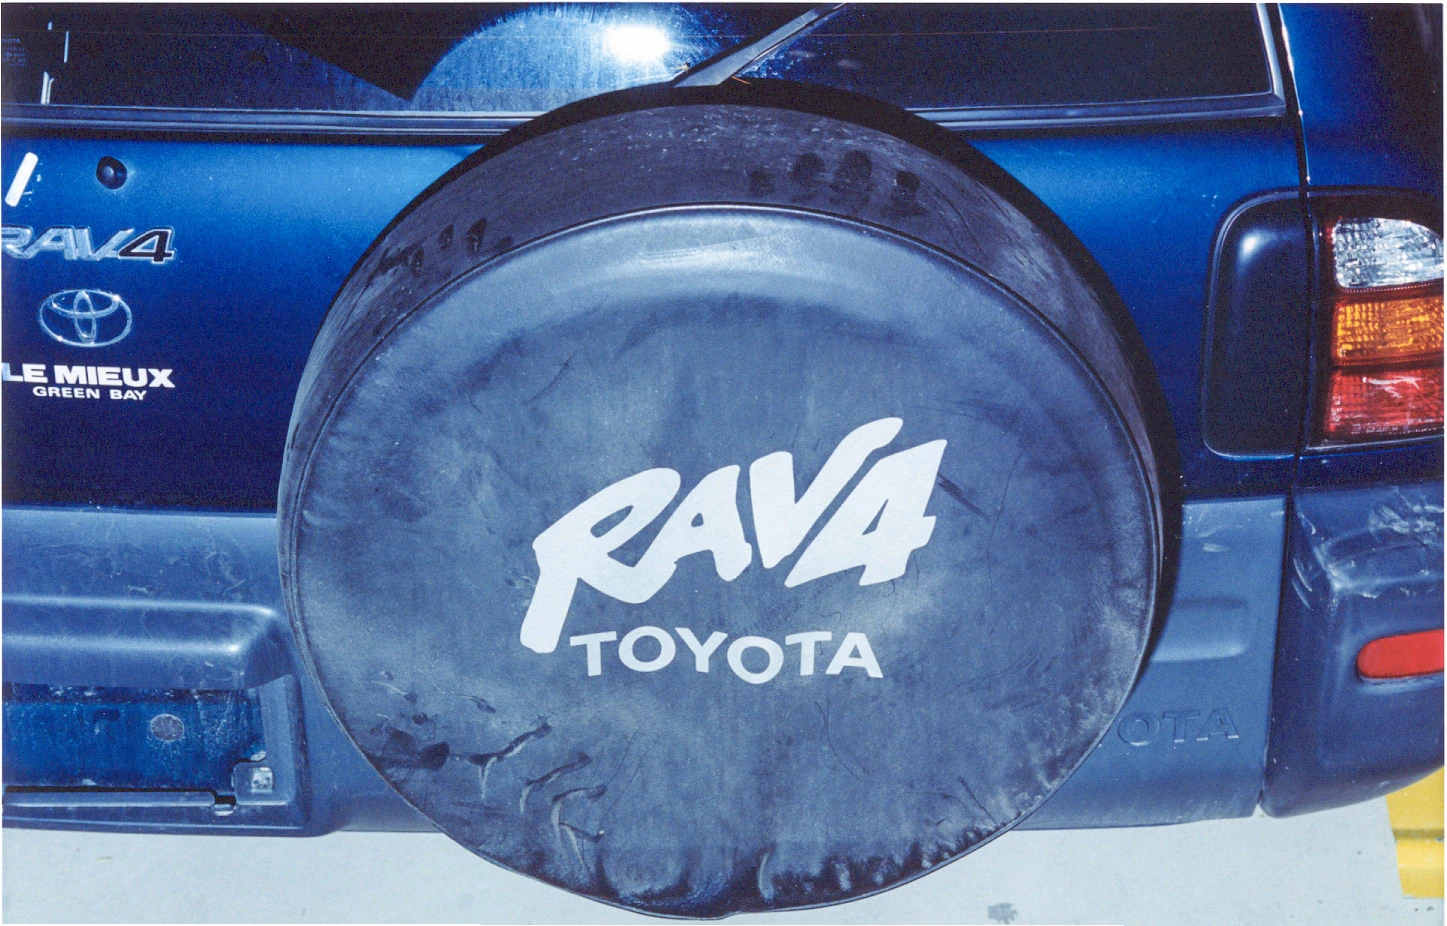
|
| 316 | Toyota RAV4 key with evidence bag | 10 | 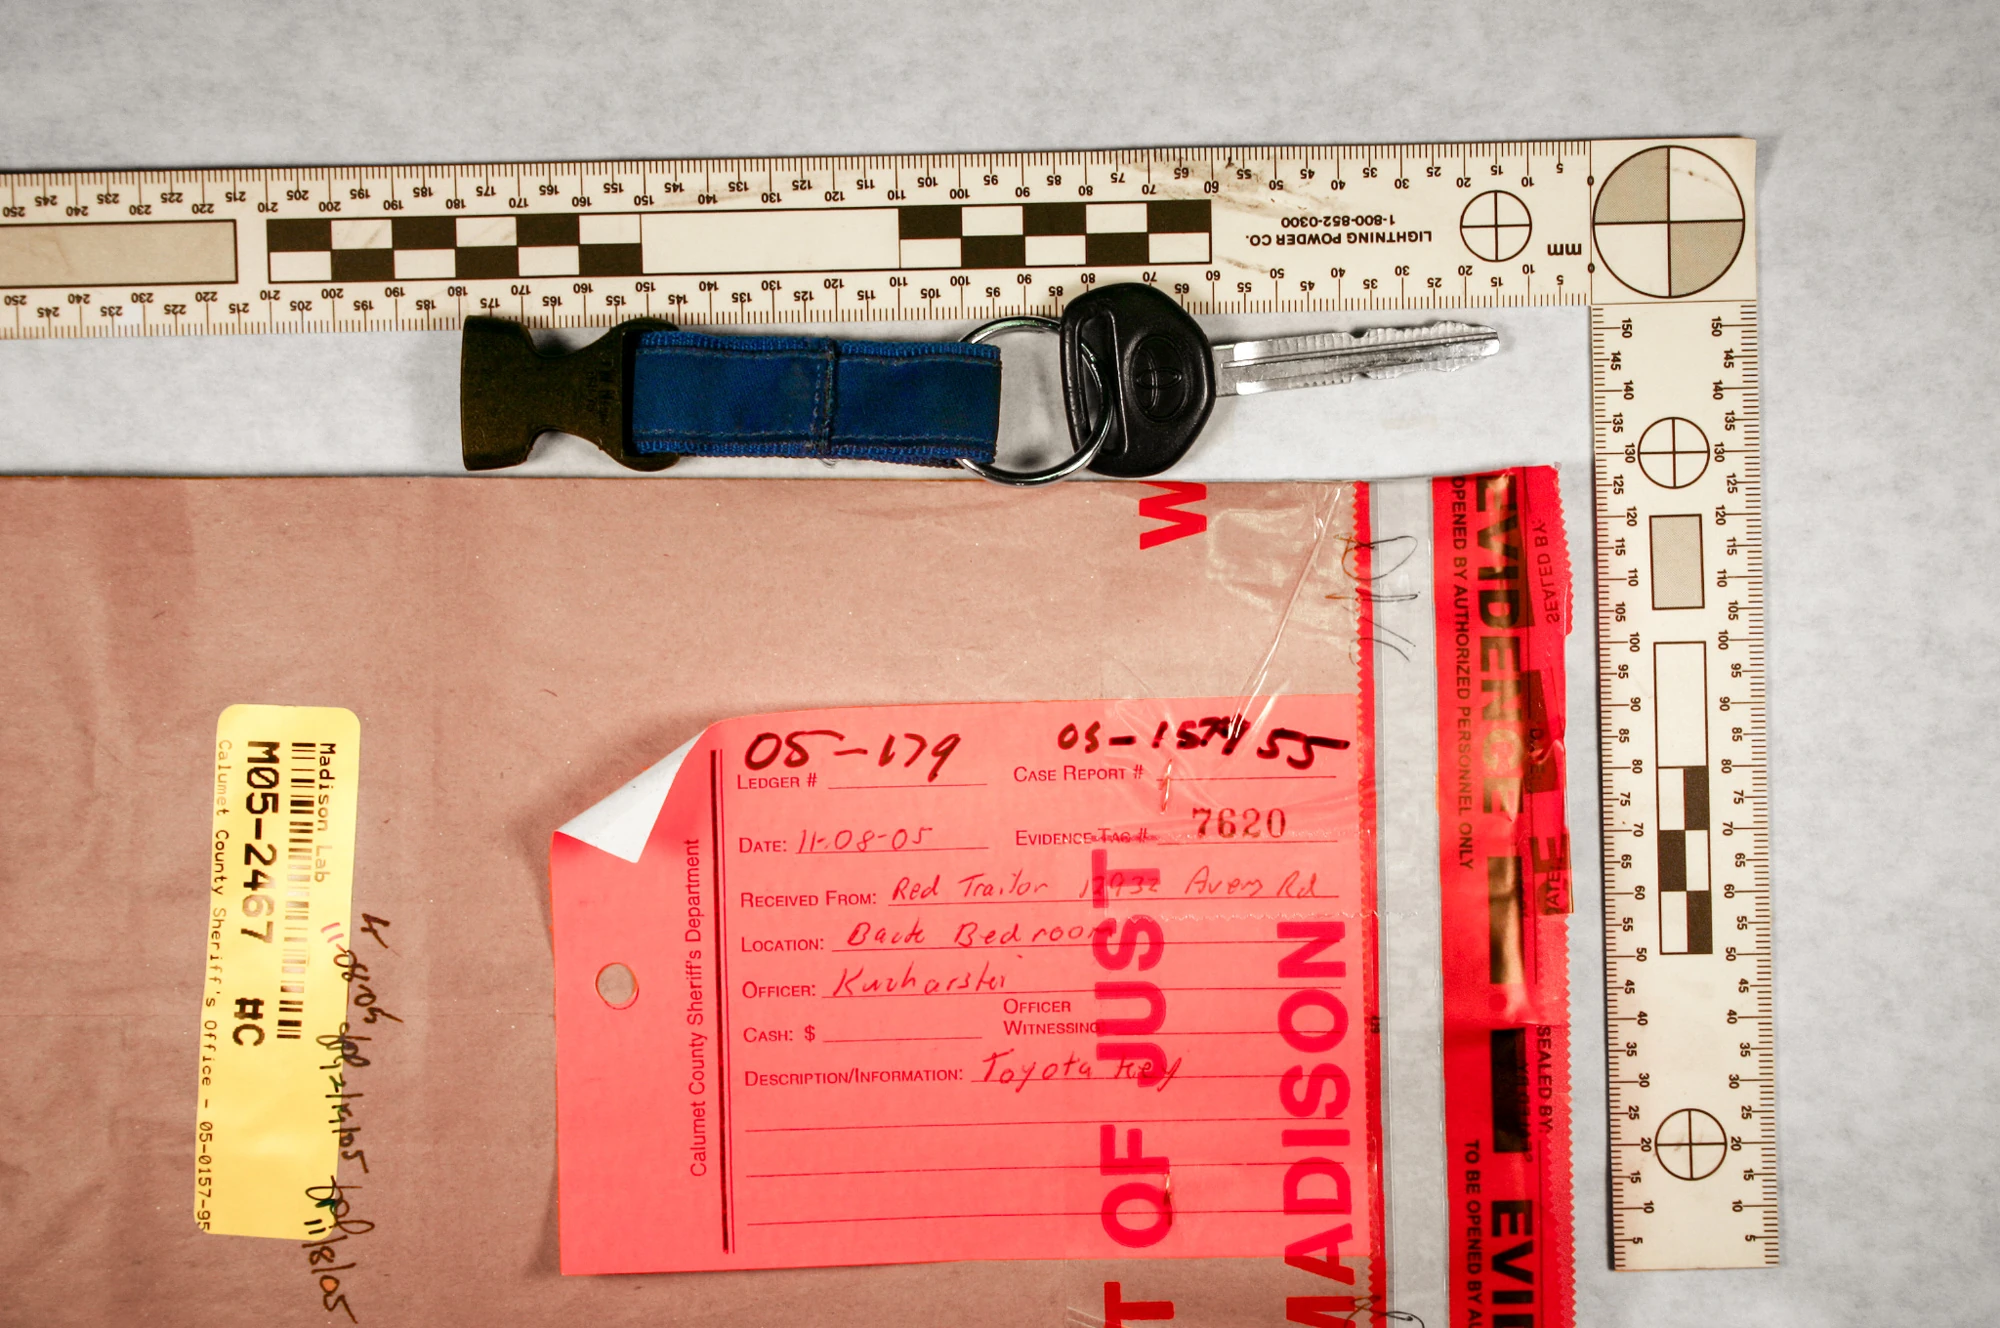
|
| 349 | Steven Avery | 12 | exhibit n/a |
| 350 | Allan Avery | 12 | exhibit n/a |
| 351 | Dolores Avery | 12 | exhibit n/a |
| 352 | Chuck Avery | 12 | exhibit n/a |
| 353 | Earl Avery | 12 | exhibit n/a |
| 354 | Barbara Janda | 12 | exhibit n/a |
| 363 | Steven Avery's burn pit and Bear | 13 | 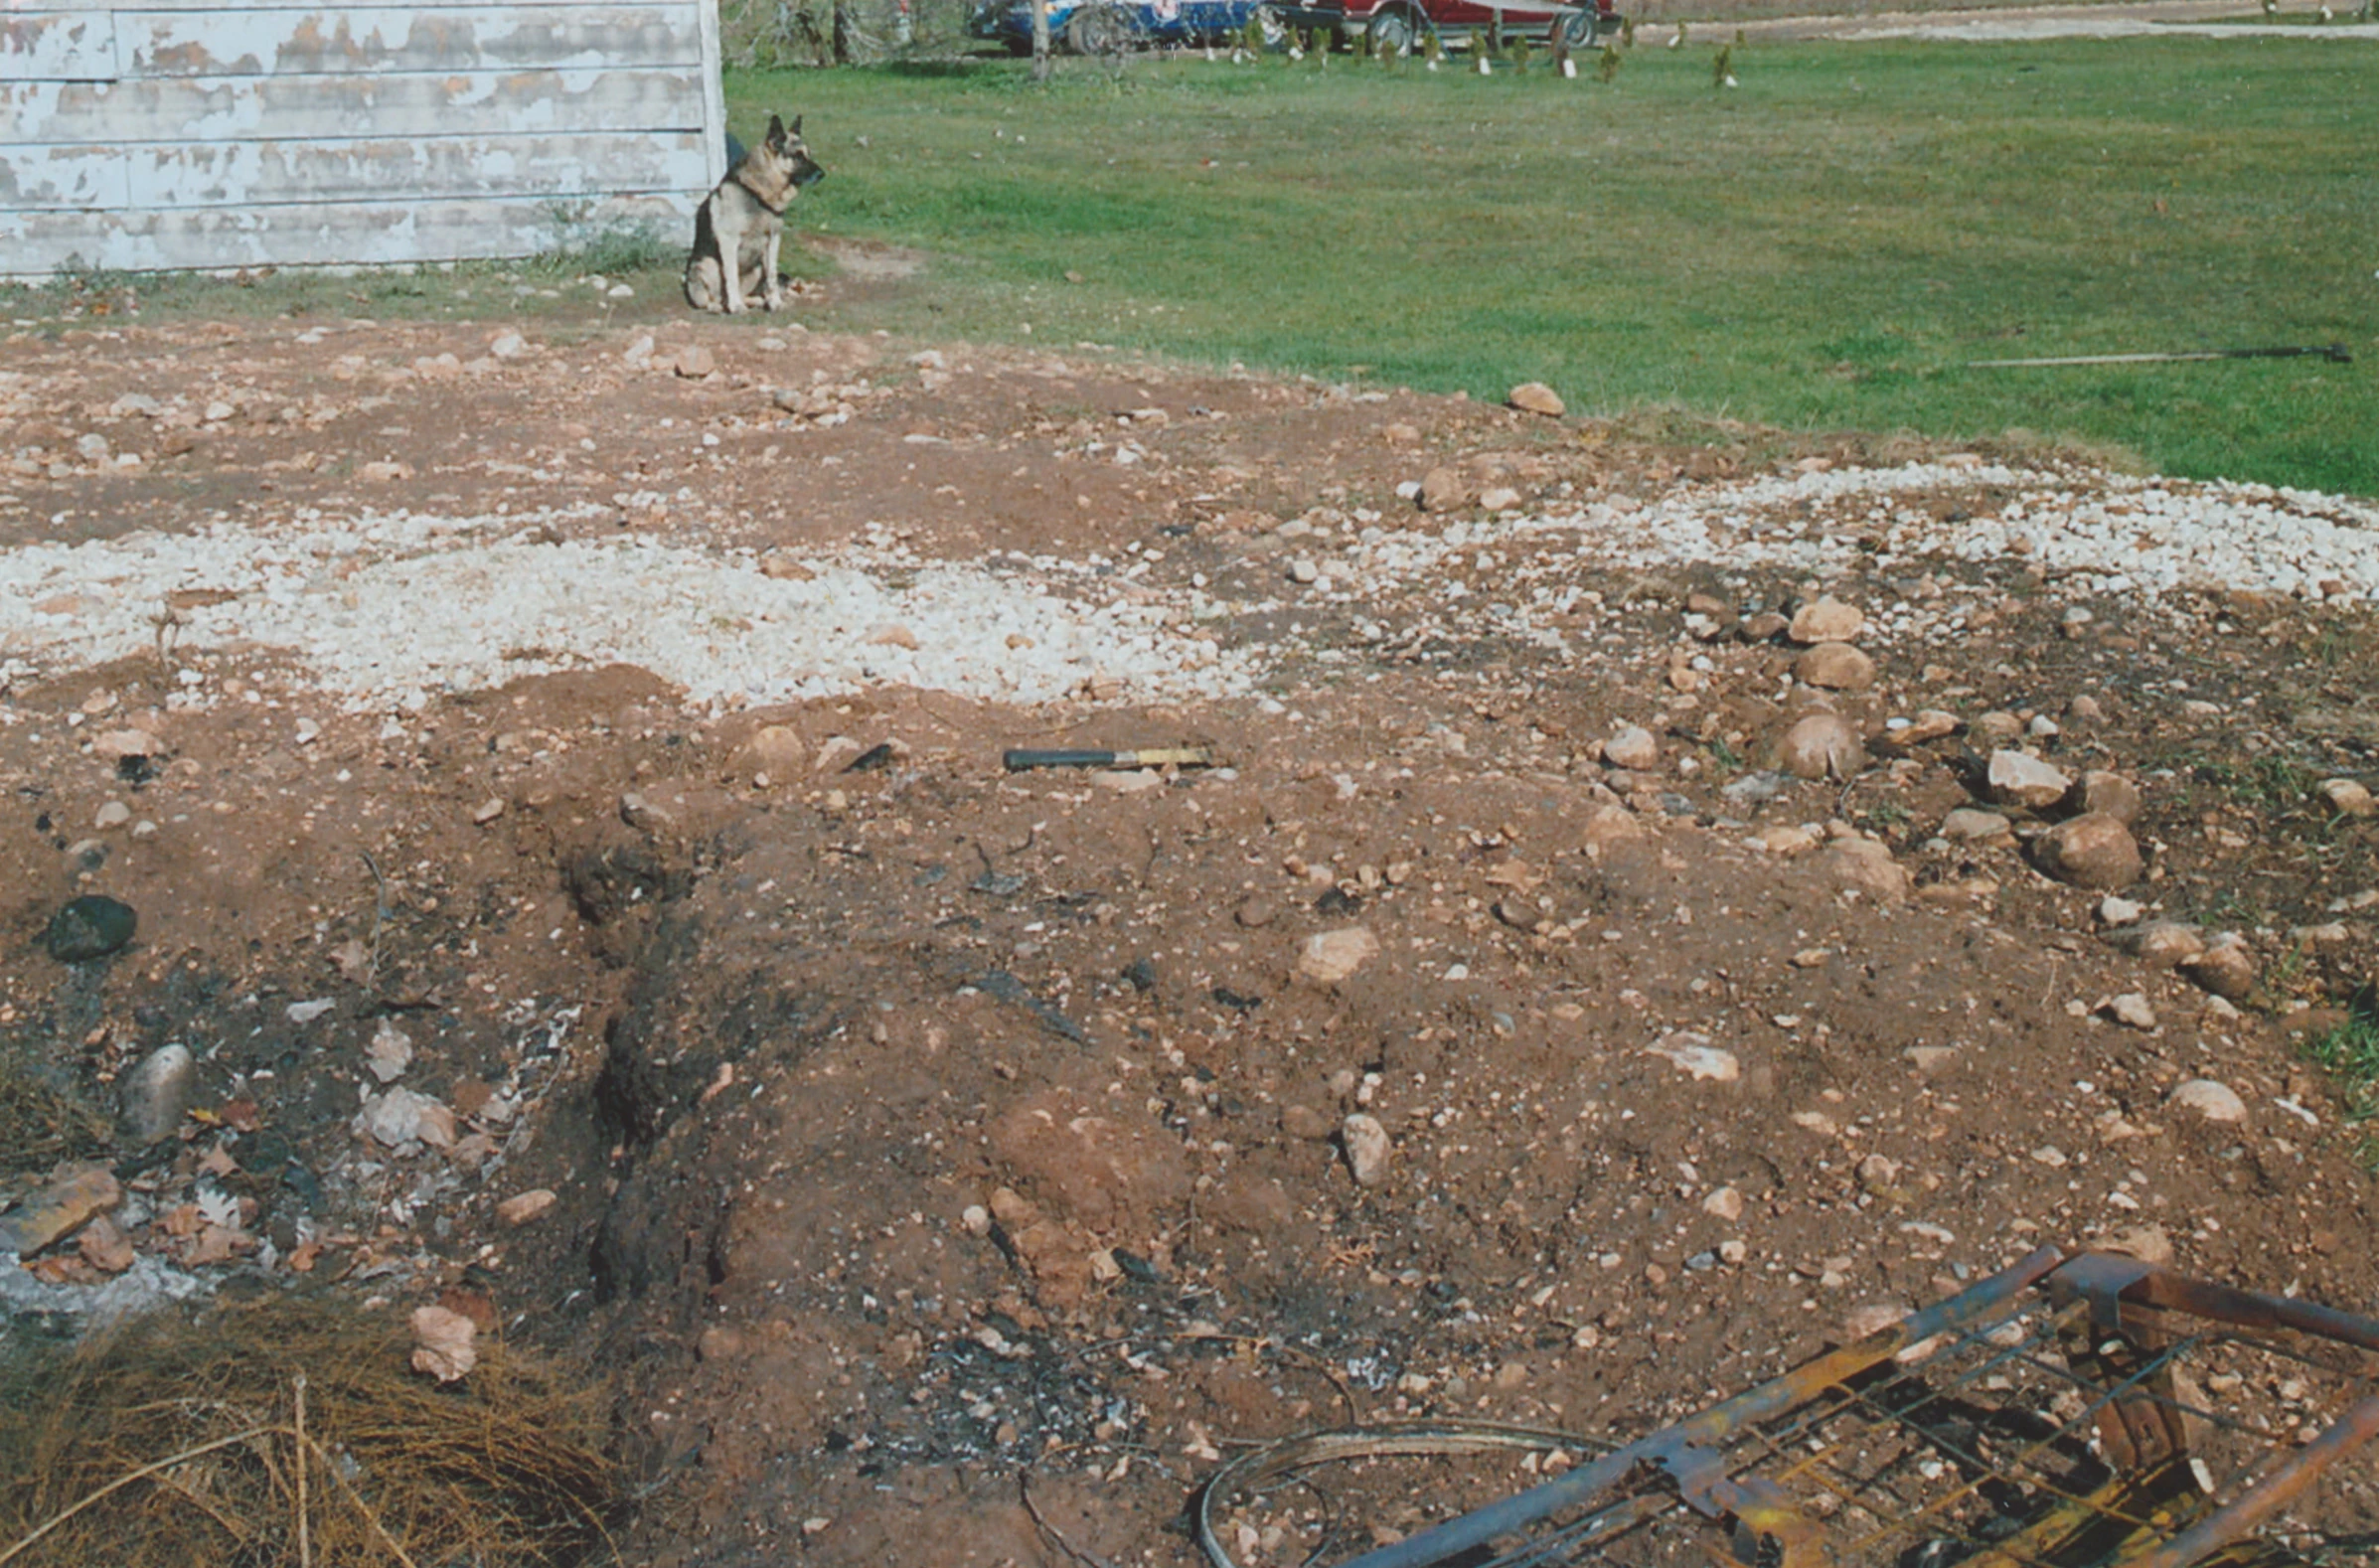
|
| 364 | Steven Avery's burn pit | 13 | 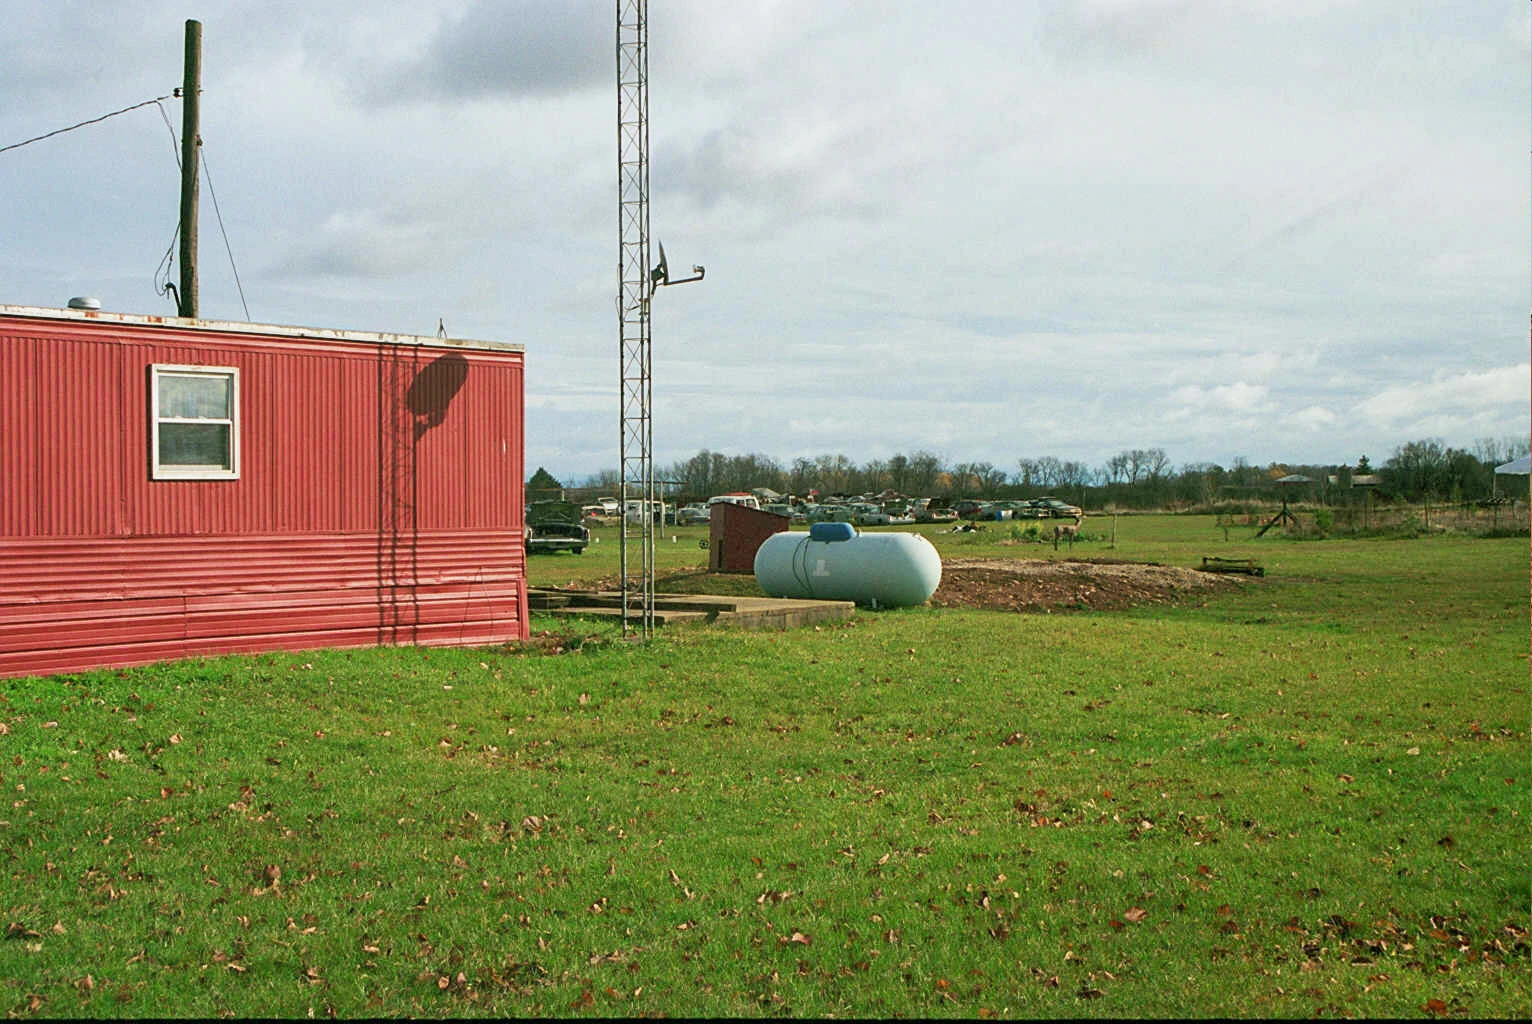
|
| 365 | Steven Avery's burn pit and Bear | 13 | 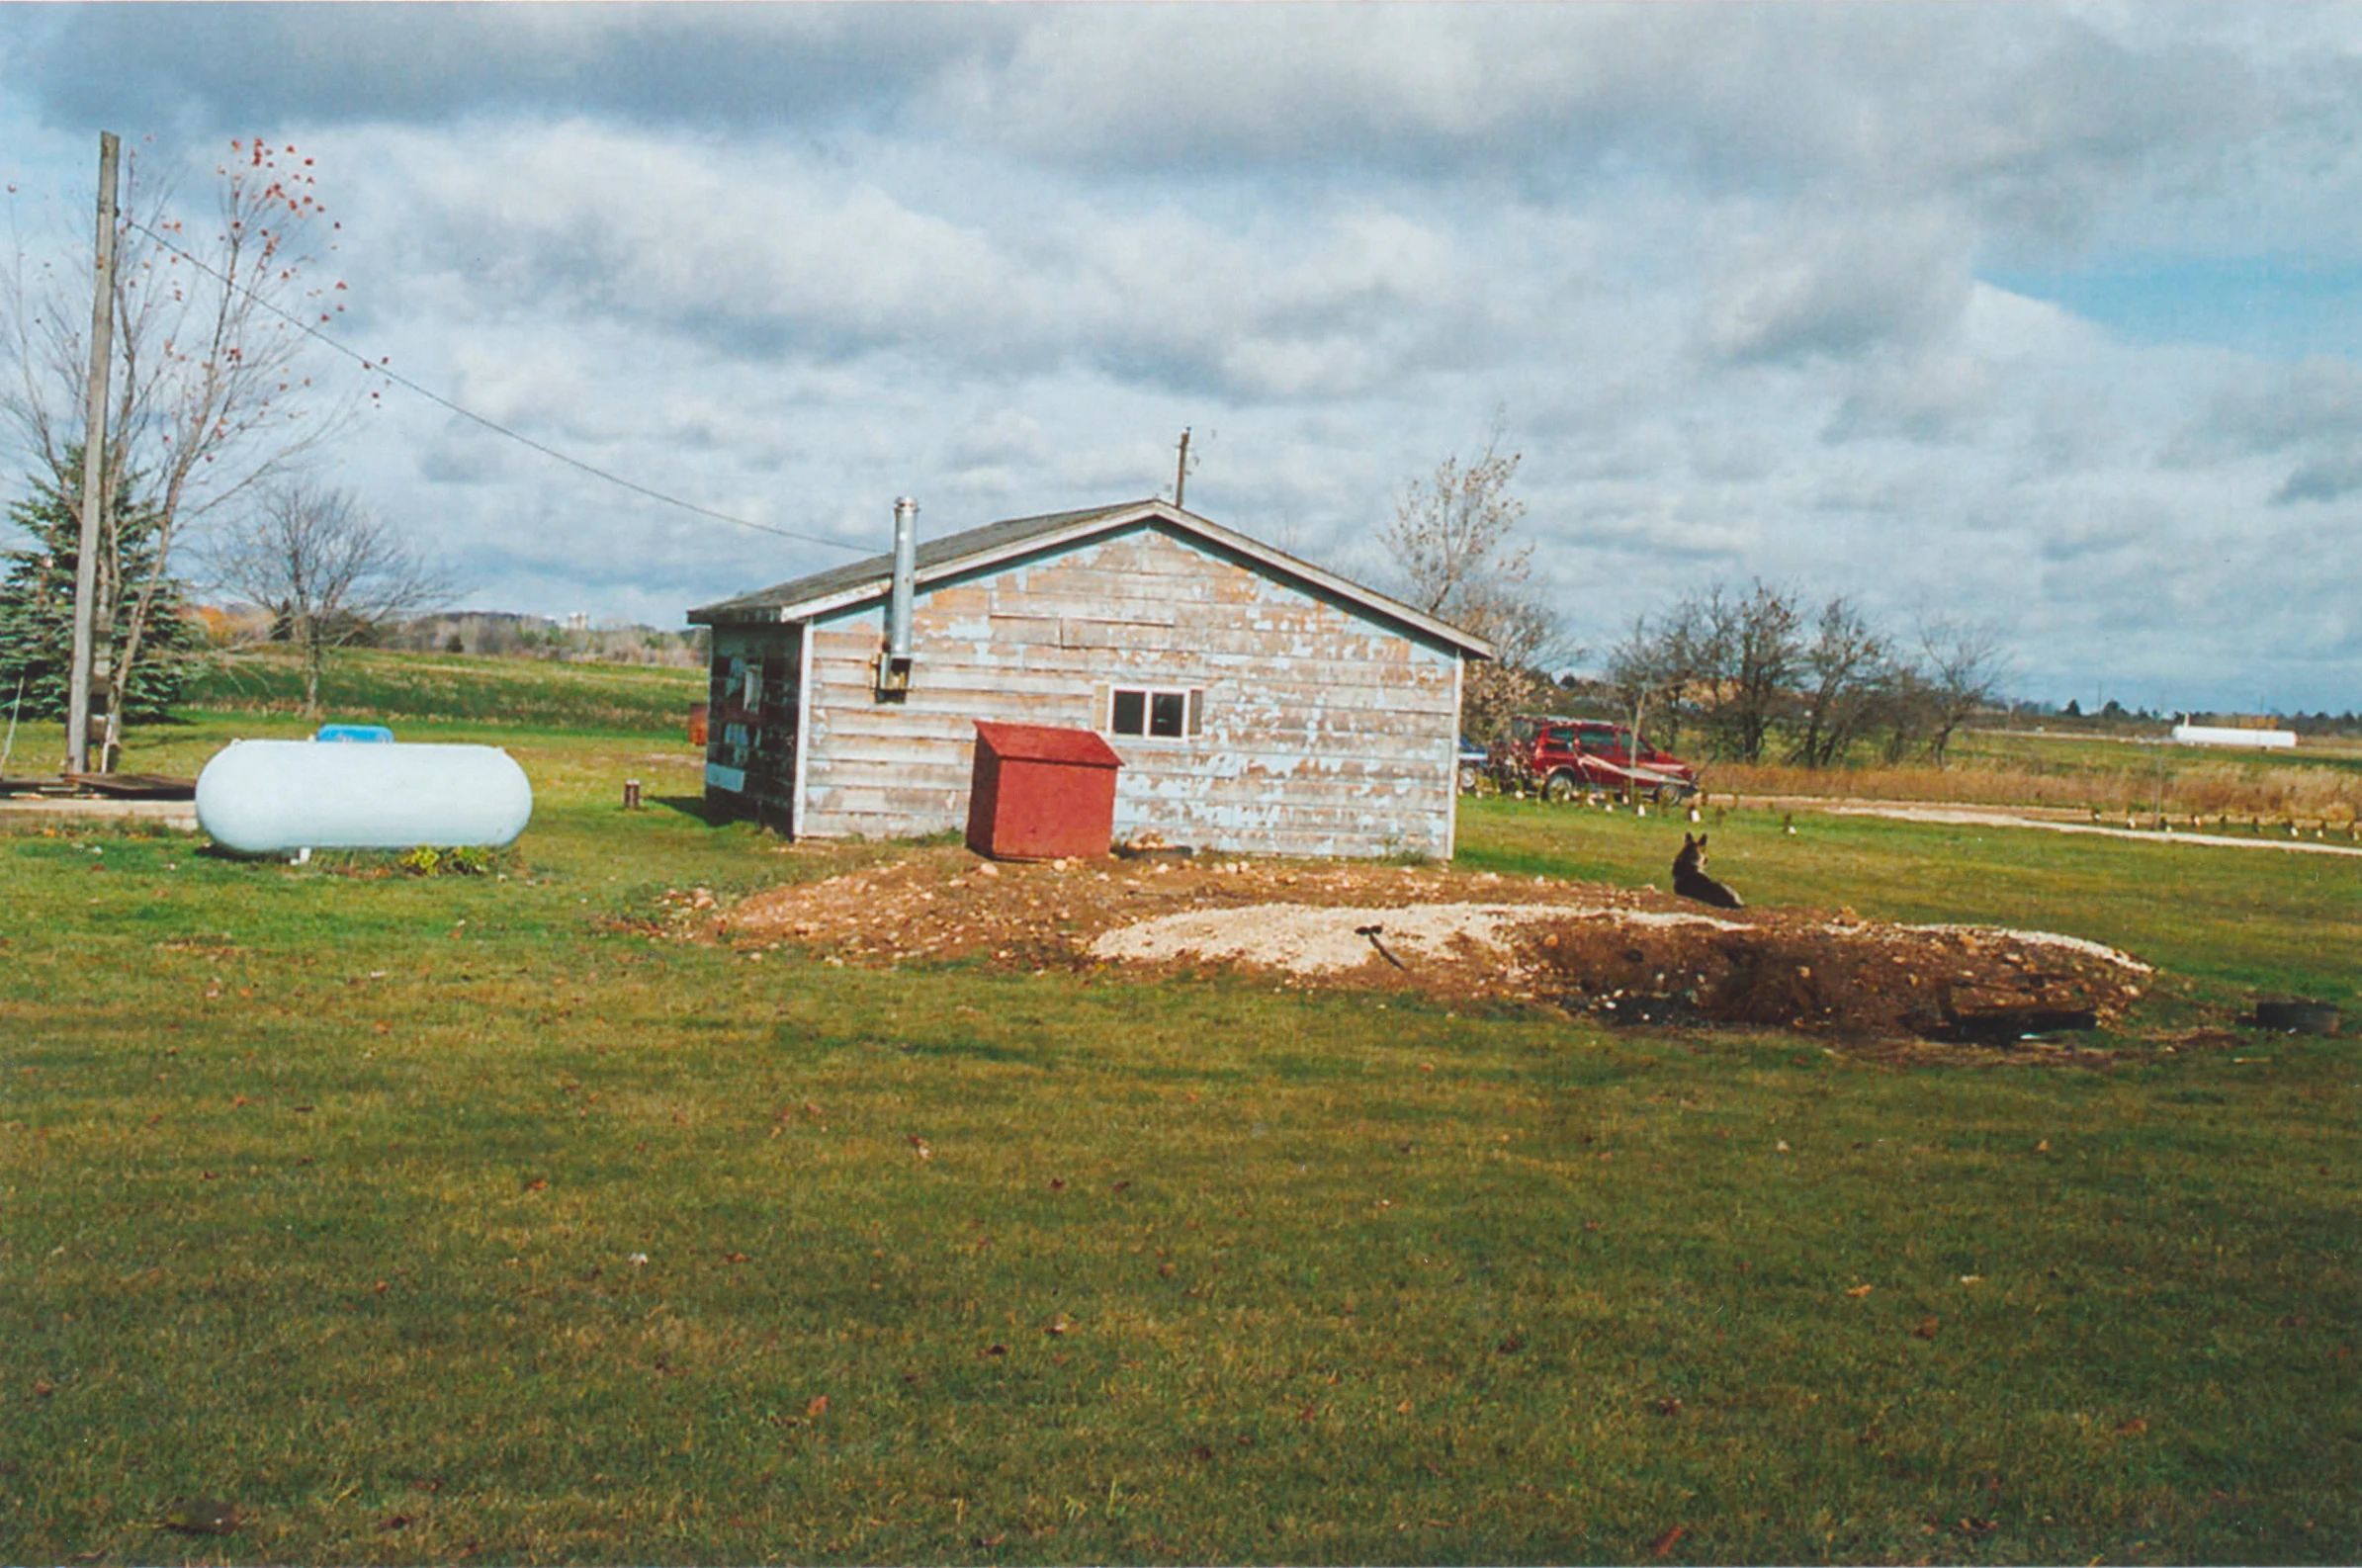
|
| 366 | Steven Avery's burn pit, garage and trailer | 13 | 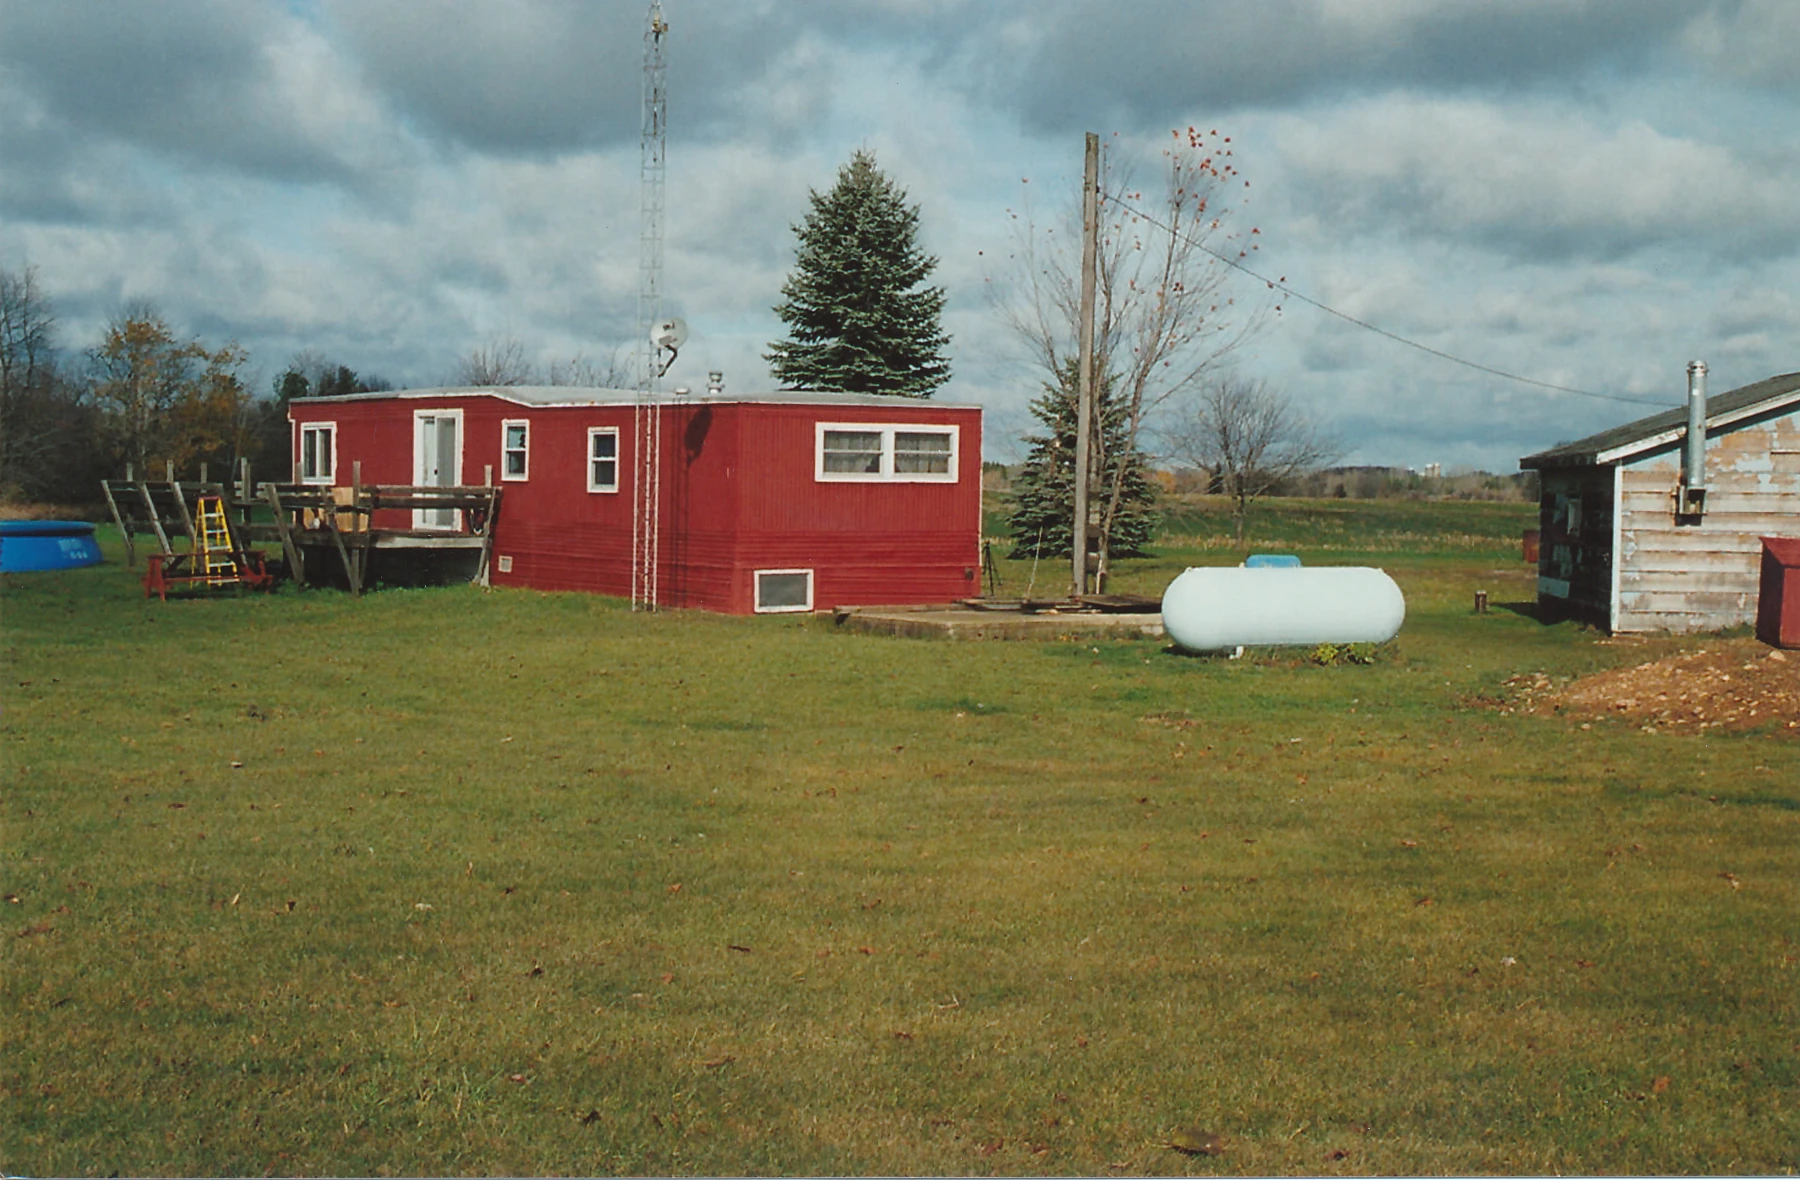
|
| 367 | Hammer found near burn pit | 13 | 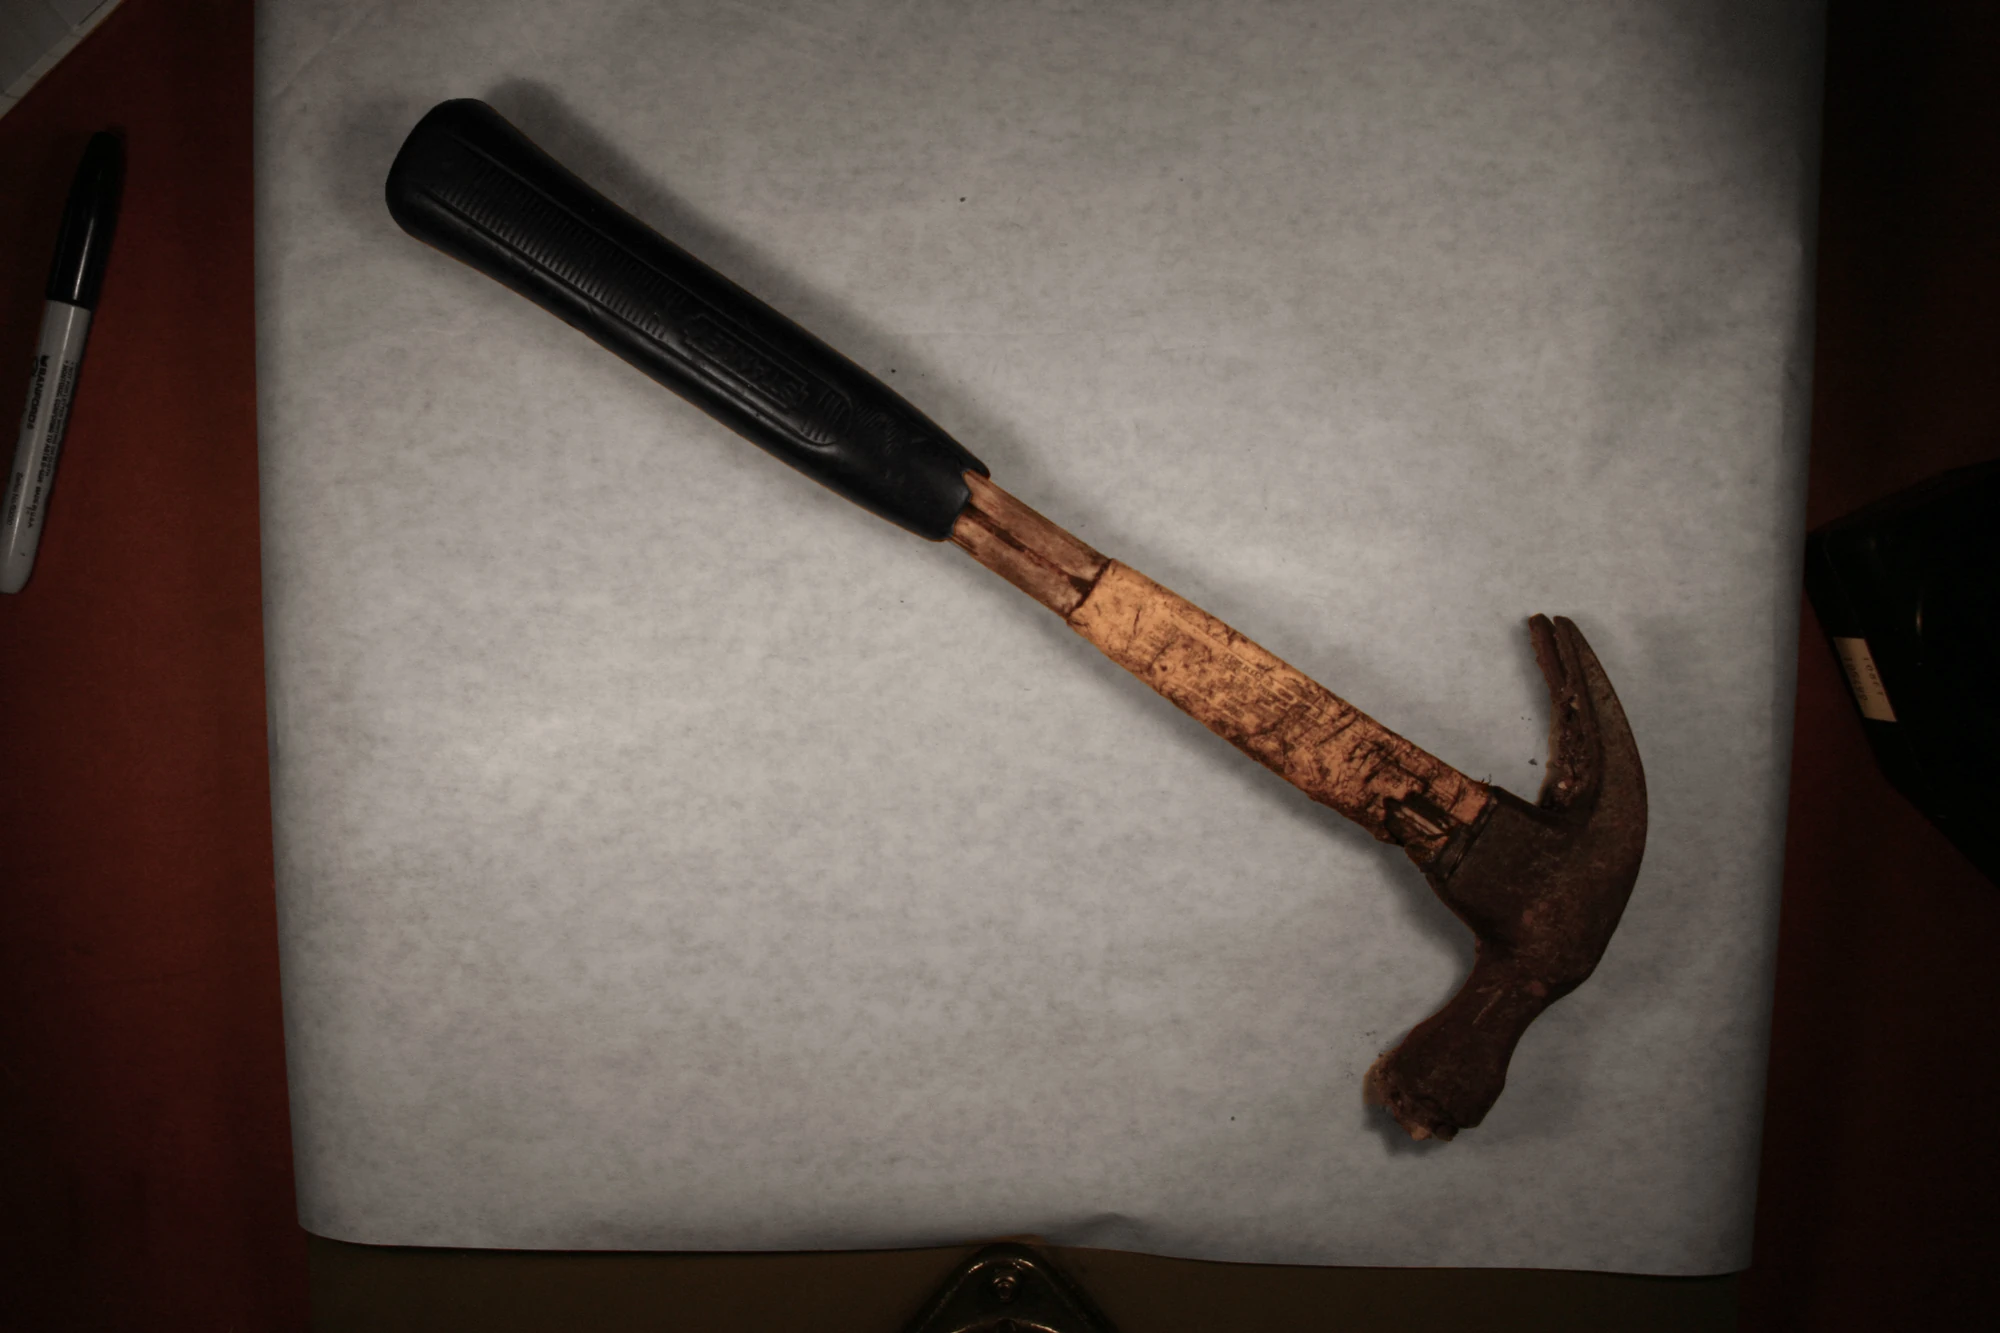
|
| 368 | Screwdriver found in burn pit | 13 | 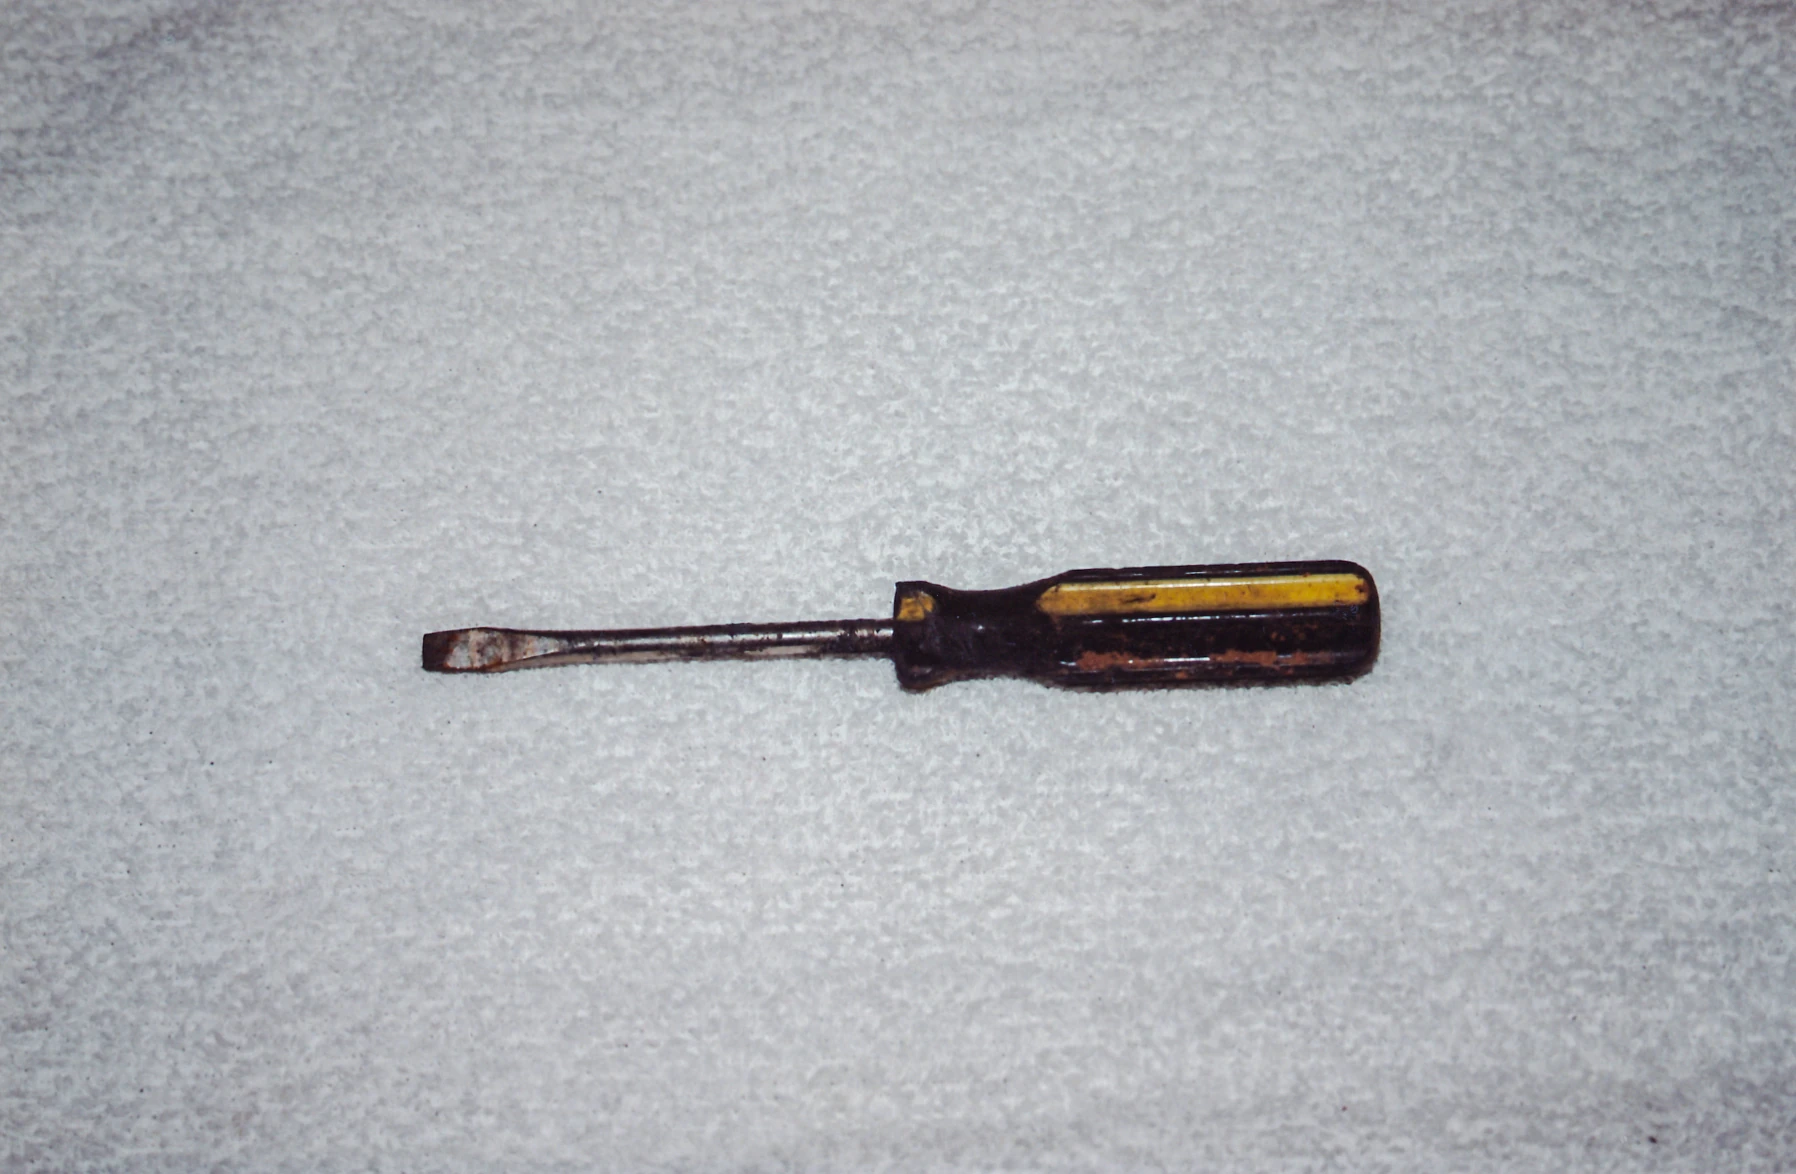
|
| 369 | Masonry tool found in burn pit | 13 | 
|
| 370 | Shovel found near burn pit | 13 | 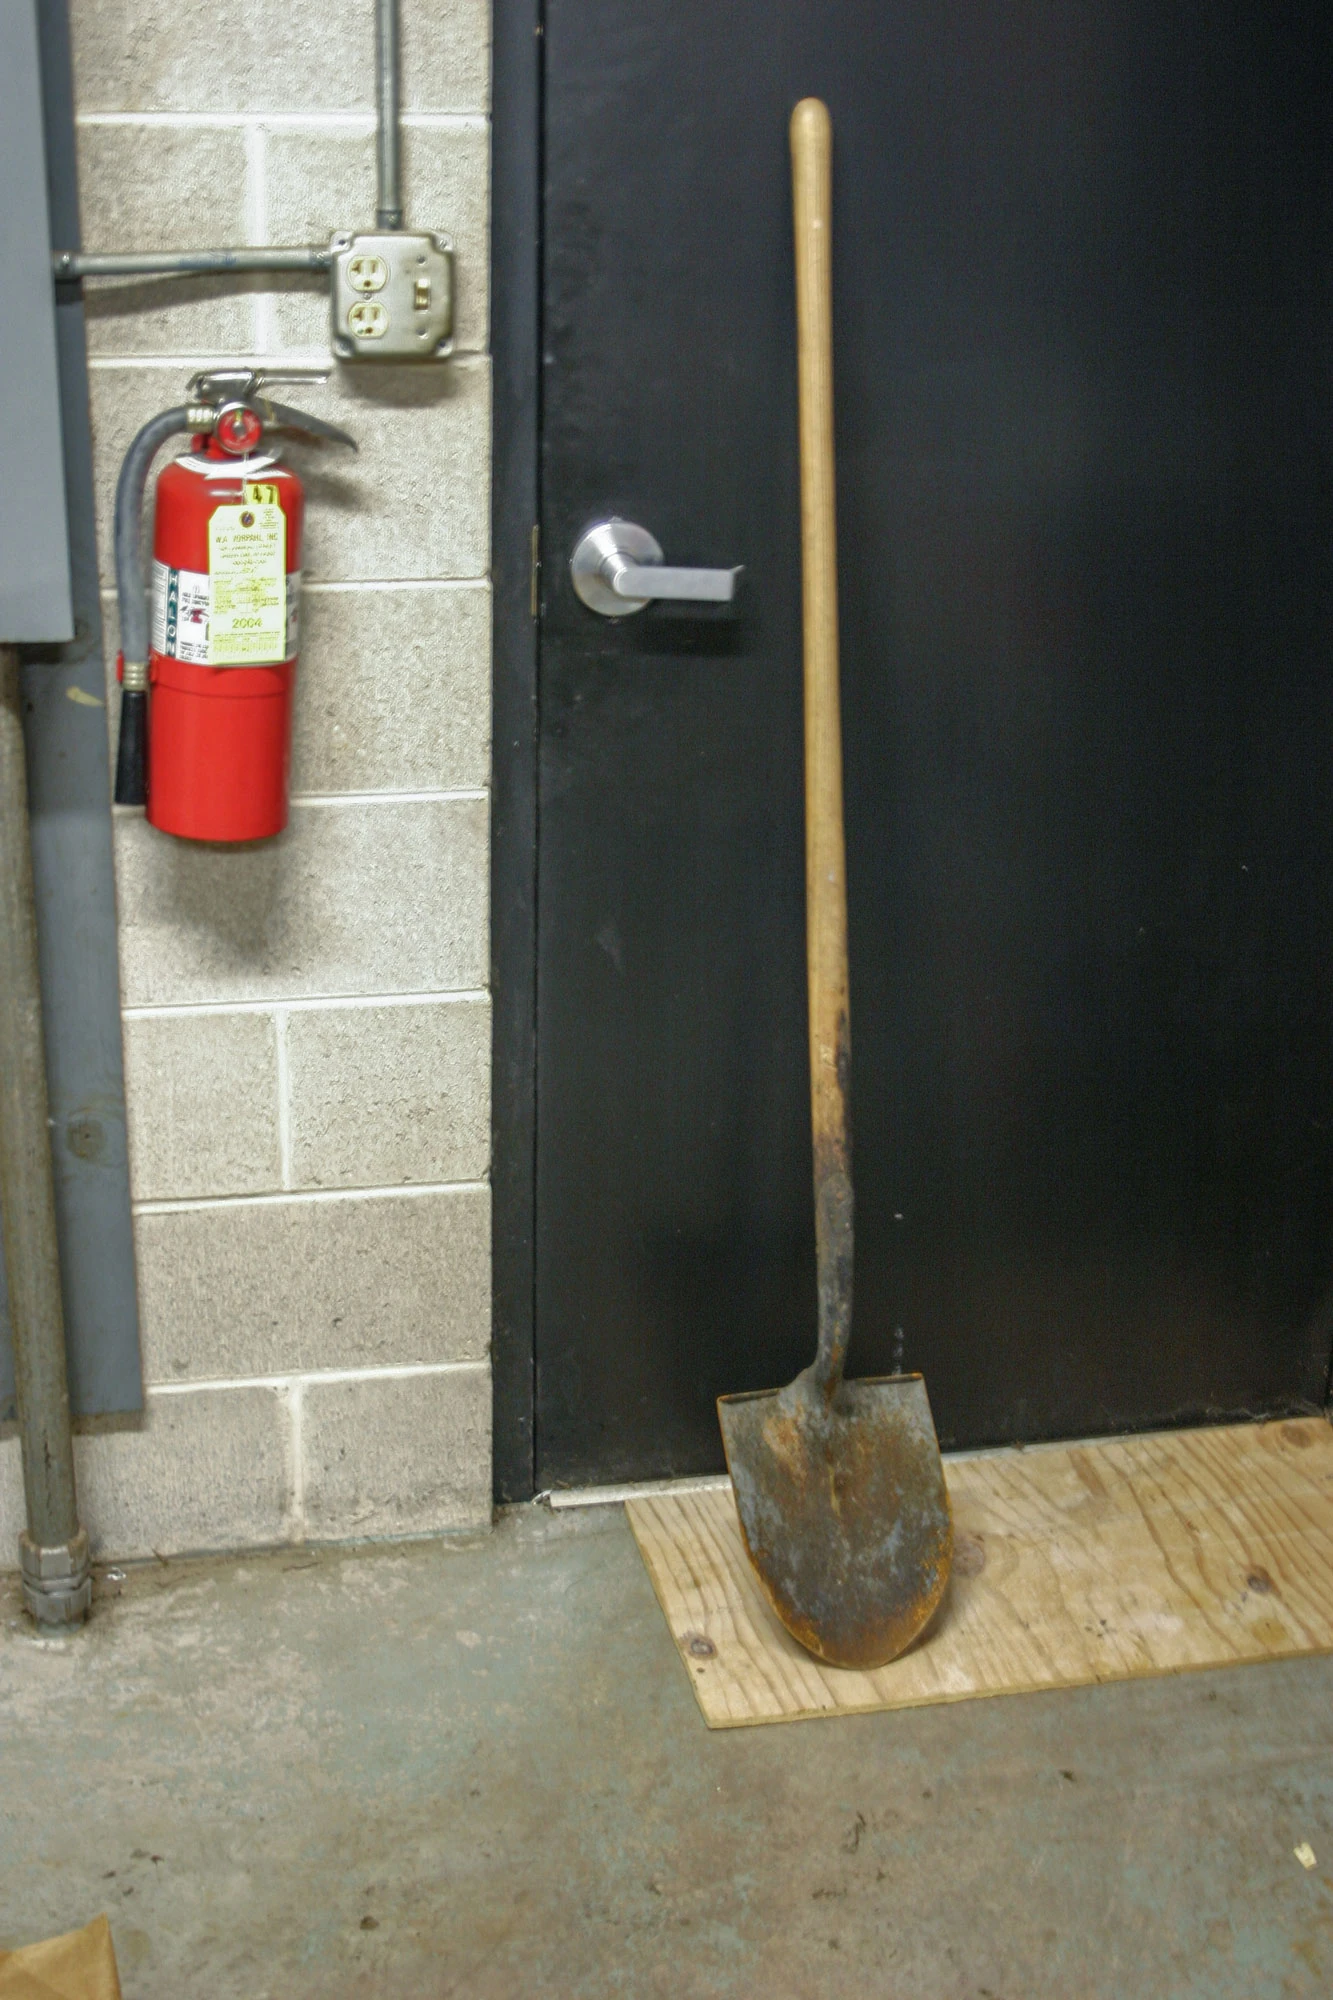
|
| 371 | Metal frame of vehicle seat | 13 | 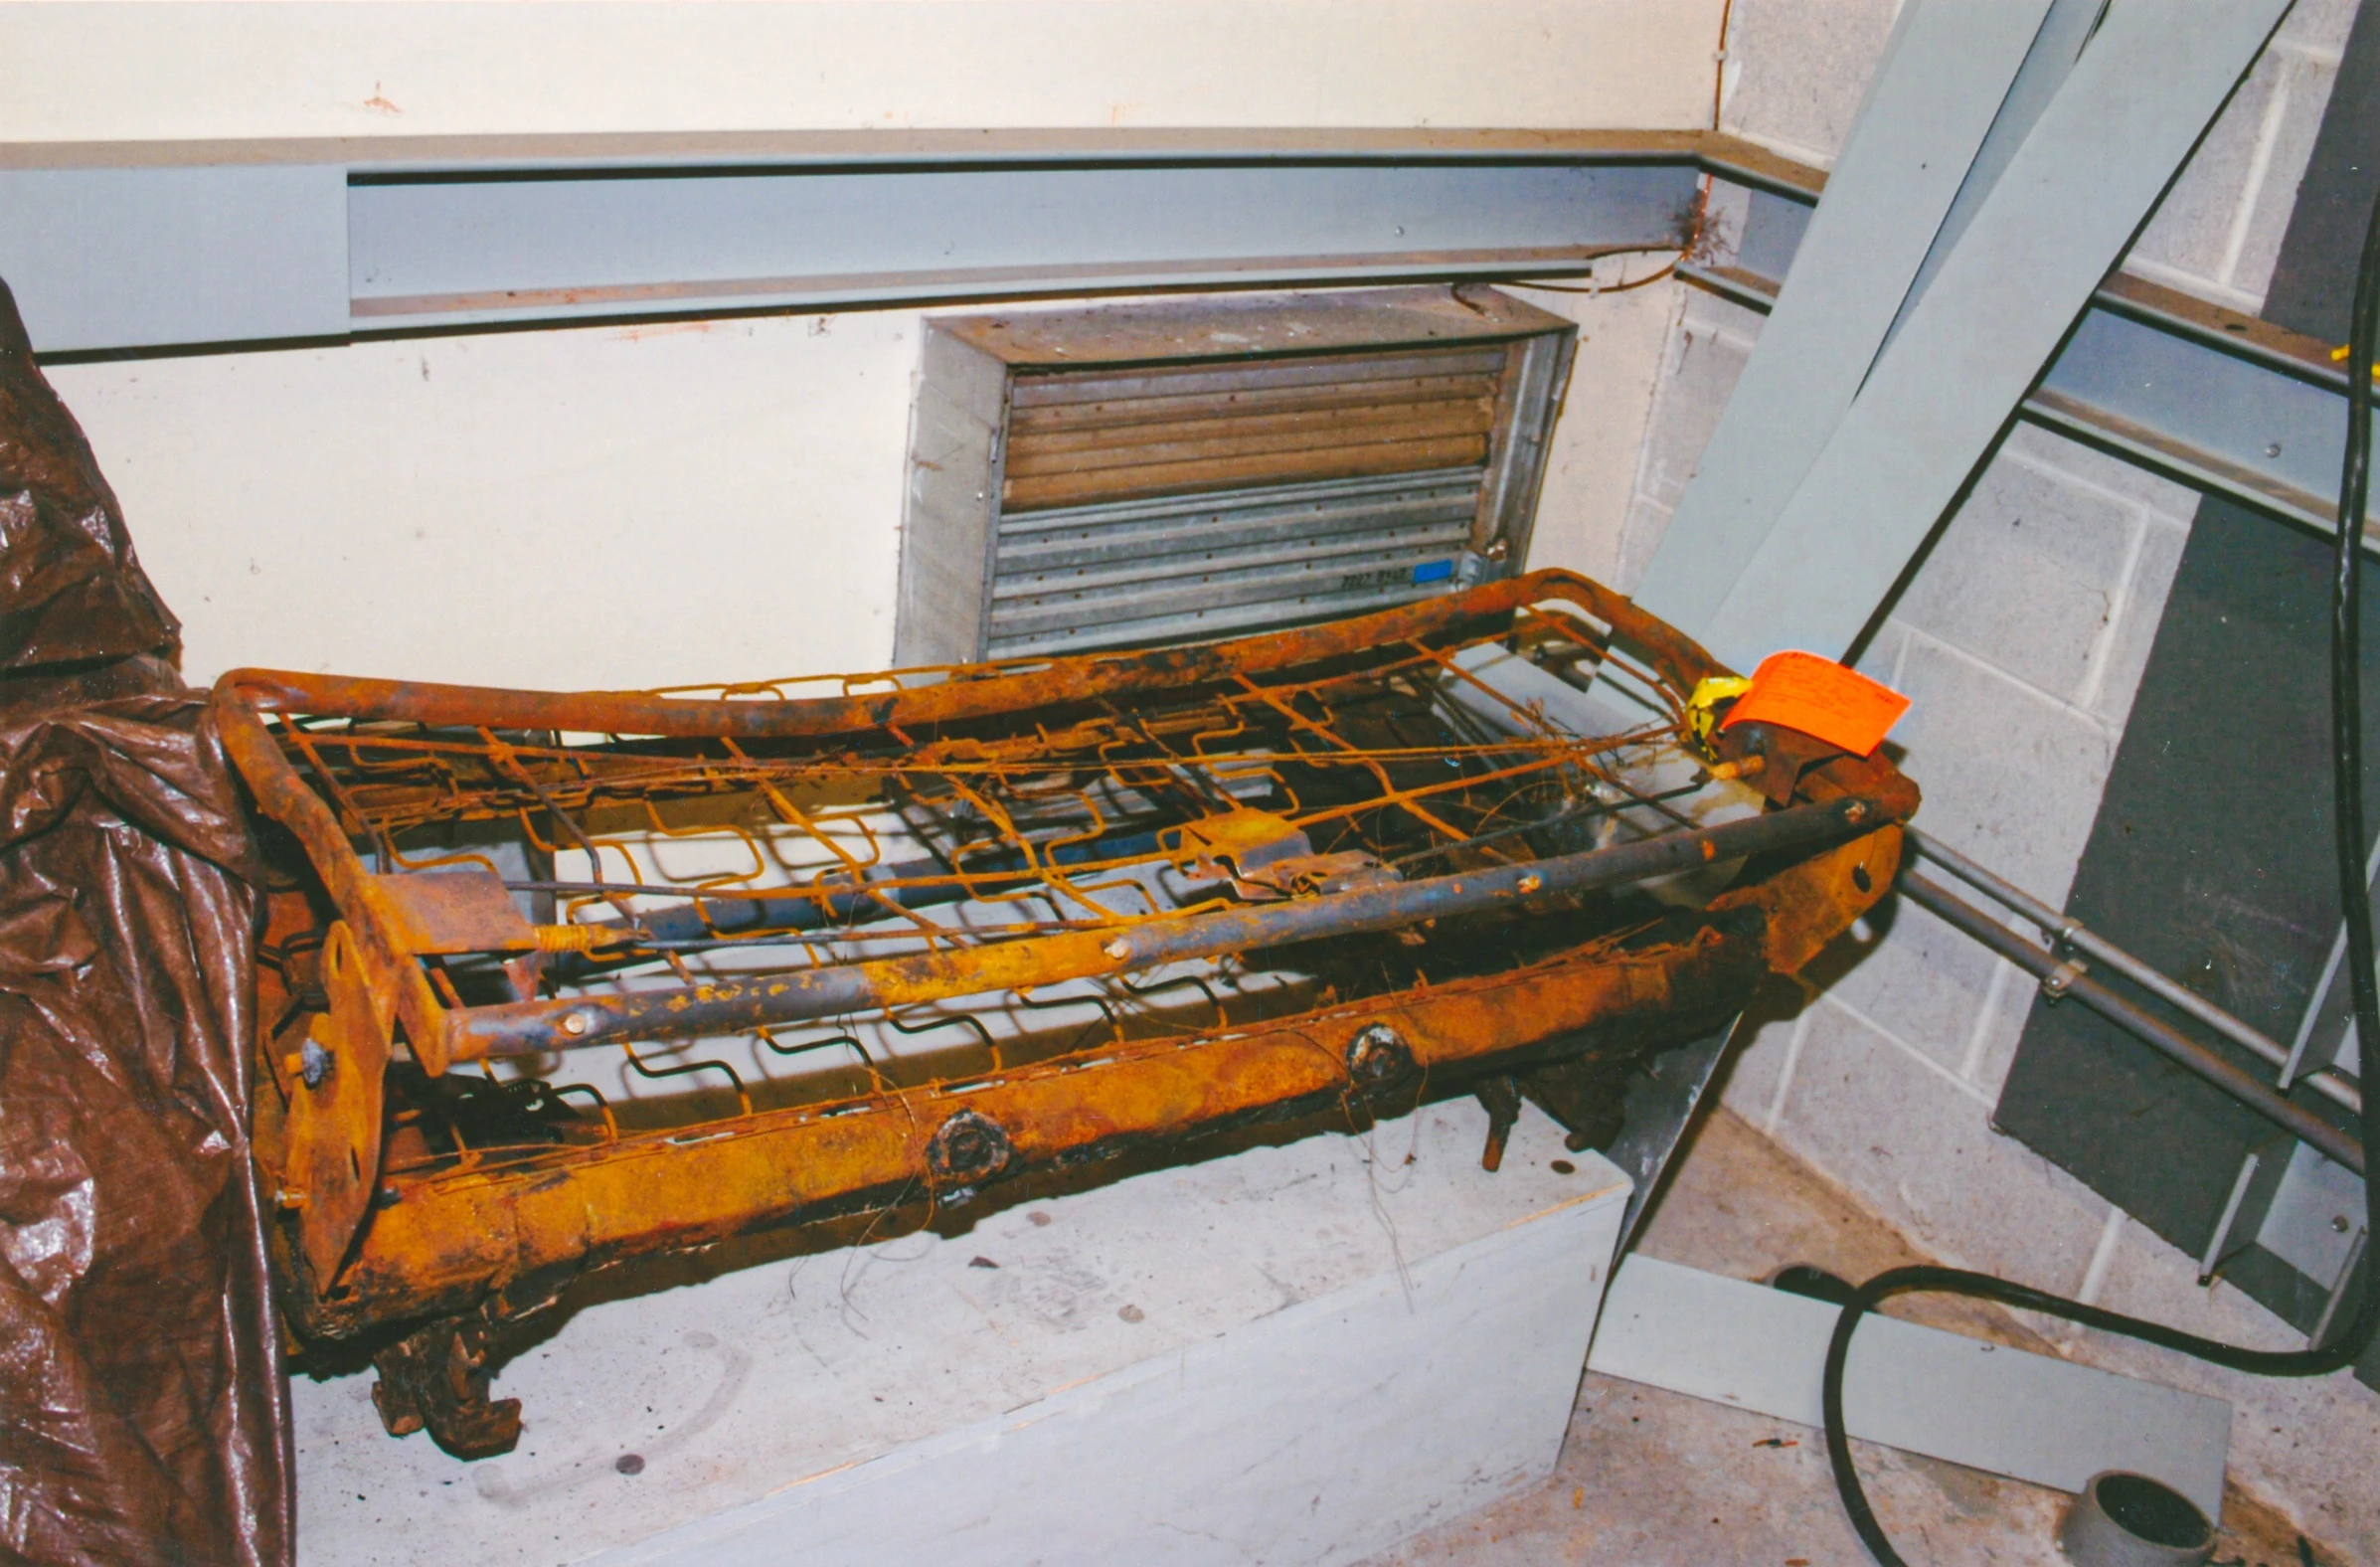
|
| 377 | Photos used for PowerPoint-presentation about teeth and jaw | 13 | File:Trial exhibit 377.jpg |
| 382 | Burn pit contents processing | 13 | 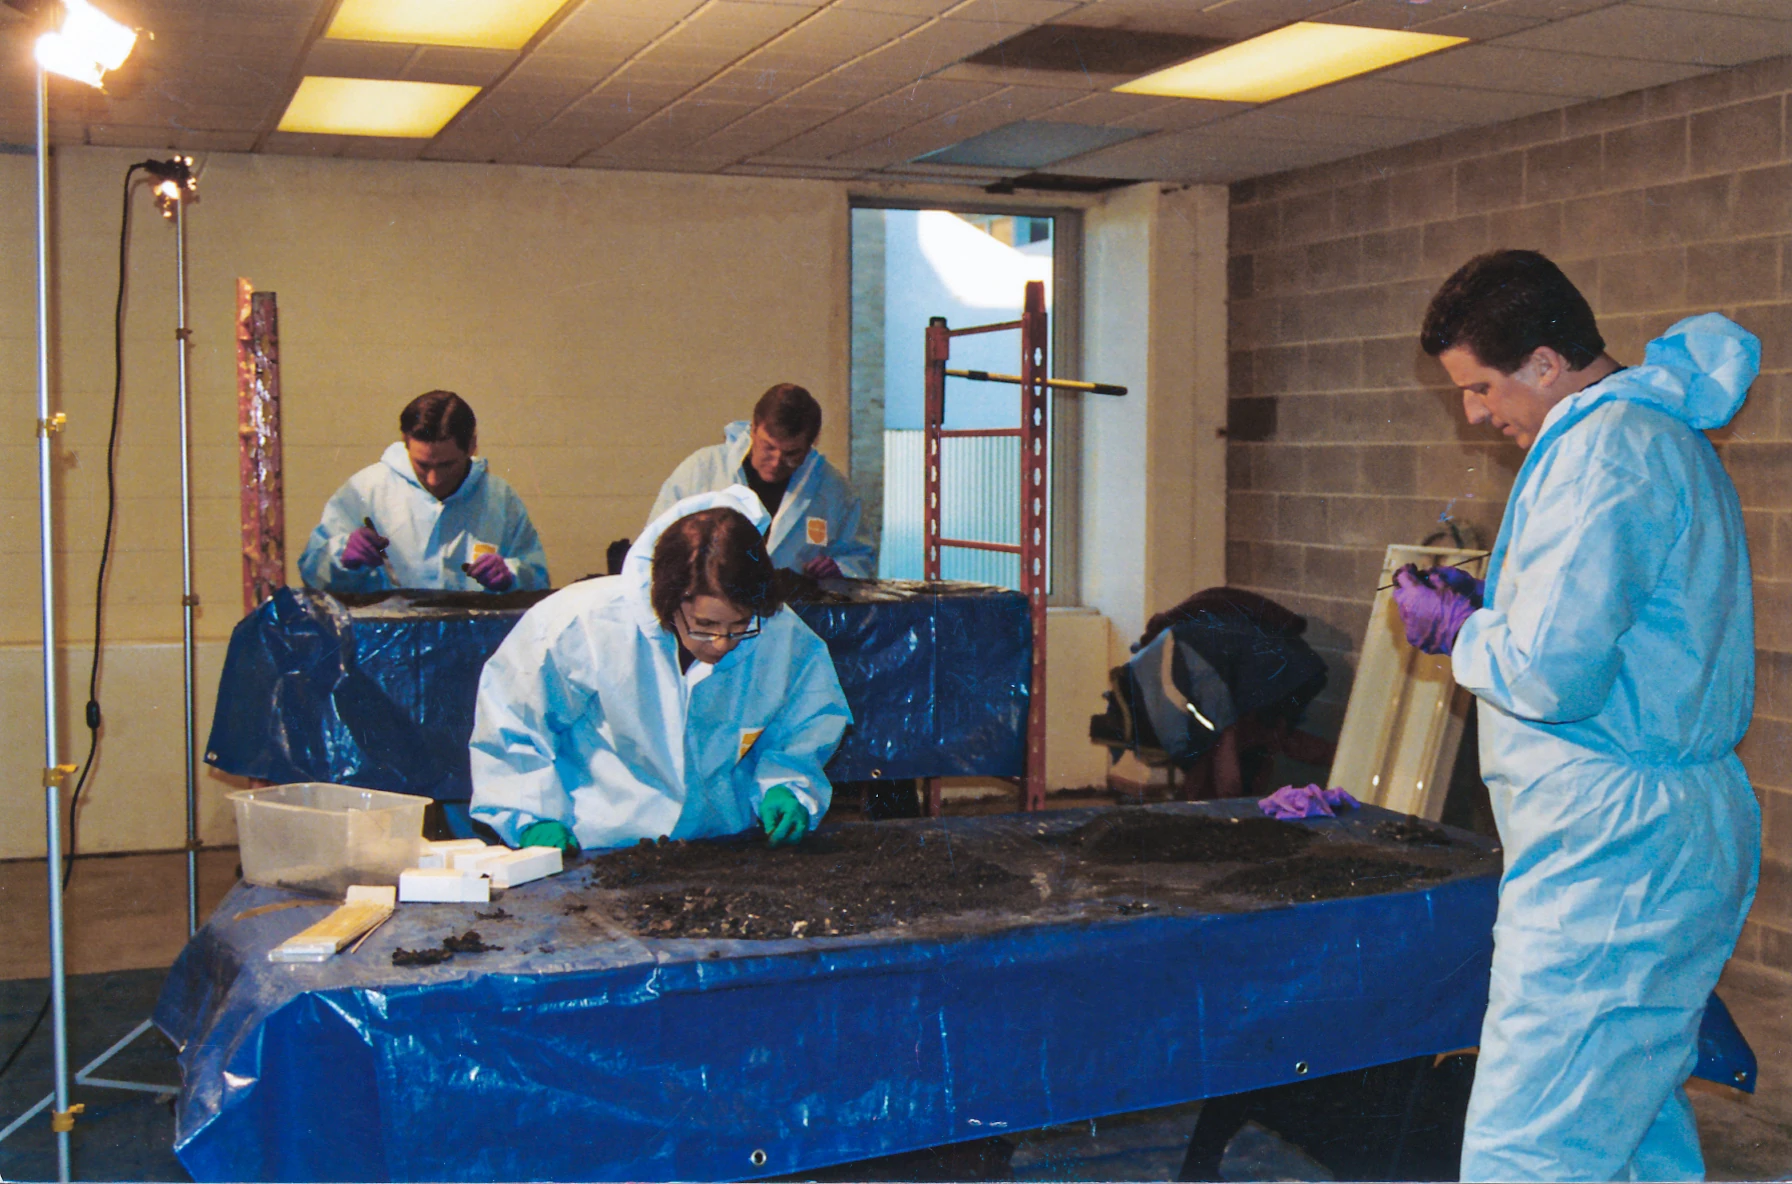
|
| 383 | Contents of burn pit submitted to Dr. Eisenberg | 13 | 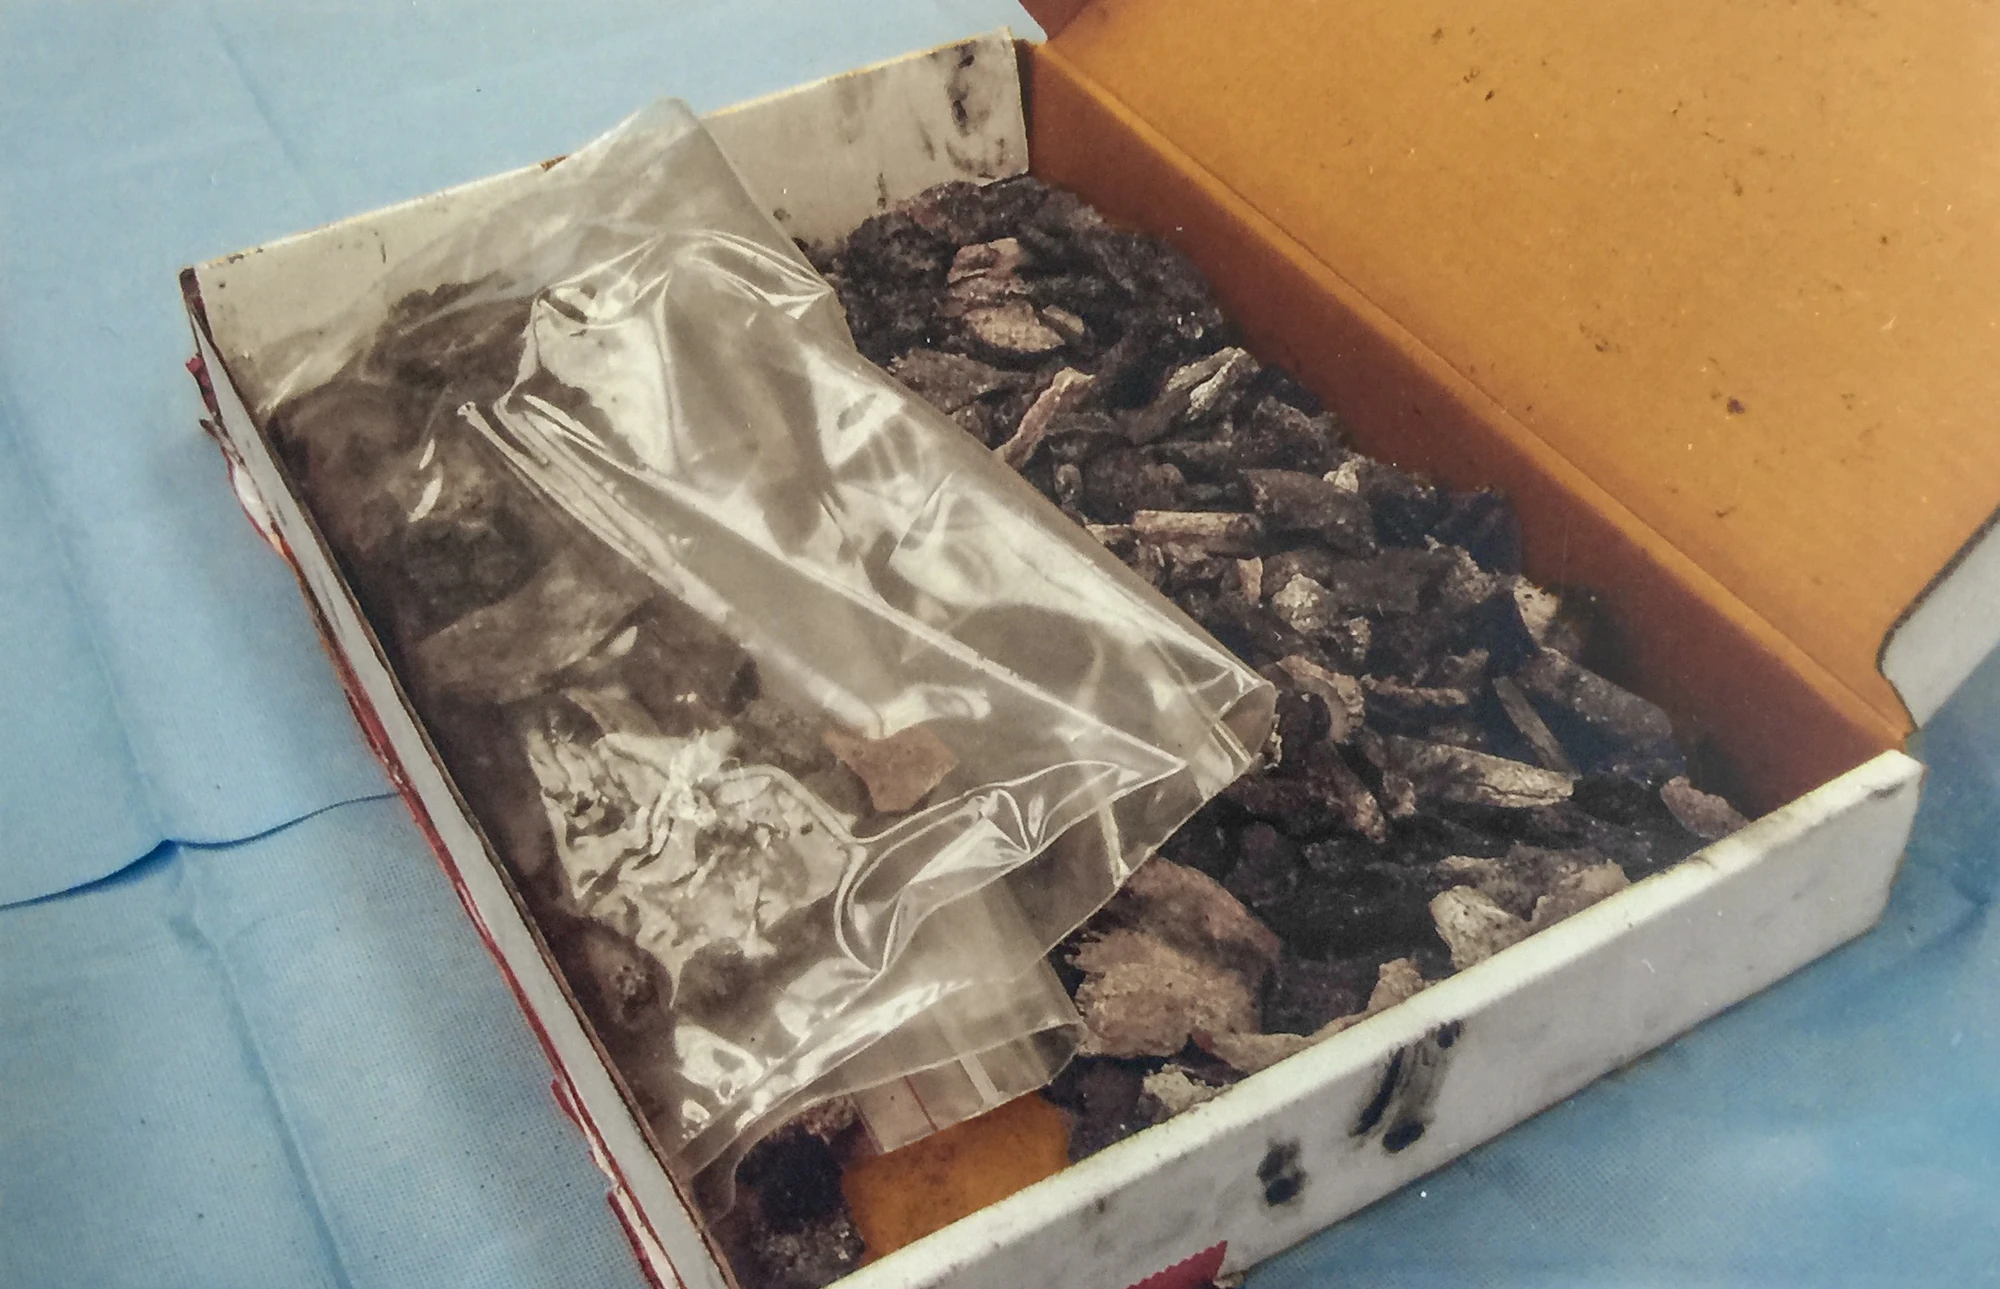
|
| 384 | Skull fragments | 13 | 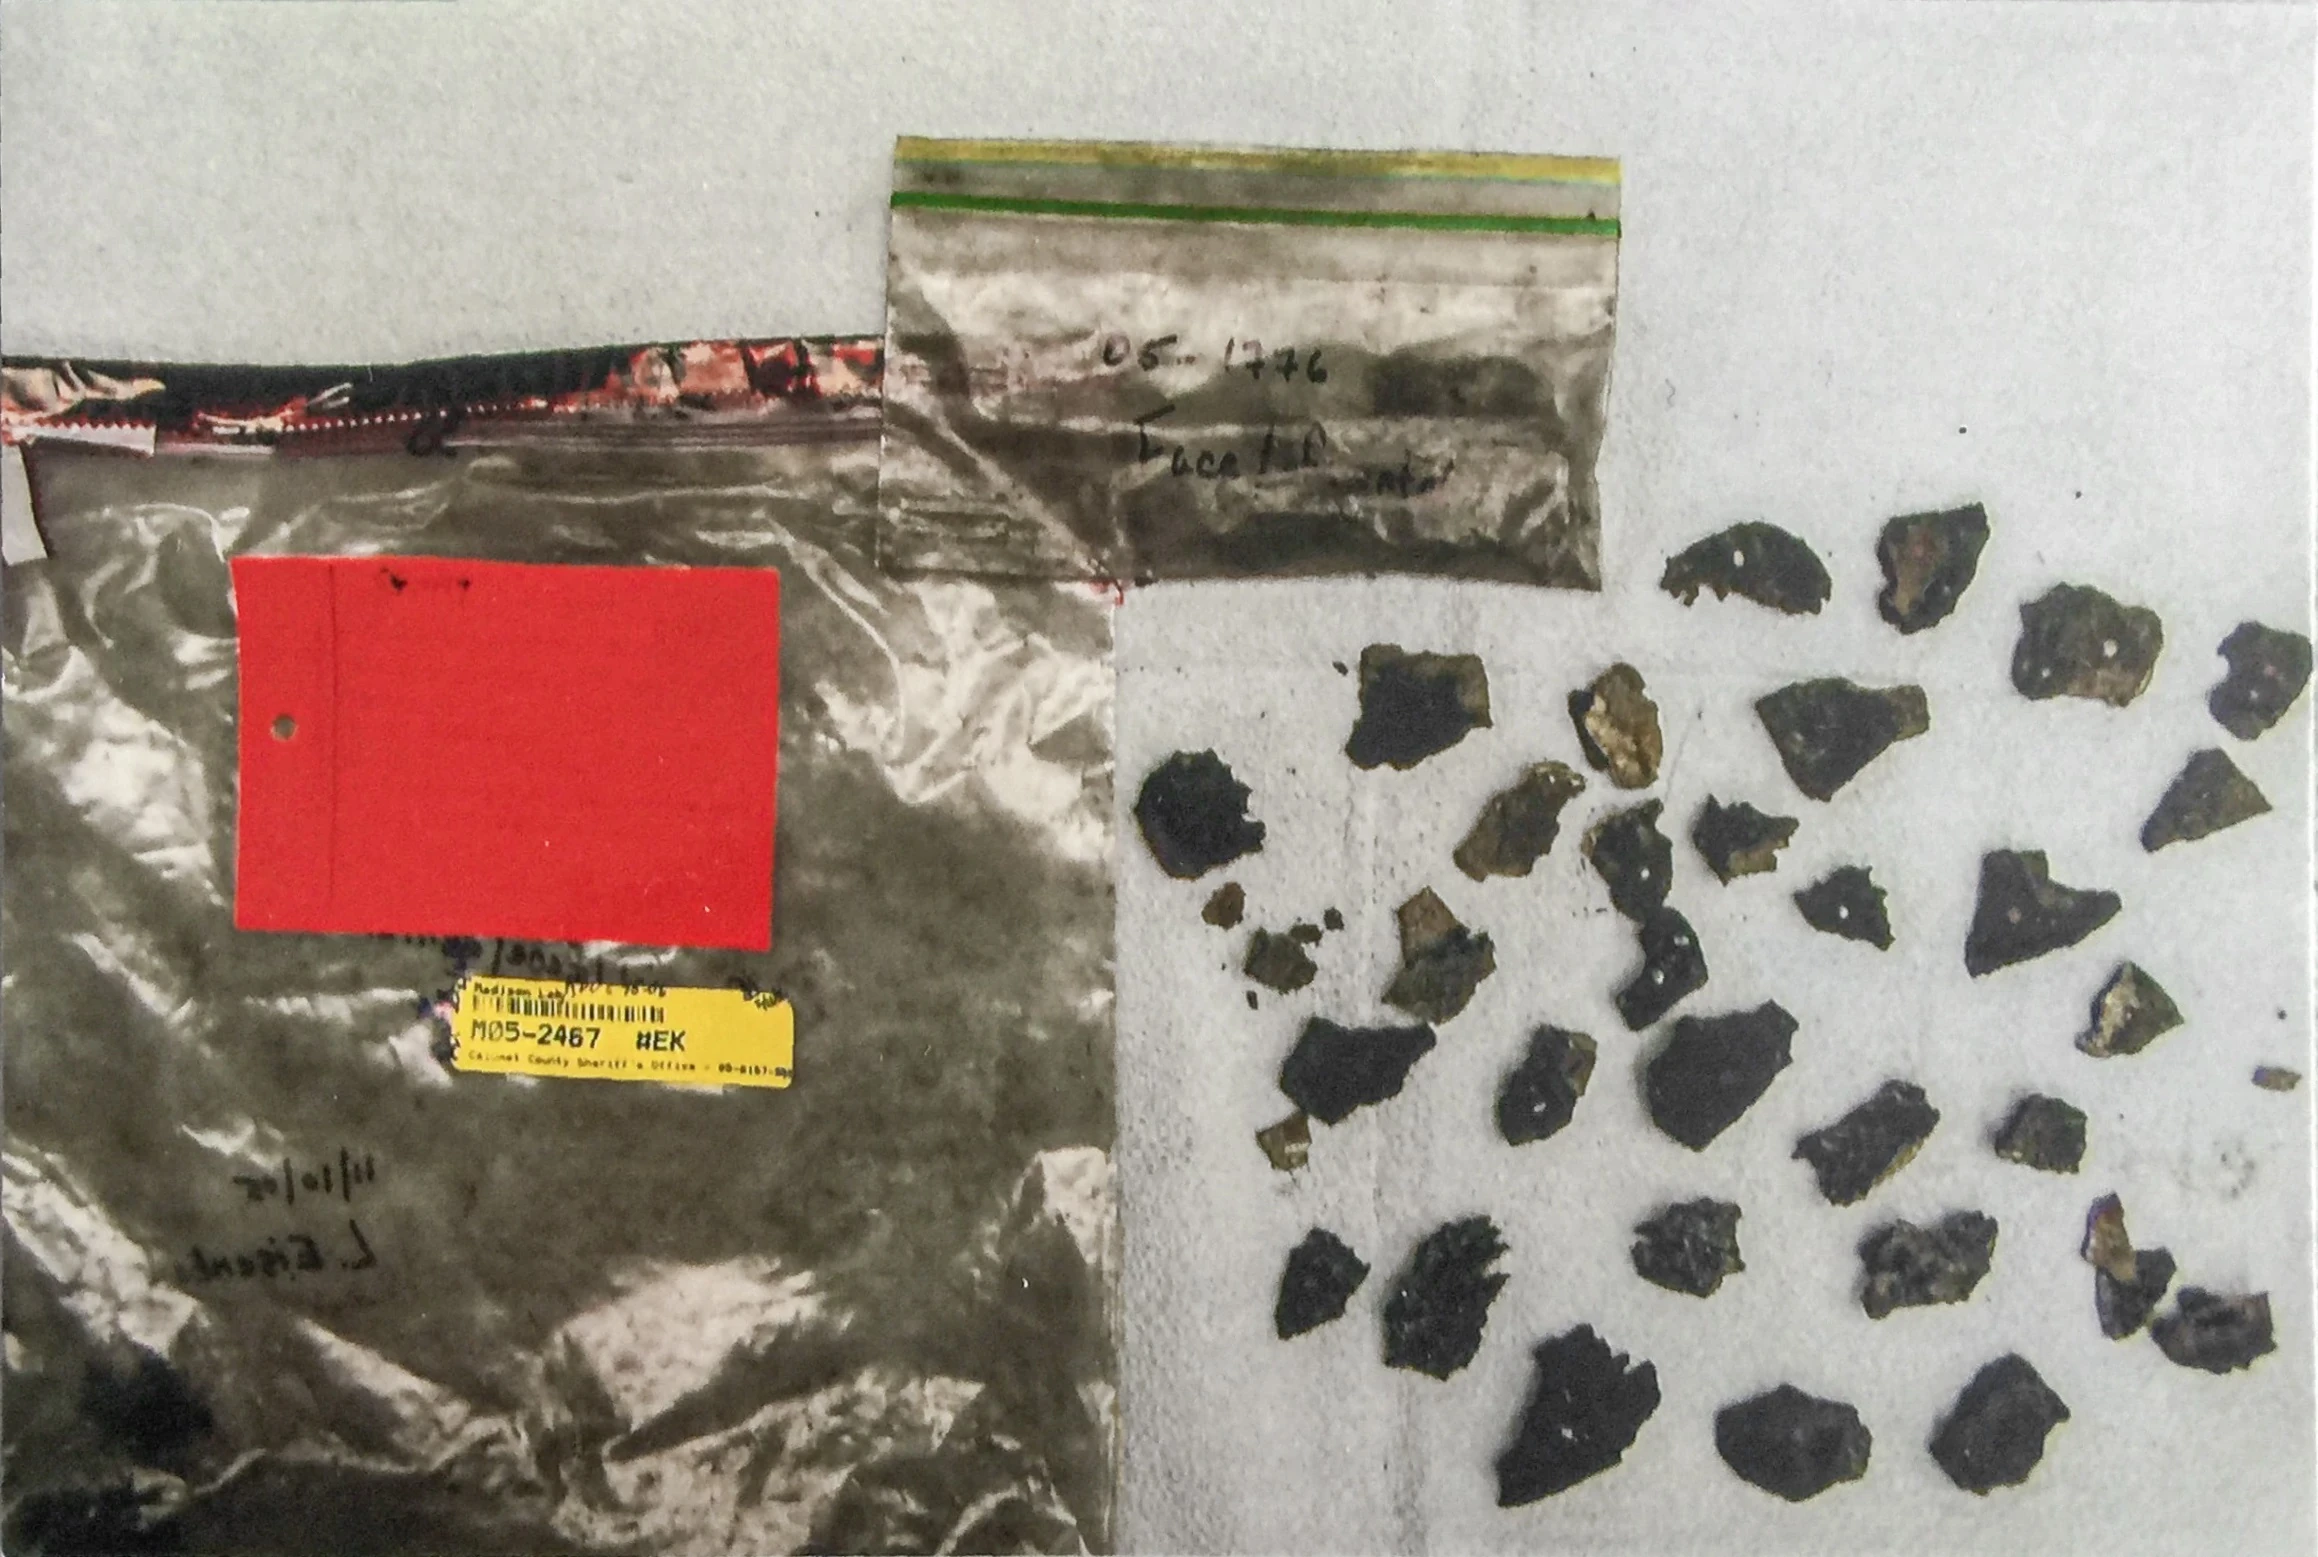
|
| 385 | Bone fragments and muscle tissue | 13 | 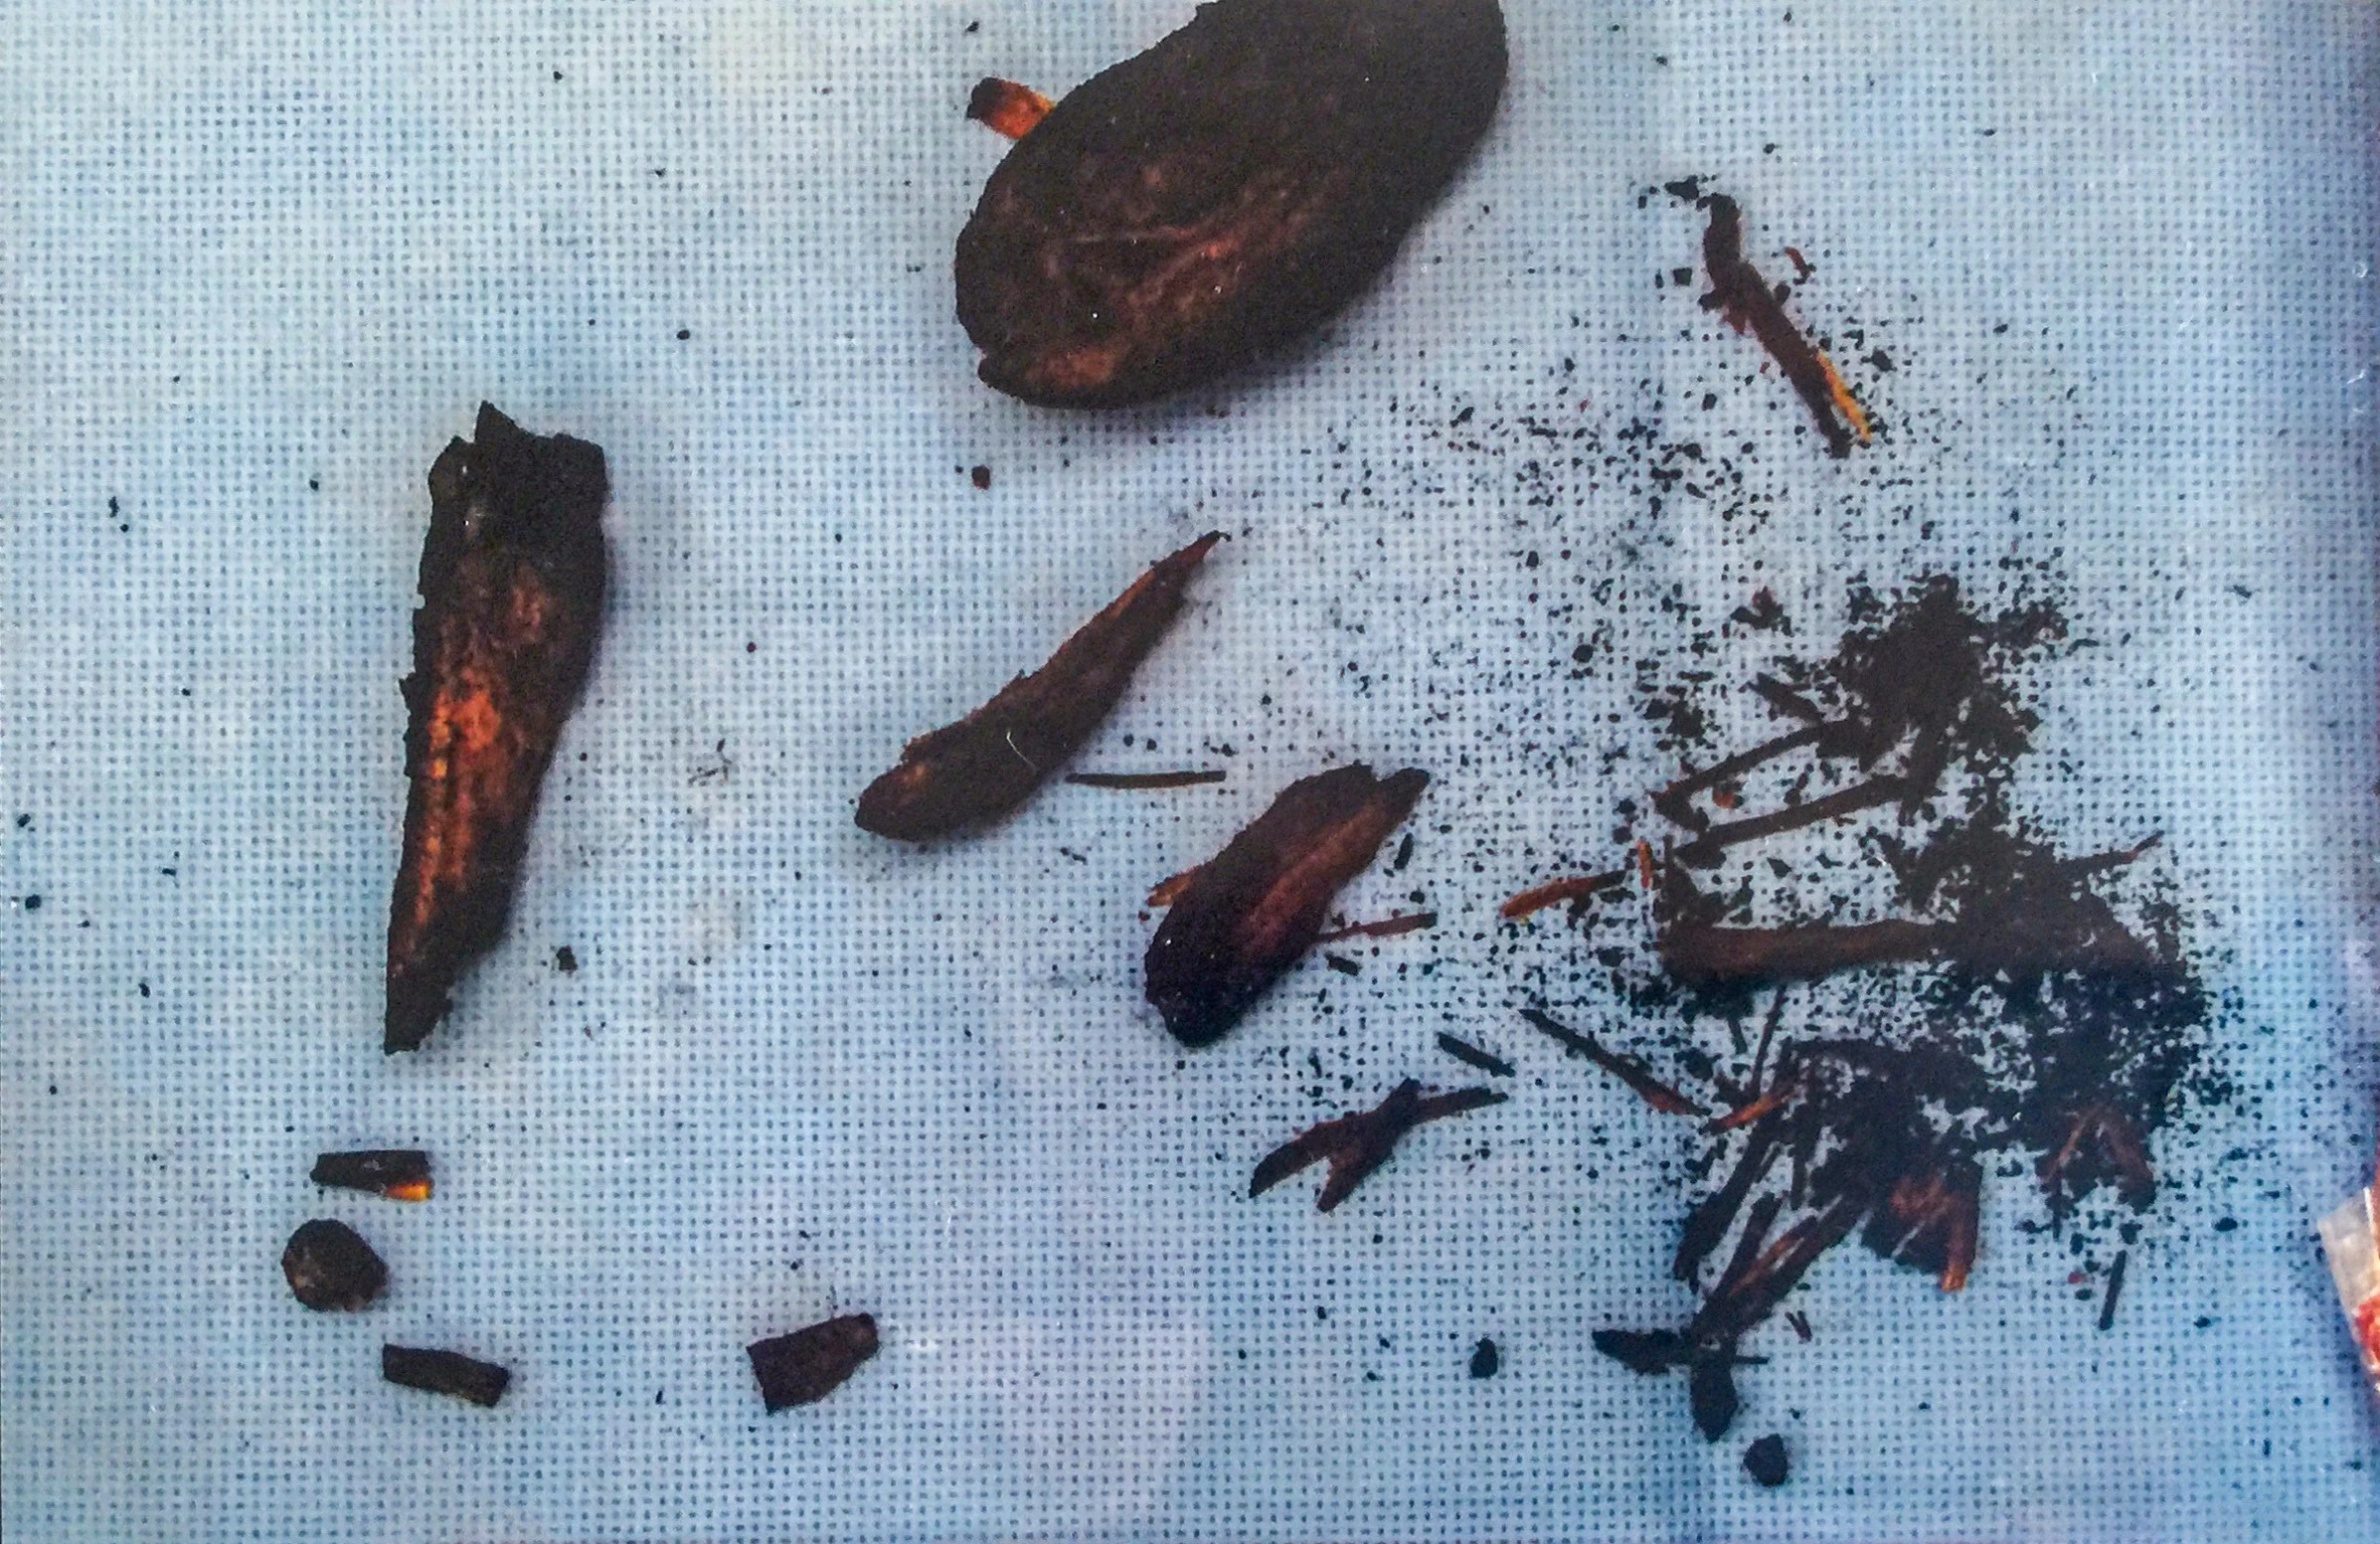
|
| 386 | Facial bones | 13 | 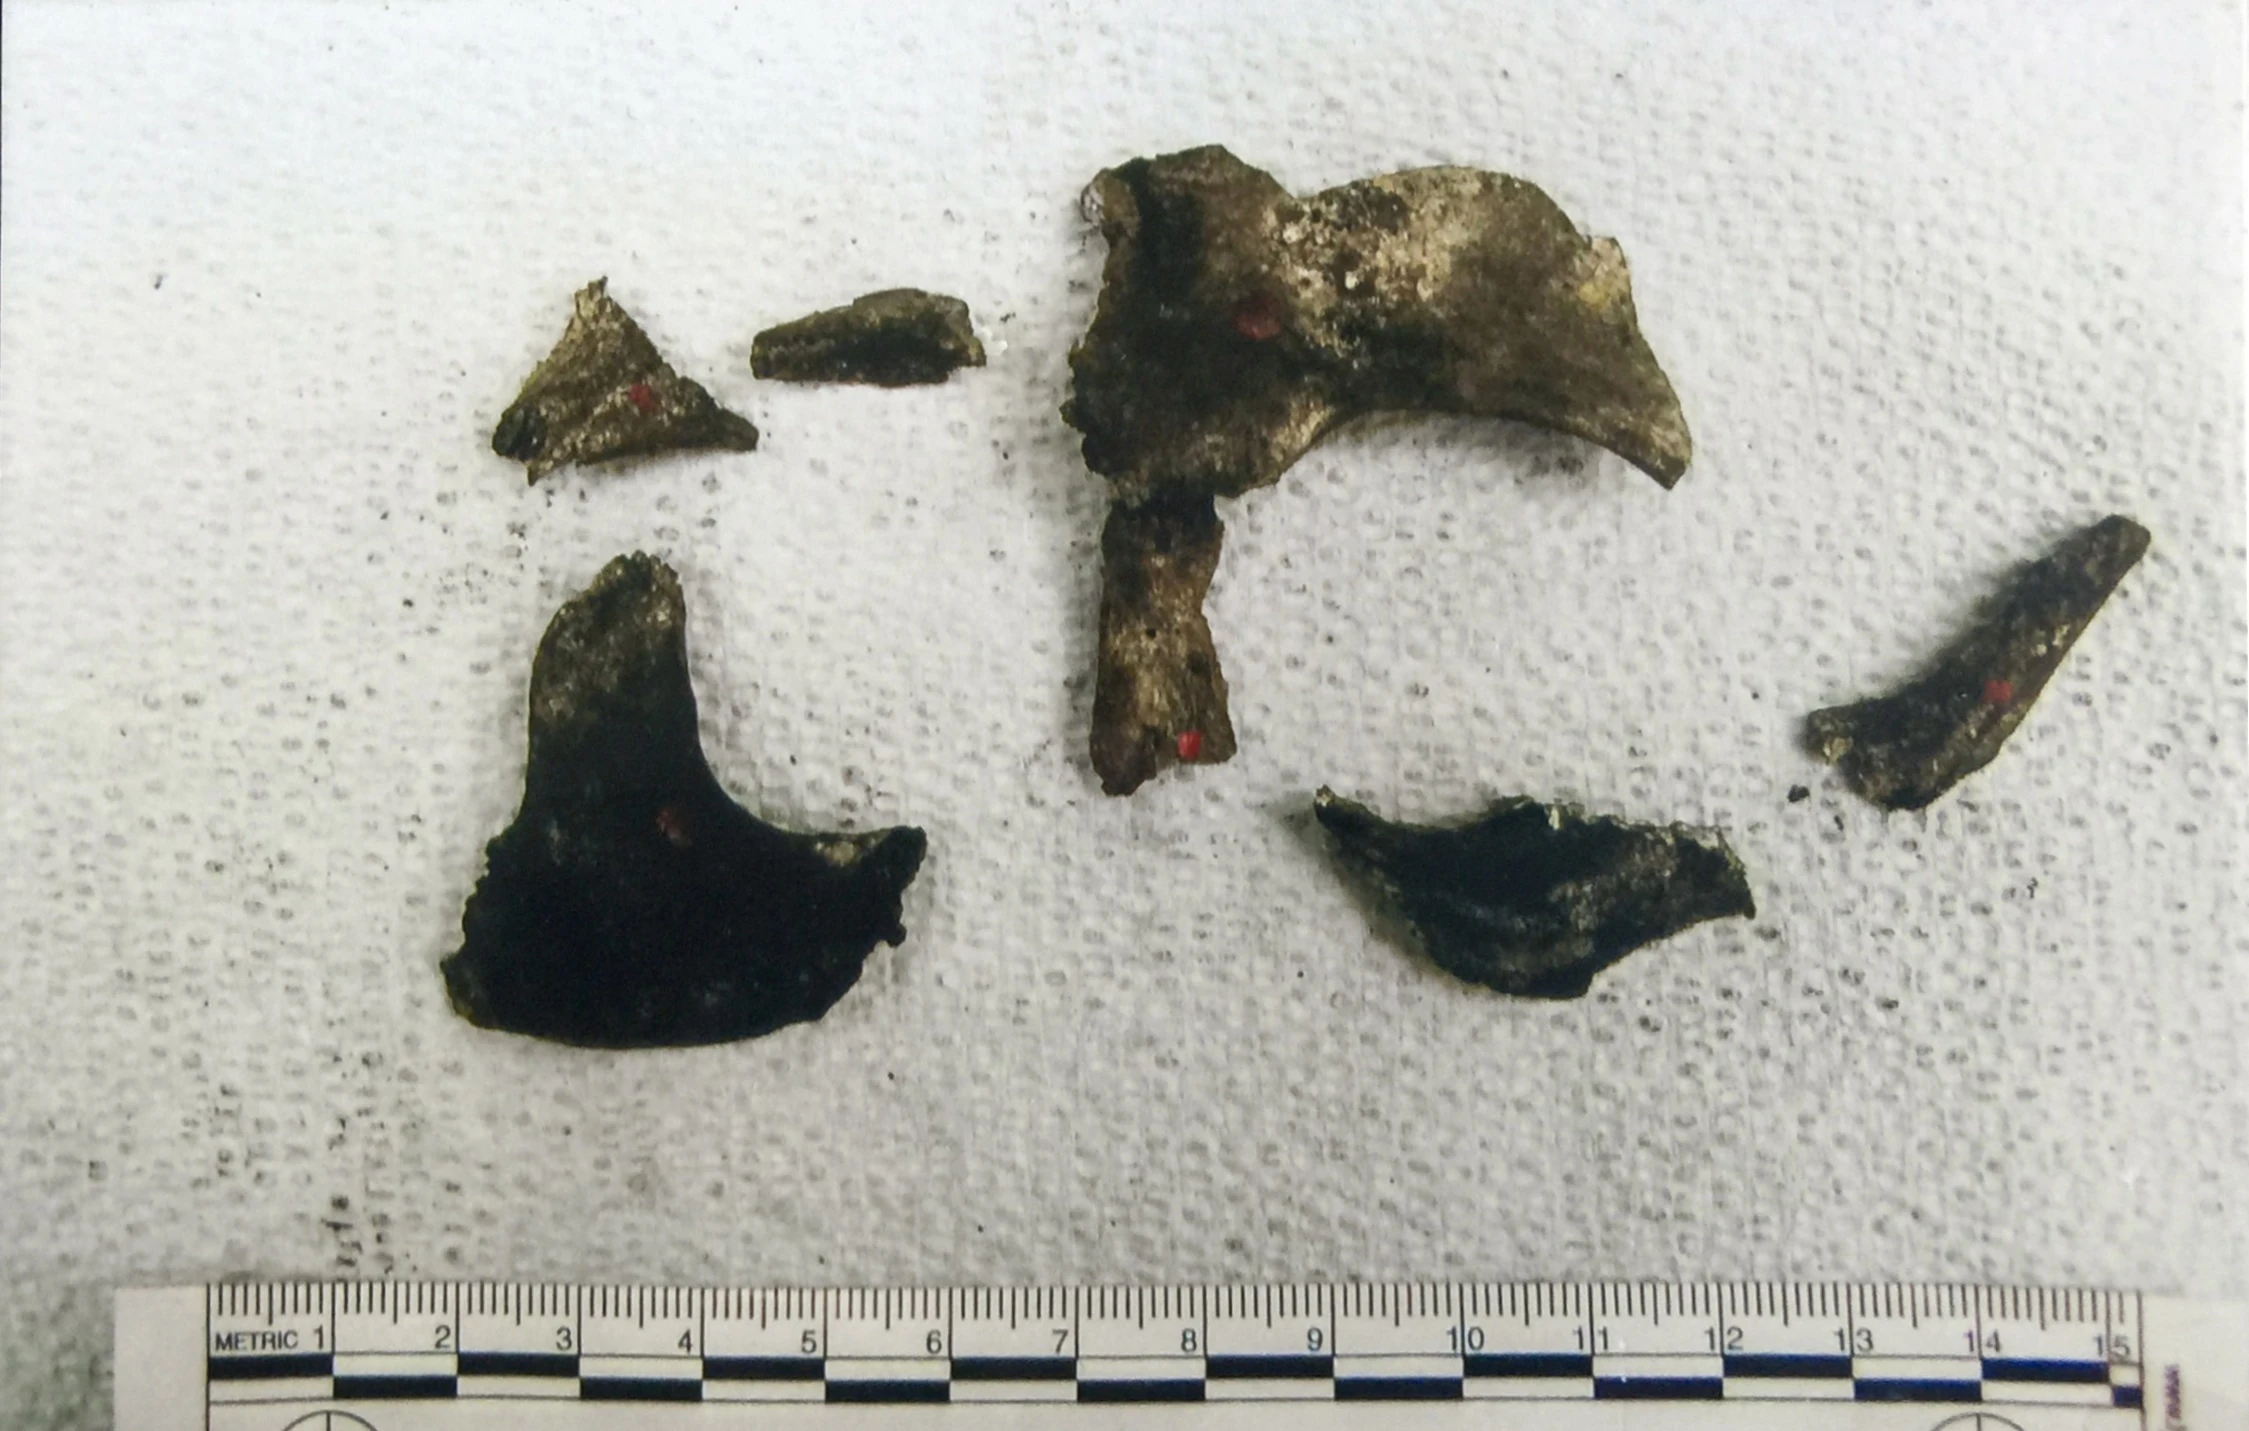
|
| 387 | Portion of facial bones | 13 | 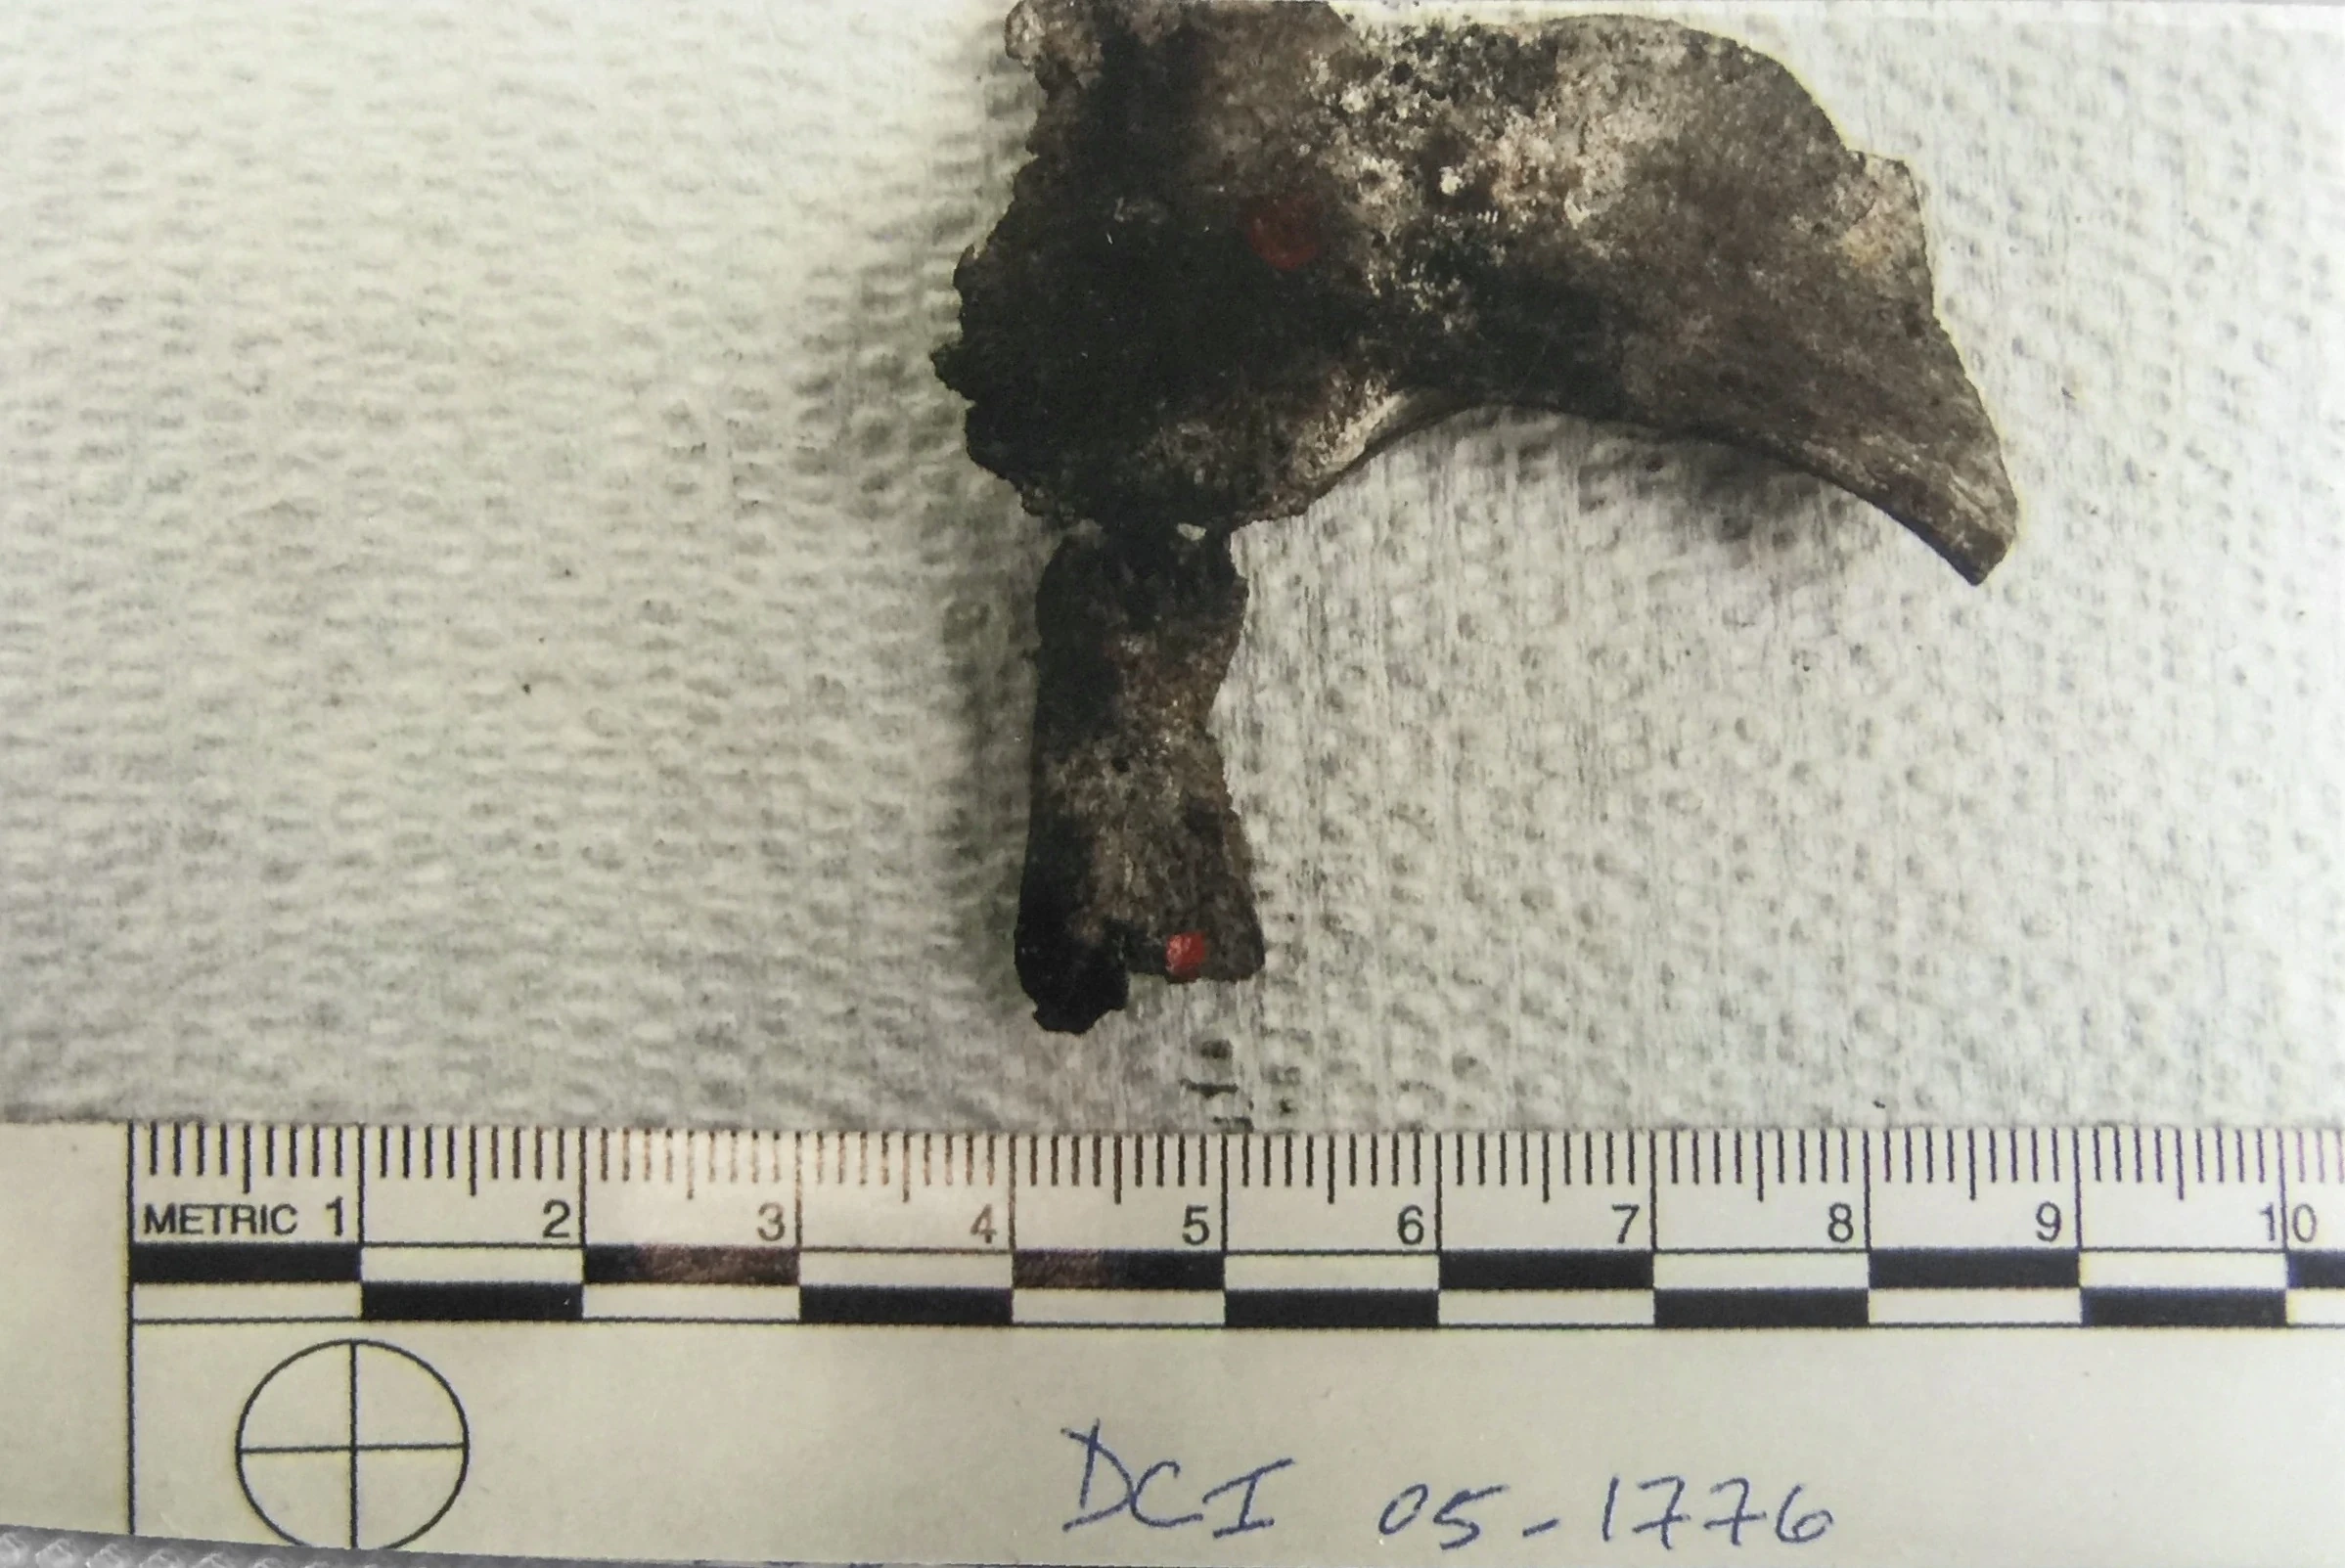
|
| 388 | 3D render of skull bones from evidence tag 8318 | 13 | 
|
| 389 | 3D render of female and male skeleton | 13 | 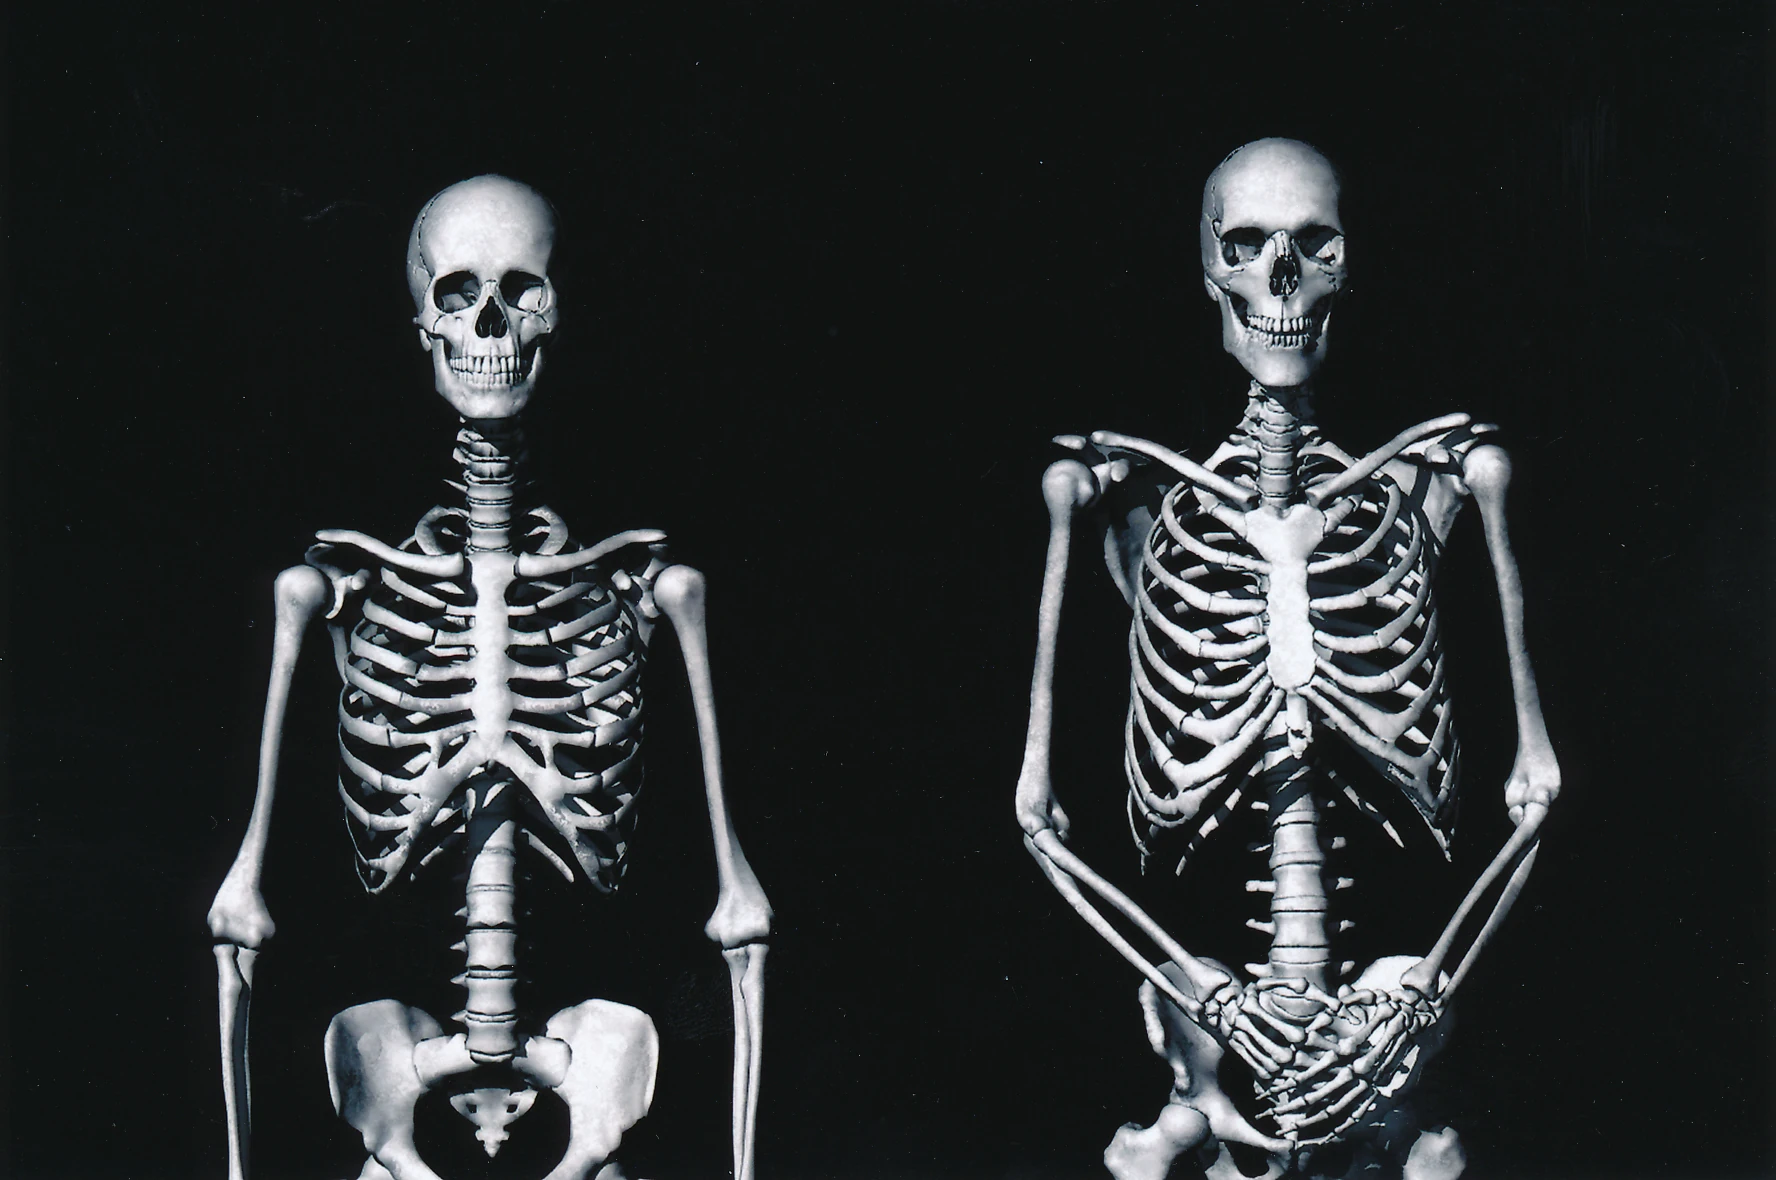
|
| 390 | Cranial bone fragment | 13 | 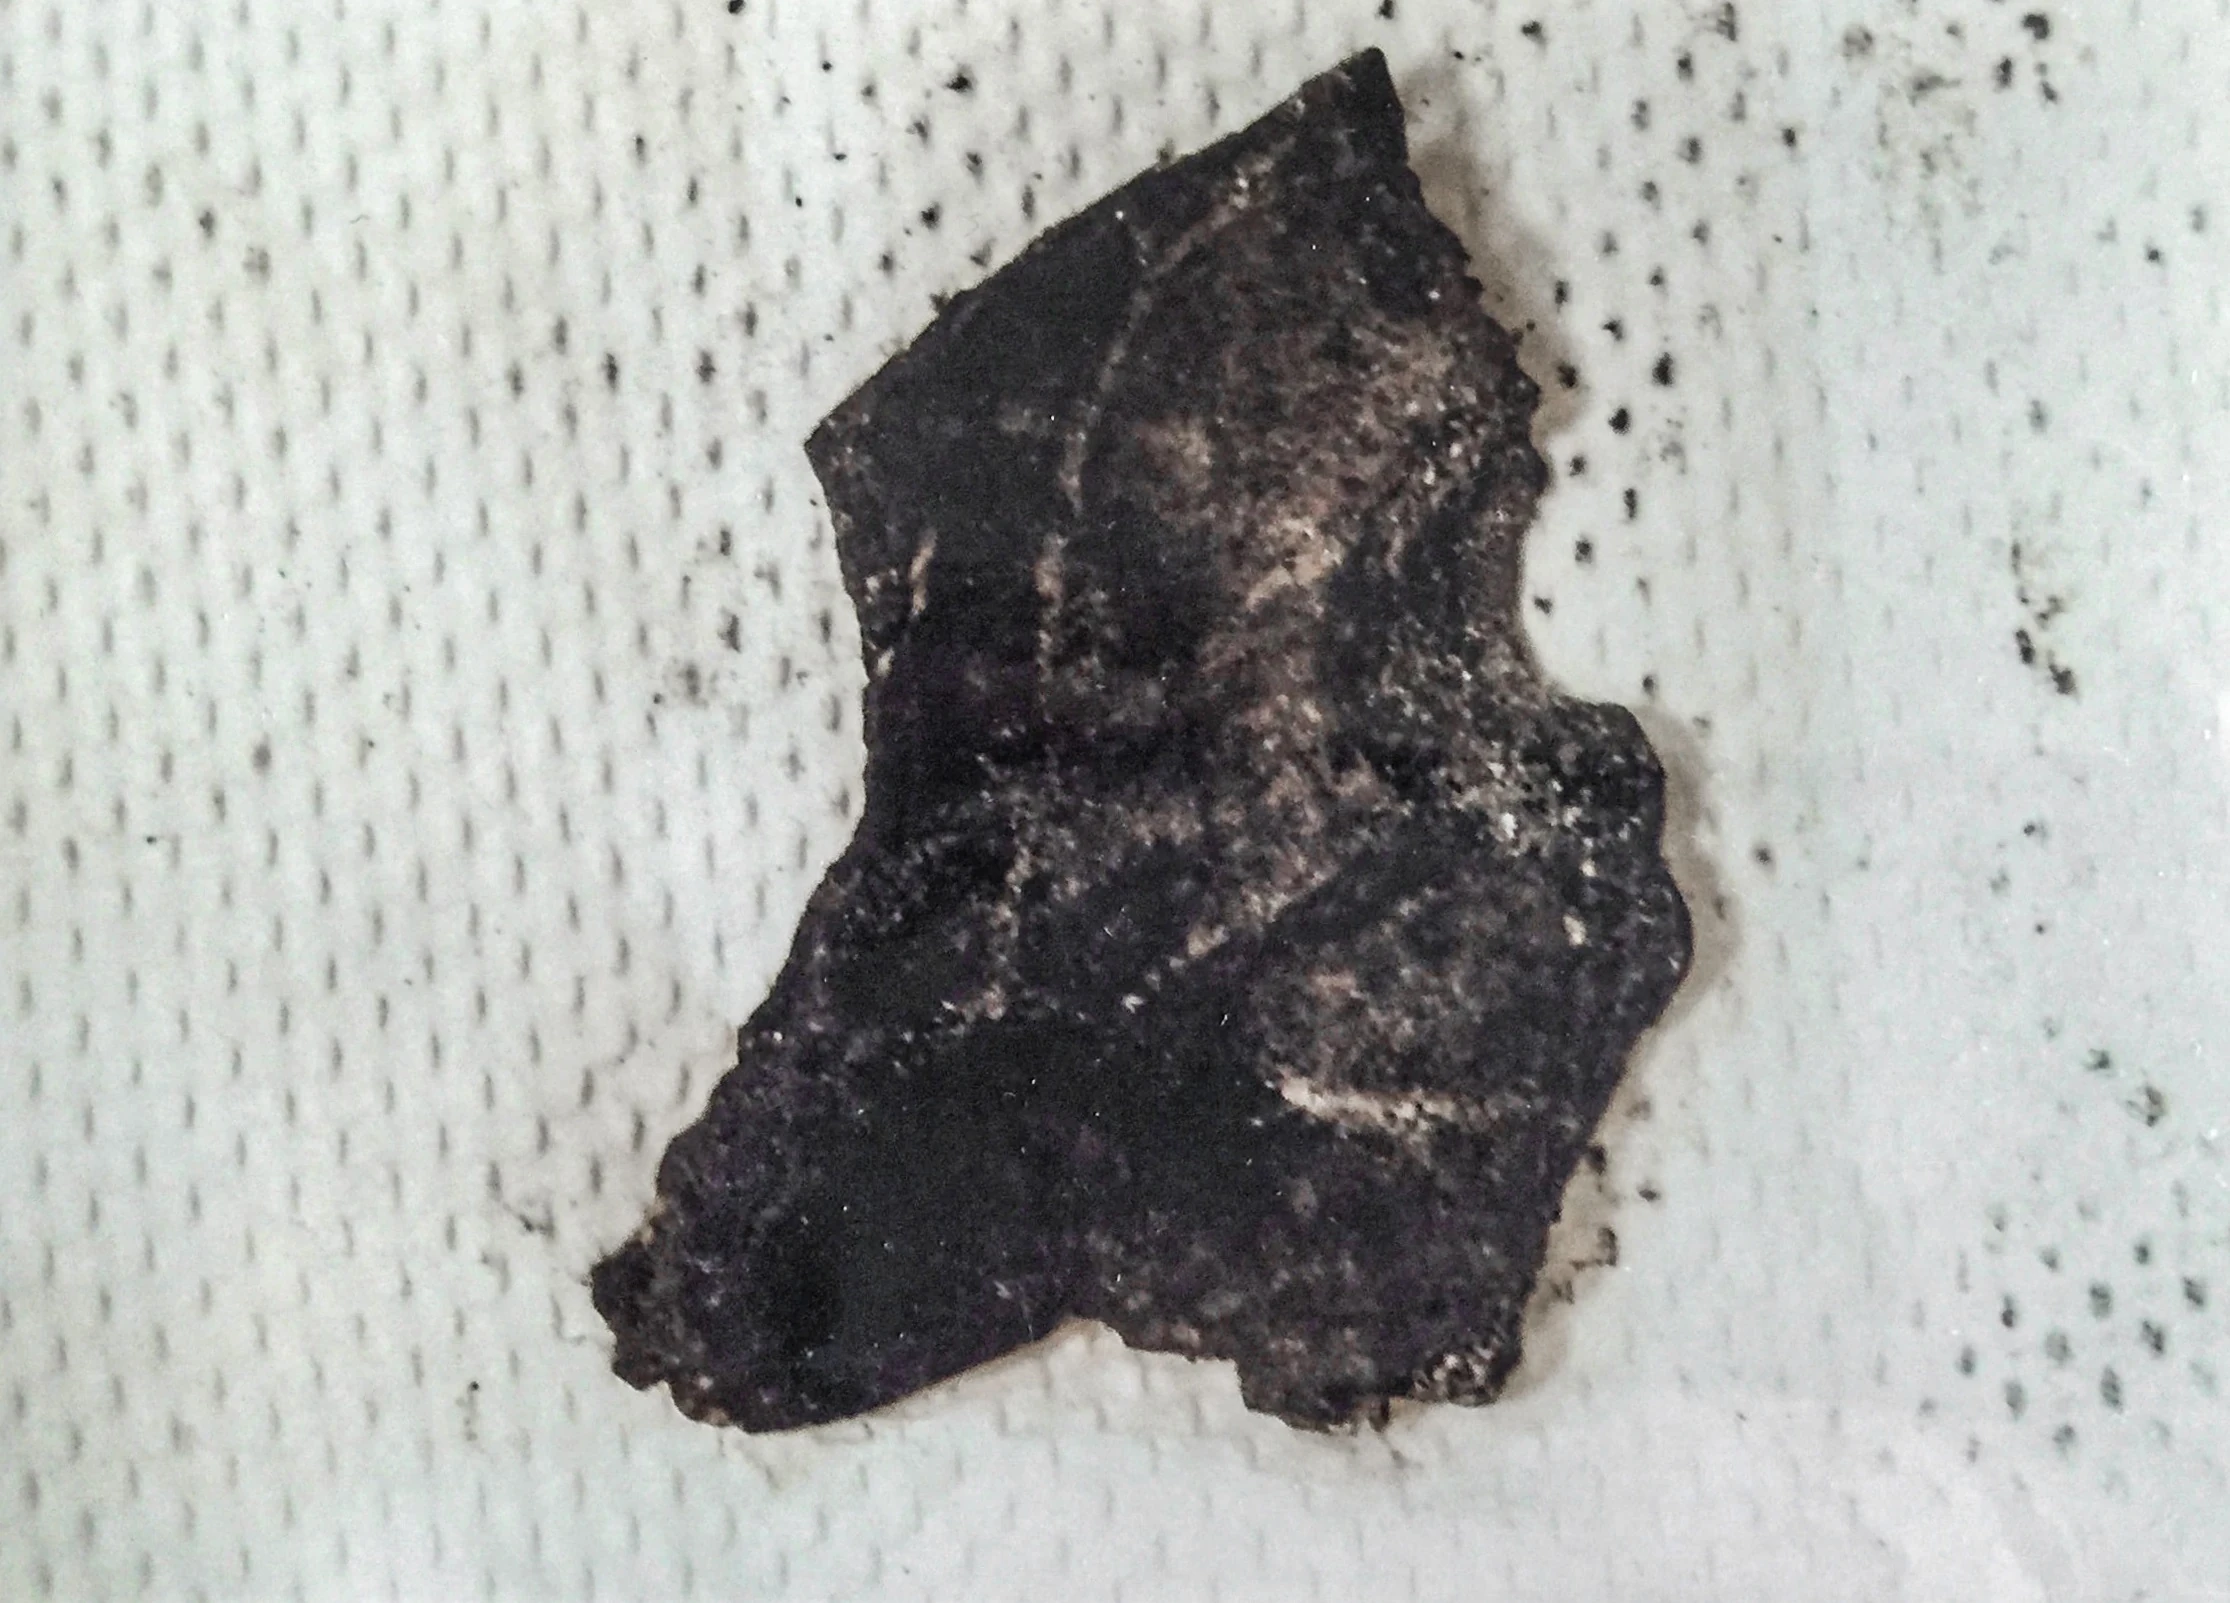
|
| 391 | Three matching skull bones | 13 | 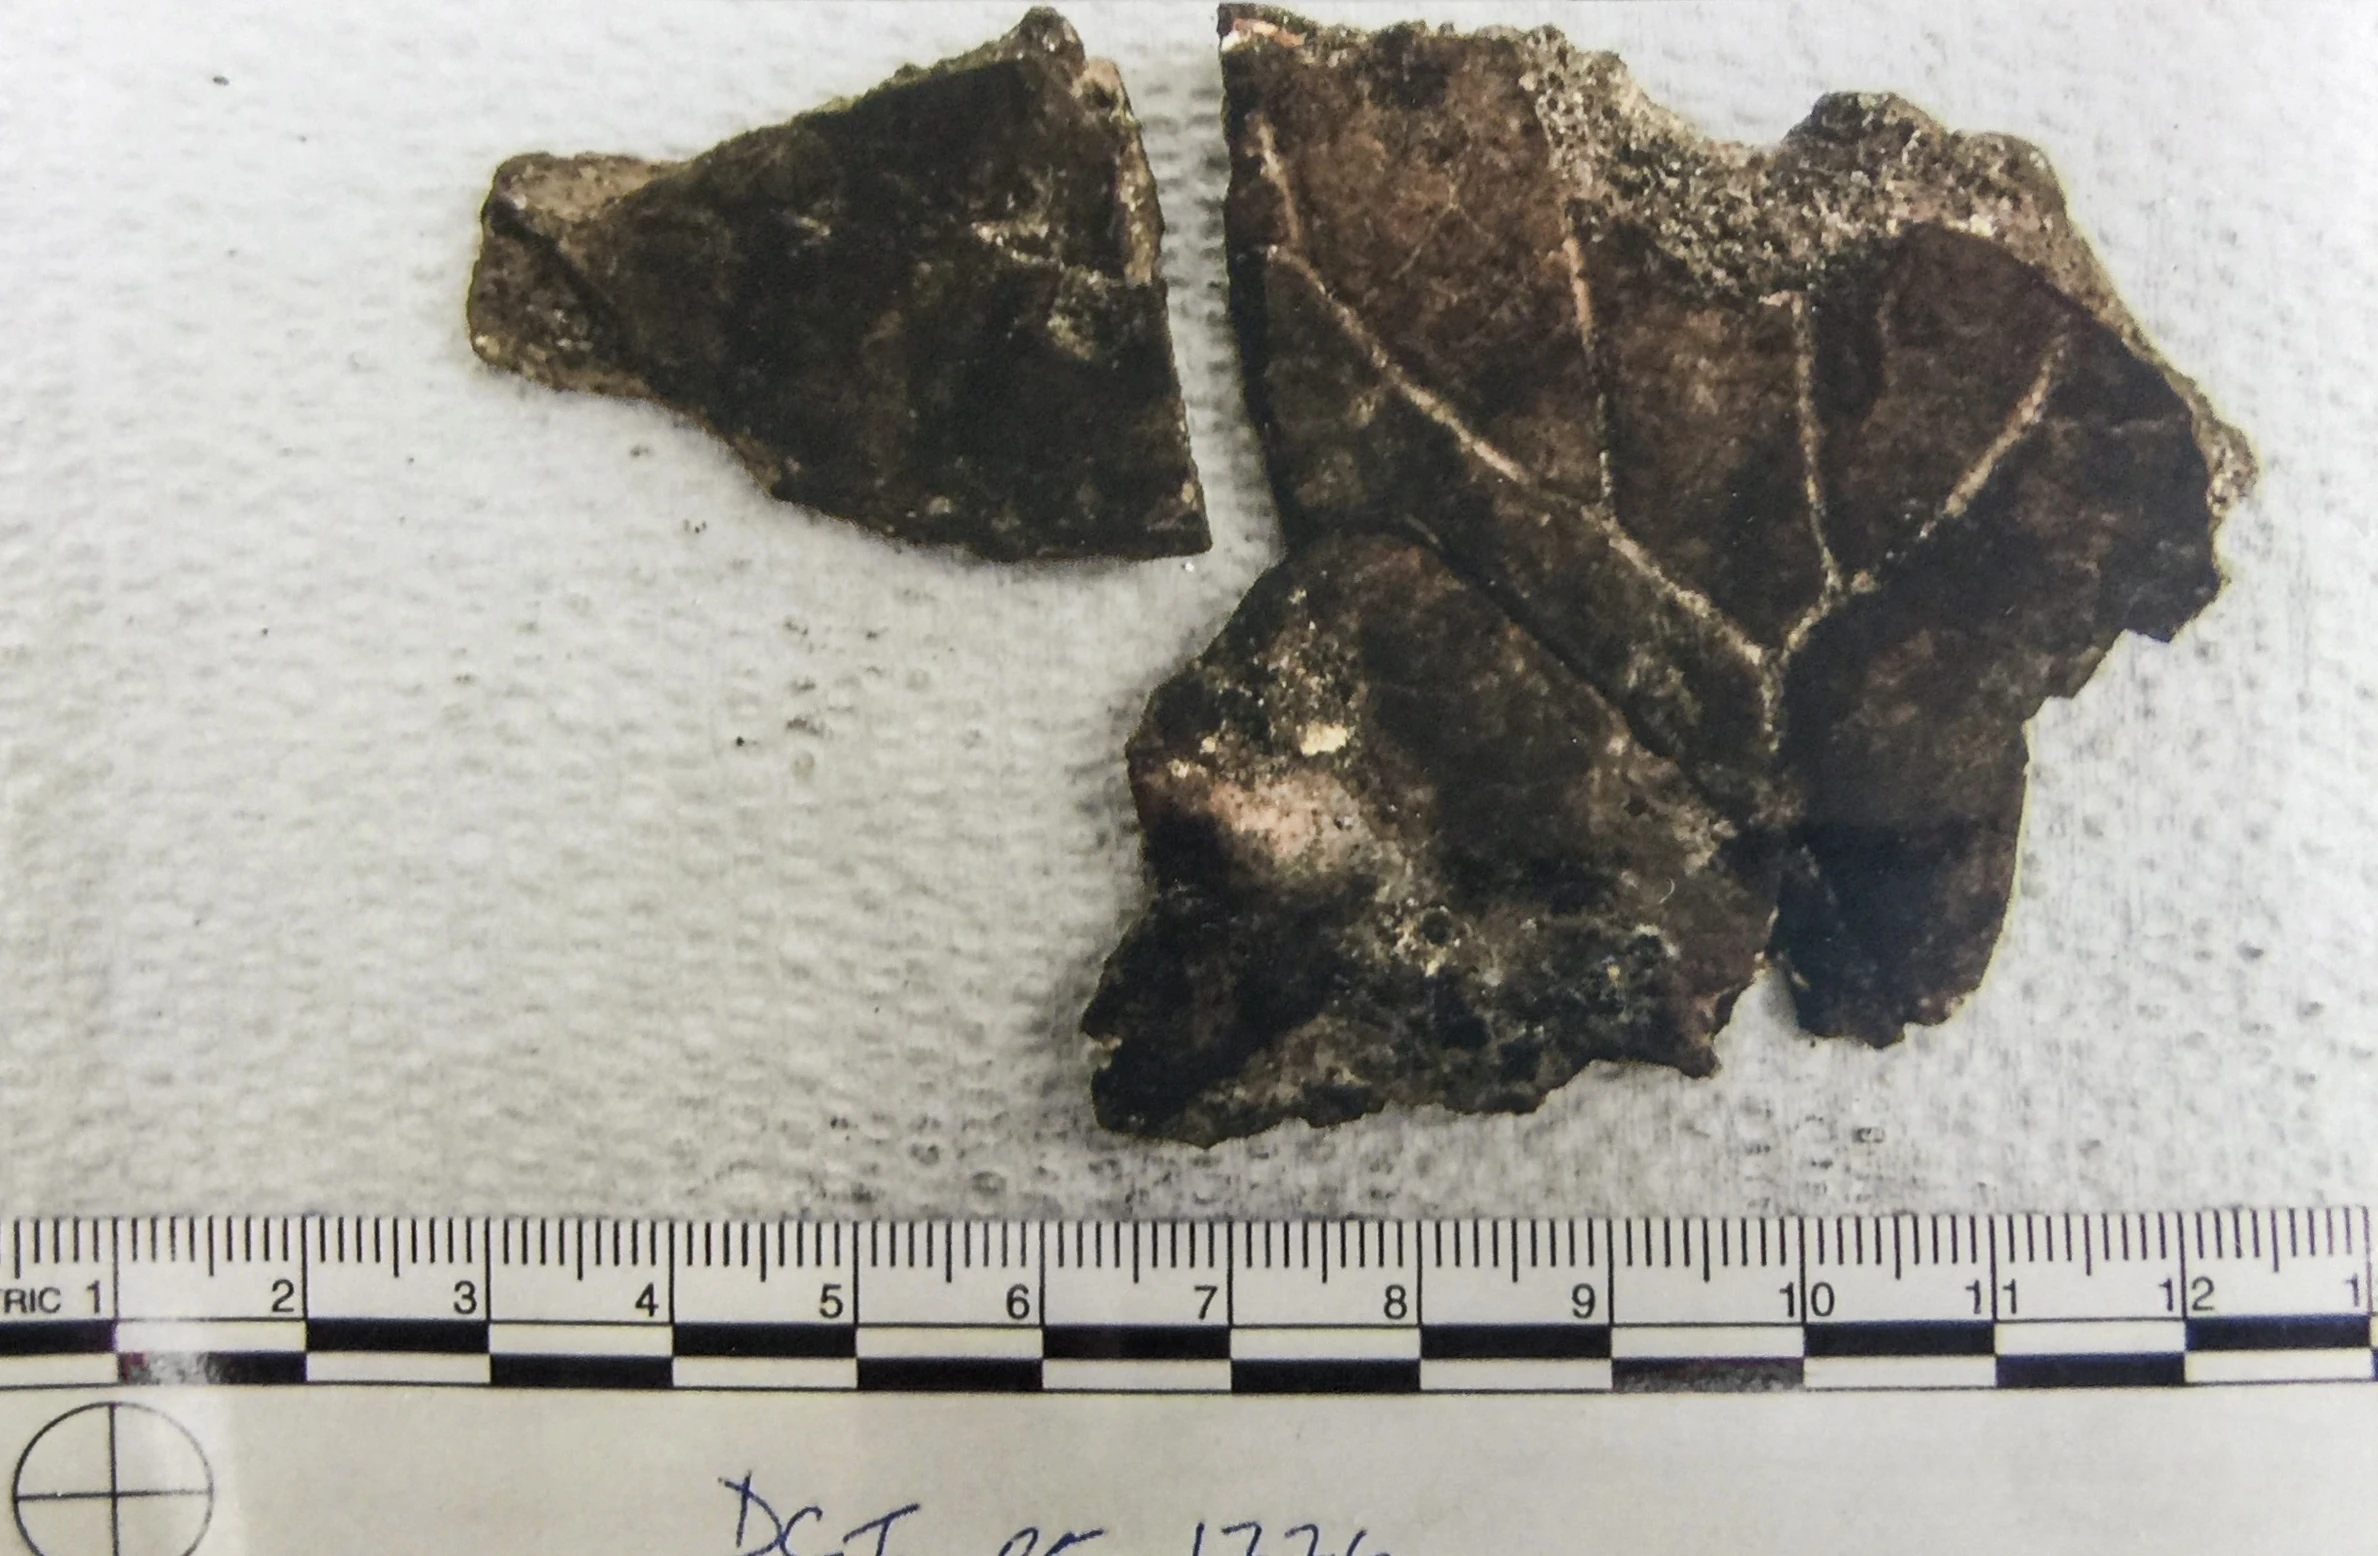
|
| 392 | Matching skull bones | 13 | 
|
| 393 | Skull bones | 13 | 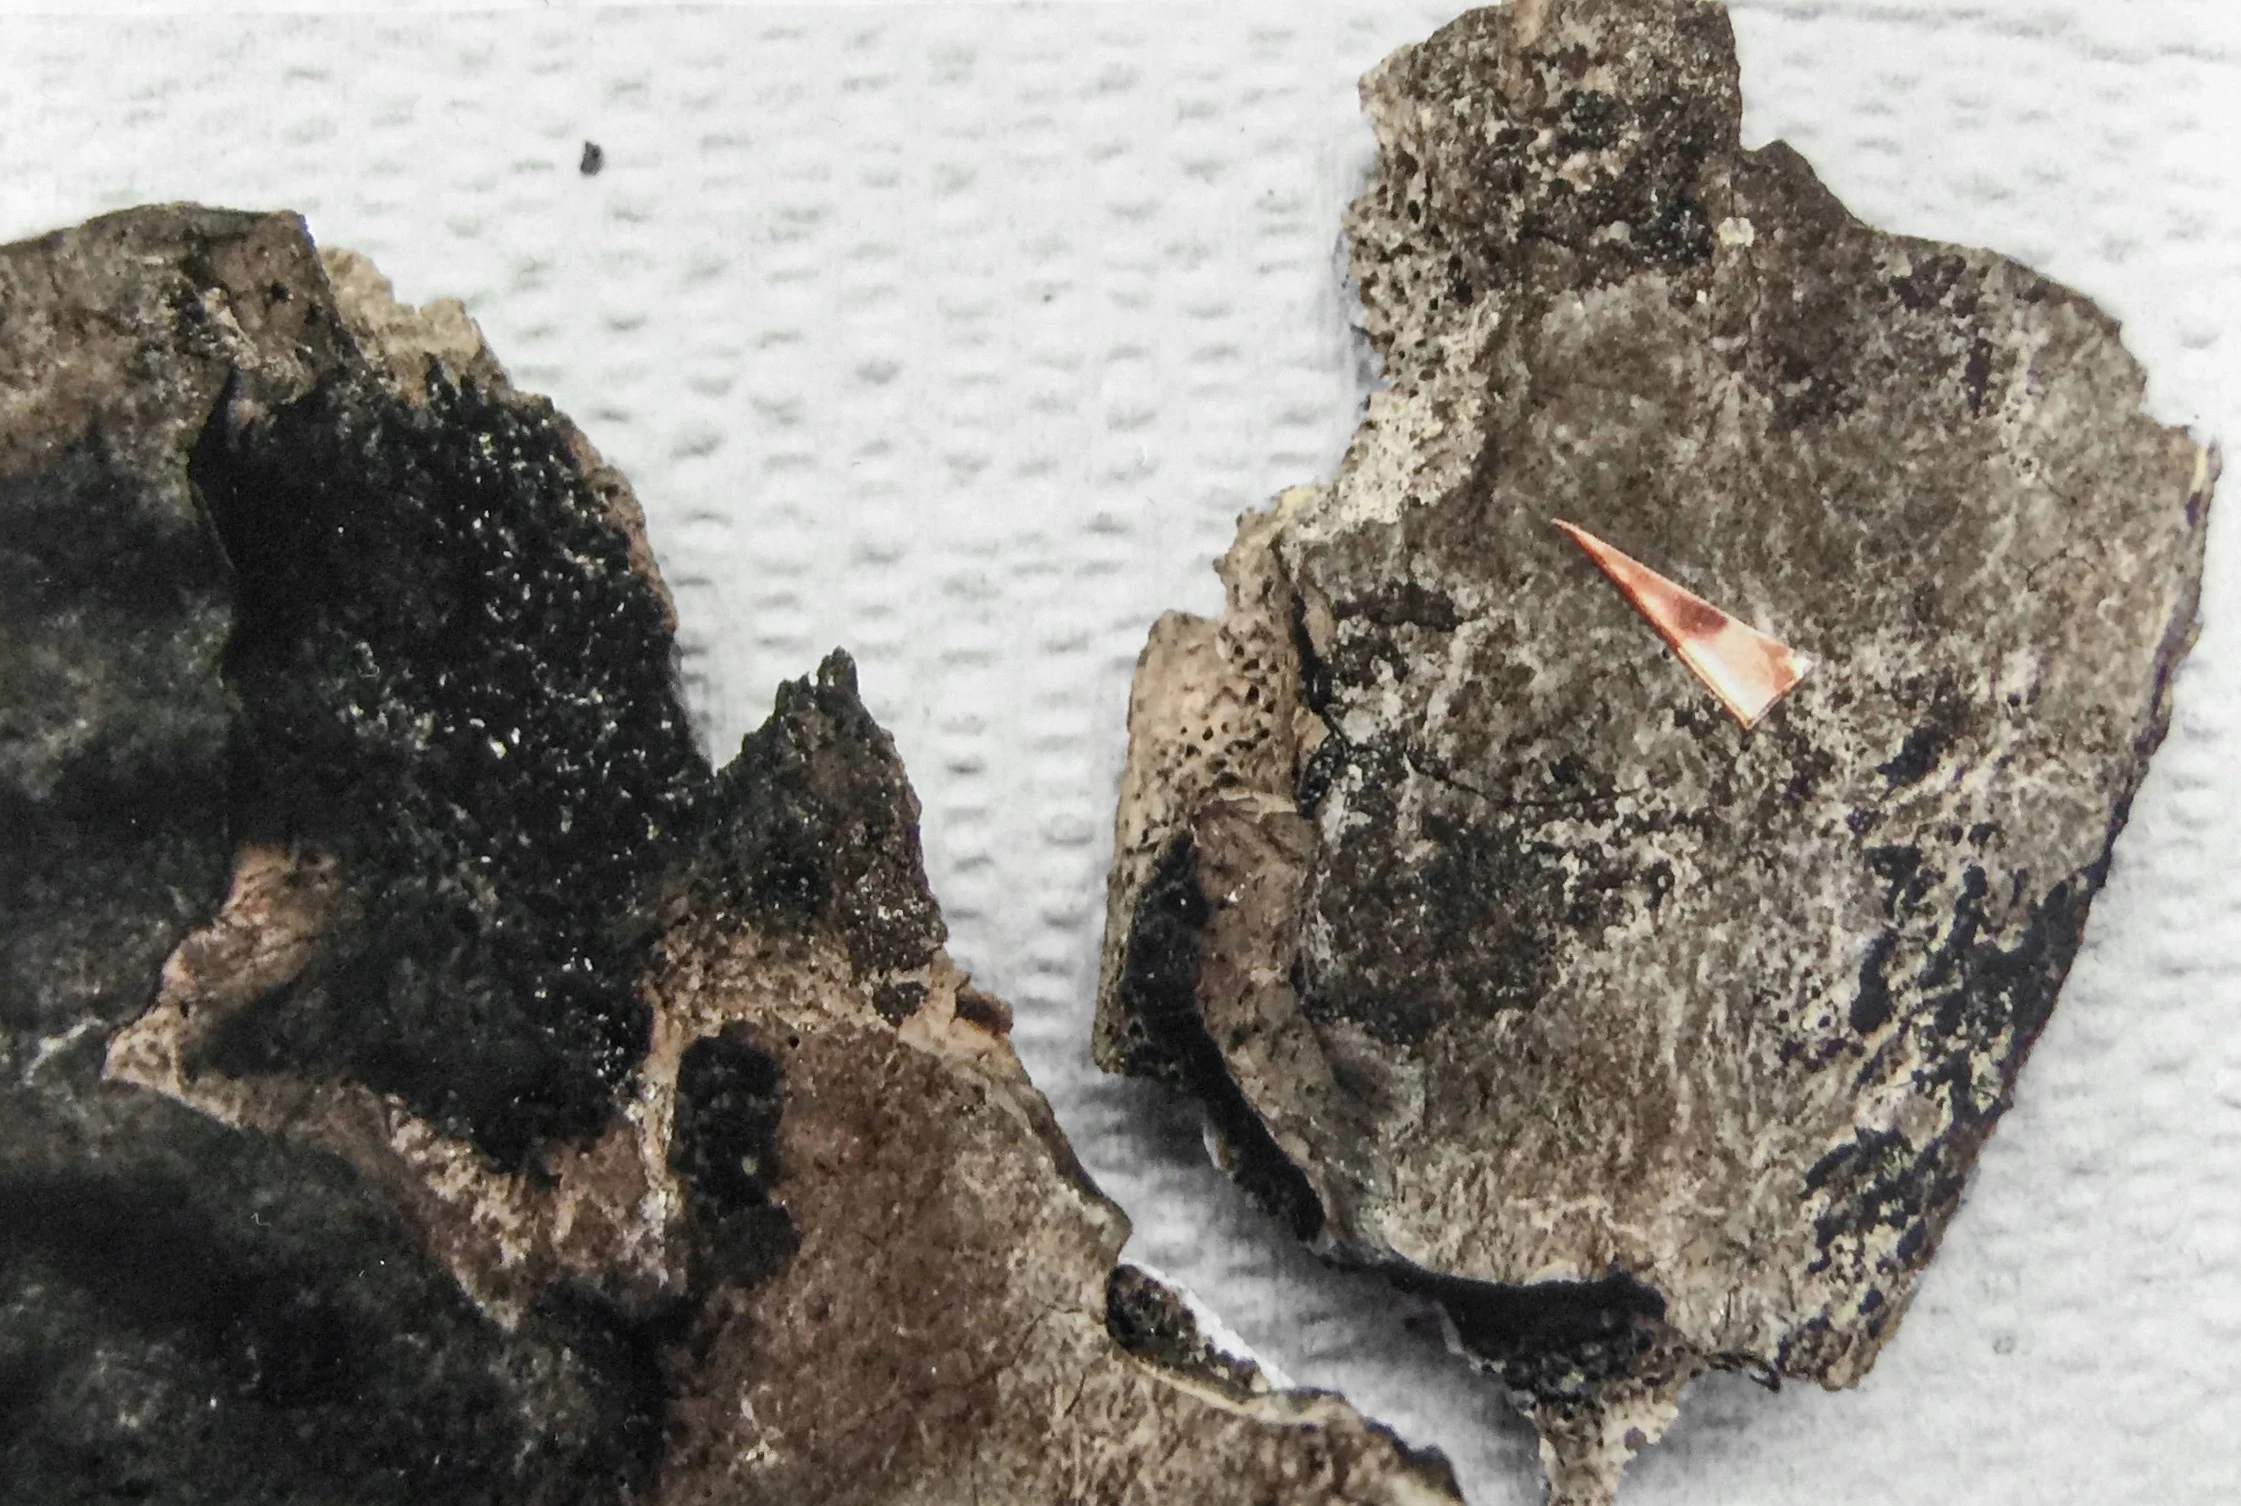
|
| 394 | Skull bones | 13 | 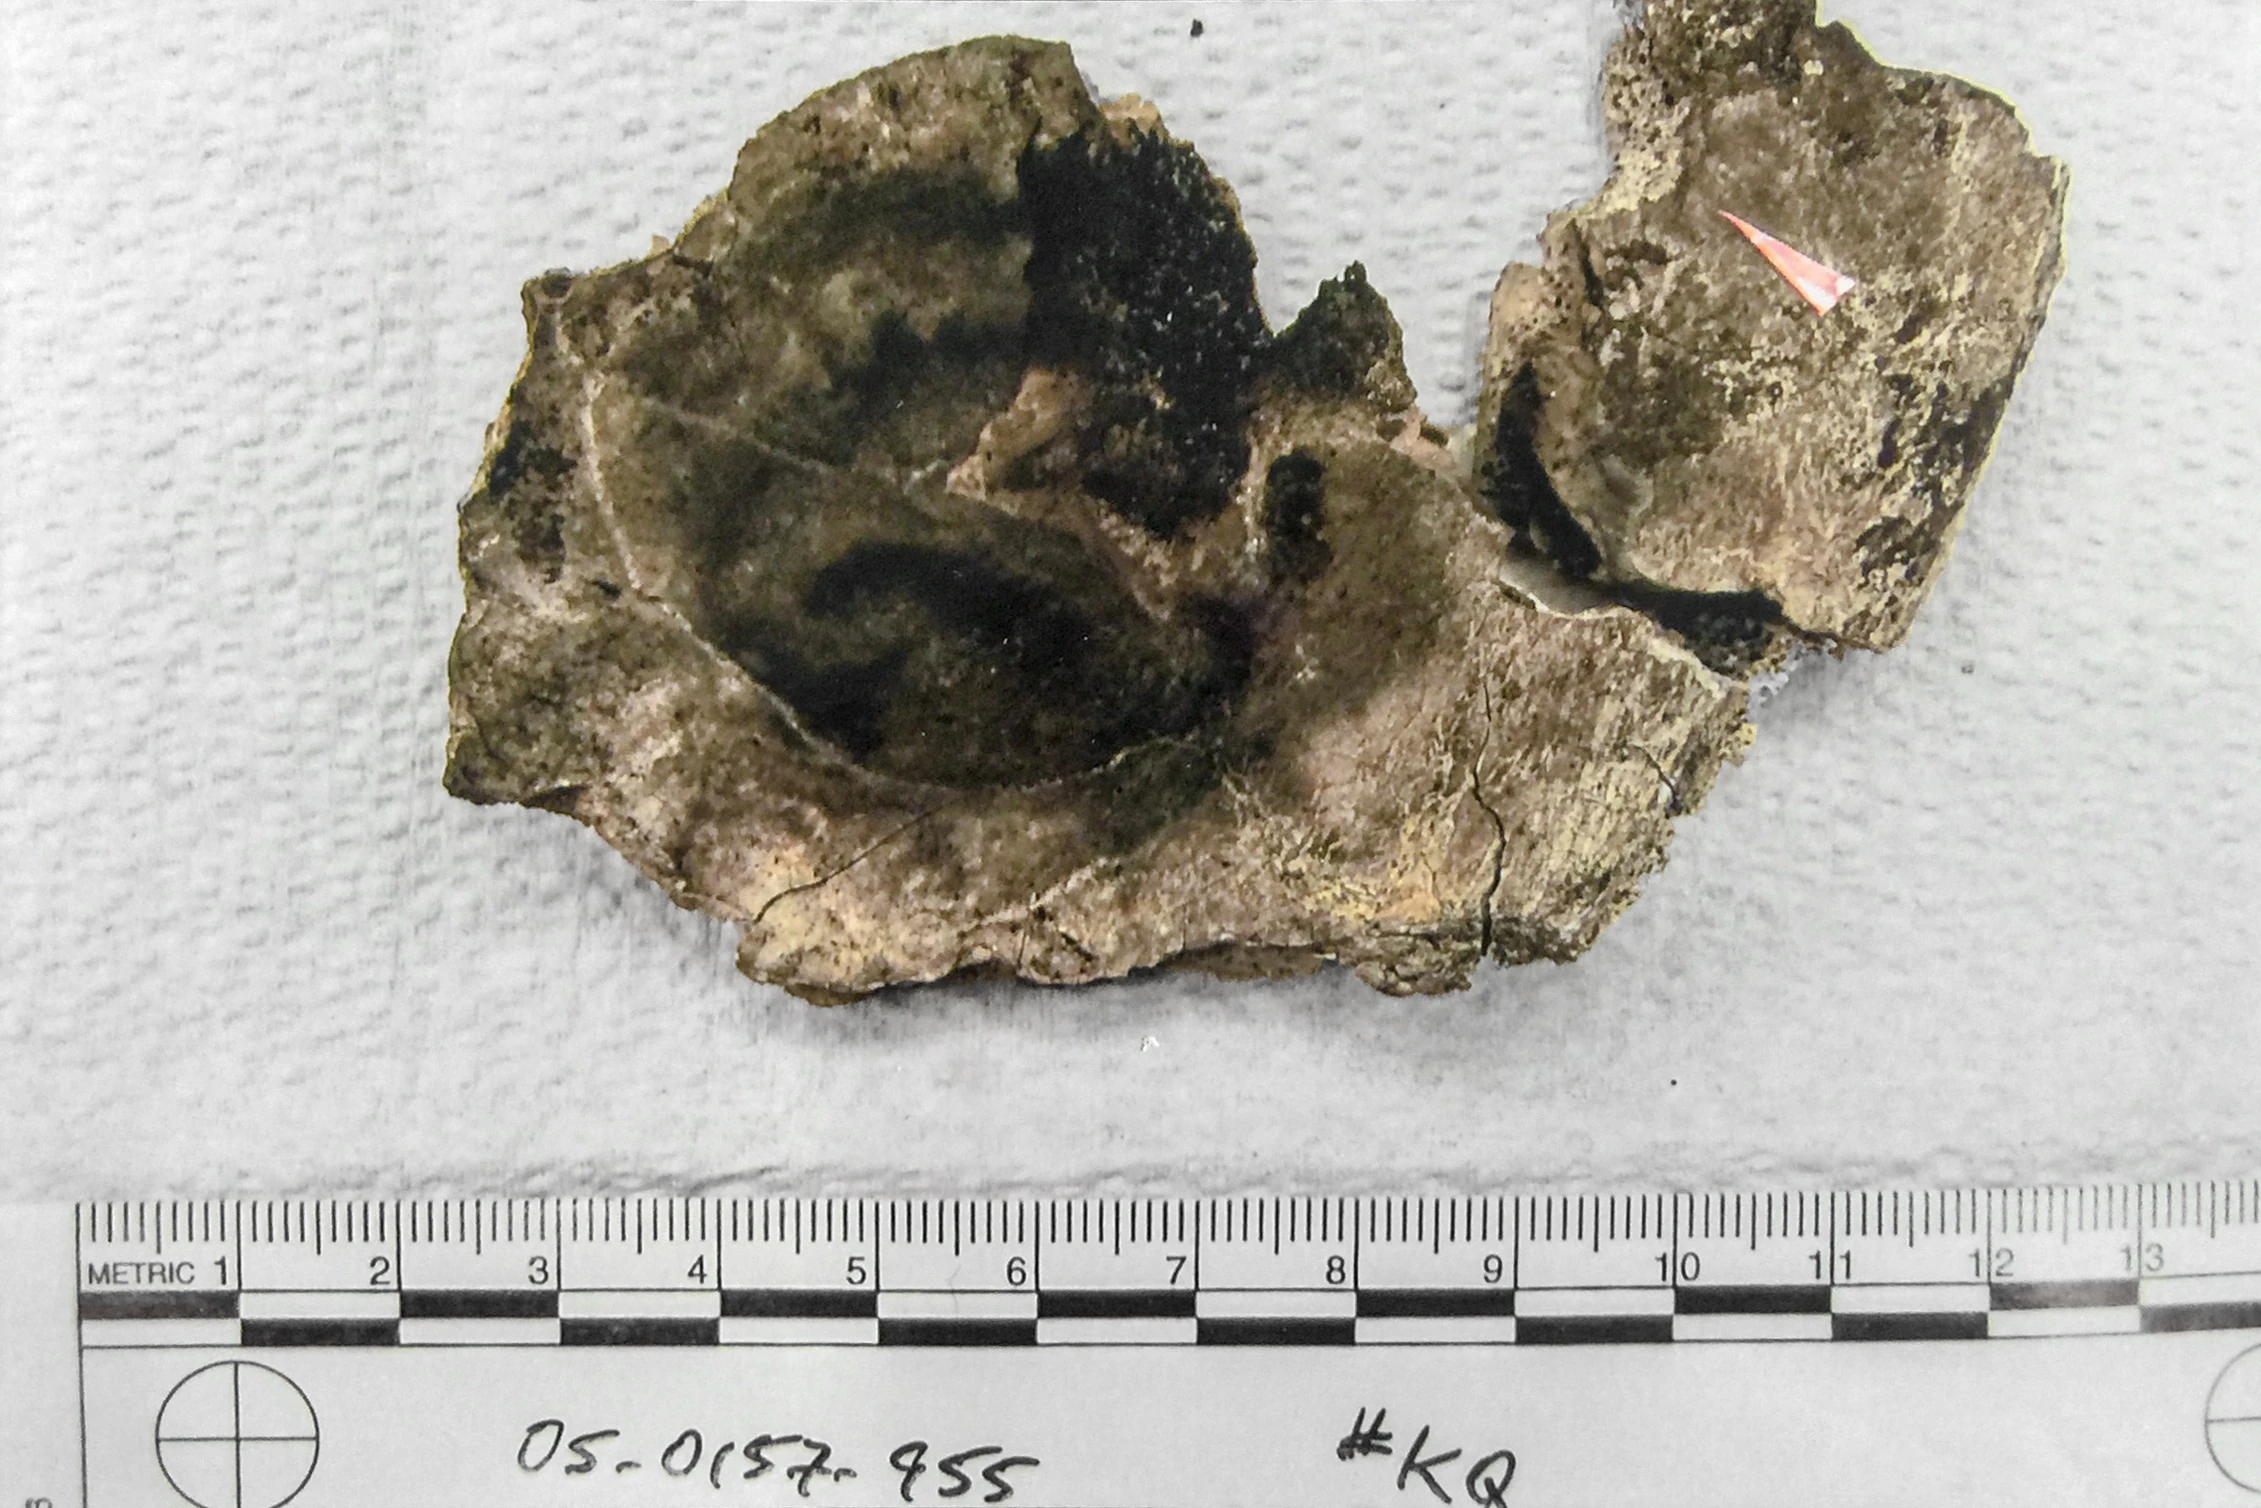
|
| 395 | Skull bones | 13 | 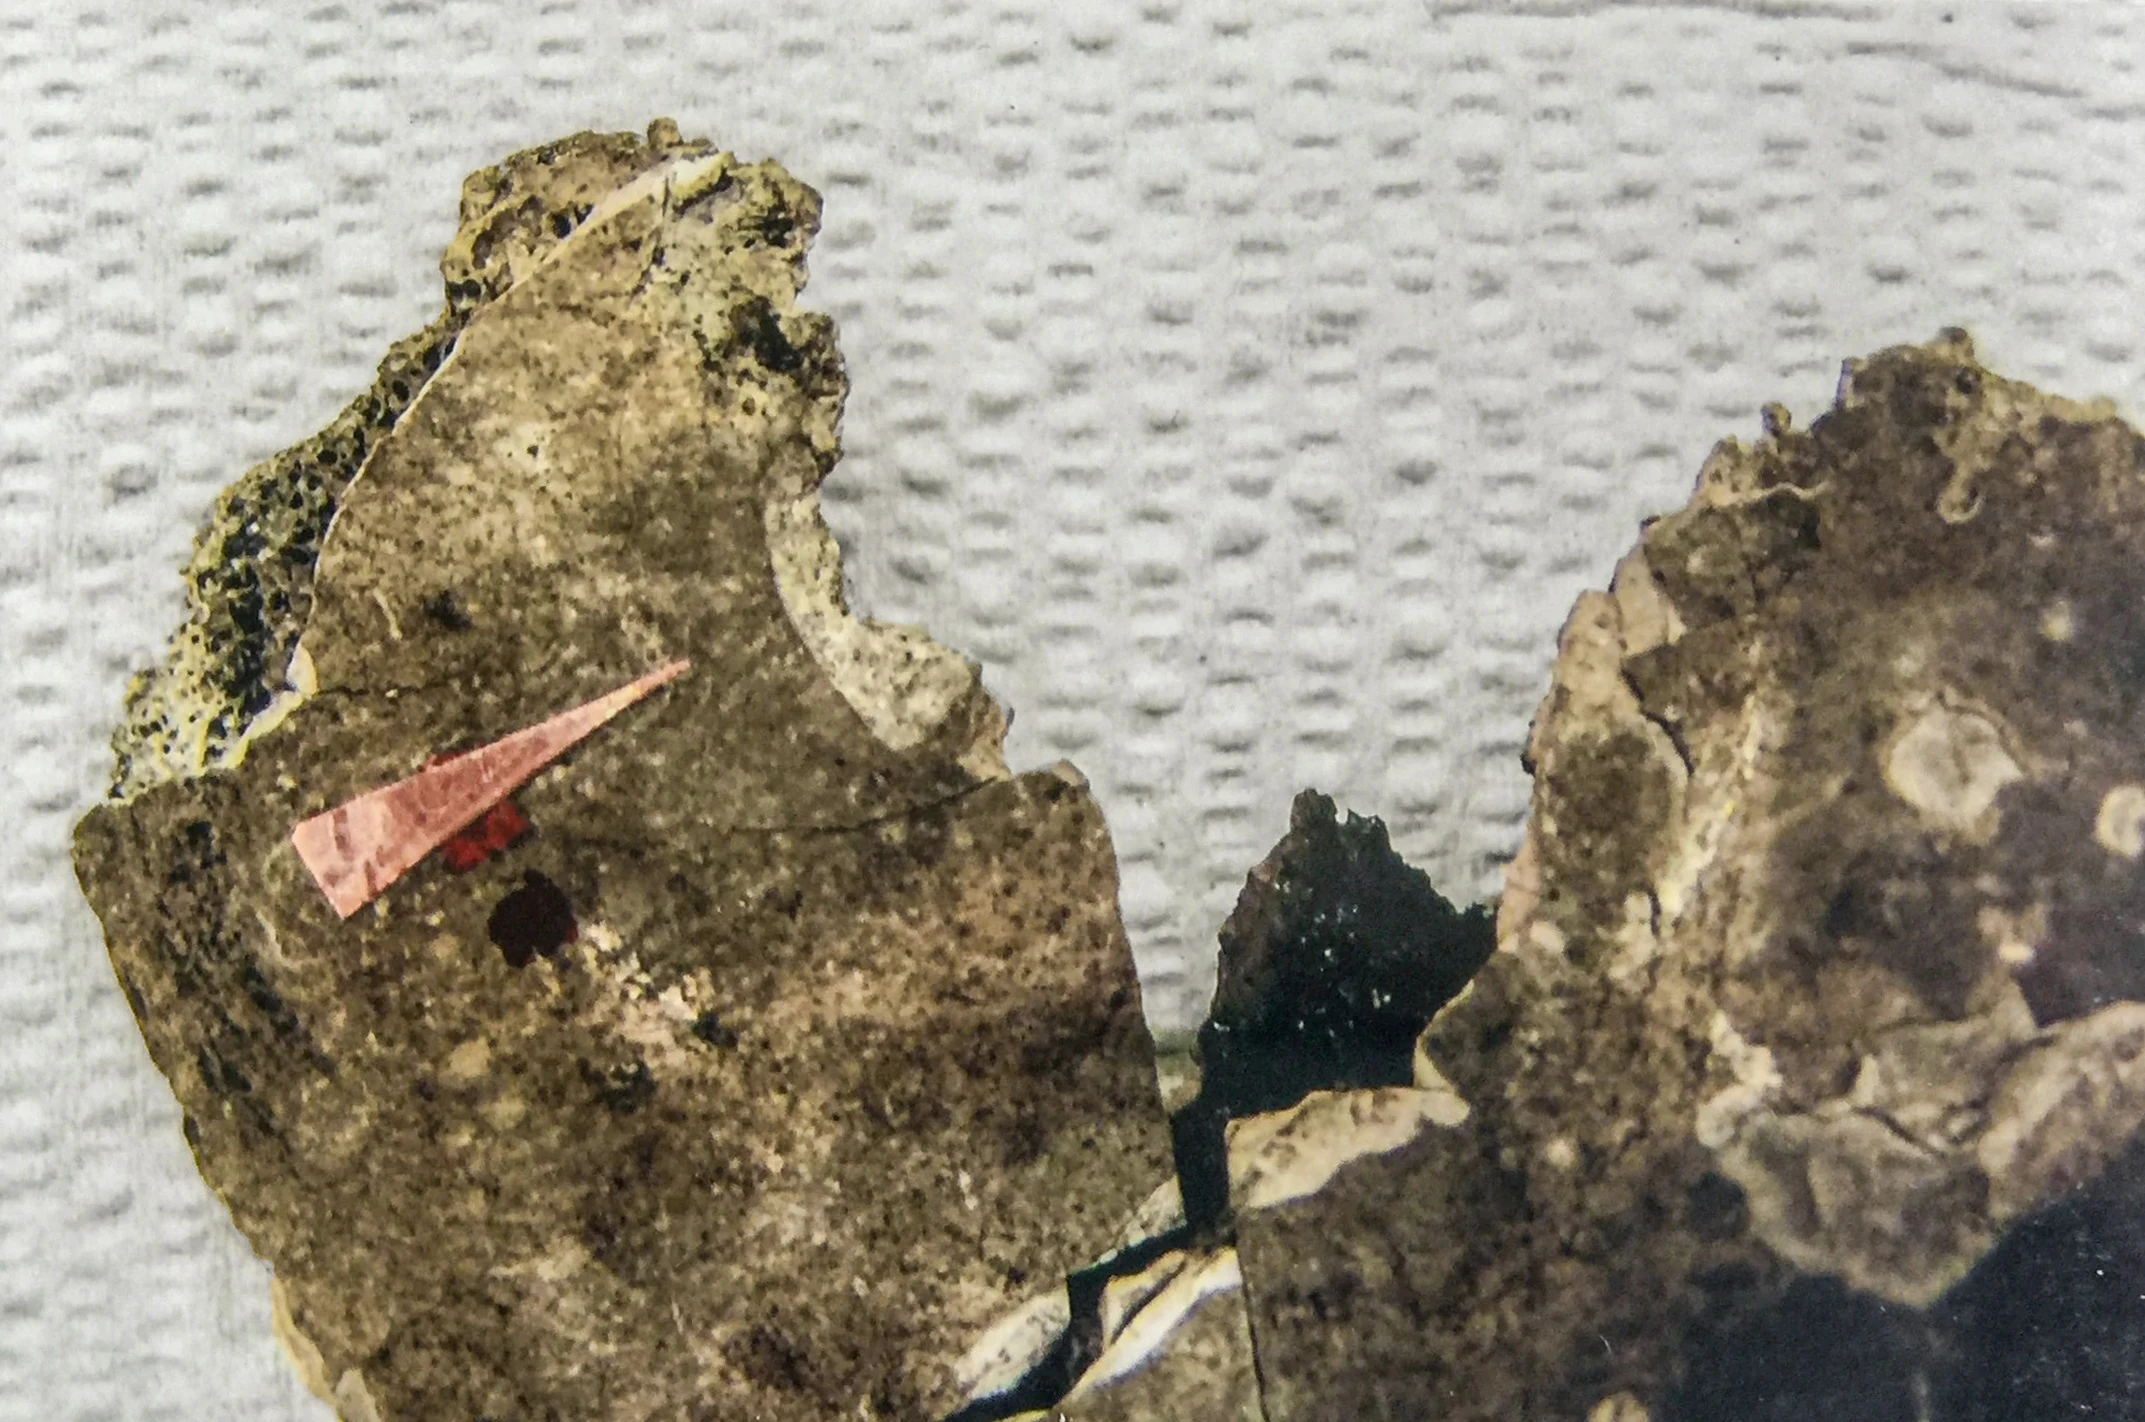
|
| 396 | 3D render of parietal defect in skull | 13 | 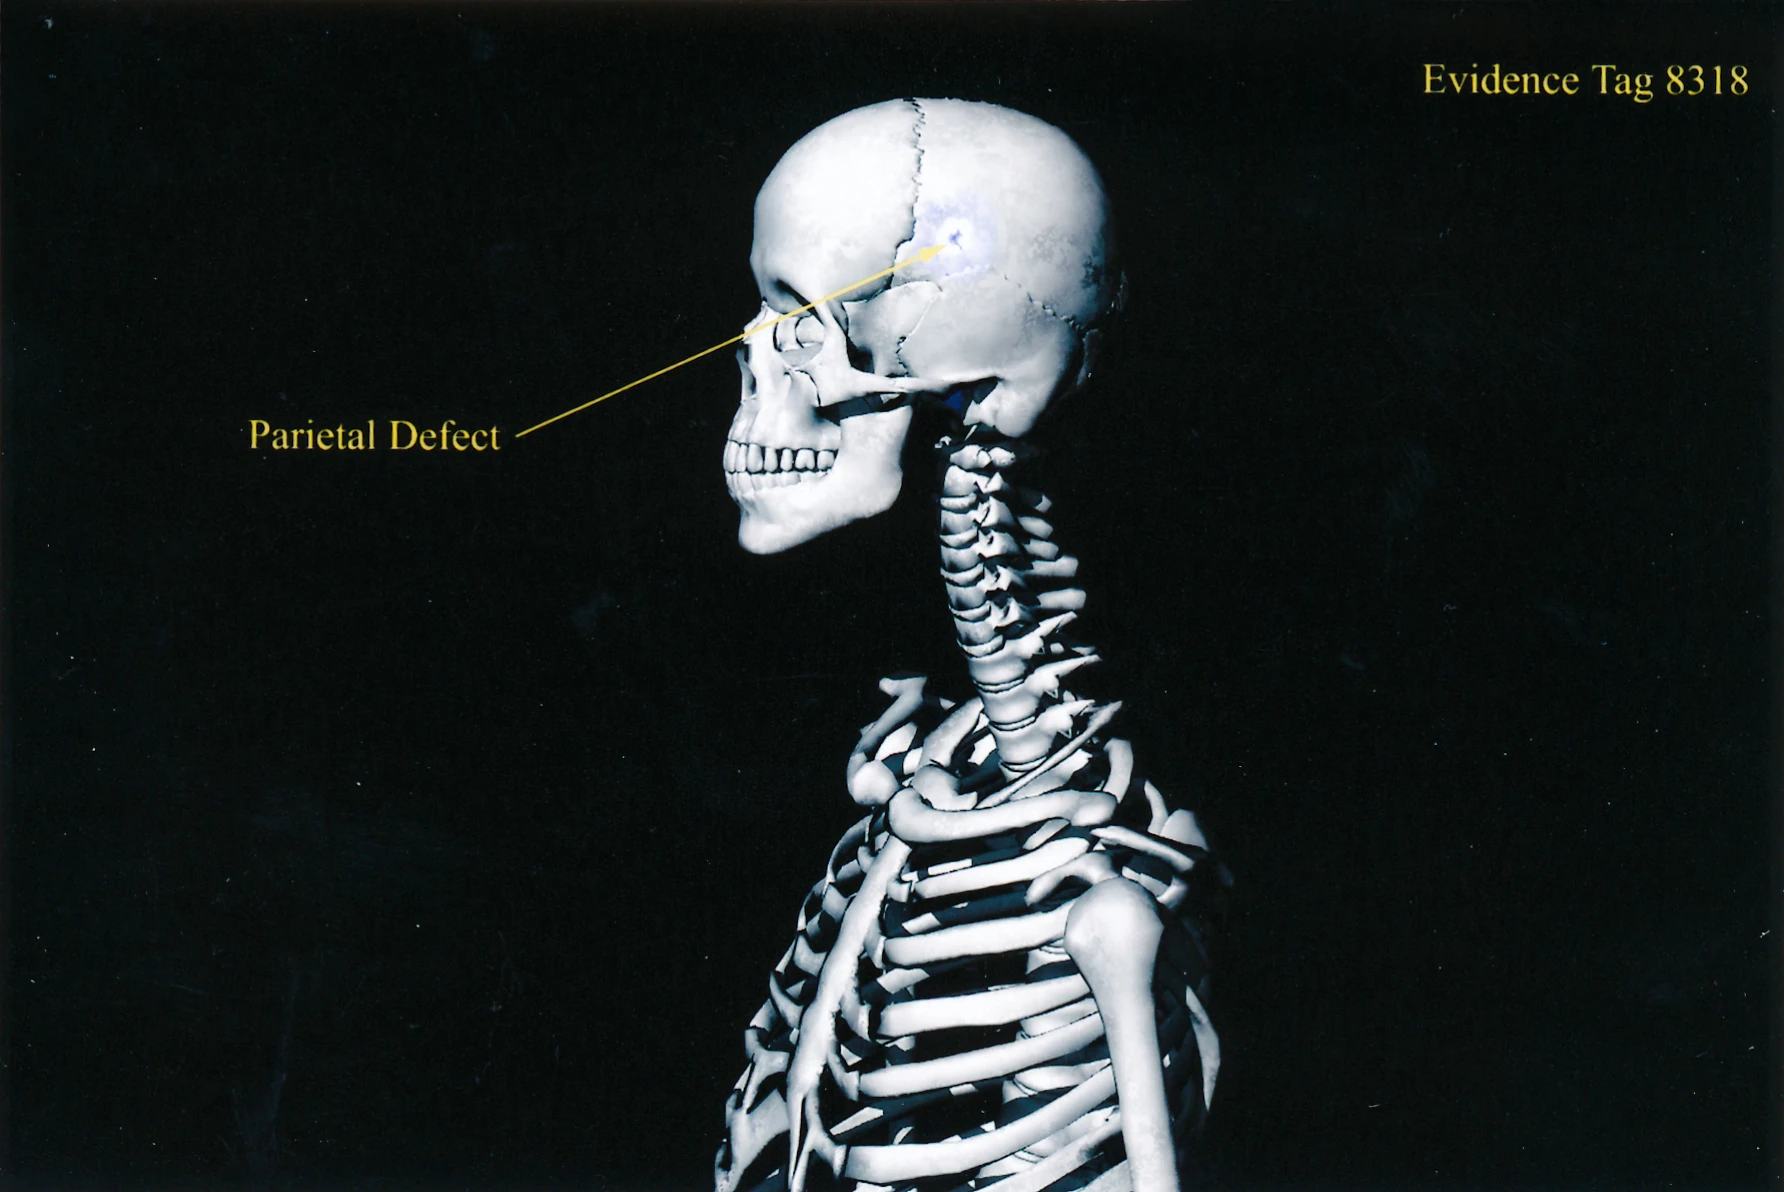
|
| 397 | Skull bones x-ray | 13 | 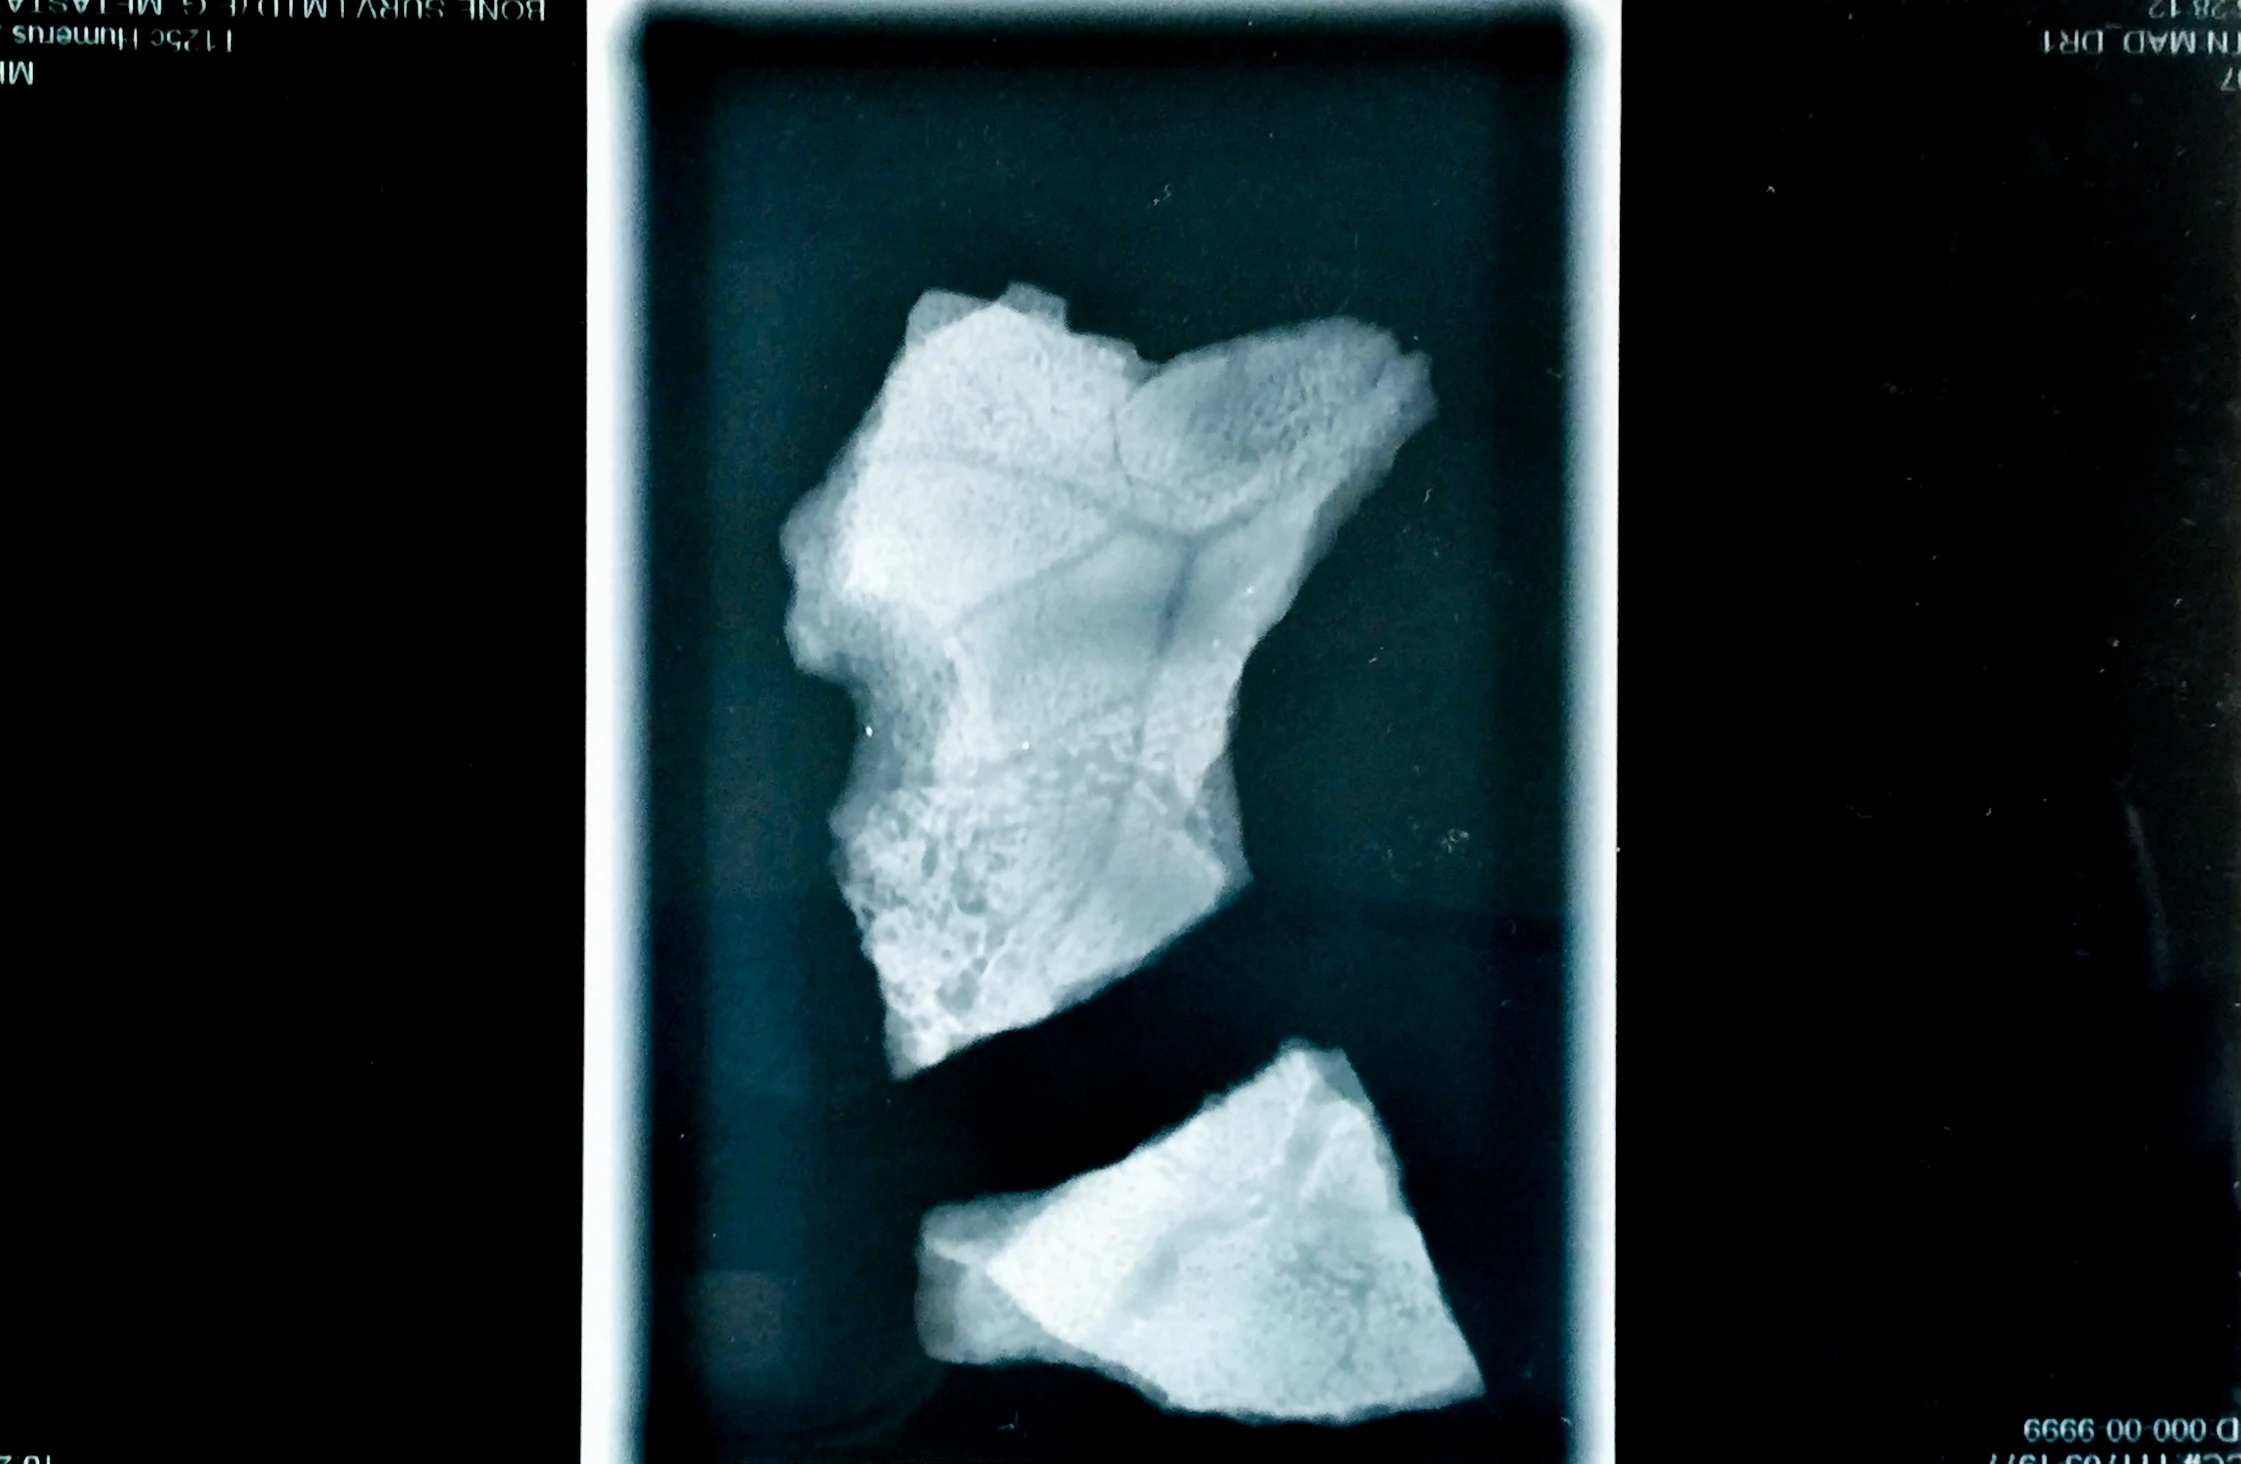
|
| 398 | Skull bones x-ray | 13 | 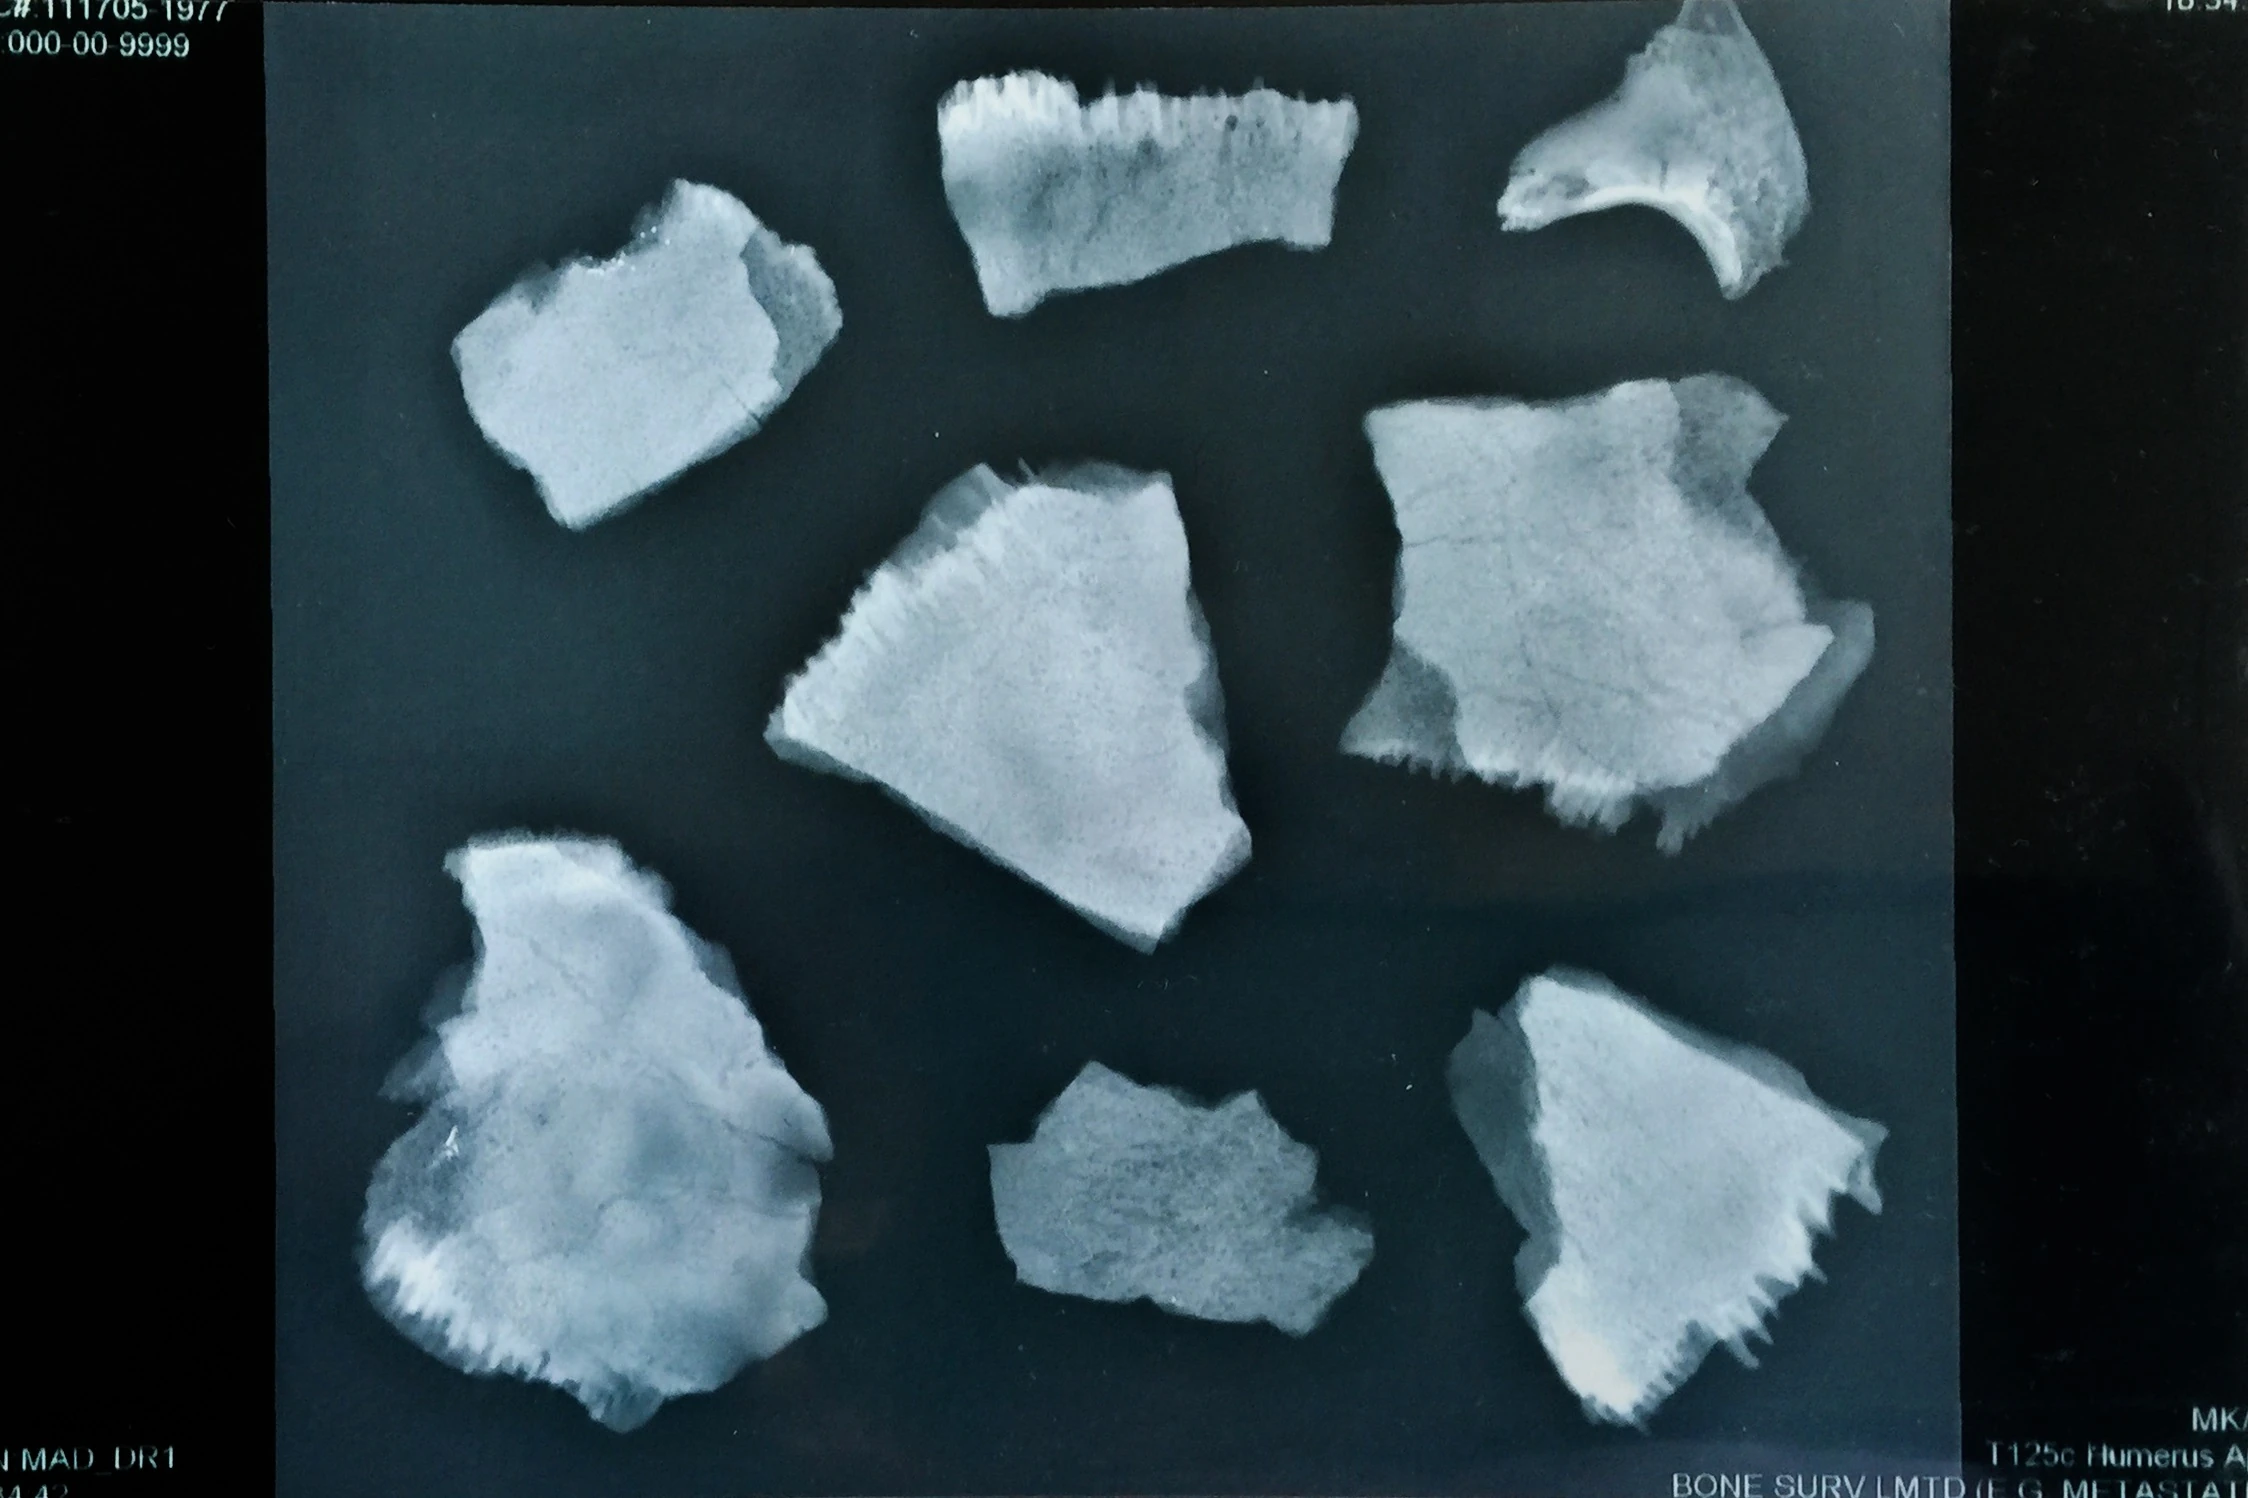
|
| 399 | 3D render of occipital defect in skull | 13 | 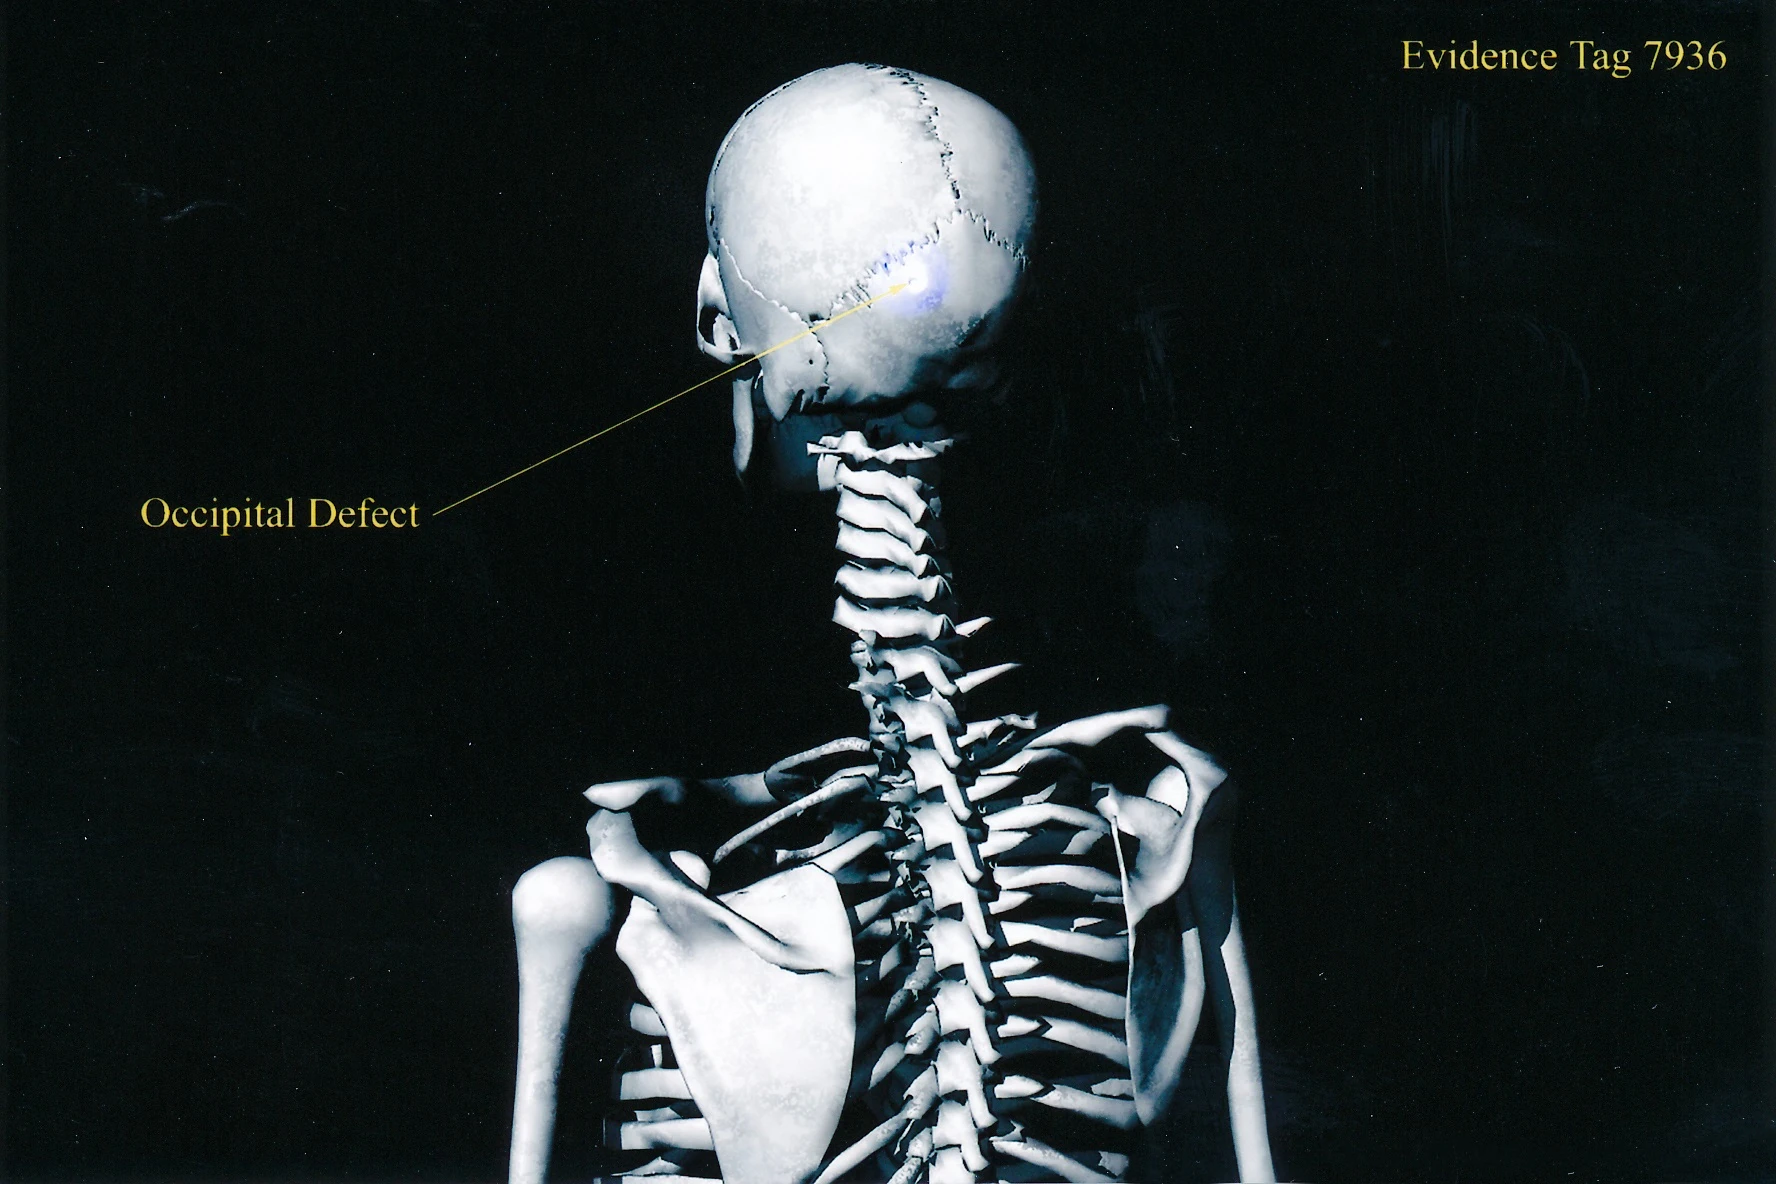
|
| 400 | 3D render marking bones found in burn pit | 13 | 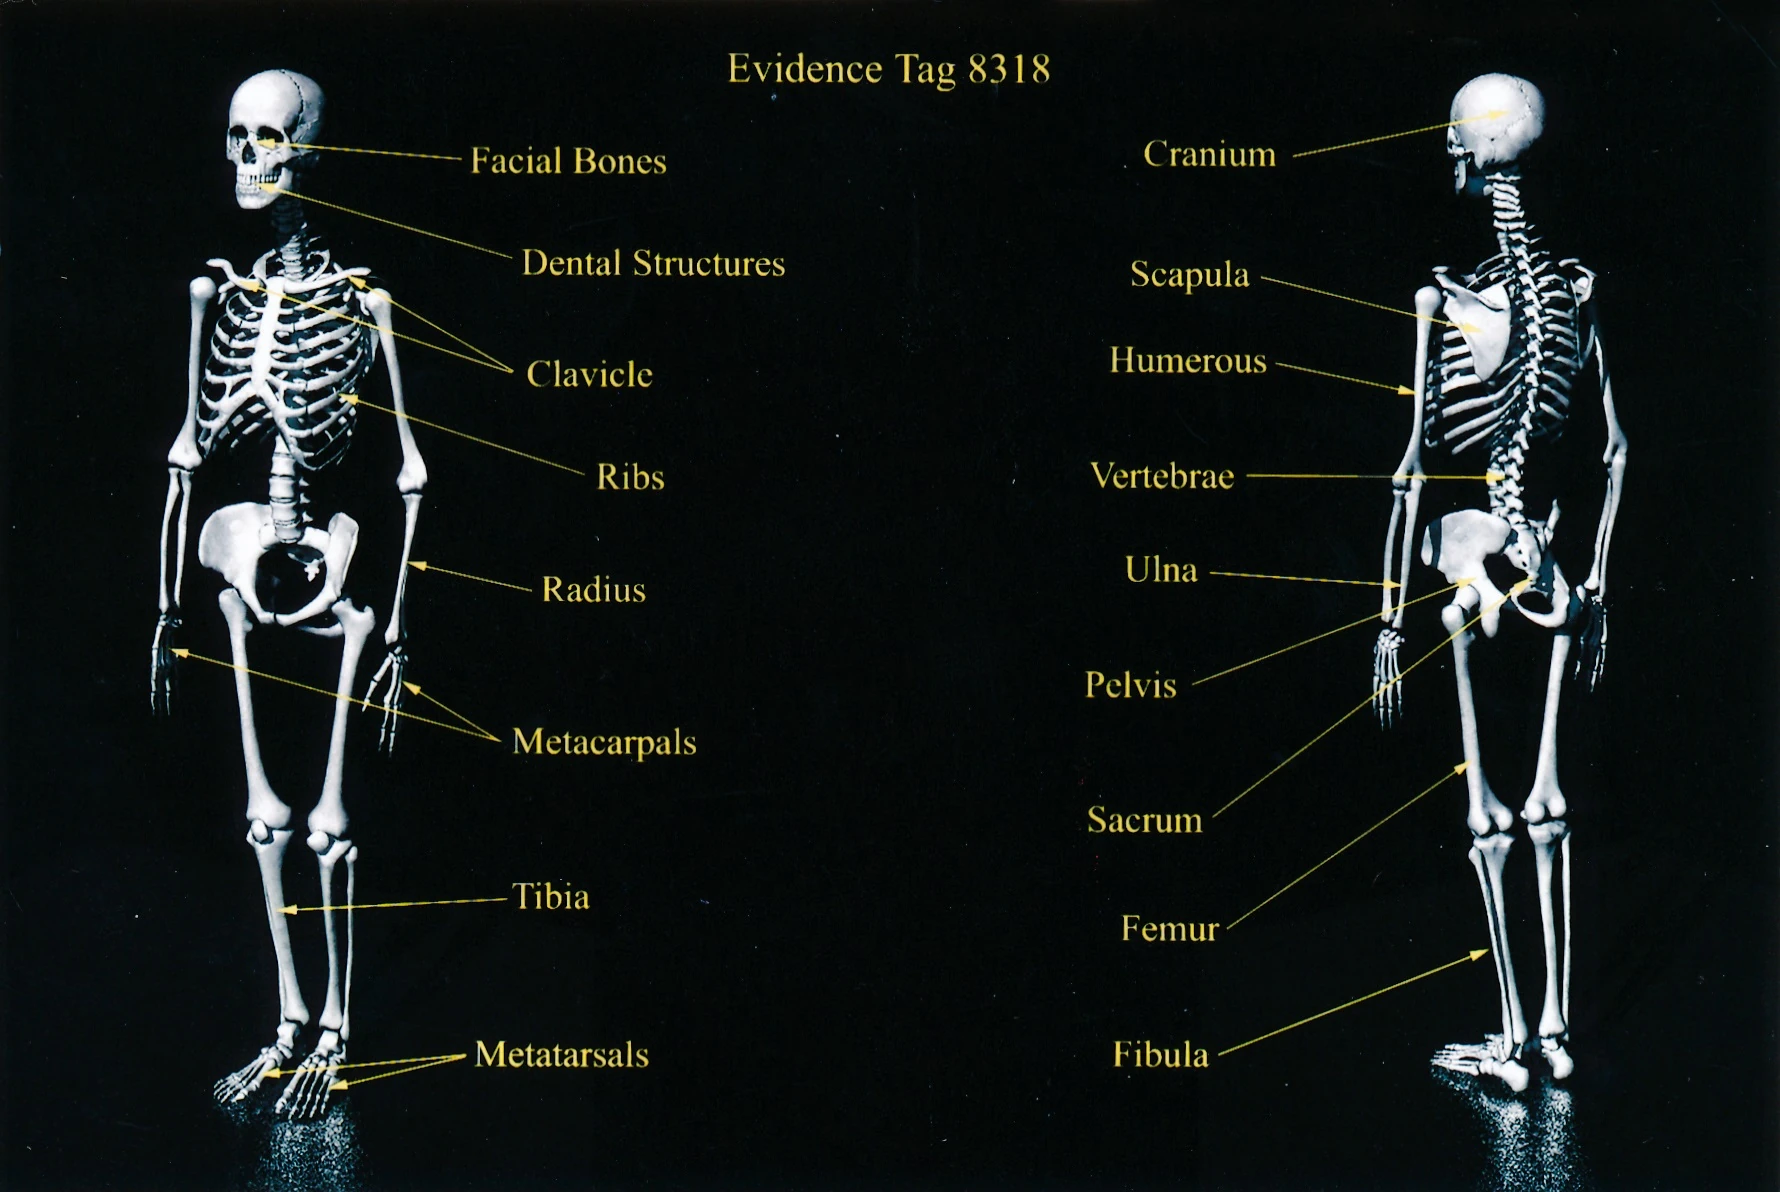
|
| 404 | Contents of the box from exhibit 415 | 14 | 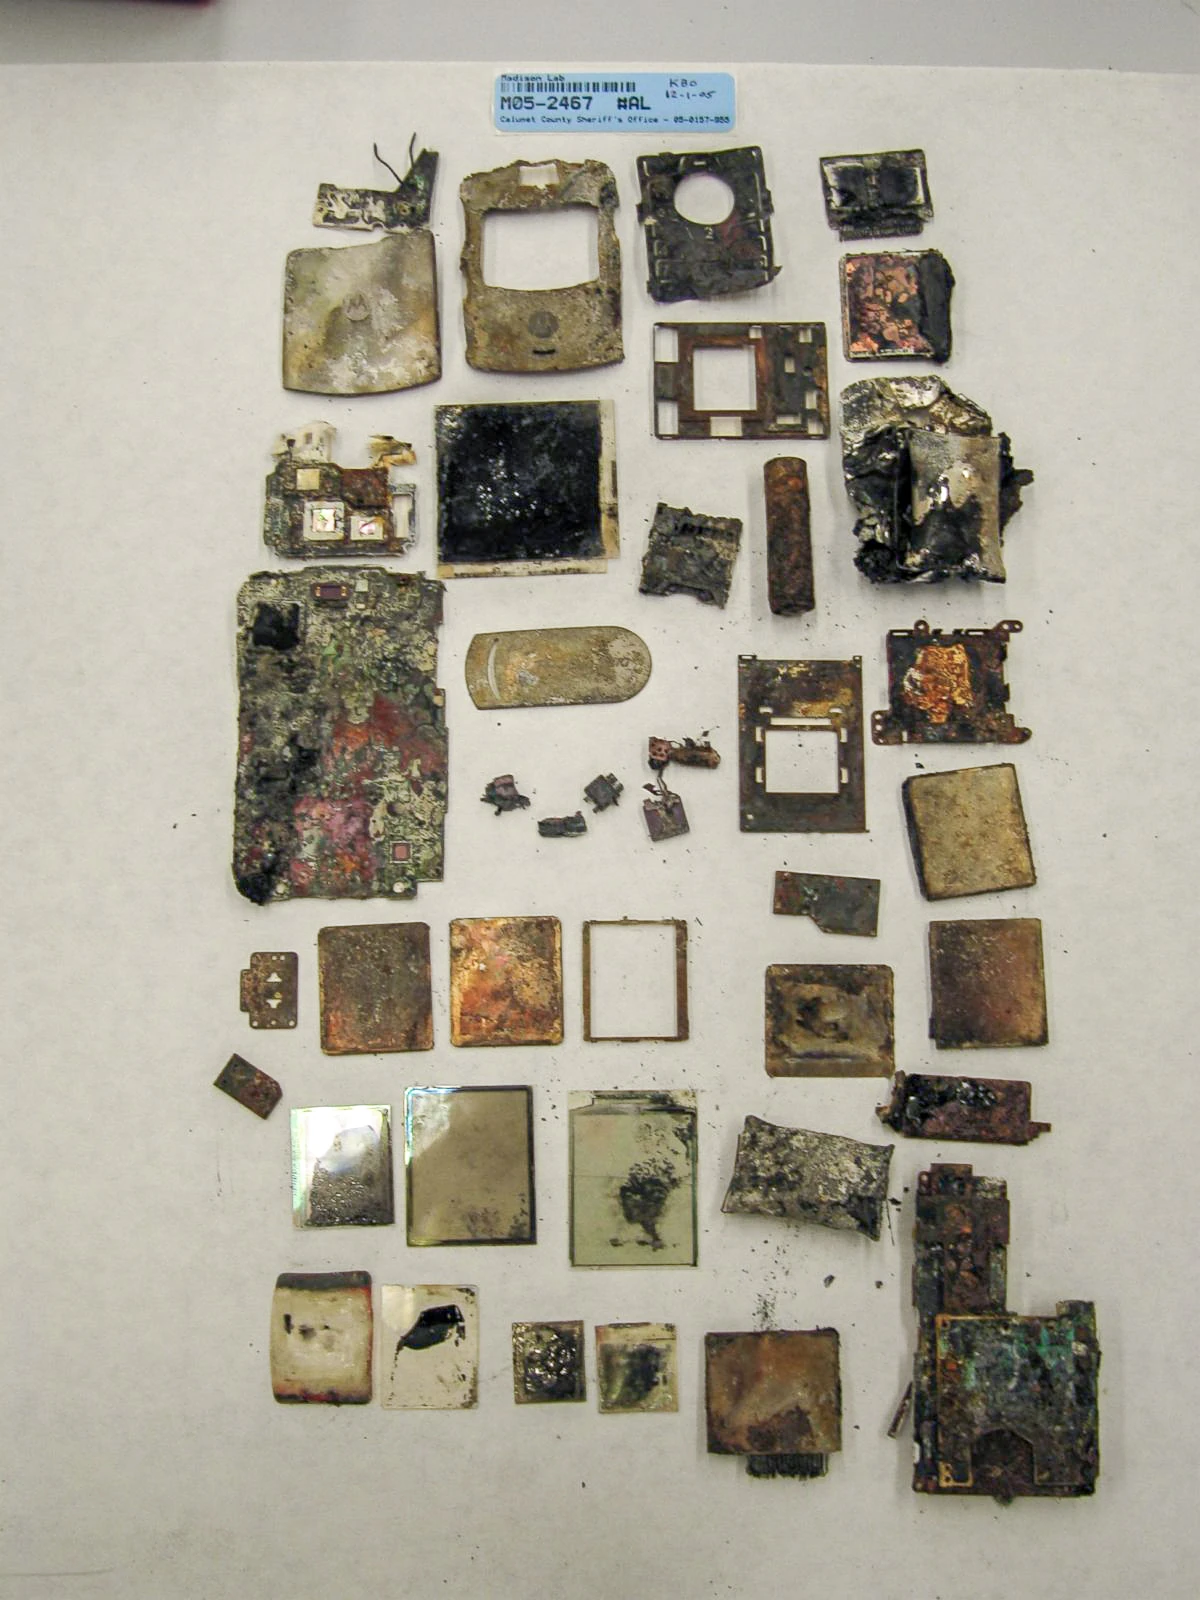
|
| 405 | Motorola cell phone back cover | 14 | 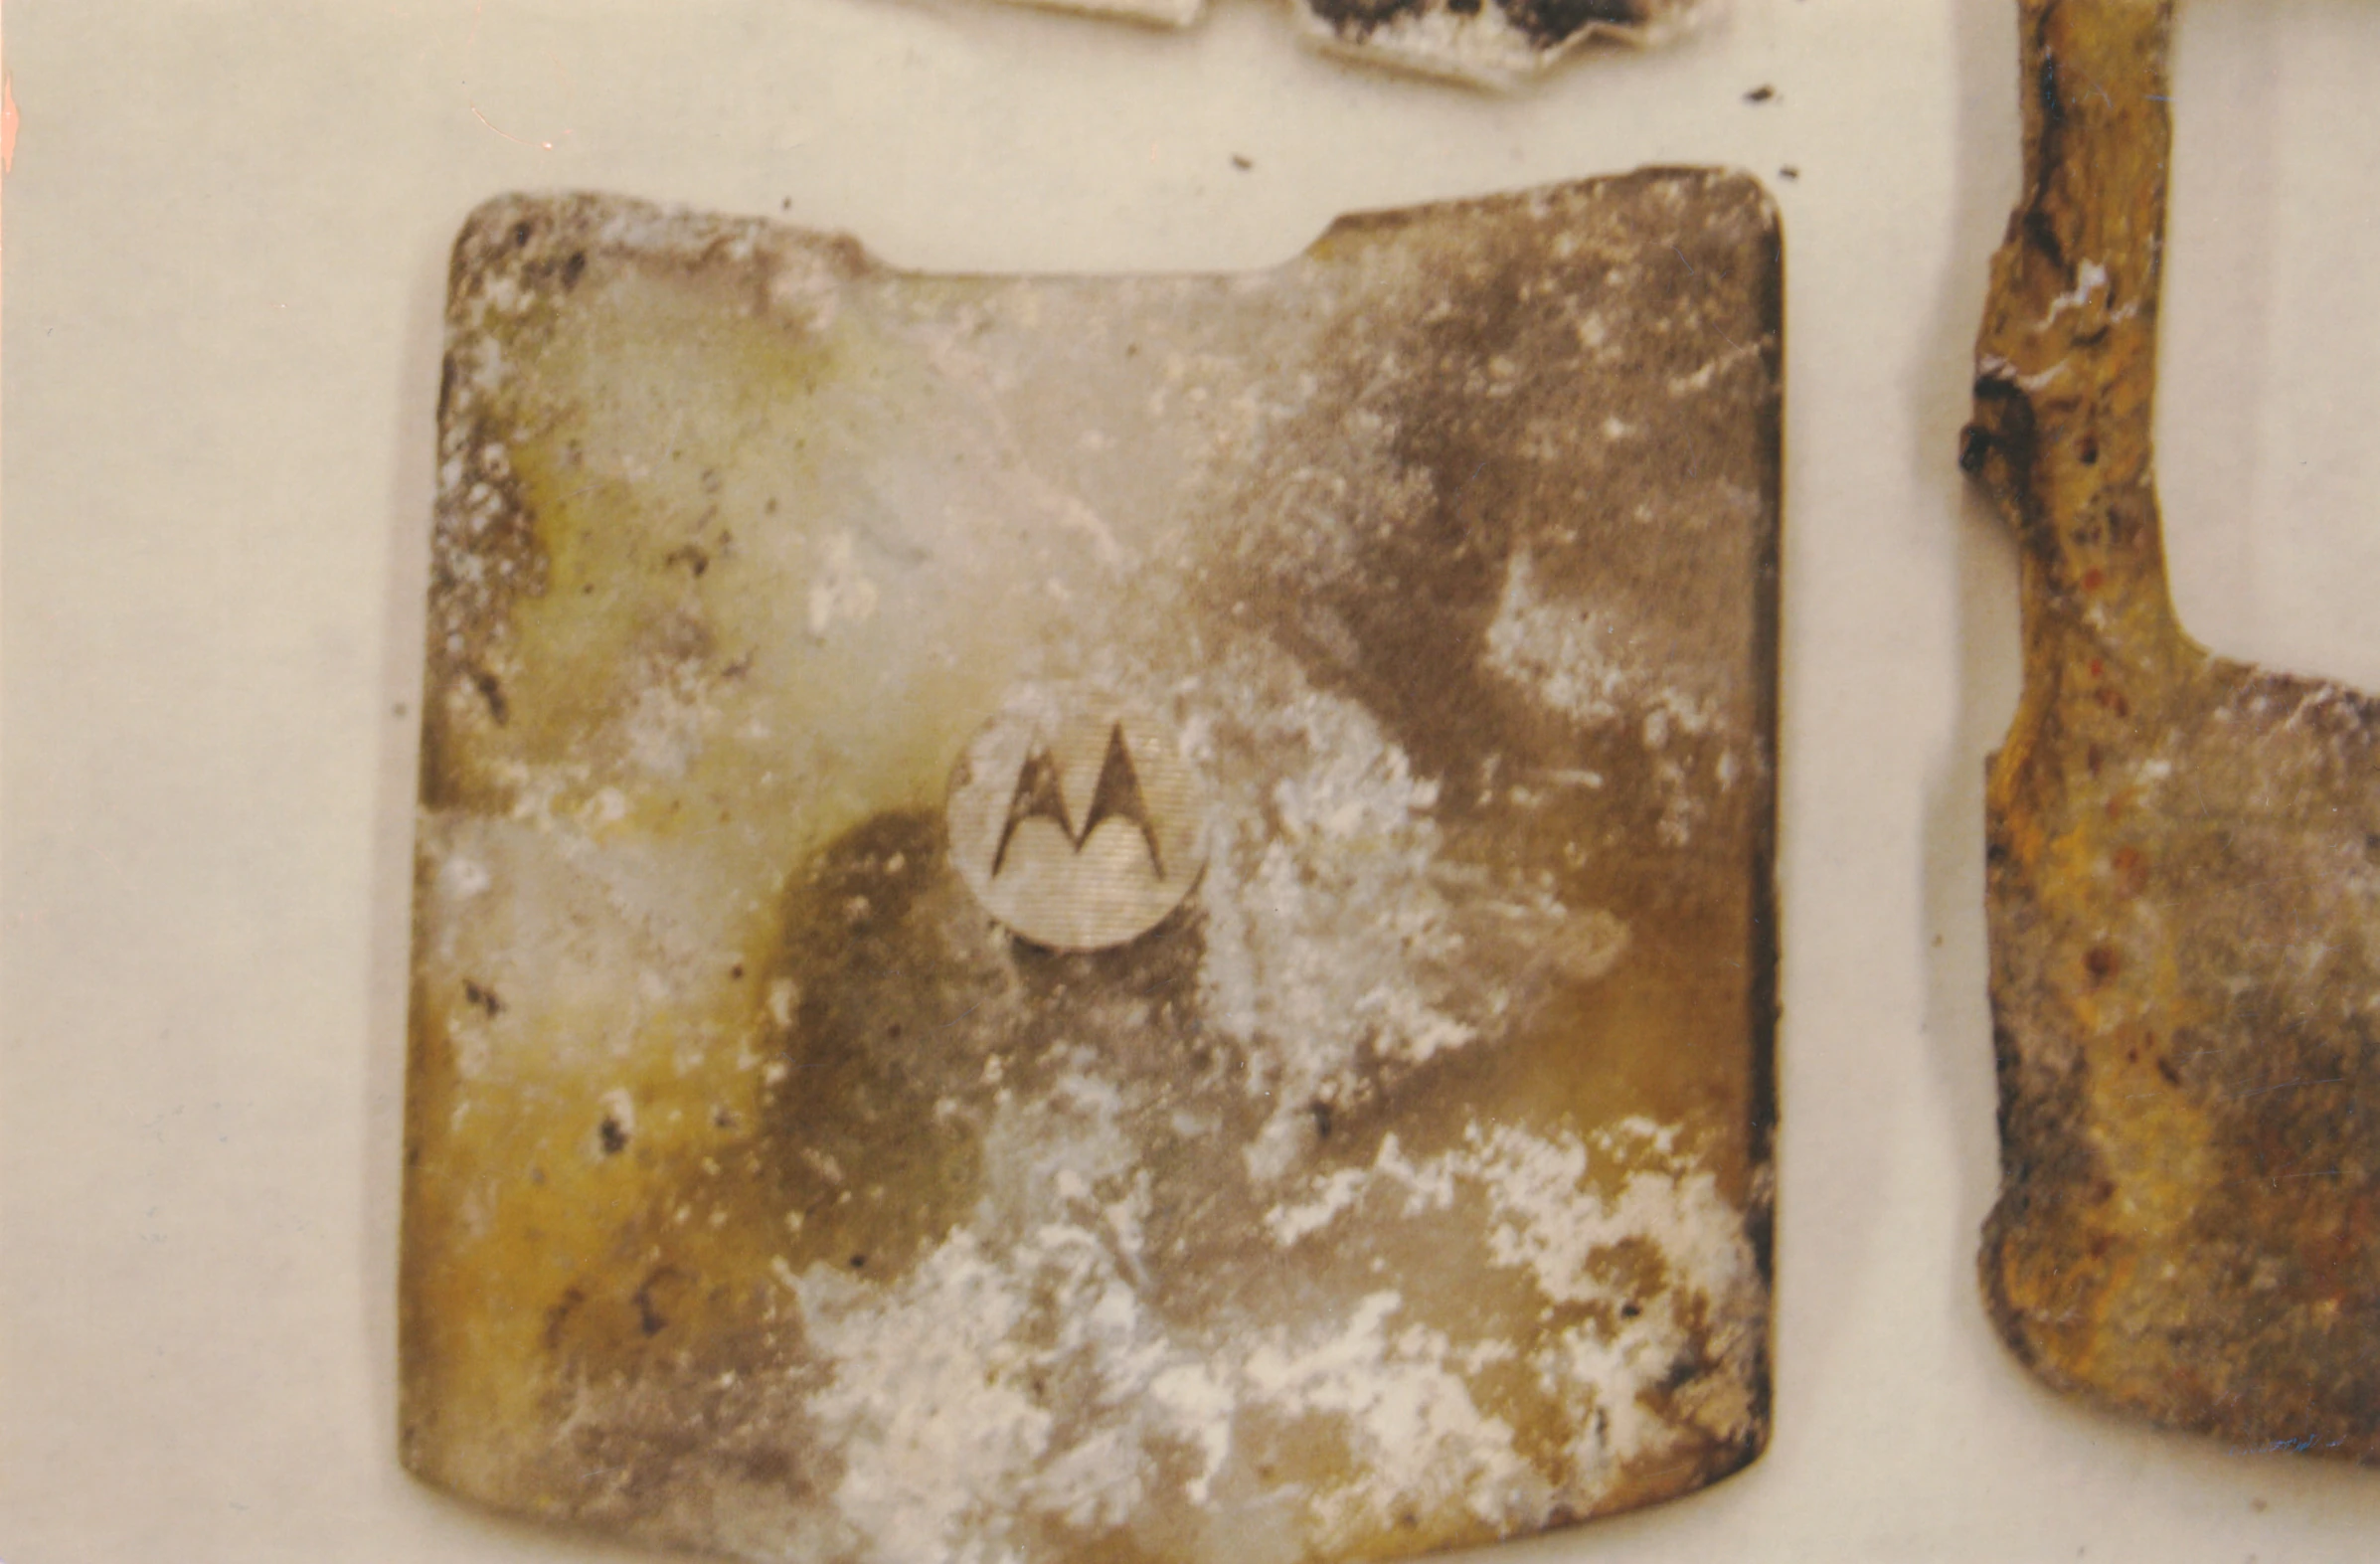
|
| 406 | Motorola cell phone front cover | 14 | 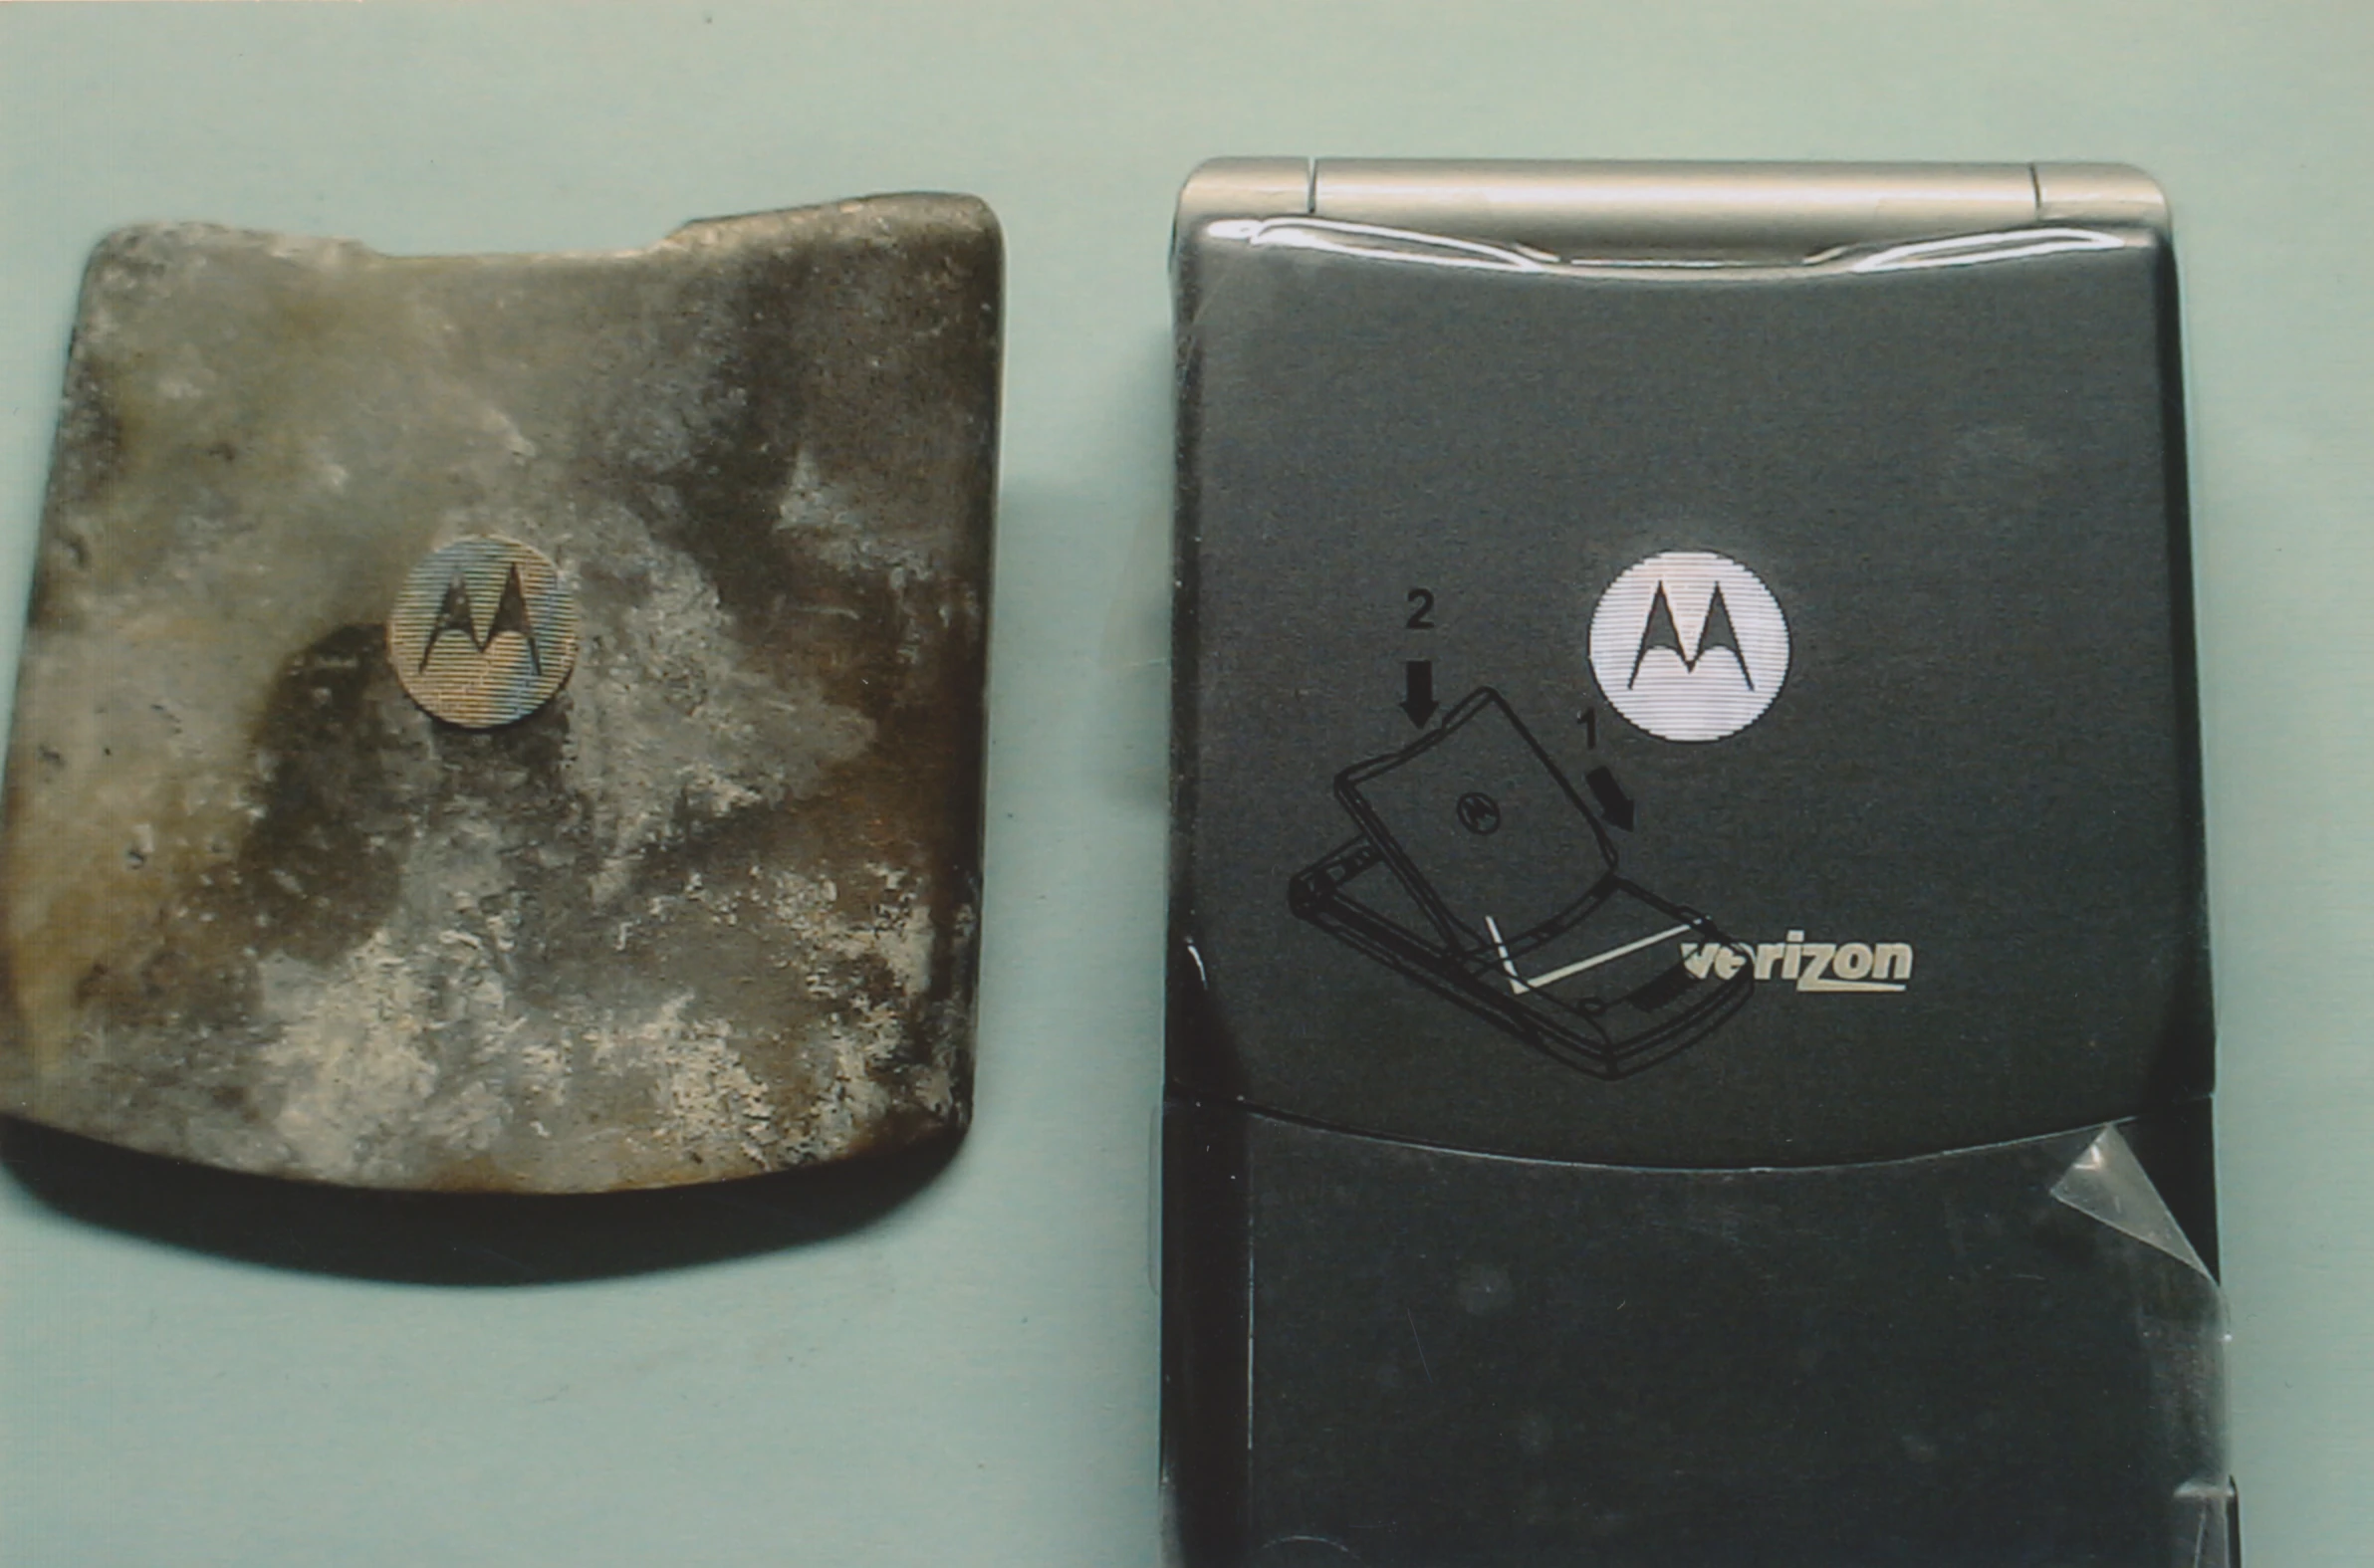
|
| 407 | Motorola cell phone front cover | 14 | 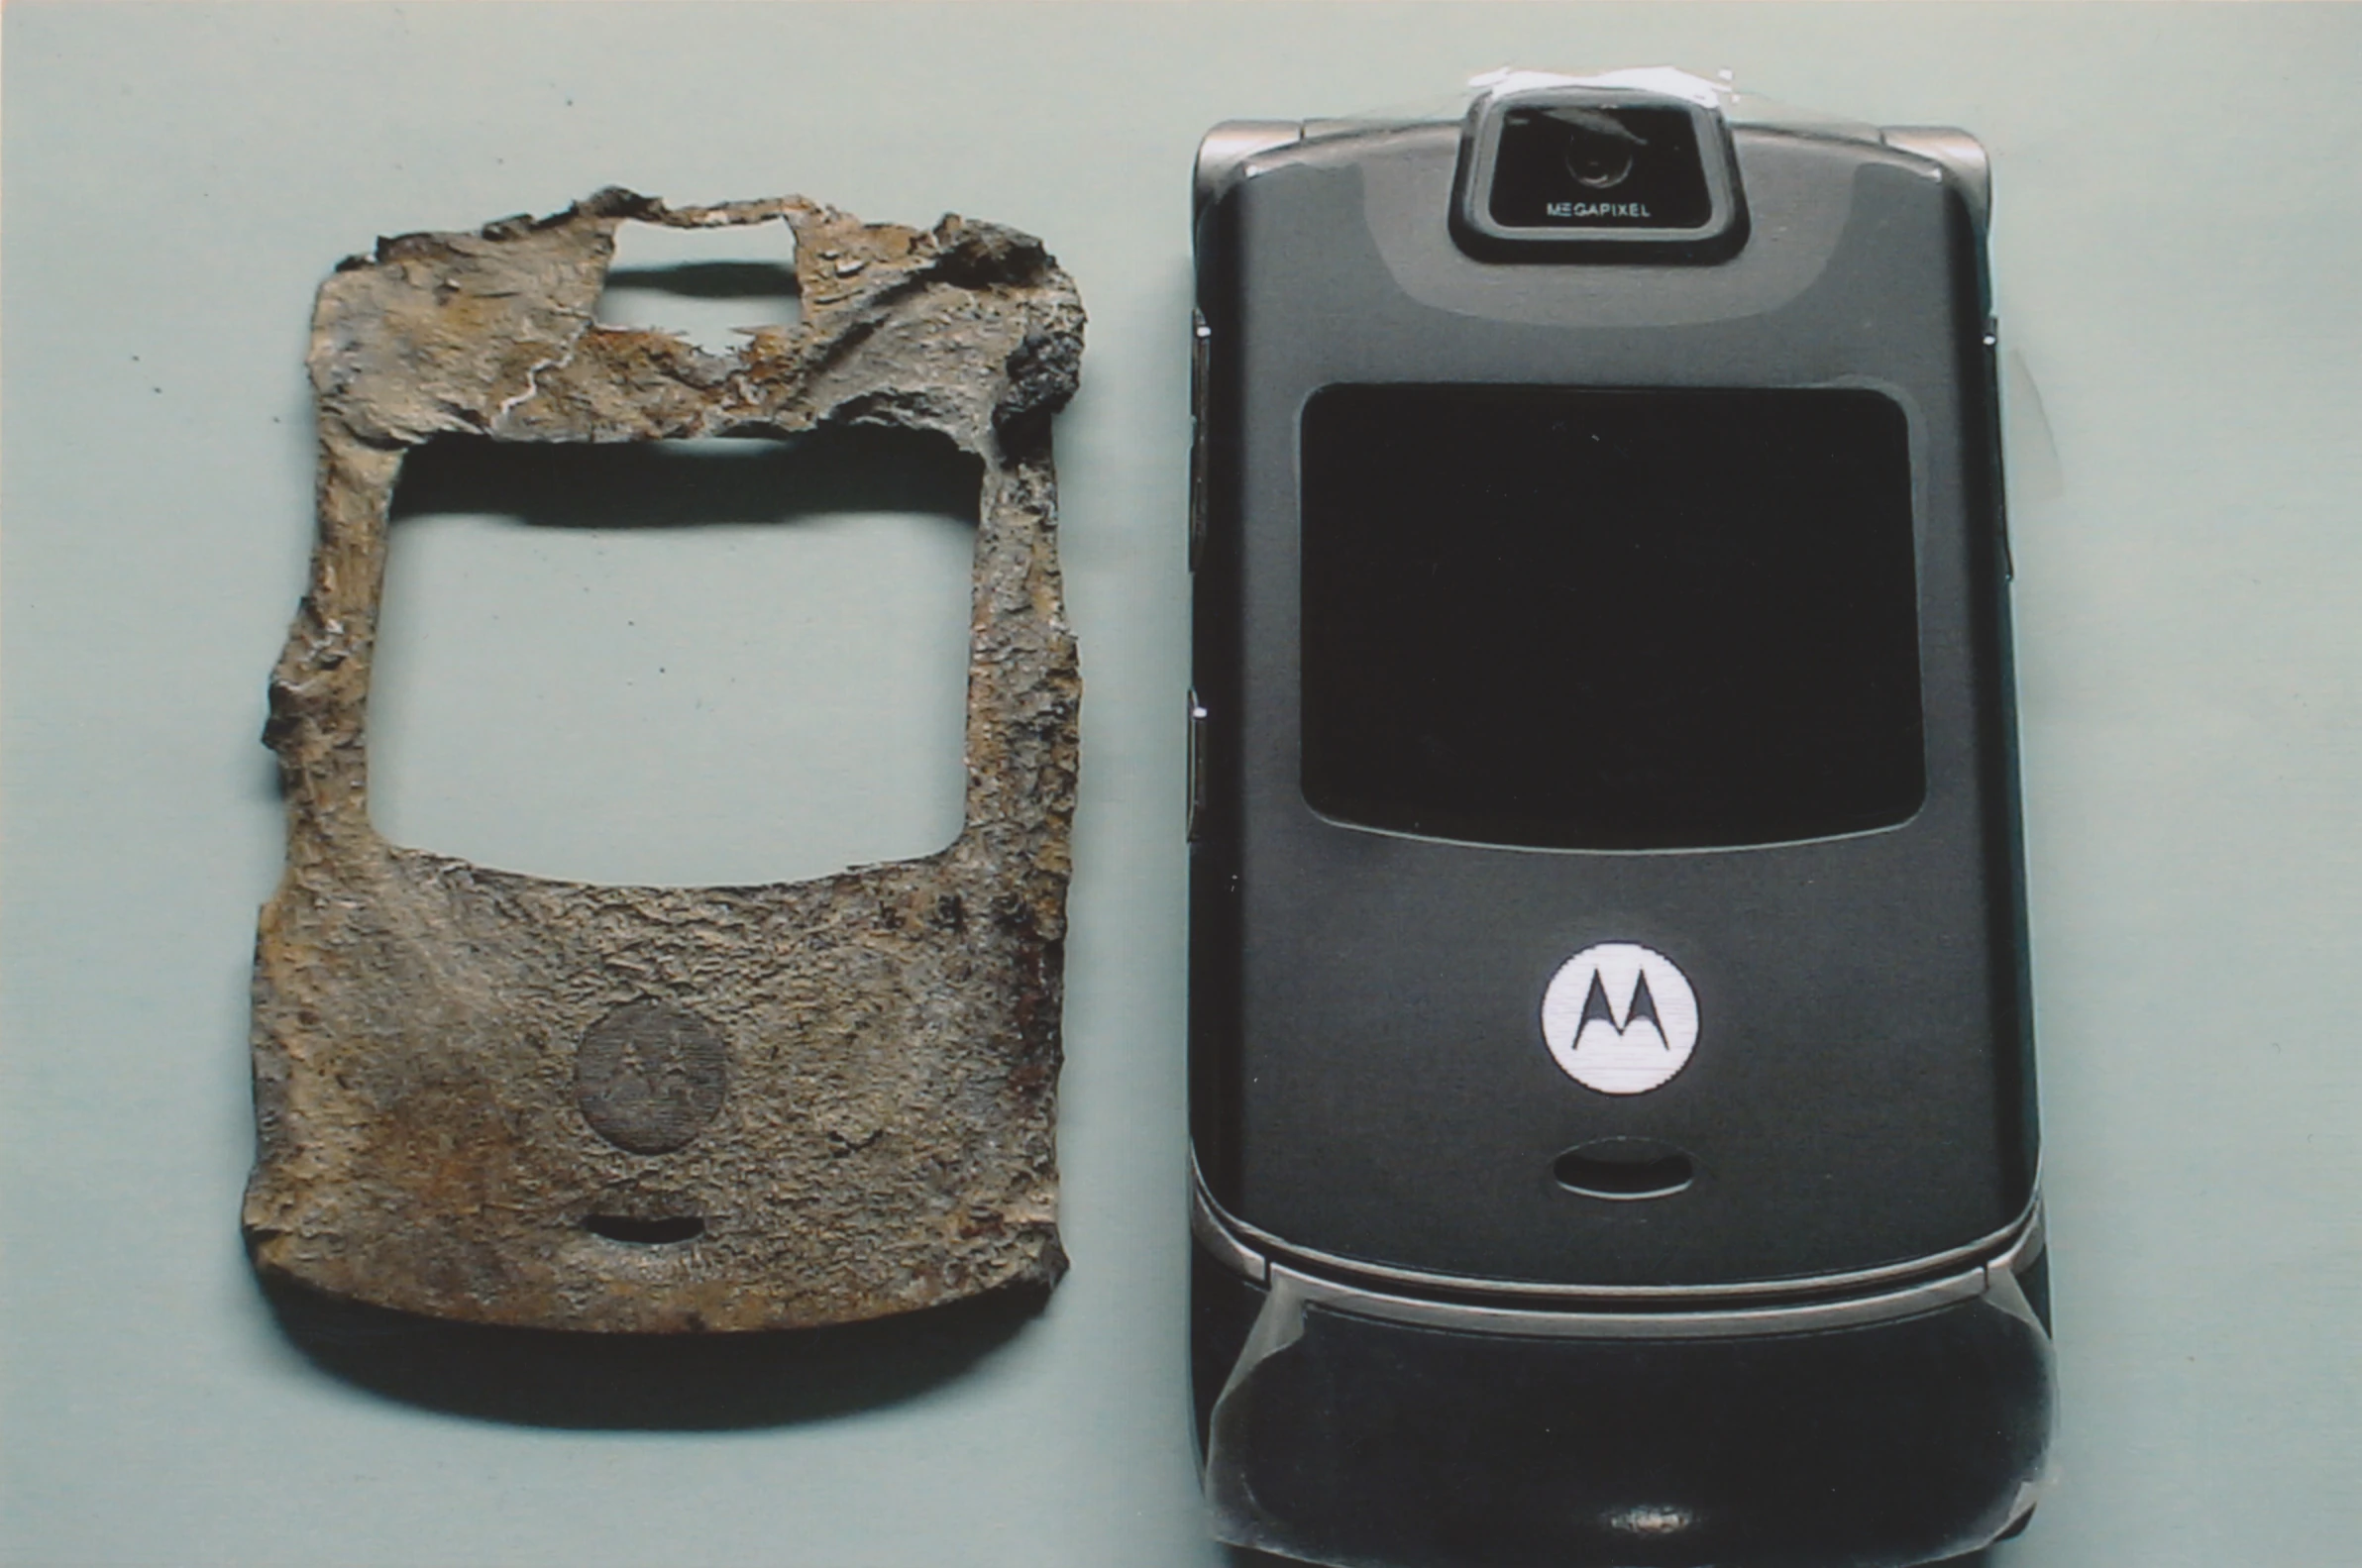
|
| 408 | Motorola cell phone keypad | 14 | 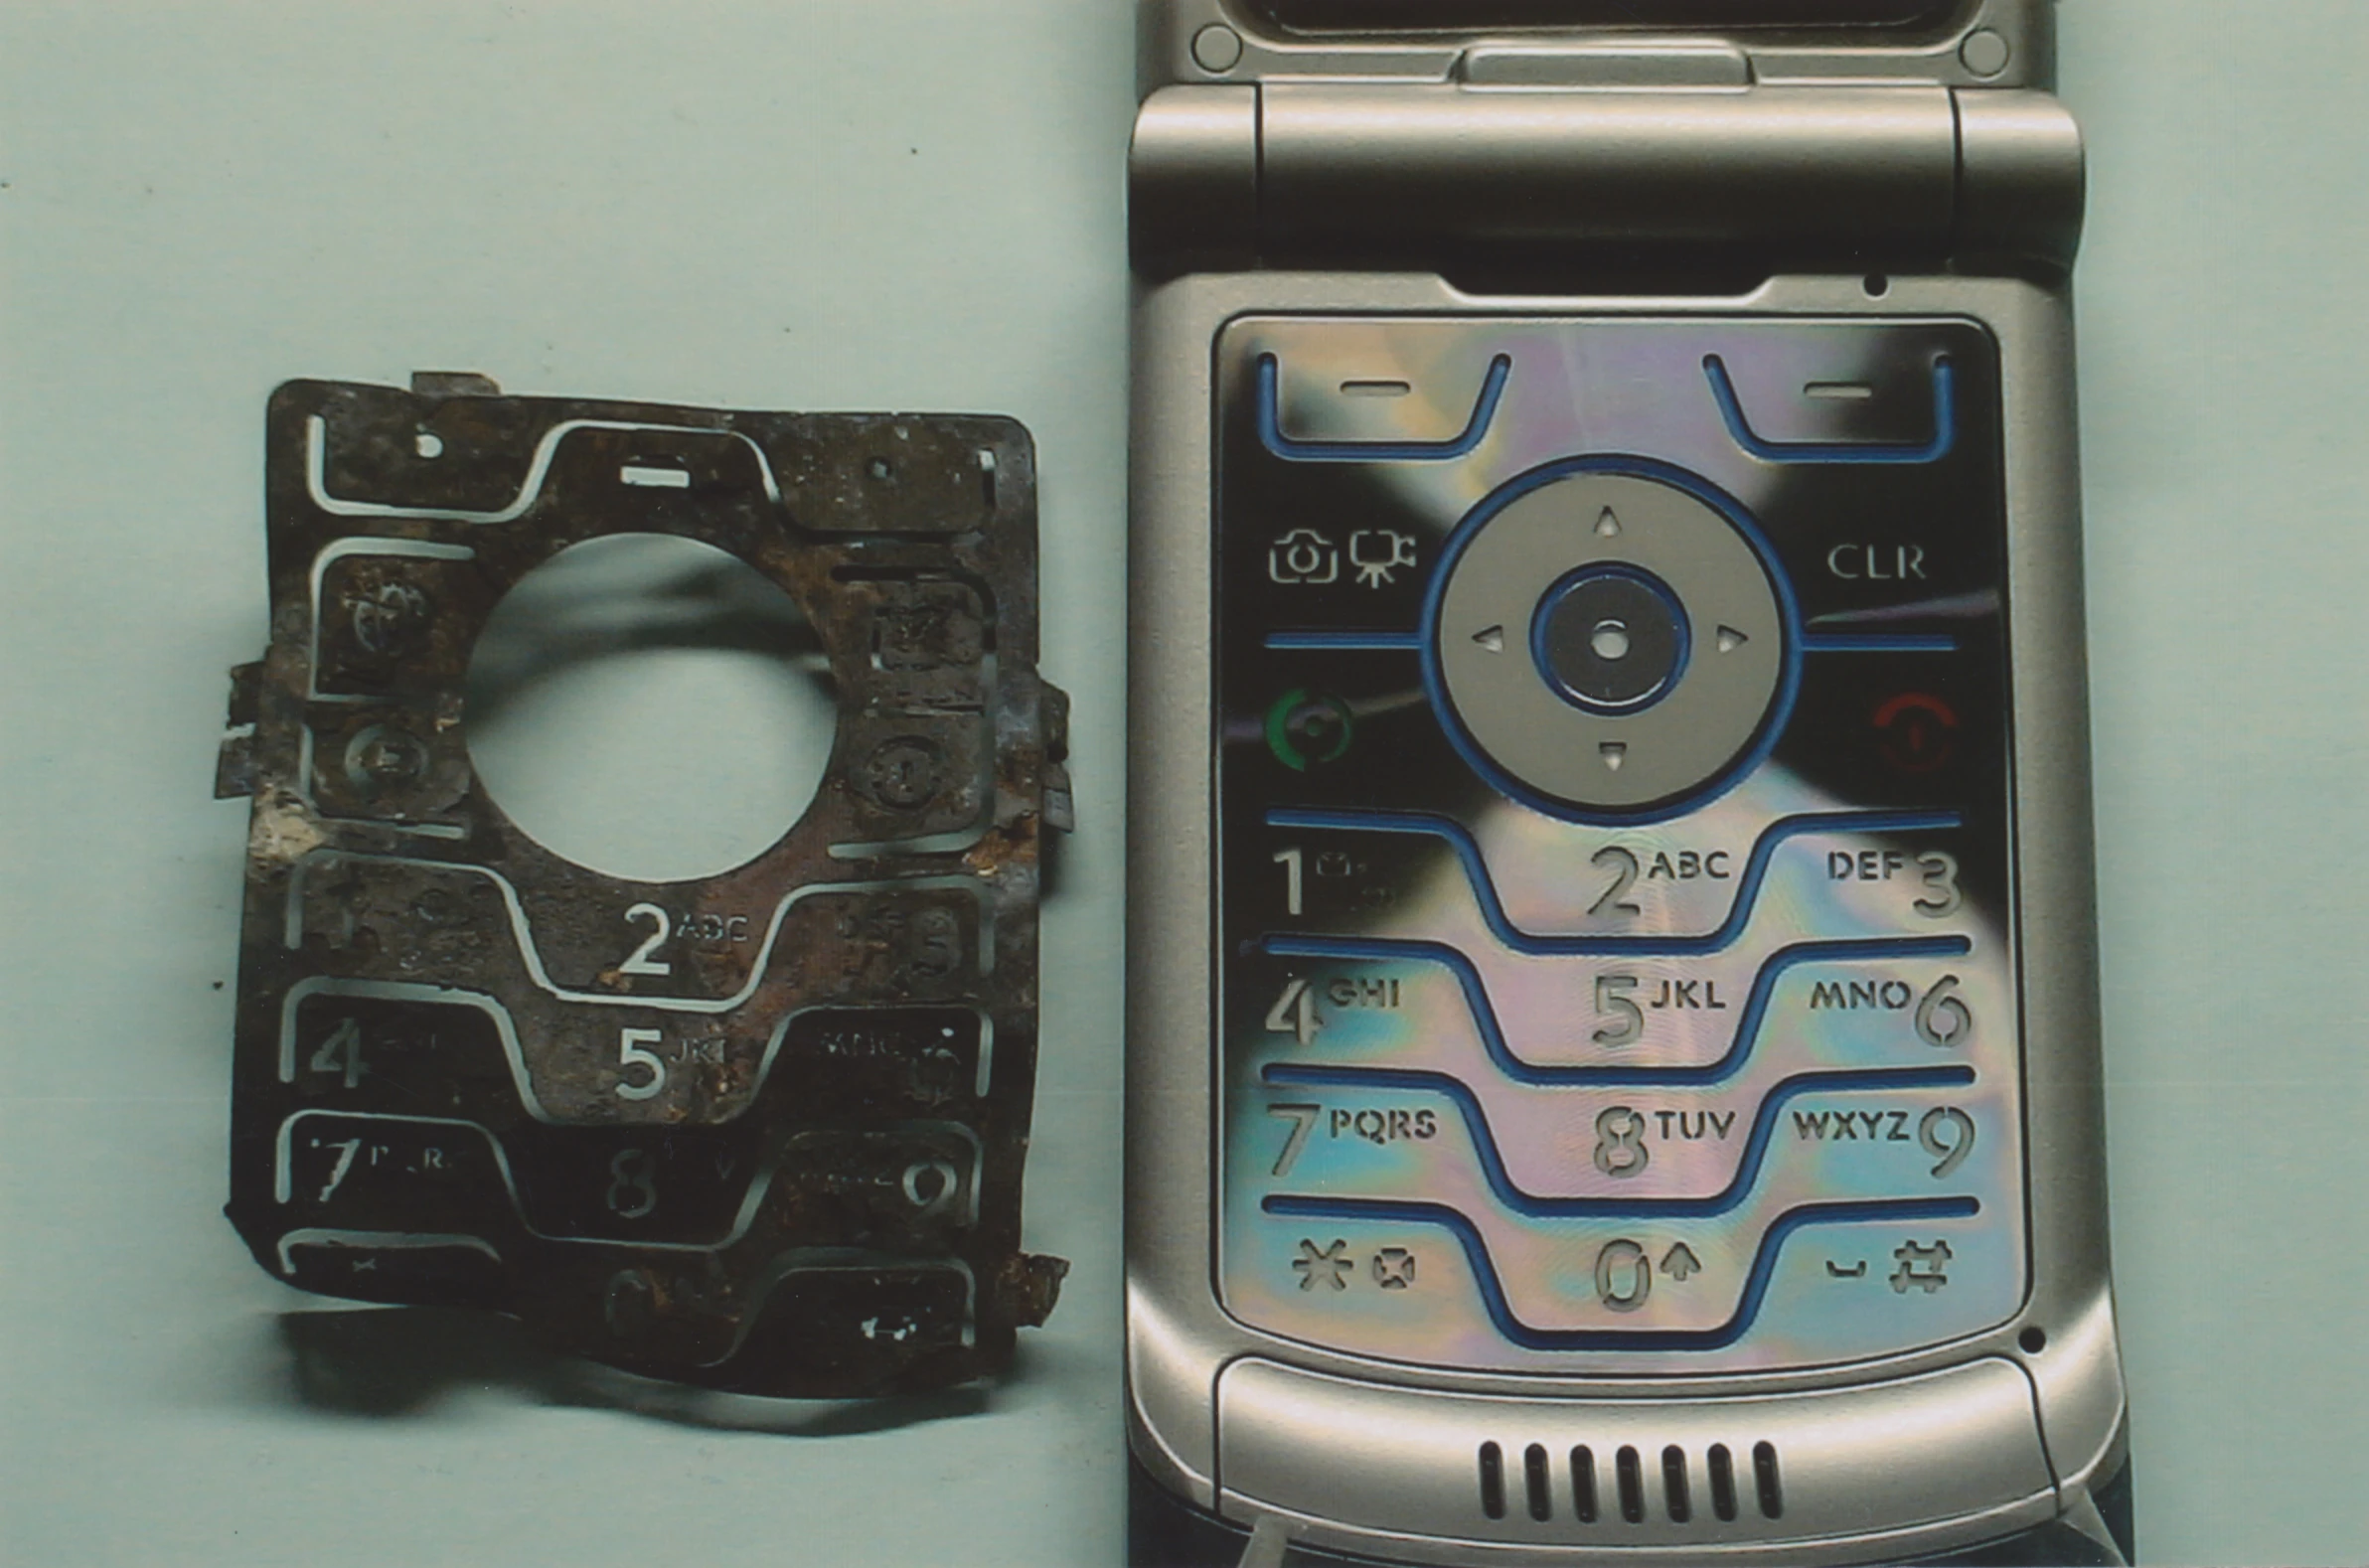
|
| 409 | Burned Motorola cell phone parts | 14 | 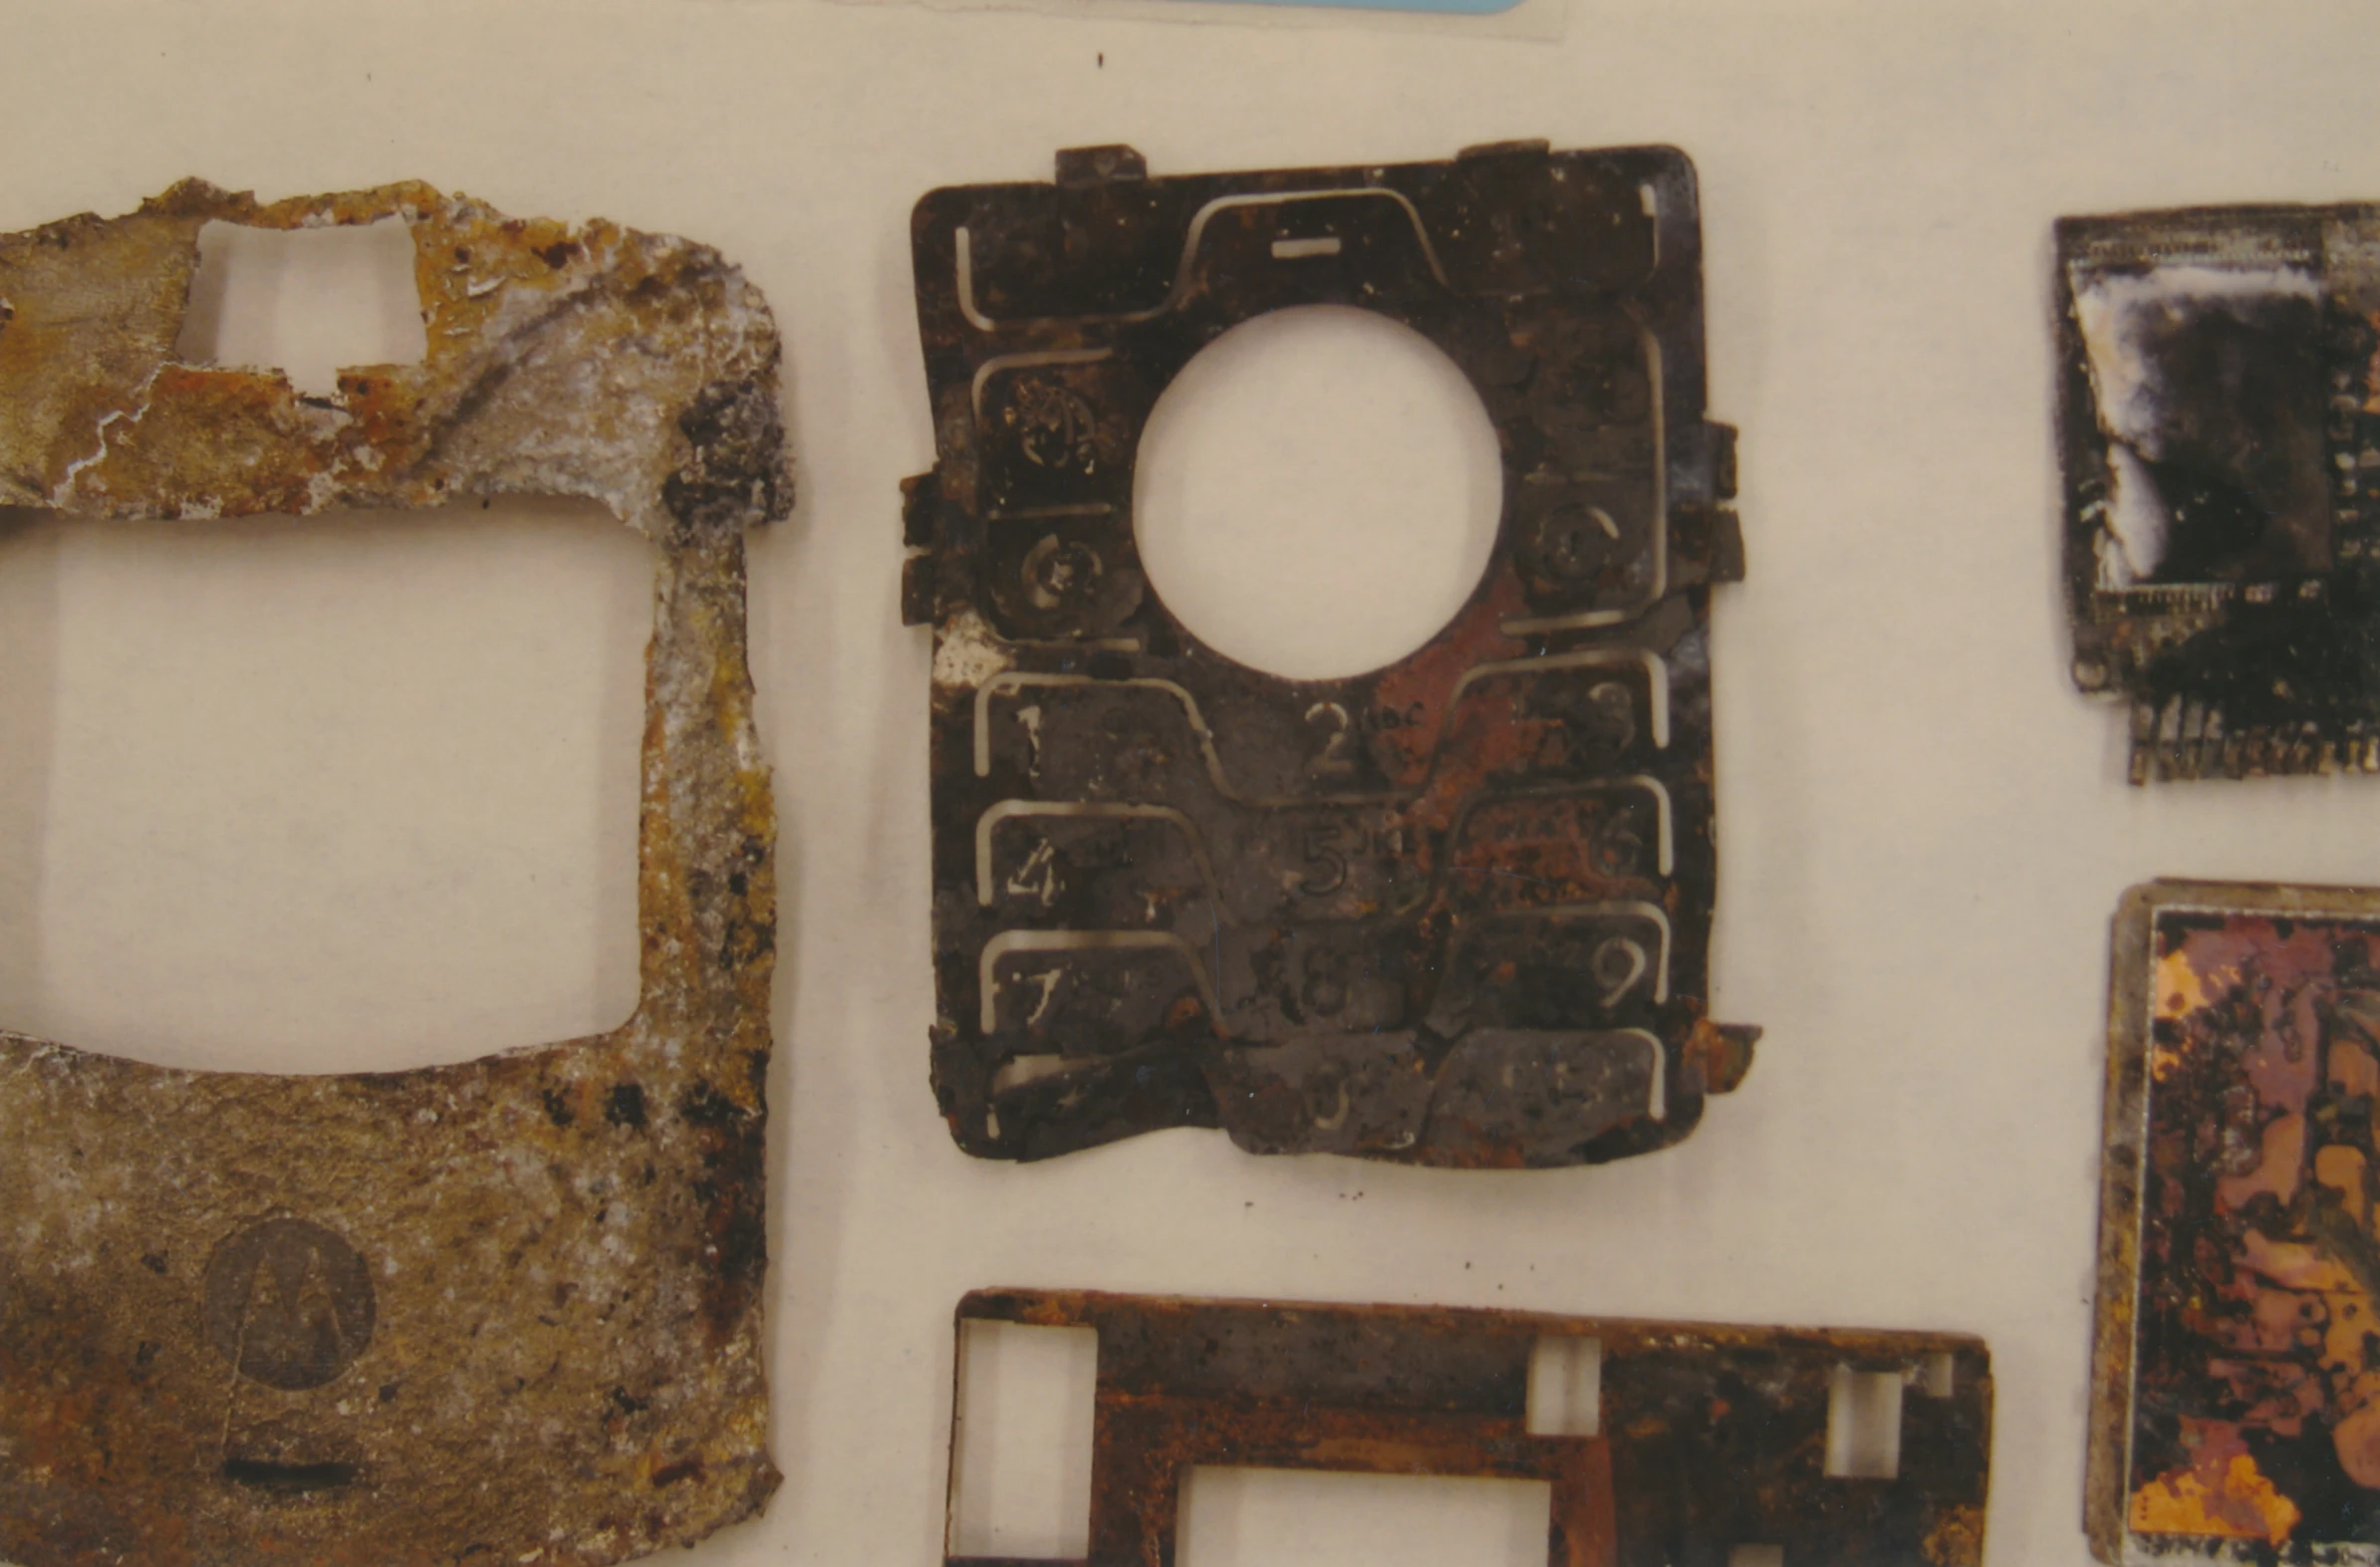
|
| 410 | Burned electronics parts | 14 | 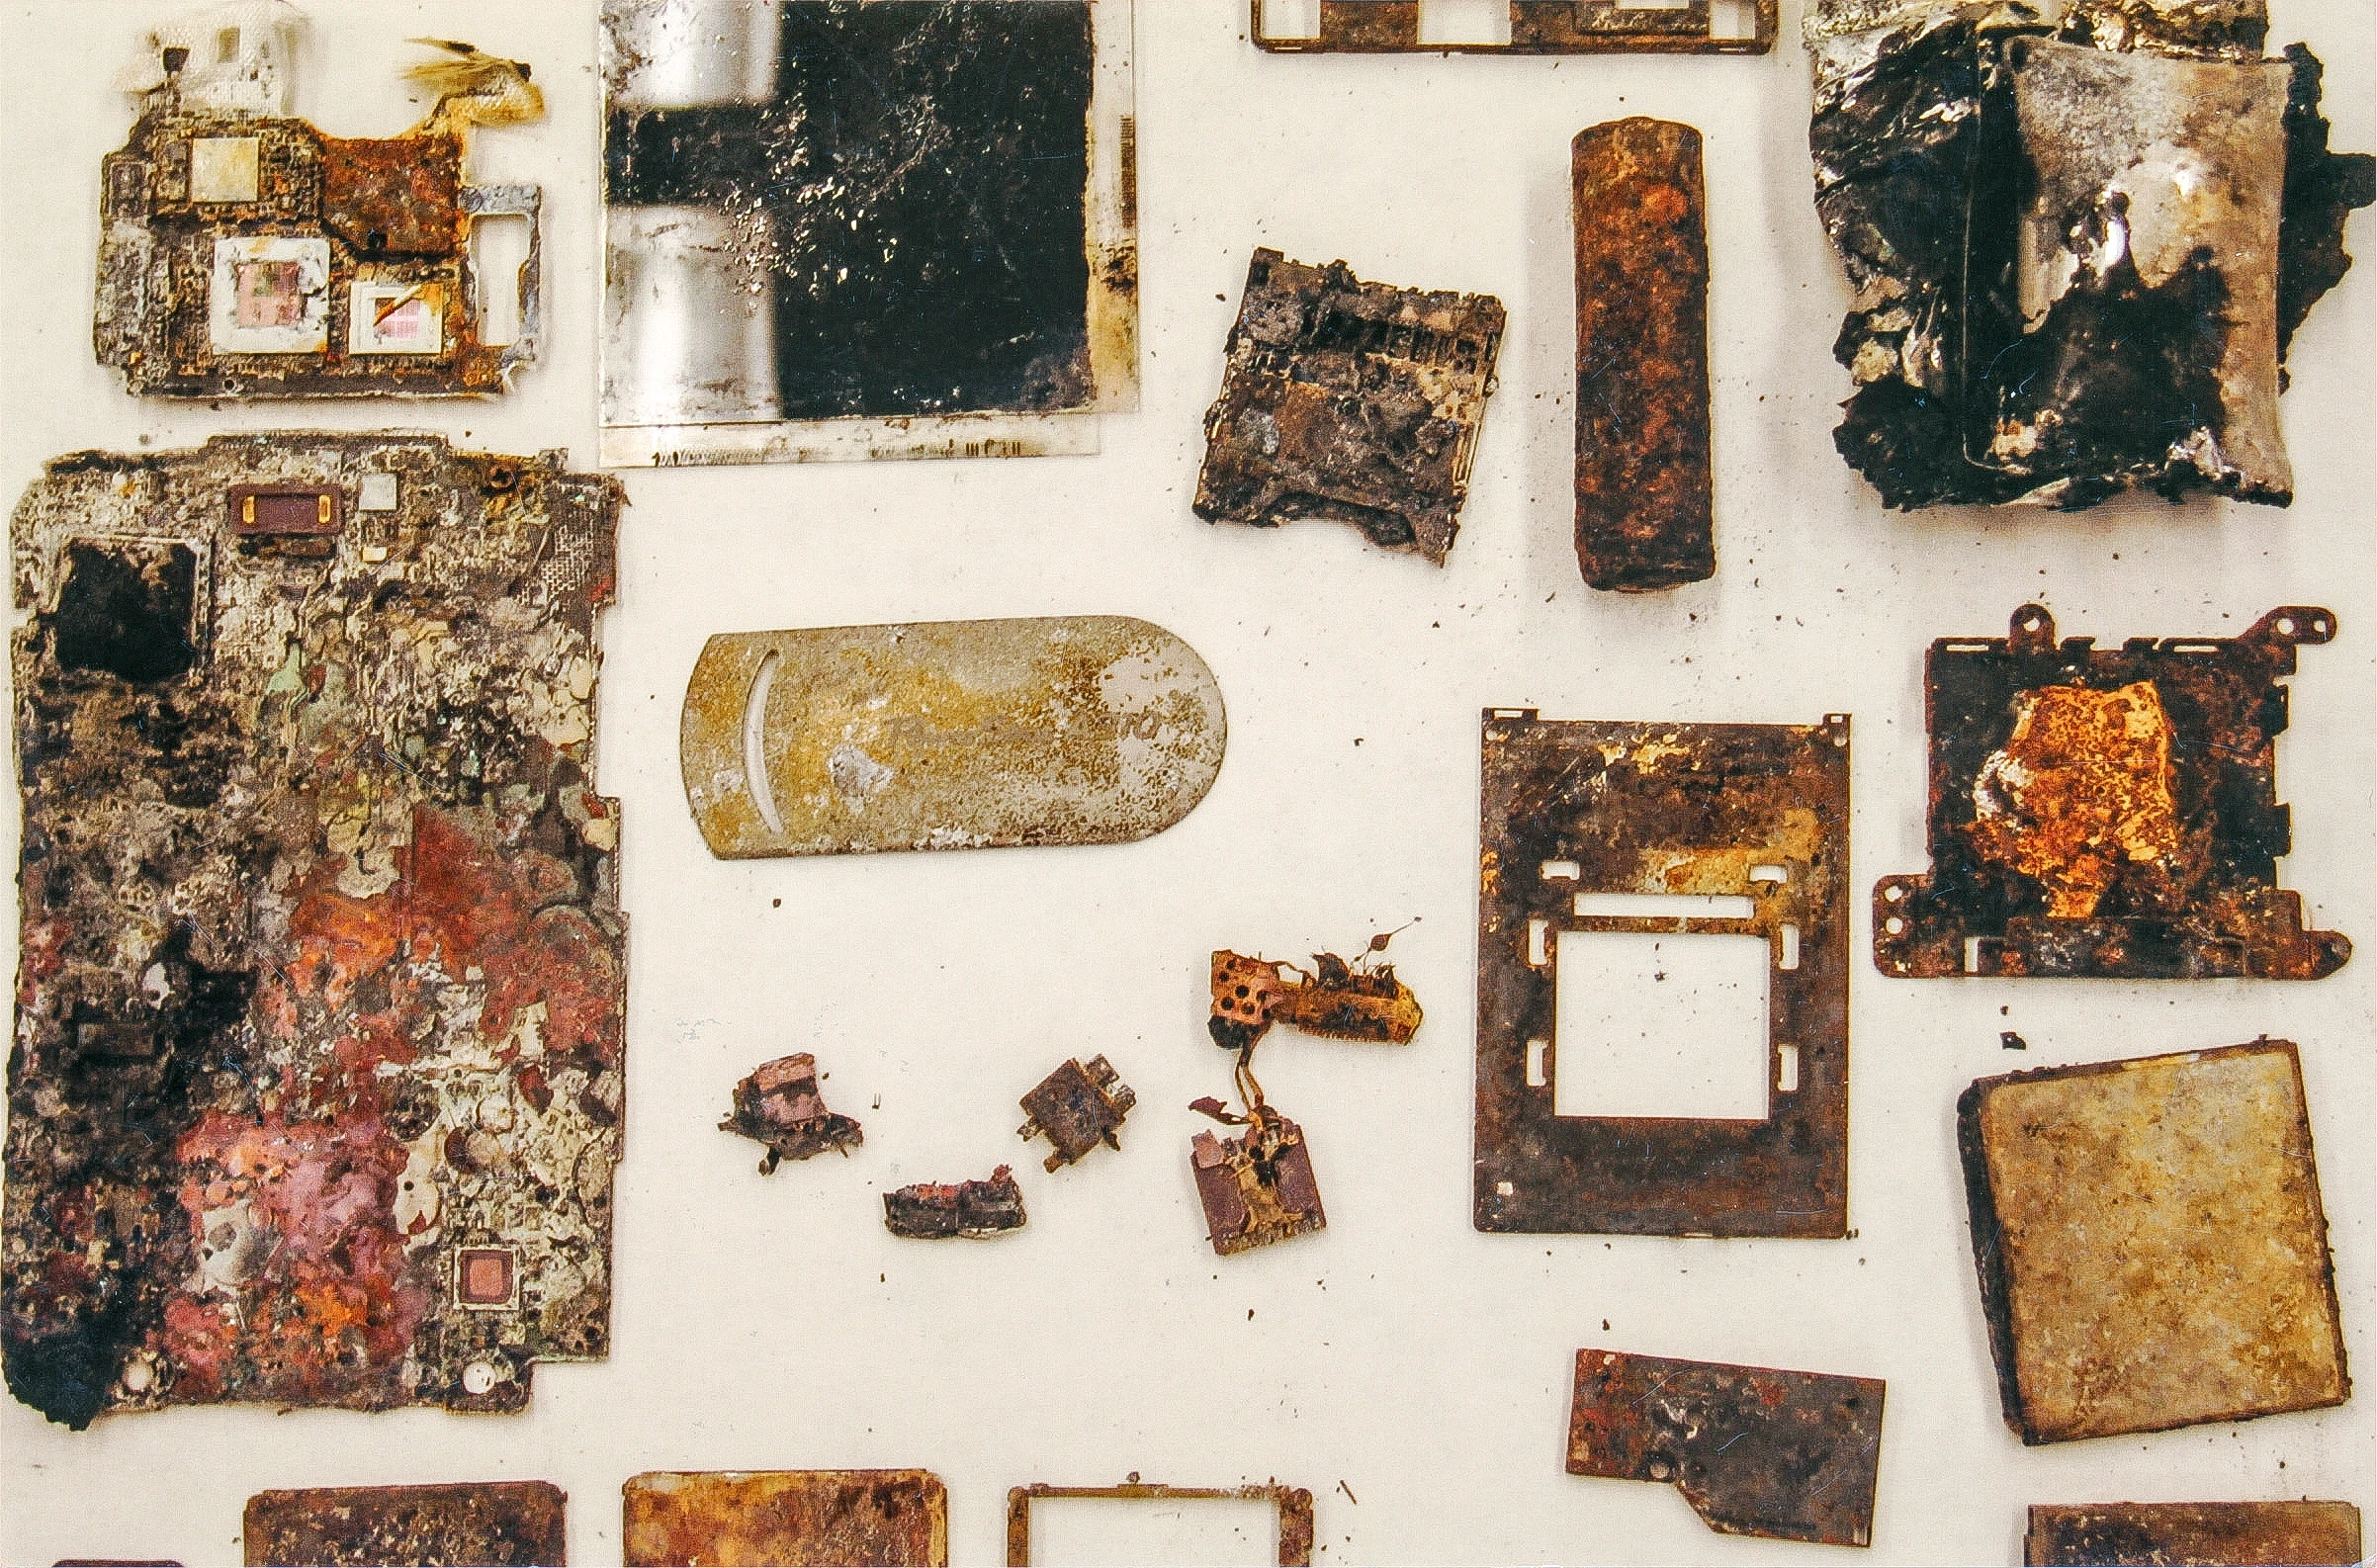
|
| 411 | Canon PowerShot camera lens cover | 14 | 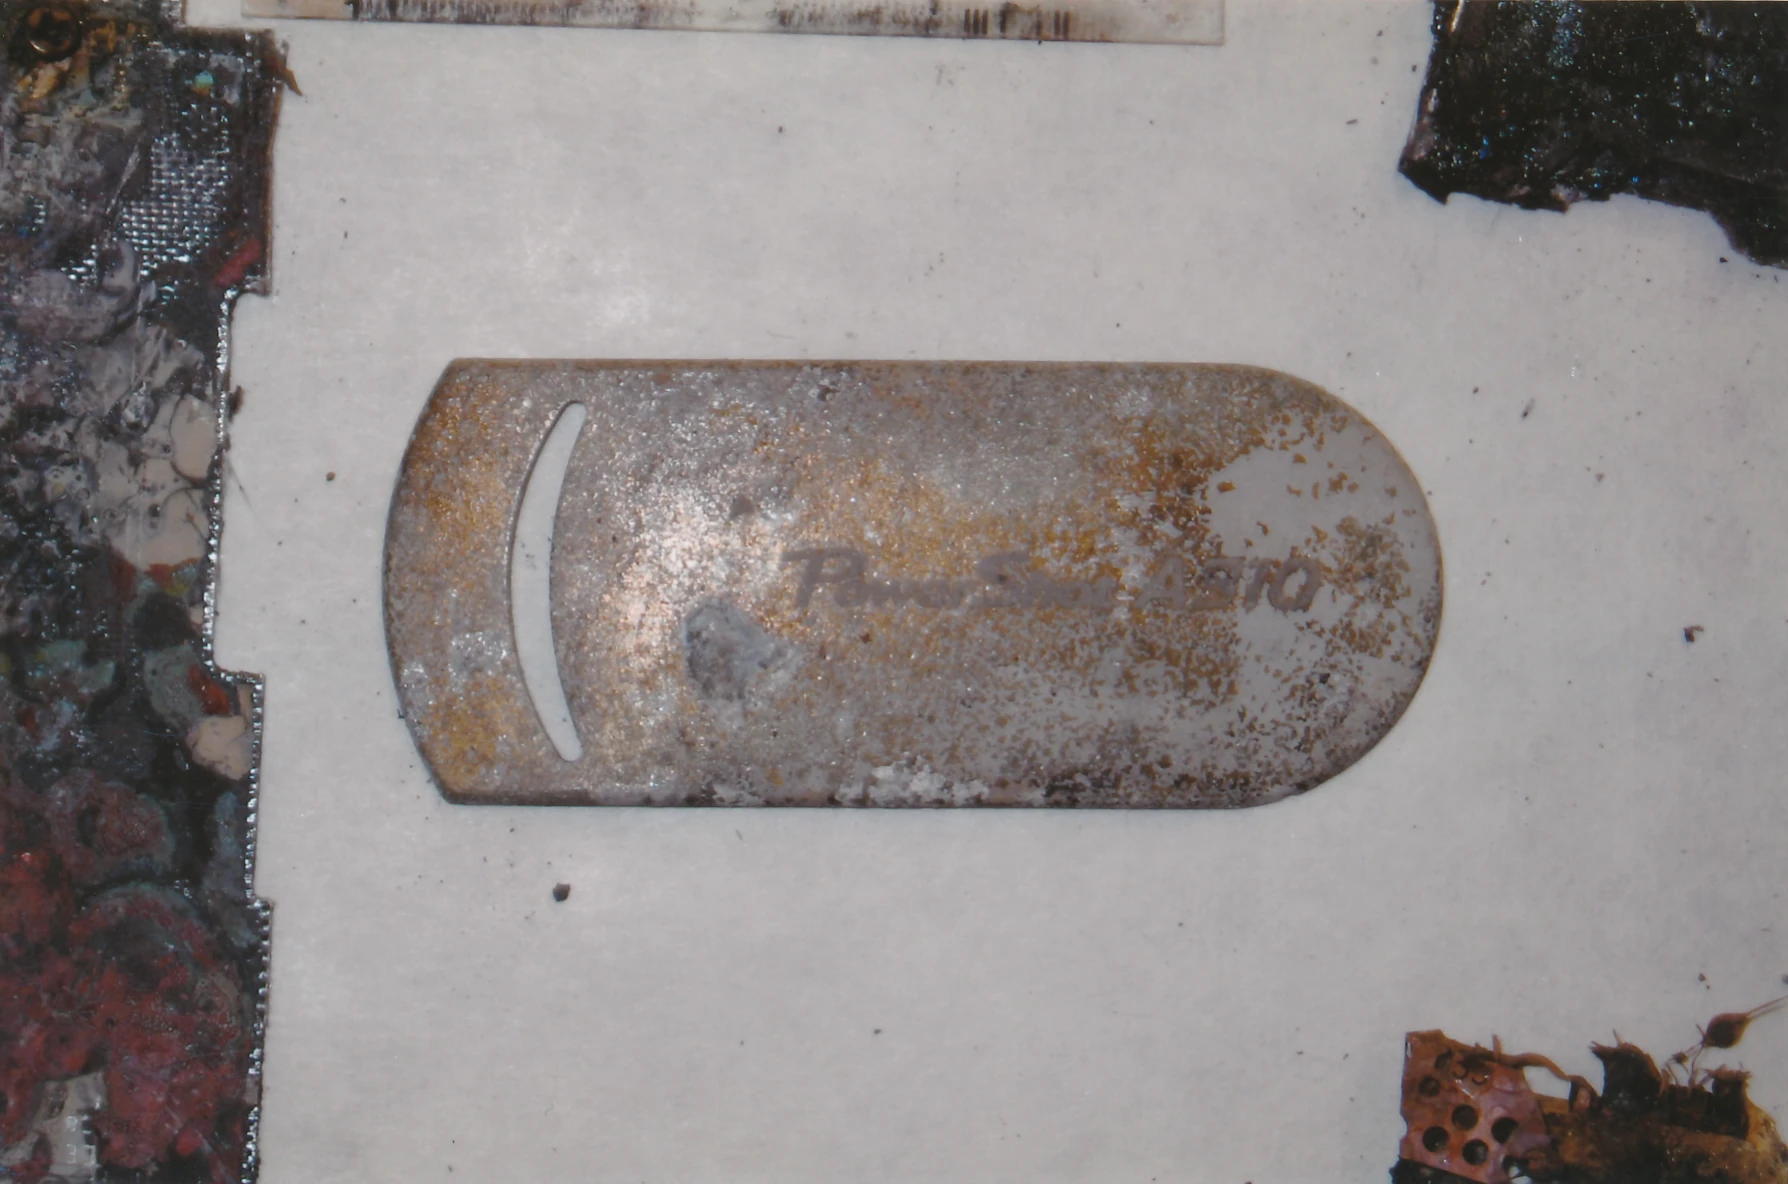
|
| 412 | Burned Motorola cell phone parts | 14 | 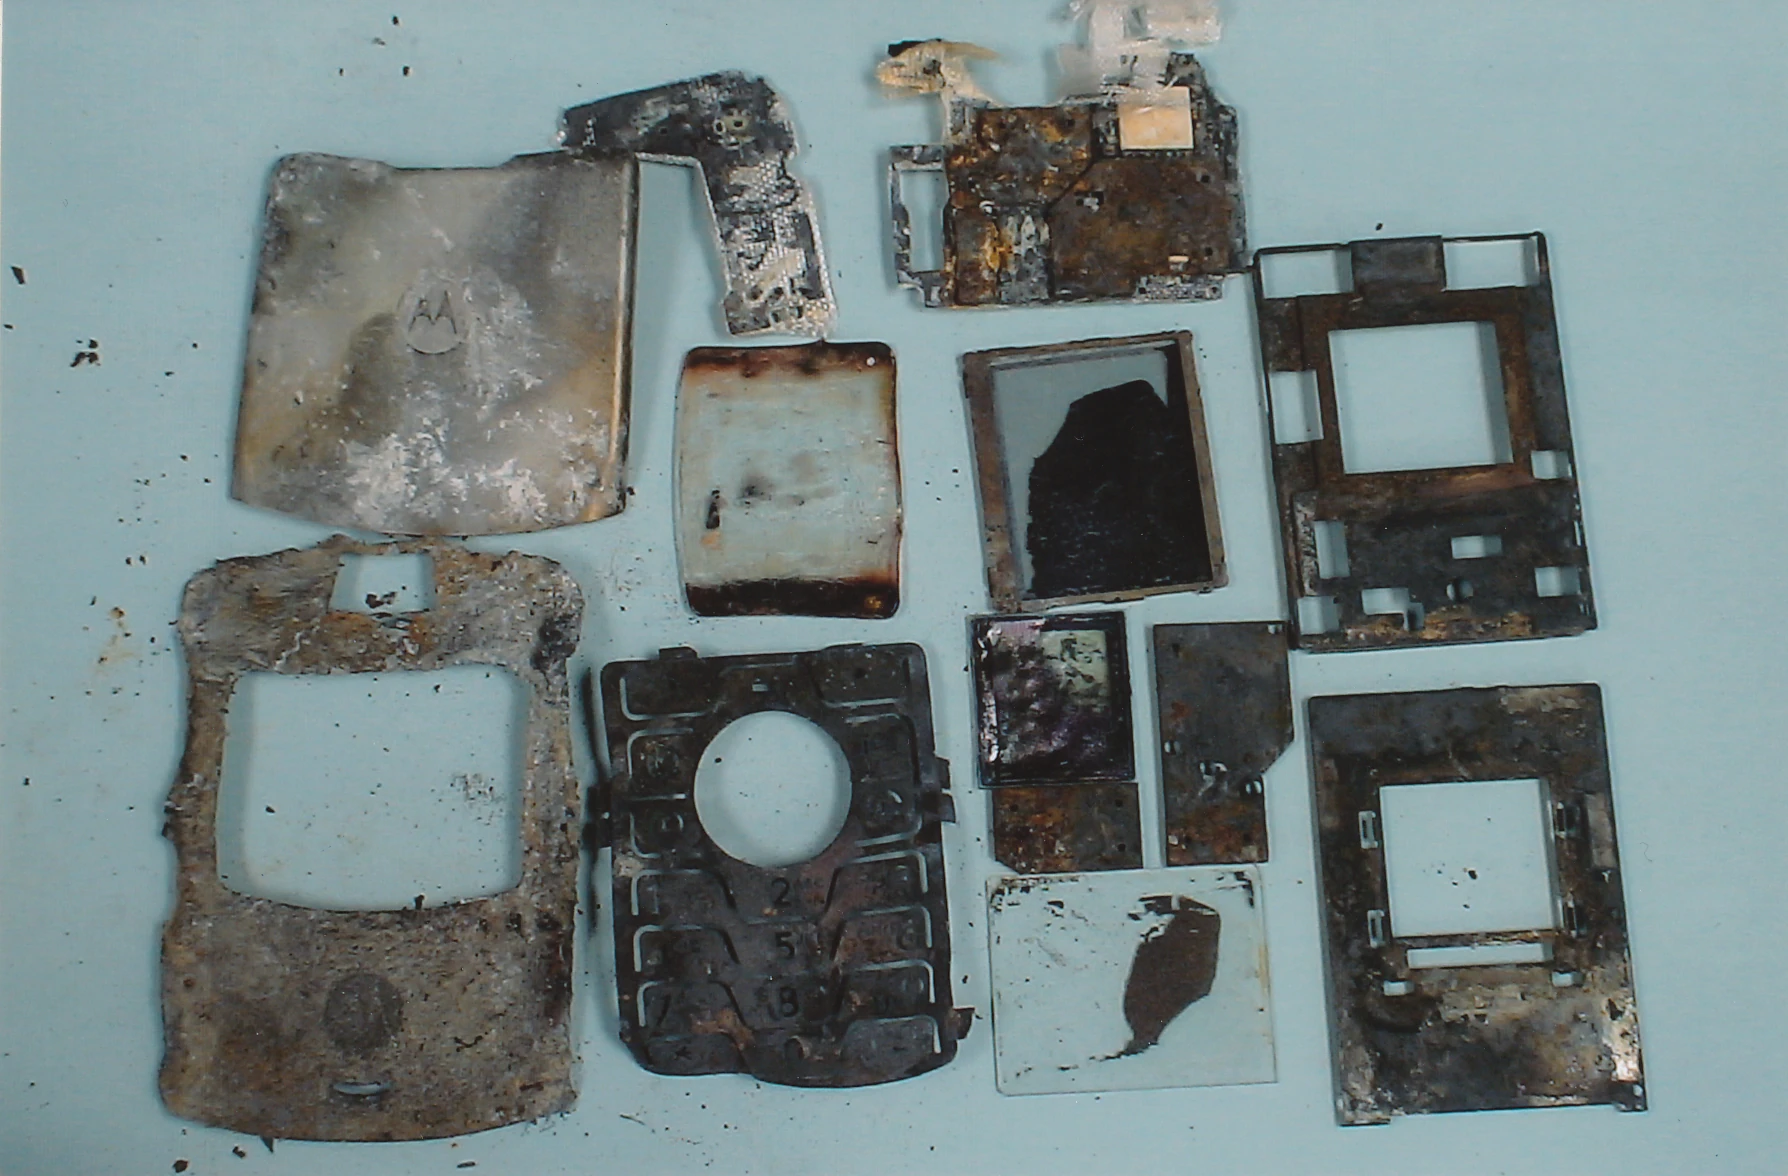
|
| 413 | Burned Motorola cell phone parts | 14 | 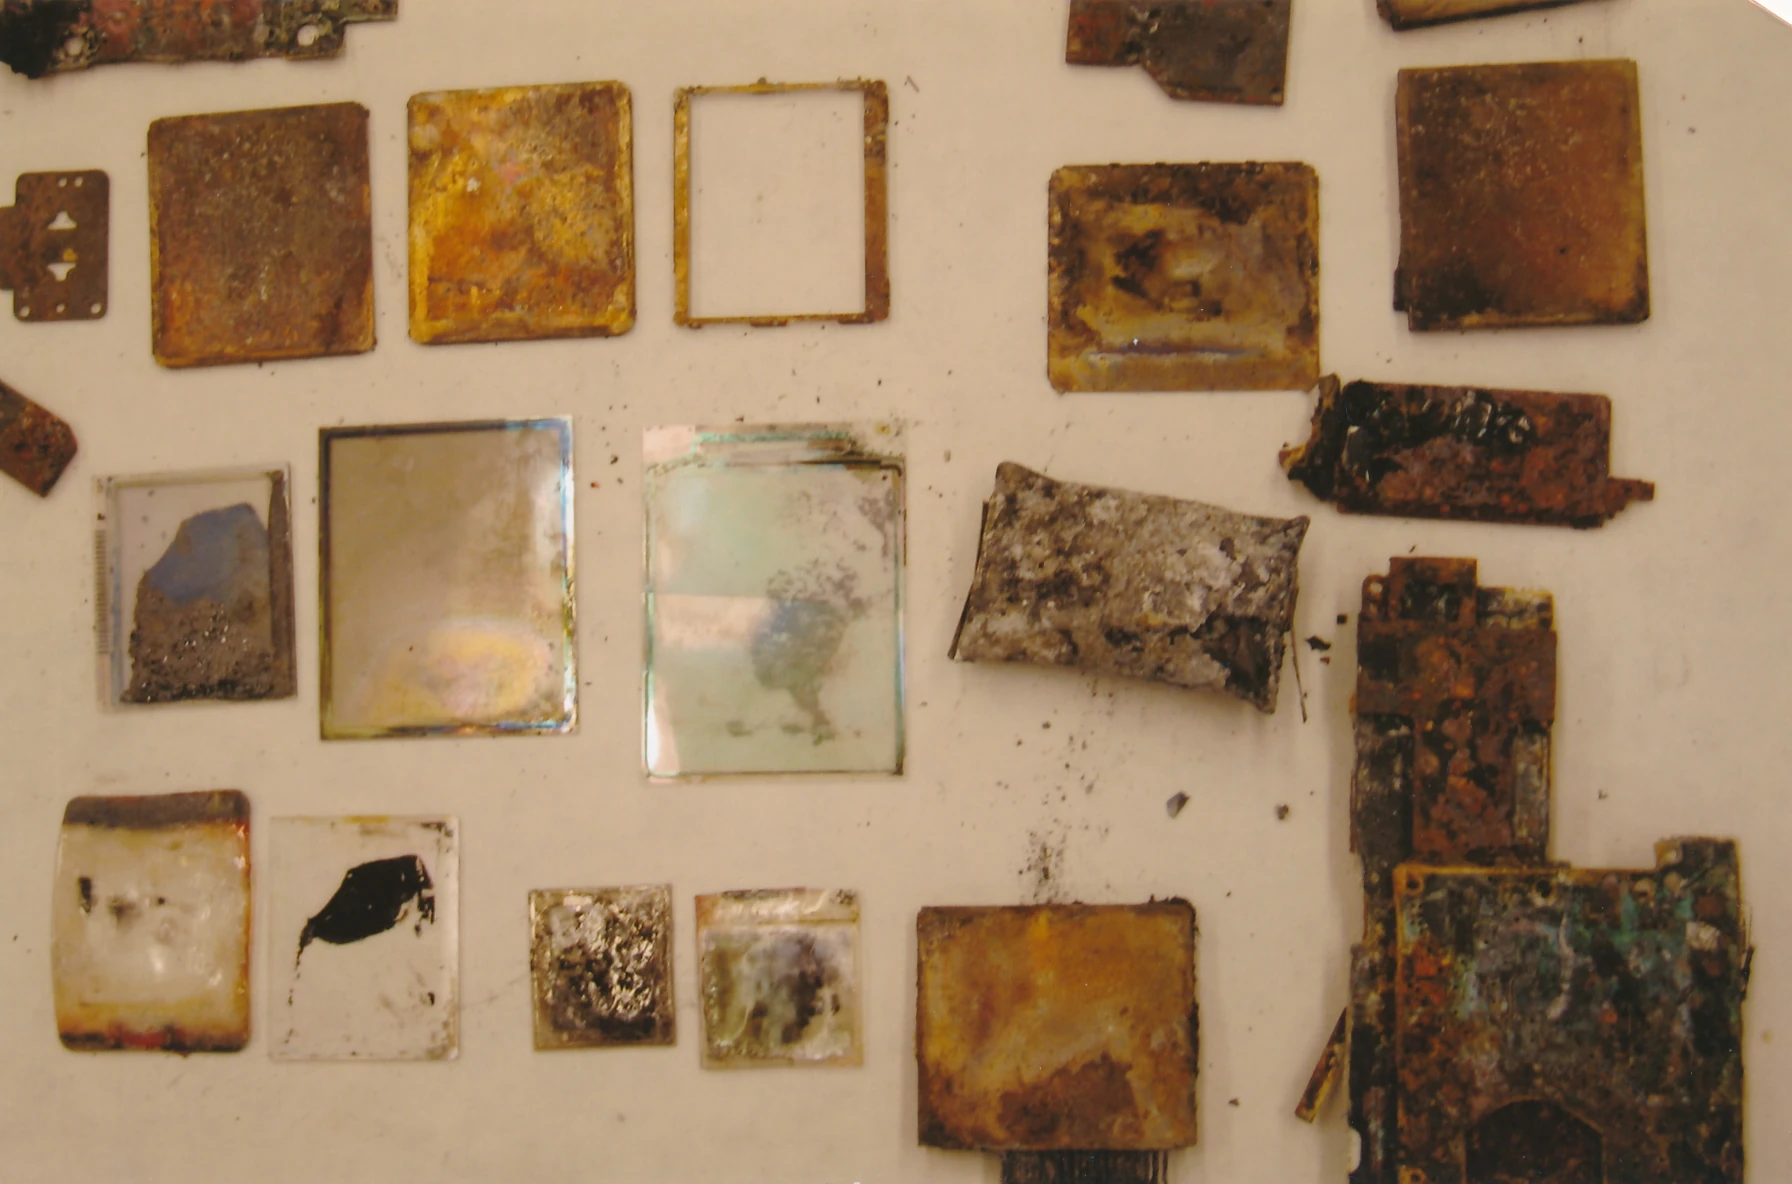
|
| 421 | Newhouse's .22 bullet shell casing comparison | 14 | 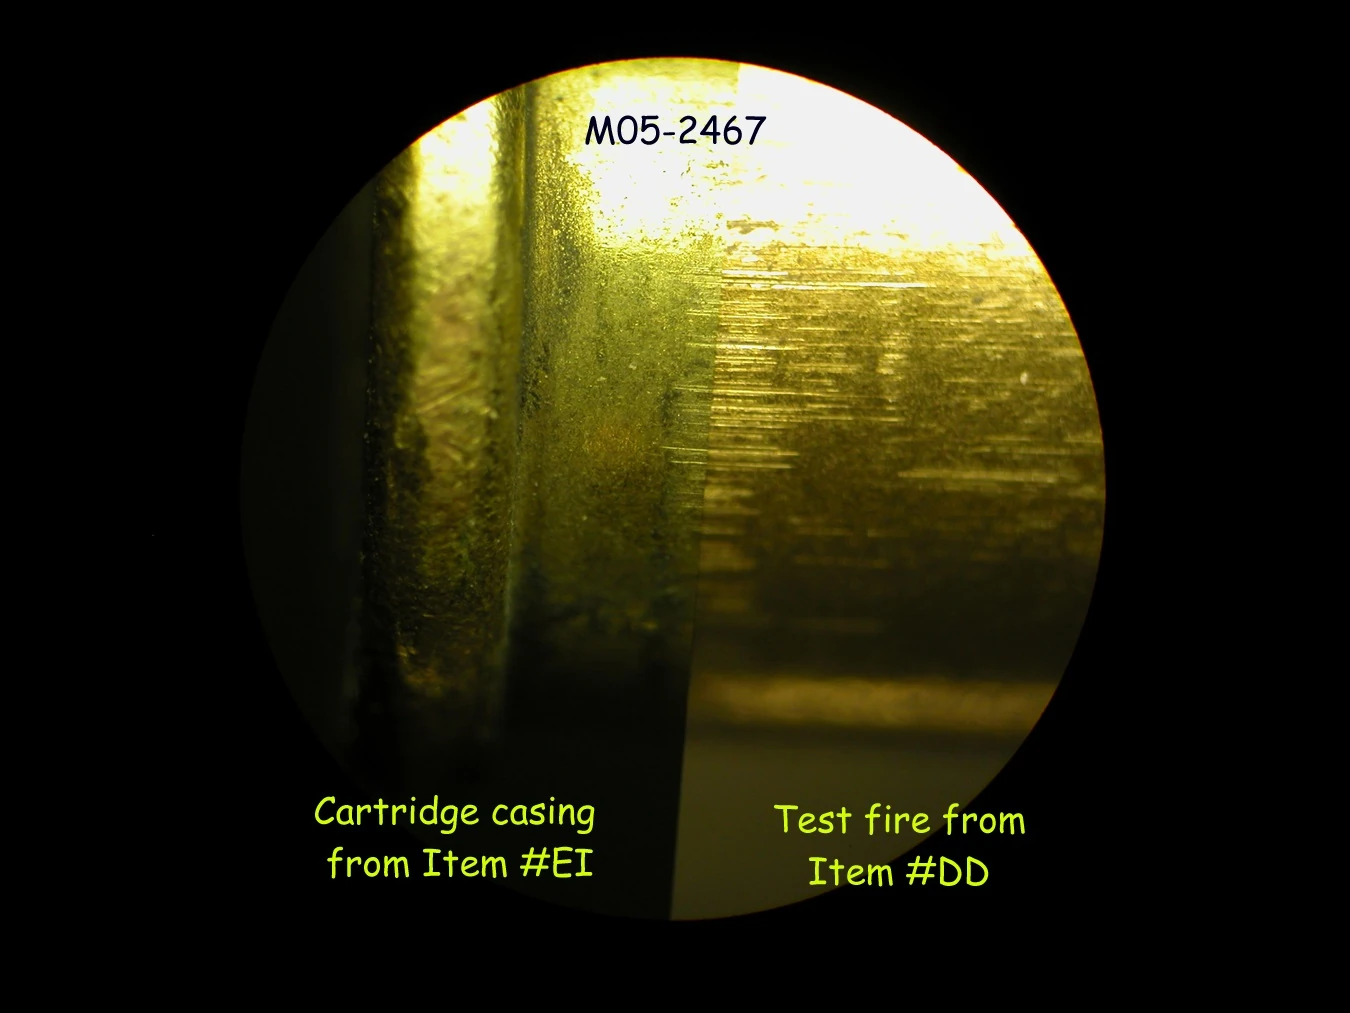
|
| 422 | Newhouse's .22 bullet shell casing comparison | 14 | 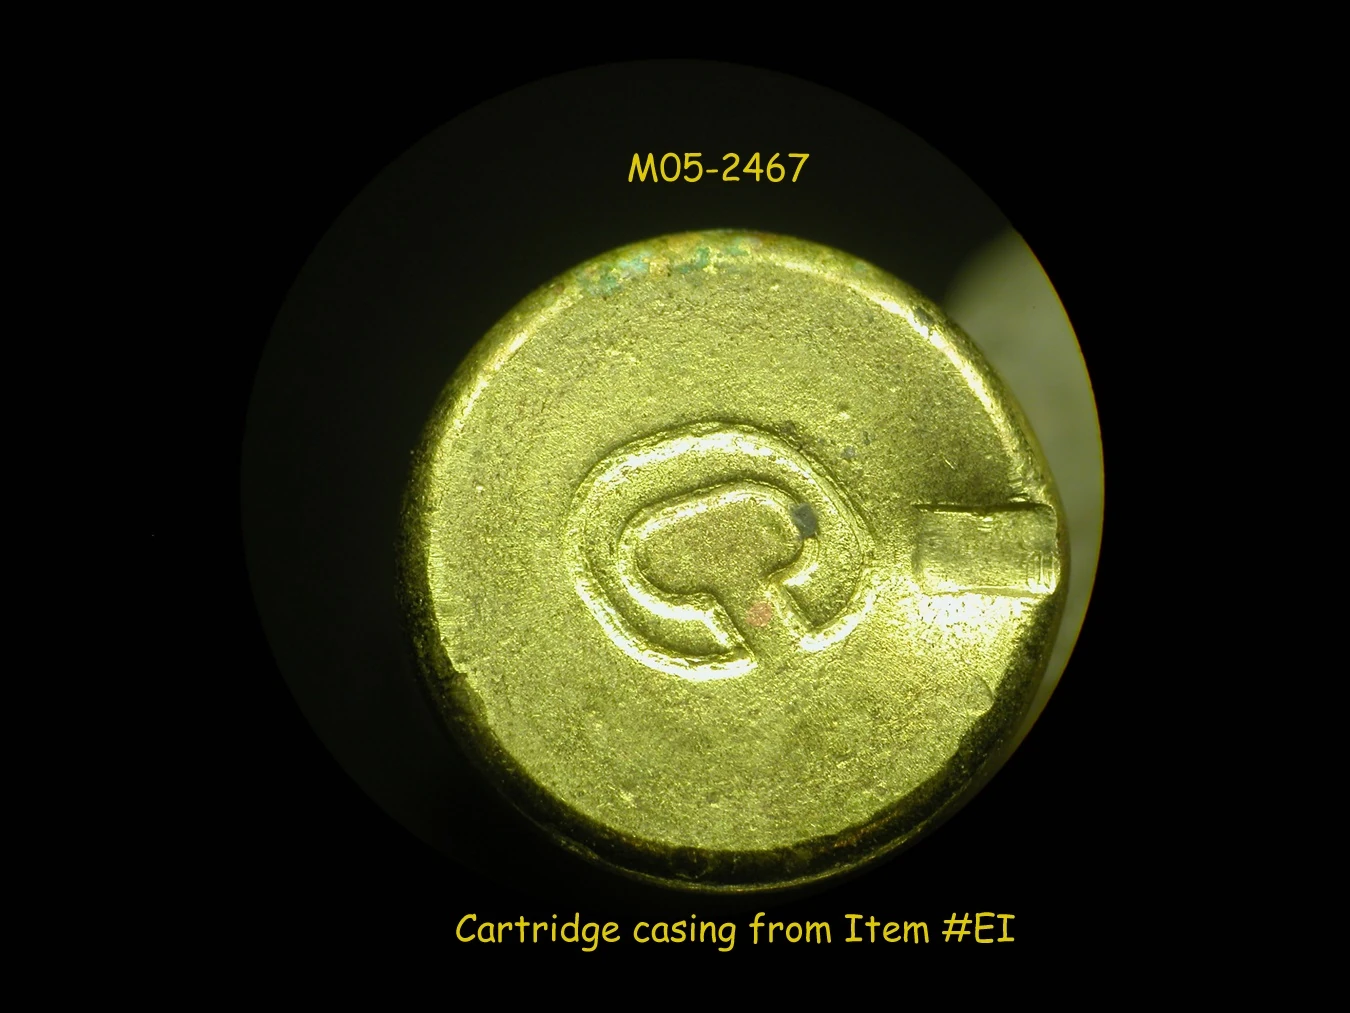
|
| 423 | Newhouse's .22 bullet shell casing comparison | 14 | 
|
| 424 | Newhouse's .22 bullet shell casing comparison | 14 | 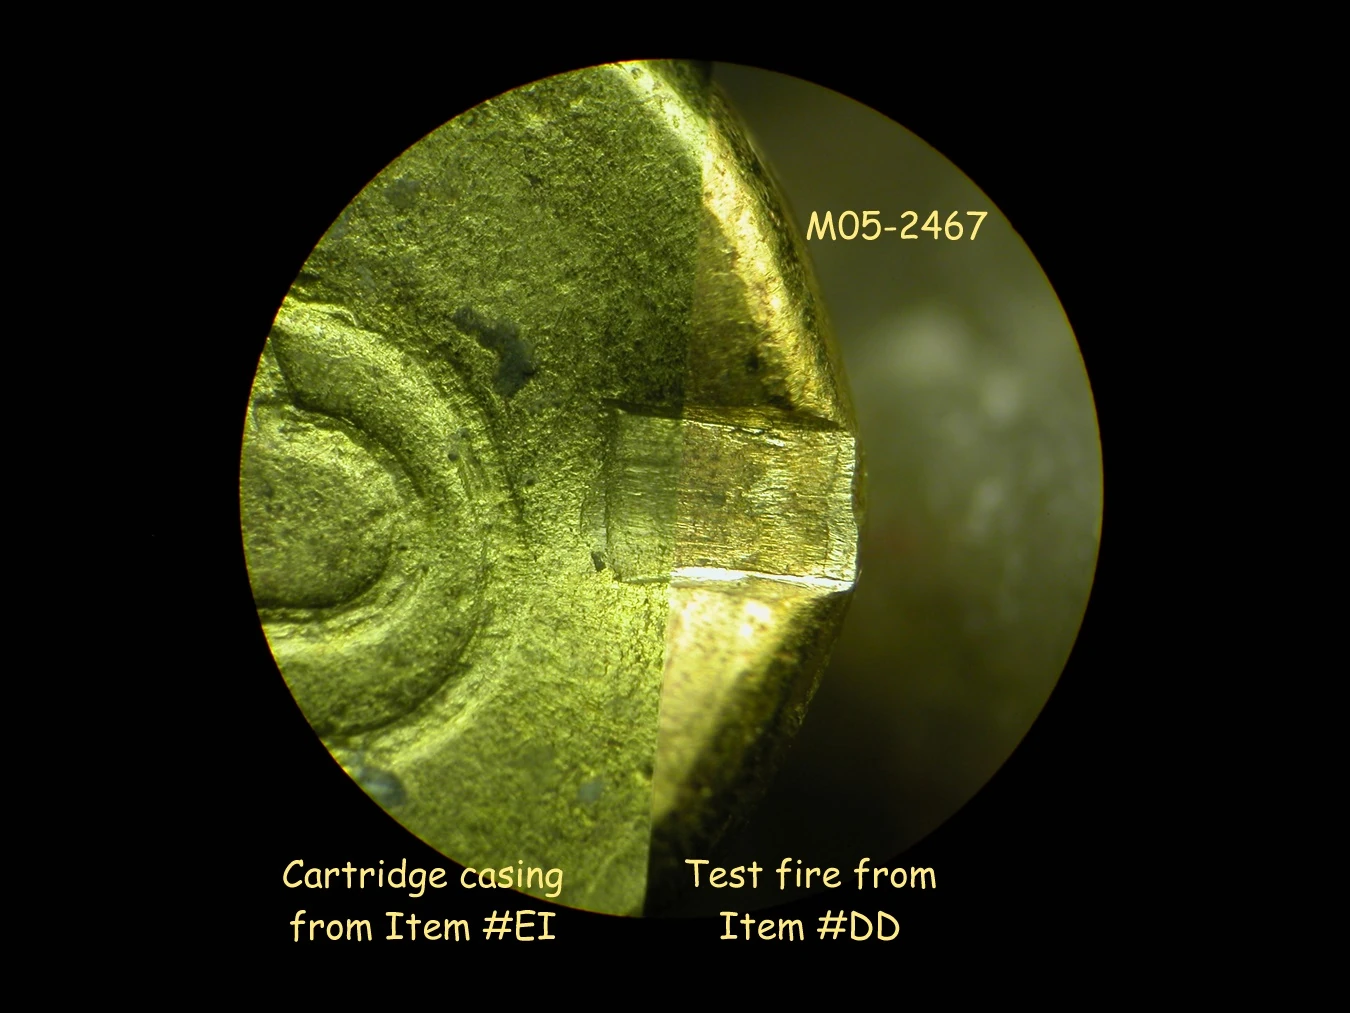
|
| 426 | Newhouse's .22 bullet comparison | 14 | 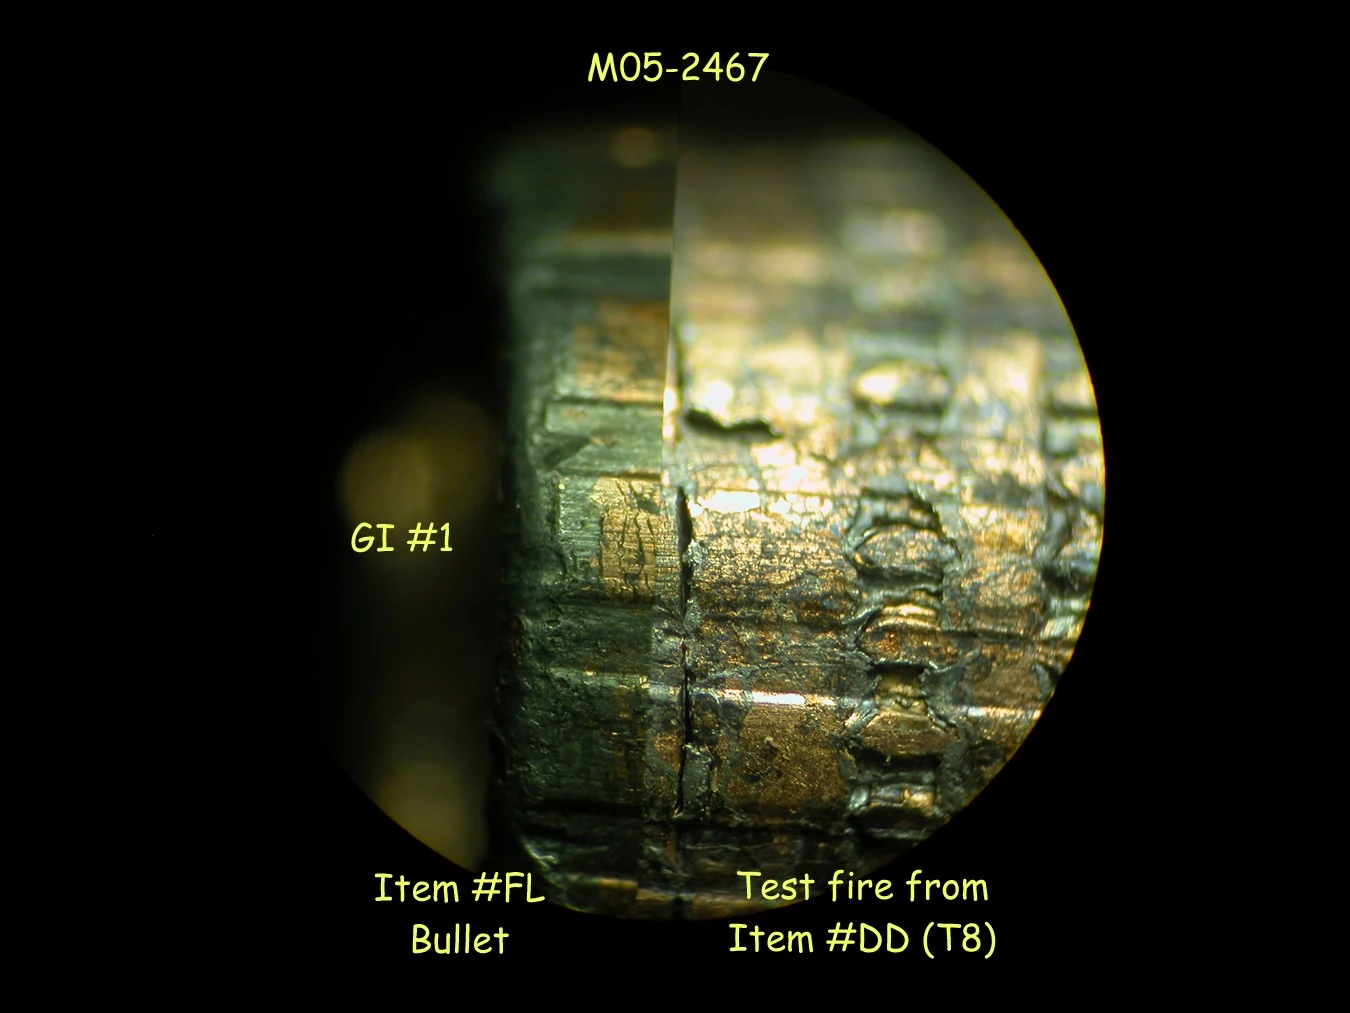
|
| 427 | Newhouse's .22 bullet comparison | 14 | 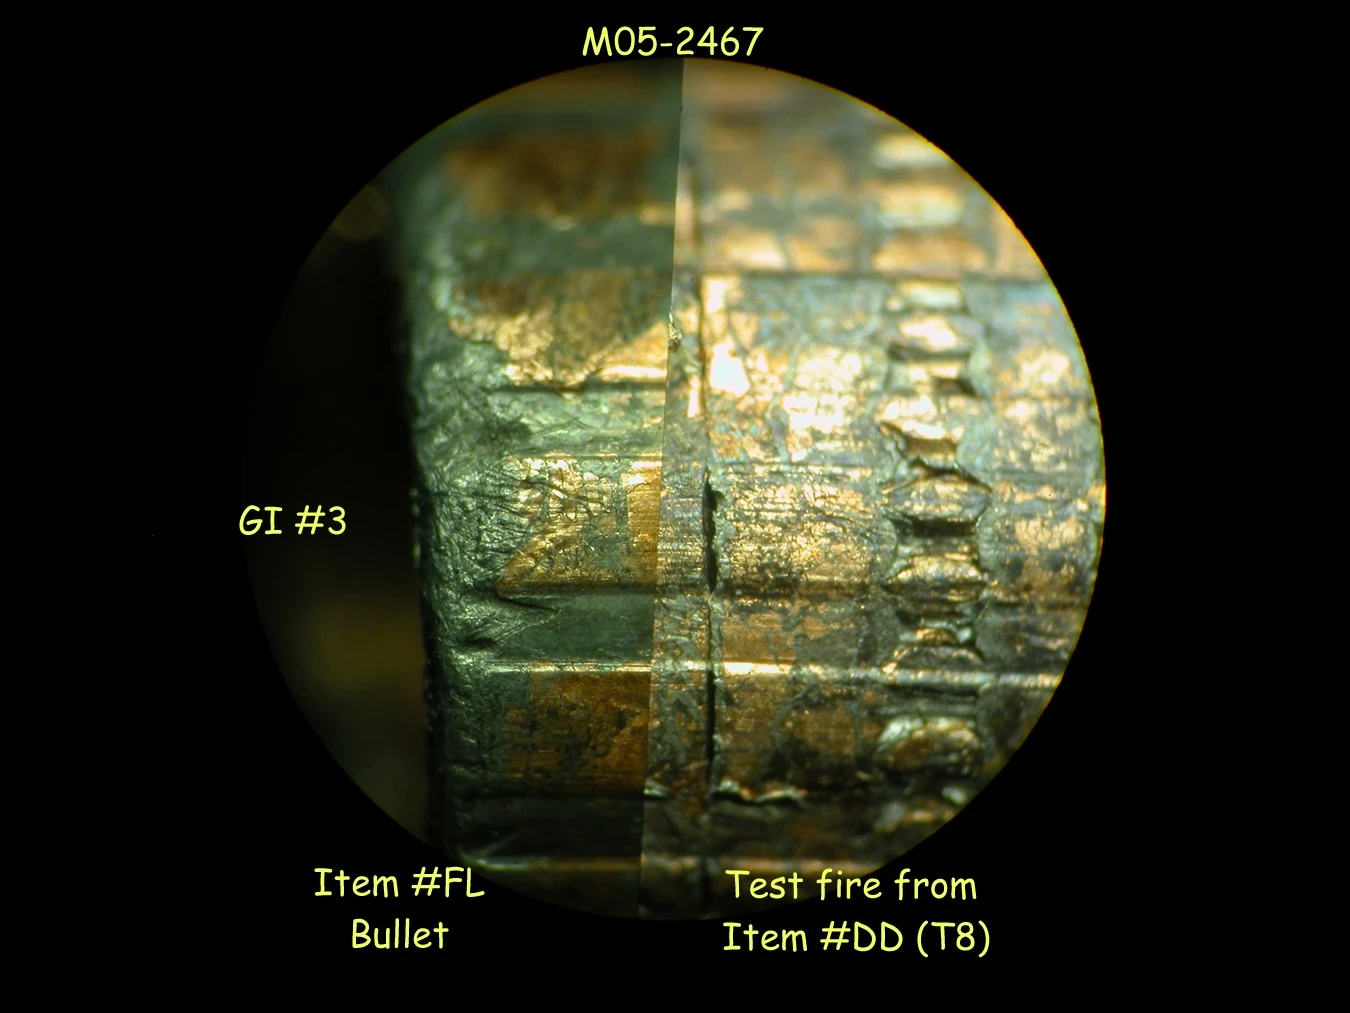
|
| 428 | Newhouse's .22 bullet comparison | 14 | 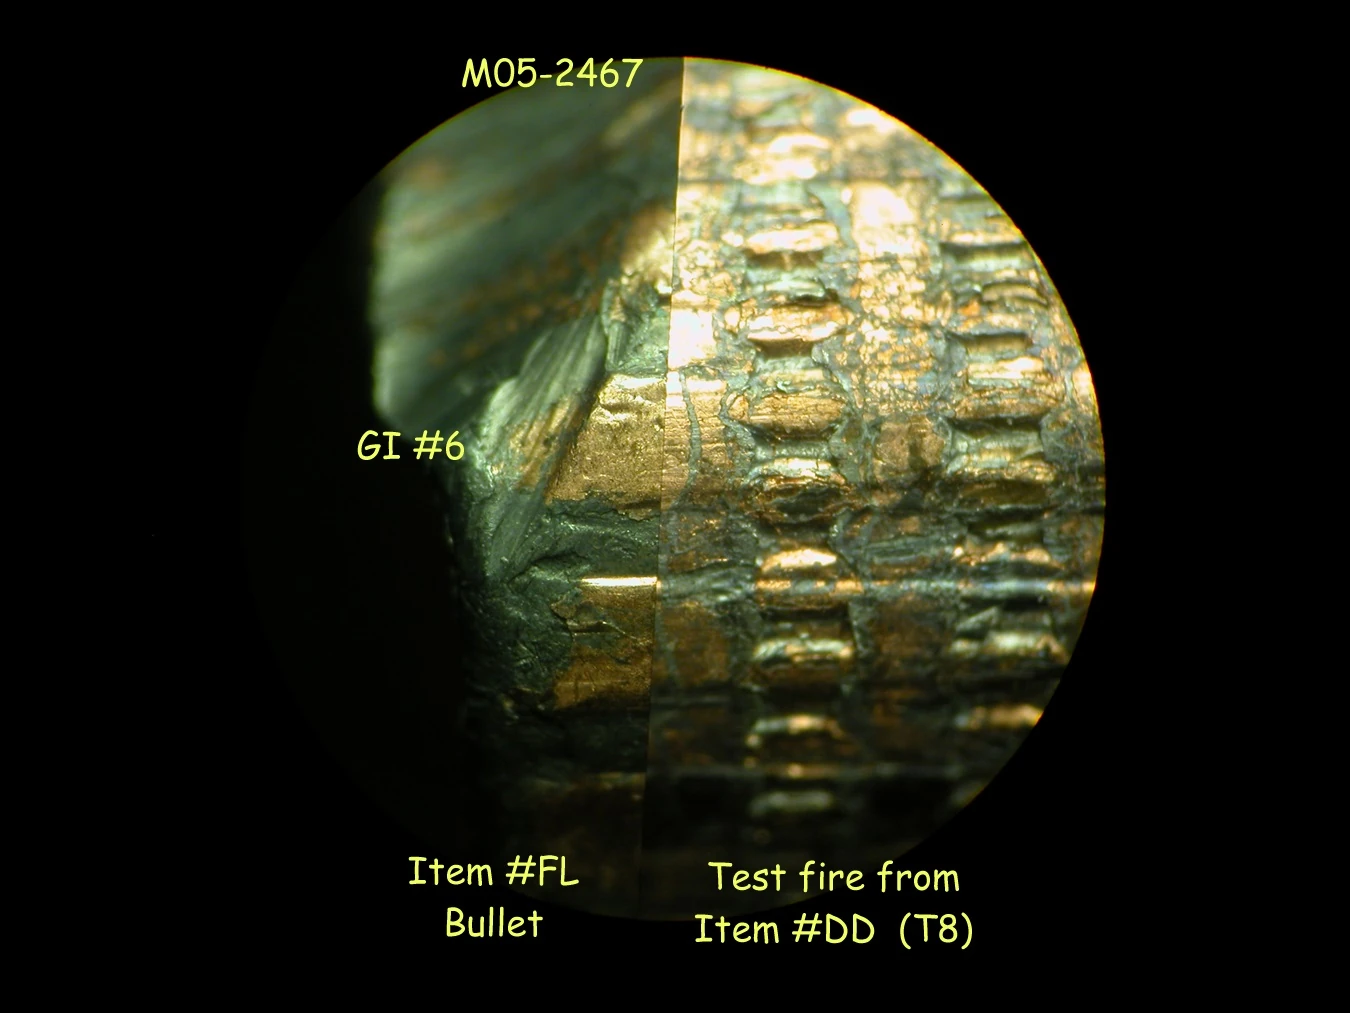
|
| 429 | Cranial bone fragment (partial bullet hole, outer surface) | 15 | 
|
| 430 | Cranial bone fragment (partial bullet hole, inner surface) | 15 | 
|
| 431 | X-ray of charred bone fragments | 15 | 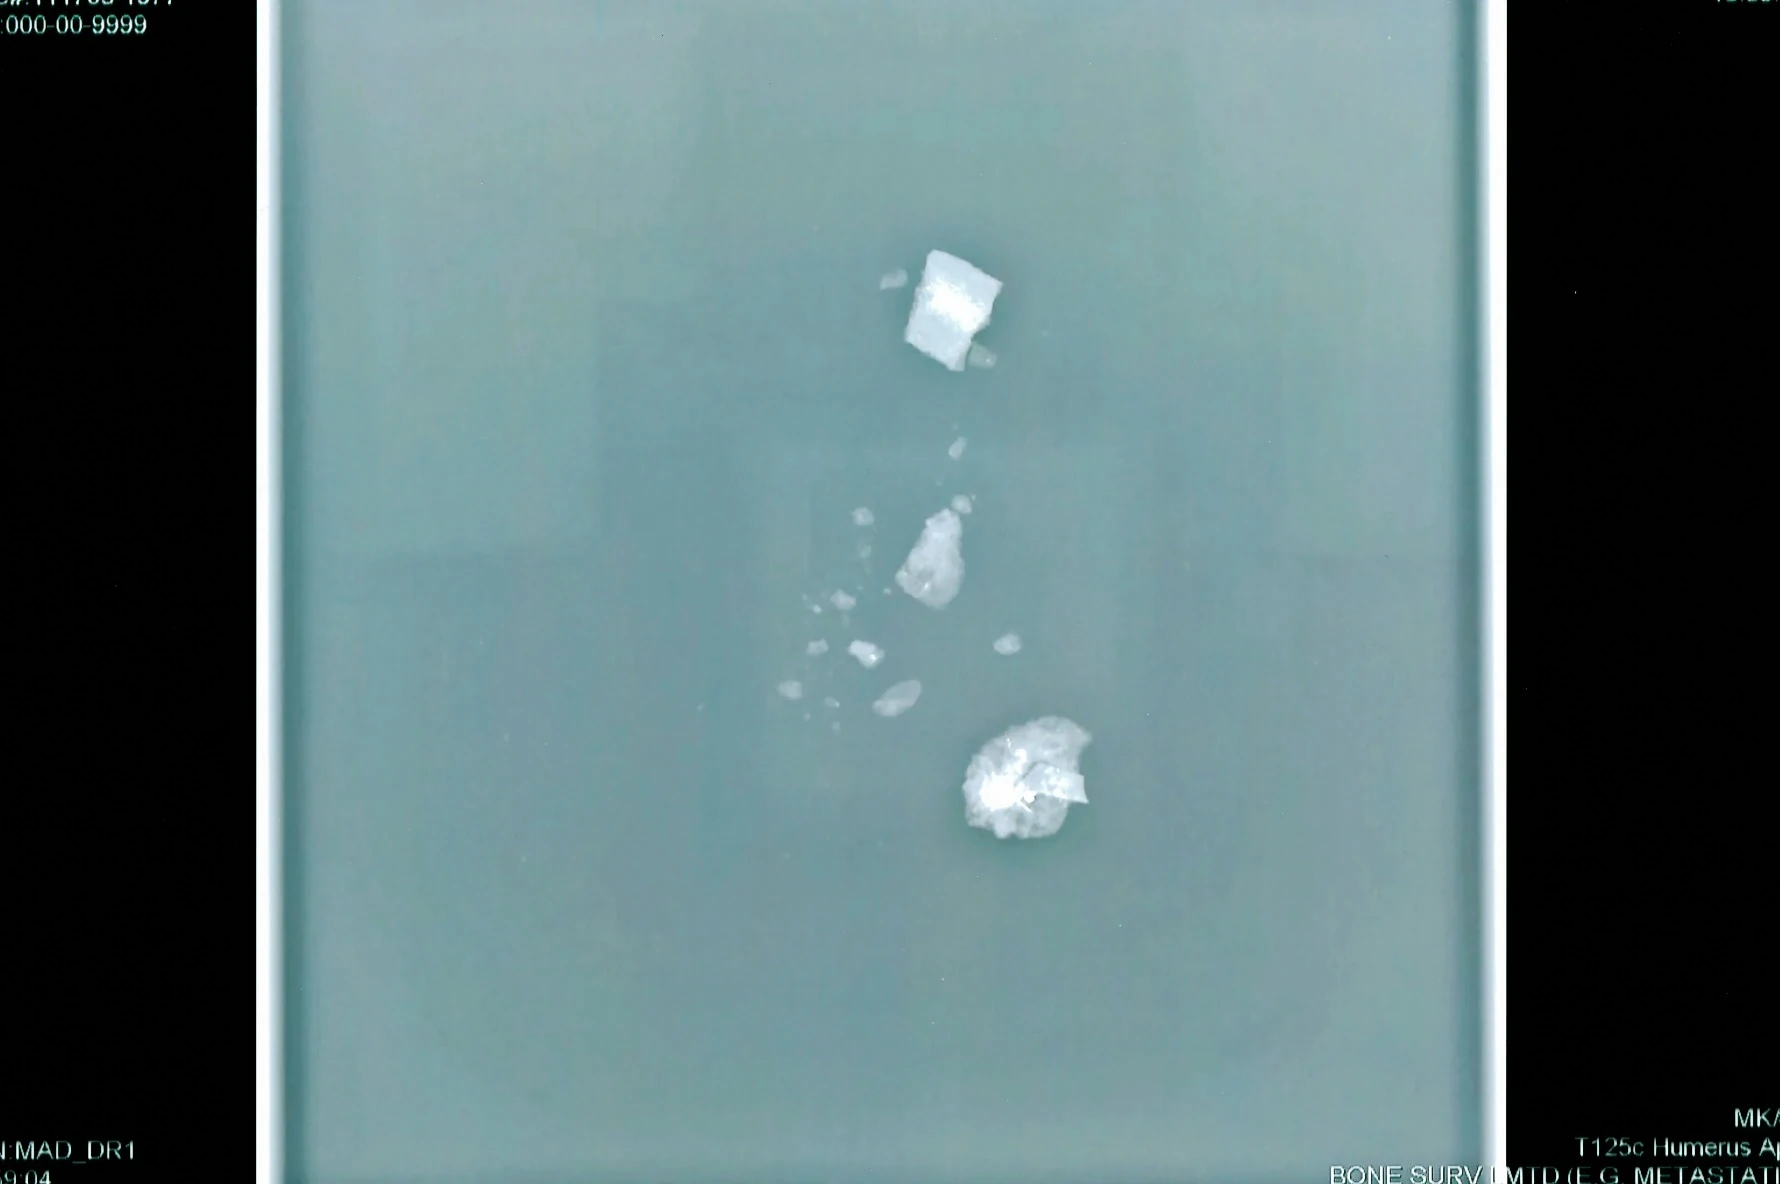
|
| 447 | Door to Clerk of Circuit Court's Office | 17 | 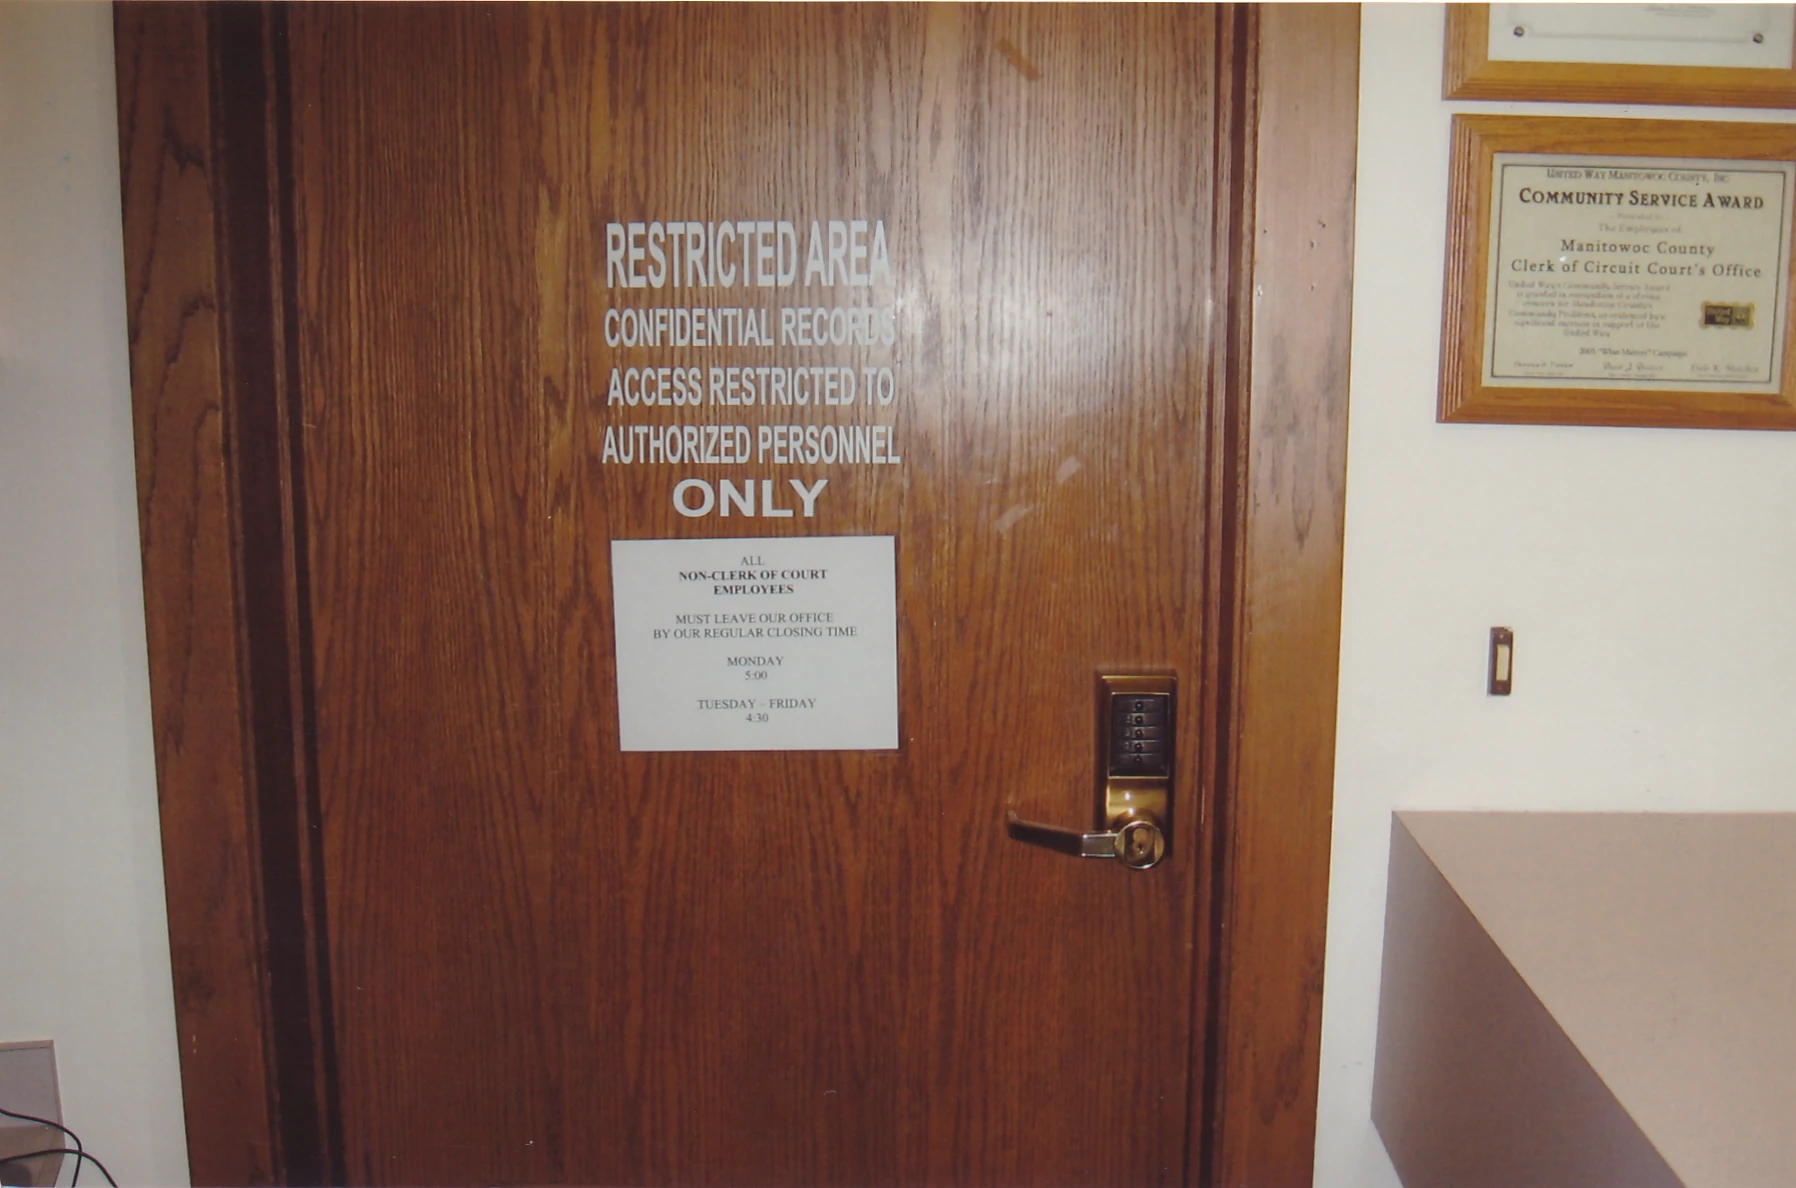
|
| 448 | Package with evidence from 1985 case | 17 | 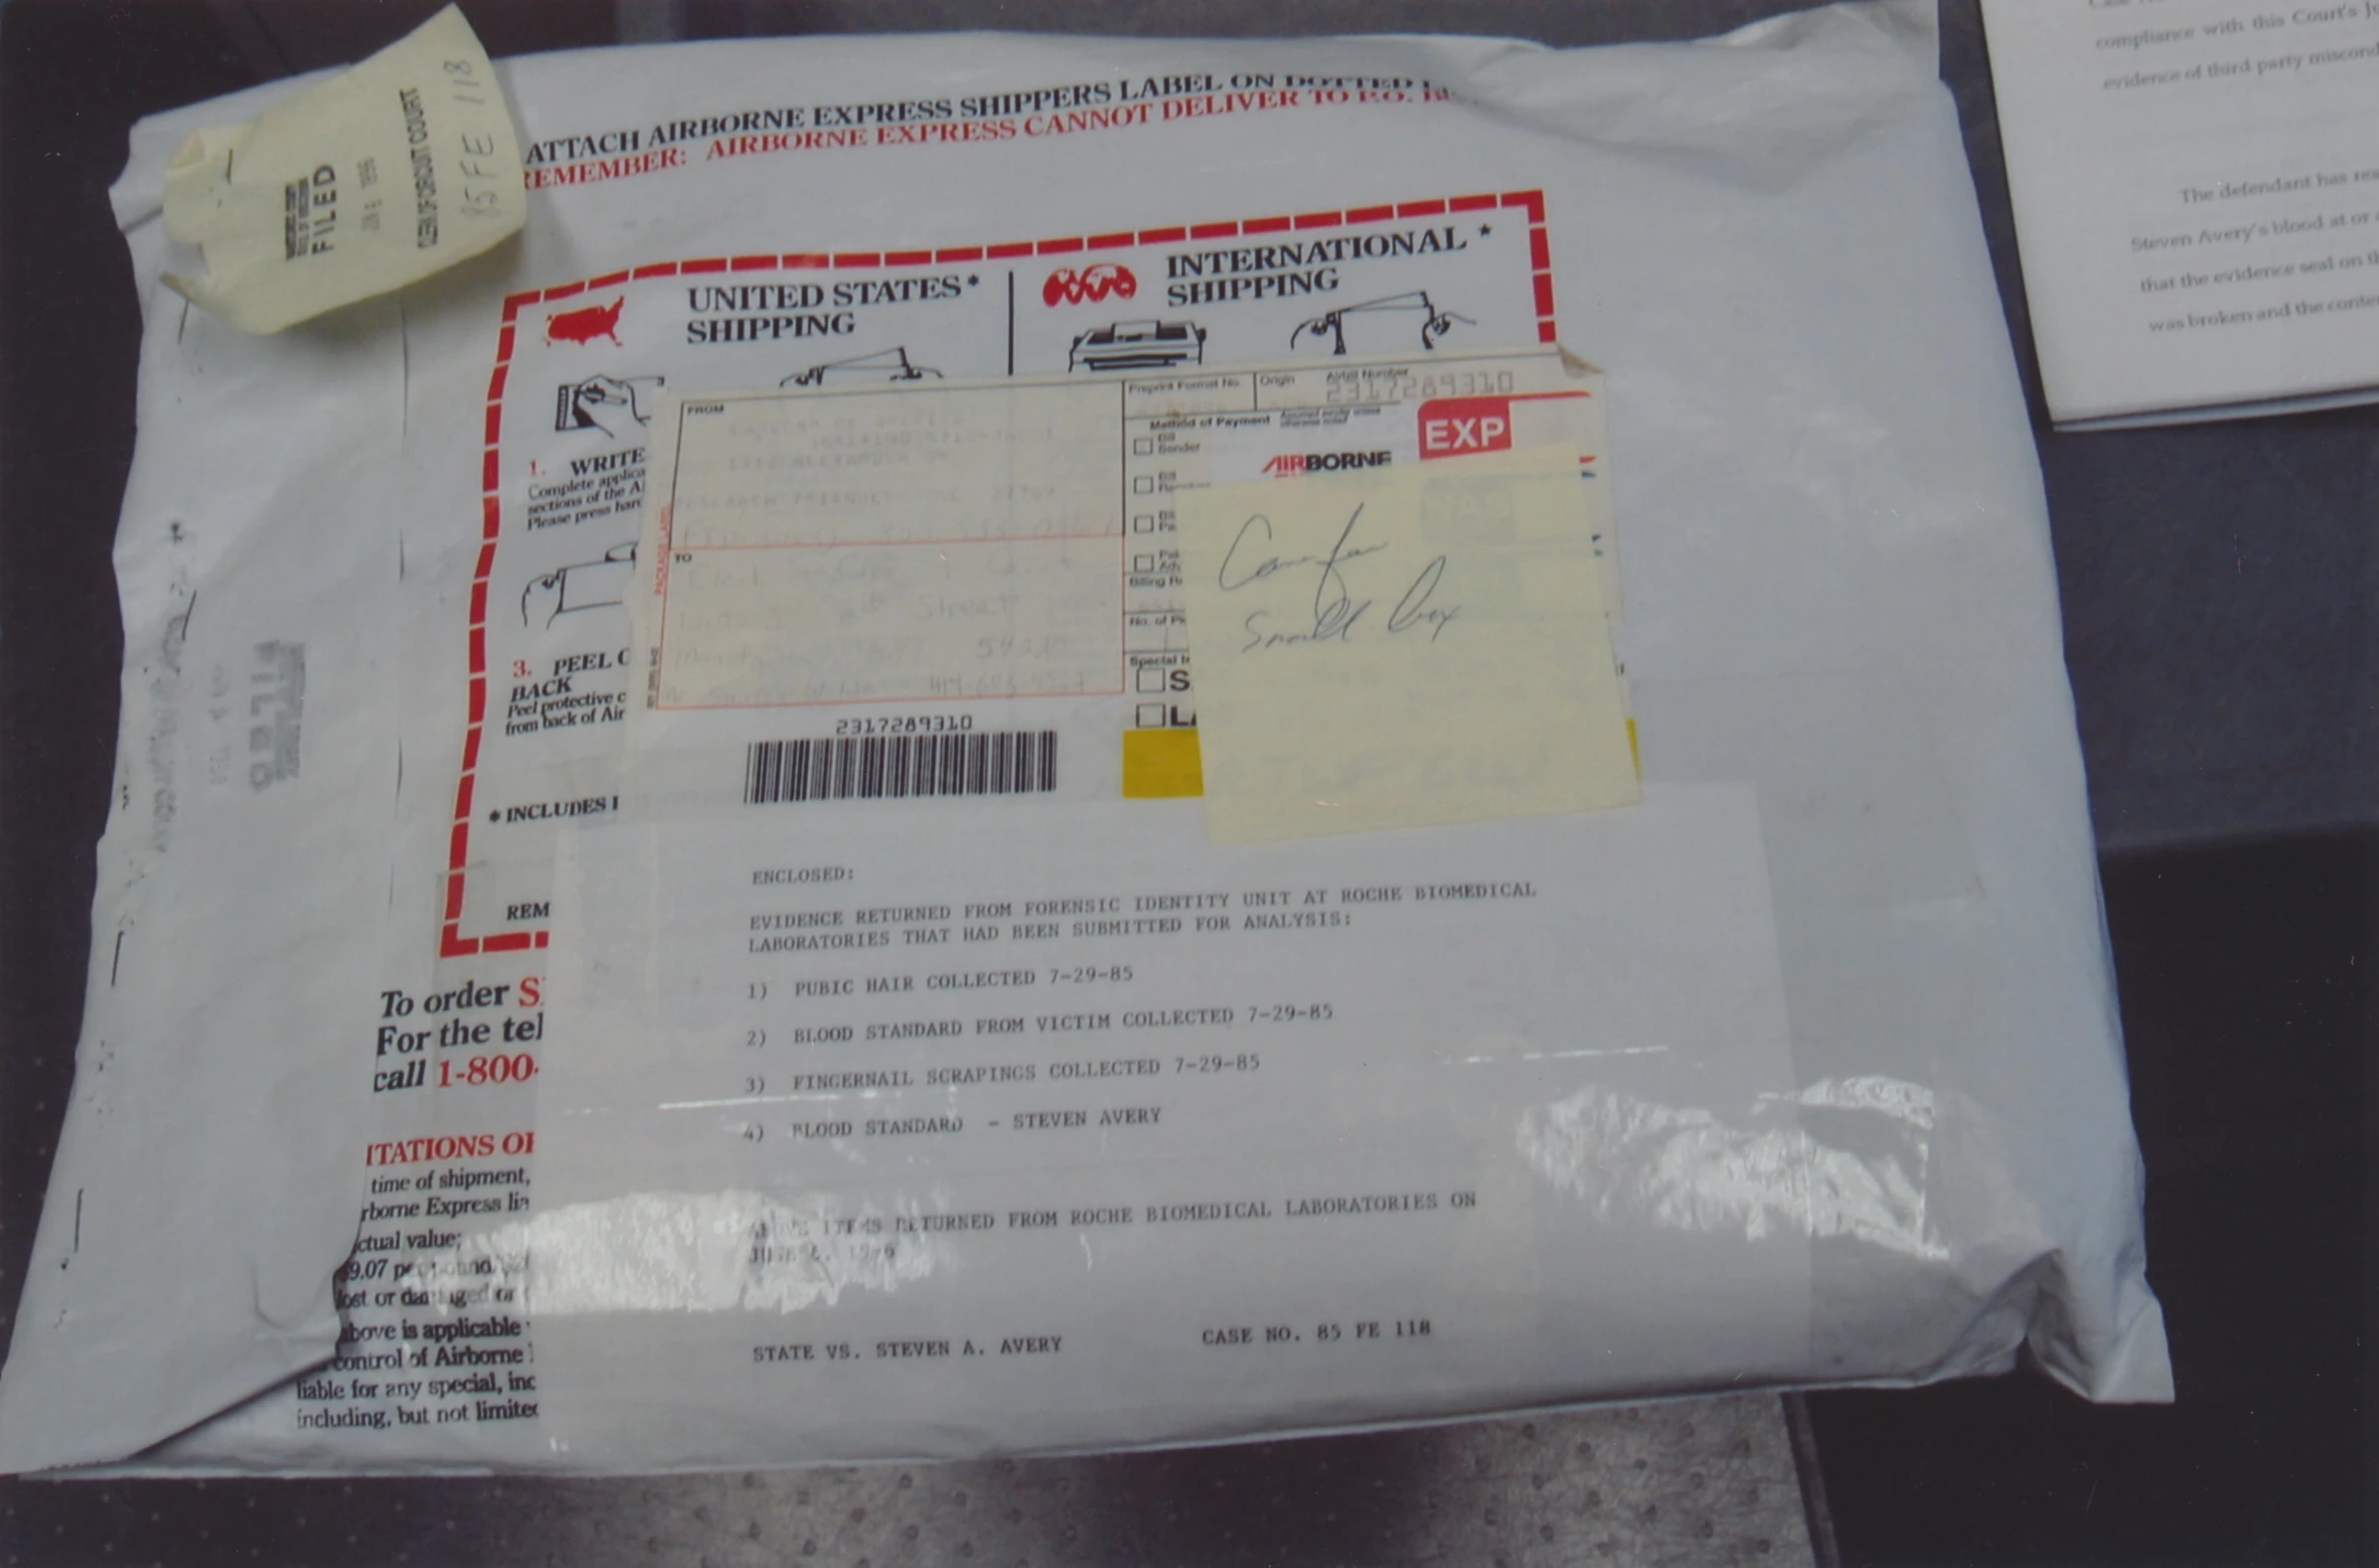
|
| 449 | Label on package from exhibit 448 | 17 | 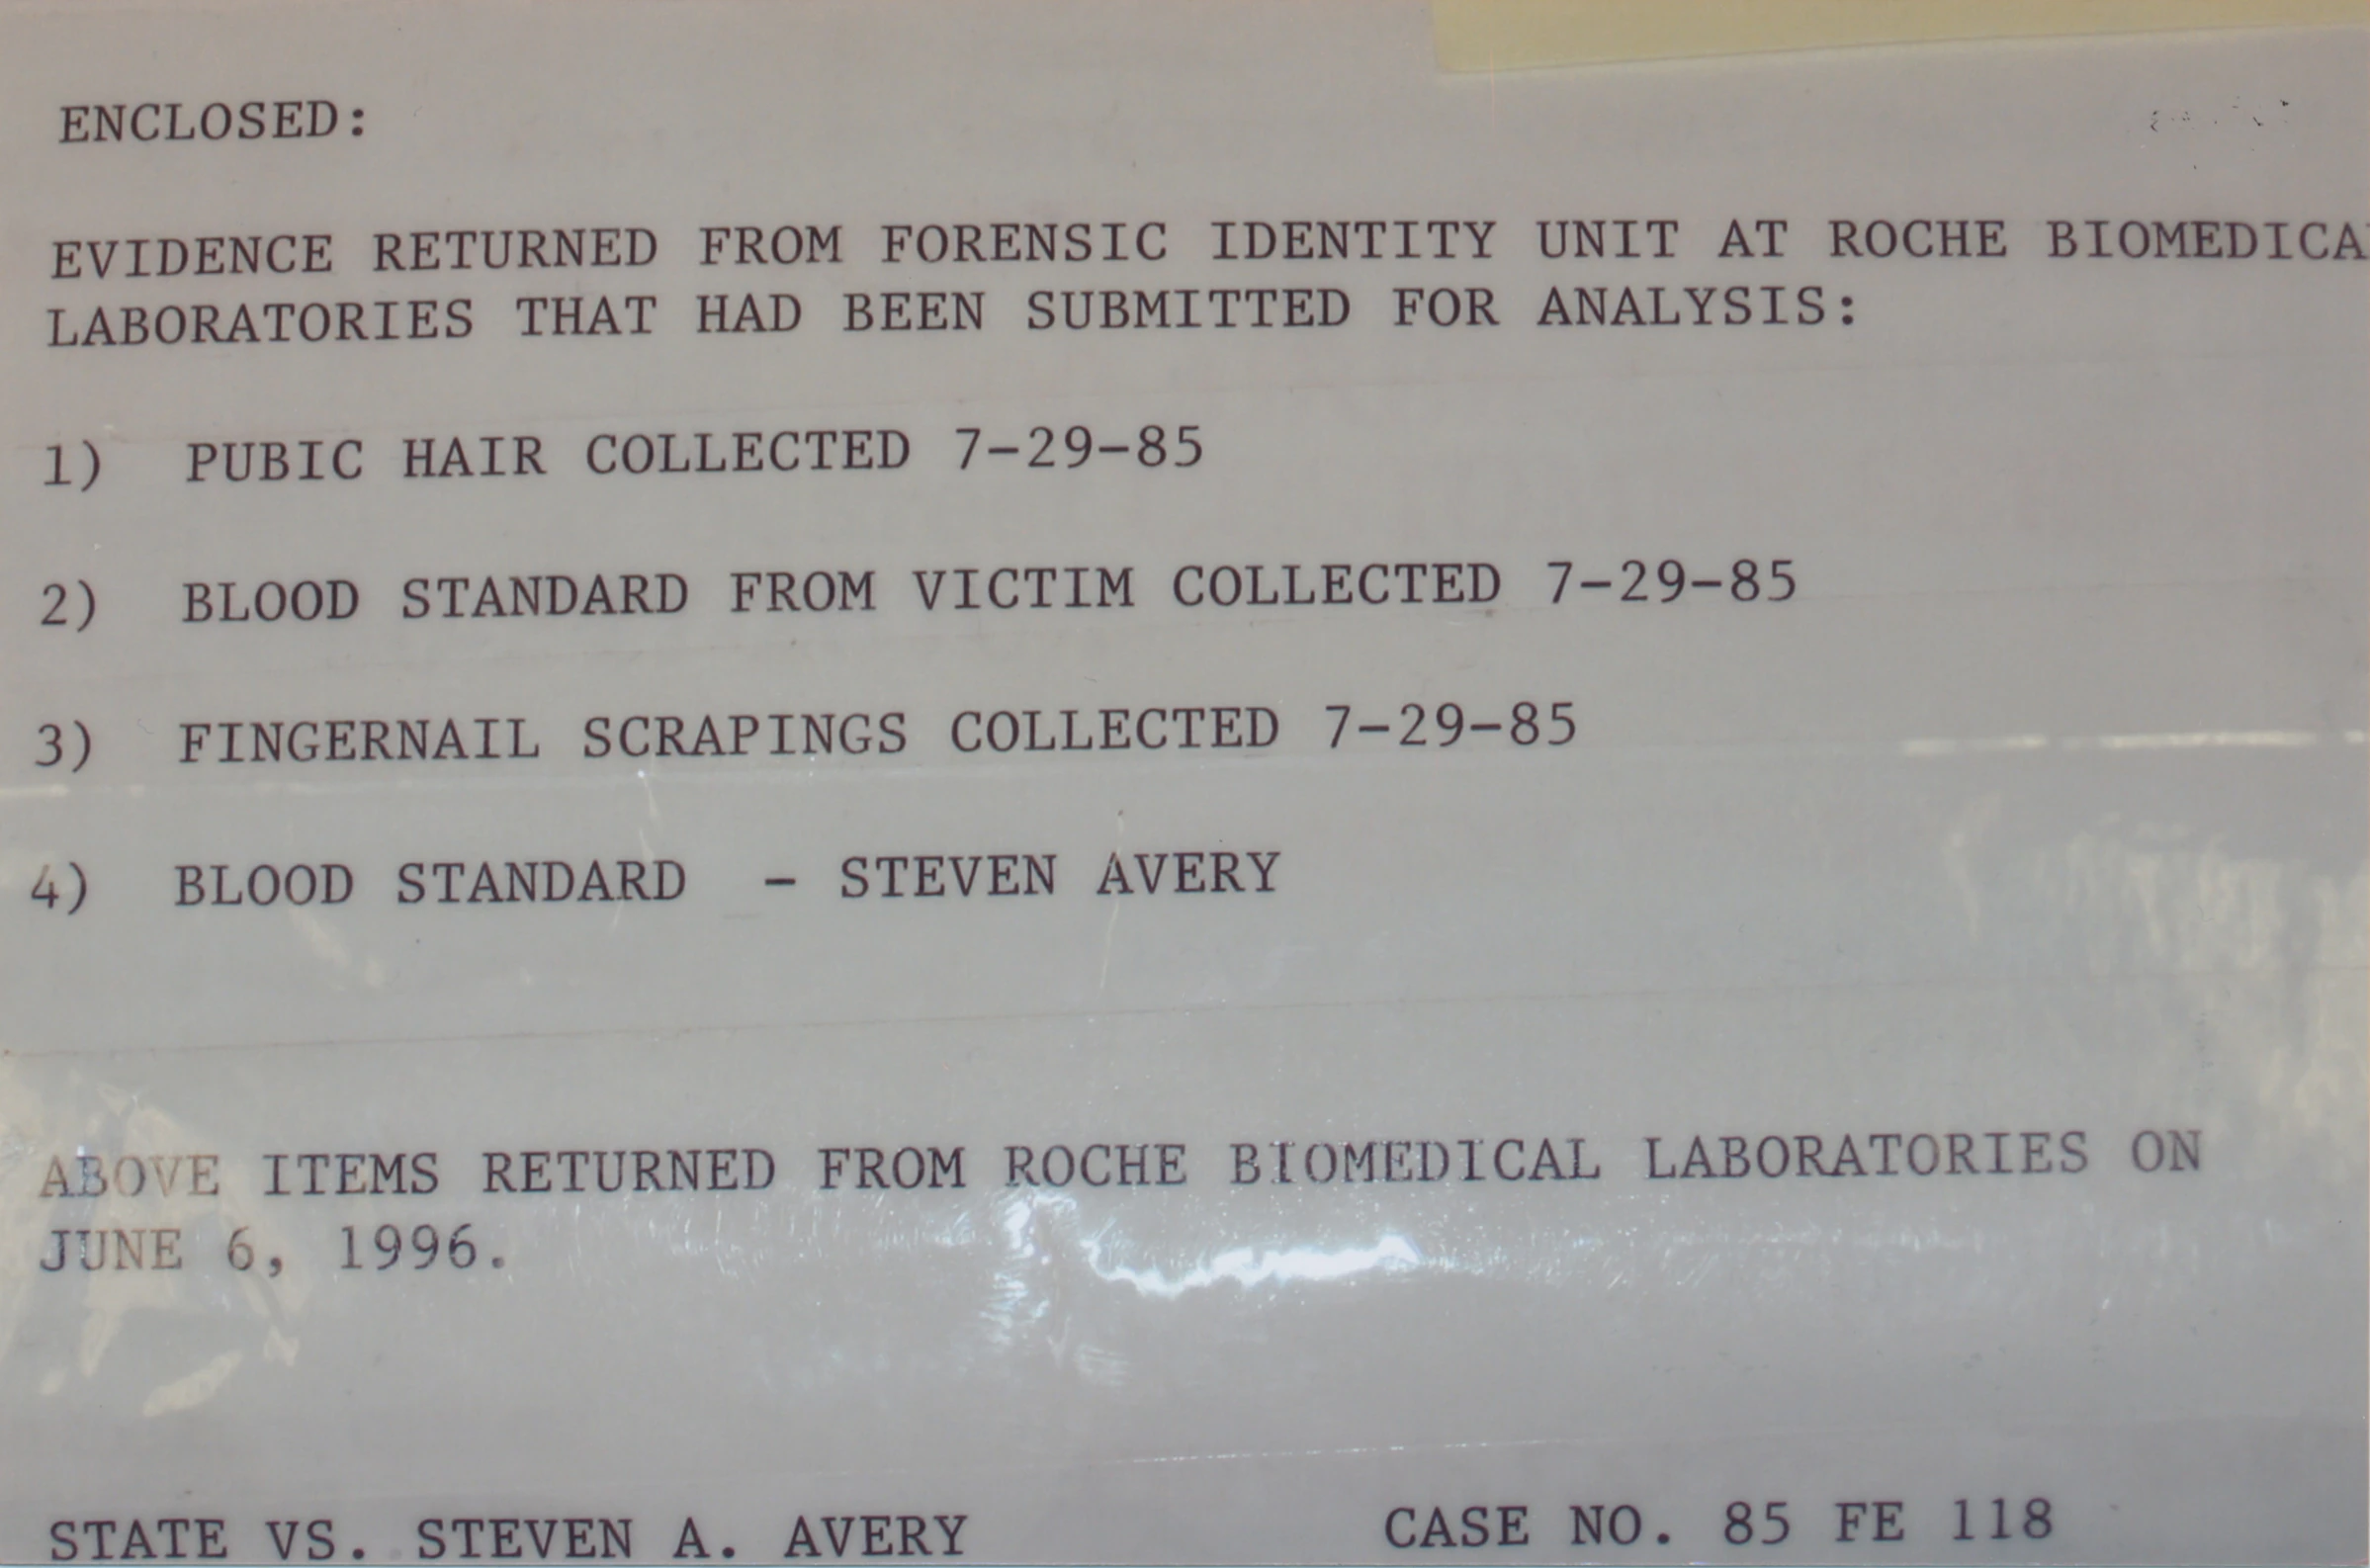
|
| 450 | Box holding the 1996 blood vial | 17 | 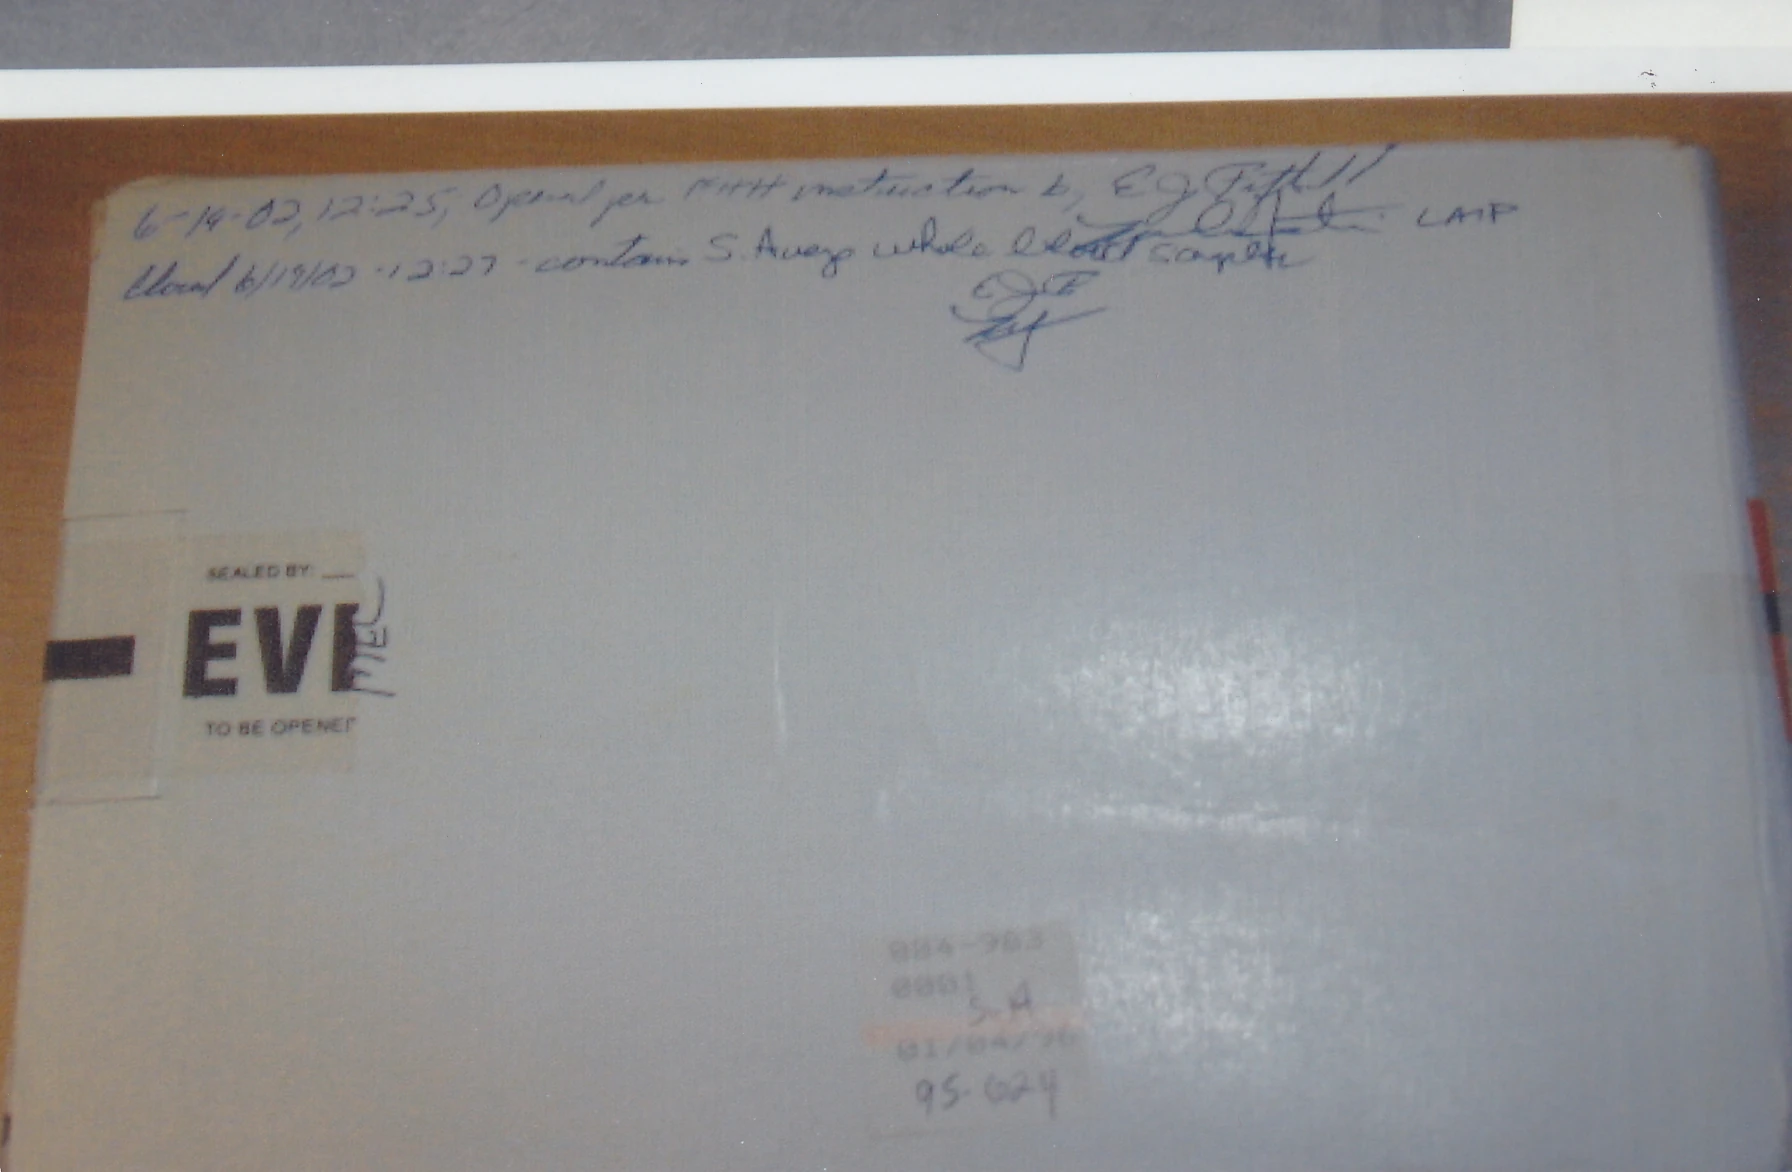
|
| 451 | Box holding the 1996 blood vial | 17 | 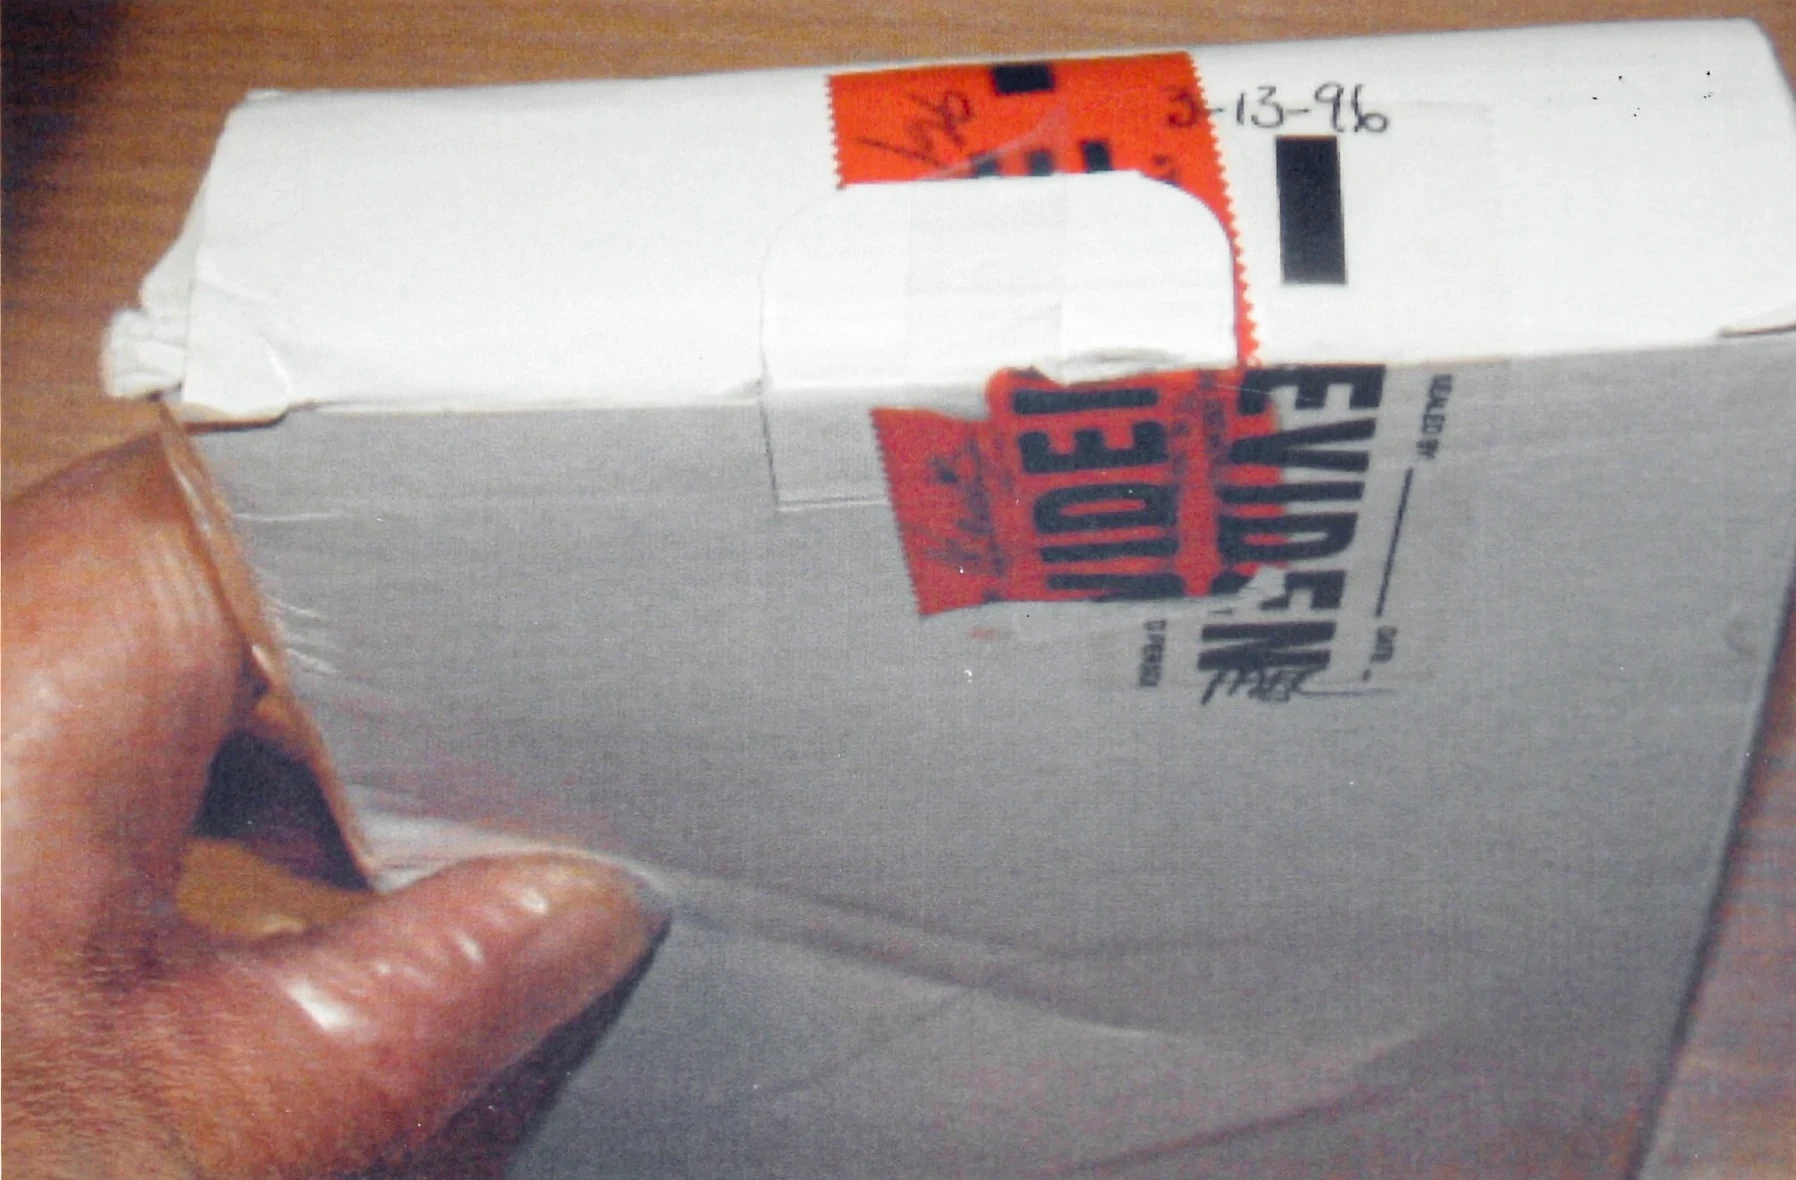
|
| 458 | Swab from ignition area of RAV4 | 17 | 
|
| 459 | Swab from RAV4 rear passenger door | 17 | 
|
| 460 | Swab from the CD case found in the RAV4 | 17 | 
|
| 461 | Control swabs from the ignition area of the RAV4 | 17 | 
|
| 462 | Control swabs from the RAV4 rear passenger door | 17 | 
|
| 463 | Control swabs from the CD case found in the RAV4 | 17 | 
|
| 464 | Boxes containing 1985 case files | 17 | 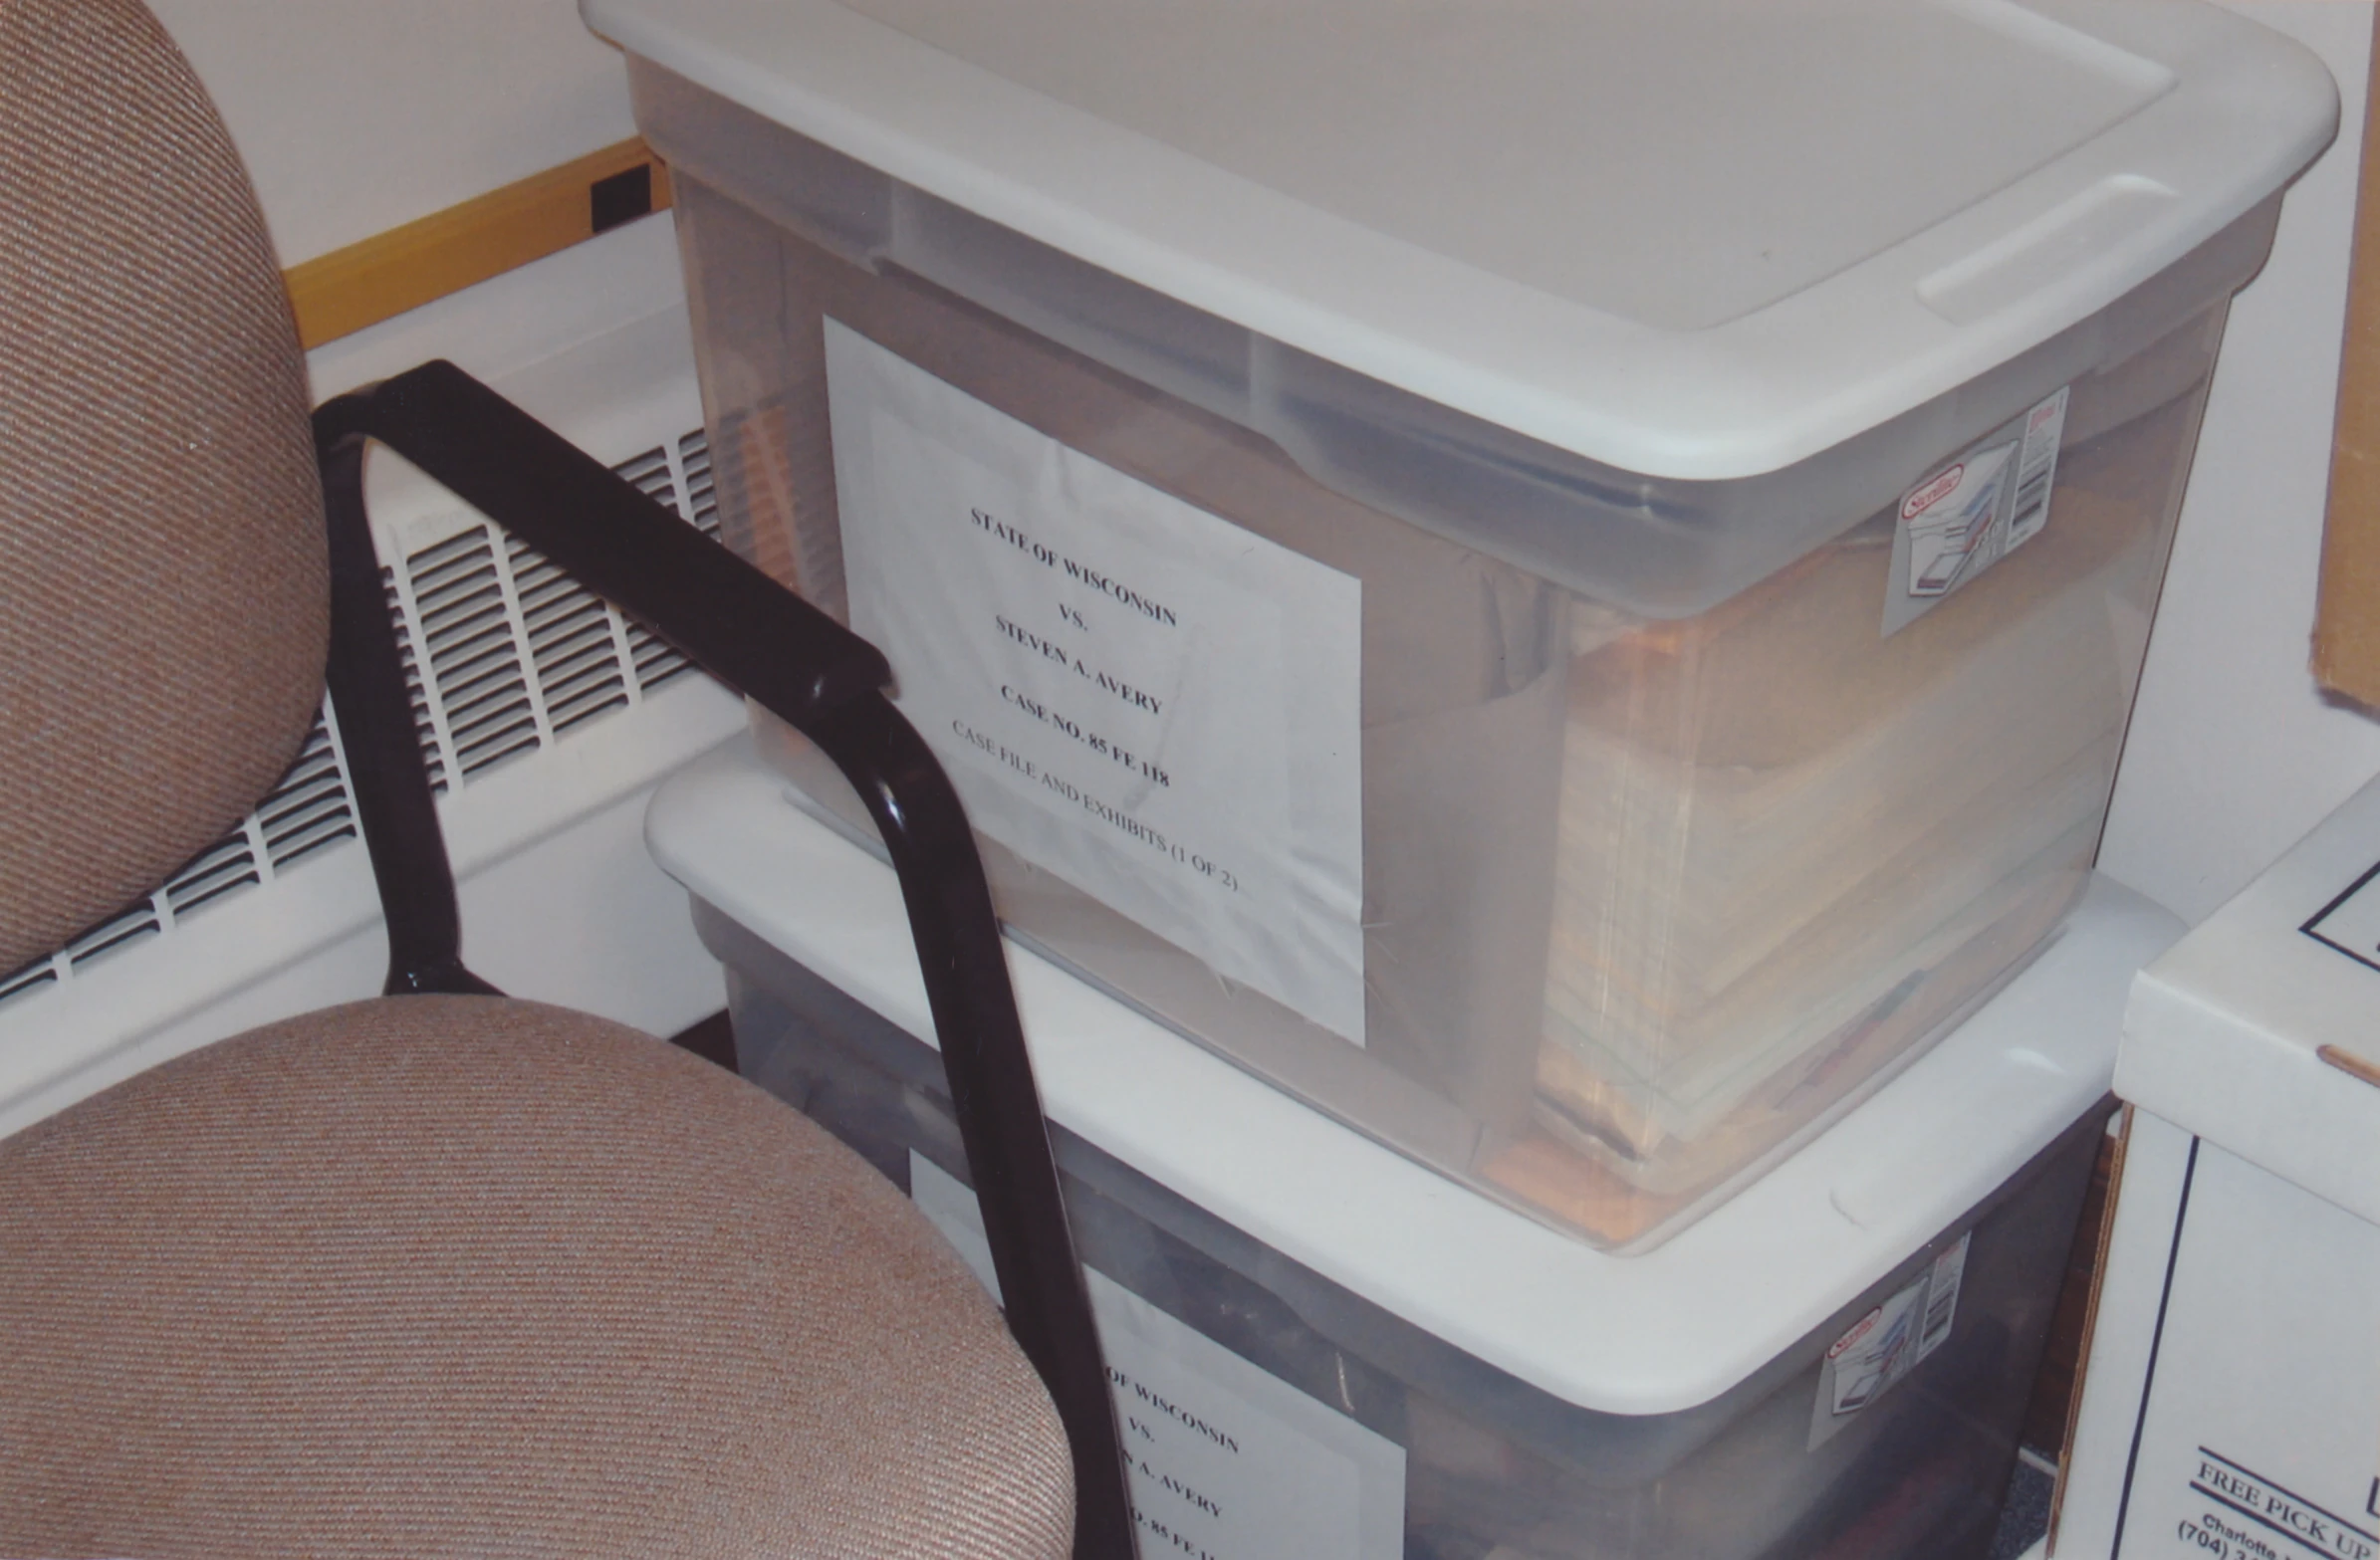
|
| 468 | Original cardboard box containing Avery's 1985 case file | 17 | 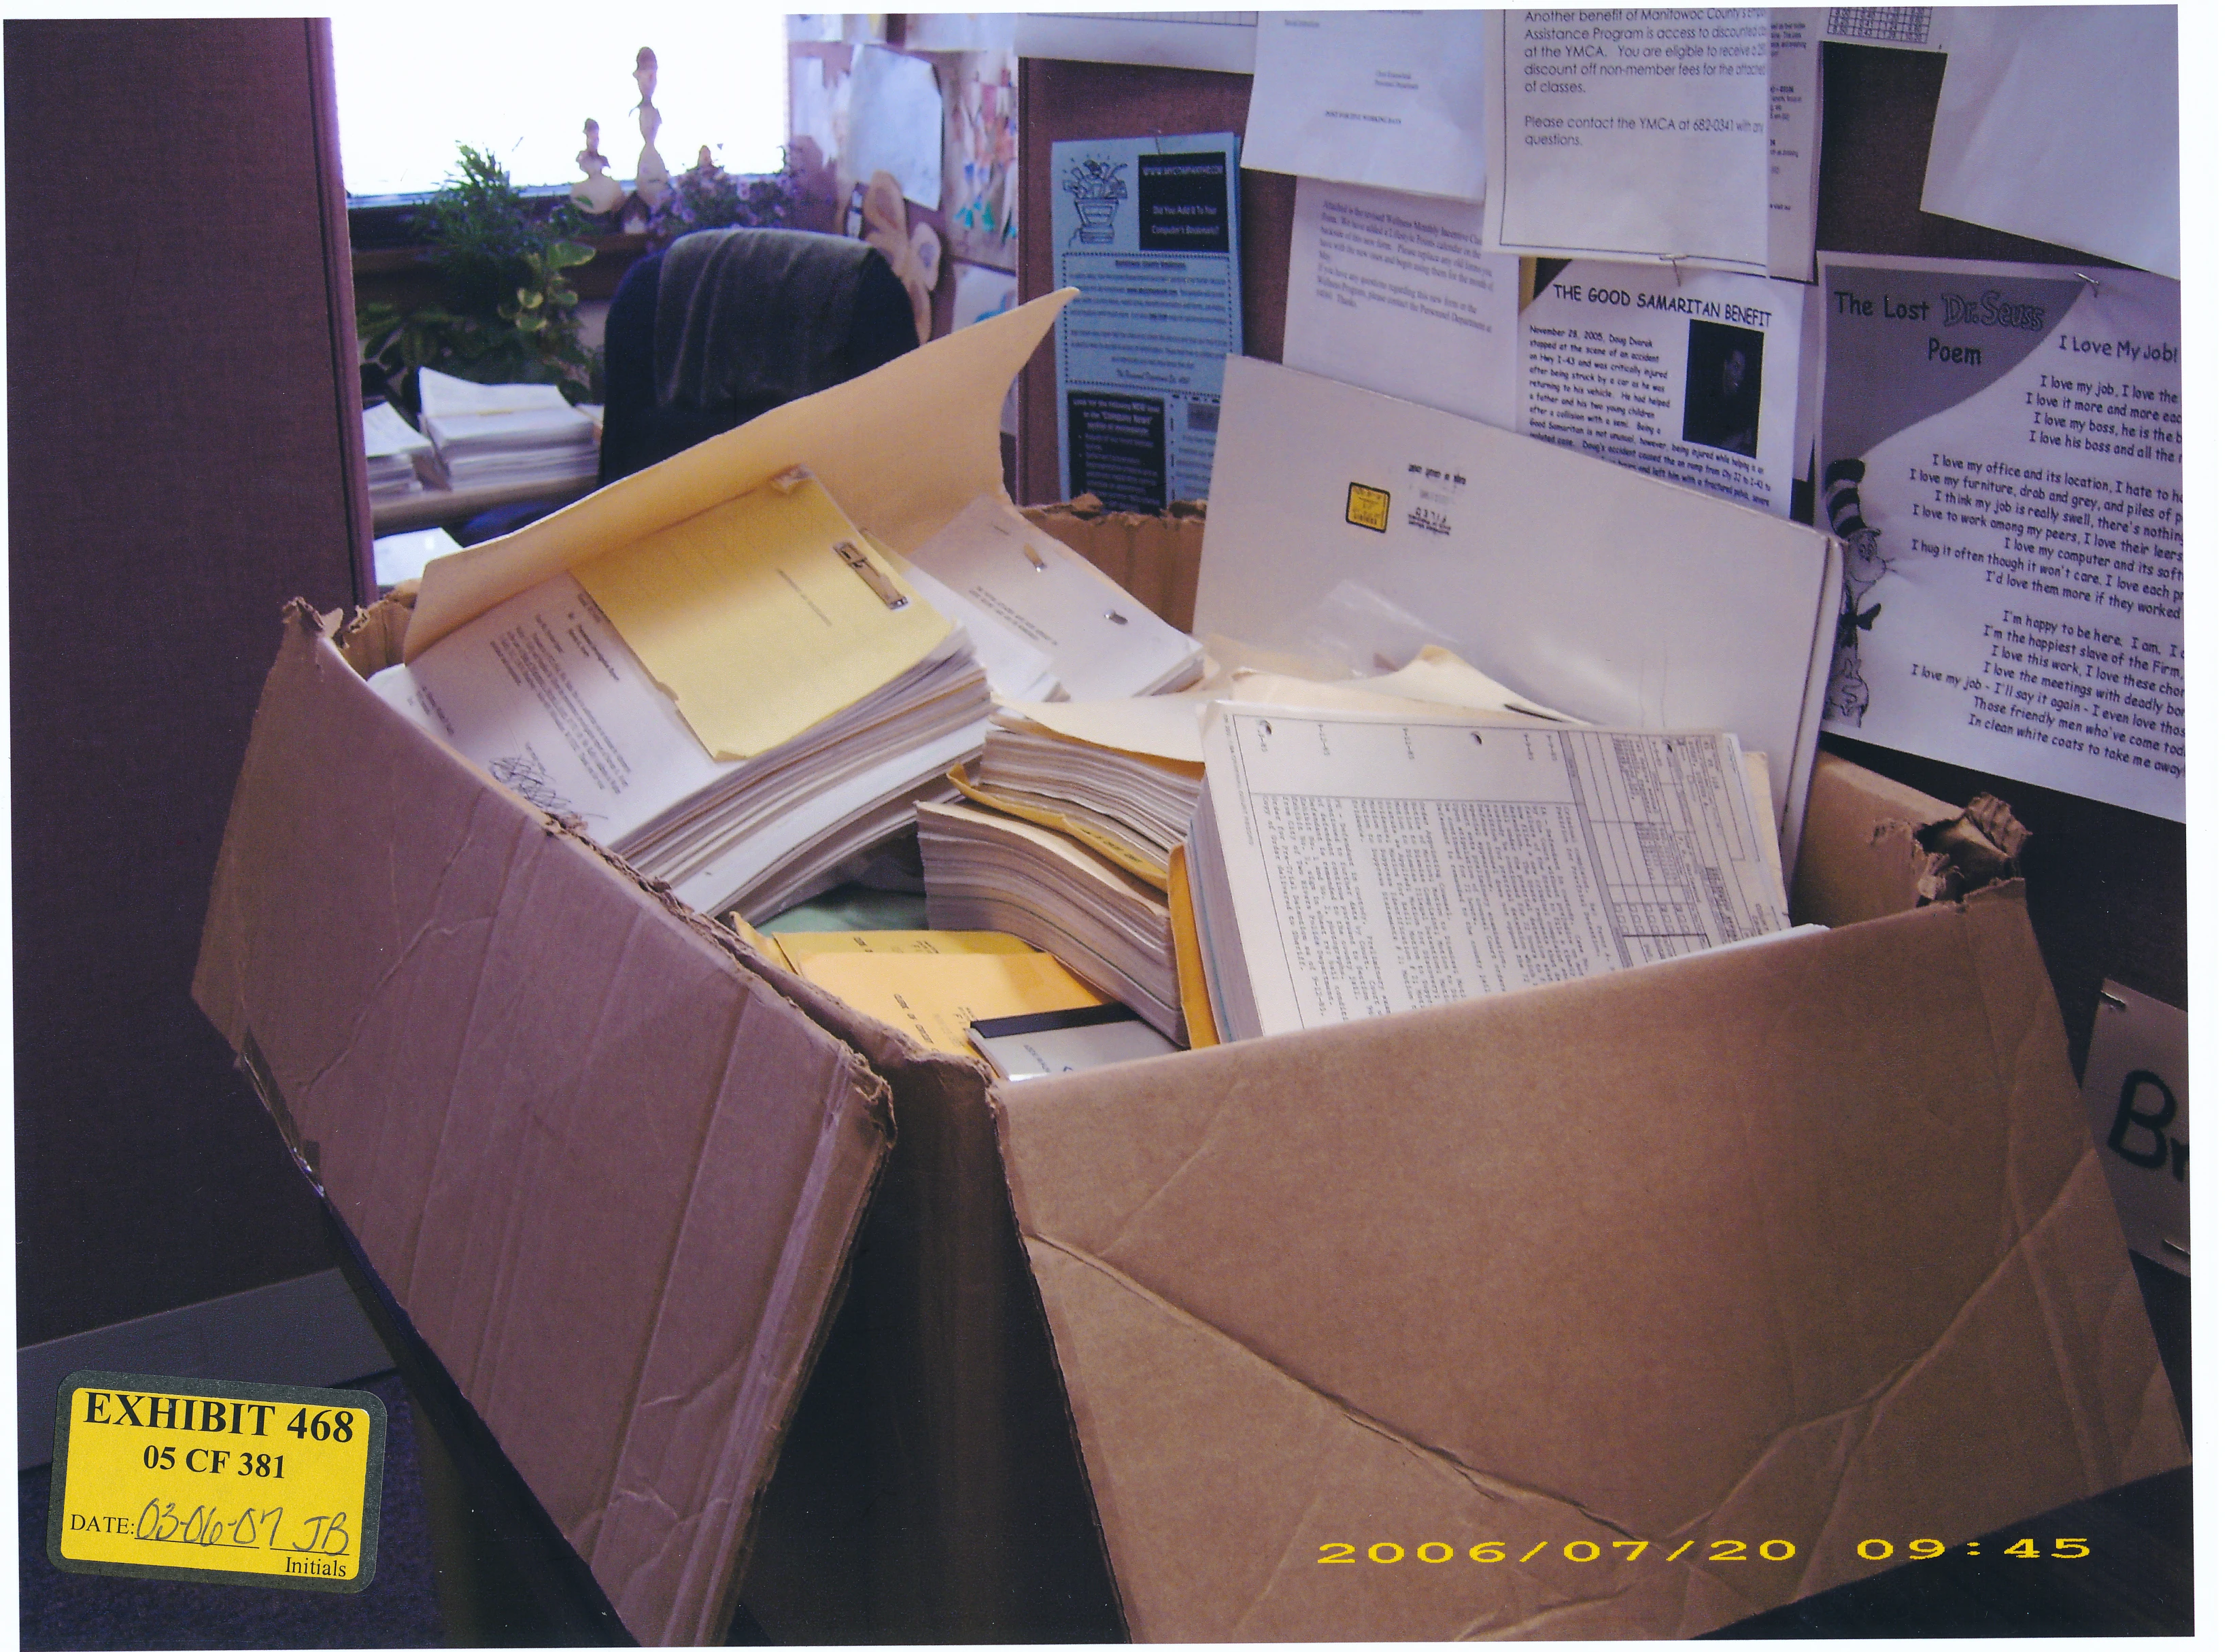
|
| 469 | Original cardboard box containing Avery's 1985 case file | 17 | File:Trial exhibit 469.jpg |
| 471 | 1996 blood vial | 17 | 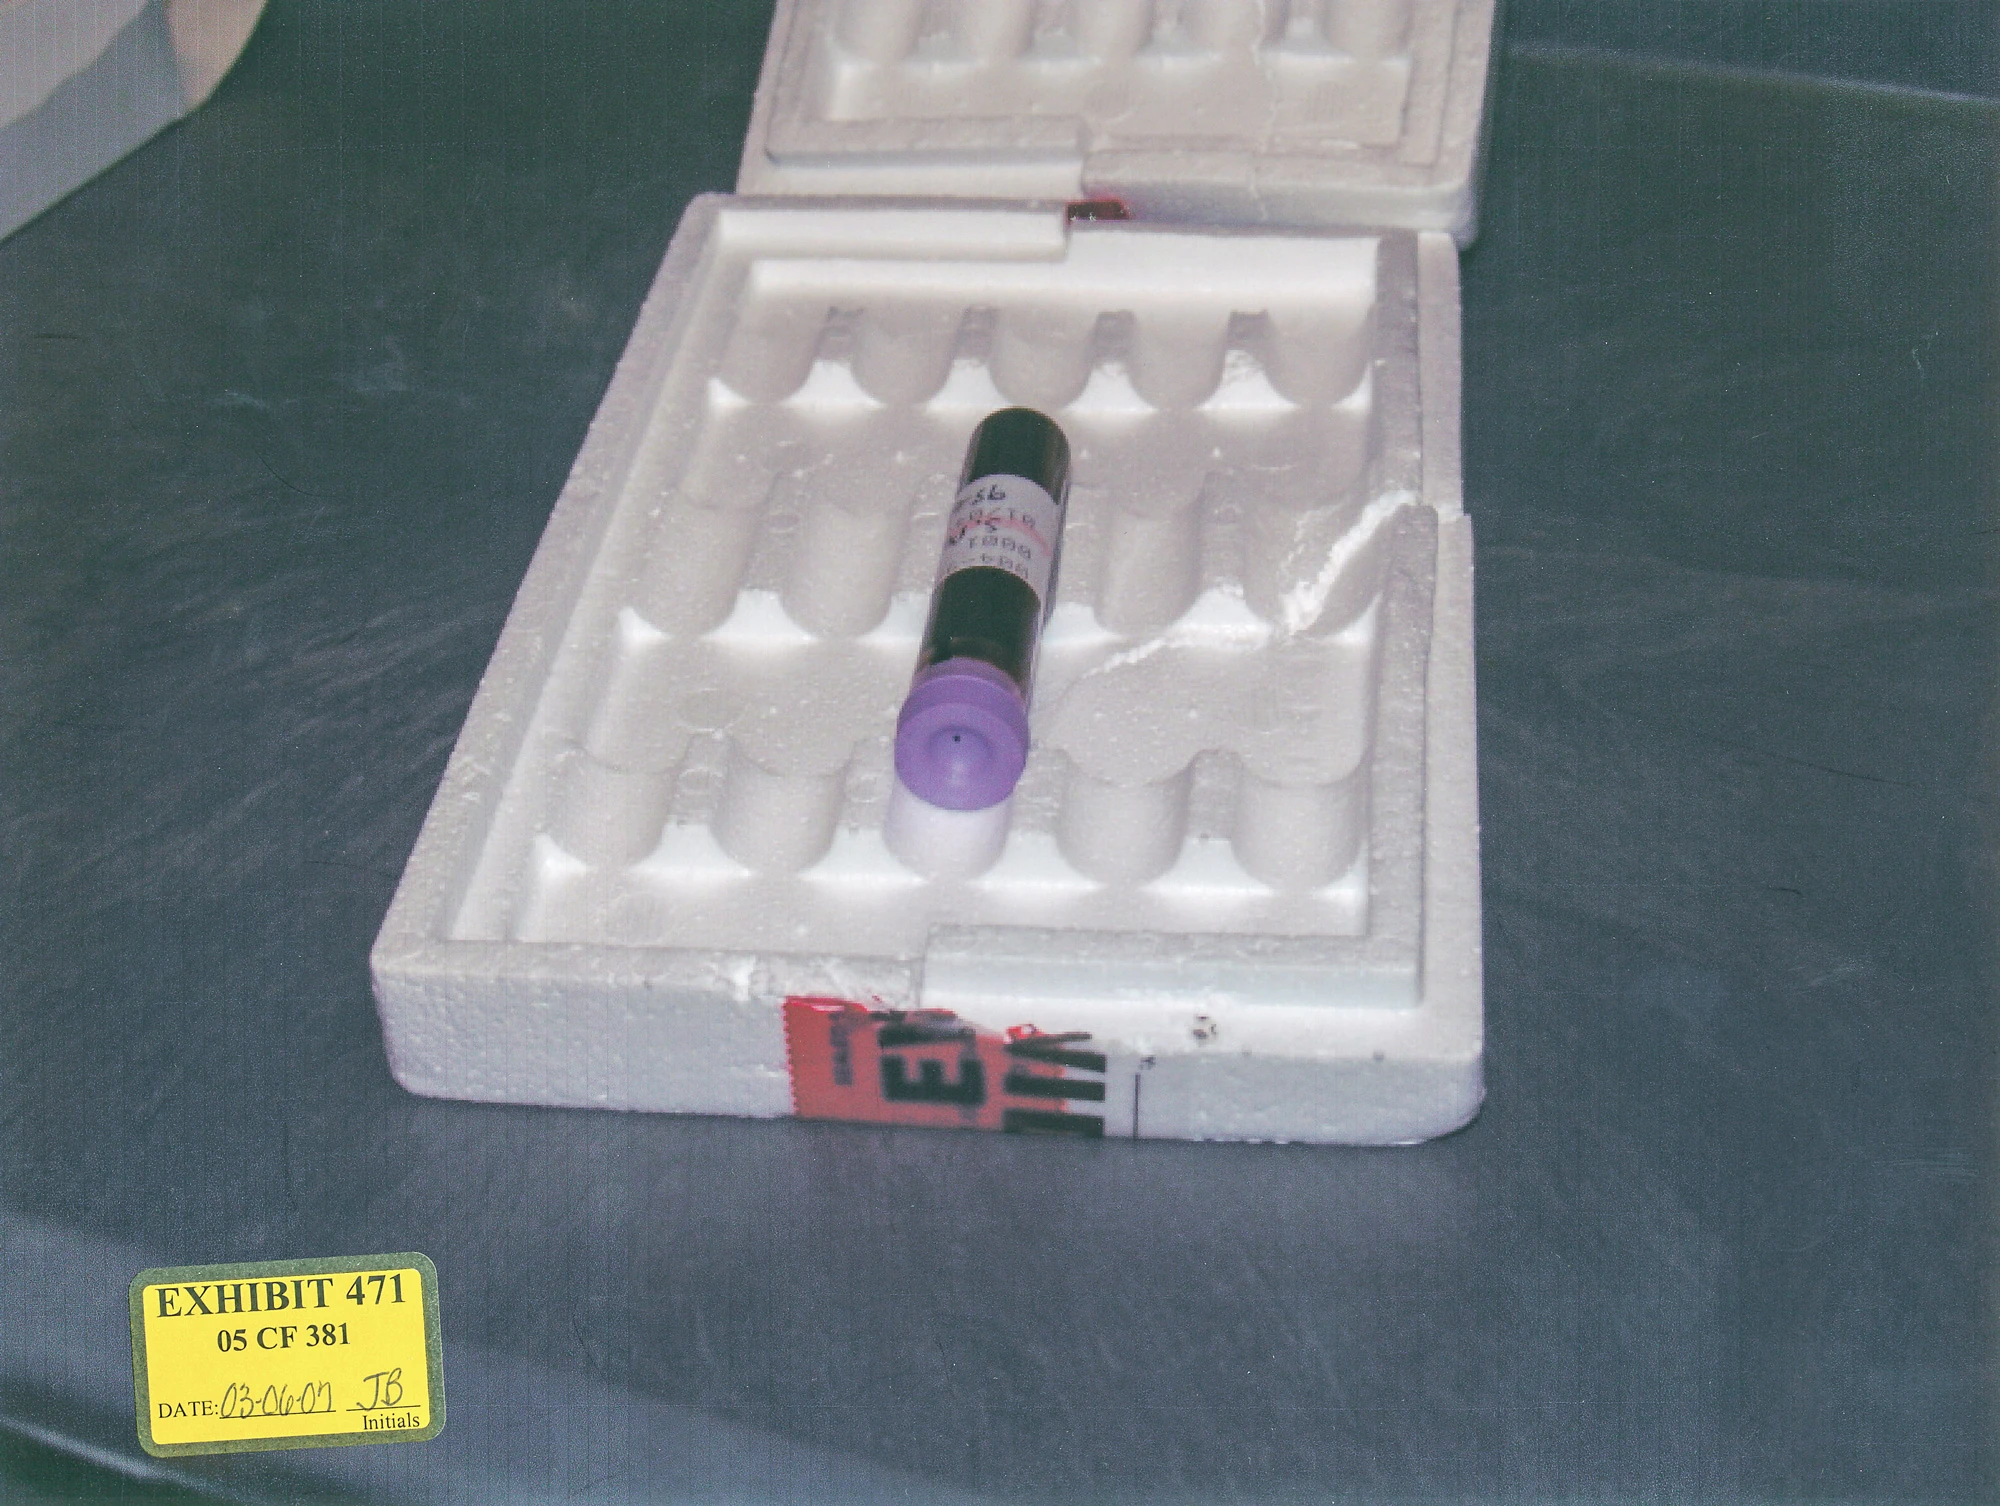
|
| 472 | (unknown) | 17 | n/a |
| 473 | 1996 blood vial | 17 | 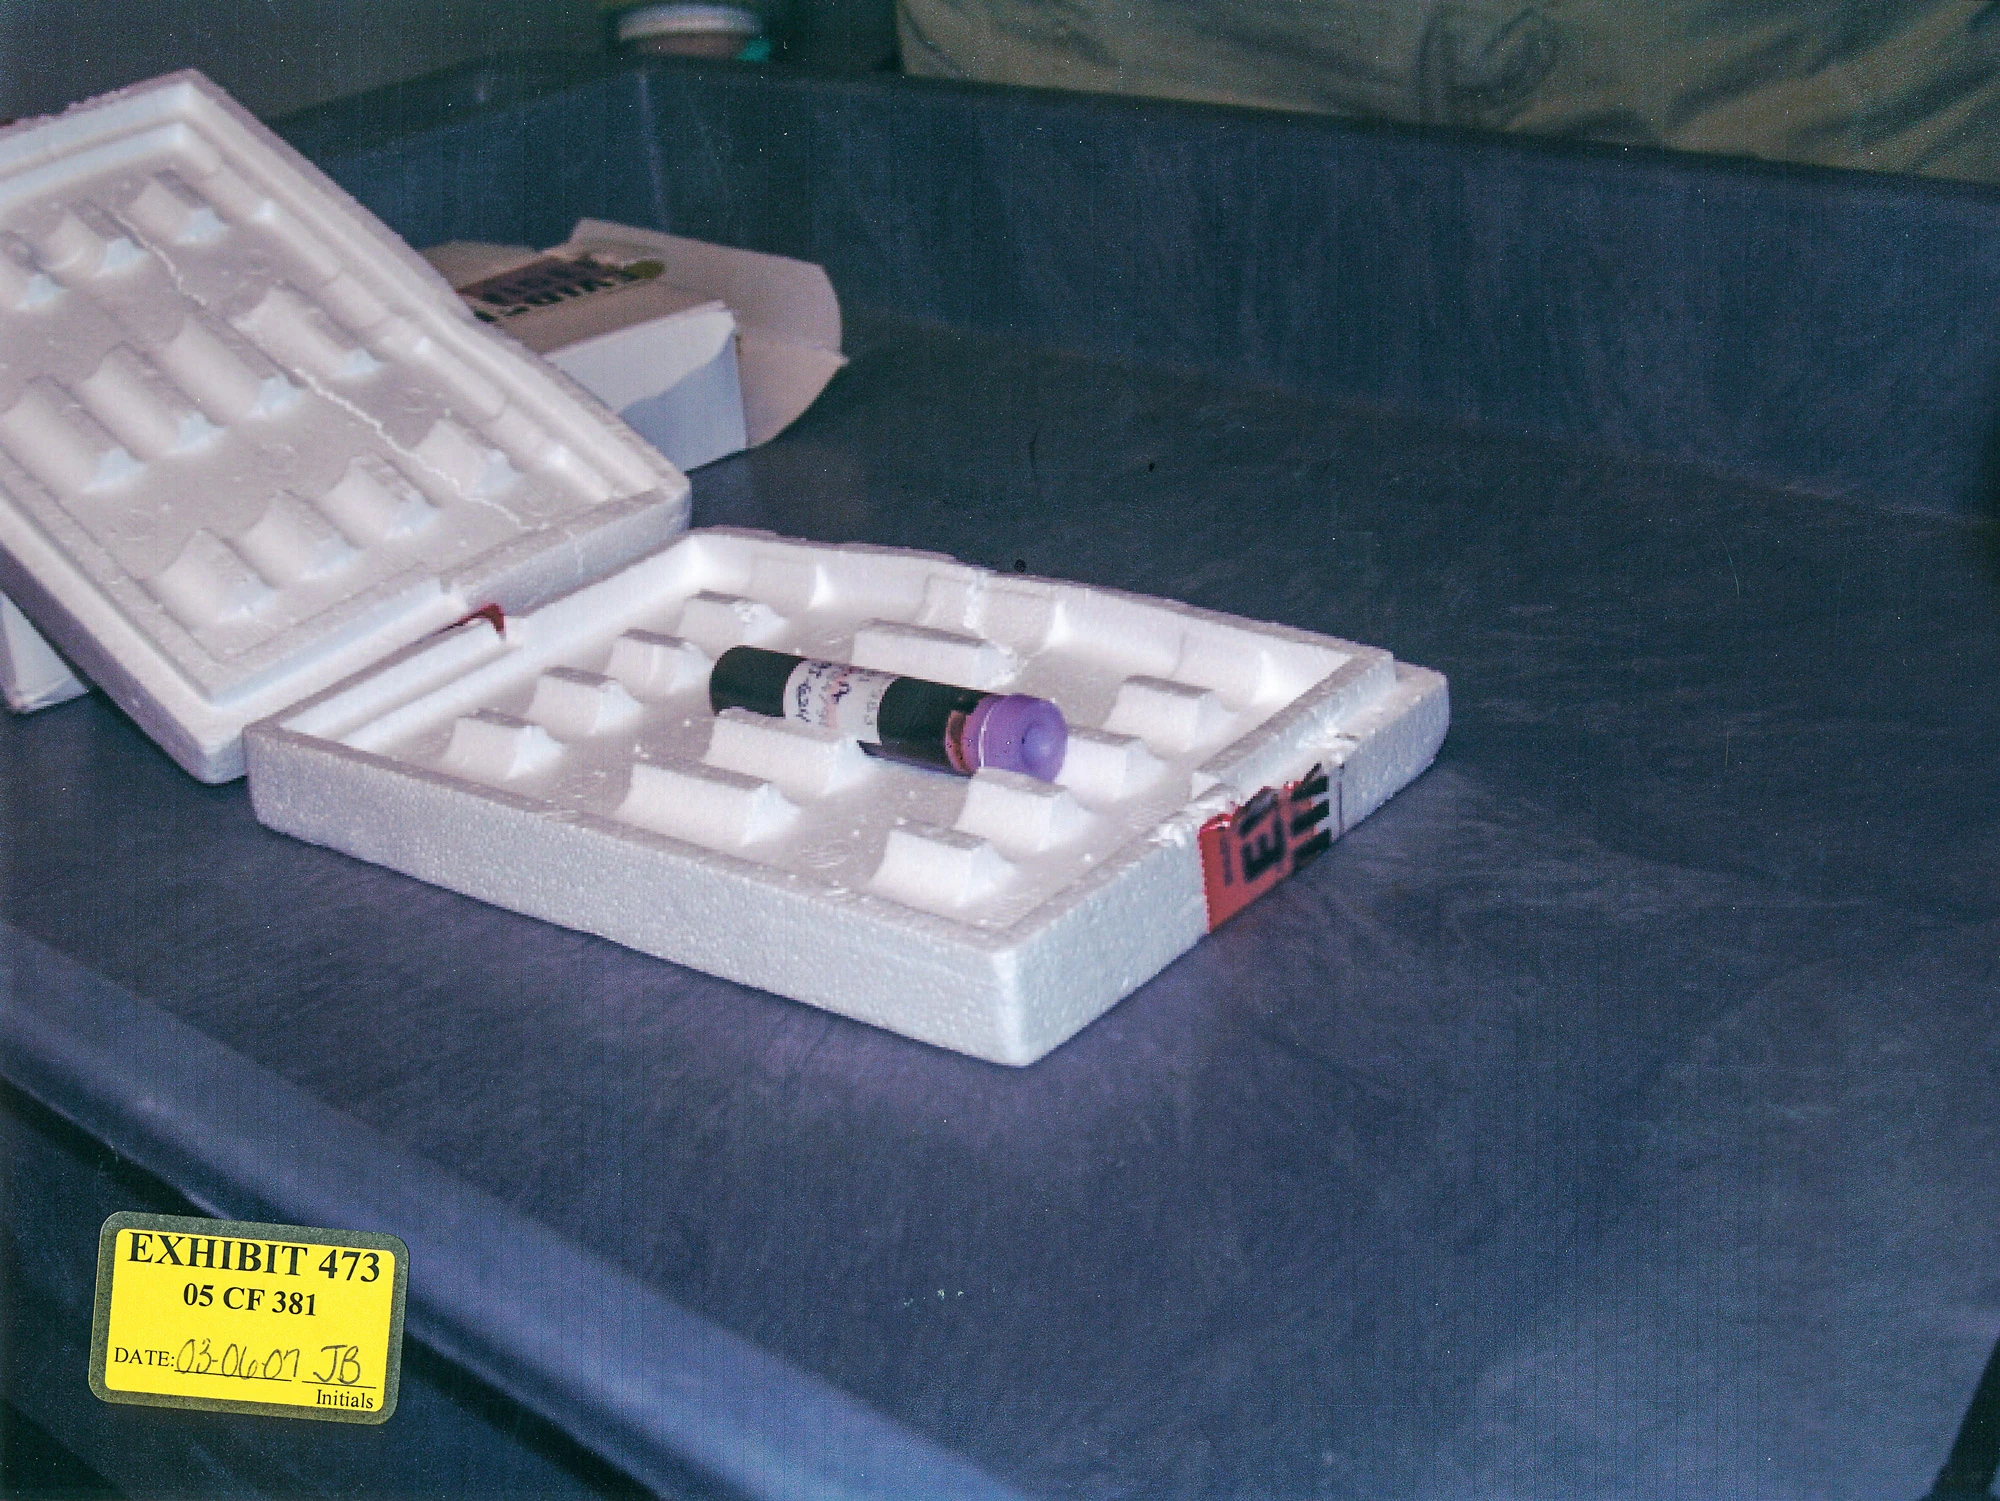
|
| 474 | (unknown) | 17 | n/a |
| 481 | Boiler | 18 | 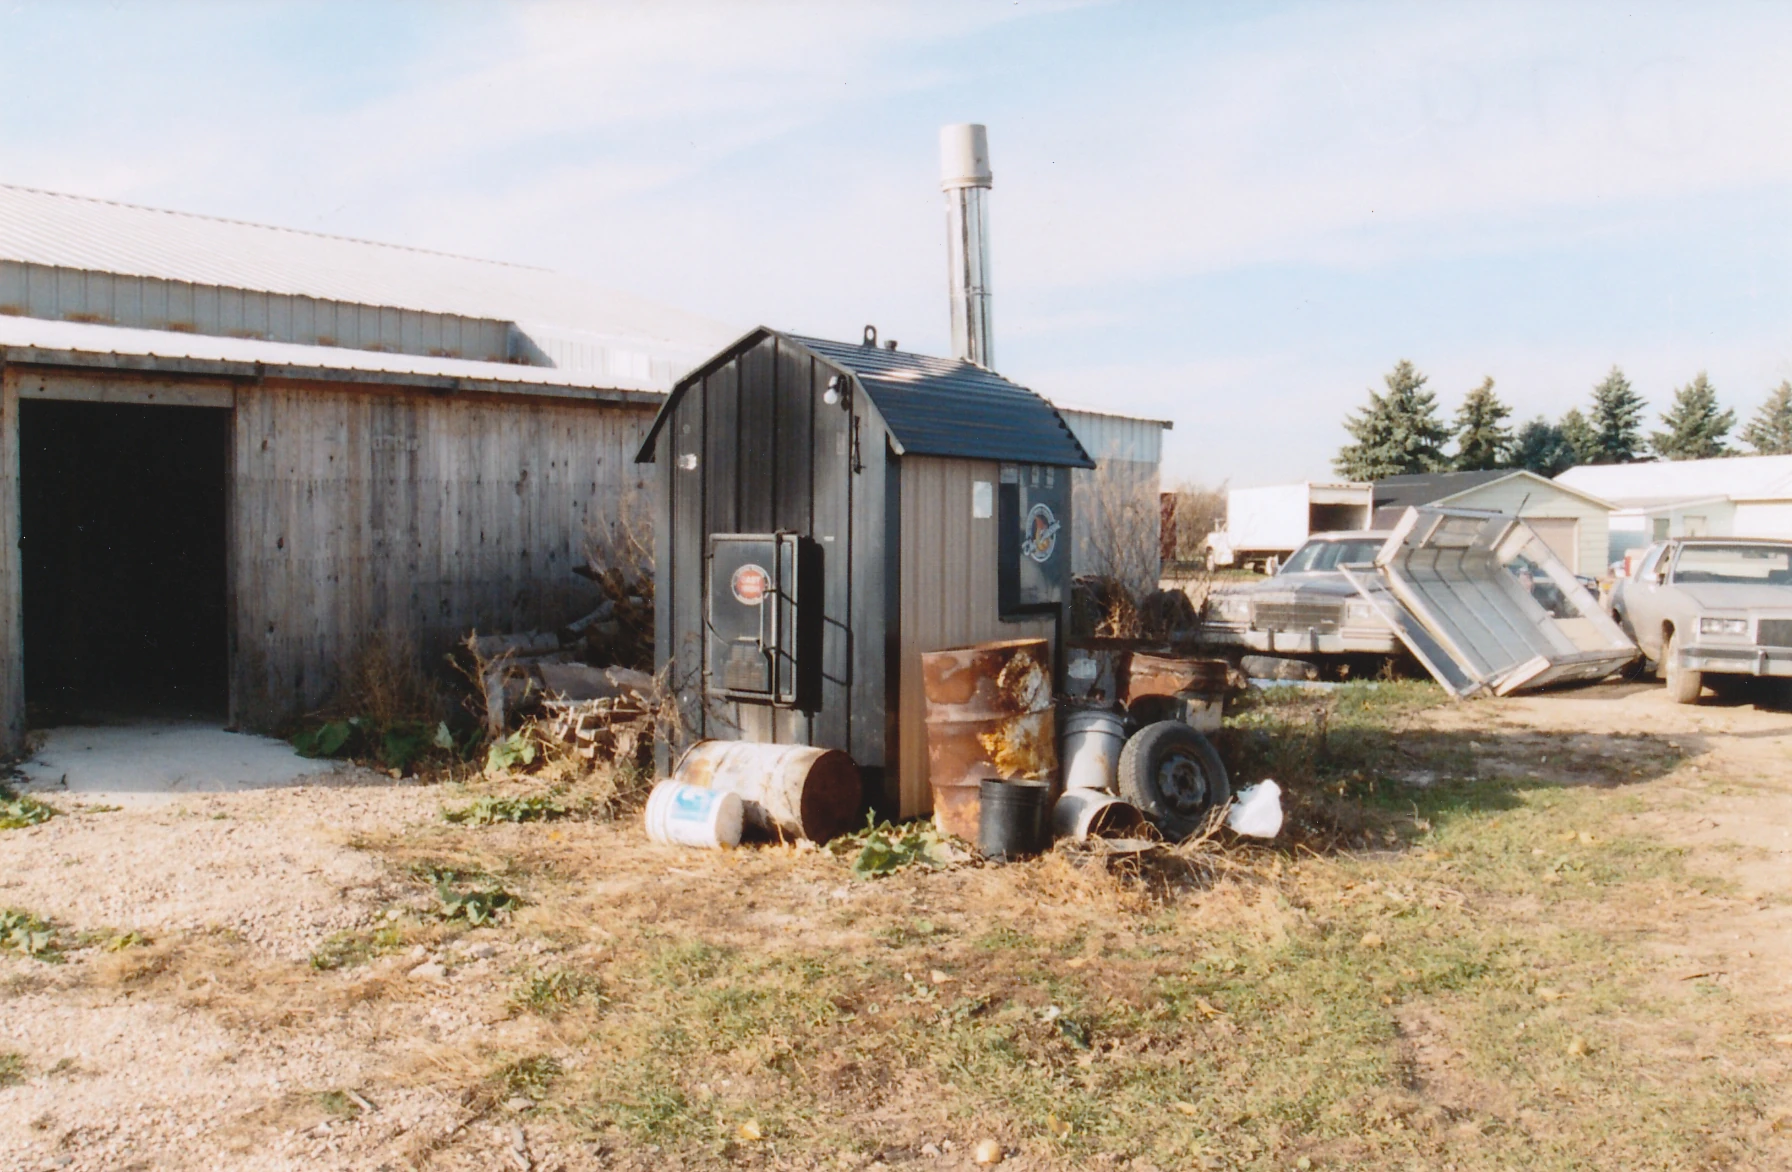
|
| 482 | Boiler's chimney | 18 | 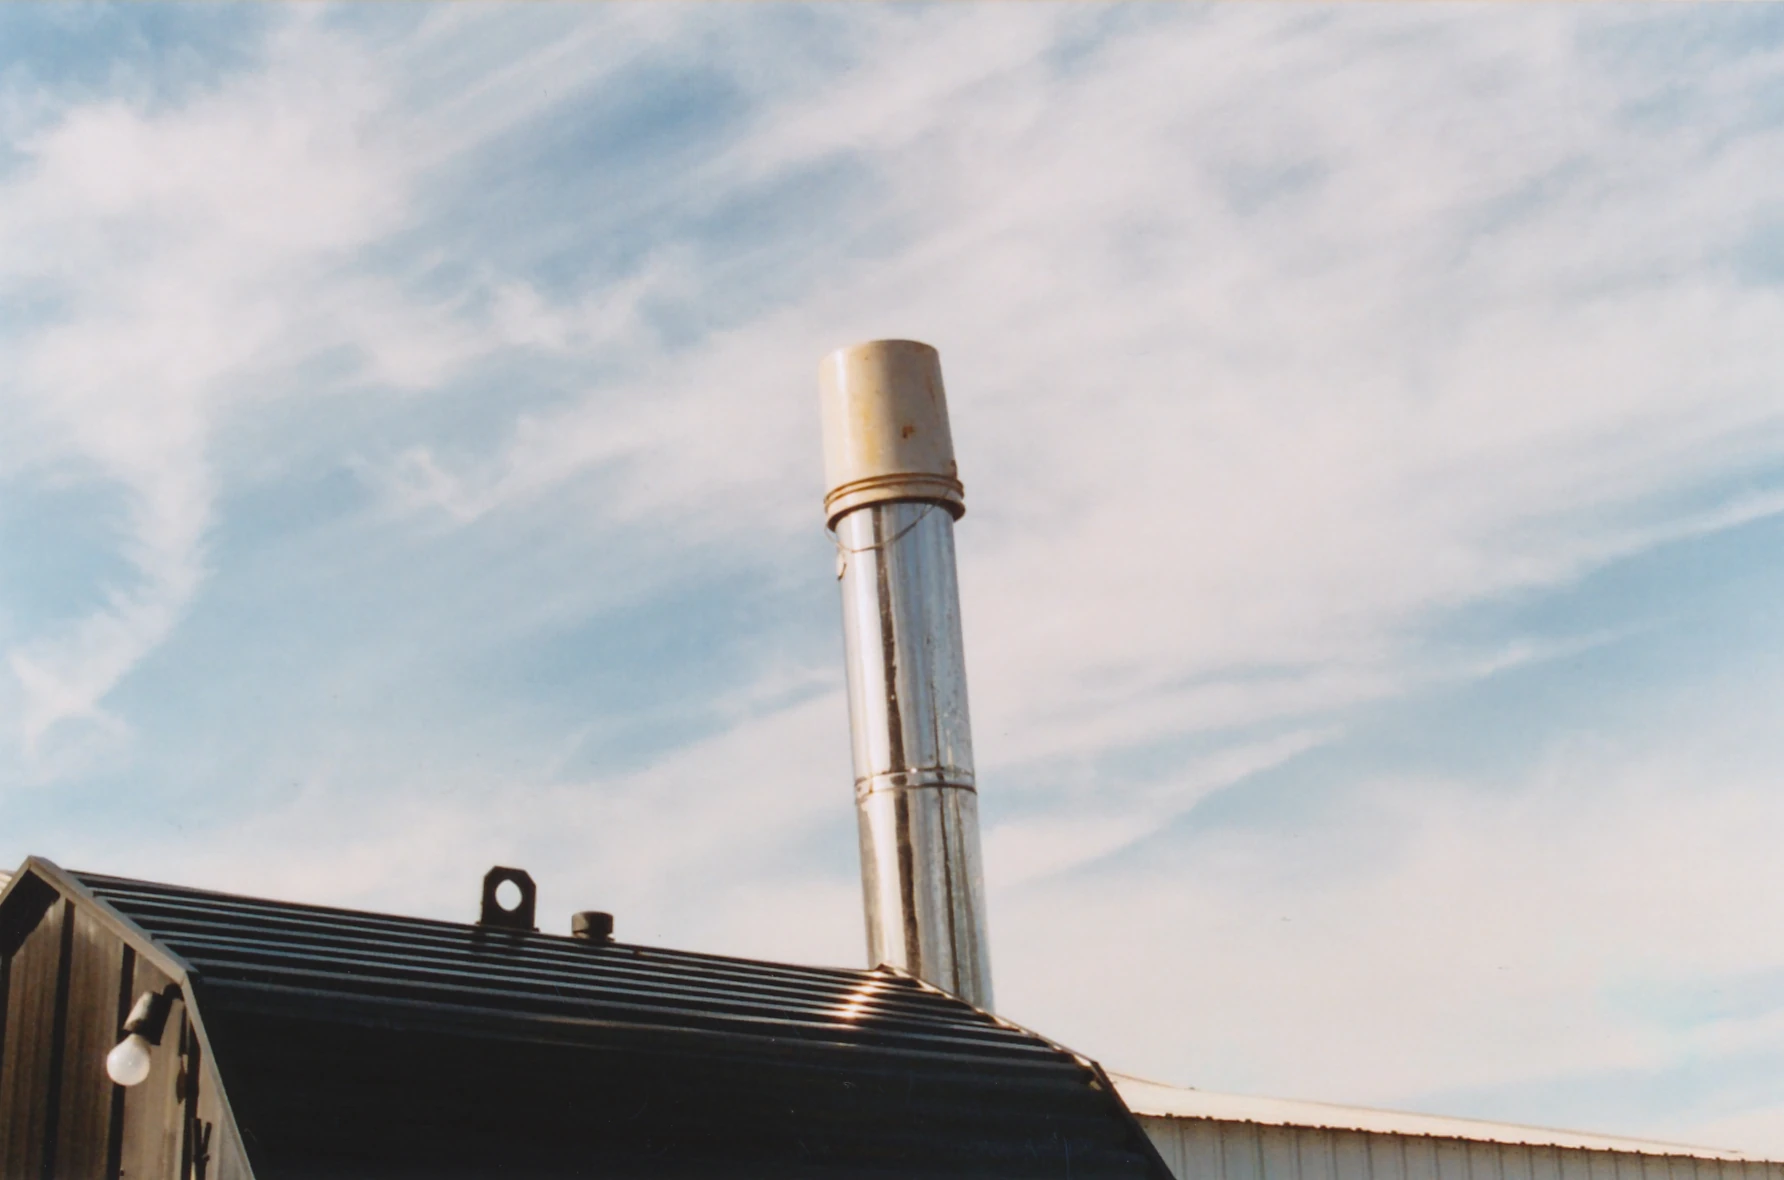
|
| 483 | Boiler unit with open door | 18 | 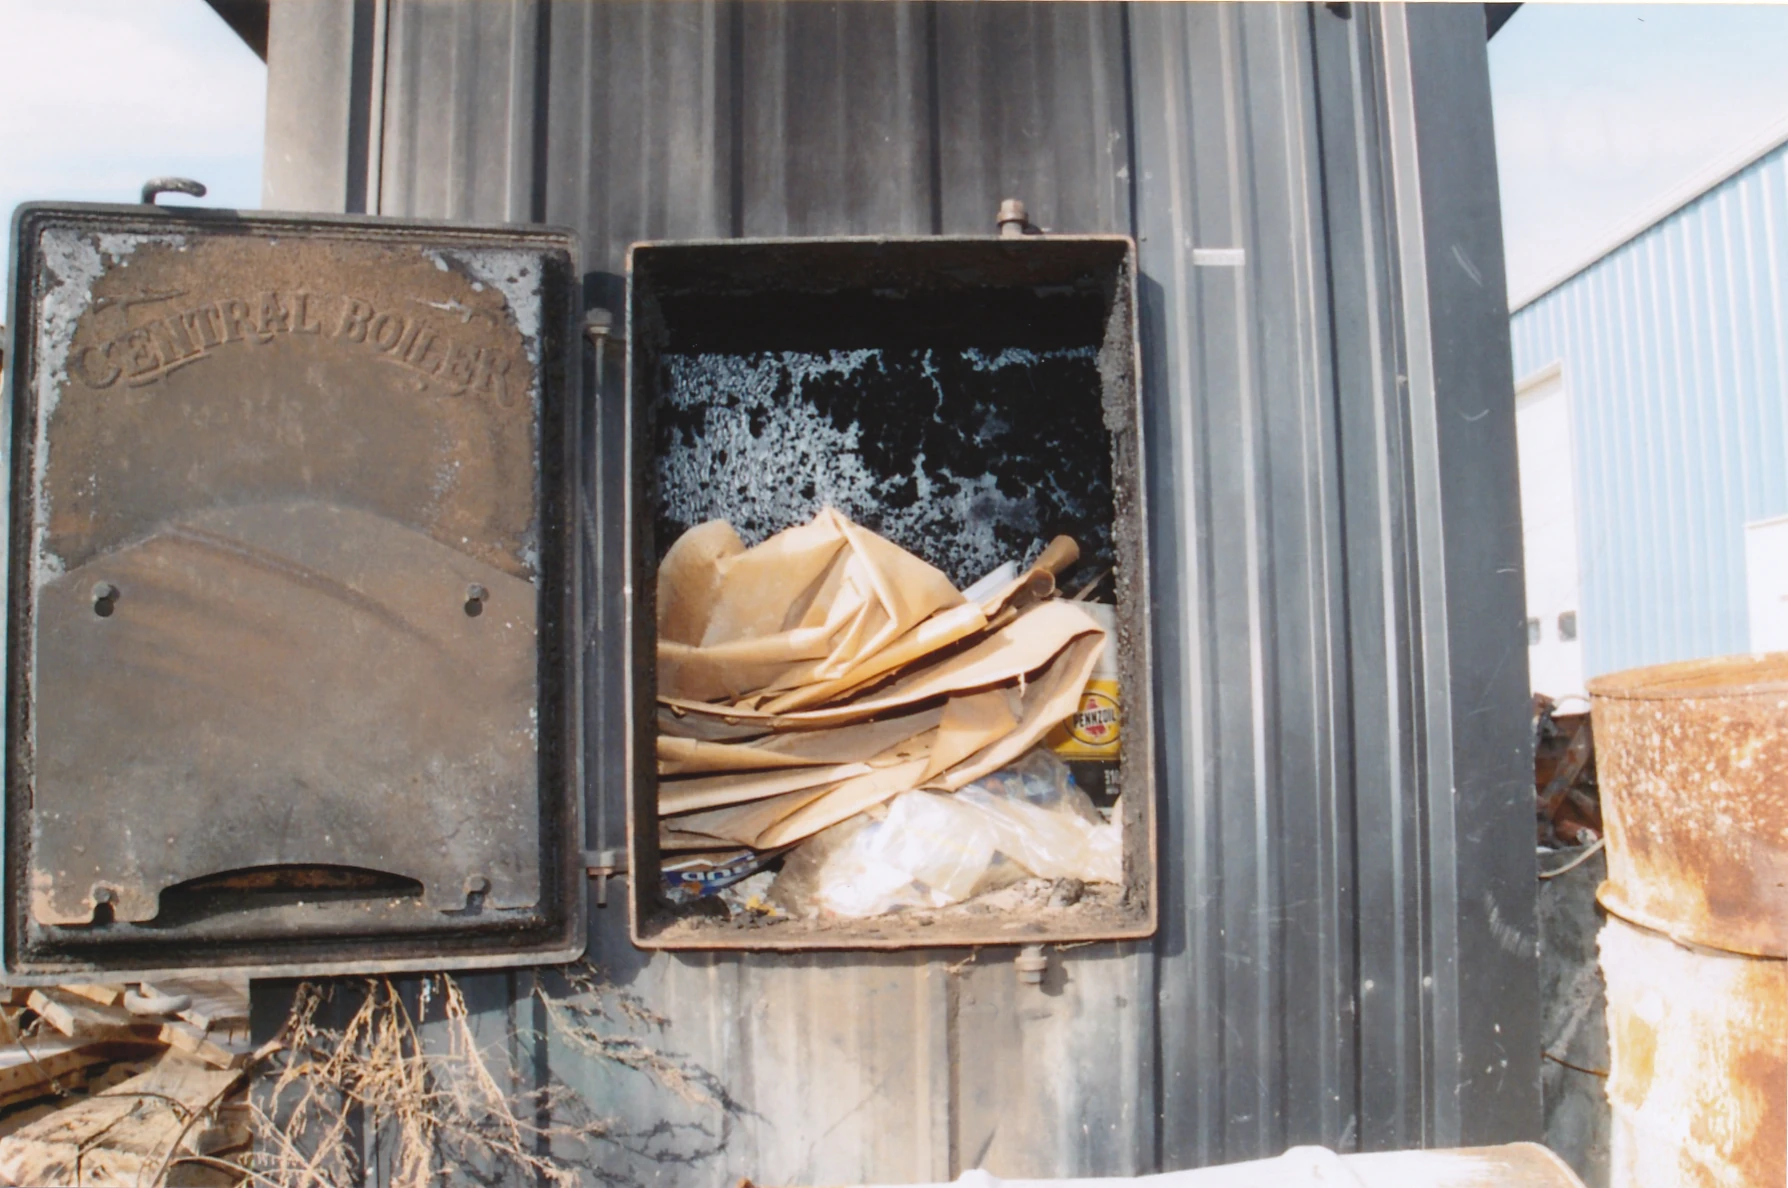
|
| 484 | Side boiler | 18 | 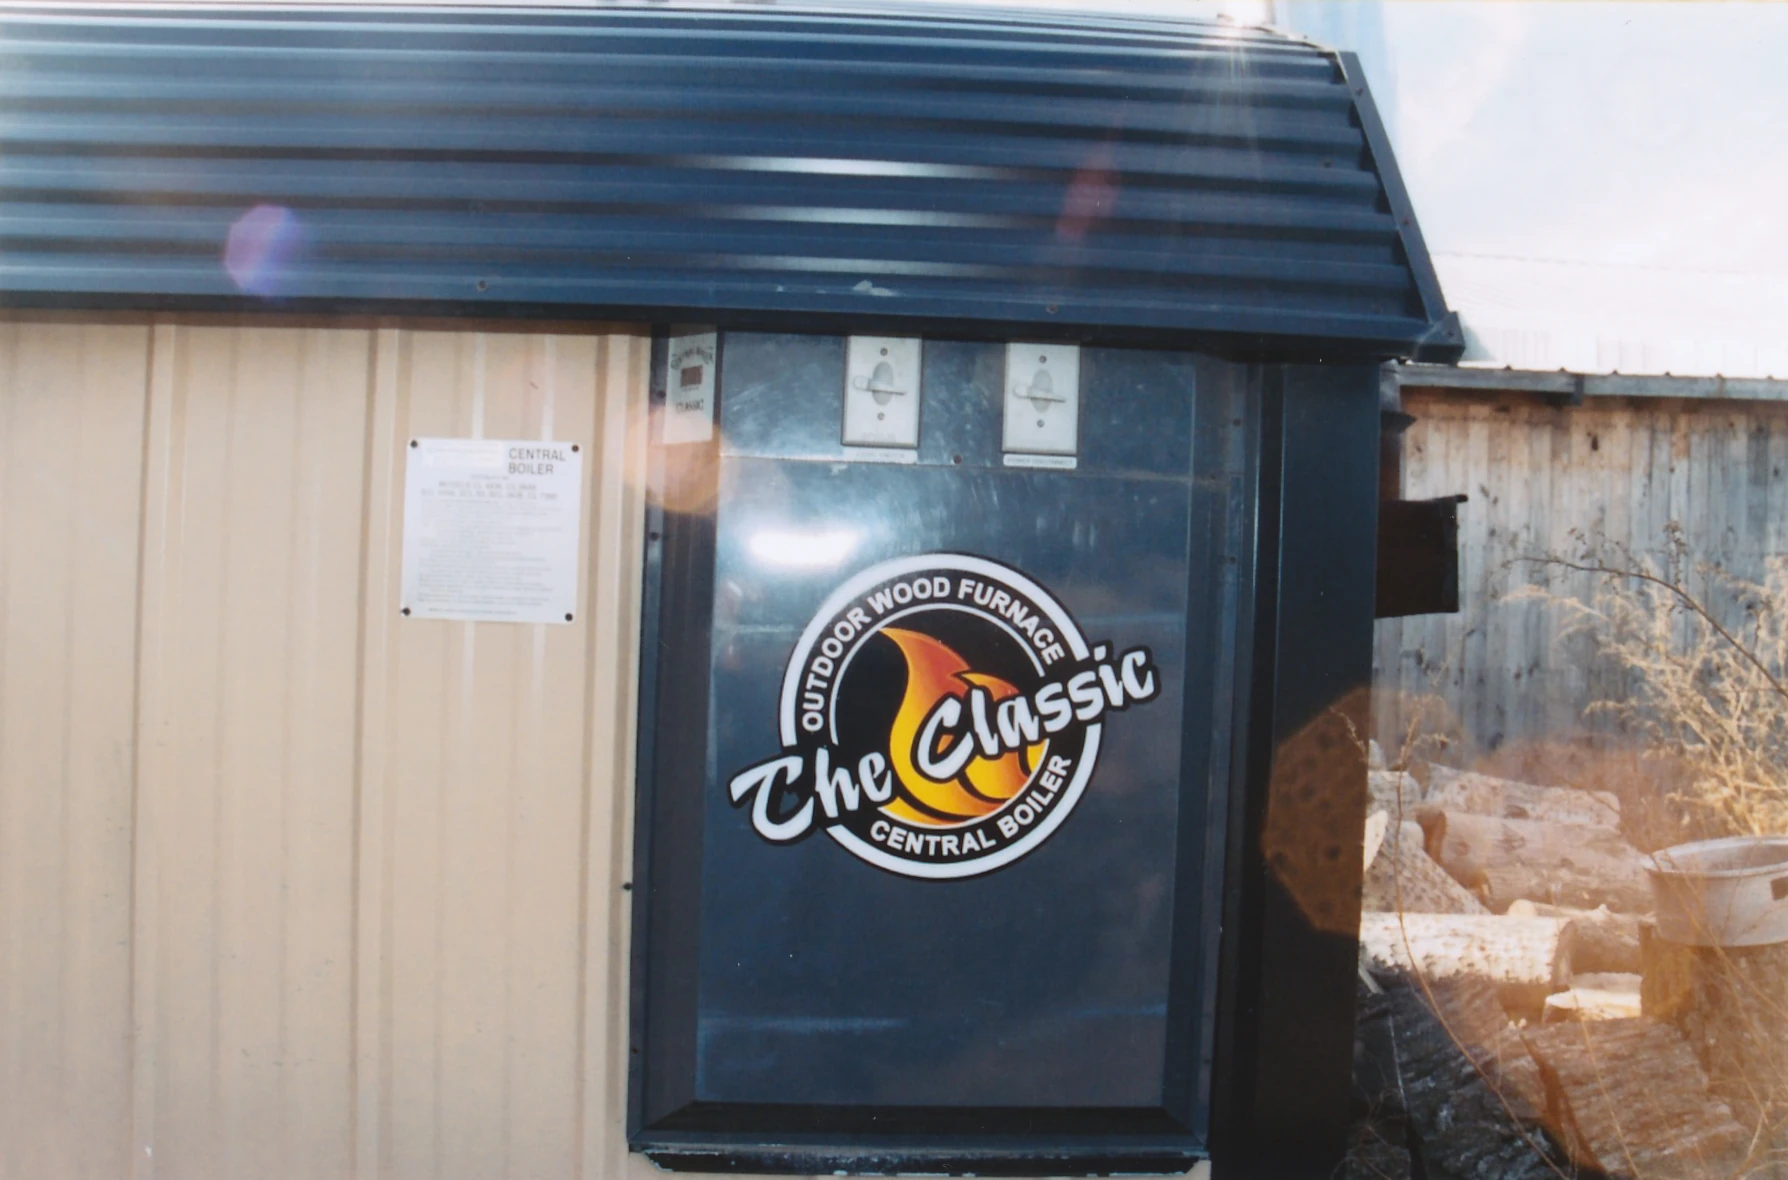
|
| 485 | Boiler unit with ash removed | 18 | 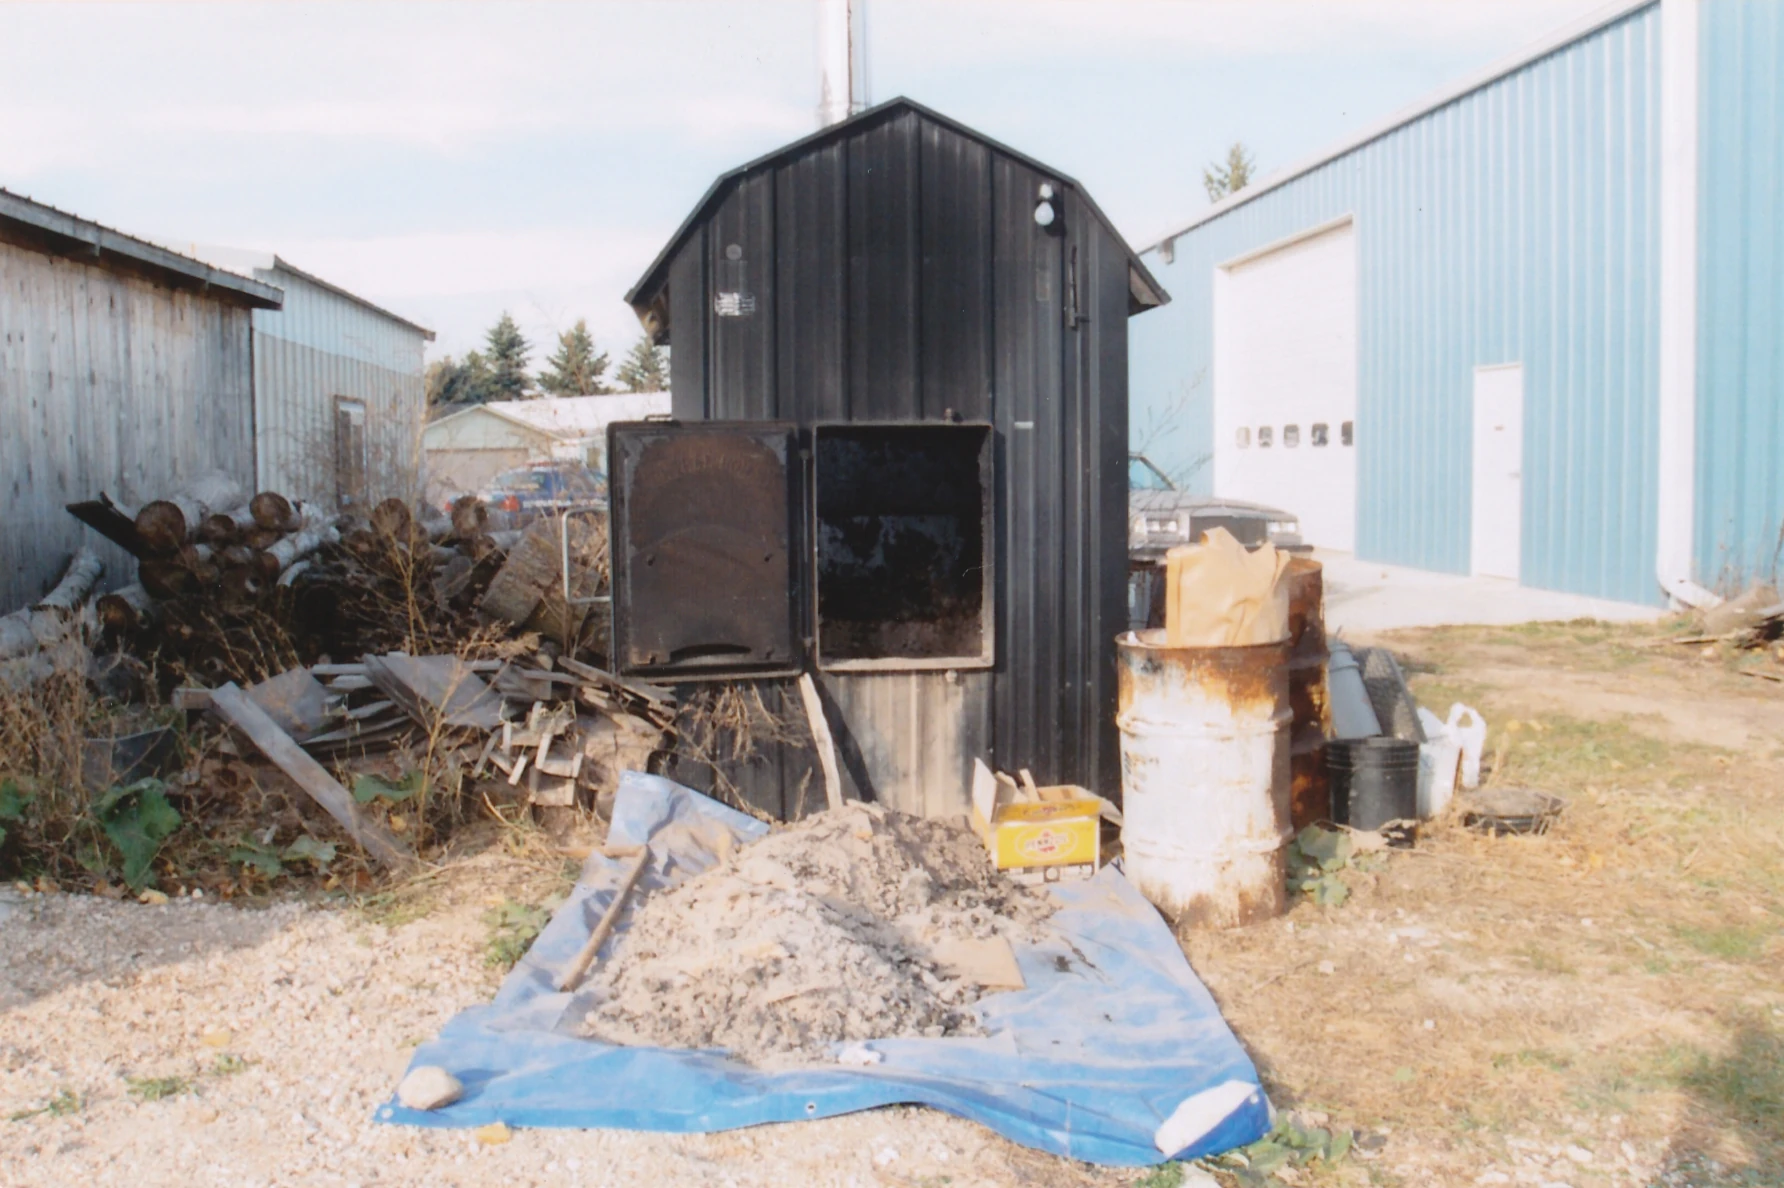
|
| 486 | Boiler's burn chamber | 18 | 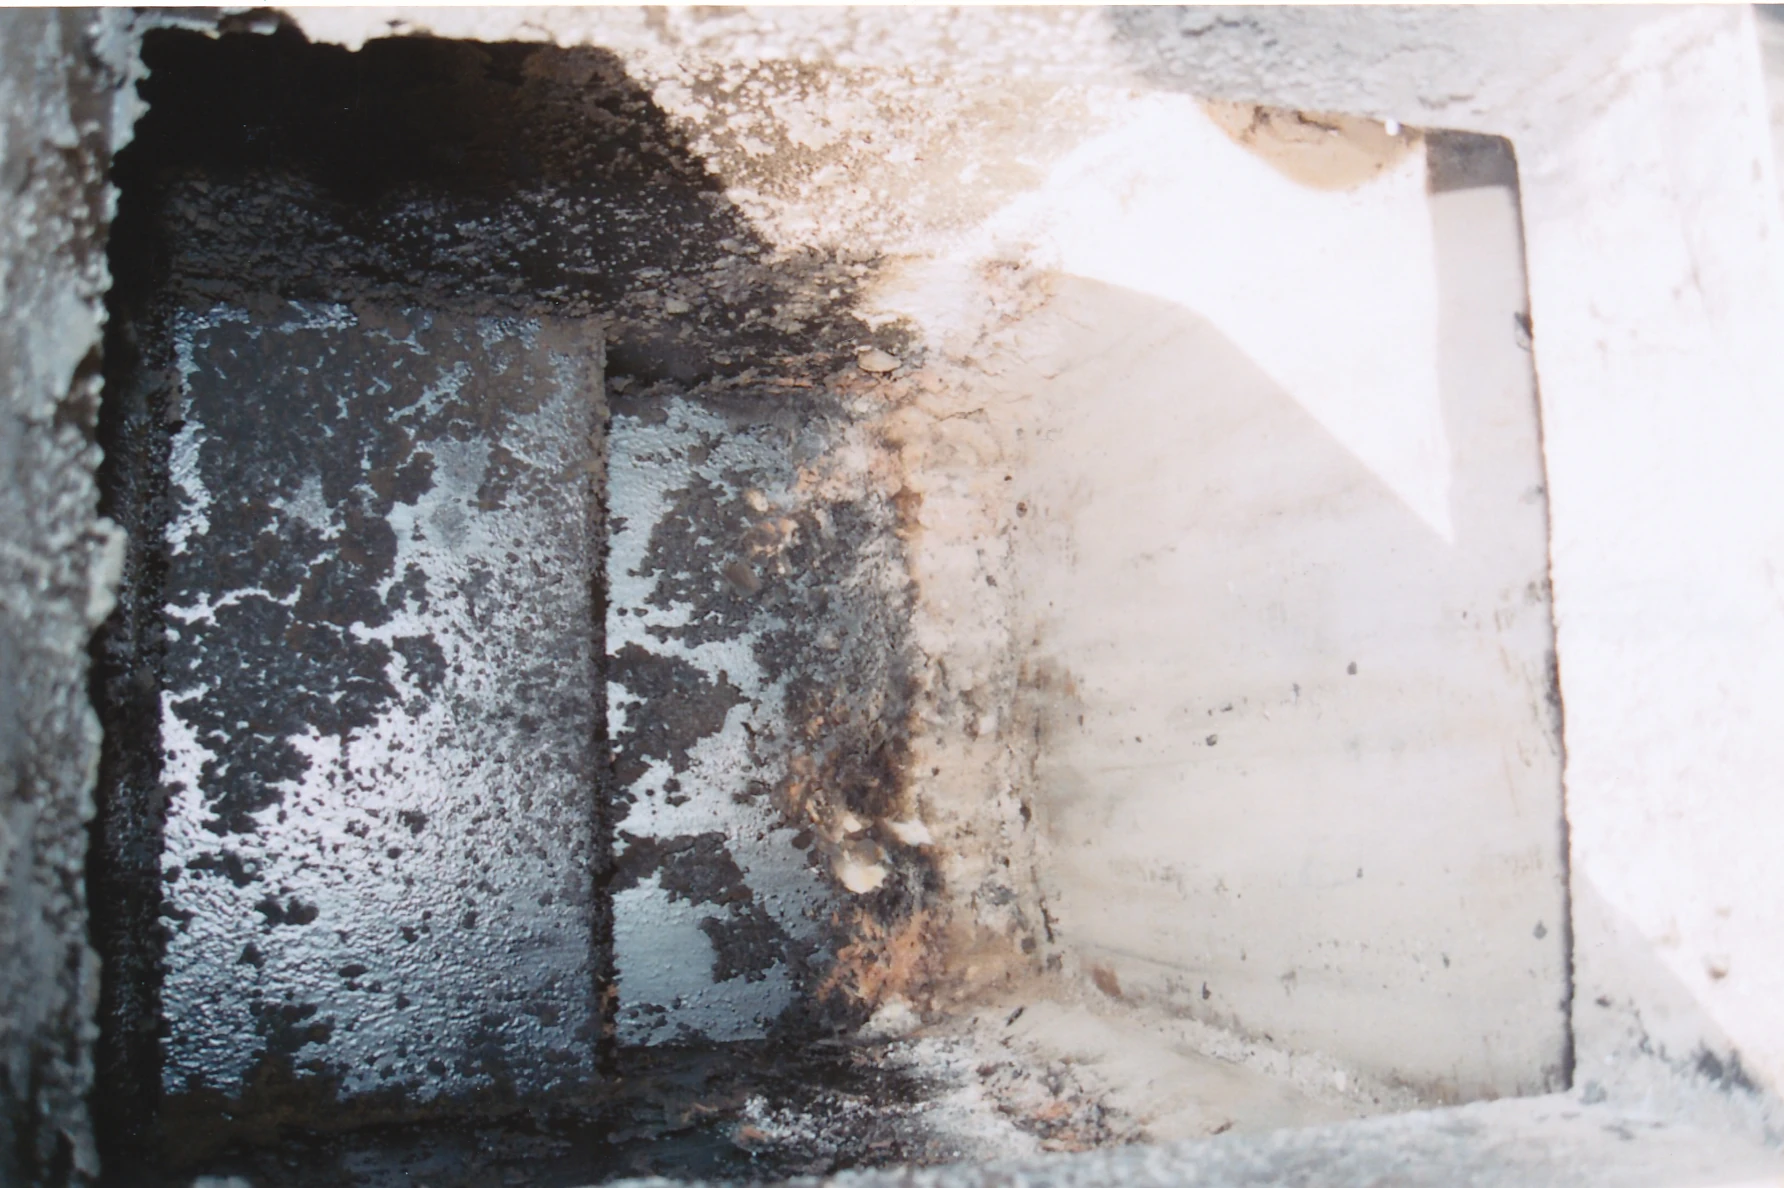
|
| 487 | Aluminium smelter (rear) | 18 | 
|
| 488 | Aluminium smelter (inner area) | 18 | 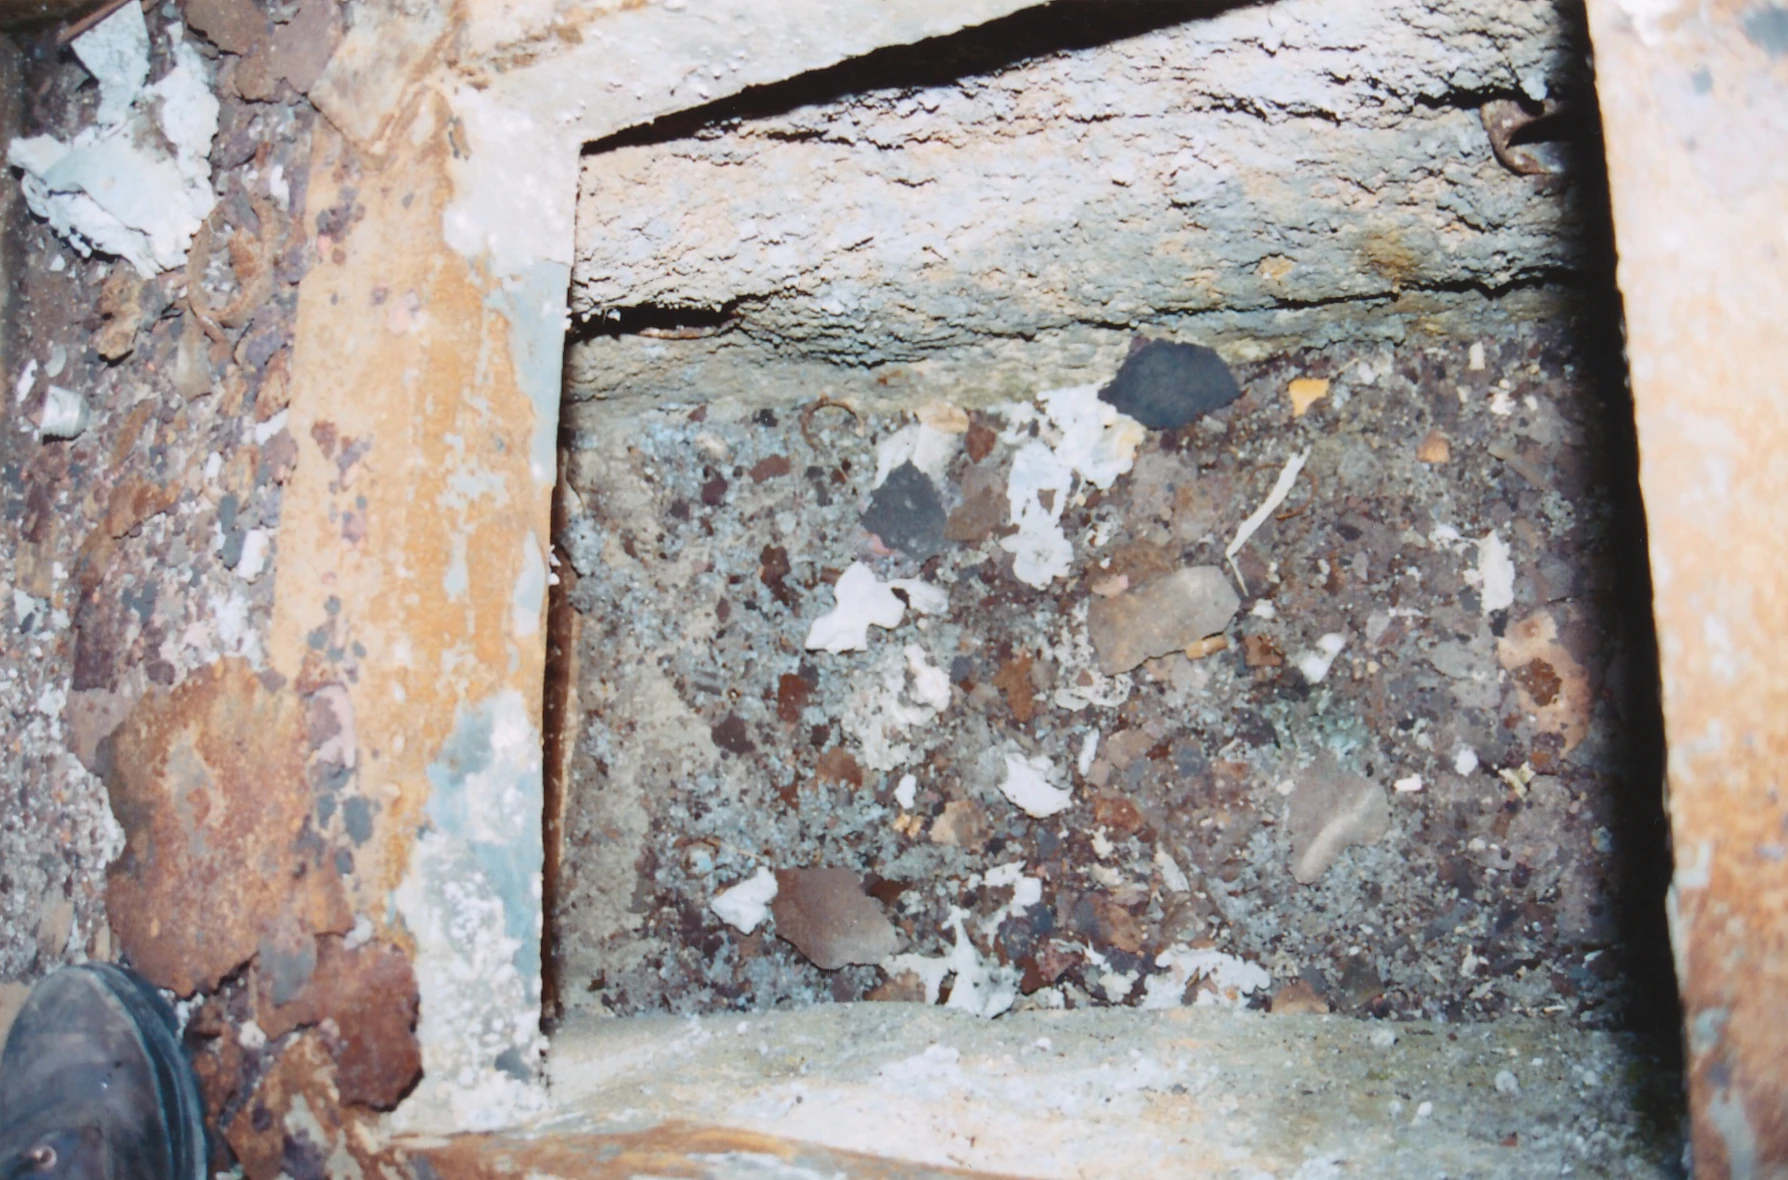
|
| 489 | Aluminium smelter (inner area) | 18 | 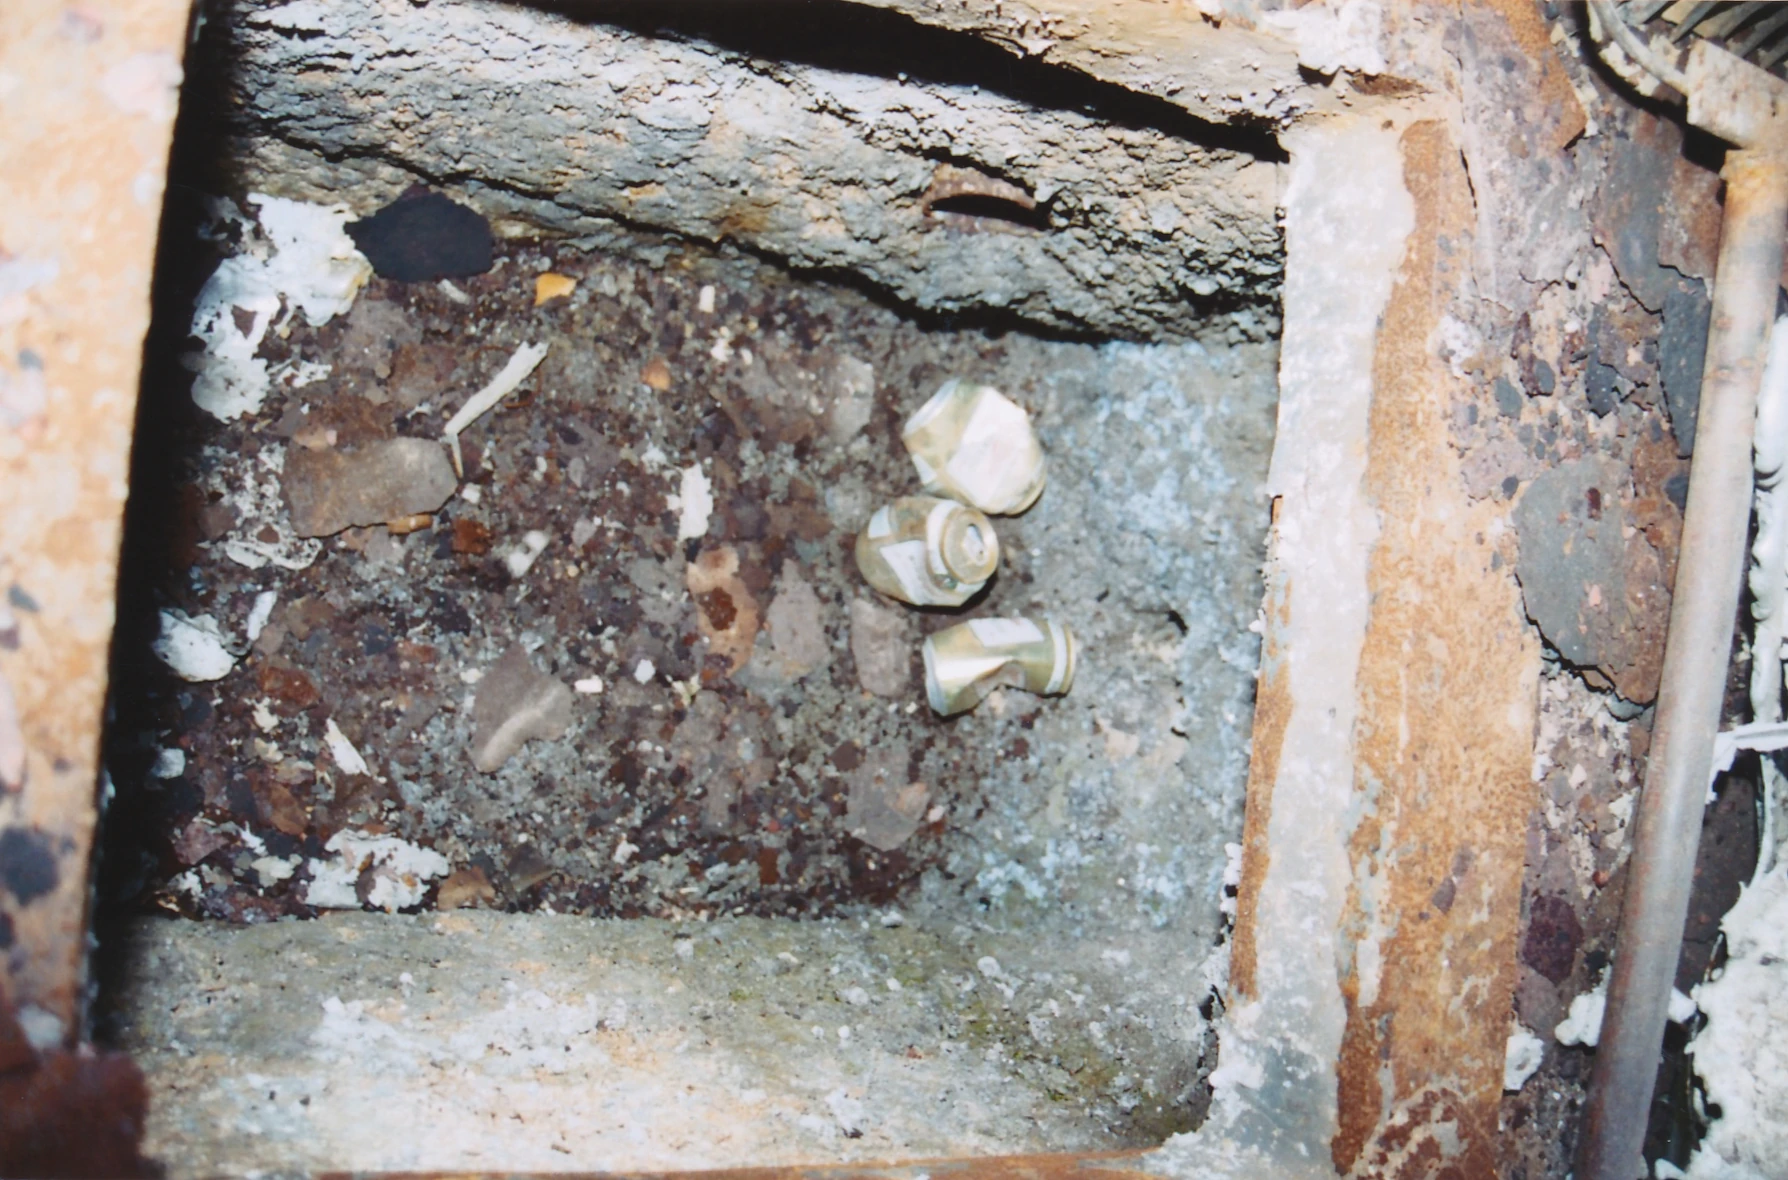
|
| 490 | Aluminium smelter (inner area) | 18 | 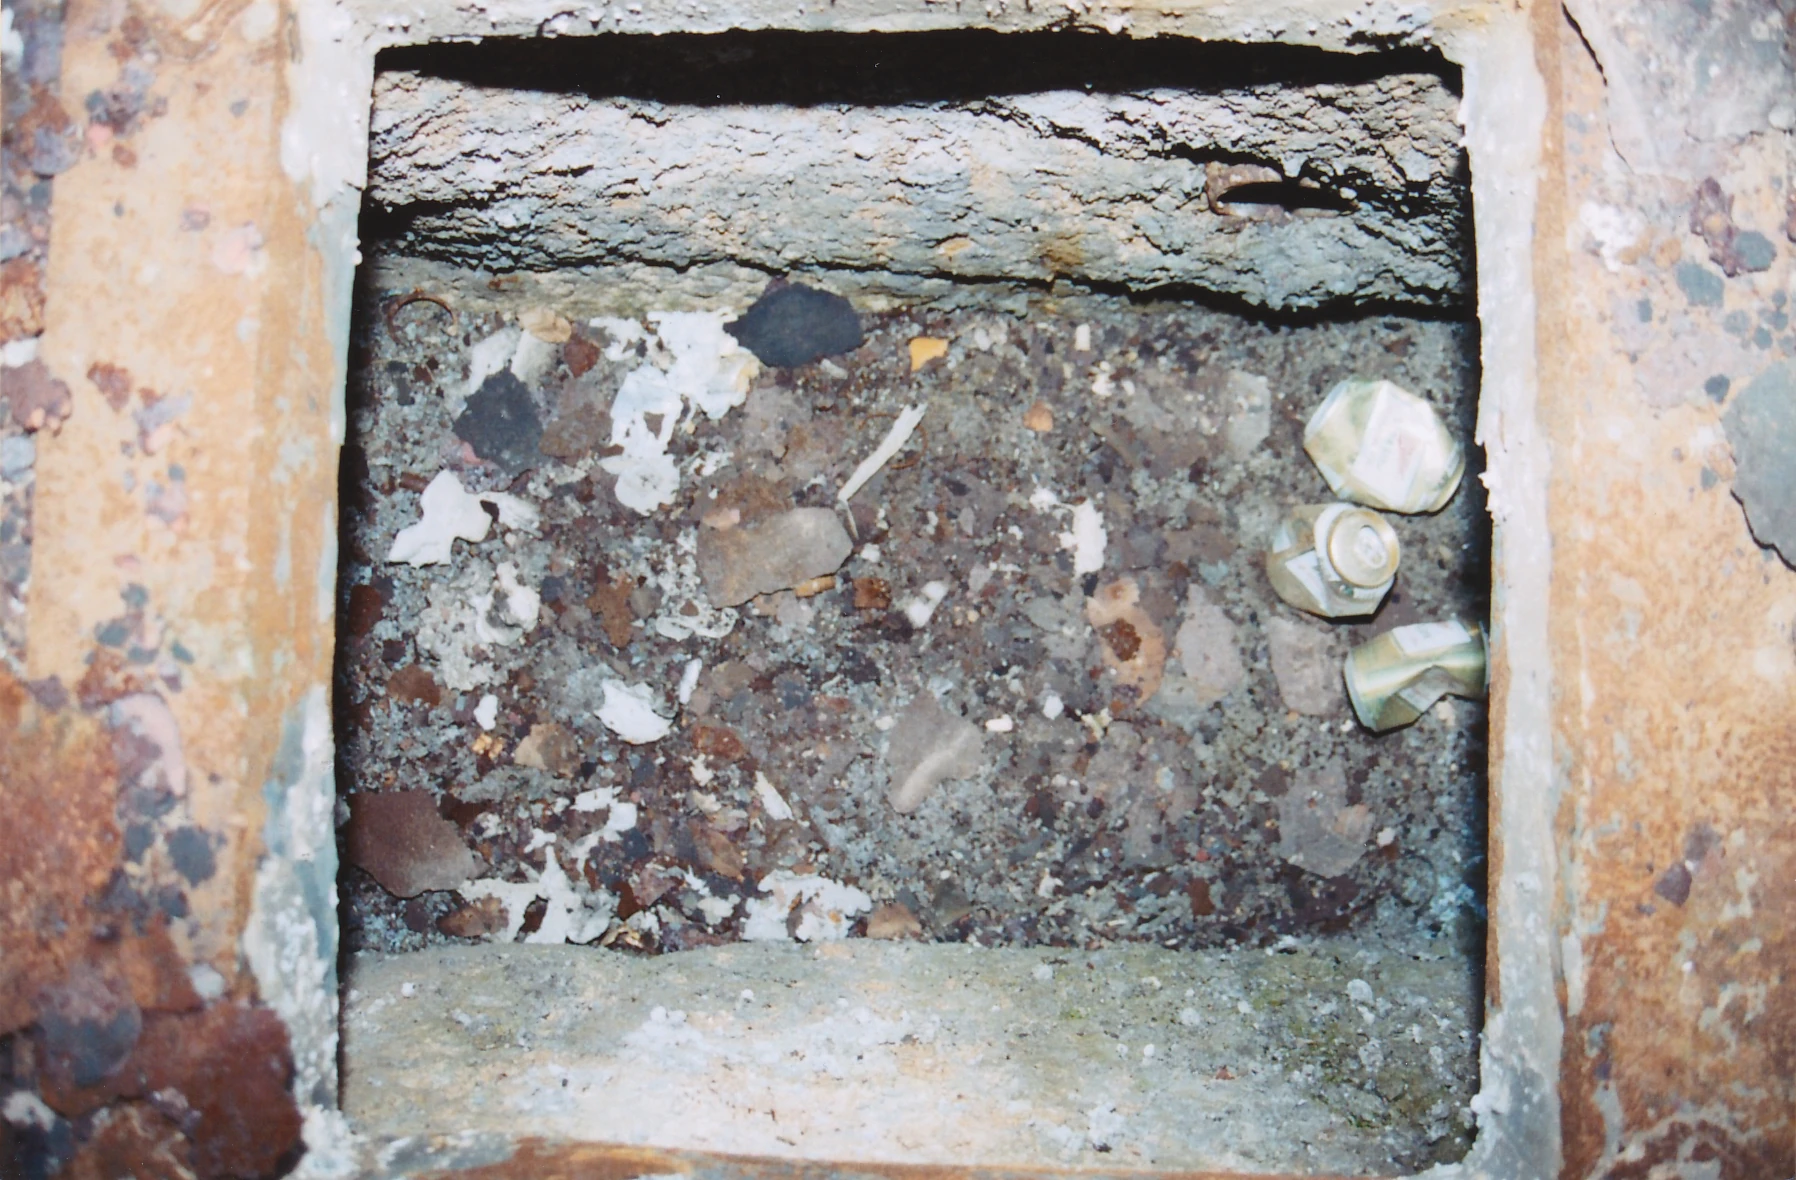
|
| 491 | Aluminium smelter (inner area) | 18 | 
|
| 493 | Aluminium smelter | 18 | 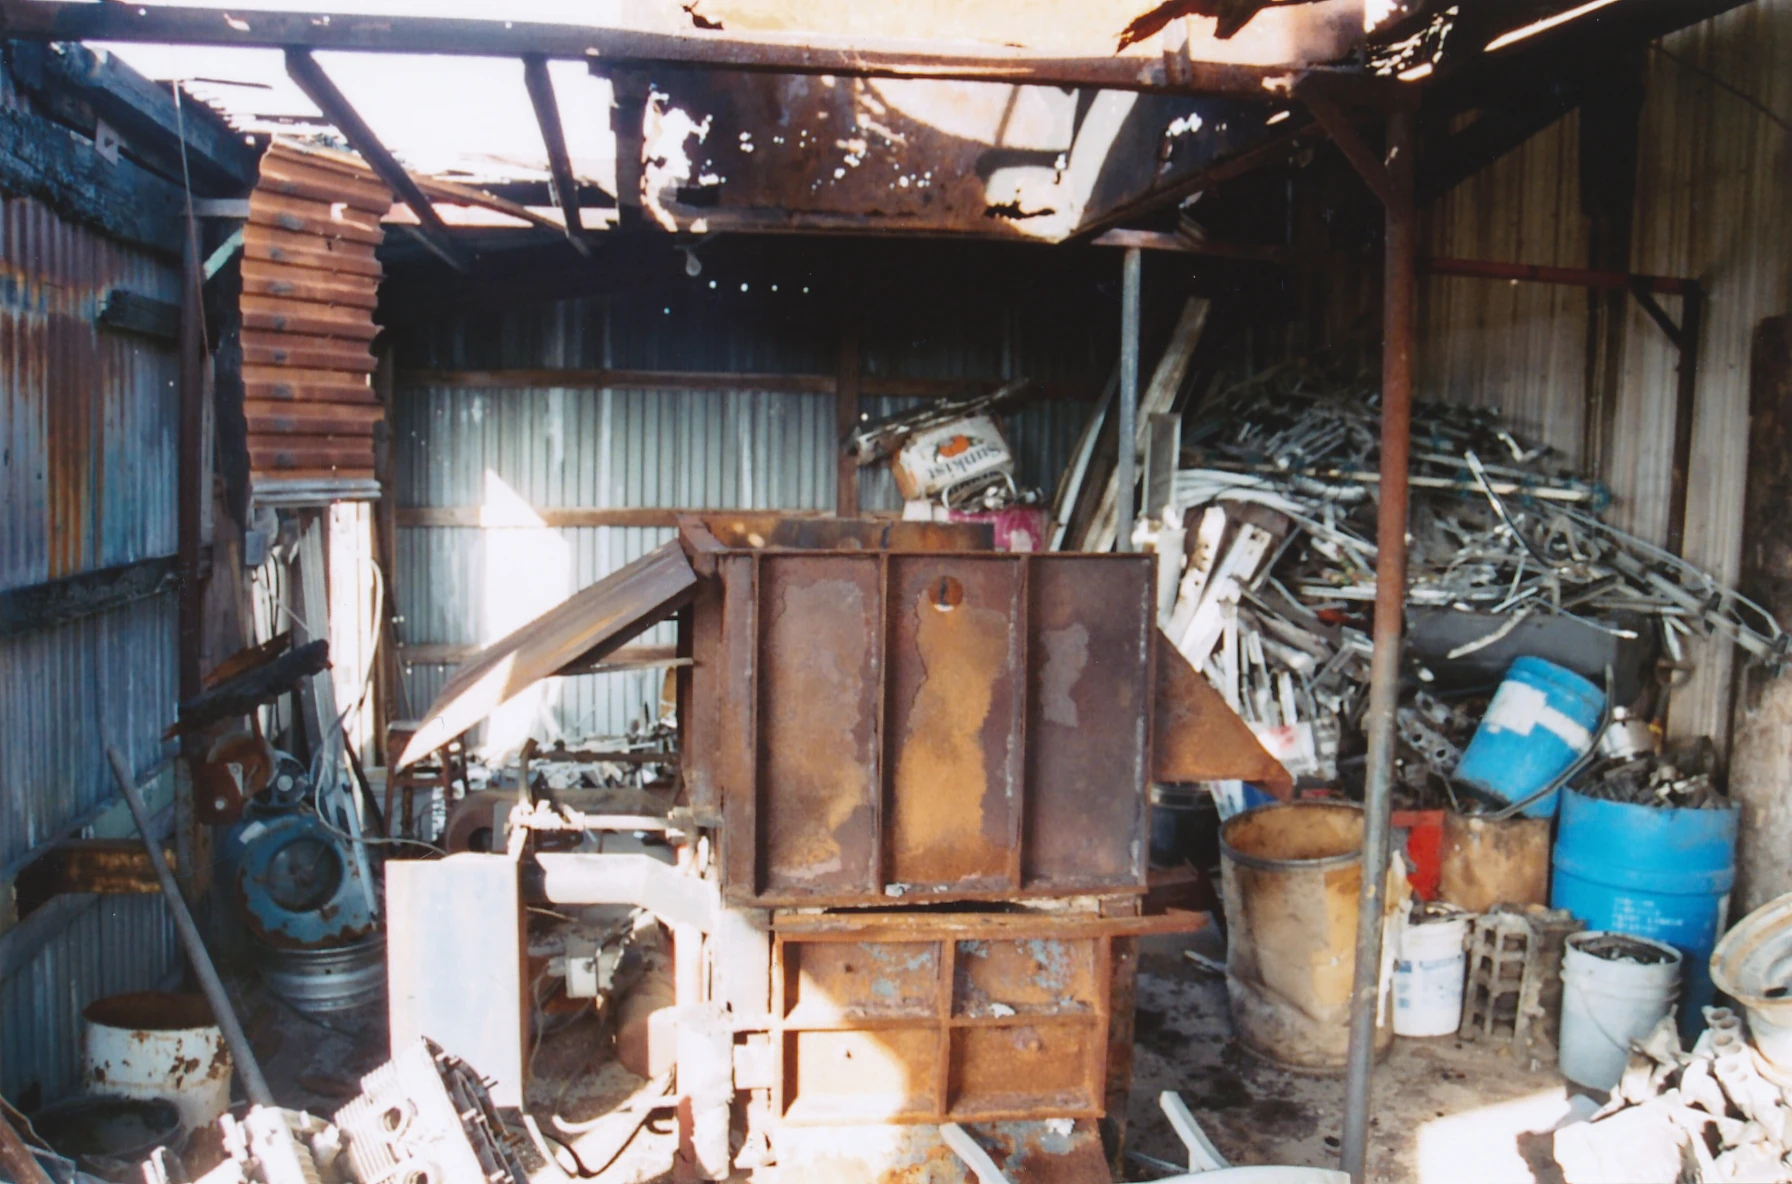
|
| 494 | Entrance to shelter with aluminium smelter | 18 | 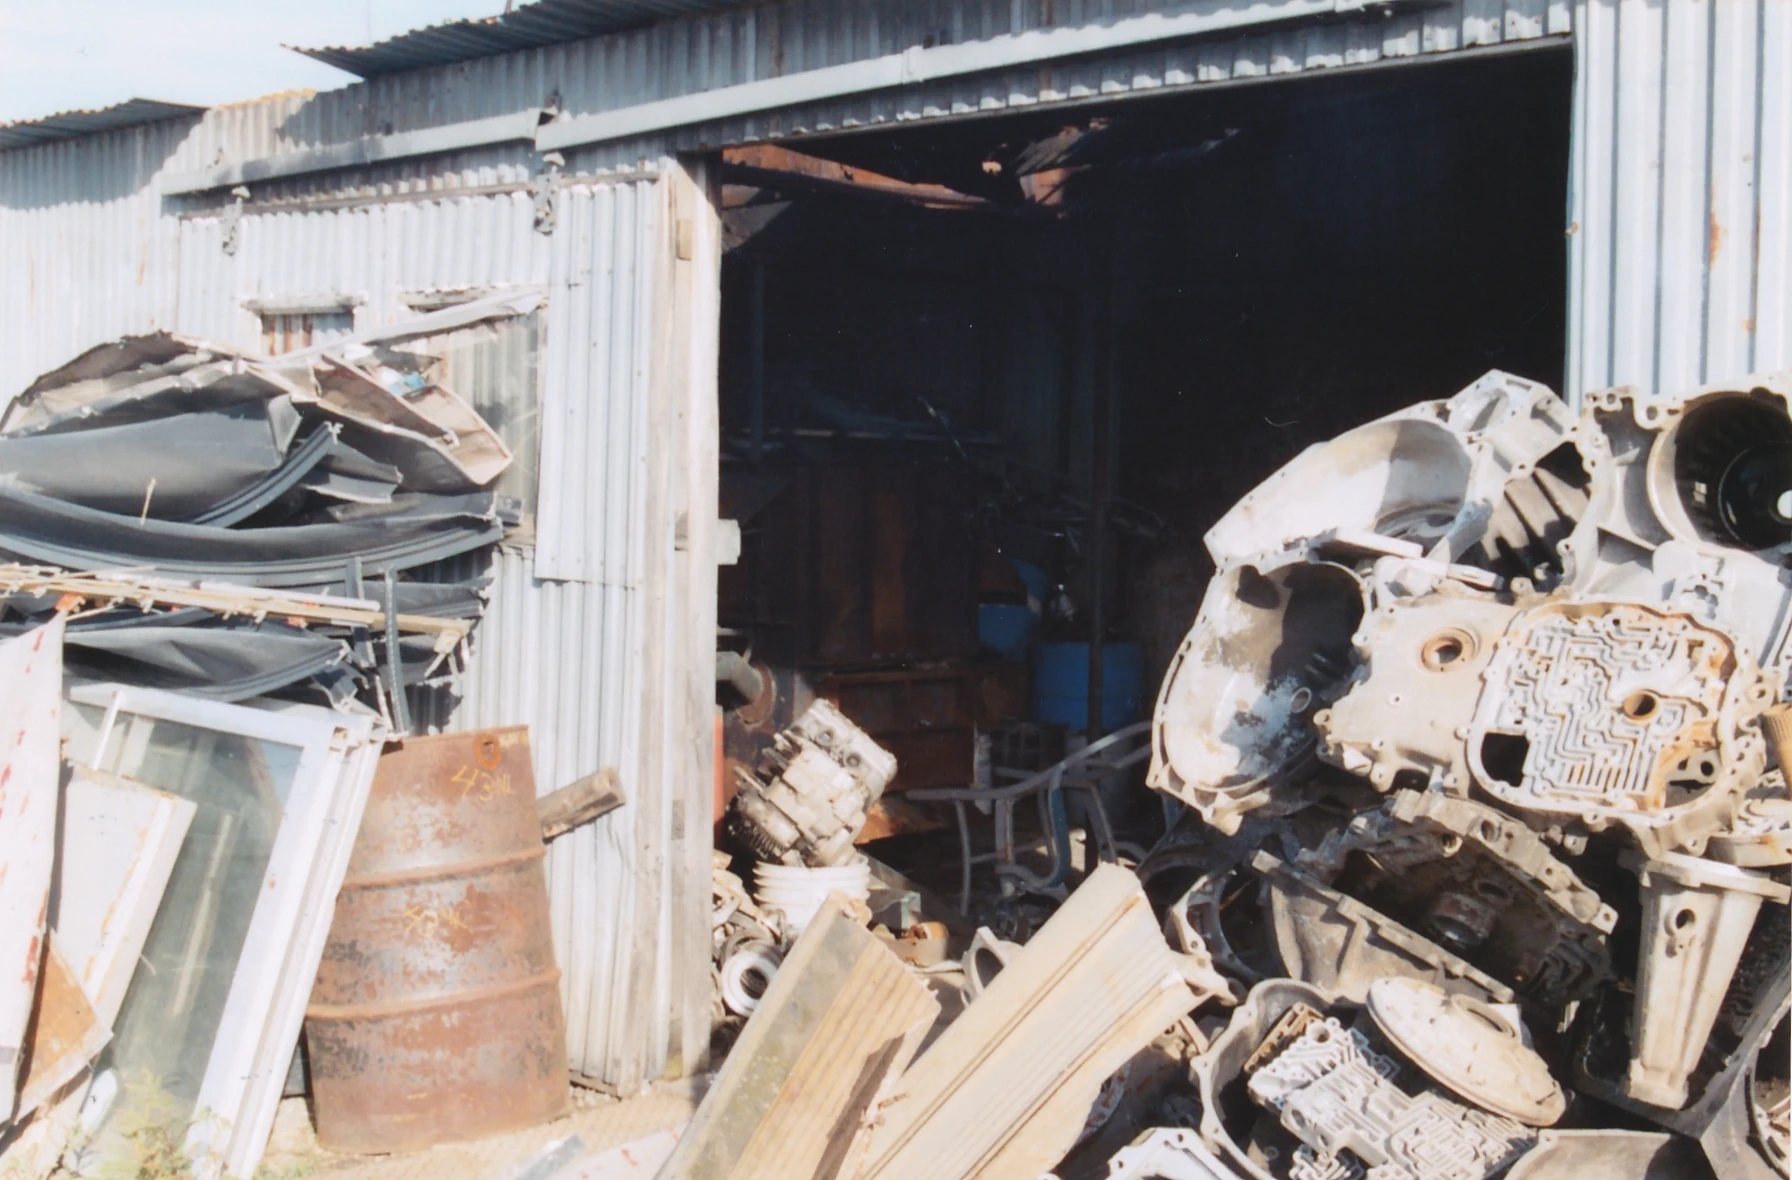
|
| 495 | LP tank and shelter with aluminium smelter | 18 | 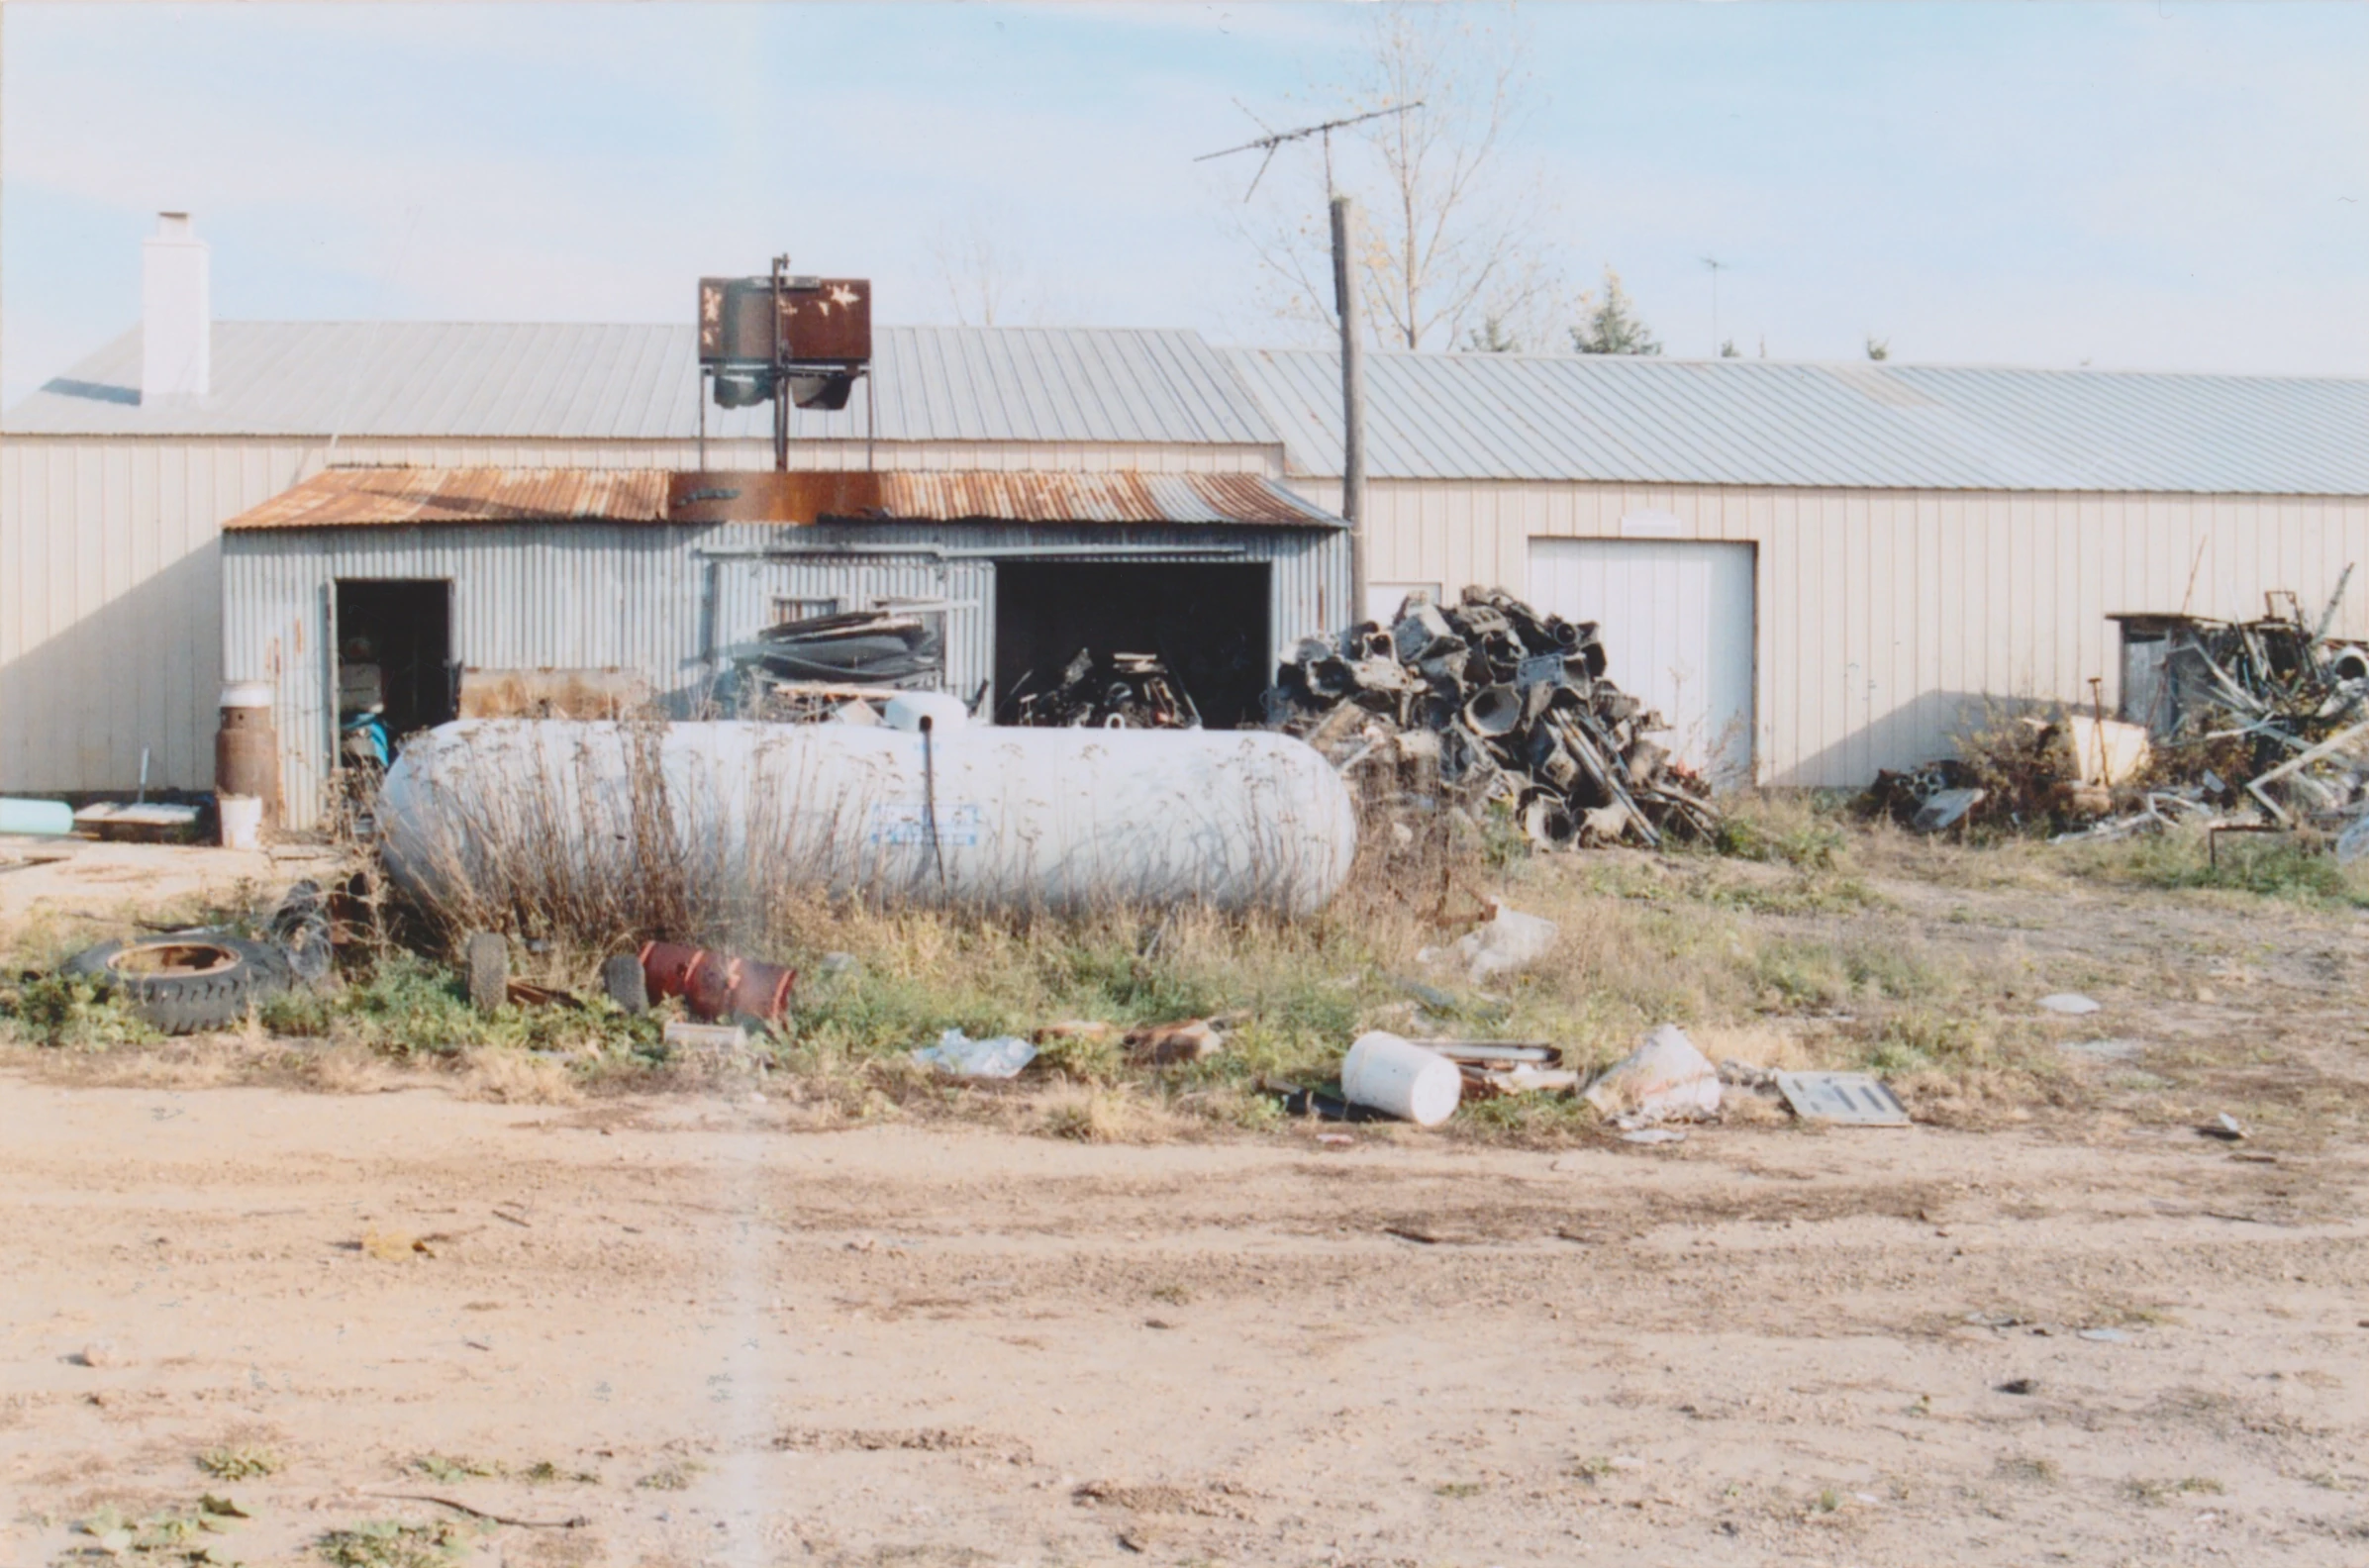
|